(Part 2) Top products from r/3Dprinting
We found 334 product mentions on r/3Dprinting. We ranked the 3,284 resulting products by number of redditors who mentioned them. Here are the products ranked 21-40. You can also go back to the previous section.
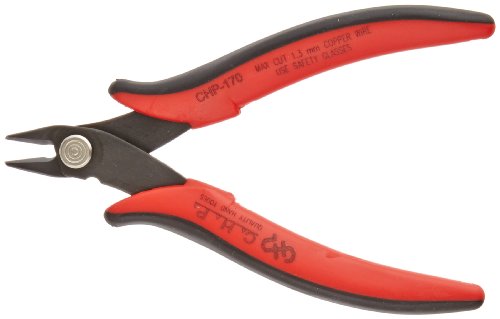
21. Micro Cutter
Sentiment score: 13
Number of reviews: 16
Flush-cut micro soft-wire cutter has 8mm long jaw with angled head for flush-cutting applications on up to 16 gauge (1.3mm) copper and soft wire21-degree2.5mm heat-treated carbon steel construction provides durability and long lifePrecision-ground holes and surfaces provide smooth movement, and spri...
 Show Reddit reviews
22. Gizmo Dorks PEI Sheet, 8" x 8" 3D Printing Build Surface with 3M 468MP Adhesive Tape
Sentiment score: 5
Number of reviews: 16
 Show Reddit reviews
23. FlashForge 3D Printer Creator Pro, Metal Frame Structure, Acrylic Covers, Optimized Build Platform, Dual Extruder W/2 Spools, Works with ABS and PLA
Sentiment score: 12
Number of reviews: 15
Full manufacturer's warranty fulfilled by Flashforge, and free email support provided by expert FlashForge techniciansA sturdy metal frame that is substantially more stable than the Creator's original wood frame.Build volume 8.9 X 5.8 X 5.9 inchesAviation level aluminum plate with a thickness of 6.3...
 Show Reddit reviews
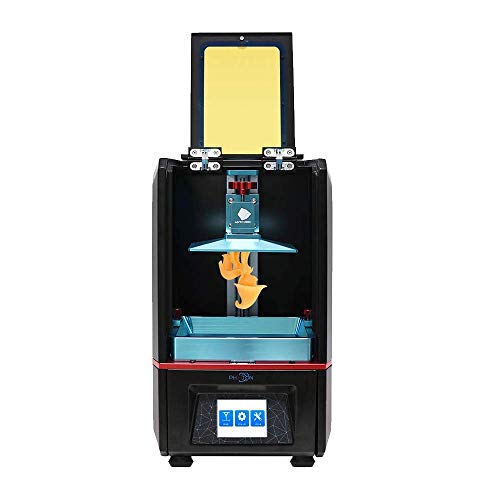
24. ANYCUBIC Photon UV LCD 3D Printer Assembled Innovation with 2.8'' Smart Touch Color Screen Off-line Print 4.53"(L) x 2.56"(W) x 6.1"(H) Printing Size
Sentiment score: 7
Number of reviews: 15
Entry-level:Easy to set up, leveling was a breeze. Software is relatively simple to use. Only 4 settings far fewer settings to adjust vs FDM printer.Incredible Resolution:Make tiny parts with accuracy, much smoother detail and quality than the FDM printer.Fast Shipping: Multiple models on a buil...
 Show Reddit reviews
25. [Gulfcoast Robotics] Y Carriage Plate Upgrade for Maker Select and Wanhao Duplicator i3 3D Printers
Sentiment score: 7
Number of reviews: 15
Compatible with Maker Select and Wanhao Duplicator V1, V2, V2.1 and Plus 3D PrintersDrop-in replacement for stock Y carriage, requires no modificationHigh quality production, manufactured by USA CompanyMade of stiff, tempered 6061-T6 Aluminum Alloy. Brushed and anodizedSupports 3 point level adjustm...
![[Gulfcoast Robotics] Y Carriage Plate Upgrade for Maker Select and Wanhao Duplicator i3 3D Printers](https://m.media-amazon.com/images/I/41LSqGT+KzL.jpg) Show Reddit reviews
Show Reddit reviews26. PEI (Polyetherimide) Sheet, Opaque Off-White, Standard Tolerance, ASTM D5205 PEI0113
Sentiment score: 3
Number of reviews: 15
PEI is a strong, rigid plastic that withstands high temperatures and offers excellent electrical insulation over a wide range of temperaturesColor is opaque off-whiteMeets ASTM D5205 PEI0113 specificationsStandard tolerance
 Show Reddit reviews
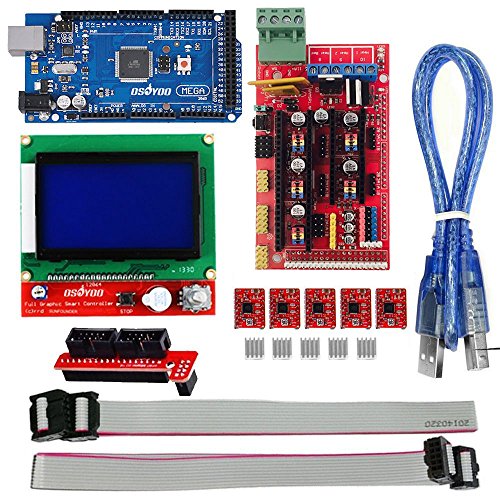
27. OSOYOO 3D Printer Kit with RAMPS 1.4 Controller + Mega 2560 board + 5pcs A4988 Stepper Motor Driver with Heatsink + LCD 12864 Graphic Smart Display Controller with Adapter For Arduino RepRap
Sentiment score: 5
Number of reviews: 15
3D printer Kit guide: 3D printer Kit guide: http://osoyoo.com/driver/3D%20printer%20instructions.pdf3D Printer Controller RAMPS 1.4 interfaces an Arduino Mega2560 board. The modular design includes plug in stepper drivers and extruder control electronics on an Arduino-compatible MEGA shield for easy...
 Show Reddit reviews
28. AFO Fire Ball, ABC Fire Extinguisher, Fire Suppression Device, Fire Safety Product With Sign
Sentiment score: -3
Number of reviews: 13
HAND HELD EASY TO USE - This fireball extinguisher weighs less than 3 pounds and requires no training.SAFE FOR USE on Class A (ordinary combustibles), Class B (Flammable liquid) spills, Class C (energized electrical fires)SELF ACTIVATING – Simply throw or roll into a fire and it will self-activate...
 Show Reddit reviews
29. ANYCUBIC 3D Printer Heating Controller MKS MOSFET for Heatbed Extruder MOS Module
Sentiment score: 8
Number of reviews: 12
Each one has done functional testSuperior performance of MOSFET (Max 280A)Extra large heat sink , the maximum current can be up to 30A or moreCan use hot bed output signal of Ramp1.4 and MKS series to controlCan use digital signal of 5-24v to control
 Show Reddit reviews
30. Signswise 2 Pack 5mm 40T Extruder Driver Feeder Gear Bore for Makerbot Mk7 Mk8 3D Printer
Sentiment score: 3
Number of reviews: 12
2 pieces Makerbot MK7 MK8 Extruder Driver Feeder Gear Bore 5mm 40T 3d PrinterOuter diameter:12mmInner hole:5mmQuantity :2 pcsThe number of teeth: 40 teeth
 Show Reddit reviews
31. Super Lube Synthetic Multi-Purpose Grease, 3 Oz.
Sentiment score: 6
Number of reviews: 12
Patented synthetic NLGI grade 2 heavy-duty, multipurpose lubricantDielectric, Food Grade, CleanNSF Rating H-1, safe for incidental food contactWill not drip, run or evaporate
 Show Reddit reviews
32. Comgrow Creality Ender 3 Pro 3D Printer with Removable Build Surface Plate and UL Certified Power Supply 220x220x250mm
Sentiment score: 13
Number of reviews: 12
REMOVABLE BUILD SURFACE PLATE: Provide all-round protection to your 3D printer build plate and ensure consistent temperature throughout the build surface. Easy to remove the printing models after cooling.SAFE POWER SUPPLY: Ender 3 Pro comes with a UL Certified power supply, protecting your printer f...
 Show Reddit reviews
33. Rust-Oleum, Gray, GrayRust-Oleum 249279 Automotive Filler Primer Spray Paint, 11 oz, 11-Ounce
Sentiment score: 4
Number of reviews: 11
Filler primer is suitable for use on wood, metal and fiberglass surfacesOil based paint with Stops Rust formula provides rust resistant base coat for cars, trucks and other vehiclesCovers up to 12 sq ft and dries to the touch (and can be recoated) in 10 minutesFiller spray paint fills minor surface ...
 Show Reddit reviews
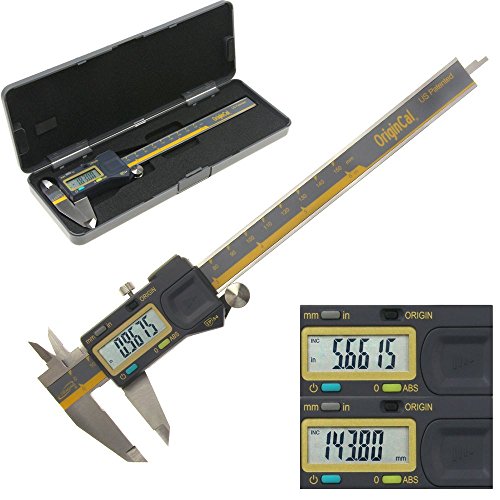
34. iGaging ABSOLUTE ORIGIN 0-6" Digital Electronic Caliper - IP54 Protection/Extreme Accuracy
Sentiment score: 8
Number of reviews: 11
Resolution: 0.0005"/0.01mm; Accuracy: 0.001" / 0.02mm; Range: 6"/150mmIP54 protection: Water drop and dust resistantUSB cable available separately.Meets DIN Standard 862; ISO certified manufacturing2 Years warranty
 Show Reddit reviews
35. eSUN 3D Printer Cleaning Filament 1.75mm Natural 0.1kg for All 1.75mm FDM 3D Printers, 1.75mm Cleaning
Sentiment score: 5
Number of reviews: 11
Industry's first 3D cleaning filamentExcellent heat stability, Wide cleaning temperature range of 150 to 260 celsius.Cleans the extruder's interior by removing accumulated residual filaments.Possesses a certain level of adhesive quality. Will not clog extruder.Clean the 3D printer's extruder before ...
 Show Reddit reviews
36. ADIMLab Updated Gantry Pro 3D Printer 24V Power with 310X310X410 Build Volume, Resume Print, Run Out Detection, Lattice Glass Platform, Modifiable to Upgrade to Auto Leveling&WiFi
Sentiment score: 6
Number of reviews: 11
<b> 90% pre-assembled 3d printer, dual Z-axis motors and dual Y-axis tracks, supply eccentric nuts to fasten the X/Y/Z pulleys or carriages, make the movement more stable and accurate</b><b> Titan direct extruder and dual fans to cool the hot end, make the extruder system more stable and wear resist...
 Show Reddit reviews
37. Silk Copper PLA 3D Printer Filament 1.75 mm 1KG 2.2LBS Spool 3D Printing Material CC3D Shine Silky Shiny Metallic Metal Red Purple Copper PLA Filament
Sentiment score: 5
Number of reviews: 10
Industrial & Scientific › Additive Manufacturing Products › 3D Printing Supplies › 3D Printing FilamentNo need polishing, the printes has a metallic luster, just like metal copper.Welcome to our store by clicking on CC3D above.Within 24 Hours Reply:If You're not Completely Satisfied for Any Re...
 Show Reddit reviews
38. Rosewill Countertop Portable Electric Machine Food Fruit Dehydrator
Sentiment score: 5
Number of reviews: 10
5 Tray Capacity : BPA-Free Herb trays, roll trays and stackable traysAdjustable thermostat: 95 to 155 Degress F, 250 Watt of drying powerA fast & easy way to make delicious, healthy and natural snacks like banana chips, fruit roll-ups, beef jerky, and dried meatsUse for drying-crafts: flowers, apple...
 Show Reddit reviews
39. Anycubic NTC 3950 100K Thermistor with 1 Meter Wiring and Female Pin Head for RepRap 3D Printer Heatbed or Hot End Pack of 5PCS
Sentiment score: 1
Number of reviews: 10
Conviniently pre-wired with 1 meter long high temperature PTFE insulated wiringUse it with heated bed or extruderTemperature sensor 100KΩ accuracy of ± 1%Pack of 5PCS
 Show Reddit reviews
40. HICTOP Upgraded Replacement Aluminum MK8 Extruder Drive Feed for Creality 3D Printer Ender 3/3Pro CR-10, CR-10S, CR-10 S4, and CR-10 S5
Sentiment score: 4
Number of reviews: 10
[UPGRADING]: Original Aluminum Drive Feed for Creality Ender 3/3Pro CR-10, CR-10 S4, CR-10 S5, it is stable and durable.[REPLACEMENT]: MK8 extruder drive feed kit, can replace acrylic parts of Creality Ender 3/3Pro CR-10, CR-10 S4, CR-10 S5.[Easy TO USE]:for 1.75mm filament of 3D printer MK8 bowden ...
 Show Reddit reviews
I had to break this into another comment due to per comment character limits.
The following previously belonged to the above comment, but was moved here due to the above mentioned limts.
> Something you can do now: Build a filament drybox. Seriously, some filaments such as certain Nylons can go bad in just a few hours, depending on ambient humidity levels. All filaments are susceptible to moisture absorption, and ideally should be kept in something like a Spannerhands holder, even while printing, but at worst you should store them in a big plastic tub with silica gel beads to keep them dry.
> If I had to give one last tip, don't stock up on too much filament yet! Seriously! I thought I would be printing mostly in PLA but now that I've had a few weeks to work with it, I've learned I prefer PETG more, and now I have so much extra PLA! I'm sure I'll find something to do with it, but for my final tip I would add "And get a good variety!". Services like MakerBox (referral) let you try a bunch of different filaments on the cheap. It's not a ton of each filament (about 50g), but I love the variety of materials and colors.
Original second level comment begins:
Final Tips: Bonus Round!
There are tons of other accessories you can get ahead of time. None of these are necessary, but are small things you might end up using (or wanting to try :P), and should help get you started getting a wishlist together. Besides the ones mentioned in this comment (and the one that precedes it) already:
Edit: Upon rereading my comment I realized I have a problem.. I own every product I just listed..
^^Except ^^for ^^the ^^nozzles ^^kit ^^so ^^it's ^^not ^^that ^^big ^^of ^^a ^^problem, ^^right?... ^^Right?!
Hi people, longtime lurker first-time commenter!
(Incoming wall of text. Just trying to be thorough!)
&#x200B;
I'm looking to buy a new dual extrusion 3D printer; specifically one that can support soluble support materials such as HIPS or PVA. High layer resolutions are preferred (~<0.1mm) but are not absolutely necessary.
I've currently looked into several newer printers but can't figure out which one is likely the most reliable:
These are pretty much all the printers I have found. Devices that merge two filaments into a single extruder are unpreferred as they are pretty iffy when printing with two different types of materials and need to create purge blocks really increases print time. Right now I'm learning towards the BIBO but would like to hear more about the device.
If anyone has any other recommendations or additional experience with dual extruder 3D printers let me know!
&#x200B;
(P.S. I accidentally turned this comment into a wall of text as there was only so much information I could find on reliable, (relatively) affordable dual extrusion 3D printing. Maybe some would be willing to collaborate to make a post covering more info so others don't have to look so far!)
SILK PLA is amazing. it DOES have serious issues. the stuff is crazy strong but very very poorly sticks to itself (brittle layer adhesion) Print it hot 220c higher if the plastic behaves for you.
so thin parts? forget it. your not likely to get it off the bed without cracking it (use ultra base)
and even 3 perimeter 25% infill grid parts can "snap" if the nozzles catches an edge (broke my adalinda dragon a few times) and if you drop it it will break.
BUT the results are simply stunning.
Here are some links (gold is not in stock that I can find right now) these are direct non affiliate links. if you want to help me out goto todays3dprint.com and use any of the links their (and then these links) but you don't have to.
Silver (I have not tried this one but they all print the same)
https://www.amazon.com/Silk-Silver-Filament-Printing-Material/dp/B06XSBFB17
Copper
https://www.amazon.com/Silk-Copper-Filament-Printing-Material/dp/B0761PMW3X
if this one was prime I would be ordering one as it looks VERY nice.
These from 3d Solutech are dirt cheap and some of my favorites! I have printed with all of them except the lavendar. I have it just have not used it yet in a print.
They call them "ultra pla"
Yellow
https://www.amazon.com/3D-Solutech-Filament-Dimensional-Accuracy/dp/B01B5KACX8
sample print Drogon
https://www.youtube.com/watch?v=ImOW0N1LNSA
Blue (my favorite)
https://www.amazon.com/3D-Solutech-3DSUPLA175BLU
Sample Print Adalinda (75 hour print truly stunning)
https://www.youtube.com/watch?v=qZV0LTx-MlY&amp;t
Green (out of stock right now)
https://www.amazon.com/3D-Solutech-3DSUPLA175GRN-Dimensional-Accuracy/dp/B01B5KPNUK
Sample Print. Aria Dragon (another truly stunning model)
https://www.youtube.com/watch?v=3g-5oyVsyRA
White
https://www.amazon.com/3D-Solutech-3DSUPLA175WHT-Dimensional-Accuracy/dp/B01B5KFRHO
Sample Print (Loubie Swan)
https://www.youtube.com/watch?v=DOavv-K-mYw
Red (really pink I have yet to find a true RED silk they all come out pink)
https://www.amazon.com/3D-Solutech-3DSUPLA175HPK-Dimensional-Accuracy/dp/B01B5LIL58
Sample Print (faceted Tree)
https://www.youtube.com/watch?v=ZbuFM0UUo2c&amp;t=100s
Here is the GOLD I used (sample print squirrel)
https://www.youtube.com/watch?v=DOavv-K-mYw&amp;t=420s
but its not available right now (not sure if it is coming back or not)
https://www.amazon.com/gp/product/B06XRPYXP2
again. its a PAIN IN THE ASS filament but damn are the results incredible. worth the suffering :-)
again the links are "clear" direct links. if you want to help me visit one of the links to amazon in my videos first which will help me out. or use the direct links here if not.
in general search for "ultra" or "silk" PLA.
Poly Alchemy ALSO makes some disgustingly gorgeous SILK PLA's !! check out Night Shade and Night Sky in particular to be truly awestruck with the beauty of these filaments
Here are some higher resolution images of some of these filaments
Poly Alchemy Night Shade (stunning and dark)
https://i.imgur.com/tyMb4Xn.jpg Another
https://i.imgur.com/fphprtA.jpg
Poly Alchemy Night Sky (I love this one)
https://i.imgur.com/BWv59dv.jpg Another
https://i.imgur.com/9zz93el.jpg
Poly Alchemy Bubble Gum
https://i.imgur.com/6WyaMIY.jpg
Elixr is NOT CHEAP $30 for 750 grams or something like that. (its around $50 a kilo)
in the US Printedsolid.com sells it.
3D Solutech Ultra Green
https://i.imgur.com/5n7nQZx.jpg
As you might be able to tell I REALLY like these plastics :-)
Friend, you may have just sold me on a prusa. At $749, it is pretty close the $1400 qidi max printer, at almost half the price. I always thought I rigid frame was better. I just remembered back in march you and I exchanged a number of messages back when I was just getting started with the Qidi. I appreciate you taking the time! I really ideally would like something that is a one square foot of print area, as an upgrade from the 6x6 inch bed I currently have. The gcreate printers look pretty sweet, but yes expensive. Great time on the oil maintenance for Qidi, I will do this as well. The chinese prusa immitator I've been looking at on Amazon is about $379, and has decent reviews, the best part is the bed is 12x12x12, so the build volume is pretty massive here . Does the Prusa printer include its own slicer? The material upgrade looks awesome, so many possibilities!
https://www.amazon.com/gp/product/B01MUAMRN7/ref=oh_aui_search_detailpage?ie=UTF8&amp;psc=1
upgraded carriage plate, should be one of the first things you do, the stock one is flimsy and prone to warping, making the print bed extremely hard to level reliably.
https://www.amazon.com/Micro-Hotend-SLOTTED-Cooling-Wanhao/dp/B01E1HANLS/ref=sr_1_fkmr3_1?ie=UTF8&amp;qid=1497736485&amp;sr=8-1-fkmr3&amp;keywords=i3+plus+all+metal+hotend
all metal hotend will enable you to print at much higher temp, and increase reliability of the print head. not strictly needed, but a great upgrade if you want to print abs, petg, or other higher temp filaments.
https://www.amazon.com/dp/B01HCVJ3K2/ref=sxr_rr_xsim_1?pf_rd_m=ATVPDKIKX0DER&amp;pf_rd_p=3008523062&amp;pd_rd_wg=sUxZ5&amp;pf_rd_r=W5Q7RV181EJYGTBW4YDJ&amp;pf_rd_s=desktop-rhs-carousels&amp;pf_rd_t=301&amp;pd_rd_i=B01HCVJ3K2&amp;pd_rd_w=ZPXZq&amp;pf_rd_i=tri+gorilla&amp;pd_rd_r=F2X8G4XDPCVTNXX6J560&amp;ie=UTF8&amp;qid=1497736655&amp;sr=1
heater bed mosfet upgrade. again, not strictly needed, but also useful for high temp filaments like abs, as you can run the heated bed at higher temps. also solves (small possibility, i3 plus supposedly fixed issue) of stock mosfet burning out and catching fire.
https://www.thingiverse.com/search?q=i3+plus+cooler&amp;sa=&amp;dwh=295945a7ab3d0cd
print a cooling fan shroud, i use the ciiicooler, the diiicooler is great as well. preferably in abs. BIG quality improvement, the stock fan is useless.
these are some of the ones i use, and there's a lot of other things you can do, extruder gear, improved bearings, too many to count really, just a matter of how far you want to go for incremental gains. the carriage plate and the cooling fan shroud are the only strictly necessary ones though.
oh and i made my own version of this z-brace, don't have the files anymore unfortunately, but this one is fine:
https://www.thingiverse.com/thing:1653631
that's also something you should do asap.
H and L makes sense, it would seem it uses normally-closed switches instead of normally-open ones, but it's the same basic principle. H stands for High signal, L for Low. As far as your endstop is concerned, if you want to try plugging them in backwards, you can, but I don't think that'll change anything, as your models seem to be bare switches, so there's no polarity. You could try using a multimeter to test continuity of the switches though. It's also possible that the RAMPS board itself isn't registering it correctly. If you want to test that, you could always pick up another RAMPS online, plug the wires and drivers in exactly the way they're currently plugged into your printer, then swap it with the old RAMPS board on the Arduino. The RAMPS itself just routes power and signals, and has no firmware of its own. This means your firmware won't notice if you've changed the shield on top of it to one with the same layout. I've linked the specific model of RAMPS I use on my prototype printer, which has minor improvements that don't change how it interfaces with the board (specifically, the fuses are a bit bigger, which helps with some problems surrounding running the heatbed and higher powered steppers). You can also change the stepper drivers to these, or another daughterboard that uses the A4988, without any changes to the firmware. It's quite possible the driver boards fried at some point, either with a trim pot adjustment shorting them out, something to do with that second potentiometer changing a setting (from what I can tell that was used to manually set something that's since become completely automatic on these driver boards), or some other issue, as they can be a bit fragile. Luckily, they're cheap, haha.
In response to your earlier question about putting an SD card in, if you want to, go for it. It won't hurt anything. It'll get rid of that error message, for sure. I don't think it'll do anything else of importance, but there may be some quirk of that specific SD card board I don't know about, so there's a possibility it'll be more compliant with one in there.
Oh, okay, I just thought of something. When you're running the machine, is the bed hot while it's turned on? the M105 command you see the machine continuously running is it probing the bed and hotend to see what their temperature is. It says B: 120, which means it thinks the bed is heated to 120C. If the bed isn't heated at all, it may be reporting a fault, which could make the machine not respond to your commands. If you want to test this, next time you turn off the board, unplug the bed's thermistor from it, and turn it on. See what the B value returned after M105 is then. If it's still either reporting 120, or some other crazy number, you may need to replace it with something like this. That may not be exactly the right thermistor, and may report weird temperatures like 60 or 10C at room temperature, due to the tables being slightly mismatched, but it should work well enough for testing, and later on, if the firmware gets changed, it'll be a known variable, so that's not an issue.
I know I've linked a few things to buy, so you may be thinking "bah, I don't want to sink money into this thing if it's this old anyway," but it's worth mentioning I'm only going to link modern components. If there ends up being a point where you just want to throw your hands up and give up working on this i2, every one of the parts I'm linking you is something used by some of the most recent printers around while still being compatible with your current device, so you're not just throwing cash away on legacy tech. Also, in the event that this thing just won't work as it's currently built, I'll happily print out and send you the components necessary to build a totally new one that reuses as many parts as possible from your current i2. Pretty much all I do is design printers, make prints for other people, and give support/advice when it comes to working with them, so I've accrued tons of spare parts that're compatible with a wide variety of things, and you'd not be the first person that's received a box of most of the components necessary to rescue a semi-functional printer out of my spare parts bin and printed out using the end of a few spools I can't use for anything major.
Hi, Im new to owning a 3D printer but have done several different prints at my college.
I have been doing a lot of researching my self on 3d printing technologies. One of the things Ive noted is dual extrusion vs single extrusion. Also Ive heard a glass bed is very important?
Ive read that dual extrusion can be good for certain applications like printing a structure with two materials, one which is dissolvable . Ive also read that dual extruders can have a tendency to cause a print to fail as the material can cool down in the extruder not being used. This then can cause issues when that printer extruder is used again within the same print as the material on the end does not heat up again properly?
Ive looked at several good bang for the buck printers(on paper)
Please give me as much info as possible. I really don't have any experience with using different printers at all, and am really open to some good internet education. So please comment away :)
Seconding everything people have said here and want to add the following.
A glass bed with 10mil PEI from CS Hyde will do wonders for bed leveling.
Upgrade your Y plate as soon as possible, the stock one warps over enough time making bed leveling nearly impossible.
All metal hotend such as the micro swiss is amazing, no more clogged PTFE tubing, easier to clean if it does.
Z brace is a must, also print a fan cooler like the Diicooler on thingiverse. Replace the stock part cooling fan with a nice radial fan, plenty on amazon, make sure its 12v. This helps prints come out cleaner.
Yours should come with thumbwheels, if not, print some, bed leveling is easier with it.
Print some spring cups as well, keeps the springs straight and not bending when leveling the bed.
DO THE MOSFET MOD TO MAKE IT SAFE!
Watch this vid and do his printed mods https://www.youtube.com/watch?v=Tpcm4XEbP1Q&amp;t=752s&amp;list=PLyIdpN_zILcknsQzSZSiWhQ685NxkWsvD&amp;index=2
Also, stay far far FAR away from Shaxon filament! It broke my hotend, check my post history to see the red glob of death I dealt with. I have had very good luck with eSun PLA.
Links for bought parts:
Fans: [here (https://www.amazon.com/gp/product/B00MJU6JR2/ref=oh_aui_detailpage_o02_s00?ie=UTF8&amp;psc=1)]
Glass plate: [Here (https://www.amazon.com/gp/product/B07B2YLWF9/ref=oh_aui_detailpage_o03_s00?ie=UTF8&amp;psc=1)]
Hotend: [Here(https://www.amazon.com/gp/product/B01E1HANLS/ref=oh_aui_detailpage_o05_s00?ie=UTF8&amp;psc=1)]
Y plate: [Here (https://www.amazon.com/gp/product/B07B251KBS/ref=oh_aui_detailpage_o01_s00?ie=UTF8&amp;psc=1)]
MOSFET: [here(https://www.amazon.com/gp/product/B01HEQVQAK/ref=oh_aui_detailpage_o02_s00?ie=UTF8&amp;psc=1)] and wires [here(https://www.amazon.com/gp/product/B017U6PGLO/ref=oh_aui_detailpage_o02_s00?ie=UTF8&amp;psc=1)]
The Flashforge Creator Pro and similar machines (they're all clones of the Replicator One dual) may do the trick. Nowadays they come with sides, front doors, and top covers so they're relatively cat safe. The Blessed Cat here recognizes the "filament loading" sound and desperately wants to catch that mysterious noodle thingie but so far she's had no luck.
They don't have so-called autoleveling, which is fine by me. The build platforms are stable enough that once you get the trick of leveling (AKA tramming) the bed to be flat with respect to the plane of the nozzle travel then it's usually good for a long time without needed to be tweaked.
They print PETG just fine, insofar as PETG ever prints "fine." It can be fussy but it's awesome when dialed in right. The bracket on the right, to replace the original swing arm lamp bracket, is done in PETG and is holding up great.
The Ender-3 and Ender-3 Pro are good budget first printers. I would advise to buy the Pro over the standard Ender 3 since it has a Mean Well UL Certified power supply, rather a generic one. If you can afford it.
Recommend to buy it from Amazon for good customer service or Banggood and Aliexpress if you want the best price.
Ender-3: https://www.amazon.com.au/Comgrow-Creality-Ender-Aluminum-220x220x250mm/dp/B07BR3F9N6/ref=sr_1_1?keywords=ender+3&qid=1573525773&sr=8-1
Ender-3 Pro: https://www.amazon.com.au/Comgrow-Creality-Printer-Upgrade-Certified/dp/B07GYRQVYV/ref=sr_1_3?keywords=ender+3+pro&qid=1573525812&sr=8-3
There are other printers in that price range such as the Anycubic i3 Mega, Anet A8 and the Monoprice Select Mini, the Ender 3 is the most popular and easily available in Australia.
> Also wanting to know other than a printer what would I need to start 3d printing. i.e. what sort of computer programs and other periferals
You will need to install a slicer on your computer, which will convert 3D models into instructions for your 3D printer. If you don't want to have your printer plugged into your computer while it is printing, your computer will need to have an sd card slot, if not purchase an adapter.
Highly recommend reading through the Getting Started guide for this subreddit.
Also here is a guide on how to build the Ender 3: https://www.youtube.com/watch?v=me8Qrwh907Q
And the Ender 3 Pro: https://www.youtube.com/watch?v=ibsOYzXduYc
Hope that helps
Pretty new to 3d printing but really interested. I basically just want to print stuff that people post and probably dabble in designing my own stuff. I am a technical guy, but I know that the designing of the models is pretty tough. I have sifted through the comments and saw two printers that stood out to me within the range I was thinking of. The CR-10 and the Prusa i3. I don't know which version is good for the CR-10 and I'm looking in the $400 range, but could go up to $800 if you guys think my value would be best there. Here are other printers I was looking at and not sure how everyone feels about those. If anyone can give me some feedback about them it'll help immensely in my decision.
https://www.amazon.com/dp/B00I8NM6JO/_encoding=UTF8?coliid=I3MX1XJ2F9XGZ7&amp;colid=30UBVRH3KC9LH
https://www.amazon.com/dp/B07421SR9J/_encoding=UTF8?coliid=I3SEAHNKKLM0QY&amp;colid=30UBVRH3KC9LH
https://www.amazon.com/dp/B016R9E7J2/_encoding=UTF8?coliid=I205Z5A0OGO6ZD&amp;colid=30UBVRH3KC9LH
Hey all, Im looking to get back into 3d printing. I used to own the Davinci 2.0, great device but it needed a lot of patience. I had to give it up, loved the size and quality of prints werent bad. The bed was always off an axis and its really a full time hobby.
&#x200B;
To the point, Im looking to spend the least possible but my max is around 500. I dont mind building. NYC. Mostly use for parts of my dioramas 12th scale to 64 scale and some figures like boats, cars, hats, guns, maybe even cosplay peices like guns haha.
&#x200B;
What type of filament should i use? Id probably prefer resin but I dont mind if someone else recommends something greater. Ive been eyeing thephoton, especially at 358 right now.
I highly advise going with the MAX v3 at that price-point. That Hatchbox delta others are recommending is quite a step down in quality and features for the price. Considering it's just a relabeled Chinese Kossel kit, the value just isn't there.
The MAX v3 is a much higher quality printer with more features and better construction, but, you have to build it yourself. IF you can swing the build, you're going to be a lot more happy with the v3 over the Alpha.
However, if you absolutely need/want an assembled printer at that price, look into the Flashforge Creator Pro. It's a solid printer that will give you great quality and provides dual extrusion capability, although dual extrusion can be difficult to get right with that design. Many people have fantastic success with it though.
I'd highly suggest just going with the MAX v3 kit though. The hardest part is soldering some large gauge wires to a flat contact on the heated bed, which you can find video instructions for in the SeeMeCNC assembly guide. If you just don't think you can solder anything, look into that Creator Pro.
Around $540. You can get it on amazon for $540 but you can also get them on ebay or aliexpress. Anycubic usually has one up for auction every week on ebay and I've seen them sell for $450-$480.
I like the fact that the photon doesn't need to be tethered like the D7 does (unless you spend extra on the control box) though there are a few other advantages like the clear panels to see inside, linear rails rather than rods. The main advantage of the D7 I have seen is the ability to control it using a raspberry pi and, it's more easily modified, and has a taller build volume.
Thanks! I got my carriage plate from Amazon, this one specifically: https://www.amazon.com/gp/product/B07B251KBS
The buildtak that came on it was awesome for about 40 days or so of print time. No issues at all, everything stuck real nice but popped off easily with a woodworking chisel. Eventually it started to wear smooth, and the plate it's attached to started to warp pretty bad in the middle. That's when I switched to glass + gluestick. btw I put my glass right on top of the old buildtak rather than try to remove it because it was really stuck on there.
As for the carriage plate, things were good for around 70 days, but eventually what happened was the original plate bent up in the corners so bad that I wasn't able to keep the bed level for more than a single print, and then suddenly I couldn't level anything at all. Since installing the carriage plate, I haven't leveled it again yet.
I'm going to suck it up and print that dii cooler too lol. Might have a friend do my first one since he has awesome cooling already.
Couple of thoughts -
Also, it will cost you some money but replacing the Y carriage and adding a good glass plate help too. I'll edit this in a sec with the links.
Edit!
Glass bed: https://www.amazon.com/gp/product/B07B2YLWF9
Y-carriage: https://www.amazon.com/gp/product/B07B251KBS
I originally was using thermal pads between the glass and the print surface. Eventually I found I had better results by skipping the pads, peeling off the print surface, and putting the glass directly on the metal bed with small binder clips on the left and right edges. I use Elmer's purple glue sticks for adhesion and rough it up with a sanding block between prints. Make sure your Y axis rods are level, as well.
Good luck!
If you enjoy tinkering then the Folger Tech i3 2020 is a pretty good printer and you can read my review of it here.
Get some Super Lube or other appropriate grease to pack the bearings with so that they don't fail on you like mine eventually did.
You will want to get a good set of metric hex keys as the vast majority of the screws are metric hex heads.
A soldering iron, 16g or better primary wire, and some solder are also a must as you will have to solder the leads to the heated bed so it can be connected to the RAMPS board.
Personally if I was to go back and build mine again I would toss the Mk2 heater PCB and use a Mk3 aluminum heated bed with a sheet of PEI on top from the start. It would have saved me both money and time troubleshooting both adhesion issues and the majorly warped heater PCB.
If you have any other questions don't hesitate to ask.
I bought an Anet A8 a while back before doing enough research, and have been pretty lucky until recently. My current printer has decided to cook itself, even after the upgrades that are suggested to make the printer safer. I would like to upgrade to a better printer that I can run for extended amounts of time without worry of setting a house fire. I would really like a printer that has a camera so I can monitor my prints while at work, and having dual extrudes would be a plus.
I have been doing a little research before posting but i'm not jazzed about what I have found so far. (although I am concerned about the build volumes) Some printers that I have come across are Mono Price Fully Enclosed Dual Extruder 3D Printer W/ Camera, FlashForge 3D Printer, and of course the Prusa i3 MK3S Kit (however adding the dual extruder is pricey)
I'm not sure if I'm all that sold on the three I listed so far mostly due to the build volume, and price, as well as not having a whole lot of reviews on them other than the Prusa.
&#x200B;
When it comes to the camera I thought about mounting my own webcam to the printer, and using that instead to help cut costs. Is this a viable idea?
&#x200B;
If anyone has any suggestions they would like to throw out please let me know.
Hey, my birthday is coming up in a couple of weeks and I was trying to think of something to ask for when a 3D printer crossed my mind. I've always thought they were pretty cool and I have a bunch of ideas for stupid little stuff to print out.
The only issue is that I know absolutely nothing about them and what I should be looking for in one or even if it's worth it for me to get one anyway. I don't mind having to put one together myself since it looks like that's the case with a lot of them after a quick Amazon search (very precise, I know).
My budget is under $300 and I'm in the US. I did find this one and it looks like it's pretty deece but want the experts to give me an educated opinion on it. [It's this one right here](https://www.amazon.com/Comgrow-Creality-Printer-Upgrade-Certified/dp/B07GYRQVYV?ref_=Oct_BSellerC_6066127011_1&pf_rd_p=471a90b9-8a34-5dd9-a6f0-17598d2f0fae&pf_rd_s=merchandised-search-6&pf_rd_t=101&pf_rd_i=6066127011&pf_rd_m=ATVPDKIKX0DER&pf_rd_r=P83BAX28P3Y3BW4VJ6YZ&pf_rd_r=P83BAX28P3Y3BW4VJ6YZ&pf_rd_p=471a90b9-8a34-5dd9-a6f0-17598d2f0fae)
I just plan on using it to print out cool stuff others post online but may take a crack on designing my own stuff eventually. Nothing too big or fancy. Like I said before, I know what 3D printers are but that's about it, lol. I'm just hoping someone here can point me in the right direction.
Looking to buy my own printer for whatever comes my way. I like to 3d print random stuff I make or things i find online from moving parts to figures. Was looking around amazon and saw this [Comgrow Creality Ender 3](Comgrow Creality Ender 3 3D Printer Aluminum DIY with Resume Print 220x220x250mm https://www.amazon.com/dp/B07BR3F9N6/ref=cm_sw_r_cp_apa_i_XxgODbQCRC3R1) but also found [this](Comgrow Creality Ender 3 Pro 3D Printer with Removable Build Surface Plate and UL Certified Power Supply 220x220x250mm https://www.amazon.com/dp/B07GYRQVYV/ref=cm_sw_r_cp_apa_i_GzgODbTQ6ZNAJ) which looks identical for a higher price. I don't see a difference. My budget would be around 300 to 400ish. I'm looking for one that'll either be enclosed or be easy enough to enclose since I'll be in a college dorm, so I don't want my roomate to be bothered by the smell if left alone. Any wireless features would be neat, but I'm fine with plugging my laptop and leaving it there. The more safety features or safer in general it is, the better.
I use the ADIMLAB gantry i3 pro. It is a workhorse and when tuned right can go for a month or more without needing maintenance. It is 370 usd and is HUGE. I use it for cosplay and am currently making a suit of iron man armor.
It is a great first time printer and I couldn’t recommend it more.
The customer support is amazing and couldn’t be better.
https://www.amazon.com/dp/B07CPQQ57D/ref=cm_sw_r_cp_api_i_qlS1DbCFFAEB7
I'll chime in... had my kit for about 2 weeks now and will share my experience:
Tools
If you don't have some of these, I HIGHLY recommend them.
Assembly isn't too hard, and the directions are pretty good. My main complaint with the directions is that sometimes they don't explain what's important and not important all the time. I spent a lot of time building, taking apart, and rebuilding the base y-axis frame because I thought I did something wrong (it wobbled) to find out that you fix that wobble as one of the last steps.
The 100mm distance that you're required to thread double nuts early in the assembly is absolutely critical by the end of the build for many different reasons. It would be nice if prusa included some kind of printed spacer to make that step foolproof.
Again, assembly is straightforward. I took a span of 3 days to finish mine while dedicating a few hours each night to do it.
Upgrades
A couple of things can be improved on the printer. The printer isn't terribly noisy, but you can make it damn near silent with a few upgrades.
Honestly as long as you purchase the aluminum Y-axis plate and use spacers alongside my Z-axis bed leveler you will get just as nice results. If you have a wood Y-axis plate you may not want to use spacers and possibly look into auto bed leveling solution.
I use something like this for lubricant: http://amzn.com/B000XBH9HI
As for the spacers I use aluminum spacers that are (I think) 1/4" OD 1/4" Length >3mm ID. Aluminum while the difference is most likely very little, it still is slightly better. I just would recomend going to a hardware store and finding spacers with an OD of 1/4" and length of 1/4" the ID does not matter as long as you can fit a 3mm bolt through it. Best to find something with a somewhat thick wall.
Budget: $100-$300
Country: US
Kit: Sure, experienced with electronics and soldering
Uses: looking to print mechanical keyboard parts (cases, keycaps, etc) and anything else I might need to print parts for.
I'm currently looking at a few different printers and most are from Creality. The Ender 3 and Ender 3 pro specifically are what I'm going for. What's the best place to actually buy one though? There's a ton of different sites with different prices and it's pretty overwhelming.
There's the one from eBay supposedly direct from the seller for $237
Amazon from Comgrow (?) for $279
And straight from Creality (I think) for $259
I'm leaning towards buying directly from the seller because I've read some things about the warranty not being fulfilled directly from creality if you buy from another source.
Other ones I'm looking at are the da Vinci 1.0 pro, regular Ender 3, or any other really. Any help would be greatly appreciated.
Hello all, just found this subreddit for the first time tonight!
Looking to order my first 3d printer.
I’m in the USA.
I can build a kit.
Honestly it will just be used to play around and make small prototype like parts.
Budget is around $300+-
I think I’ve narrowed it down to these two:
Creality Ender 3 Pro
https://www.amazon.com/gp/aw/d/B07GYRQVYV/ref=sspa_mw_detail_2?ie=UTF8&amp;psc=1
Or
The AnyCubic Mega S
https://www.amazon.com/gp/aw/d/B07J9QGP7S/ref=sspa_mb_hqp_detail_mobile_aax_0?ie=UTF8&amp;psc=1&amp;smid=A1A5FQE7R5RISB
Any thoughts on the two of these for a newb.
I’m a tinkerer, and machinist, right now I own a Shapeoko CNC router, but have programmed and created many things over the years.
I appreciate the help!
I’d like to order tonight!
Look into purchasing a PEI (Polythermide) sheet to put onto your printing surface. I did so and it works incredible!
Just make sure that you take your time while applying it to reduce the amount of air bubbles. I picked up this kit from amazon: https://www.amazon.com/gp/product/B01KGDTPQK/ref=oh_aui_detailpage_o04_s00?ie=UTF8&amp;psc=1
Edit: It takes virtually no maintenance, and everything sticks to it incredibly well. I also forgot to mention that I have only tested it with ABS, but I hear PLA works well too. I have also heard that PETG sticks better than ABS or PLA.
Edit 2: I also should mention that I was able to stick it directly to the aluminum bed. Make sure to clean it really well if you do plan on taking this route.
I was originally going to buy an ender 3 as my first 3d printer. I have zero experience but after lurking here a bit I thought I knew what to buy. However amazon currently has some good deals on some of these printers. so my options are now:
Ender 3: $229.99
Monoprice Maker Select v2: 239.99
Ender 3 pro : $259.99
Monosprice Maker Select Plus: $289.99
&#x200B;
I'm sort of leaning toward the Maker Select v2. But having no experience I'm hoping you guys will know better. I don't think building an Ender kit would be an issue, but for my first one I think Monoprices may be easier. I'm mostly looking to start with some minis and maybe randon little knick-knack type things. Although I think this may be something I get really into down the line, so as long as they're versatile I will probably build anything and everything I can :-p
If you haven't looked into it, a regular $30 food dehydrator will work. this is what I got, works great. Use the temps listed Here and it will be fantastic.
Bonus points if you add a lazy susan bearing to the bottom, and add a bowden connector to feed filament through as it stays dry during a print. Works fantastic for the hygroscopic Nylon and PETG filaments. I've run PLA through as well and it does print better even though it doesn't absorb as much water.
I understand the nook and cranny issue. There would have to be some post processing to smooth the surface out. The issue I have been reading is that the material used for food safe 3d printing cant take much abuse and or quickly biodegrades, has little to no resistance to being cleaned with any sort of chemicals. Again, this is what I know of, I am hoping someone knows of a solution.
I was reading more about PTFE and 3d printing. It seems like you can not 3D print using PTFE besides the 3M material and thats going to be crazy expensive for now.
As far as making parts that dont need to be food safe, ABS seems like the way to go. It looks like getting an enclosed printer is also a good idea. Or getting a printer you can make an enclosure for. So far I have looked at a CR-10, Monoprice Maker Select Plus, and FlashForge 3D Printer Creator Pro though the build area is a bit small on this one.
Hotend replacement:
I replaced the stock hotend/PTFE tube setup with an all-metal Micro Swiss hotend ($50):Amazon link to the Micro Swiss all-metal hotend kit: https://amazon.com/gp/product/B01E1HANLS/ref=ppx_yo_dt_b_search_asin_title?ie=UTF8&psc=1
Bed leveling:
Frame Stabilization:
I printed the parts, and purchased the hardware at Home Depot for the Z-brace mod, which stabilized the printer frame:Thingiverse link for Z-brace mod for I3 Plus: https://www.thingiverse.com/thing:1653631(note the original Thingiverse link in comments, which is required for the other Z-brace parts: https://www.thingiverse.com/thing:921948)
Cooling:
I printed a Dii Cooler in PETG and replaced the stock cooler with one of those 24V "squirrel cage" fans, which provided much better cooling for all sides of my prints. Before that it really only cooled the front of prints, leaving the sides and especially the rear of prints looking pretty bad.Thingiverse link for Dii Cooler for i3 Plus: https://www.thingiverse.com/thing:1025471
Hello everyone, I am currently in the market for my first 3D printer, and was hoping to get some advice on what printer would best fit my needs. I would like to spend no more than 300 USD max, and I live in Wisconsin in the United States. I am willing to build a printer from a kit, and I have limited electronics experience (though I am very willing to learn and my brother has a lot more experience). With the printer I would like to print a variety of things, such as pieces for props I am making, a lightsaber, probably some miniatures for DnD, and any other stupid things I can think of and design. I don’t really have any extenuating circumstances. Currently I am looking at 3 different printers, all around the same price:
Monoprice Maker Select V2: https://www.amazon.com/dp/B018GZBC3Y?tag=thewire06-20&linkCode=xm2&ascsubtag=AwEAAAAAAAAAARPY
Anycubic Photon: https://www.amazon.com/ANYCUBIC-Assembled-Innovation-Off-line-Printing/dp/B07TVW9HGH/ref=mp_s_a_1_1_sspa?adgrpid=61744442371&gclid=Cj0KCQiA-4nuBRCnARIsAHwyuPr9qUkHk3c-bjztvPtoPCnQfwmJiur43IW5Sqo_gLb2kfWEBrmndEMaAusvEALw_wcB&hvadid=274732107337&hvdev=m&hvlocphy=9018836&hvnetw=g&hvpos=1t2&hvqmt=e&hvrand=1205846483522208665&hvtargid=kwd-409136528305&hydadcr=21036_9428322&keywords=anycubic+photon&qid=1573068757&sr=8-1-spons&psc=1&spLa=ZW5jcnlwdGVkUXVhbGlmaWVyPUFZUVVYT0NERzhRTFImZW5jcnlwdGVkSWQ9QTEwNDE5NjlRMUFTUlBNR1ZRNksmZW5jcnlwdGVkQWRJZD1BMDUzMDYwN1BBOEZWNFRKU01GVyZ3aWRnZXROYW1lPXNwX3Bob25lX3NlYXJjaF9hdGYmYWN0aW9uPWNsaWNrUmVkaXJlY3QmZG9Ob3RMb2dDbGljaz10cnVl
Ender 3: https://www.amazon.com/Comgrow-Creality-Printer-Upgrade-Certified/dp/B07GYRQVYV/ref=mp_s_a_1_2_sspa?adgrpid=56791742355&gclid=Cj0KCQiA-4nuBRCnARIsAHwyuPpuBebDhMzsbSGWKX2y-Dq2wg37UXSEJqeqqEfB5I6zU-MDqdo4q8QaAiFfEALw_wcB&hvadid=274684426752&hvdev=m&hvlocphy=9018836&hvnetw=g&hvpos=1t3&hvqmt=e&hvrand=5031503050646445943&hvtargid=kwd-446200976551&hydadcr=14671_9484359&keywords=ender+3+3d+printer&qid=1573068855&sr=8-2-spons&psc=1&spLa=ZW5jcnlwdGVkUXVhbGlmaWVyPUEyNlJNRVZTSEVBVkdHJmVuY3J5cHRlZElkPUEwMDY2NTcxMVlVNjFBVExFSTZWUCZlbmNyeXB0ZWRBZElkPUExMDIzODY4V1BDMkY5UUpZR0NMJndpZGdldE5hbWU9c3BfcGhvbmVfc2VhcmNoX2F0ZiZhY3Rpb249Y2xpY2tSZWRpcmVjdCZkb05vdExvZ0NsaWNrPXRydWU=
I am open to other printers, these are just the ones that were on my radar, so feel free to suggest other options.
Thanks for the help and sorry for the long links!
Hey! I got the same printer and was using ABS for my first couple prints. Couple things--First the built in items on the SD card are sliced for PLA printing, so you need to up the temps on the extruder and bed--I had success just upping it to 240/80. This got it to stick, but I had to get my z positioning (the thumb wheels on the corners) just right. Also I absolutely needed a raft for anything to really stick.
If you're slicing your own items in Cura, the default filament size is 2.8mm and you're probably using 1.75mm filament.
Unfortunately on any prints longer than an hour the ABS would start to curl off the bed--I chalked that up to the somewhat breezy room I have my printer set up in currently.
tl;dr Make sure your bed/z is leveled precisely so that a piece of standard printer paper can slide underneath the nozzle in each corner with resistance. Try upping your temps and checking your slicer settings as well.
/u/Redditull mentioned a glass bed. I picked one up on amazon, this fits the bed pretty nicely (just lays between the corner screws)--you do need to raise your z-stop, there's a metal lever contraption screwed into one of the sides of your printer's frame that you need to unscrew and raise. I also attached a PEI sheet to this and I used thermal pads to attach all this to the bed. This all improves adhesion greatly, I've mostly been using PLA after the difficulties I had but I would imagine ABS would stick just fine as well.
Borosilicate Glass
PEI Sheet
Thermal Sheet
100% correct. This stuff is pretty amazing. I've tried a couple of spools of silk blue from a couple of different vendors and they make very good prints as well.
Polyalchemy and Prusament both have some colors I can't get from other vendors. Getting gorgeous prints from the Polyalchemy Bubblegum (pink) and their deep purple.
Couple of questions. First, I will be getting my first printer and wondering if certain printers use certain programs better?
Second, I want to use the printer to make my own custom board games, (Catan and D&D pieces) do any one printer do a better job with this?
I have no knowledge of how the programming works yet and just want to know what I am getting into before I jump right in.
Edit: The first printer I was looking at was ADIMLab
https://www.amazon.com/dp/B07CPQQ57D/?coliid=I1C3MXODC8HJYO&amp;colid=2YI1JED33NYNA&amp;psc=0&amp;ref_=lv_ov_lig_dp_it
Edit 2: My price range is $300-$850. US Resident, I have a friend who will help me set up if needed.
> It's definitely not as easy as it seems, and there is some post print work, but i love it.
In grad school I got to play with a Makerbot Replicator and a Lulzbot. I'm looking for one of my own, with an emphasis on cheap and big.
Is this the one you have? Very nice. A bit expensive for me, though.
For me high speed (Dremel/finishing sander) sanding on PLA only made things worse.
The plastic started to melt into the sandpaper, ruining the sandpaper quickly without accomplishing much.
If the details of the print can survive it, the best way to finish PLA is to hide everything under primer paint.
Hit the PLA with 120 and 220 sandpaper by hand. Light and slow are the operative words here--plus patience. 120 may not be needed or may even be counter-productive on 0.1/0.05mm parts.
Do a second pass with 400 grit. The part should be relatively smooth to the touch.
Then I apply filler primer (smaller details, not going to sand, don't want to smother) or sandable filler primer (flat surfaces, larger details, both details and surfaces can be sanded by hand).
Filler primer of either sort works best in many light coats rather than a few heavy applications.
Sand filler primer with 400 (or 220 if there's somehow too much of it). You can even step up to 800, 1000, 1500, and 2000 (I did this to ONE part). Again, light and slow or the sandpaper will quickly pick up paint that is now mashed in, ruining it. Don't bother hitting the PLA with anything above 400 grit--it doesn't work well and eats through sandpaper. You're better off using higher grits on the paint rather than the part.
Finally apply whatever paint or other colors you want on top of the primer.
I highly recommend a competent "shop-vac" to contain dust and lengthen the lifetime of your sandpaper. If you don't sand too "hard" most of the plastic/paint will vacuum right out, greatly extending the lifetime of each piece.
My beautiful wife wants to buy me a kit for my bday, I live on a acreage in Canada so I pretty much am narrowed down to Amazon. I found three kits I like , just wondering if any one could give me some input on which would be the most bang for the buck. I currently own a Anet A8 and in the process of slowly building a Hypercube from scratch, my first build so it's taking a while,. Thanks for the input.
1 - FLSUN Large Size Cube 3D Printers with 260 * 260 * 350mm Large Printing Size,Auto-Leveling System, Heated Bed,Full Gifts,One Roll PLA Filament 1.75mm, Metal Frame CA Stock https://www.amazon.ca/dp/B07J65MM6B/ref=cm_sw_r_other_apa_i_F23CCb114XN6Z
2 - Tevo Tornado 3D Printer Gold Color. Large Printing Size Support Off-line Print. SD Card Reader +Tool Kits + Hotbed + Factory Original Supply and Canadian After-Sale Service (300 * 300 * 400mm) https://www.amazon.ca/dp/B07DFNLRC6/ref=cm_sw_r_cp_apa_i_p33CCbP0VSVXQ
3- ADIMLab 3D Printer Assembled 24V Prusa I3 3D Printing Size 310X310X410 with Heat Bed, Glass, Control Box, MK10 DirectDrive Extruder, PLA, Auto Leveling Upgrade Available https://www.amazon.ca/dp/B07CPQQ57D/ref=cm_sw_r_cp_apa_i_-33CCb371TENB
Alright, seeking advice here (duh, right?)...
I'd like to keep the purchase under 1k USD so strongly considering the Prusa MK3S kit, though I noticed the below options. I'd like dual extrusion, but mainly for support materials (dissolvable), but not a requirement. Does anyone have any thoughts on the other two or should I stick to the Prusa at this price point? TIA!
Flashforge
https://www.amazon.com/FlashForge-Structure-Optimized-Platform-Extruder/dp/B00I8NM6JO and subsequently ...
Qidi
https://www.amazon.com/QIDI-TECHNOLOGY-Printer-Newest-Model/dp/B076BLQWHY
Actually, the parts are pretty standard, so it doesn't really matter where you buy from.
I bought them from various sources (electronics markets, amazon, and some local shops), so my links are just to be seen as examples:
Printed upgrades:
There is one small error in the assembly videos: The bed mounting plate (the H-shaped thing) is mounted upside down in the video. The bar that goes across the axes and connects both outer plates should be under the plates, not above as in the assembly videos.
Snapping during a print is usually an indication of moisture absorption, get a food dehydrator and try drying the roll before you give up on it. Rosewill has a rebranded one which is basically the same OEM as the $125 Printdry system.
My budget go to is still Inland from Microcenter, their PETG and PLA+ is supposed to be Esun, regular PLA is Polymaker. Another vote for Atomic filament here, I only used their PETG but diameter and color are super consistent and some colors even have Pantone code (I've had a few of the darker colors of Inland vary shade during long prints or between consecutive smaller prints). Veracity from Filastruder is also super consistent for color and diameter from the PETG and HTPLA (listed as ProPLA) I've used and comes in MasterSpool compatible coils.
There isn't a way to do it without having seam lines, and you, being the one that made it, will always see them. Some people may not notice them for a while, but upon close inspection they will become obvious.
All props that I have made have peen printed, assembled, finished, in that order. If you want to keep the stainless steel pla visible, there isn't really anything I can think to do. In terms of part assembly I trust nothing but Krazy Glue. It dries in about 10 seconds, and another 30 seconds or so and the bond is stronger than the later bonds of PETG, which is known for its layer strength. Absolute nightmare if you mess up. If you do mess up, or are not confident on the seam, separate immediately.
If you're looking to go the painting route then I would assemble it, fill the gaps with some Bondo. Wait for it to dry, sand it flush, use some Filler Primer, then spray paint it. Once painted, cover in a Clear Coat so the paint doesn't rub off.
If you have any more questions feel free to ask and I'll get back to you.
That's a very good point. I'm confident in my soldering skills, I neglected that others may not be. I have seen a few FET's out in the wild. I'm not sure if they are all created equally.
I'm aware of the reprap one:
http://www.reprap.me/power-expander.html
and the Amazon Trigorilla one:
https://www.amazon.com/TriGorilla-Printer-Heating-Controller-Extruder/dp/B01HCVJ3K2/ref=sr_1_1?ie=UTF8&amp;qid=1482884825&amp;sr=8-1&amp;keywords=3d+printer+mosfet
Can anyone chime in on the best Mosfet solution for those that don't have the skills or want to possibly void their warranty?
problems so far havent really been anything serious, i bought the upgrades before i even built it so i cant really talk for the stock version
Upgrades i bought for it
other than that havent really had any problems with it its been a great printer so far, i am going to start printing some upgrades for it soon but its printing really nicely so far, if you do end up getting it ive got my s3d profiles i could email you ive got them looking pretty good, the retraction was one of the longest settings to get dialed in for me as this is my first bowden tube printer
if you have any more questions let me know
I'd do a different spool setup. I use the TUSH The only needed hardware for that one is 4 skate bearings. If you need bearings I'll send you 4 for $5 or 8 for $6. Shipping included to US.
The other tools I recommend:
Thanks! I'd not heard of that model. Someone else recommended Flashforge 3d (http://www.amazon.com/FlashForge-Structure-Optimized-Platform-Extruder/dp/B00I8NM6JO/ref=sr_1_5?ie=UTF8&amp;qid=1449683425&amp;sr=8-5&amp;keywords=ultimaker+3d+printer) any comparison.. or is the Ultimaker 2go that much better.
Casting would allow me to use different materials, adjust the painting, weigh them correctly..
WOOD FILL?? Oh my. That IS interesting.
Buy
($6)Wires:For the MOFSET mod
($1o)MOFSET
($6)Wire spades:For the MOFSET mod
($8)Assorted M3 Bolts:You need some for a few mods and for the bolts you will inevitably strip on this
cheapwonderful machine($13)Longer assorted M3 Bolts:For a few mods
($9)M4 Bolts:For one of the mods
($9)Metric allen wrench set:Had to order one of these since metric tools aren’t common round these parts
(~$20) PLA of preferred choice- You’ll run out of the sample bit quick so go ahead and order a roll or two to be prepared. You will note some upgrades require ABS so a small spool of that to your order will also help.
($6)M3 Lock nuts:Critically needed for a simple mod
($10)Threaded rod and nuts:Please note that this item seemed difficult to find online. I recommend going to your local hardware store and getting two 5/16” rods of at least 16” in length. They should have an assortment of threaded rod in various lengths available. Also note that the pitch of the threading matches the nuts you buy. Further instructions regarding this can be seen in Azza’s Z-Axis braces below.)
($6)9mm Wrench for the nozzle: Don’t wait for your first clog, go ahead and have this on hand to remove/change the nozzle. Note to only tighten/loosen the nozzle when heated.
Below is the order of printable upgrades I recommend but I suggest you mix in a few other prints along the way because this is a hobby after all and you should be having fun. It helps to have your quality as tuned in as much as possible for some of these so be patient and keep trying if you need to.
Print
Spool holder- temporary : Until you can mount your spool on top of the enclosure or any other personal preference.
Belt tensioner- print x2
Z-brace
Shielded stop button
Cable relocator : It’s a pain, but if you spend the time to do this and turn your extruder motor 90 degrees then you can get the full Z height without ruining your cables. It does involve opening all the cables to the PSU and feeding a few extra inches back through the cable chains.
Cable shroud : Looks nice if you do the cable relocator.
The following need to be printed in ABS:
M3 Bed Nut retainer: 10/10 upgrade. I know they look worse than the nice metal stock ones, but these help keep your bed level longer.
CiiCooler
Glass bed Holder
Now that the first major round of printed upgrades is done it’s time to shift to a few more supplies to pick up to really fine tune the machine.
Buy
($5)Radial fan: For CiiCooler
($5)Glue sticksThis and a glass bed is magic
($25)Borosilicate glass 8” x 8”
($26)Y-Carriage plate upgrade: This has been a nice upgrade as I now only need to relevel the bed every couple weeks instead of every print. Check out this guide for a ‘how to’ as well as a free upgrade by shifting your Y pulley over.
($15)rechargeable dehumidifier: For keeping in the bin with your opened filaments
($9)Extruder gears: Might be able to hold off on these, but will need eventually. If for some reason you have a Maker Select with metal X-axis blocks (V1 and V2, but not V2.1) then this is a must. You can follow this guide for a how to.
($28)Metal extruder plate and lever: Not needed, but nice.
($14)Noctua 40mm fan: Not needed, but makes the printer a lot quitter. A LOT quieter.
($50)MicroSwiss All Metal Hot End: The destruction of my PTFE tube by this point pushed me to doing this upgrade. If needed you can follow this guide for replacement. Remember to tighten/loosen when the nozzle its hot.
($6)Ceramic cotton: Tore off the stock one when replacing for the all metal hot end by accident. At least its thicker than stock
Now that the printer is in its final form, its time for the enclosure which is a stacked Ikea Lack hack.
Print
Spool holder
Pi Case
120mm fan cover
Fan grill
120mm fan PSU modification: I edited this to fit upside down since my PSU is mounted on the underside. This was nice since I blew the 40mm fan anyways so it made everything a lot quieter than before.
IKEA Lack filament guide
Webcam holder: This is one I designed specifically for the webcam I happen to have lying around. The camera mount piece can be changed out no problem though for what ever webcam you have or buy. The SketchUp file is included on Thingiverse for such purpose.
Buy
($20)2x Ikea Lack: Luckily there is one right down the street from me. I am located in North America though, so we do not have the STUVA, if you live literally anywhere else you may check in to this as an alternative.
($80)Plexi glass for enclosure: Could be cheaper alternatives, but it looks cool
($9)Foam pads for feet
($42)Raspberry Pi3: For OctoPrint. I also suggest using a different USB cable than the stock one provided by Monoprice or you will have issues.
($9)2x 120mm fans: Used for the power supply cooling and enclosure
($6)Rocker Switches so that the enclosure fan can be on for PLA, but off for ABS
($15)Dimmable LED lights
($10)8mm LED light connectors
Total:
$250 printer + $452 upgrades/parts + ~$80 PLA/ABS to date
I'll make a comment with gcode and settings when I get home in a couple hours.
These are the part cooling fans I bought and the bearings on the Y axis were the lm8uu. Might do the same on the X axis soon. 40mm noctua fan is easy to find on Amazon.
I'm not running the stock nozzle, I'm running another 0.4mm brass nozzle found here because my stock nozzle never was too reliable. This plus the better extruder gear (Link) ended all clogs. Micro Swiss upgrade definitely on my to do list tho
There are a lot of variables in play here, but I strongly recommend getting the upgraded carriage plate from Gulfcoast Robotics (fka RepRap Champion).
https://www.amazon.com/gp/aw/d/B07B251KBS/
Not only will it improve initial leveling, it will hold level longer. The stock carriage plate is prone to warping and may be the twisted component that is throwing things off for you.
This guy: here super cheap and helps the printer grab onto the filament a little bit more. I noticed that mine would sometimes slip during retractions. I'd also make sure you are using the little clips that hold the ptfe tight into the coupler. Excess play here can also cause issues
Hey everybody, I'm relatively new to the 3D printing scene as far as the printers themselves are concerned. I've been looking around for a sub $500 printer and I found the Creality Ender 3 Pro on Amazon for ~$260. Wanted to know if anyone has one and what they think of it or if there are suggestions for others.
Any feedback is helpful and much appreciated and the link to the printer is below. Thanks!
Creality Ender 3 Pro: https://www.amazon.com/dp/B07GYRQVYV/ref=cm_sw_r_cp_apa_i_0DEYCbVJH97DS
I've also had issues due to bad tape. The green frog tape is horrible. Before I got my PLA sheet, I used the cheap wal-mart type wide blue painters tape and it worked great. I liked to use kapton, but it's just too delicate to last very long. I was changing it out every 2 weeks. PEI is the answer (waay tougher than buildtak)...lasts about a year and everything sticks to it. Also, since PEI has such good adhesion, your z level is a little more forgiving for that first layer.
https://www.amazon.com/Gizmo-Dorks-Printing-Surface-Adhesive/dp/B01KGDTPQK/ref=pd_lpo_vtph_328_bs_img_2/136-9930884-8852130?_encoding=UTF8&amp;psc=1&amp;refRID=B25F74EX68VYED1NFMY2
He means like this, adhered to glass, or directly to the heater.
I'd personally recommend glass with hairspray. Best print bed I've gotten yet!
Lithium grease is more for weather resistance and heavy duty. I wouldn't use anything heavier than the ptfe silicone.
http://www2.dupont.com/Consumer_Lubricants/en_US/applications/faqs.html
Honestly though $6.82 and free shipping http://www.amazon.com/Synthetic-Grease-Syncolon-Purpose-Lubricant/dp/B000XBH9HI
That stuff is really good and not too heavy.
Most cheap calipers are fine for measuring prints for accuracy. If you want to get something a little better than the cheapest but not spend too much, I'd recommend these. They're probably not more accurate than other digital calipers in the $20-$25 range, but the absolute origin feature makes them easier to use since you don't have to zero-out each time you use them.
I also have a self-built i3 that was loud when first built. I was able to cut down on noise by doing the following:
Also, periodically make sure that all nuts are tight. They tend to loosen from vibration allowing washers to rattle around.
My next step will probably be using IGUS Drylin bearings in place of my ball bearing LM8UUs, but this plan is on hold while I consider switching to a CoreXY configuration.
Hope this helps!
I ordered this one, and it got to me in Canada pretty quick for a decent price: https://www.amazon.com/gp/product/B07B251KBS/ref=oh_aui_detailpage_o01_s00?ie=UTF8&amp;psc=1
I've literally only done two prints since I got it installed though, so I can't say how big an improvement it is on the original yet.
Even in the slowest setting my dremel would be too fast, and even the small sanding wheel would be WAY too big to sand that print.
When sanding a 3D print you want to use wet/dry sand paper, the black sandpaper. Getting it wet and moving slowly will reduce building up heat which could warp the print.
Before sanding you may want to trim supports with a flesh cutter a tool like this:
https://www.amazon.com/dp/B00FZPDG1K/ref=cm_sw_r_em_apa_i_aKt5CbB6PMGJX
An X-acto knife would also be useful.
For figures you’re going to want to get an SLA 3d printer. Something like this ANYCUBIC Photon UV LCD 3D Printer Assembled Innovation with 2.8'' Smart Touch Color Screen Off-line Print 4.53"(L) x 2.56"(W) x 6.1"(H) Printing Size https://www.amazon.com/dp/B078N2TSYS/ref=cm_sw_r_cp_api_i_B3XKDb4GBGPPH
It makes super smooth prints and since you aren’t trying to build anything huge.
Can you design or model with any of the software out there?? That’s the key for making a new head for your legends, Mezco figs or whatever but I know a lot of people are doing it so maybe you know someone who can hook you up with files and some you can find online but if you want to make your own stuff you’ll need to learn. There’s a lot of tutorials on YouTube.
The Photon seems to have pretty good reviews on Amazon.com and reviews elsewhere all seem to be better than average considering the more complicated processes involved. I have been following both printers since release (just ordered a Photon last week) and it has had far less issues than the D7 did on release (which I didn't buy for that reason). Both printers seem to have about the same overall quality control now from following their Facebook groups etc. I have mixed opinions on how the D7 is constantly fixing things and releasing revisions (current printer version is 1.5). It seem great they are improving it but I would not want to buy one and then have to spend $125 a few months later on an upgrade kit to fix issues.
Step one: don't use a raft unless you absolutely have to. If you do have to, invest in a pair of these and go to town. Heat gun/butane torch will also help if used very carefully.
https://www.amazon.com/gp/product/B00FZPDG1K/
&#x200B;
As for making the top smooth, that's all about your printer calibration and settings. Without seeing what the top looks like or your settings I can't help with that one.
Don't buy the filadry one. It is the exact same as this:
www.amazon.com/Rosewill-Countertop-Dehydrator-Adjustable-RHFD-15001/dp/B018UR4XJI/
There are spool holders for it on thingiverse. I am sure there are others but this one is super cheap and I have it so I can vouch for it's effectiveness.
I've had good success with .03inch thickness (0.762mm)
That's a bit thicker than you would tend to find, but it has the benefit that you can use high grit sandpaper to resurface it many many times. I'm about 200 prints in on my first sheet, and I suspect it'll outlast the printer if I don't break the mirror tile it's on. (the sizes are awkward on this listing unless you have a 12x12 build surface like I use)
https://www.amazon.com/Polyetherimide-Natural-Standard-Tolerance-Thickness/dp/B00CPRDDLY/ref=sr_1_1?s=industrial&amp;ie=UTF8&amp;qid=1502675019&amp;sr=1-1&amp;keywords=pei
As others have stated, that repeating pattern of lines is a sign of extruder slippage or binding.
Two things to check is make sure your pivot screw isn't too tight. That will prevent the gears from engaging tightly. You may also need to stretch out the clamp-spring a bit to give more compression.
The Crealiy plastic extruder is known to have issues and you'll benefit greatly from the cheap Hictop aluminum extruder.
CHP-170 Micro Cutter https://www.amazon.com/dp/B00FZPDG1K/
These are fantastic cutters that have served me well for a long time. Highly recommended for this application and not expensive.
The first one is fine. Not sure if the last one is any different. That being said, I was able to print PETG pretty well with the stock heating block, though the MS is definitely better. While you're at it, pick up a new extruder gear. Definitely helps, but don't forget to re-calibrate your e-steps.
https://www.amazon.com/Signswise-Extruder-Driver-Makerbot-Printer/dp/B00ZZRI0DC/ref=sr_1_fkmr2_1?ie=UTF8&amp;qid=1495639138&amp;sr=8-1-fkmr2&amp;keywords=duplicator+extruder+gear
Twice your price range but I have these.
There is a great comparison video of several different calipers in the reviews. Some of which I think are in your price range.
I've tried clips with glass. The problem is your printhead and/or cooling fan will hit the clips unless you're really careful. I recommend the silicone thermal pads.
http://3dprinterwiki.info/wiki/wanhao-duplicator-i3/duplicator-i3-basic-mods/adding-a-glass-bed/
I've also tried hairspray on glass, and gluestick on glass, and painter's tape on glass. To hell with all of those, it's always either not sticky enough, or too sticky. Get yourself a sheet of PEI to put on your glass. It's soooooo much better than anything else. Perfect adhesion while printing, then your part just pops off easily when it's done.
Thermal glass $12: https://www.amazon.com/Signstek-Printer-Heated-Tempered-Borosilicate/dp/B00QQ5Q3BI
PEI + adhesive $17: https://www.amazon.com/Gizmo-Dorks-Printing-Surface-Adhesive/dp/B01KGDTPQK
It really depends on how comfortable you feel with electronics. Watch Youtube videos on the conversion and see if its something you are up for. If it were me, I'd do RAMPS (still with the mosfet mod) with Marlin firmware. Several people on this sub have done it and would mostly likely be nice enough to give you their Marlin firmware. If you go this route you'll have to set the current limit on the drivers, edit the configuration.h in Marlin, calibrate the e-steps, PID tune both hotend/bed and give the RAMPS board solder joints a carefully once over. Sometimes there are extra solder balls and shotty joints.
EDIT: you might also need to recrimp some connectors.
EH I have such a nice setup / case, and I know fire chance is low but peace of mind would be nice.
I'd prefer a mini one of these: https://www.amazon.com/Extinguisher-Suppression-Device-Safety-Product/dp/B01JVXFQ6E
Something rated to put out a small fire, because frankly that's all I'll have in my enclosure if I ever have one. There's nothing majorly flammable in there.
Thanks for the suggestions! The Maxiwatt hot end looks impressive! I may have to try it out sometime. I just have a couple more questions:
Time to upgrade to one of these perhaps? Either that, or try adding some blue threadlocker to the threads of the connector.
As for getting the filament back on the spool, you can set the printer to retract it, but it's a very slow process. I would probably just wind it back by hand carefully.
You can buy a food dehydrator on amazon for like 30 something bucks and then you just cut out the tray part from each stacking ring and there you go! Took me like 10 minutes and it is perfect for drying PLA and PETG.
Rosewill Countertop Portable Electric Food Fruit Dehydrator Machine with Adjustable Thermostat, BPA-Free 5-Tray RHFD-15001 https://www.amazon.com/dp/B018UR4XJI
Similar (prob identical) models can be had from Ali express for cheaper if you don’t mind the long shipping time.
Also if you want to print from the dehydrator you can put a lazy Susan in there and make a little hole to feed filament through. This is exactly what the filament dryer and feeder they sell for 100 bucks is constructed of.
I'm a huge fan of the silk copper/bronze filaments. Silk gold is pretty good too but when people look at prints with those silk copper or bronze they more often ask if they're actual metal.
https://www.amazon.com/Bronze-Filament-Printer-Printing-Material/dp/B07FCC3TJG/ref=sr_1_3?ie=UTF8&qid=1537377823&sr=8-3&keywords=silk+bronze+filament
https://www.amazon.com/Silk-Copper-Filament-Printing-Material/dp/B0761PMW3X/ref=pd_bxgy_328_img_2?_encoding=UTF8&pd_rd_i=B0761PMW3X&pd_rd_r=c5eff776-bc30-11e8-85dd-873fcc9bd247&pd_rd_w=mfPAa&pd_rd_wg=SPizH&pf_rd_i=desktop-dp-sims&pf_rd_m=ATVPDKIKX0DER&pf_rd_p=6725dbd6-9917-451d-beba-16af7874e407&pf_rd_r=FY9NVDFGYTQ7G7B53M61&pf_rd_s=desktop-dp-sims&pf_rd_t=40701&psc=1&refRID=FY9NVDFGYTQ7G7B53M61
I like the igaging stuff. iGaging ABSOLUTE ORIGIN 0-6" Digital Electronic Caliper - IP54 Protection / Extreme Accuracy https://www.amazon.com/dp/B00INL0BTS/ref=cm_sw_r_cp_tai_ZQERAbVQDZTS9
It’s won a lot of caliper shootouts on YouTube.
I highly doubt it's the SD card. If it was the SD card the printer would likely just simply stop instead of continuing to move without extruding. It could be a settings issue, something you changed and forgot to set back though.
Is the extruder motor still moving, or in your case likely grinding away bits of the filament? That's an important question.
Did you make sure to get all the PLA out before going to PET-G and vice versa? If you plan to do filament type changes on a regular basis you should pick up something like eSUN's cleaning filament. It has a really wide temperature range (150C to 260C) which means it's good for making sure you've got all your previous filament type out.
I'm looking to buy an Ender 3 pro
https://www.amazon.com/gp/product/B07GYRQVYV/ref=ox_sc_saved_title_1?smid=A2ALB3RMNIRLH8&psc=1
But have seen it for cheaper on eBay, and am curious if it's safe to go the eBay route?
Here are two of the eBay sellers I saw:
https://www.ebay.com/itm/Creality-Ender-3-Pro-3D-Printer-Thermal-Runaway-Protection-220x220x250mm-DC-24V/223131248691?epid=14027539696&hash=item33f3a8a833:g:CS8AAOSwXFFbljwA
&#x200B;
https://www.ebay.com/itm/Used-Creality-Ender-3-Pro-3D-Printer-220X220X250mm-Mean-Well-Power-DC-24V-PLA/153401984963?epid=4029954280&hash=item23b77887c3:g:p~AAAOSwCy5cgIVX
Just printed my first ninjaflex test print and it came out way better than i expected. The only problem is how long it takes for all the previous filament to be cleaned out. I was thinking of getting the following from eSun but wanted to make sure there wasn't any other options I'm missing.
http://www.amazon.com/Printer-CLEANING-Filament-Makerbot-Printers/dp/B00MVIYNFW/
If anyone has used eSun with a bowden setup i would love to hear how you used it. Did you put it right into the hot end by removing the PTFE tubing or did you just put in a piece between your filament chance and have the new filament push it though? I'm just wondering how that would work with ninjaflex already being hard to get back pressure on with a bowden.
This is the caliper that I bought:
https://www.amazon.com/gp/product/B00INL0BTS/ref=oh_aui_detailpage_o07_s00?ie=UTF8&amp;th=1
I wish I bought a 3mm hexdriver so that I did not have to use the hex key.
My biggest tip would be to pre-install or thread the screws in first when installing any screw to the frame. The threads need to be cleaned of the powder coat. This will make installing anything to the frame go much smoother.
Other than that use the online manual read the directions clearly and read the comments, they are very helpful.
Have you tried lubricating the z-axis threaded rod? It's not mentioned anywhere in the assembly guide, but I found that a liberal application of super lube did wonders for my RepRapPro Mendel. The Z axis used to bind constantly when it moved too fast and now it's perfect.
Then you'll want to learn something like sculptris.
I just found out about this today, it might be appropriate for you if you want to keep costs down. Traditional FDM printers (what most people have) are better for engineering parts. The only other printer I can think of would be the Form 2/3, which is 2-3k.
https://www.amazon.com/ANYCUBIC-Assembled-Innovation-Off-line-Printing/dp/B078N2TSYS/ref=sr_1_3?keywords=ANYCUBIC+Photon+UV+LCD+3D+Printer+Assembled&amp;qid=1562307287&amp;s=gateway&amp;sr=8-3
I started with a pair from harbor freight, but then decided I wanted something a little more substantial, so got these off of Amazon - https://www.amazon.com/gp/product/B00INL0BTS/ref=oh_aui_search_detailpage?ie=UTF8&amp;psc=1 and moved the HF pair out to the garage. These iGaging ones do feel more substantial.
Get a pair of PCB flush cutters like this: https://www.amazon.com/Hakko-CHP-170-Micro-Cutter/dp/B00FZPDG1K/ref=sr_1_11?keywords=pcb+flush+cutter&qid=1569304958&s=gateway&sr=8-11
they're usually for snipping away excess resistor legs and solder, but they lay nice and flat, so they can edge their way under that raft for you to snip away. I use mine more for cleaning prints than circuit boards.
WD-40 is not a lubricant, I use mobil grease, but this would be just fine ( see link) or stop at a auto store and get a multi purpose grease.
Super Lube 21030 Translucent White Color 3 oz. Automotive Accessories https://www.amazon.com/dp/B000XBH9HI/ref=cm_sw_r_cp_api_i_Yk22Cb96K4F0F
I have a maker select v2 and recently switched to 3 point leveling with one of these. Highly recommended.
This gives an excellent overview of the benefits of 3 point leveling.
I was having the same problems as you prior to the upgrade. I couldn't get even leveling across the bed which led to my printer collecting dust for a few months.
Capillary issue hadn't occurred to me before, but it makes sense. But if you are going to acylic matte prime it anyway, I guess trying to fill those layer gaps first is a step worth taking.
Something like a filler-primer: https://www.amazon.com/dp/B003CT4AM0/ref=nav_timeline_asin?_encoding=UTF8&amp;psc=1
https://www.amazon.com/dp/B01HCVJ3K2/ref=cm_sw_r_cp_ep_dp_PI.Cyb7TB37GQ
This is the board I'm looking doing. I like it because of the heat sink.
I know there is that is half the price, but the heat sink I think is better.
Yes its true if wood is around or any flammable material it would be wise to take precautions. However remember that you will never really exceed 275°C when printing and most fires with 3D printers happen due the heater cartridge falling out or when the wrong mosfets are installed on the electronics board. If however you really want to be safe install this fire ball extinguisher on top of your 3D printer:
https://www.amazon.com/Extinguisher-Suppression-Device-Safety-Product/dp/B01JVXFQ6E
The downside of this ball is that a false positive alarm will cost you your printer. A thermal camera or a smoke detector connected to the PSU will trigger when the fire already happened. This means you have to extinguish the fire yourself and If you are not close by this might be an issue.
Oh yeah most definitely. Here is a link to the RAMPS kit that I bought and Here is a link to the E3D clone I bought. For this clone to work I printed an insert for the heatsink.
Personally, I love my FlashForge Creator Pro!
http://www.amazon.com/FlashForge-Structure-Optimized-Platform-Extruder/dp/B00I8NM6JO
https://www.amazon.com/ANYCUBIC-Assembled-Innovation-Off-line-Printing/dp/B078N2TSYS/ref=sr_1_4?keywords=anycubic+photon&amp;qid=1566830737&amp;s=gateway&amp;sr=8-4
I would get this.. I sill might.. Yeah :) I most likely will.
Don't use anything that can eat away at the plastic in your linear bearings. Highly suggest Super Lube Synthetic Grease
https://www.amazon.com/Super-Lube-21030-Synthetic-Grease/dp/B000XBH9HI/ref=asc_df_B000XBH9HI/?tag=hyprod-20&amp;linkCode=df0&amp;hvadid=167152075853&amp;hvpos=1o2&amp;hvnetw=g&amp;hvrand=17297344115033260690&amp;hvpone=&amp;hvptwo=&amp;hvqmt=&amp;hvdev=c&amp;hvdvcmdl=&amp;hvlocint=&amp;hvlocphy=9027607&amp;hvtargid=pla-315922229188&amp;psc=1
What i use on my printer, same model and rebrand name.
"v2.1" is a label that means nothing anymore, since there have been four revisions of v2.1 and the most current model is still called v2.1
Wanhao has never done a "mosfet change" in the board,they upgraded under-rated connectors to properly handle the amount of power needed to pass through them; they didn't add anything.If you want to be sure, open the box and look at things for yourself.
Edit: Apparently Wanhao did update a mosfet. But I haven't seen any reports of someone who had something like this in their printer. It's likely the updated mosfet is visually identical to what they replaced.
I got this one and it's working great: https://www.amazon.com/gp/product/B0761PGLZ4
For sure. http://www.soliforum.com/topic/2816/howto-converting-to-a-ramps-controller/
Pretty helpful sub, you can always ask me for help if you get stuck along the way. Also, I used the Makerfarm Pegasus instructions for putting the RAMPS together.
This is the kit I bought, it was mostly complete but I had to order some jumpers because I was short a few. http://www.amazon.com/OSOYOO-Printer-Controller-Stepper-Heatsink/dp/B0111ZSS2O?ie=UTF8&amp;psc=1&amp;redirect=true&amp;ref_=oh_aui_detailpage_o08_s00
What WayGroovy said.
I picked up This Pair
They are pretty nice and affordable. I would stay away from the 20 dollar throwaways. They are more trouble than they are worth.
Bought this one and works wonderfully.
Yeah, it was a printer i got for a good deal from china. My old board melted and shorted out so I had to get this new one.
Is there a way to enable eeprom on this board? I'm not having much luck finding any article online on how to enable it.
Also, is this everything I would need to convert it to the arduino with ramps? https://www.amazon.com/dp/B0111ZSS2O/ref=cm_sw_r_other_awd_ZNj3wbQV2DV9T
A lot of people swear by plain white (so you can see any stuck crud) ABS. I personally never print ABS and don't want to buy a spool just for cleaning, so I was happy to find eSun cleaning filament. It looks expensive, but you only use 6 inches/150mm at a time. The big pluses for the cleaning filament are that they are "sticky", so should do a good job pulling crud out of the hotend, plus they melt over a very wide range, so if a bit gets left behind, it'll melt right out even if you print PLA next.
It's a yellow plastic sheet you glue to your print bed. When the bed is warm, PLA, ABS, and most other thermoplastics stick to it like glue. (EDIT - Flexible filaments stick to it too well and you actually need to smear a little bit of oil, vegetable oil or whatever onto it to stop it from bonding to the surface. I use a spray avocado oil on the rare occasion that I use flexies.)
When the bed cools off, it pops right off again usually. You can get it in thick enough sheets that it lasts for years and all you have to do for maintenance is wipe it down periodically with rubbing alcohol.
No goops, no glues, no nuthin. Heat your bed, print on it.
It's been around for several years and information about how awesome it is keeps just slipping through the cracks for a lot of people.
If you have a heated bed, there is no better print surface. You can buy it on Amazon.
https://www.amazon.com/Polyetherimide-Natural-Standard-Tolerance-Thickness/dp/B00CPRDDLY/ref=sr_1_6?ie=UTF8&amp;qid=1501385359&amp;sr=8-6&amp;keywords=pei
>The price is decent.
Not really, make sure you're thinking of the right thickness. The 0.03" sheet most people use from Amazon is $30 for 12x24".
CS Hyde's price is $40 for 12x12", and only 0.02" thick too. You're basically paying 5x as much as the Amazon price. Sure it already comes adhesive backed, but is that really worth it?
Congrats on your decision! Hope you enjoy it as much as I do.
As far as the auto bed leveling kit, it's brand spankin new and it's the first time I'm seeing it. There were rumors on here of MTW releasing that. Manual bed leveling with the clips that come with the kit were a huge pain in the ass; there was too much play and you need a hex key to level it. I printed Easy bed levelers which are light years better. Manual bed leveling now takes just a quick couple minutes, which I only do after a handful of prints. While you're at it consider these for your printer, too (not necessary but will make your life a lot easier once you start printing):
Thanks! I've been using this https://www.amazon.com/gp/product/B00FZPDG1K/ref=oh_aui_search_detailpage?ie=UTF8&amp;psc=1 but being very careful and as you can see, it's not that precise.
If your prints have become crap but no real changes in settings, you might have a clogged nozzle or a slipping PTFE tube.
Grab some nozzle cleaning filament and shove a few inches of that through your nozzle (while it's hot if course) and see if that improves anything. If you still have issues, you may need to disassemble your hotend and look for issues. If the PTFE tube has started slipping, you'll have a large pool of melted filament just above the nozzle and below the tube you'll have to clear out
https://www.amazon.com/gp/aw/d/B078N2TSYS/ref=cm_cr_arp_mb_bdcrb_top?ie=UTF8&amp;th=1&amp;psc=1
Enjoy!
http://www.amazon.com/Polyetherimide-Off-White-Standard-Tolerance-PEI0113/dp/B00CPRDDLY
GREAT material for printing adhesion. NO glue, no hairspray, just clean it every once in a while with alcohol
Ok seems it was $20.
Someone recommended this https://www.amazon.com/HICTOP-Upgraded-Replacement-Aluminum-Extruder/dp/B0761PGLZ4 in a reddit comment.
Since I was at that moment testing a calibration cube at 135% flow rate and still seeing random under extrusion I figured. Why not?
just barely mounted it last night so haven't done much printing.
Apart from a cube and a cable catcher that failed.
But the layer lines are excellent compared to before.
Sorry.. I fell asleep for a bit..
In the left pane at the top is "connection" where you set the port and baud rate. From other responses it seems the manufacturer screwed you on that though as it only does .gcode files. That is crazy.. I never heard of that as gcode is kind of an industry standard for CNC and 3D printers.
The ramps board is not too bad for most printers I've seen, but you would have to open up your printer controller and look at the plugs to gauge how hard it would be. Go on Amazon and search for "Ramps 3D mega". I got a kit with the RAMPS board, Arduino Mega 2560, 5 a4988 stepper controllers, 5 heatsinks, and a serial cable for $25. For $35 you can get one that includes a display and rotary encoder.something like this and then you just have to flash the firmware of your choice on there.
I have an Anet A8 with Ramps 1.4 and a BLtouch sensor. I used the Anet A8 Config file and adjusted a few things to enable my BLtouch. This video helped me a lot to understand what each line of code is doing, so I wasn't just assuming everything was right. I do believe I have different stepper drivers though, if I'm not mistaken my drivers are the A4988's that came with this Ramps kit on Amazon.
Edit: Sorry I'm not much help I got mine to work by following countless videos and wikis. Some specific for Anet, some specific for the BLtouch, and some for general Marlin firmware. Then I compared all the above to fit my setup as well as going over my config file many times for reasureence. If this post doesn't make headway try r/aneta8
This is what I usually use. Pretty much whatever the hardware store has, though.
I actually use a sheet of PEI that is 0.03 inches thick and stuck to my print bed with double sided tape. It gets sticky when it heats up and releases the parts when it cools. The best part is that the only thing I have to do between prints is wipe it off with isopropyl alcohol.
[Flush Cutters] (http://www.amazon.com/Hakko-CHP-170-Stand-off-Construction-21-Degree/dp/B00FZPDG1K/ref=sr_1_1?s=hi&amp;ie=UTF8&amp;qid=1421781333&amp;sr=1-1&amp;keywords=flush+cutters}) for removing support material
&nbsp;
Digital Calipers
&nbsp;
Blue Painters Tape
&nbsp;
Crazy Filimants (Glow in the Dark or Ninjaflex are good choices)
EDIT: I really suggest staying away from plastic calipers. There are metal calipers that are similarly priced and will last much much longer and are higher quality.
I usually recommend these from Harbor Freight because they do fractions:
https://www.harborfreight.com/6-in-digital-caliper-with-sae-and-metric-fractional-readings-63731.html
And these from Amazon because the quality is much higher for a very good price, but they don't do fractions.
https://www.amazon.com/gp/product/B00INL0BTS
I use both depending on what room I'm in.
I went with this Mosfet for my Maker Select and am very pleased with it:
ANYCUBIC 3D Printer Heating Controller MKS MOSFET for Heatbed Extruder MOS Module https://www.amazon.com/dp/B01HCVJ3K2/ref=cm_sw_r_cp_apap_5g3yWwXefECUF
It used to be branded TriGorilla. The thing is a beast.
So if anyone ever ends up in a situation like mine, I'd like to leave a note here. I purchased an aftermarket mosfet board (as long as it supports 5v switching you'll be fine). I soldered into the bypass pad on the main board, ran this to my + input on the mosfet and ran a jumper wire to the - from the power supply. Then I wired up my power supply and the bed, and the bed is heating properly. I bought a super beefy mosfet with a heatsink which is probably overkill, but it's working, so I can't complain.
Now I just have to figure out how to mount this thing in the box...
I want to clarify that when this person is saying "PEI over glass" that this person is saying to put PEI [on top of] borosilicate glass, not in place of glass.
A sheet of PEI with 3M 468MP adhesive tape to borosilicate glass is a game changer. Use simple binder clips to keep it on the bed.
------
Edit: I stand corrected. OP was genuinely saying to use PEI instead of glass. I don't suggest adhering PEI directly to your plate because you're not always going to want to print on PEI depending on your material, and PEI will eventually get bubbles and warp and you'll want to be able to replace it.
Source: Have used PEI for over a year now.
Do you have flush cutters? Like this? https://www.amazon.com/Hakko-CHP-170-Micro-Cutter/dp/B00FZPDG1K/ref=asc_df_B00FZPDG1K/?tag=hyprod-20&amp;linkCode=df0&amp;hvadid=198070022856&amp;hvpos=1o1&amp;hvnetw=g&amp;hvrand=430673449294190113&amp;hvpone=&amp;hvptwo=&amp;hvqmt=&amp;hvdev=m&amp;hvdvcmdl=&amp;hvlocint=&amp;hvlocphy=9008336&amp;hvtargid=pla-382997837730&amp;psc=1
At the minimum to replace the board, I'd say replace the board with a RAMPS, so either 35$ https://www.amazon.com/OSOYOO-Printer-Controller-Stepper-Heatsink/dp/B0111ZSS2O/ or 30$ if you skip the LCD https://www.amazon.com/Wangdd22-Printer-Controller-Mega2560-Compatible/dp/B01G6ON5H8/ (The maker select LCD doesn't work directly with the RAMPS without some modification)
Then you'll need a dupont crimping tool and some housing to redo some wires. For another 30$. You might be able to get away with using some pliers instead of a crimping tool.
Honestly I'd try seeing if you can get a replacement from wherever you bought it from first.
I bought this for $35 and cut the insides out of each layer. Fits 2 spools typically (unless theyre the wide spools). Works great with variable and reliable temp
https://www.amazon.com/Rosewill-Countertop-Dehydrator-Adjustable-RHFD-15001/dp/B018UR4XJI/ref=mp_s_a_1_13?keywords=food%2Bdehydrator&amp;qid=1562872208&amp;s=gateway&amp;sr=8-13&amp;th=1&amp;psc=1
Oh haha sorry.[ Gizmo dorks] (https://www.amazon.com/gp/aw/d/B01KGDTPQK/ref=sxts1?ie=UTF8&amp;qid=1483410646&amp;sr=1&amp;pi=AC_SX236_SY340_FMwebp_QL65)
Smoke alarm, webcam, and fire extinguisher nearby, but most importantly it's in an area where it could burn to the ground and not set the rest of the house on fire.
Ideally the smoke alarm should be tied to a smart outlet that the printer is plugged into, so it can automatically shut down.
You could also set one of these automatic extinguishers over your printer.
https://www.amazon.com/Extinguisher-Suppression-Device-Safety-Product/dp/B01JVXFQ6E
https://www.amazon.com/WilliamsRDM-675-3D-Stovetop-Firestop-Rangehood/dp/B00FL6VU3Y
That's intermittent underxtrusion. Make sure you didn't over-tighten the screw that holds down the pivoting arm in the extruder mechanism. It should move freely.
The plastic extruder mechanism is really weak and I've replaced it with an aluminum upgrade on three Creality printers to solve this specific issue.
It's a 5-minute install.
It turned out better than I was expecting just using a small flush face cutter, this one specifically. CHP-170 Micro Cutter https://www.amazon.com/dp/B00FZPDG1K/ref=cm_sw_r_cp_apa_i_pSZ8AbGRVD76F
If you bought one of thos $10 clones I think it would be better just buying the cables to your regular direct drive extruder that came with the printer, I bought one these thermistors and I also bought this heater cartridge. There is also this one that comes with 5 thermistors and 5 12v heater cartridges for $12.
It's possible that you forgot to switch the jumper back from USB to VREG. That would explain why the printer is only turning on the lcd and thermistor when plugin in the usb cable.
Ah thanks. Have you tried the aluminum extruder drive feeder mod ?
This is what I used. I clean my rails every few weeks and apply this to them.
https://www.amazon.com/Super-Lube-21030-Synthetic-Grease/dp/B000XBH9HI/ref=pd_sim_328_3?ie=UTF8&amp;dpID=31-xhQ8JfAL&amp;dpSrc=sims&amp;preST=_AC_UL160_SR120%2C160_&amp;refRID=H3FTJJAS37BZQ08QAHTP
OSOYOO 3D Printer Kit with RAMPS 1.4 Controller + Mega 2560 board + 5pcs A4988 Stepper Motor Driver with Heatsink + LCD 12864 Graphic Smart Display Controller with Adapter For Arduino RepRap https://www.amazon.com/dp/B0111ZSS2O?ref=yo_pop_ma_swf
Go ahead and buy some spare thermistors. I hear they go bad pretty quickly. I bought them in bulk :)
https://www.amazon.com/gp/product/B01B41K7OM/ref=oh_aui_detailpage_o02_s00?ie=UTF8&amp;psc=1
https://www.amazon.com/gp/product/B078N2TSYS/ref=ox_sc_sfl_title_3?ie=UTF8&amp;psc=1&amp;smid=A1A5FQE7R5RISB
This is the first one I got and cost is all relative, for me the 500USD I paid was cheap for what it did. Build one warhammer army and break even on cost. However yes some of them are very expensive.
Setup took maybe 20 minutes or so total. Assembling takes about 10, then about another 10 to get the bed leveled. Assembly is literally just 6 bolts you screw in. The bed leveling is a bit of a pain but not difficult. Directions say to use a piece of paper during leveling, but I found it more accurate to use a feeler gauge instead if you have one handy, if not the paper will work.
I tried the painters tape and had some success but still kept detaching from the base about 1/2 the time. I did not try glue or hairspray. While researching lots of people mentioned the PEI sheet so I figured I'd gamble on it. I have printed 7 or 8 things with it and only had 1 that didn't stick and that was probably my fault because I did not remember to wipe it down with rubbing alcohol. This is the one I got: https://www.amazon.com/Gizmo-Dorks-Printing-Surface-Adhesive/dp/B01KGDTPQK/ref=sr_1_2?ie=UTF8&amp;qid=1484765745&amp;sr=8-2&amp;keywords=pei
My suggestion is try it with the stock surface and/or the painters tape and see what kind of luck you have. If you have issues with sticking, then buy the PEI sheet.
As mentioned, flush cut snips is a common name for them. I have a pair identical to these, even at $5 they're leagues ahead the blue handled version that come free with so many printers.
https://smile.amazon.com/Hakko-CHP-170-Micro-Cutter/dp/B00FZPDG1K/ref=sr_1_3?crid=1JK6FBN2VHTH9&keywords=flush+cut+snips&qid=1558783149&s=gateway&sprefix=flush+cut++sn%2Caps%2C227&sr=8-3
Yeah I've already upgrade to an all aluminum extruder.
Out of curiosity, which one are you using?
Just to clarify your clarification, something like this?
https://www.amazon.com/Polyetherimide-Off-White-Standard-Tolerance-PEI0113/dp/B00CPRDDLY
Silk Copper 3D Printer Filament PLA 1.75 mm 1 KG (2.2 LBS) Spool 3D PLA Printing Material Silky Like Shiny Metal https://www.amazon.com/dp/B0761PMW3X/ref=cm_sw_r_cp_api_i_ihvaCbHW79QQB
Silk Copper 3D Printer Filament PLA 1.75 mm 1 KG (2.2 LBS) Spool 3D PLA Printing Material Silky Shine Shiny Metal CC3D Metallic PLA Like https://www.amazon.com/dp/B0761PMW3X/ref=cm_sw_r_cp_api_i_e1mVCb9X70V7M
Hey guys,
You may have seen this post on /r/overwatch yesterday. I 3D printed this mask on my Monoprice Maker Select.
Used PLA, and basic settings in Cura (200/50 temp).
This is my recommended guide to finishing a 3D printed Prop for any one curious:
Rustoleum Filler Primer - Do 2 or 3 layers of this. Maybe more, you'll know if you need a layer or more. Do some sanding between layers.
I hate regular bondo, so I use Bondo Spot putty, this is what I used to fix everything else. Round out edges, add detail, and to smooth out. Lots and lots of sanding. I used several layers of Bondo spot putty, the trick is to lay it on thin, and do many layers. Don't get impatient and slather it on.
mask after one layer of primer & getting ready for paint
before visor & side view
The mk3 kit comes with all the allen keys necessary, philips and flat head screwdrivers, and needle nose pliers.
I'd suggest some cheap cutters, you'll want them during assembly for the zip ties and after for filament. Brass brushes are handy for cleaning the nozzle.
For cleaning the bed, alcohol and windex from your friendly neighborhood grocery, drug, or big box store. Or the unfriendly store, if you prefer. (Windex for prior to printing PETG; alcohol for PLA)
Eventually, you'll probably want 7mm and 17mm wrenches for changing the nozzle.
You might want to switch out the extruder gear as well. Switching the stock one out and calibrating my e-steps helped a lot. This is the one I got.
https://www.amazon.com/gp/product/B00ZZRI0DC/ref=oh_aui_detailpage_o08_s00?ie=UTF8&amp;psc=1
CC3D has amazing copper and gold (don’t bother with the silver). Silk Copper PLA 3D Printer Filament 1.75 mm 1KG 2.2LBS Spool 3D Printing Material CC3D Shine Silky Shiny Metallic Metal Red Purple Copper PLA Filament https://www.amazon.com/dp/B0761PMW3X/ref=cm_sw_r_cp_api_i_eRrBDbSCBP7H5
I used this one when I upgraded mine. Works very well, been using it for the last 12 months or so with no issues.
https://www.amazon.com/dp/B00INL0BTS/ref=cm_sw_r_other_apa_i_pLbZDbZK580M6
Had mine for about 2 years. It has been reliable and repeatable. I haven't put it on a calibration block set but everything I've used it for has fit together as expected.
For reference, I'm using this kit, upgraded from the original melzi board.
so im looking to get into 3d Printing, and unless someone has some better option, im going with the MP Select Mini.
My question is on the other things i need. Here is the list of the things im looking to buy along with the printer:
I have a set of exacto knives and a screw bit set. Is there anything else im missing?
> I am looking for tools that I will need for general printing and maintenance
Set of tweezers to remove stringy plastic oozing from extruder, soft wire cutter makes snipping end of filament a breeze, assorted m3-m6 hex nuts and bolts will come in handy. Maybe some combination wrenches
And if you want to run octoprint, a raspberri pi, camera, & power supply.
Would it be worth the extra $10 to get this board instead?
TriGorilla Mosfet Board?
https://www.amazon.com/ADIMLab-Assembled-Printing-310X310X410-Available/dp/B07CPQQ57D/ref=mp_s_a_1_3?ie=UTF8&amp;qid=1542915406&amp;sr=8-3&amp;pi=AC_SX236_SY340_QL65&amp;keywords=adimlab+3d+printer&amp;dpPl=1&amp;dpID=41CUcYPkqPL&amp;ref=plSrch
Worth the money?
https://smile.amazon.com/gp/product/B003CT4AM0/ref=ppx_yo_dt_b_asin_title_o06_s00?ie=UTF8&psc=1 This is the one I used, hopefully its not too much more expensive but it was $4.70 for me.
There is also cleaning filament. It is safe to use at ABS and PLA temperatures. Just extrude the cleaning filament until it starts coming out clean. Then lower or raise the temperature to match the new plastic and extrude it until the cleaning filament is no longer being extruded. https://www.amazon.com/dp/B00MVIYNFW/ref=cm_sw_r_cp_apa_HzGvybEZNY8K2
The Rosewill Model RFHD-15001 is exactly the same dehydrator as the PrintDry model on Matterhackers. with the exception of the badging and top components. You’ll have to cut out the tray floors yourself to get the filament to fit.
Any thoughts on if this would be okay to use? https://www.amazon.com/OSOYOO-Printer-Controller-Stepper-Heatsink/dp/B0111ZSS2O/ref=sr_1_1?ie=UTF8&amp;qid=1491874832&amp;sr=8-1&amp;keywords=ramps+kit
I don't want to get something that might go all sparky sparky poof poof
Curious your bondo workflow. Seems like you can lose a lot of detail . Have you considered using 2-3 coats of this Primer Filler.
Dry your filament this is what I use works well Rosewill Countertop Portable Electric Food Fruit Dehydrator Machine with Adjustable Thermostat, BPA-Free 5-Tray RHFD-15001 https://www.amazon.com/dp/B018UR4XJI/ref=cm_sw_r_cp_api_i_q-T5Cb8M4WNG1
This one should work fine, or any made for the MK10. Bought some from China to try, waiting for them to arrive. Don't forget to calibre the e-step.
https://www.amazon.com/gp/aw/d/B00ZZRI0DC/ref=mp_s_a_1_1?ie=UTF8&amp;qid=1487643503&amp;sr=8-1&amp;pi=AC_SX236_SY340_FMwebp_QL65&amp;keywords=mk10+extruder+gear&amp;dpPl=1&amp;dpID=31pamITDHBL&amp;ref=plSrch
I've heard you can use filler primer for smaller cracks, and bondo for larger cracks/seams.
I would, of course, test how the PLA reacts to the primer, first, though. Wouldn't want to ruin a 20 hour print!
GOD PEI WHEN WILL PEOPLE REALIZE THAT THEY DONT NEED HAIRSPRAY OR TAPE OR GLASS OR VOODOO MAGIC BECAUSE PEI WORKS BETTER THAN ALL OF THOSE
FUCKING PEI EVERYONE
EDIT: PEI FFS