Top products from r/DIY
We found 183 product mentions on r/DIY. We ranked the 7,518 resulting products by number of redditors who mentioned them. Here are the top 20.
1. CH Hanson 03040 Magnetic Stud Finder
Sentiment score: 9
Number of reviews: 23
Small and compact, easily fits in pocketPowerful magnets allows hands free use2 way level for ease of markingNo batteries required. Scan Depth: 1 inchSoft grip for easy grabbing and gentle touch
 Show Reddit reviews
2. LEDwholesalers 12-Volt 16.4-ft RGB Color-Changing Kit with Controller and IR Remote, Power Supply, and LED Strip in White PCB, 2034RGB-R2+3369+3208
Sentiment score: 9
Number of reviews: 21
Complete kit includes: flexible LED strip, controller with wireless IR remote, and power supplySet static colors, adjust brightness, select various auto color-changing modes via wireless IR remoteLED strip is cuttable and linkable to fit various length requirements (required components not included,...
 Show Reddit reviews
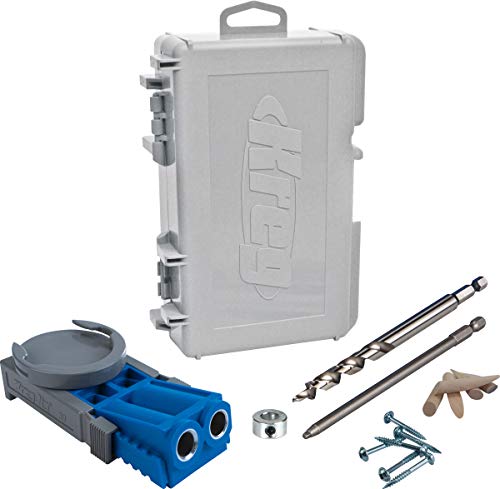
3. Kreg Jig R3 Pocket Hole System
Sentiment score: 7
Number of reviews: 14
The Kreg Jig Jr(R3) is an amazing repair jig and an exceptionally handy addition to any tool collectionEasy to use and installWhether you're crawling under a table to make a quick repair or taking Kreg Joinery on the roadPocket hole jig system for do-it-yourselfersEasy to adjust for materials 1/2-In...
 Show Reddit reviews
4. SUPERNIGHT LED Strip Lights, RGB Color Changing 16.4Ft SMD5050 LEDs Flexible Light Strip Waterproof Rope Lighting Kit with 44 Key Remote Controller and 12V Power Supply
Sentiment score: 3
Number of reviews: 8
【RGB Color Changing】This RGB Led strip lights kit can change colors,set speed modes, adjust brightness with 44 Keys remote controller. DIY selection keys can help you create your great led mood lighting. All items including IR remote controller, led strip and power supply has over charging, sh...
 Show Reddit reviews
5. Nilight RGB Strip LED Rope Light
Sentiment score: 4
Number of reviews: 8
12V DC (adapter not included) Super bright Waterproof Cool White 3528 SMD LED stripLength:16.4 ft./5 Meter 300 LED lights per reel. Allowable cut every 3 LED lightsEasy and flexible installation. Ideal for home and business lighting decoration.Comes with 3M adhesive sticky backingHigh brightness, wi...
 Show Reddit reviews
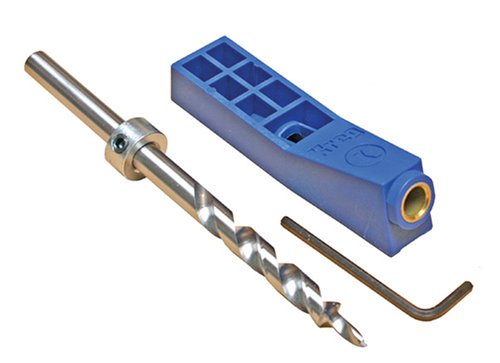
6. Kreg MKJKIT Mini Kreg Jig Kit
Sentiment score: 2
Number of reviews: 8
Makes pocket Hole joinery work easierNo-fence design makes for easy positioningOne-hole Jig is great for furniture repairs or flooring workIncludes 3/8-inch step drill bit, depth Collar, and Allen wrenchHandy for repair applications and space constricted areas
 Show Reddit reviews
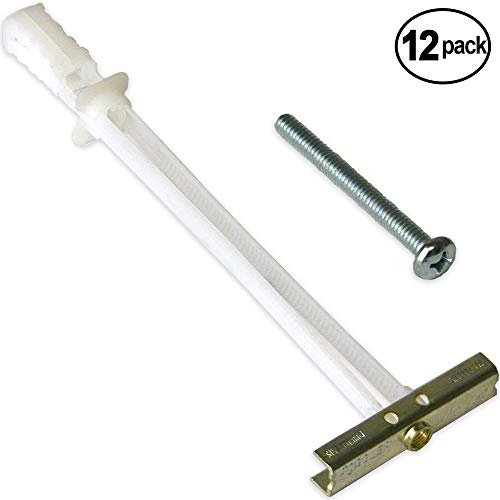
7. TOGGLER SNAPTOGGLE Drywall Anchor with Included Bolts for 1/4-20 Fastener Size; Holds 80 pounds Each in 1/2-in Drywall by TOGGLER (12 Pack)
Sentiment score: 1
Number of reviews: 7
Toggle anchor installs behind 3/8- to 2-1/2-thick hollow materials including gypsum board,Anchor affixes to the wall before adding the bolt and fixture, allowing one-person installation andMade in USA, and includes 1/4-20 UNC-threaded boltsUltimate tensile strength is 265 lb. in 1/2 drywall and 1,08...
 Show Reddit reviews
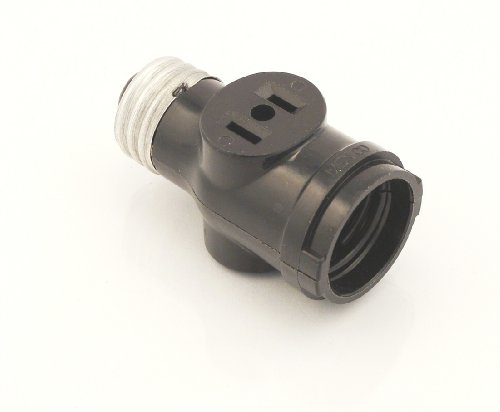
8. Leviton 1403 Two Outlet Socket Adapter, Black
Sentiment score: 4
Number of reviews: 7
Perfect for workshops and garagesTwo outlet socket adapter660 Watt125 Volt
 Show Reddit reviews
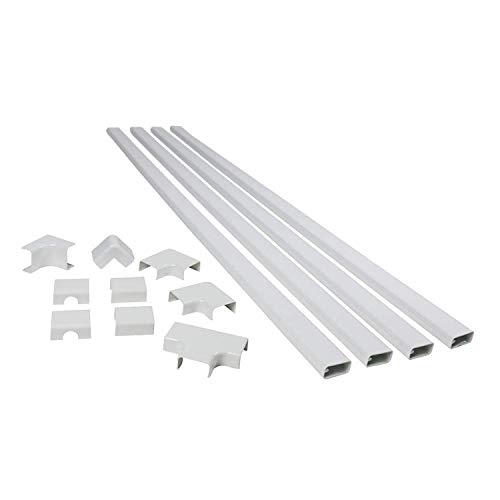
9. Wiremold Cable Management Kit, CordMate II, Cord Organizer and Hider, Cord Cover, Concealer, and Protector for Wall, Medium Capacity, CMK50
Sentiment score: 2
Number of reviews: 7
CONCEALS UP TO 3 CABLES: CordMate II TV Cable Management System perfectly hides dangling and messy TV cables or computer cords for a neater appearance and better entertainment experiencePROTECT YOUR KIDS FROM CABLE CATASTROPHE: TV cables can cause tripping and other safety hazards if left dangling. ...
 Show Reddit reviews
10. LED Word Clock - Displays Time as Text - Powered by AC Adapter (8" x 8")
Sentiment score: 1
Number of reviews: 7
Ideal for home or officeForget numbers, this unique clock has a matrix of words which are selectively highlighted to display the correct time.The time is displayed as text in five minute intervals.Wall mount or desktop with built-in stand.Dimensions: 8” x 8” - Includes AC adapter / Unit will ope...
 Show Reddit reviews
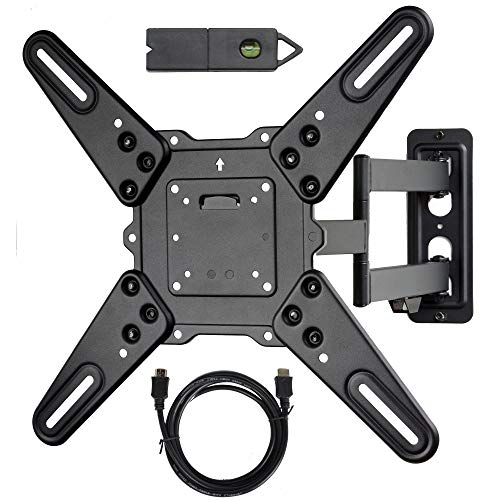
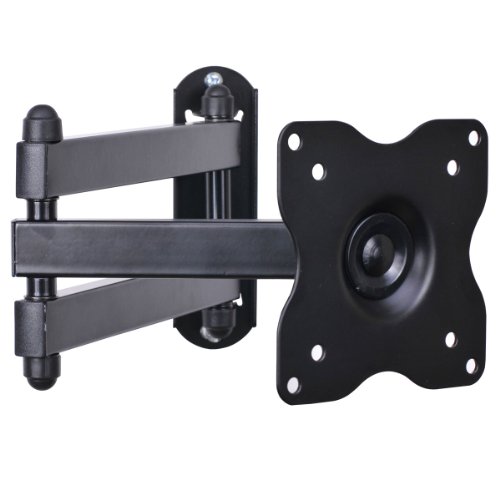
11. VideoSecu ML531BE2 TV Wall Mount kit with Free Magnetic Stud Finder and HDMI Cable for Most 26-55 TV and New LED TV up to 60 inch VESA 400x400 Full Motion with 20 inch Articulating Arm WP5
Sentiment score: 1
Number of reviews: 7
Heavy gauge steel mount supports TV up to 88 lbs. Compatible with VESA (mounting hole pattern) 400x400mm/400x300mm/400x200mm/300x300mm/300x200mm/200x200mm/200x100mm/100x100mm (16"x16"/16"x12"/16"x8"/12"x12"/12"x8"/8"x8"/8"x4"/4"x4")Tilt, pan and 20” pull out from the wall provides maximum viewing ...
 Show Reddit reviews
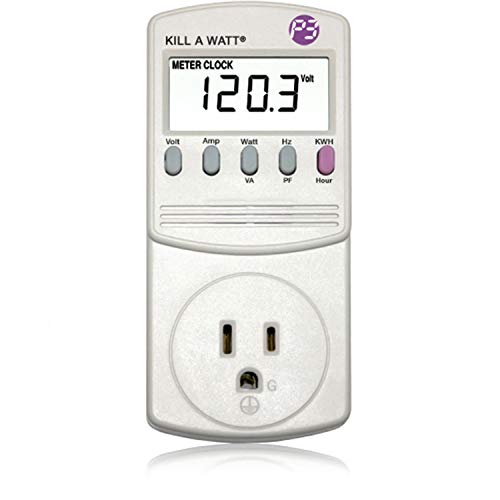
12. P3 P4400 Kill A Watt Electricity Usage Monitor
Sentiment score: 2
Number of reviews: 7
Choose from the Kill-a-Watt's four settings to monitor your electrical usageMonitor your electrical usage by day, week, month, or yearFeatures easy-to-read screenElectricity usage monitor connects to appliances and assesses efficiencyLarge LCD display counts consumption by the kilowatt-hourCalculate...
 Show Reddit reviews
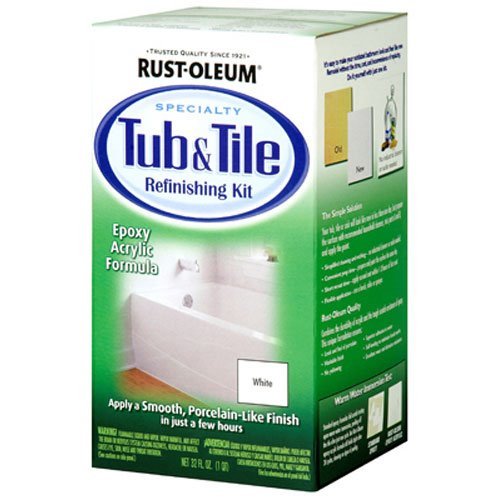
13. Rust-Oleum 7860519 Tub And Tile Refinishing 2-Part Kit, White, 32 oz
Sentiment score: 6
Number of reviews: 7
Prepare and paint surface the same day with a tough, 2-part epoxy acrylic formula that withstands moisture and resists corrosionFor best results, thoroughly mix parts A and B separately before mixing together for 2 minutes--once combined be sure to use within 6 hours of mixingEach kit covers up to 1...
 Show Reddit reviews
14. VideoSecu ML12B TV LCD Monitor Wall Mount Full Motion 15 inch Extension Arm Articulating Tilt Swivel for Most 19"-32", Some Models up to 40", LED TV Flat Panel Screen with VESA 100x100, 75x75 1KX
Sentiment score: 3
Number of reviews: 6
Compatible with VESA (mounting hole pattern) 75x75(3"x3") or 100x100(4"x4")High grade steel material offers loading capacity to 44lbsPost-installation level adjustment allows the TV to perfectly level; Removable TV plate designed for single-person installationAdjustable 5 degrees forward or 5 degree...
 Show Reddit reviews
15. Metro ED500 DataVac 500-Watt 120 volt 0.75-HP Electric Blower Duster
Sentiment score: 2
Number of reviews: 6
Sturdy all-steel construction. Please note: This item is a blower, NOT a vaccuum.Includes air pin-pointer, air concentrator nozzle, air -flare nozzle, micro-cleaning tool kitMore effective than canned air and safer than canned air500 watt motor, .75 HP, 4.5 amps, 70 CFM air flow120 volt (not for use...
 Show Reddit reviews
16. O'Berry Enterprises 3233 Squeek No More Kit, 3 inch X 1/8 inch
Sentiment score: -1
Number of reviews: 6
Eliminates squeaks between floor boards and joistsEngineered plastic alignment depth toolCan be used on carpeted floorsIncludes 1 tool, 50 scored screws, 1 drive bitClamshell
 Show Reddit reviews
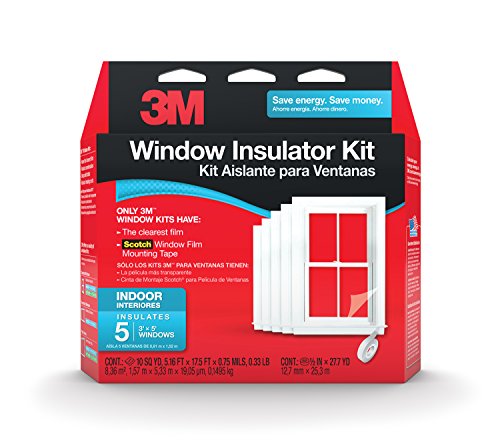
17. 3M Indoor Window Insulator Kit Insulates 5 - 3'x8' Windows
Sentiment score: 2
Number of reviews: 6
Included: (1) 5.16' x 17.5' film sheet, (2) rolls of tape, 1/2" x 27.7 ydInsulates five 3' x 5' windowsLowers heating costs and saves energyApplies easily, shrinking tight, wrinkle-free and clear on glassIncreasing the R-value of single pane window by 90%
 Show Reddit reviews
18. Hitachi C10FCE2 15-Amp 10-inch Single Bevel Compound Miter Saw (Discontinued by Manufacturer)
Sentiment score: 1
Number of reviews: 6
Hitachi Power Tools has renamed to Metabo HPT. Same great tools, with only a new name.15 Amp motor, intense power for the toughest cutting jobs0 to 52 degree miter angle range, to the right and left for increased flexibility0 to 45 degree bevel range, to the left with adjustable bevel stops for prec...
 Show Reddit reviews
19. Weller WES51 Analog Soldering Station
Sentiment score: 5
Number of reviews: 6
Receptacle For Easy Iron ReplacementDesigned For Continuous Production SolderingSlim, Comfortable Pencil With Eta Tip Reduces Operator FatigueTip Temperature Offset CapabilityAllows User To Reset Station Temperature To Match In Tip Sizes & StylesStation Includes Power Unit, Soldering Pencil, Stand a...
 Show Reddit reviews
20. LEDwholesalers 12 Volt DC Waterpoof LED Power Suppply Driver Transformer with 3-Prong Plug, 30W, 3207
Sentiment score: 5
Number of reviews: 6
IP68 waterproof ratingConverts AC voltage to 12V DCWire leads and 3-prong plug for easy connectionsAutomatic thermal & overload cut-off, short circuit protectionEfficient, long life, stable, and reliable
 Show Reddit reviews
Hi. This sounds like such a fun project to do! I also agree with the mount idea.
I've used this for my monitors before I switched to these. Both are great quality, easy to install, and deliver what they advertise.
The benefit of these articulating types is that they can also tilt, swivel, and rotate. I don't know how your vanity is set up, but tilting might be something to consider if you ever both sit and stand. The swivel might be helpful if you're trying to catch the best natural light from a particular window.
The former is definitely more affordable and a simple enough solution. It's very sturdy when mounted onto a stud, or be sure to use anchors. Also, if you plan to use this type of mount, just be aware that when it's pushed back, the center of the mirror (if you affix it to the mount at the exact center) will be offset about a couple inches to the side from where the mount is attached to the wall. I hope I explained that well enough. There should be more info on this in the reviews with photos to help explain what I mean, or feel free to ask me for more details.
The latter (or something like it) would be a great option if you didn't want to attach anything to the wall at all as it can clamp onto an edge of your vanity, if possible. This might be a good route if your vanity is floating away from a wall. This one is much more costly, though, and I would personally rather spend that money on the makeup goodies lol. I'm only mentioning this option as it's the only other mount I've had experience with and it's a great mount, but there could be similar ones out there at a lower price point with the same features by now (I bought it a couple years ago).
Safety tips: I don't know if you have plans for how to affix the mirror to the mount, or what kind of mirror you want to use, but in regards to safety (if it is a simple bare mirror) I would recommend to create/attach/build some kind of backing/frame for the back and around the edges of the mirror so that it's more sturdy when you move it around. Also, I would recommend sticking bumpers onto the parts of the mount that come into contact with the back of the mirror when the mirror is pushed back towards the mount.
I hope this was helpful. Please feel free to ask me any questions.
Tell your pops I used this stuff on my tub and it came out nice.
Couple tips: The directions say to use like 400 grit sandpaper, screw that, I tried that for almost 20 minutes and it wasn't doing a thing. I went down to like 150 grit. Real rough stuff. And it gouged the surface right up. I would periodically wipe the dust off with a damp cloth, then dry the surface and start sanding again. I think I sanded for just over an hour, taking a lot of short breaks to catch my breath since it was a pretty good workout. Once most of the gloss was gone and it was pretty well gouged up I applied the epoxy. People in the reviews complained about the vapors from the epoxy. So I setup two fans, a box fan blowing out the window and another fan blowing right at my head (the toilet's at the perfect height for this ;-)) And I felt completely fine breathing normally. It's been about a year and it's holding up great. Though we have babied it, just cleaning it with soap and water and a soft sponge, but it stays clean fairly easily and still looks great. Highly recommended easy DIY job for an old tub.
You really don't have a lot of choice in order to support a desk that tall, the leg joints will have to be the strongest part of the desk. L Brackets won't work.
You don't need fancy joints, but you do need strong ones and you will need bracing on the legs. You could get a Pocket hole jig like this This allows you to join to panels fairly easy and strong (use glue also).
You could build a desk like this without the drawer only using the pocket joints.
I have a Weller WES51 Analog Soldering Station, and I highly recommend it for just about any kind of work. https://www.amazon.com/gp/aw/d/B000BRC2XU/ref=mp_s_a_1_3?ie=UTF8&qid=1518809457&sr=8-3&pi=AC_SX236_SY340_QL65&keywords=weller+wes51&dpPl=1&dpID=41WVs6AdNqL&ref=plSrch
The slightly more expensive digital version doesn’t solder any better, it just has buttons and a display instead of an adjustment knob.
If you’re working on tiny components, then you’ll just need to buy a few smaller tips, but there are plenty of sizes and shapes out there for Weller irons. I’ve always just bought cheaper knockoff tips, like the ones where you can get a variety pack of 10 for ~$30 on amazon. I don’t think tips are really worth spending a premium for the Weller brand, unlike the iron itself. Something like this: https://www.amazon.com/gp/aw/d/B00VFYPKN2/ref=mp_s_a_1_fkmr2_2?ie=UTF8&qid=1518809384&sr=8-2-fkmr2&pi=AC_SX236_SY340_QL65&keywords=weller+replacement+tip+set+wes51
I’d also recommend a good vise or workstation to hold things steady, because there’s nothing worse than trying to use crappy little helping hands or just solder on a bench top. I use a Panavise like this, just as an idea, but there are probably some decent cheaper options out there: https://www.amazon.com/gp/aw/d/B00011QA0M/ref=mp_s_a_1_1?ie=UTF8&qid=1518809613&sr=8-1&pi=AC_SX236_SY340_QL65&keywords=panavise+350&dpPl=1&dpID=41smUr9QAlL&ref=plSrch
You can get ROLLS of remote controllable LED lights online. My husband and I use them for lighting our computer cases for instance. Just do a little research in the reviews to make sure people have a good experience with their safety and longevity for the price. https://www.amazon.com/LEDwholesalers-Changing-Flexible-Controller-44-button/dp/B0040FJ27S
If you are looking for an easy solution around 100 to 200 give philips HUE a try? You can control with your phone and they have a couple of products that provide ambient lighting. https://www.amazon.com/Philips-259945-Bloom-Frustration-Free/dp/B00I12YFP0/ref=pd_sim_60_5?ie=UTF8&dpID=41j4KdlKf9L&dpSrc=sims&preST=_AC_UL160_SR160%2C160_&psc=1&refRID=YGM42E2837A7BAV7AW3M and this https://www.amazon.com/gp/product/B00F0W3CI0/ref=s9_dcacsd_bhz_bw_c_x_6 and they have lots of other hue products too.
You could build up a crown moulding with a small shelf before the ceiling then line it with rope lighting to create a lit ceiling. https://www.youtube.com/watch?v=YaSHR6mfbRE
You could buy a couple of lamps from ikea, craigslist, marshalls, tj max, home goods, then put lower wattage lights (40w or 25w) in them on the 2700 (warmer) side of the spectrum. Dimmable lamps would be a plus just make sure the bulbs are dimmable too. They could be standard lamps, wall mounted plug in lamps, pendants you plug in then hang from the ceiling or even something more zen like a salt lamp: https://www.amazon.com/YYout-Himalayan-Crystal-Dimmable-Electric/dp/B01DP47SDY/ref=sr_1_2?ie=UTF8&qid=1469690772&sr=8-2-spons&keywords=dimmable+salt+lamp&psc=1
You can put any pluggable light on a remote with a light switch remote. They can be pretty handy... Or the clapper lol. https://www.amazon.com/Etekcity-Wireless-Electrical-Household-Appliances/dp/B00DQ2KGNK/ref=sr_1_7?s=hi&ie=UTF8&qid=1469690399&sr=1-7&keywords=plug+remote
You can get okay ones for $50-100. Are you looking for a soldering station or just a soldering pencil/gun?
I would recommend a wall unit, as opposed to a butane unit, because butane ones are mainly for people soldering in the field. They are nice and portable, but you have more wall outlets than butane canisters in your place, so it's easier
..
Weller and Hakko are great brands, their tips are a bit pricey too, but trust me, they last a lot longer than the cheap irons and their cheap tips.
You can't go wrong with any of these:
Weller
Hakko
Feel free to ask me other questions.
Totally worth the money:
A drill that will actually drill holes. I bought a POS drill (50 bucks) and it had no power to it. I finally dropped 250 on this and well worth every penny:http://www.amazon.com/gp/product/B00DG7SYYI
If you're doing any type of wood working and you want to join peices of wood securely and have it look nice look into the Kreg Pocket Hole Jig:
http://www.amazon.com/gp/product/B000J43A7W
I also purchased this guy to help clean up the massive extension cable that I have in my garage. Totally worth it as well:
http://www.amazon.com/gp/product/B00005A1K1
Also invest in a good pair of safety glasses and dust mask.
Do yourself a solid and buy a stud finder. The magnet kind is too cheap not to. This one at Amazon is $7 and is great: https://www.amazon.com/gp/aw/d/B000IKK0OI/ref=mp_s_a_1_1?ie=UTF8&qid=1479919614&sr=8-1&pi=AC_SX236_SY340_QL65&keywords=magnetic+stud+finder
Also, it's smart to double check what your finder tells you before actually trying to screw anything. I usually use a finish nail to probe the spot and be sure that there is actually a stud where I think there is. You never know what craziness is going on behind drywall and if you were wrong, it's super easy to repair a finish nail hole.
Good luck!
Oh, they are :)
When I saw this I thought about a project I had completed using edge lighting with LED strips (literally LEDS in a strip, an example: http://www.amazon.com/Triangle-Bulbs-T93007-Waterproof-Flexible/dp/B005EHHLD8), since it looks like the LEDs in the housing are LED strips. So I was going to make my suggestion.
I definitely think that EL Tape would look way nicer for less work, but I had a lot of fun with an edge-lit piece I made last summer, so I thought I should at least recommend it in case OP thought it was cool too.
Nice job, man. Money and time well spent.
Here’s a super easy, cheap, yet still very slick stop gap option til you have the time/$/inclination to tackle the uppers. FYI, the steel on the ikea “stainless” shelves can get spot rust over time, so like most IKEA solutions it’s short term. As an alternative, you could just get the brackets and do butcher block (or just maple) to match the counter top.
Use snap toggles and you don’t have to sweat stud location. Properly installed they can hold hundreds of pounds. Buy a box, you’ll be glad to have lots of extras for future projects.
(They’re available at HD/Lowe’s. They come with zinc plated 2-1/2” 10/24 machine screws; worth splurging on stainless replacements since they’ll be visible and they’re in the kitchen. They can be repositioned slightly if necessary, which allows for level micro-adjustments with the shelf in place. The first shelf might take 30-45 min while you get the hang of it, subsequent shelves will go up in 10 min flat.)
Four shelves, box of snap toggles, stainless machine screws: under $200. Install: 2 hours. 3 tops.
(Source: Contractor/Interior finishes)
I think this is my best option. This has pretty good reviews on Amazon, http://www.amazon.com/gp/aw/d/B0040FJ27S/ref=pd_aw_sbs_1?pi=SL500_SS115&simLd=1.
Do you know where I might find just the remote? Would something like this work with the receiver that's already attached? http://www.amazon.com/gp/aw/d/B00HH2HCZA?cache=5b5096e43f3b1bc2289126dc21d6ee71&pi=AC_SX110_SY165_QL70&qid=1412179894&sr=8-25#ref=mp_s_a_1_25
Easiest & cheapest way is to get something like this to seal it up for the winter. It's not a permanent fix and you'd have to repeat it each winter, but it does work and work pretty well (especially for what you in Fla would call 'cold' :) )
I bought a set of these LED lights from amazon a couple of months ago, they are VERY bright, they would be absolutely perfect for projects of this nature. The strip can even be cut and reconnected with wires if desired. This controller has a few different fade modes, and ability to make all the colors stay constant. With different controller types you can even connect to music, which would be nice,
LED strips are wonderful for that. Amazon sells them.
I used LED strips attached to an outdoor light-sensistive timer put on top of the cabinets, so I have light-sensitive LED underlighting.
Quick shot of my lighting
[strip] (http://www.amazon.com/Hitlights-Flexible-Ribbon-Adapter-included/dp/B005GL5R56/ref=sr_1_3?ie=UTF8&qid=1370794301&sr=8-3&keywords=led+strip)
power source
I put mine near the front of the cabinet, so they wouldn't ever be visable. If you want a wider range of light, put them closer to the back, and they'll cover the whole cabinet.
Good luck!
It really depends on what you want to start building? Any ideas of what your first 5 projects are? For woodworking, I'd get the following.
a) Circular saw. It will make fast work of cutting sheet goods, it's possible to rip boards with decent accuracy, and you can cross cut as well. Super versatile because you can make several jigs and use different blades for hardwoods, plywoods, and even tile. For light, occasional work, you won't notice a difference between a $50 Skil model and a $120 DeWALT model. Just don't drop it.
b) Jig saw. You can also cut plywood and hardwoods with a jig saw, but the results will not be as good. The benefit of a jig saw is that you can make circular (or any shape really) cuts. You can make a low more artsy stuff with a jig saw.
http://www.amazon.com/PORTER-CABLE-PCCK602L2-Lithium-Tool-Combo/dp/B00CM7Z2KW/
I'd suggest a a drill and impact driver set. You can get away with just a drill and use it to drive screws as well. However, with the combo sets, I was able to pick up an impact driver and a flashlight with a carrying case that uses the same batteries for about $20 more than just a drill and 2 batteries alone. The impact driver will allow you to drive 3-1/2" screws into studs like butter.
http://www.amazon.com/Kreg-R3-Pocket-Hole-System/dp/B000J43A7W
This bad boy has made furniture makers out of many that wouldn't be able to in the past. You'll need a good clamp to use with it. Just search YouTube for videos about building stuff. Ana White uses pocket holes on every thing and she makes decent stuff.
"A woodworker never has enough clamps." Everyone knows this.
http://www.amazon.com/Jorgensen-3724-HD-24-Inch-Heavy-Duty-Steel/dp/B00005R1HY
http://www.amazon.com/Irwin-Quick-Grip-Clamp-Set/dp/B00A9KMARW/
I have 6 of the 24" clamps, 8 of the Irwin Quick Grip clamps, and a handful of spring clamps. I've been able to build just about anything with that many clamps... but I've wanted more. If you use the pocket hole system, you'll want to clamp pieces together before you drive the screws.
I went to a Habitat for Humanity ReStore and picked up an old particle board desk that is about 300 lbs for $20. That's what I use. Otherwise, you can build one from 2x4s with the tools above and build your skills.
Squares, Drill bits, Driver bits....
I usually pick up something new for every project I start.
That's about $500 worth of tools and is the barest of bare bones I'd suggest someone to start with if they want to build bookshelves etc. The most important thing you can have is knowledge and YouTube/Reddit is the best place to get it if you don't have a woodworker to physically teach you.
If you enjoyed the process of making this and see real value in the higher quality results compared to buying flatpack particleboard furniture...
For you next one you night consider buying specialty plywood that comes with a nice hardwood veneer on one side (oak, maple, walnut, cherry, etc). You could also buy a cheap pockethole jig and build a hardwood face frame for the front (for fun). But as long as it's not getting really beat on, the veneer edge banding lasts pretty well.
Something like this will work: Rust-Oleum kit That's a link to Amazon just because it's easy to find on there. You can probably find a similar product almost anywhere that sells home improvement stuff. As with most any paint type thing, preparation is key. Get the tub as clean as possible and carefully follow the directions.
I guess you could call it DIY, but it was pretty easy. I bought the components from Amazon:
The transformer plugs into the wall and then into the dimmer (I extended the wires using 12v wire I had on hand and butt contectors) then 2 wires out of the dimmer into the strip of lights. The light strip comes with a standard looking DC connector, which I removed and just hard wired it. I also used the entire strip, but it can be cut every two inches at certain points. If you choose to cut the strip, you will need to solder the wires onto the strip. Since I used the entire strip I just used the included wire (after removing the DC connector thing)
I used one of these for years before I bought an adjustable heat iron:
http://www.homedepot.com/h_d1/N-5yc1vZ1xmx/R-100391613/h_d2/ProductDisplay?langId=-1&storeId=10051&catalogId=10053
It works pretty well, just have to be careful not to get things too hot.
This is the one I bought and see around the EE dept all the time:
http://www.amazon.com/Weller-WES51-Analog-Soldering-Station/dp/B000BRC2XU
Either way, make sure to watch some videos on soldering, the proper technique is very important to get good joints and not overheat components.
I was shopping around for a kit. Is this the one you own?
I have an amazon gift certificate, so I was thinking of picking up one of these Weller units. Any opinions? It seems like overkill, so I wondered how good you find the temp control on yours and whether the features on the other model would be worth it in the long run for occasional projects.
Super easy to do it in this configuration. these are VESA mounts that I used they rotate and tilt. This will work perfectly for you.
Look at this stuff, it's cheaper on Amazon but they have it at Home Depot for a little more. Works nicely when done fully and should work just as nicely as a patch to keep the peeling down. Just make sure to take out the drain cover first since the flipper might not have done it correctly.
I recently bought a magnetic stud finder that runs purely on a pair of magnets rather than battery. I run it in an 'S' shape across my wall and it sticks to certain areas.
Now here's the problem: What do I even do with that information? I want to hang some heavier things up (say, a mirror or something) and as far as I know you're supposed to hammer into the stud but like... if the stud finder is attaching to the metal in the frame then won't me hammering a nail into it endanger the frame? Wouldn't I be clanking right into the metal already in there? What if the thing I'm hanging needs to be attached to more than one stud and they're not close enough?
Should I mark an inch below / above / next to the spot that the stud finder attached to? How am I supposed to know that that's still part of the frame?
Ftr, this is the stud finder: https://www.amazon.com/gp/product/B000IKK0OI/
I'm sure this is all supposed to be very obvious... google seems to think so since I can't find any real resources aside from 'stud finders help you find studs'.
Thank you!
Yes! A few options...
Hope that helps!
I probably would have gone with something like this for the lights.
Or if you really wanted to get fancy, you could go with something like this that comes with a remote and is RGB so you can have any color you want. The RGB ones generally come with an adapter for the power and an IR controller so you can change the color like this. Honestly, I would be really leery about using what I assume are just Christmas lights.
How about the DataVac Metro ED500? It's very popular with IT folk, and it's perfect for your intended usage.
http://www.amazon.com/Metro-Vacuum-ED500-500-Watt-Electric/dp/B001J4ZOAW
Bonus -- it's half the price of the compressor you suggested.
Honestly man El is a great product but I don't know. Personally I would go with a color changing LED tape product. See the thing about El from my experience was that it was hard to keep in place, not too bright , and the noise the power inverter makes was just awful. It's great for tiny project (I made a battery powered el wire shirt for a rave) but something like that you'd probably want to explore a bit. And sorry I can't help with the soldering it's something I have never done.
And this is what I had in mind as a better idea.
http://www.amazon.com/gp/aw/d/B0040FJ27S?pc_redir=1405572280&robot_redir=1
I hear you, but there is only one way to get that experience. You don't need a workshop either...
You could do it well with:
It'll be more than a weekend project with those, but a great experience.
A table saw (~$200+) and/or miter saw ($100) aren't needed, but would speed that up significantly.
That appears very similar in function to the Stanley one I have. Although, mine has an LCD display instead of the three lights.
I've actually used it successfully to find not only studs, but also floor joists through carpet (to use something like this to greatly improve the floor squeak.)
I am not aware of a way to wire a switch in a headboard that is up to code. You would probably need to attach the bed to the wall/floor so it is considered part of the structure, and any exposed wire would need to be in conduit. Can you put the switch in the wall?
Let me give you a simpler option if you want the switch on the headboard.
I have used these LEDs on a few projects. They are cheap and you can buy additional strips to extend them, or you can cut them shorter. Just make sure your power adapter has the current for the length you attach. They come with a remote which can turn them on and off and set the color and brightness. However, they remember the state they were in. So you could set them to a cool blue or pink or whatever she likes and forget about the remote. Then, with the wireless switch I linked, she can easily just turn them on and off. (you could always turn them on and off with the remote, but it's nice to have a switch because it is always in one place.)
GC here who specializes in decks/rails.
First, get yourself this Pocket Hole Jig (this things is worth every freaking penny), and get some blue kreg 2-1/2" pocket screws from home depot/lowes.
Then add one more layer to your current picture. So you should have 2x4 on bottom, then 1x2, then pickets, 1x2, 2x4 on top, then optional 2x6 for something a little nicer. Doing it this way allows you to place the bottom 2x4 first, then assemble the pickets/1x2s as one unit that you can place on top of 2x4, with final 2x4 on top. Use the pocket hole jig on the ends of the 2xs to attach to posts. this will create an amazingly strong railing. attach pickets to 1x2s using 3 or more 15/16 guage trim nails.
Pic 1
Pic 2
Pic 3
If you zoom in on pic 2 enough on the top, you can see the pocket holes. I filled these in with plastic plugs made by kreg, if its being painted, you could also use their pine ones which make an almost invisible seam.
Also, I HIGHLY recommend using KDAT (Kiln Dried After Treatment) wood. if you don't, the wood will expand/contract after installation causing all of your joints to come undone. its also paint ready as soon as youre done. no need to wait until it dries. Find a specialty retailer for good woods, I'm particular to Madison Woods, pricey, but worth it.
OMGOMGOMGOMGOMG. Best $10 I ever spent. I love this thing:
http://www.amazon.com/CH-Hanson-03040-Magnetic-Finder/dp/B000IKK0OI
I recommend modifying it to use a standard household bulb. You are essentially building a sconce. I would look into something like these plus a 12V PSU like this. You will also need a socket like this.
Strips is the way to go. You can either buy a premade kit, like the one IKEA sells. It's pretty solid for the price.
I would get this one though. RGB, and has a remote so you can change the colors at whim.
You can buy these to help separate them out.
I was planning on using the 65mm screws that came with the mount.
The studfinder I am using, also in the picture, does have the AC voltage detection. But, like you said, I don't know how accurate this is so I will be sure to very cautious.
As far as the wall material, I'm not sure what it's made of. I'm going to try to find out.
If interested, this is the mount I bought. Seems to be one of the most popular and versatile on Amazon.
Thank you for your response. Never even considered the material of the sunroom wall.
Looks great! Again those wires. Cut to size, re-paint with same wall paint, and attach to wall. Will look loads better and cost effective.
Definitely an exhaust fan is installed (but no clue if working or not). Looks like it has a plug, so I would get an extension cord and plug it into an outlet, see if it works (most likely it will). If it does, then get one of those light bulb adapters that have an electrical outlet, plug the fan into it and add a light bulb.
Something like this: http://www.amazon.com/Leviton-1403-Outlet-Socket-Adapter/dp/B001F71O70
Edit: please update us with the results.
Kreg Pocket Jig is a little guide that lets you drill and secure a board to another board using pocket screws. This means that if you have two sides of an arcade cabinet, in your awesome arcade shape, you'll be able to affix boards to the inside face of the sides easily. So basically you'll be able to easily and sturdily connect your two sides together, making your frame.
Text will not do the job here, you should look up Kreg Jig on youtube and watch it in action, it will be worth a thousand words.
My assumption is you're going to make shaped sides from plywood (with a jigsaw or similar), then connect them with trusses, using pocket screws, then cover the trusses with plywood. That will give you your cabinet, though the screen and electronics mounting won't be trivial, and I (unfortunately!) can't help you with the electronics.
I've had a slot of success mounting TVs, including a plasmas, directly to drywall with heavy duty Toggle Bolts. The bolts are the anchors and use washers under the head of the screw, sandwiching the TV mount. My only concern using them would be if the framing studs that you apparently don't have are too far apart or your drywall is super thin.
I know I'm not really answering your question here... but we just installed 5 more foot of cabinet space and my wife wanted some under cabinet lighting. I looked on Amazon and most of the stuff was pretty expensive.
I opted instead to do LED strip lighting and ordered 32' of it + transformer + dimmer for the same price as 24" of any of the other solutions. The pluses are:
Pics are here: http://imgur.com/a/R6ynJ
Here's what I got:
Transformer/Power Supply
Warm White LED Strips (16ft)
Dimmer w/Wireless Remote
I used 2x 16ft strips and it worked just fine. Came up to a total of $63.25
I've got one of these
http://www.amazon.com/Weller-WES51-Analog-Soldering-Station/dp/B000BRC2XU/ref=pd_cp_hi_1
Love it. Definitely look for something with adjustable temps and replaceable tips.
Get the quart can of the tub and tile refinisher from Rustoleum. Plenty there to do the required three coats on a bathtub. It's a two-part epoxy paint which cures hard and looks like porcelain, kind of. I've used it, and it's really, really good. Check the reviews on Amazon, too. If you decide to go that route, PM me for a bunch of tips. It's easy to mess it up. It does take the tub out of commission for a couple days while it cures, so factor that in.
https://www.amazon.com/Rust-Oleum-7860519-Refinishing-2-Part-White/dp/B000PTSBKW
I like these, a nice cheap solution .
Invest in an electric meter (I use this one) And leave it plugged into all of your appliances for at couple days each. Write down the energy usage of each appliance. Research the energy usage of new appliances and calculate the cost savings. Anything that will pay off in fewer years than you plan to stay in this house, invest in.
Use the kilowatt meter to check every single plug in the house. Some things will surprise you - an xbox uses a lot of power even when it's off due to the transformers in the power supply unit constantly running!
Invest in "smart plugs". Use them for appliances that draw a more power when idle than necessary. Classic cases are TV's, phone chargers, kitchen appliances. Shut them off.
Is your house electrically heated? Big problem. Get rid of the electric heat entirely and replace it with gas or wood.
Replace every light bulb in your house with ultra low energy usage LED or CF bulbs. A 75 watt equivalent LED uses 13.5 watts, and a 75 watt equivalent CF uses 19 watts. Replace the most commonly used bulbs with LED's (they're pricey), and the less commonly used bulbs with CFL's. Consider getting timers to automatically turn lights off to save power.
Don't open your fridge or freezer very often. Plan out what you need and prevent "browsing".
Don't run your electric stove very often. Plan what to cook to minimize stove on time.
Is your water heater electric? Turn down the hot water temperature. Use less hot water around the house. Wash your clothes and dishes in cold water.
Here's one that's just a couple of powerful magnets stuck in a piece of plastic. Works great!
https://www.amazon.com/CH-Hanson-03040-Magnetic-Finder/dp/B000IKK0OI/ref=sr_1_4?keywords=magnetic+stud+finder&qid=1568782809&sr=8-4
You could do a repair, then after that put a coating of this refinishing stuff on it:](http://www.amazon.com/Rust-Oleum-7860519-Refinishing-2-Part-White/dp/B000PTSBKW/ref=sr_1_3?ie=UTF8&qid=1395774341&sr=8-3&keywords=bath+tub+paint)
I've used this stuff and it looks great when you're done, although granted now you're painting over a brand new tub. OP, you might be able to use this stuff to refinish only the top edge of the tub. A white coat of this stuff would likely blend in with no difference between the top edge and the rest of the tub.
I need outlets because the lights I'm using come with plugged control boxes.
But I'm curious why you think I need 12/4 as that gets to the heart of my question.
If I where you, I would use this
Just cut to whatever size you want and solder the strips back together, has a nice remote to choose color and even has some cool effects. Pretty cheap too.
So I had several closets that were very dark and hard to see in. None had outlets and I didn't feel like getting anything wired in. So I made these lights using AA batteries. You can find everything on Amazon. Perfect for apartments too! One closet comes in at around $30, less if you don't get nice rechargeable batteries like I did.
Switch
Lights
Case
This is what I use and it would definitely be strong enough to get through 2" of drywall.
You could use something like this: http://www.amazon.com/Leviton-1403-Outlet-Socket-Adapter/dp/B001F71O70/ref=sr_1_2?ie=UTF8&qid=1407430422&sr=8-2&keywords=light+socket+plug+adapter
That way you can run an extension cord into your shed for light without sacrificing the porch light. It would obviously only work if the porch light is switched on, but it's better than not having a porch light at all. I wouldn't run more than a few lamps off that power source though.
Edit: how many more times do you think I could say porch light?
All of this. Coating the tip with a glob of solder when you're done with it is a good idea -- flick the solder off when you next use it and all of the oxidation goes with it.
I've got one of these and it's well worth it.
> Light bulb socket adapter: One outlet version -- www.amazon.com/gp/product/B001PCVTFC[1] , two outlet version -- http://www.amazon.com/Leviton-1403-Outlet-Socket-Adapter/dp/B001F71O70[2] . Best not to try to make one of these yourself, can be dangerous if something gets wired backwards.
I get these here in the local electrical market. But the light bulb holders are a little higher, I was thinking if I could get a customized socket somewhere near my bed. Where I can plug in my charger.
> Fan speed regulator: Depends on the fan, ceiling fans are controlled different than box/stand fans. Usually it's a burnt resistor or such. Probably best to just replace the regulator assembly, most of the time they're not repairable anyway.
I thought of posting an image of how it looks like from the outside.
Here is an image of it. I think I can even open it, take a pic and let you know, I thought I would first post the pic and ask for feedback. Is the regulator speed depended on the type of ceiling fan? The fan that I am using 1200 MM Sweep, 380 RPM, 80 Watts power consumption.
> Broken cupboard door:
Here is how it looks like. This is the broken door side. And this is how it looks on the cupboard. This image is from another cupboard where both the hinges are intact. So I think it is not really broken but the screws and nut seems to be come off? I went to a hardware store and showed them this pics, they bluntly said that only screws and nuts are not available, you need to purchase the complete set. I don't even know if I am using the technical terms like screws, nuts, hinges right. Forgive me if they are called something else.
> Toilet lid
The one that I have seems to be a little different. Here is what it looks like. The lid wont just fit easily on those plastic connectors given on the top of the hole.
Above all I really want to say a big thank you for taking out time and replying to me. It really helps and can go a long way if I get started with DIY stuffs.
*Sorry if any of the links turned dead. Imgur is disabled in my office, and I used my mobile's 2G network to upload to imgur and manually added the links here on the browser.
Yup, about half your pictures are cove lighting, and the other half lighting pillars and walls is up lighting. If that's the effect you're going for, the product I linked should do quite nicely. If you have the money, I would wholy suggest getting RGB LEDs and an appropriate controller, just in case someday you want to change it up. This kit comes with everything you need, and has some picture examples which I think match what you are looking for. You can certainly find cheaper kits on eBay, just keep in mind that for RGB you will need the LEDs, a controller and a power supply.
Here is the Amazon equivalent. I have had two sets for about three years, still working great.
I bought a special tool called a pocket hole jig which essentially drills a diagonal hole into the wood that hides the screw. I had never heard of it until this project, but it's pretty handy.
http://www.amazon.com/Kreg-MKJKIT-Mini-Jig-Kit/dp/B00065WPP2/ref=sr_1_2?ie=UTF8&qid=1375465882&sr=8-2&keywords=pocket+hole+jig
I got this thing. Works like a champ.
I hope you know how hard it was to resist adding a LMGTFY link... lol
Linky!
An item like this may help slightly
http://www.amazon.com/gp/aw/d/B00002NCJI?pc_redir=1397404152&robot_redir=1
Also make sure the storm windows are shut if the flat has them. As someone else mentioned electric space heaters for the most commonly used rooms while your in them, dress warm and keep the heat low. It's not worth the time effort money to insulate if your renting. If there are fans in the space, some have a reverse option which will pull the heated air down circulating the warmer air.
Light bulb socket adapter: One outlet version -- www.amazon.com/gp/product/B001PCVTFC, two outlet version -- http://www.amazon.com/Leviton-1403-Outlet-Socket-Adapter/dp/B001F71O70. Best not to try to make one of these yourself, can be dangerous if something gets wired backwards.
Fan speed regulator: Depends on the fan, ceiling fans are controlled different than box/stand fans. Usually it's a burnt resistor or such. Probably best to just replace the regulator assembly, most of the time they're not repairable anyway.
Broken cupboard door: Get a box of wooden matches; break the heads off 3-4 of them, however many will fit into the screw hole. Dip them into wood glue, then shove them into the hole as far as they will go. Once the glue dries, cut them off flush with the wood surface, then screw the hinge back into the newly filled-in wood. If you lost the screws, take one out of another hinge and your local hardware store should have something that matches up. Can also try getting a screw a couple sizes up instead of the matchstick trick. Screws are numbered for "thickness" and then measured for length. Quick chart of the American system is here -- http://s.hswstatic.com/gif/screws-1.jpg.
Toilet lid - usually these just sit on top of the tank? If you're talking about the seat, there are usually 2 screws under the hinge tabs, look for a cover you can flip up. Might have to use pliers underneath to hold the nut while tightening the screw above.
For the vast majority of things, if you don't want to post on /r/diy (that's what it's here for!) just search Google for "cabinet door hinge fell off", or "toilet seat loose," etc, there's plenty of information out there (even step by step YouTube videos!)
Source: Way too much of my childhood spent watching This Old House and reading this thing.
You can get a Kill-A-Watt meter for $20 which can measure voltage, current, and wattage for 120v and has a hold feature. As far as convenience goes it seems like a better deal.
I own a few of these personally. Great tool!
http://www.amazon.com/gp/aw/d/B000IKK0OI/ref=mp_s_a_1_1?qid=1405916887&sr=8-1&pi=SY200_QL40
This
http://www.amazon.com/Metro-Vacuum-ED500-500-Watt-Electric/dp/B001J4ZOAW/ref=sr_1_1?s=hpc&ie=UTF8&qid=1412294826&sr=1-1&keywords=Data+vac
Is the real pro tip. So much better and cheaper in the long run. Powerful, doesn't freeze your hand if you use it too long and you can turn it upside down without shooting out harmful chemicals.
Take a look at this stuff, worked great on making our tub look new. You can probably just use it on those specific spots.
http://www.amazon.com/gp/product/B000PTSBKW/ref=oh_aui_detailpage_o04_s00?ie=UTF8&psc=1
I would recommend using a magnetic stud finder. They allow you to find where the drywall screws are. Once you find a screw with it, move it vertically to find at least 2 other screws to verify it's just not a stray screw. This is the one I use regularly.
Then you can mount directly into the stud.
You could also use toggler snaptoggle anchors if the studs don't line up quite where you want the mounts to be. I use these very often for monitor mounting. The drywall is plenty strong enough. These do require a 1/2" hole to be drilled, however. So keep that in mind if you will be having to patch them later.
I painted porcelain wall tile in our bathroom that was avocado green about 2 years ago and it's held up brilliantly.
I used this stuff
I bought a Hitachi compound miter saw from a local big box hardware store. It doesn't cost a lot more, and it's taken everything I've thrown at it with no issues at all... It's light but solid, and powerful enough to handle hardwood and 4x4s without bogging down.
How does your well connect to the electric currently? If it just plugs in something like this might be able to tell you the usage:
http://www.amazon.com/gp/product/B00009MDBU/ref=as_li_tl?ie=UTF8&camp=1789&creative=390957&creativeASIN=B00009MDBU&linkCode=as2&tag=mydeliciousbo-20&linkId=DTGDYSFIA2V7CMWT
You want something like a Kill-a-Watt meter. There are a few different models from that brand and a few different brands offer similar devices it seems. But it will give you a readout of the exact voltage and frequency of your outlet plus track energy usage of whatever is plugged into it.
I have been using this one for years, with great success. It stows inside my drill case like a James Bond gadget (From Russia With Love). I have never used an electronic stud finder. The only problem I have had with this one is when I find metal studs, but I have since learned how to deal with them.
https://www.amazon.com/CH-Hanson-03040-Magnetic-Finder/dp/B000IKK0OI?ref_=ast_bbp_dp
Go crazy with PWM controlled RGB LED strips such as this.
I use those to light my home office. I made a large wooden square out of some pieces of 1x4, attached/ran the LED strip around the top of it a few times, and hung it from the ceiling so it reflected off the white ceiling. It makes a very awesome indirect lighting system.
I've found this 120v AC to 12v DC converter on amazon, would something like this allow me to use the pin I've already installed into the machine?
https://www.amazon.com/dp/B0034GUEY4/ref=nav_timeline_asin?_encoding=UTF8&psc=1
The casual user can get by just fine with the $40 Kreg pocket hole jig. I do a decent amount of woodworking and it works well.
http://www.amazon.com/gp/aw/d/B000J43A7W/ref=mp_s_a_1_1?qid=1458056617&sr=8-1&pi=SX200_QL40&keywords=kreg+jig&dpPl=1&dpID=41auGxMjmXL&ref=plSrch
Get a wall mount. Measure how far he needs to sit comfortably there and find something that will reach. This one is cheap and extends 15" out. I used that one for a while with my previous desk setup
Also make sure your monitor can fit it before you buy. 99% of them do but obviously check before you buy it
The weird part is that it definitely sticks (the magnetic stud finder) to the corners. Both concave corners (ie-the regular corners of a 4 sided room) and the convex corners (ie- like a hallway corner)....don't know if convex and concave are the proper terms.
So, it can find SOME nails through whatever material is on there. Just not ANYWHERE on the wall itself.
It's not very likely that your closet molding will hold the weight of a TV plus whatever you're planning on mounting the TV on.
What I would do is get 2 of these [exercise bars] (http://www.amazon.com/Sunny-Health-Fitness-Door-Chin/dp/B0016BNDXI) (or similar) and make a mount for your TV to hang on both of them. Depending on how deep your door frame is you can even tilt it down a few degrees. The concept is based on this sort of mount.
The bars are going to be placed across the door frame, one higher than the other to allow for the TV mount to be hang on them.
If you're experienced enough to build your own mount for the TV, go for it (it can be a bit tricky especially if you want to tilt, rotate and reposition the TV), or you can get something cheap like the link above and use only the part for the TV and store the part that is bolted to the wall for when you can drill holes to the wall.
You can also use this sort of mount to mount it on the exercise bars.
HTH.
Edit: more clarification.
No, it's a jig for creating pocket holes. I own it, and it works really great. Lets you put in hidden screws that pull pieces together just about anywhere.
http://www.amazon.com/Kreg-R3-Pocket-Hole-System/dp/B000J43A7W/ref=sr_1_3?ie=UTF8&qid=1396413078&sr=8-3&keywords=kreg+jig
Credit to user/rosulek and user/ericslager for their DIY projects that eventually helped me develop mine. Below are links to their DIY projects.
user/rosulek:
Here
user/ericslager:
Here
Also, most all of the materials I used I got from the Home Depot.
Lastly, the link to the LEDs from Amazon:
Here
This is the best out there. Anything else will not be as reliable. And no batteries!
http://www.amazon.com/CH-Hanson-03040-Magnetic-Finder/dp/B000IKK0OI/ref=sr_1_1?ie=UTF8&qid=1343482450&sr=8-1&keywords=stud+finder
I know it's still a WIP, but if you weren't already planning on it, I would attach a small basket to the underside of the desk with enough room to fit your extension cord, router, etc. Then use a wire cover to run the cord along your wall and into the outlet.
Tutorial for basket
Example of wire cover
I know you took a lot of time soldering those, but you might look into something like this: http://www.amazon.com/Generic-Waterproof-Flexible-Adhesive-Lighting/dp/B005EHHLD8/ref=sr_sp-atf_title_1_3?ie=UTF8&qid=1383242785&sr=8-3&keywords=led+tape
Thanks! Here's the LED strip I used http://www.amazon.com/gp/aw/d/B0040FJ27S/ref=mp_s_a_1?qid=1367438860&sr=8-1&pi=SL75
Pro-Protip: Metro Datavac.
http://www.amazon.com/Metro-Vacuum-ED500-500-Watt-Electric/dp/B001J4ZOAW
Seriously, this thing is amazing.
http://www.amazon.com/LEDwholesalers-Changing-Flexible-Controller-44-button/dp/B0040FJ27S/ref=sr_1_2?ie=UTF8&qid=1422155193&sr=8-2&keywords=led+tape
The LED tape was nice, cheap, and effective. It's kinda bright, but I don't think it's bright enough to light an entire room.
I have my 50" TV mounted to a single stud with two lags. It's an arm mount and the TV is only about 40 pounds though.
OP, why not get a piece of nice plywood to attach to your mount, then use the lags to put into the top of the mount. This is going to be hard to explain, but if you mount the bottom mounting holes to the plywood(use nuts and bolts with the bolt head on the backside flush with the plywood), and the top lags through the plywood and the studs. Then you only make two holes in the wall and the mount is secure. The bottom may try to pull away from the wall when you adjust the TV though.
The bottom has it's force going into the wall and down, while the top has the force going away from the wall and down.
Get a single stud mount. I have had this one for almost two years now. You may need a set of these as well.
Ohhhhh.... to you have a ceiling or wall light fixture out there? If so you might be able to use something like this and pull power off the light circuit.
https://www.amazon.com/Leviton-1403-Outlet-Socket-Adapter/dp/B001F71O70/ref=sr_1_5?ie=UTF8&qid=1473968821&sr=8-5&keywords=light+bulb+socket
Um... did you look into this clock at all? (If you did I can see why you would like making a more customized version.)
i wouldn't worry about drywall coming off the studs.. not even sure how this would happen.
game plan is sound. go for it. the only possible issue (and it's minor) is you could screw into an existing drywall screw, but the odds of this are almost 0. worst case is you screw 1/2" away.
but if you want to be absolutely sure, amazon sells these "stud-finders" that are just rare-earth magnets with a small level bubble. it finds studs by locating the drywall screws... nice little tool.
Buy one of these. Way better than that canned air crap.
http://www.amazon.com/Metro-Vacuum-ED500-500-Watt-Electric/dp/B001J4ZOAW/ref=sr_1_10?ie=UTF8&qid=1412294286&sr=8-10&keywords=air+duster
You'll thank me.
edit: whoever downvoted me... Dude, you have to get one. They're so crazy good.
sure! Supernight LED Light strip.
Amazon link
Depends on the size of the battery, and how much current the electronics draw. A typical phone charger draws around 100mA, and if it's a 5 watt lamp (LED) that would draw another 250mA, give or take. Add in some inefficiency for the inverter and lets call it a total load of 500mA, or 0.5 amps, on the battery.
Battery capacity is measured in amp-hours, a 1 amp-hour battery can provide 1 amp for 1 hour, or 2 amps for half an hour, etc. etc. Amazon sells a 35 amp-hour battery, that would run my very roughly estimated load for 70 hours.
edit I forgot, you said you were in the UK, that makes my current estimates wrong, but the principle is the same, determine how much current your load draws (you can use something like a Kill a Watt to measure it), and you can figure out how long the battery will last.
OR you could buy
http://www.amazon.com/Princess-International-Inc-Word-Clock/dp/B00JPNWR3G/ref=sr_1_1?ie=UTF8&qid=1405366132&sr=8-1&keywords=word+clock
for about 1000x less opportunity cost
It looks like it.
I have one of these, it has been a life saver in a house with plaster and lath.
Maybe something like this. Can set many different colors, dimmable.
I used this for under cabinet lighting in my kitchen.
http://smile.amazon.com/gp/product/B00ASHQQKI?keywords=led%20light%20strips&qid=1450218869&ref_=sr_1_3&sr=8-3
That isn't true at all. I can get away with a simple magnet and just use it to find a sheetrock screw.
Look at this stud finder on amazon -
CH Hanson 03040 Magnetic Stud Finder
https://www.amazon.com/dp/B000IKK0OI/ref=cm_sw_r_cp_tai_mPogzb17D3WA9
4.5 out of 5 stars with over 7,000 reviews and only costs $9.99. Thing doesn't even require batteries.
I would tell people the exact opposite of what you said. Don't waste $30-40 on a stud finder when a $9 one will work just as well.
I spent $40 on a pocket hole jig specifically for this project. It was more expensive than I wanted, but in the end, I think it was worth it for the results it provided.
It sets you up to drill the pocket holes at the right angle, at the right depth, for whatever thickness wood you're working on
Good job on the project, but they do make cheap mounts, although they are wall mounts I own both of these which would have been cheaper.
http://www.amazon.com/gp/product/B003O1UYHG/ref=oh_details_o04_s00_i00?ie=UTF8&psc=1
http://www.amazon.com/gp/product/B000WYVBR0/ref=oh_details_o04_s00_i00?ie=UTF8&psc=1
Do you have an attic?
I would tackle insulating the ceiling first.
Another thing is to make sure your windows are not leaky
3M 2141BW-6 Indoor Window Insulator Kit, 5-Window https://www.amazon.com/dp/B00002NCJI/ref=cm_sw_r_other_apa_i_XI9UDbZD0JC2D
Yeah, I mounted them both on the wall. I found 2 studs and measured the spacing so I could have the monitors touching w/out a gap in between. Here are the mounts I used:
https://www.amazon.com/gp/product/B003O1UYHG/ref=oh_aui_detailpage_o09_s00?ie=UTF8&psc=1
Patience, padawan; I'm on my flight back as I type this!
You're going to want a second pair of hands regardless to hold stuff in place while you drill and tighten. I'm not sure what they mean by "two drywalls"; it sounds as though they layered it, but to my totally unprofessional self, that sounds silly.
16" apart ("on center" is the terminology used in construction) is standard for non-load-bearing studs, but you really can't trust it. Mine ended up ranging from 14" to 28" apart. Get a studfinder and mark them out; this one is super cheap, and works very well for metal studs.
Could you link me to or post an image of your mounting bracket? The primary reason I used plywood is that the bracket I got stupidly wasn't wide-enough to span even two studs. If you can hit at least two with yours, I'd say it's safe to forgo the plywood. That's true that the plywood is only visible from the side; unfortunately, my TV location causes that to be exposed (thanks, picky roommate >_>). If that's not a concern, I see no reason not to go ham and use the plywood.
The only potential issue with using 12 toggle bolts is that you'll have twice as many holes in the drywall to patch up when you eventually move out, but that's negligible.
I'm going to non-definitively say that there's no way your studs are 1" wide. That'd break compatibility with anything intended to use the standard size for wooden studs. But hey - finding the middle of a stud is what the studfinder's for!
Depending on how much juice you needed and how strongly you felt about the grounded outlet...here
i would just go with something like this running to the back wall.
Then a couple of these run to the outlets.
I know you said you didnt want cables across the floor but other than installing sockets in the floor or hanging them from the ceiling...not a lot of options.
I would buy a mount similar to this (http://www.amazon.com/VideoSecu-Articulating-Extension-Post-installation-ML531B/dp/B000WYVBR0/ref=sr_1_2?ie=UTF8&qid=1381798137&sr=8-2&keywords=tv+mount) and mount it on a post.
A Plexiglas enclosure may be a little elaborate and cost upwards of $100 in parts alone. I would just make a cover for the TV with a good quality tarp and put it over the TV when not in use.
Agreed, but you'd at least one this guy it comes with the proper bit.
If he was planning on making more than one I'd suggest the full jig, it makes things a lot easier and you don't have to measure every time to get the proper depth... well worth the hundred bucks IMO
hell, with the 40 brackets he used he probably could have paid for the jig and screws...
I don't think it has the special birthday feature, but you can buy these and other variants from the market:
http://www.amazon.com/Princess-International-Inc-Word-Clock/dp/B00JPNWR3G/ref=sr_1_1?ie=UTF8&qid=1405368569&sr=8-1&keywords=word+clock
If you plan on building more than a work bench I recommend getting a miter saw. You can get a decent one for cheap:
[This is what I got]
(http://www.amazon.com/Hitachi-C10FCE2-10-Inch-Compound-Miter/dp/B000V5Z6RG/ref=sr_1_1?ie=UTF8&qid=1422581816&sr=8-1&keywords=mitre+saw)
My plan was to trade up if I ever outgrew it, but that hasn't happened yet.
drill stud caps from attic using a common point of measurement in the room and above. using fish rod or wet noodle
http://www.amazon.com/LABOR-SAVING-DEVICES-Noodle-Retriever/dp/B00009WE0H/ref=sr_1_1?ie=UTF8&qid=1377227340&sr=8-1&keywords=wet+noodle
pull wire into attic and across. Wet noodle will allow you to use the existing box and not cut any drywall (assuming there is no fire block [horizontal 2x4] which changes the situation some)
Chain goes down the wall, pull chain out through the existing box using magnet tool
I wouldn't run Cat 5 under a carpet due to it being very easy to break via pinching
raceway is the easiest way to do this but doesnt give you a polished look
http://www.amazon.com/Wiremold-CMK50-CordMate-Computer-Entertainment/dp/B0015EDVVU/ref=sr_1_1?ie=UTF8&qid=1377227537&sr=8-1&keywords=cable+raceway
This is what you're looking for. LED Light Strip - 12V they're about as simple as you can get. If you want to get fancy, you can make a barrel jack connector for you 12V battery and run this with colors.
This https://www.amazon.com/dp/B000IKK0OI/ref=cm_sw_r_other_apa_i_6f8QDbTW0CFKP
Think of it less as a stud finder and more of a device that allows you to find metal on the other side of your drywall. A long, solid magnetic pull is a pipe. A vertical line of magnetic dots is a stud.
I use togglers to mount all my TVs. They would be even stronger on plaster lath.
The only time I would hesitate is for an articulating mount that can come away from the wall. In that case find at least one stud and use togglers in the corners or the side that isn’t on a stud.
12 Pieces TOGGLER SNAPTOGGLE Drywall Anchor with included bolts for 1/4-20 Fastener size; holds 80 pounds each by TOGGLER https://www.amazon.com/dp/B01IU6HG48/ref=cm_sw_r_cp_api_QNi6BbV9J5WBP
$10 for 16 ft. You might want to add a real LED controller so you can dim them. http://www.amazon.com/dp/B005EHHLD8/ref=cm_sw_r_an_am_at_ws_us?ie=UTF8
Link text.
For about $20, you can get this. It's enough to do 5 3'x 5' windows. Or you can buy the tape by itself.
Get a pocket hole jig and you'll get the same thing without having to buy brackets.
Kreg MKJKIT Mini Kreg Jig Kit https://www.amazon.com/dp/B00065WPP2/ref=cm_sw_r_cp_api_i_8ZSHDbRY2XENK
Kreg MKJKIT Mini Kreg Jig Kit https://www.amazon.com/dp/B00065WPP2/ref=cm_sw_r_cp_api_i_RBZ4Cb55MTRYJ
https://youtu.be/zxMqtmoOVbY
Obviously drill the holes on the inside facing edge
I have only ever used the magnet based ones that are inexpensive. The magnets find the drywall nails which are only in the studs.
https://www.amazon.com/CH-Hanson-03040-Magnetic-Finder/dp/B000IKK0OI/ref=sr_1_4?s=hi&ie=UTF8&qid=1504558503&sr=1-4&keywords=stud+finder
There are actually stud finders made with rare earth magnets: http://www.amazon.com/CH-Hanson-03040-Magnetic-Finder/dp/B000IKK0OI
I've used lots of fancy electric ones in the past. Nothing is more consistent than this cheap thing.
Try this type of stud finder.
https://www.amazon.com/CH-Hanson-03040-Magnetic-Finder/dp/B000IKK0OI
http://www.amazon.com/CH-Hanson-03040-Magnetic-Finder/dp/B000IKK0OI I've used this for years and will never use anything else again... yea it's just a magnet
This is what I use in my old house: CH Hanson 03040 Magnetic Stud Finder https://www.amazon.com/dp/B000IKK0OI/ref=cm_sw_r_cp_apa_i_t5StDb0W5KXV8
+1 for pocket holes.
http://www.amazon.com/Kreg-R3-Pocket-Hole-System/dp/B000J43A7W/ref=sr_1_1?ie=UTF8&qid=1449595585&sr=8-1&keywords=kreg+jr
http://www.amazon.com/Kreg-R3-Pocket-Hole-System/dp/B000J43A7W/ref=wl_it_dp_o_pC_nS_nC?ie=UTF8&colid=11849T9OC3D6G&coliid=IUHIVR4L8ZJCO
Take your pick:
Home Depot
Lowes
Amazon
Wire Raceway
Can be painted and allows for wire access if needed.
Can you run them behind the wall?
If not, check out these covers, they can be painted to match the wall
Use plastic cable raceway. https://www.amazon.com/Wiremold-CMK50-Cord-Mate-Kit/dp/B0015EDVVU/ref=sr_1_3?s=electronics&ie=UTF8&qid=1466288264&sr=1-3&keywords=cable+raceway
simplest way (if I am reading your post correctly) is buy a light->outlet adapter.
https://www.amazon.com/Leviton-1403-Outlet-Socket-Adapter/dp/B001F71O70
> http://www.bhphotovideo.com/c/product/259157-REG/Giottos_AA1900_Rocket_Air_Blower.html
Now why use that when there's this:
http://www.amazon.com/Metro-Vacuum-ED500-500-Watt-Electric/dp/B001J4ZOAW/ref=sr_1_1?ie=UTF8&qid=1412301341&sr=8-1&keywords=computer+blower
https://www.amazon.com/dp/B001J4ZOAW/ref=cm_sw_r_cp_api_3TjrybTDF87S2
I've been eyeing this, but can't decide if I'd have enough uses...
"Used for any 12 volt application (motorcycle, car or suv auto modding)."
You need a 12 volt adapter. Find one for purchase.
Couple that with this, and you're all set!
http://www.amazon.com/Strip-light-Waterproof-Flexible-Light/dp/B005EHHLD8/ref=sr_1_1?ie=UTF8&qid=1405054002&sr=8-1&keywords=led+strip
The only thing you'll need is to find the right transformer to plug it all in, unless you just buy this version.
http://www.amazon.com/LEDwholesalers-Controller-2034RGB-3315-3215/dp/B0040FJ27S/ref=sr_1_3?ie=UTF8&qid=1405054038&sr=8-3&keywords=led+strip
I used a 16.4 ft RGB LED light strip kit from LEDwholesalers. I got it on Amazon for $32.
For the Americans here this is the equivalent.
My roommate and I both have these (he has a few sets around our house) and they work without issue.
http://www.amazon.com/gp/product/B0040FJ27S/ref=oh_aui_detailpage_o04_s00?ie=UTF8&psc=1
http://www.amazon.com/Ledwholesalers-Changing-Flexible-Yourself-Controller/dp/B0040FJ27S/ref=sr_1_1?ie=UTF8&qid=1344378430&sr=8-1&keywords=multicolor+led+strip
http://www.amazon.com/LEDwholesalers-Controller-2034RGB-3315-3215/dp/B0040FJ27S/ref=sr_1_1?ie=UTF8&qid=1367435588&sr=8-1&keywords=led+strip+light
You really should shop around. Here's an entire kit for a lot less
thoughts on the LED strip lights?
http://www.amazon.ca/gp/product/B005EHHLD8/
The link is under the first picture, but here you go: http://www.amazon.com/gp/product/B00ASHQQKI/ref=oh_details_o02_s00_i00?ie=UTF8&psc=1
I made a word clock to.
OP wouldn't make his money back.
Cheaper: http://www.amazon.com/Princess-International-Inc-Word-Clock/dp/B00JPNWR3G/ref=sr_1_1?ie=UTF8&qid=1411877203&sr=8-1&keywords=qlocktwo
https://www.amazon.com/LED-Word-Clock-Displays-Time/dp/B00JPNWR3G
Use this kind
12 Pieces TOGGLER SNAPTOGGLE Drywall Anchor with included bolts for 1/4-20 Fastener size; holds 80 pounds each by TOGGLER https://www.amazon.com/dp/B01IU6HG48/ref=cm_sw_r_cp_apa_i_DFNNDbR6C3Y1B
Togglers are where it's at
I swear by THIS.
Hi. The mount itself isn't what's putting the strain on the wall. It's the weight of the TV on the mount. Even if it feels secure after you mount it the weight of the tv will begin pulling on the mount and causing it to rip at the drywall.
Supposedly you can use snap toggles like this and I'm not saying you can't use them, I'm just saying I've never used them so I can't verify that they're good to go based on any experience.
I was always told that anything that's load bearing should be mounted into studs otherwise you're just screwing something really heavy into drywall and eventually it will fail.
I used a 16.4 foot (5 meter) roll and ended up cutting off about 2.5 feet, so probably close to 14 feet.
Here's a link to the lights I use:
http://www.amazon.com/SUPERNIGHT-Waterproof-Flexible-300leds-Changing/dp/B00ASHQQKI/ref=sr_1_2?ie=UTF8&qid=1405091074&sr=8-2&keywords=led+strip+lights
I've used this product before:
Squeeeeek No More Floor Repair Kit
http://www.amazon.com/OBERRY-ENTERPRISES-3233-SQUEEEEEK-REPAIR/dp/B0006IK8YE/ref=sr_1_1?ie=UTF8&qid=1405351948&sr=8-1&keywords=Squeeeeek+No+More+Floor+Repair+Kit
with great success. The bottom video here:
http://www.123itsdone.com/index.html
shows how it's done over vinyl.
There will be a small hole, inevitable with vinyl, but you might be able to find a strategic spot in the fake grout line, or pattern. But see the video first...
Hardware store should sell kits of plastic you can install on inside of window for added insulation. How old is the house? Earlier than around 1970 and it will have almost no insulation at all.
http://www.amazon.com/3M-Indoor-Window-Insulator-5-Window/dp/B00002NCJI
They make screws designed with break off heads meant to go though the carpet, floorboards, and into the floor joists beneath. So.e just go through the carpet leaving the head on.
https://www.amazon.com/OBERRY-ENTERPRISES-3233-SQUEEEEEK-REPAIR/dp/B0006IK8YE/ref=asc_df_B0006IK8YE/?tag=hyprod-20&linkCode=df0&hvadid=167152358566&hvpos=1o1&hvnetw=g&hvrand=9836158661788938309&hvpone=&hvptwo=&hvqmt=&hvdev=m&hvdvcmdl=&hvlocint=&hvlocphy=9027423&hvtargid=pla-312808039115&psc=1
Is one type.
I have never had to use them so I can't vouch for them myself.
You can test the outlet voltage and the hair dryers current draw with a Kill A Watt
With this information, you can determine whether it’s a voltage drop issue or an hour per day issue or if they are just getting gunky.
You can get a smaller version of the Kreg jig for $40. http://www.amazon.com/Kreg-R3-Pocket-Hole-System/dp/B000J43A7W/ref=pd_cp_hi_2
Takes a little more finagling, but I've used mine a ton. Once you've gone pocket screw, you don't really ever want to go back - it is so easy!
Just be careful with those lights in the enclosed box. Read some reports of similar lights overheating. Especially bad in an enclosed box.
Here is the product & review, I know they are a different brand, doesn't mean they didn't come out of the same factory.
Waterproof Flexible 300leds
>I have the same saw. It's $120 from amazon. http://www.amazon.com/dp/B000V5Z6RG
Ah, that's no where near the same saw! YOU have a chop saw, he has a "sliding compound miter saw"!
Big difference!
No, there are tons of LED strips that have pre-coded patterns in them. Here is an example!
Electric stud finders are shit. Buy this wonderful little magnet and wave it over a wall until it sticks. This will effectively just find the studs by finding the nails in the studs and sticking to them, then you know your stud location and you can move up and down on that to find the height you want.
Seriously. It works every single time, I hang mine on a piece of dental floss so I can swing it around on the wall until it sticks on it’s own.
It costs $7 and will prevent your tv from falling off of the wall.
CH Hanson 03040 Magnetic Stud Finder https://www.amazon.com/dp/B000IKK0OI/ref=cm_sw_r_cp_api_i_FJNNDbVDS7NAQ
I used these, and theres no need to use a computer! it comes with its own remote!
O'BERRY ENTERPRISES 3233 "SQUEEEEEK NO MORE" FLOOR REPAIR KIT https://www.amazon.com/dp/B0006IK8YE/ref=cm_sw_r_cp_apa_BvMYAbP4ECXK4
What about a simple articulating wall mount like this ?
I used a really similar one (maybe this exact one) to mount a ~24" tv in my bedroom. Folds right up to the wall when I need it out of the way and pulls out & swings around in any direction when needed.
**Edit- And in terms of being nervous about mounting to the walls, just buy or borrow a cheap studfinder. You'll have no problem supporting a small tv with a couple of screws into a stud!
I use my miter saw much more than my circular saw. I got this guy years ago and have had no regrets.
Toggler Snaptoggle brand toggle bolts (not regular toggle bolts!). There are various models but the ones I've used require a 1/2" hole each. I've used two to hang an adult bicycle, and used a few in conjunction with one lag for a plasma TV. Note in the product description on the total weight recommendations since your mount is around 20lbs (excl shipping material). Example:
"Recommendations:
12 Pieces TOGGLER SNAPTOGGLE Drywall Anchor with included bolts for 1/4-20 Fastener size; holds 80 pounds each by TOGGLER https://www.amazon.com/dp/B01IU6HG48/ref=cm_sw_r_cp_apa_l3GQAb516XPXX
These screws sink threw your carpet and then you snap off the heads. Never used it but saw it on ask this old house
O'BERRY ENTERPRISES 3233 "SQUEEEEEK NO MORE" FLOOR REPAIR KIT https://www.amazon.com/dp/B0006IK8YE/ref=cm_sw_r_cp_api_4tMYAbJ1SC011
The TV is 46" and the mount I got is this one. I guess what I need to know now is whether that IS a stud or not? Does it qualify for mounting? I can put plywood up on two studs but sadly it won't be centered on my wall anymore :(
How strong of a magnet are you using? If the plaster is thick, it needs to be very strong, and you need to watch very carefully (and hold it very loosely, or dangle it from a string.) I use one of these, and it just barely does it for my plaster walls, and it was a pain in the ass.
Also, are you finding multiple nails, and then connecting them vertically to find the stud? I found there was all kinds of random metal shit in my wall apparently, but the only clear vertical lines were studs. FWIW, there was not a stud by my outlet box either (I don't even wanna know how crazy the electric is in my apartment.)
The magnet ended up working for me, but next option was to remove the baseboard and see if that helped, and if not, drill little holes underneath till I found the stud. As long as you put the baseboard back on, there's no harm in it.
It really depends on how much power what you're plugging in uses, the UPS' battery size, and the reliability of the manufacturer.
I have a 1500VA 900W CyberPower UPS I got on Black Friday for $140. I have my media server, router, and a switch plugged into it, and it's enough to keep all of that running with no power for roughly 50 minutes.
If you're seriously considering getting an UPS, I'd first buy something like the Kill a Watt. Plug a power strip into it, with all the electronics you're considering having plugged into the UPS, and see how much power they're using combined.
The general rule of thumb is to shoot for 20-25% more power on your UPS to give a buffer and time on batteries. The more battery time you want, the more power you want.
I'm averaging between 100-180W with all my gear plugged into the UPS, but it's rated for 900W with a good battery, so I get a far longer time up on batteries than I would if I had only gotten a 250W UPS. Didn't need all that extra room, but that Black Friday deal was a complete steal, and to be honest, I'm lazy as hell and hate having to restart my server and all my scripts that run on it.