(Part 2) Top products from r/DIY
We found 113 product mentions on r/DIY. We ranked the 7,518 resulting products by number of redditors who mentioned them. Here are the products ranked 21-40. You can also go back to the previous section.
21. Leviton T5632-W USB Charger/Tamper-Resistant Duplex Receptacle, 15-Amp, White,1-Pack
Sentiment score: 1
Number of reviews: 6
SMART - Built-in smart chip recognizes the individual device’s charging requirement to optimize the chargePOWERFUL – Two high-powered charging ports with 3.6A of charging powerCONVENIENT – No more searching for charging adapters! Upgrade your existing outlets so you can charge up to two USB po...
 Show Reddit reviews
22. LEDwholesalers 12 Volt DC Waterpoof LED Power Suppply Driver Transformer with 3-Prong Plug, 30W, 3207
Sentiment score: 5
Number of reviews: 6
IP68 waterproof ratingConverts AC voltage to 12V DCWire leads and 3-prong plug for easy connectionsAutomatic thermal & overload cut-off, short circuit protectionEfficient, long life, stable, and reliable
 Show Reddit reviews
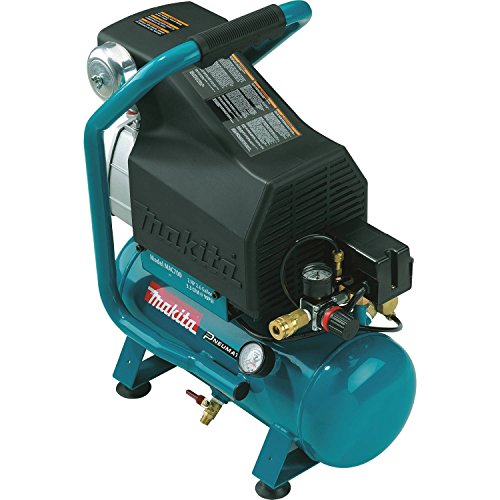
23. Makita MAC700 Big Bore 2.0 HP Air Compressor
Sentiment score: 3
Number of reviews: 6
Cast iron pump with big bore cylinder and piston, combined with greater bore and stroke, delivers maximum performanceSubstantially lower noise levels with a large 1,720 RPM pump, enabling greater displacement at lower RPMLow amp draw reduces incidences of tripped breakers and voltage drop that can c...
 Show Reddit reviews
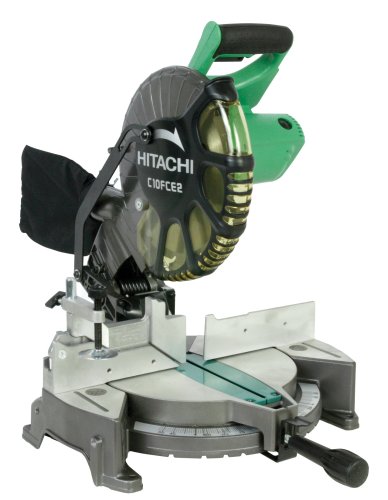
24. Hitachi C10FCE2 15-Amp 10-inch Single Bevel Compound Miter Saw (Discontinued by Manufacturer)
Sentiment score: 1
Number of reviews: 6
Hitachi Power Tools has renamed to Metabo HPT. Same great tools, with only a new name.15 Amp motor, intense power for the toughest cutting jobs0 to 52 degree miter angle range, to the right and left for increased flexibility0 to 45 degree bevel range, to the left with adjustable bevel stops for prec...
 Show Reddit reviews
25. O'Berry Enterprises 3233 Squeek No More Kit, 3 inch X 1/8 inch
Sentiment score: -1
Number of reviews: 6
Eliminates squeaks between floor boards and joistsEngineered plastic alignment depth toolCan be used on carpeted floorsIncludes 1 tool, 50 scored screws, 1 drive bitClamshell
 Show Reddit reviews
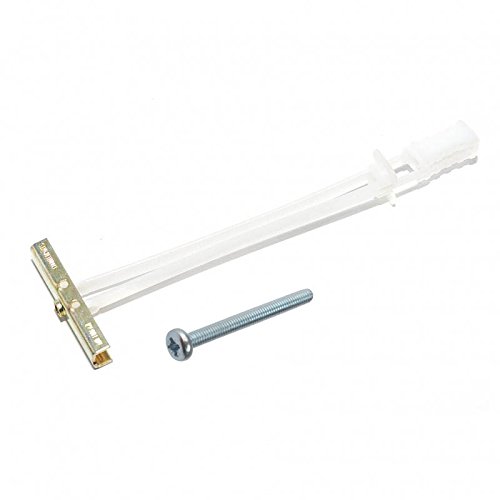
26. TOGGLER SNAPTOGGLE Drywall Anchor with included bolts for 1/4-20 Fastener size; holds 265 pounds each in 1/2-in drywall each by TOGGLER (4 Pack)
Sentiment score: 2
Number of reviews: 6
Simple to use and easy to install molly anchor kit.Twice as strong as a regular toggle bolt - solid metal channelStraps act as installation tool, help install metal channel behind the wallKit includes 4pc SNAPTOGGLE 1/4-20 toggle bolts (no bolts)
 Show Reddit reviews
27. Weller WES51 Analog Soldering Station
Sentiment score: 5
Number of reviews: 6
Receptacle For Easy Iron ReplacementDesigned For Continuous Production SolderingSlim, Comfortable Pencil With Eta Tip Reduces Operator FatigueTip Temperature Offset CapabilityAllows User To Reset Station Temperature To Match In Tip Sizes & StylesStation Includes Power Unit, Soldering Pencil, Stand a...
 Show Reddit reviews
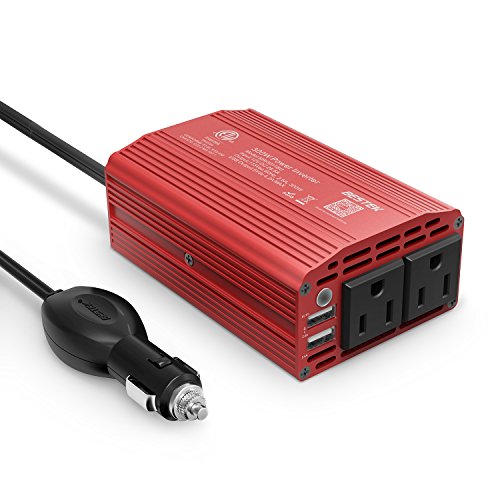
28. BESTEK 300W Power Inverter DC 12V to 110V AC Car Inverter with 4.2A Dual USB Car Adapter
Sentiment score: 2
Number of reviews: 5
BESTEK Advantage: America's leading power inverter brand. Provides 300 Watts continuous DC to AC power and 700 Watts instantaneous power, featuring 2 AC outlets and 2 USB portsFast Charging: two 110V AC outlets for charging larger devices such as laptops and tablets, 2 USB charging ports (0-2.4A) fo...
 Show Reddit reviews
29. Build Your Own Earth Oven: A Low-Cost Wood-Fired Mud Oven, Simple Sourdough Bread, Perfect Loaves, 3rd Edition
Sentiment score: 2
Number of reviews: 5
Detailed instructions including photos and diagrams make this a complete how-to book on building and baking with a traditional earth ovenTips on baking real sourdough bread, tooDenzer10" x 7"114 pages
 Show Reddit reviews
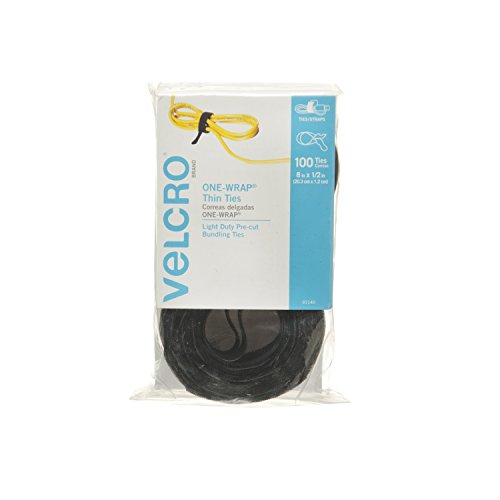
30. VELCRO Brand ONE-WRAP Cable Ties | 100Pk | 8 x 1/2" Black Cord Organization Straps | Thin Pre-Cut Design | Wire Management for Organizing Home, Office and Data Centers
Sentiment score: 1
Number of reviews: 5
WIRE ORGANIZING SELF BUNDLING TIES - Get organized fast with these simple to use, self-fastening thin ties that will contain and store cords and wires quickly and safely; Secure large cords and bulky cables with ease for a neat finishWIRE AND CORD MANAGEMENT - These bundling ties are ideal fasteners...
 Show Reddit reviews
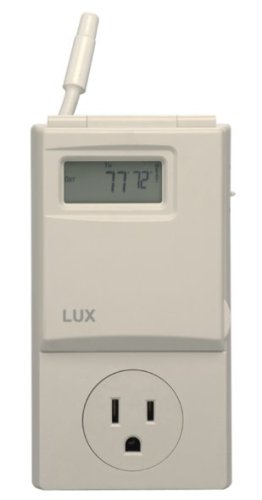
31. Lux WIN100 Automatic Heating & Cooling 5-2 Day Programmable Outlet Thermostat, Compatible with Portable A/C, Fans, and Space Heaters
Sentiment score: 2
Number of reviews: 5
PROGRAMMABLE: This 5-2 day thermostat allows you to program weekdays and weekends at different temperaturesEASY TO USE: Comes with easy to use touch keys and displays the current temperature for easy referenceINSTALLATION: No installation or wiring, easy to plug in and select the desired heatCOMPATI...
 Show Reddit reviews
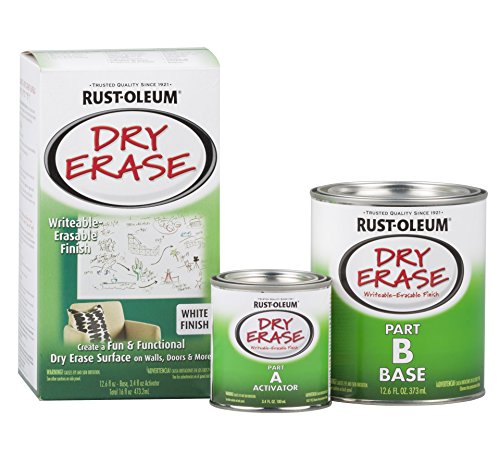
32. Rust-Oleum 241140 Dry Erase Brush-On Kit, 1 Pack, White
Sentiment score: 1
Number of reviews: 5
Indoor use on a variety of objects including walls, doors, cabinet doors, message centers, menu boards, toy chests, craft projects and moreTo apply, mix pats A and B and coat surface within 1 hour of mixing with a dense foam roller or brushDries to the touch in 1 hour, cleans up with soap & water a...
 Show Reddit reviews
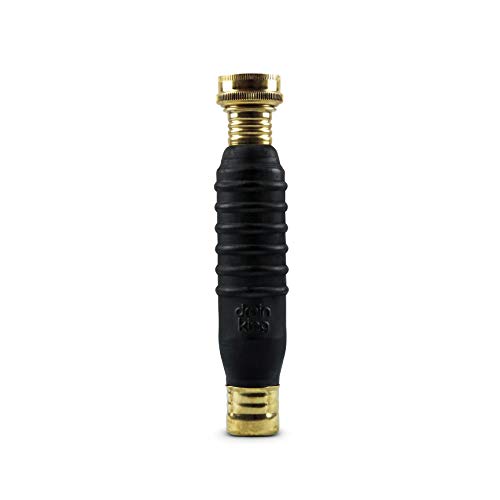
33. Drain King 186 Bathroom Sinks, Showers, and Swimming Pool Drains, 1.5 to 3 Inch
Sentiment score: 3
Number of reviews: 5
Made in U.S.A with high quality materialDrain King is the original water-powered drain cleaner to ever enter the marketOur Drain Kings feature a water pulsating valve to unclog blocked drains quickly, no hassleClears slow and clogged drains with water power in your bathroom sink, kitchen sink, and s...
 Show Reddit reviews
34. Tyke Supply Dual LCD Monitor Stand Desk clamp Holds up to 24" LCD Monitors
Sentiment score: 3
Number of reviews: 5
Tyke Supply is the only seller of Tyke Supply ProductsFully adjustableEasy to install Desk clampVesa compatibleHolds up to 24 inch lcd wide screen monitors
 Show Reddit reviews
35. Makita LCT200W 18-Volt Compact Lithium-Ion Cordless Combo Kit, 2-Piece (Discontinued by Manufacturer)
Sentiment score: 4
Number of reviews: 5
Two-speed 1/2-inch driver-drill delivers 450 inch-pounds of max torque and weighs only 3.5 poundsVariable-speed impact driver provides 1,280 inch-pounds of max torque and weighs only 2.8 poundsBoth tools feature built-in LED light and ergonomic shape for even pressure and easy controlIncludes two co...
 Show Reddit reviews
36. Franklin Sensors ProSensor 710 Precision Stud Finder
Sentiment score: 3
Number of reviews: 5
Uses Multi-Sense Technology to find studs more accurately through difficult surfaces.Instantly finds wood studs, metal studs and other hidden objects.One-step operation: Press button to turn on. LED lights instantly indicate the location of objects.Always-on deep scanning (up to 1.5").Can detect mul...
 Show Reddit reviews
37. g2 Bottle Cutter
Sentiment score: 4
Number of reviews: 5
DIAMOND TECH CRAFTS-G2 Generation Green Bottle CutterBe part of Crafting a Green World it's easy with the new Generation Green (g2) Bottle CutterMade from recycle aluminum the g2 is lightweight and allows you to easily score and separate discarded bottles and wide- mouth jars in 3 stepsIts 6 turrete...
 Show Reddit reviews
38. Pour-On Epoxy Finish Is Equal To 60 Coats Of Varnish And Provides A Gorgeous High Gloss Appearance
Sentiment score: 4
Number of reviews: 5
For Embedding, Preserving, CoatingJust one coat of "Glaze Coat" equals 60 coats of varnishWaterproof & heat resistant to 120 degreesHi gloss epoxy finish needs no polishingCan be used on almost any surface
 Show Reddit reviews
39. InstaMorph - Moldable Plastic - 12oz (White)
Sentiment score: 2
Number of reviews: 5
REUSABLE: Heat, mold, and use within minutes. Reheat to remold again and again.LOTS OF USES: Create custom grips, mounts, brackets, knobs, dials, and connectors without molds.HIGHEST QUALITY: We source the best ingredients from US and UK suppliers and package everything in our US locations to ensure...
 Show Reddit reviews
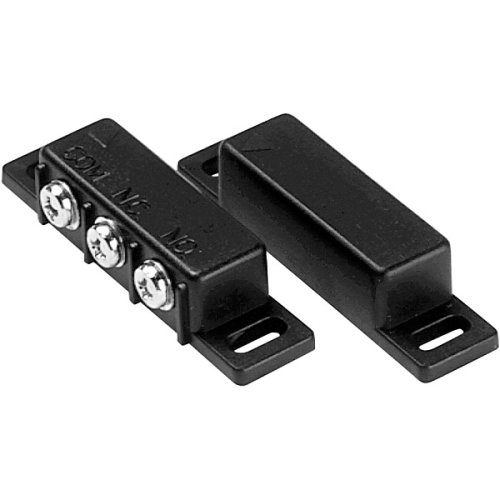
I have a Weller WES51 Analog Soldering Station, and I highly recommend it for just about any kind of work. https://www.amazon.com/gp/aw/d/B000BRC2XU/ref=mp_s_a_1_3?ie=UTF8&qid=1518809457&sr=8-3&pi=AC_SX236_SY340_QL65&keywords=weller+wes51&dpPl=1&dpID=41WVs6AdNqL&ref=plSrch
The slightly more expensive digital version doesn’t solder any better, it just has buttons and a display instead of an adjustment knob.
If you’re working on tiny components, then you’ll just need to buy a few smaller tips, but there are plenty of sizes and shapes out there for Weller irons. I’ve always just bought cheaper knockoff tips, like the ones where you can get a variety pack of 10 for ~$30 on amazon. I don’t think tips are really worth spending a premium for the Weller brand, unlike the iron itself. Something like this: https://www.amazon.com/gp/aw/d/B00VFYPKN2/ref=mp_s_a_1_fkmr2_2?ie=UTF8&qid=1518809384&sr=8-2-fkmr2&pi=AC_SX236_SY340_QL65&keywords=weller+replacement+tip+set+wes51
I’d also recommend a good vise or workstation to hold things steady, because there’s nothing worse than trying to use crappy little helping hands or just solder on a bench top. I use a Panavise like this, just as an idea, but there are probably some decent cheaper options out there: https://www.amazon.com/gp/aw/d/B00011QA0M/ref=mp_s_a_1_1?ie=UTF8&qid=1518809613&sr=8-1&pi=AC_SX236_SY340_QL65&keywords=panavise+350&dpPl=1&dpID=41smUr9QAlL&ref=plSrch
Now if you don't have the clearance. Your only way to do it is is to build a frame around it so you hide the unfinished part. But personally, I'd just get another one that's in in-wall.
You can get okay ones for $50-100. Are you looking for a soldering station or just a soldering pencil/gun?
I would recommend a wall unit, as opposed to a butane unit, because butane ones are mainly for people soldering in the field. They are nice and portable, but you have more wall outlets than butane canisters in your place, so it's easier
..
Weller and Hakko are great brands, their tips are a bit pricey too, but trust me, they last a lot longer than the cheap irons and their cheap tips.
You can't go wrong with any of these:
Weller
Hakko
Feel free to ask me other questions.
I had been wanting to build one of these for about a year and finally got around to it this month. I roughly followed the steps in the book "Build Your Own Earth Oven" by Kiko Denzer, like the other pizza oven fella on here. I'm happy with how it turned out. I haven't cooked in it yet but it holds heat very well (the first small fire I lit went out before I went to bed and the oven was still nice and warm in the morning) and it hasn't shown more than hairline cracks (although it's not a big deal if it does crack). I'll do my best to answer any questions anyone has!
It cost about $150 (US) in total which went on bricks, gravel and lots and lots of sand. The clay, of course, was free.
Resources for doing it yourself:
Build Your Own Earth Oven by Kiko Denzer
Build Your Own $20 Outdoor Cob Oven for Great Bread and Pizza
How to Build a Simple Wood-Fired Cob Oven
Building an Earthen (Cob) Oven
Wood Fired Clay Pizza Oven on Imgur
Way cool project!
I was thinking that if you still have money to spend of this project, some sort of monitor mounting system might help the overall aesthetic, then you wouldn't have to worry about the screw heads messing up the levelness of the monitors slightly either, and you could remove the bases.
Something like this x2 might work and look very nice. I found a pair of something similar called a space arm on ebay for under 80$ for a pair.
The make ones like this too, but i dont think those look quite as nifty, and wouldnt work as well for 27"ers.
PS: i love that you decided to tie some wood in with the legs and speakers, makes it look more inviting and less monolithic.
This stuff looks fun and easy - http://amzn.com/B003QKLJKQ
Super strong moldable plastic pellets.
Heat, mold, and use within minutes. Reheat to remold again and again.
Great for all types of art, hobbies, prototypes, props, modeling, etc.
Create custom grips, mounts, brackets, knobs, dials, and connectors without molds.
12 oz of InstaMorph in a convenient screw top storage jar. Enough for many different projects in a single jar.
I've had success using a scoring tool specifically for bottles like this:
GreenPowerScience demonstrates a pretty effective technique of scoring, then alternating boiling water and cold water around the score mark until it breaks. I've found that if you use rubber gaskets or hair ties around bottle on either side of the score mark, it keeps the temperature changes localized to where you want it to break. With the hair ties I get a perfect clean break every time. Before I tried that there would often be chips and erratic cracks
I purchased the Makita 18V Lithium Ion set linked earlier (http://amzn.com/B000V2DSE2). I love them, they work great and the batteries charge fast. One thing I wish I did was get the LXT version, which has a larger battery. I don't want this for longer run time, although that would also be nice, but it would run the rest of the cordless tools that Makita sells. Things like a circular saw, sawzall, shoot even a friggin leaf blower can all run on the same batteries. So I find my self now wishing I had originally bought the bigger battery set.
This one specifically: Makita LXT 18V
Reason being, it has the compact impact driver that everyone loves, and the hammer drill (which can switch between hammer function or normal drill function).
TL;DR: I wish I bought Makita LXT 18V over the Maktita 18V
Drain Zips. I have a few of these and they work great -- along the same lines as your wire hangar, but probably better reach and grab. You can find them at any local hardware or big box store for just a few bucks.
http://www.amazon.com/Faucet-Queen-Zip--Drain-Clog/dp/B000YHRAXE/ref=sr_1_13?ie=UTF8&qid=1422409079&sr=8-13&keywords=drain+zip
If it's a deep, full clog, I've got one of these that also works like a champ, but you need a garden hose to supply force: http://www.amazon.com/G-T-Water-Products-186-Attachment/dp/B0000CBIWC/ref=sr_1_1?ie=UTF8&qid=1422409317&sr=8-1&keywords=drain+pressure+hose
Probably $10-$20 also at any hardware or big box store.
YMMV but I have one of these, and while it definitely will magnetize itself to a screw you have to have faith that the people who put up your drywall got all the screws nicely into the middle of the stud. The people who built my house definitely didnt. The studs arent all perfectly 16 inches on centre either. After using this while mounting a large tv and putting a bunch of unnecessary holes in our walls to find the studs we bought a sensor one it made sense for us to pay the extra for peace of mind because we were renovating and hanging a bunch of heavy things though
Yeah I patched the big voids with mortar. You can see a slight difference in color but it's not bad at all. My sink is ground/polished down to the point that there is a lot of exposed aggregate (and the surface had a shine before the epoxy, I guess from the polished silicon in the sand?), so there's a lot going on anyway.
If you are leaving any voids (which is fine, just make sure they can drain so that water doesn't sit in them), make sure to thoroughly vacuum them so there's no cement dust that could come loose.
I (think I) used this one: http://www.amazon.com/Finish-Varnish-Provides-Gorgeous-Appearance/dp/B000PEGLBS
Here's a pic of the sink; it looks better in person :) http://imgur.com/a/k1lwZ#9
If you ever have to replace the cables, try these instead of zip ties. :)
Desk looks super awesome. I'm going to be setting up a new desk once we move, and now I'm inspired.
I use mine in my woodshop. The small "pancake" porter cable type compressors are pretty awful (I went through two in 3 years, they are essentially unserviceable) and LOUD.
I then bought this Makita
It is AWESOME. Runs great, and AMAZINGLY QUIET, Amazon is selling it for about $200.
EDIT: Did I mention that it's quiet? In my garage I can talk on the phone while it pumps.
LED strips are wonderful for that. Amazon sells them.
I used LED strips attached to an outdoor light-sensistive timer put on top of the cabinets, so I have light-sensitive LED underlighting.
Quick shot of my lighting
[strip] (http://www.amazon.com/Hitlights-Flexible-Ribbon-Adapter-included/dp/B005GL5R56/ref=sr_1_3?ie=UTF8&qid=1370794301&sr=8-3&keywords=led+strip)
power source
I put mine near the front of the cabinet, so they wouldn't ever be visable. If you want a wider range of light, put them closer to the back, and they'll cover the whole cabinet.
Good luck!
Fellow 1920s house owner here...obviously, CHWK's suggestions are best, but if that doesn't work I've had good success with these into the plaster and lathe.
I guess you could call it DIY, but it was pretty easy. I bought the components from Amazon:
The transformer plugs into the wall and then into the dimmer (I extended the wires using 12v wire I had on hand and butt contectors) then 2 wires out of the dimmer into the strip of lights. The light strip comes with a standard looking DC connector, which I removed and just hard wired it. I also used the entire strip, but it can be cut every two inches at certain points. If you choose to cut the strip, you will need to solder the wires onto the strip. Since I used the entire strip I just used the included wire (after removing the DC connector thing)
Came here to say cob oven. Sand, clay and straw instead of firebrick and mortar, and the cost in materials including the firebricks for the floor (if you want them - you can use cob for that too), and a tarp for mixing is usually under $50 or so. The biggest downside is having to cover it because there is no concrete in the mix, but I've built a few of them and they get just as hot and make great pizza. You can even let them weather and just build a new one every 5-10 years or so as they break down. I mean, $50.
Some great plans here though probably more than $50. And the authoritative text here.
I used one of these for years before I bought an adjustable heat iron:
http://www.homedepot.com/h_d1/N-5yc1vZ1xmx/R-100391613/h_d2/ProductDisplay?langId=-1&storeId=10051&catalogId=10053
It works pretty well, just have to be careful not to get things too hot.
This is the one I bought and see around the EE dept all the time:
http://www.amazon.com/Weller-WES51-Analog-Soldering-Station/dp/B000BRC2XU
Either way, make sure to watch some videos on soldering, the proper technique is very important to get good joints and not overheat components.
I was shopping around for a kit. Is this the one you own?
I have an amazon gift certificate, so I was thinking of picking up one of these Weller units. Any opinions? It seems like overkill, so I wondered how good you find the temp control on yours and whether the features on the other model would be worth it in the long run for occasional projects.
Honestly I have no clue what that is but I will check it out now.Thank god someone replied ;)
EDIT:So I can use my pickups battery?I have a Dodge Ram 1500, will this kill it like leaving the lights on too long?
Also which inverter off Amazon would work?I see they have different outputs?Like this would work right: http://www.amazon.com/Outlets-Inverter-Charging-Smartphones-Tablets/dp/B004MDXS0U/ref=pd_sim_107_1?ie=UTF8&dpID=51RkdWdCdgL&dpSrc=sims&preST=_AC_UL160_SR160%2C160_&refRID=1EN92XBPC38SW536R5A4
I agree with the clogged drain scenario. A simple option for this type of drain is a Drain King. Connect it to a hose pipe and stick it into the drain pipe. When you turn on the water it blows up like a balloon, sealing the pipe and using water pressure to clear the line. You can get them at pretty much any hardware or home improvement store.
I hear you, but there is only one way to get that experience. You don't need a workshop either...
You could do it well with:
It'll be more than a weekend project with those, but a great experience.
A table saw (~$200+) and/or miter saw ($100) aren't needed, but would speed that up significantly.
That appears very similar in function to the Stanley one I have. Although, mine has an LCD display instead of the three lights.
I've actually used it successfully to find not only studs, but also floor joists through carpet (to use something like this to greatly improve the floor squeak.)
Oh I didn't realize it plugs in
You want this or something like it. Just plug that into your outlet, plug your wireless switch into that. It will make it so that the switch will not operate or get power until the temperature drops to whatever value you enter.
Hopefully that works for you as it will be entirely plug and play and take less than 5 minutes to set up.
I recommend modifying it to use a standard household bulb. You are essentially building a sconce. I would look into something like these plus a 12V PSU like this. You will also need a socket like this.
I bought this onefrom Amazon, I am 2 for 6 in making glasses out of them but still trying, plus I like emptying the bottles!!
First successful attempt:
http://imgur.com/mlow7
Pour some epoxy over the top. It looks great and will totally protect the surface.
http://www.amazon.com/Pour-On-Varnish-Provides-Gorgeous-Appearance/dp/B000PEGLBS
Same stuff, but thanks for the suggestion. I'm actually using it, and just erasing the ghosting w/ a Mr. Clean magic eraser every once in awhile.
Meanwhile I ordered this dry erase paint, which I'm going to apply in coats with the proper sanding and primer. Will report back here in a week or so--hopefully this works!
I have a makita drill and impact set and it's been flawless for 5 years. http://www.amazon.com/Makita-LCT200W-18-Volt-Lithium-Ion-Cordless/dp/B000V2DSE2/ref=pd_sxp_grid_pt_0_1
Two years ago I built a privacy fence and wanted another impact driver with out the expense. I purchased the Ryobi bundle for $99.
I have had no issues with either, but as a home owner, Ryobi has so many other great affordable tools that the batteries work with.
https://www.ryobitools.com/power-tools/products/details/540
This method gives you some pretty jagged edges and is way less than 80% effective. Glass cutter mounted to a board seems to work best from what I've worked with. This and this also work pretty well but cost more than a $3 glass cutter mounted to some scrap wood.
I know I'm not really answering your question here... but we just installed 5 more foot of cabinet space and my wife wanted some under cabinet lighting. I looked on Amazon and most of the stuff was pretty expensive.
I opted instead to do LED strip lighting and ordered 32' of it + transformer + dimmer for the same price as 24" of any of the other solutions. The pluses are:
Pics are here: http://imgur.com/a/R6ynJ
Here's what I got:
Transformer/Power Supply
Warm White LED Strips (16ft)
Dimmer w/Wireless Remote
I used 2x 16ft strips and it worked just fine. Came up to a total of $63.25
I've got one of these
http://www.amazon.com/Weller-WES51-Analog-Soldering-Station/dp/B000BRC2XU/ref=pd_cp_hi_1
Love it. Definitely look for something with adjustable temps and replaceable tips.
Buy this for 20.00. Don't waste your time with the string and all that other jazz.
http://www.amazon.com/Generation-Green-g2-Bottle-Cutter/dp/B004ZRV3AU
It works great on basically anything bottle sized/shaped.
You will have far less headaches, and you don't need a torch, the flame from a tea candle is more than adequate.
My current set the compact set from Makita: http://www.amazon.com/Makita-LCT200W-18-Volt-Lithium-Ion-Cordless/dp/B000V2DSE2/ref=sr_1_6?s=power-hand-tools&ie=UTF8&qid=1310495108&sr=1-6
They can be had cheaper during black-friday sales and the like.
The biggest win vs. a NiCad is first weight. LiIon is far, far lighter for the same power load.
Second, LiIon have a more usable power. NiCad degrades rather linearly. Ie, the more you use it, the less power it puts out. LiIon will hold on and produce roughly the same output until you've used about 90% of the charge.
Third, LiIon can (and SHOULD) be charged before you use them all the way to zero. They don't suffer the "charge memory" thing that NiCad does.
Specific benefit to that Makita set: Charge time from almost 0 to 100% full is 15 minutes. 15 minutes.
Sounds like you want to use the kind of finish that is used on bar tops and bar tables. There are many different brands, such as this one:
http://www.homedepot.com/p/Rust-Oleum-Parks-1-qt-Gloss-Super-Glaze-Finish-and-Preservative-241352/202056337
Or this:
http://www.amazon.com/Pour-On-Varnish-Provides-Gorgeous-Appearance/dp/B000PEGLBS
So I had several closets that were very dark and hard to see in. None had outlets and I didn't feel like getting anything wired in. So I made these lights using AA batteries. You can find everything on Amazon. Perfect for apartments too! One closet comes in at around $30, less if you don't get nice rechargeable batteries like I did.
Switch
Lights
Case
All of this. Coating the tip with a glob of solder when you're done with it is a good idea -- flick the solder off when you next use it and all of the oxidation goes with it.
I've got one of these and it's well worth it.
I know you said you wanted to build, but this is only 40 bucks and is fantastic. I have a 24" and a 19" attached to this, it's then clamped to an Ikea build your own desk, can't recall model though.
http://www.amazon.com/Dual-Monitor-Stand-clamp-monitors/dp/B002R9HQLI/ref=sr_1_1?ie=UTF8&qid=1341326765&sr=8-1&keywords=dual+lcd+monitor+stand
I found it on amazon for about 50 dollars. So far I like it quite a bit, the height you have to set, but the arms move freely and the monitors tilt, rotate and swivel.
If I was going to buy another compressor I'd probably get a Makita.
http://www.amazon.com/Makita-MAC700-Big-Bore-Compressor/dp/B0001Q2VK0/ref=sr_1_1?s=hi&ie=UTF8&qid=1374779714&sr=1-1&keywords=makita+compressor
http://www.amazon.com/Makita-MAC2400-Big-Bore-Compressor/dp/B0001Q2VPK/ref=sr_1_2?s=hi&ie=UTF8&qid=1374779762&sr=1-2&keywords=makita+compressor
http://www.amazon.com/Makita-MAC5200-Big-Bore-Compressor/dp/B0001Q2VPU/ref=sr_1_3?s=hi&ie=UTF8&qid=1374779762&sr=1-3&keywords=makita+compressor
As it stands they have great CFM flow and are relatively overbuilt.
A cheap stud finder will help you locate the studs. if you can hit one stud it will be sufficient to support the TV. That being said these wall anchors are amazing if you can't find a stud. pop four of those in and it will hold the TV no problem!
I have a Makita compressor and absolutely love it.
http://www.amazon.com/gp/aw/d/B0001Q2VK0/ref=mp_s_a_1_1?qid=1416637483&sr=8-1&pi=AC_SY200_QL40
Amazon to the rescue?
http://www.amazon.com/gp/product/B001E1Y5O6/ref=oh_details_o06_s00_i00?ie=UTF8&psc=1
Many times in the past, I've had good success with one of these:
The black part swells to the diameter of your pipe when you turn on the water hose (keeping the water from coming up backwards), and creates enough pressure to break the clog loose.
I have this mount. I have had no issues with it. I am not sure if it will work for your monitor but if you want new ones you can check here one of my friends has this and has nothing but goos things to say about it.
Yeah, especially to protect the (I'm assuming) non-oil-based, less-durable coats of paint underneath. http://www.amazon.com/Finish-Varnish-Provides-Gorgeous-Appearance/dp/B000PEGLBS/ref=sr_1_2?ie=UTF8&s=arts-crafts&qid=1301373510&sr=1-2
I bought a Hitachi compound miter saw from a local big box hardware store. It doesn't cost a lot more, and it's taken everything I've thrown at it with no issues at all... It's light but solid, and powerful enough to handle hardwood and 4x4s without bogging down.
Tap on the wall with your knuckle and listen for the difference in sound, good stud finders can be had for fairly cheap as well.
ProSensor 710 Franklin Sensors ProSensor 710 Precision Stud Finder Yellow https://www.amazon.com/dp/B0064EICKG/ref=cm_sw_r_cp_api_aw4Dyb0DQVVAB
Sugru, while very useful, wouldn't be ideal in this application because it is too rubbery.
I'd go with a moldable plastic like instamorph.
A magnetic switch, like the kind security systems use to see if a window is open.
https://www.amazon.com/dp/B0009SUF08/ref=sxts_kp_bs_lp_1
One side mounts on the door, the other side mounts on the door frame and has wires running to it. When a magnet gets close to the wired one it opens/closes a contact (depends on how you wire it). So wire it to be open when there's a magnet and the circuit will close (thus the light turns on) when the door is opened and the other part moves away. The circuit opens again when the door is closed and the other part gets close. Works for both sliding and regular doors.
I think Makita is an excellent brand. But the batteries are very small and low-power on that kit. If I where you, I'd spend a little more and get this instead: http://amzn.com/B000V2DSE2 . I have an older version of that set and it has worked well for many years. Although even those batteries are small-ish for big projects (e.g. insufficient drilling holes and driving screws to deck small porch in one charge).
I've found this 120v AC to 12v DC converter on amazon, would something like this allow me to use the pin I've already installed into the machine?
https://www.amazon.com/dp/B0034GUEY4/ref=nav_timeline_asin?_encoding=UTF8&psc=1
Buy a https://www.amazon.com/ProSensor-710-Franklin-Sensors-Precision/dp/B0064EICKG/ref=sr_1_1?ie=UTF8&qid=1498578785&sr=8-1&keywords=franklin+prosensor+710
The stud finder you are using detects the change in density, which can be the edge of a stud or various other things. If you have textured walls, just moving it over the surface can give you a false positive. The prosensor checks across the entire width and gives you a visual indication of the where the stud is. There is apparently one at Cosco (Kirkland branded) that runs about $35.
The thing is life changing, particularly if you are moving to a new place.
nice build, one thing though, get rid of that chinese receptical, its a fire hazard, they werent even bothered to clean up the edges around the "TR" letters in the mold, who knows how there quality control is of the actual electronics. get a Leviton one instead, they come in every colour
If you wish to power the projector off your truck's battery you will need to find an inverter with sufficient wattage. The 110-240V is the voltage abilities; if you're in the states (which I assume given the Ram) you are working with 110V.
Something like this:
http://www.amazon.com/Outlets-Inverter-Charging-Smartphones-Tablets/dp/B004MDXS0U/ref=sr_1_1?ie=UTF8&qid=1450163409&sr=8-1-spons&keywords=300w+power+inverter&psc=1
That link is just representative of what you need. I don't know the wattage required for that projector. If you already own the projector you can look at the label and it should say something like 110V at xxA where the xx is some number. If you multiply those numbers you will get the wattage minimum. For future reference P=I*V where P is power in Watts, I is current in Amps, and V is voltage in Volts.
Something to note, if you wish to run this independent of the truck's battery you can buy/borrow a car battery and connect the inverter to that instead. Know that after a period of time either battery will die. That time, however, depends on current load from the projector. I won't get into that (there are college degrees on just that topic) but I would say you should get 2-3 hours out of a standard car battery.
http://www.amazon.com/gp/product/B000V2DSE2/ref=oh_details_o04_s00_i00
Lightweight, compact, and powerful. Battery lasts for a long time and recharges fast. Don't waste any money on cheaper cordless drills.
You might try snap toggles. I was an installer for a commercial company and we hung a lot of cabinets and heavy cubicle systems with these. I hung my 60" plasma tv with them as well. They are rated at several hundred pounds. Check the specs at the website. But if you don't want to have to locate the studs, this may be a solution for you.
http://www.toggler.com/products/snaptoggle/overview.php
https://www.amazon.com/Toggler-Snaptoggle-Toggle-Drywall-Molly/dp/B005C4YE4M
I would put a layer of epoxy coating on top of the whole thing. Something like this should be available at a local big box store.
http://www.amazon.com/Pour-On-Varnish-Provides-Gorgeous-Appearance/dp/B000PEGLBS
Ah, you'd think the switch would be waterproof given it's designed location, but unless it specifies it I wouldn't put it in a wet location. You could bypass using the one supplied and put in a mag like this one https://www.amazon.com/Directed-Electronics-8601-Magnetic-Switch/dp/B0009SUF08/ref=sr_1_7?ie=UTF8&qid=1484926127&sr=8-7&keywords=pin+switch
I like the idea but not the cost. I applaud the execution and I am totally a fan of DIY, however I just ordered this
http://www.amazon.com/Dual-Monitor-Stand-clamp-monitors/dp/B002R9HQLI/ref=sr_1_1?ie=UTF8&qid=1293564463&sr=8-1
If you are able to make it by hand, then InstaMorph (or a similar product) might be an option.
http://www.amazon.com/InstaMorph-Moldable-Plastic-12-oz/dp/B003QKLJKQ
Very nice, could've gone with these outlets tho for more USBness: http://www.amazon.com/Leviton-T5632-W-Charger-Resistant-Receptacle/dp/B00J3PMU4C
I like the way you think sir. I found a similar fan on Amazon, different model numbers with more CFM coverage but I'm wondering if I can go with something smaller and pair it with something like this so it shuts on and off on its own. Which in lies another question...how to I power the damn thing? I also completely forgot to mention that the master bedroom gets pretty damn cold at night when the AC is on at night and in the winter time when I turn on the heater (apartment has heating coils) the bedroom gets way too hot. Saw a similar reviewer with my situation so I'm hoping to find a solution for both needs: to cool/heat the second bedroom.
As a dad...what is this privacy you speak of?
Go for a "pancake" or "hot dog" style. They are sufficient for airing up tires and occasional tool use.
Pancake style
HotDog style
Also, in my experience, electric paint rollers are much less hassle for housepaint. Less clogging and easier cleanup.
You might like this book; Build You Own Earth Oven
It's polyester pellets with a low melting point
There are similar products like this that are available worldwide:
InstaMorph LINK
as well as
ShapeLock LINK
You just need a reasonably large automotive battery and an inverter.
Something like this, one of these, and a car battery. Use a deep cycle battery if you plan on using this regularly, and pick up a battery charger. Otherwise you can just plug it into the battery in your car, if that works.
One like this for $18 http://www.amazon.com/Generation-Green-g2-Bottle-Cutter/dp/B004ZRV3AU#
Anyone who wants to improve their cable management skills needs to get these fuckers. I don't know how I lived without them: http://www.amazon.com/Velcro-Reusable-Self-Gripping-Inches-91140/dp/B001E1Y5O6/ref=sr_1_1?ie=UTF8&qid=1376163559&sr=8-1&keywords=velcro+cable+ties
No more snipping 20 cable ties when I want to move something. They're just as strong as zipties but you can reuse them as many times as you want.
won't that blanket suffice? It says it has a thermostat?
Other than that use a line voltage thermostat and a heating pad? Should not take mush to keep it warm.
This
That is overkill - but would work. You could find a baseboard heat one at a rehab shop for 5 bucks.
There are also reptile heaters.
These snaptoggle toggle boltswork extremely well. There are a variety of sizes, so pick the ones that match the weight of what you are mounting. If you choose to follow the advice of others and mount plywood first, add the weight of the plywood and television together.
I've got one of these, which might work for your fan control. http://www.amazon.com/gp/product/B000E7NYY8
That is a full brick oven. and a very nice one. Mine is clay. There are tons more to see @ http://ukwoodfiredovenforum.proboards.com/ or http://www.fornobravo.com/forum/
but I followed the technique in this book "Kiko Denzer - Build Your Own Earth Oven" http://www.amazon.co.uk/dp/096798467X/?tag=googhydr-21&hvadid=6229408160&hvpos=1t1&hvexid=523520&hvnetw=g&hvrand=643651100990024808&hvpone=&hvptwo=&hvqmt=b&hvdev=c&ref=pd_sl_rq5ew2bfc_b
If you plan on building more than a work bench I recommend getting a miter saw. You can get a decent one for cheap:
[This is what I got]
(http://www.amazon.com/Hitachi-C10FCE2-10-Inch-Compound-Miter/dp/B000V5Z6RG/ref=sr_1_1?ie=UTF8&qid=1422581816&sr=8-1&keywords=mitre+saw)
My plan was to trade up if I ever outgrew it, but that hasn't happened yet.
I have the same saw. It's $120 from amazon. http://www.amazon.com/dp/B000V5Z6RG
Try Drain King. It's amazing what water pressure can do.what ever is stuck should move before you burst a pipe.
http://www.amazon.com/G-T-Water-Products-186-Attachment/dp/B0000CBIWC/ref=sr_1_1?ie=UTF8&qid=1452997609&sr=8-1&keywords=Drain+King
Just check the specs. But since they are drawing from the wall you can get some solid juice. They usually tell you which standards they are compatible with. For example at the bottom of https://www.amazon.com/gp/product/B00J3PMU4C/ref=ppx_yo_dt_b_search_asin_title?ie=UTF8&psc=1 it has a comparison chart.
Sorry for not being clear on this.
It's currently a single unit with two outlets in it (like this).
One of the two outlets is "always on", the other is controlled by a switch (so you can plug in a lamp or other light source that is then controlled via switch at the door vs on the light).
I was hoping to swap the existing unit for one that included USB ports. I wanted to maintain the 1 outlet always hot, 1 controlled by switch configuration I already had.
According to /u/trekkerscout they do not make a receptacle unit that will allow that so I'll have to choose to have the whole thing be on the switch or the whole thing always on.
As far as the safety warning, thanks for the reminder. I always kill the power at the circuit breaker (and I make sure I do it myself, I know a few guys who have had issues because their buddy/dad/colleague killed the wrong breaker so I take extra care to make sure it's right) but it's a good warning anytime you deal with exposed wiring.
if LED and at 5W for 50, you could run 1000 bulbs for 100 watts.. That would be a very small inverter (this one is $30).
Also, the demand would be low enough that even 200' of extension cords would work fine... You could easily go to 2000 LED bulbs without risk. ( 200w = < 2A draw on #14 wire)
An earth oven seems more approachable than a brick one to me. Then again, I've been saying for nine years or so that I'm going to build one and still haven't made it happen...Kiko Denzer's earth oven book
This is what you need.
They make dry erase paint!
Edit: https://www.amazon.com/Rust-Oleum-241140-Erase-Brush-White/dp/B000PGBCOC
Rust-Oleum 241140 Dry Erase Brush-On Kit, White https://www.amazon.com/dp/B000PGBCOC/ref=cm_sw_r_awd_8PRPub0PB2RT0
Instead of that $130 kind, I used this $20 alternative which works fantastically. I made a table for D&D, and the entire tabletop is painted with this stuff. Used permanent marker to make a 1" grid via vertex dots, and the dots only sometimes come off when I use a magic eraser, which gets EVERYTHING else up.
Maybe more, but can't be much more at 6.78 per 100, I think they're even cheaper at lowes. http://www.amazon.com/o/ASIN/B001E1Y5O6/?tag=dp-us-20
"Used for any 12 volt application (motorcycle, car or suv auto modding)."
You need a 12 volt adapter. Find one for purchase.
http://www.amazon.com/InstaMorph-Moldable-Plastic-12-oz/dp/B003QKLJKQ
I would use snap toggle anchors at a minimum.
amazon
This one works well
Go to your local used appliance store, or Habitat for Humanity, and find the smallest refrigerator you can find. Think dorm room size, if possible.
Get a hole saw and drill two four inch holes in the sides; one high on the right side, and the other low on the left side. Over the lower hole screw one of these:
https://www.radioshack.com/products/radioshack-120vac-4-fan?variant=5717368453
The other hole gets one of these screwed to the outside:
http://www.homedepot.com/p/4-in-x-4-in-PVC-DWV-Closet-Flange-C4851HD4/100345759
Now buy a few pieces of 4" PVC. Straight, elbows, anything you think would be good to direct the air to the area the plants are sitting. Since cold air falls, perhaps run it to the roof of the enclosure over the plant stands.
Now turn it on. In a few minutes you should feel cool air falling gently over the open rack shelving that your plants will sit on.
Now you need to control it. Buy one or two of these:
http://www.amazon.com/Lux-Heating-Cooling-Programmable-Thermostat/dp/B000E7NYY8
Plug the small fridge into one outlet, and the fan into the other, if you want them separate. Turn the internal thermostat on the fridge to the lowest setting you can. It will stay there 'till the end of time. It will not be needed to control the temps. The outlet controller will do that.
Finished. Total cost: maybe $100 to $150 USD, depending on what kind of bargain you drive for the little fridge. And you can use it for a second duty. It will keep your drinks cold while you are puttering amongst the greenery.
I swear by THIS.
I would suggest using some of that whiteboard paint or chalkboard paint for the top. Minimizes the number of pieces that can be lost by the drunks.
This should do the trick. http://www.amazon.com/gp/aw/d/B00J3PMU4C?pc_redir=1409472304&amp;robot_redir=1
As someone who has done a lot of similar projects at home and professionally I could make a couple of recommendations.
I recently bought this Makita compressor and I LOVE it! Recharges in 30 seconds and it's very quiet. Not a huge capacity for say roofing or framing but for moderate jobs you will never be waiting for a pressure.
Also this Harbor Freight 18g brad nailer has proven itself very versatile and reliable over the last five years or so. For $20 you can't beat it for trim work and cabinetry.
Why not something like [this] (http://www.amazon.com/BESTEK-Outlets-Inverter-Charging-Smartphones/dp/B004MDXS0U/ref=pd_sim_sbs_23_1?ie=UTF8&amp;dpID=51dt4hRUj4L&amp;dpSrc=sims&amp;preST=_AC_UL160_SR160%2C160_&amp;refRID=0CMT7QFE6QK90YQF7Y7A)?
I've used this product before:
Squeeeeek No More Floor Repair Kit
http://www.amazon.com/OBERRY-ENTERPRISES-3233-SQUEEEEEK-REPAIR/dp/B0006IK8YE/ref=sr_1_1?ie=UTF8&amp;qid=1405351948&amp;sr=8-1&amp;keywords=Squeeeeek+No+More+Floor+Repair+Kit
with great success. The bottom video here:
http://www.123itsdone.com/index.html
shows how it's done over vinyl.
There will be a small hole, inevitable with vinyl, but you might be able to find a strategic spot in the fake grout line, or pattern. But see the video first...
They make screws designed with break off heads meant to go though the carpet, floorboards, and into the floor joists beneath. So.e just go through the carpet leaving the head on.
https://www.amazon.com/OBERRY-ENTERPRISES-3233-SQUEEEEEK-REPAIR/dp/B0006IK8YE/ref=asc_df_B0006IK8YE/?tag=hyprod-20&amp;linkCode=df0&amp;hvadid=167152358566&amp;hvpos=1o1&amp;hvnetw=g&amp;hvrand=9836158661788938309&amp;hvpone=&amp;hvptwo=&amp;hvqmt=&amp;hvdev=m&amp;hvdvcmdl=&amp;hvlocint=&amp;hvlocphy=9027423&amp;hvtargid=pla-312808039115&amp;psc=1
Is one type.
I have never had to use them so I can't vouch for them myself.
>I have the same saw. It's $120 from amazon. http://www.amazon.com/dp/B000V5Z6RG
Ah, that's no where near the same saw! YOU have a chop saw, he has a "sliding compound miter saw"!
Big difference!
O'BERRY ENTERPRISES 3233 "SQUEEEEEK NO MORE" FLOOR REPAIR KIT https://www.amazon.com/dp/B0006IK8YE/ref=cm_sw_r_cp_apa_BvMYAbP4ECXK4
Overall I spent about $126 because I used a lot of material that I already had (baseboard, paint, romex).
Materials Used:
Leftover 7/16" OSB sheathing cut to size
(2) Closetmaid Cubeicals
Existing baseboard
1" x 12" pine board
Shelf hardware
Paint
Painter's Putty
Caulk
Primed Quarter Round
LED light strip
12v Power Supply
(2) LED PCB connectors
Magnetic Door Switch
(2) Old Work Boxes
Romex Cable
Outlet
Outlet Cover
I use my miter saw much more than my circular saw. I got this guy years ago and have had no regrets.
These screws sink threw your carpet and then you snap off the heads. Never used it but saw it on ask this old house
O'BERRY ENTERPRISES 3233 "SQUEEEEEK NO MORE" FLOOR REPAIR KIT https://www.amazon.com/dp/B0006IK8YE/ref=cm_sw_r_cp_api_4tMYAbJ1SC011
50lbs anchors? Nah, man. Uses these big bastards instead:
http://www.amazon.com/Toggler-Snaptoggle-Toggle-Drywall-Molly/dp/B005C4YE4M/ref=sr_1_9?ie=UTF8&amp;qid=1465239367&amp;sr=8-9&amp;keywords=drywall+anchor
I'd probably affix some of those velcro cable-ties or similar to the back of the box to clean up the dangling cables some more. You can then still open the ties to move your consoles and cables around, but there'll be no more risk of pulling on any cables by accident when carrying something past or so. Plus, bonus, it looks cleaner.