(Part 2) Top products from r/Darkroom
We found 17 product mentions on r/Darkroom. We ranked the 33 resulting products by number of redditors who mentioned them. Here are the products ranked 21-40. You can also go back to the previous section.
21. Grafix Matte 0.005 Dura-Lar Film, 9-Inch by 12-Inch, 25 Sheets
Sentiment score: 1
Number of reviews: 1
Acid free and archivalHigh heat and tear resistantAvailable in rolls and padsAvailable in Clear, Matte, Wet Media or MetallizedAvailable in a wide range of thicknesses
 Show Reddit reviews
22. Saint GOBAIN ADFORS FCS8801-M, 36" x 100', Gray
Sentiment score: 0
Number of reviews: 1
Fiberglass screen cloth18" x 16" meshFeature: Gray color
 Show Reddit reviews
23. Whitmor Clip and Drip Hanger - Hanging Drying Rack - 26 Clips
Sentiment score: 0
Number of reviews: 1
CAPACITY: 11.81"X15.16"X15.75": Portable, & compact, the 26 clips let you hang & dry your delicatesCOLLAPSIBLE: After drying clothes this collapses flat when not in use for easy storage.ADJUSTABLE:Hook hangs anywhere: closet rod, shower curtain rod, a clothesline, garment rack or shelfDURABLE: Quali...
 Show Reddit reviews
24. CPM Delta 1 3511112 35110 Brightlab Junior Safelight 11W Universal Red Bulb
Sentiment score: 0
Number of reviews: 1
Delta 1 brightlab Junior universal Red safelight
 Show Reddit reviews
25. Delta 1 Datatainer Storage Bottle ~ 1 Gallon
Sentiment score: 0
Number of reviews: 1
For photographic ChemistryWrite on label for easy description and expiration informationHolds 1 gallon of chemistryChemically inert bottleDark to prevent light degradation of chemistry
 Show Reddit reviews
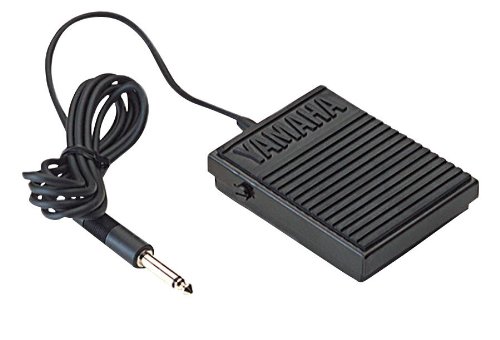
27. Yamaha FC5 Compact Sustain Pedal for Portable Keyboards, black
Sentiment score: 2
Number of reviews: 1
5 foot cable1/4" TS plugGenuine Yamaha accessory
 Show Reddit reviews
28. The Book of Alternative Photographic Processes
Sentiment score: 0
Number of reviews: 1
 Show Reddit reviews
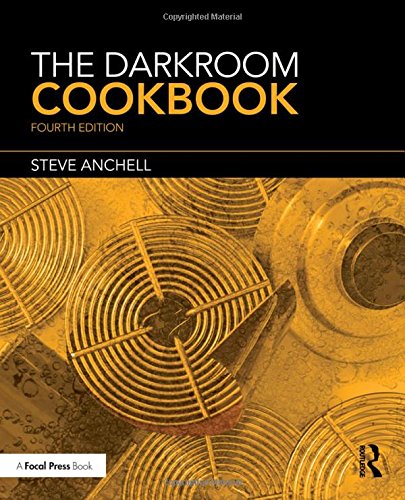
29. The Darkroom Cookbook (Alternative Process Photography)
Sentiment score: 0
Number of reviews: 1
Taylor Francis
 Show Reddit reviews
30. Way Beyond Monochrome 2e: Advanced Techniques for Traditional Black & White Photography including digital negatives and hybrid printing
Sentiment score: 0
Number of reviews: 1
 Show Reddit reviews
31. Blueprint Series, Vol. 2: Petersen's How-To Photographic Library
Sentiment score: 1
Number of reviews: 1
 Show Reddit reviews

Hey, Tiger stadium! I grew up in Detroit!
For 4-5 years I've been doing almost nothing but lith printing. (Check out my analog site for an idea of the looks I go for, I'm most into lith for the strange way it renders contrast and the paper grain vs. color). But one thing I've found is if you get a print with warm tones you really like, chances are selenium will change them to something different (maybe great or maybe not) - so I try for a print that doesn't need any post-work like bleaching or toning if the color I'm getting works for me. Moersch Omega can boost the colors of some papers, too.
One thing is to try to amp up color in the first place - weaker or tired developer helps (if you start getting spots, a pinch of sodium sulfite can get you another print or two); lith (esp. due to the long exposures) can really benefit from flashing for highlights (non image-forming exposure - highlights suffer from intertia and an extra kick of light can push them over the edge), esp. since so much of the color comes from the high tones. it can really help hold onto delicate clouds and sky tones, etc.
Testing for non-image forming exposure is tougher for lith of course, since you don't develop to completion - so getting a print that seems good, and then choosing a highlight area on the next print and pulling the neg, sticking diffusion under the lens [I use [dura-lar, matte acetate that comes in pads](https://www.amazon.com/dp/B0027AAOL6/ref=sxts_kp_tr_2?pf_rd_m=ATVPDKIKX0DER&pf_rd_p=8778bc68-27e7-403f-8460-de48b6e788fb&pd_rd_wg=ks2EG&pf_rd_r=QJADBG6ZCPAFXN5BAEBF&pf_rd_s=desktop-sx-top-slot&pf_rd_t=301&pd_rd_i=B0027AAOL6&pd_rd_w=chBdQ&pf_rd_i=dura-lar&pd_rd_r=6059d04b-60b3-4c6d-8294-ca4ca023689b&ie=UTF8&qid=1539640201&sr=2)) and adding strips of 1-second duration to the highlight areas is a good test. Snatch for shadow detail and see how much flashing starts to beef up highs and when it's actually fogging.
(When I print, I start pretty small, like 8x10 cut in half, in 5x7 trays. Same paper though. I dial in the prints that way to save paper and dev. before going bigger, my final prints are 16x20 or even 20x24 lately. Measure the distance from the baseboard to the lens when you're ready to go bigger. New distance ÷ original distance, squared gives you a number; multiple your exposure time - or times, like dodging/burning, flashing - by this number, gets you very close). I use detailed print maps so I have all the various times handy.
Lith also really likes late-development flashing, which can be just flicking the room lights on for a second. Not enough to fog the borders - but when the shadows start getting established, try it - it can really boost color. Doing it to the point of fog can really boost color, but can give you a dull print - but you can bleach the borders with ferri-fixer and a good brush, or iodine-alcohol bleach on a dry print. Iodine is good for removing black spots from dried prints - I shave a toothpick down to like one fiber and use a loupe made for retouching with a brush opening. Then you spot the bleached spot as if it were a dust spot. Really an accurate way to bleach or retouch. I use a quality Grumbacher watercolor set to spot lith prints, my regular spotting dyes don't have the colors I need. I use gum arabic when spotting gloss prints - if you steam the print a bit after spotting, sometimes it will sort of melt the spotting into the emulsion and hide it enough to be invisible under glass.
Fixer really kills color - want to get depressed? Acid stop a lith print normally, give it a quick rinse, and turn on the room lights - the print won't fog right away since the developer is deactivated. The color in an unfixed lith print can be extraordinary, and then watch the fix bleach it away. I've tried using TF4 and TF5, and weak and exhausted fix for a few minutes, then rinsing and fixing in fresh fix - that seems to help. This is a shot of my lith setup, got it fairly dialed in. I need a cover for 20x24 trays still, big sheets of plex are kinda pricey though!
Gold toning lith prints for cool tones - you may get a color you like, but if the print is really warm, you may get more of a mauve. For neutral blue, bleach the print to completion in ferri-bromide, and redevelop in standard paper developer. (test with scrap prints of the same paper - sometimes diluting the paper dev works well too). This gives the gold toner a more neutral tone to begin with, and takes less time and exhausts that pricey stuff more slowly. (My stuff seems to work better looking cold and desolate).
The Facebook lith group is fantastic, great know-how there, Tim Rudman and Wolfgang Moersch post there. When Moersch likes your print, that's a good damn day!!!
So, normal light (black body spectrum) is a Gaussian distribution of frequencies around a single wavelength. The center-point of this distribution can be moved higher or lower to alter the color of that light as we perceive it. Objects give off bluer (higher-frequency) light the hotter they become, white hot is hotter than red hot, etc. We commonly refer to color spectrums by a Kelvin-equivalent temperature as a result, hence you can buy 'warm white' 3000K light bulbs, 'cool white' 4000K light bulbs, and 'daylight' 6500K lightbulbs.
Now, although our eyes are reasonably good at automatically adjusting to differences in the colors of light sources, so unless we're looking out for it (or it's a big difference), our brain compensates and we just see 'white'. Camera film does not make this adjustment, so shooting under a 3000K light (this is the traditional spectrum of an old incandescent light bulb, so we commonly call it 'Tungsten') with a film meant for daylight (6500K), everything looks yellow. Shooting in daylight with a tungsten (3000K) balanced film, everything looks very blue.
Now, in order to fix this, manufacturers make 'color correction' filters meant to cut out the blue light when you're using tungsten film in daylight, or cut out the yellow light, when you're using daylight film indoors. These are not the same as color filters for black and white.
For using daylight film indoors you need a special blue (wratten 80A to 80D) filter.
For using tungsten film outdoors you need a special orange (wratten 81A-81D) filter.
If you're using a Nikon 50 1.8, you're almost certainly need a 52mm filter. Unlike Leica E39 or other weird sizes, 52mm Wratten filters are really easy to get, and can be had pretty cheap; and super quality is probably not critical for the look you're after.
Here's some (normal color film indoors) cheap filters in 52mm. https://www.amazon.com/gp/offer-listing/B00009V356/
This is just one of the many useful plans to be found in Blueprint Series Vol. II by Petersen's Photographic. Highly recommended.
Canda doesn't have any photography stores or lab glassware retailers? These are pretty standard to store chemicals in or you can go fancy and use lab amber glass bottles
https://www.amazon.com/Delta-Datatainer-Storage-Bottle-Gallon/dp/B00009V3DO
Pick up a copy of The Darkroom Cookbook. It saved my ass a few times working for photographers.
​
Edit: And two 8x10 mat boards, one with a dime-sized circle cut in it, and the other with a double dime width oval cut into it, make great burning tools. The two together make all sorts of useful shapes.
You need to put some weight on the hanging film. I use this to hang my drying films, and this on the end of each individual film.
Each film is different also, some tend to curl more than others, or band in the middle. After my film is totally dry I cut them into manageable strips and then inside a nice heavy book overnight, then on to scanning.....
Sadly I don't have the space for a print dryer. My significant other already eyes me warily when any new smallish darkroom equipment shows up. I may try weighting the prints on the line. Otherwise, I wonder if I can make my own print dryer of sorts - I read online about someone putting prints between fiberglass screens. I wonder if that, maybe with some gentle drying from a hairdryer, would do the trick. I'll have to try that over the weekend...
That's bad in a few ways:
https://smile.amazon.com/Delta-Brightlab-Junior-Safelight-Universal/dp/B00013J8UY/ref=sr_1_fkmr0_2?keywords=ilford+safelight&qid=1563904006&s=gateway&sr=8-2-fkmr0 This is probably the lowest-priced sure-to-work-well option out there. Remember to keep it 4'/1.25m from your paper (both the enlarger base and your development trays).
You can get some use out of it with this book: https://www.amazon.com/Book-Alternative-Photographic-Processes/dp/1418073725
https://www.amazon.com/gp/aw/d/1138297372/ref=mp_s_a_1_1?ie=UTF8&qid=1522425713&sr=8-1&pi=AC_SX236_SY340_QL65&keywords=way+beyond+monochrome&dpPl=1&dpID=51D8Mn6OKjL&ref=plSrch
(sorry for the messy link.. on mobile)