Top products from r/Greenhouses
We found 21 product mentions on r/Greenhouses. We ranked the 57 resulting products by number of redditors who mentioned them. Here are the top 20.
1. Bootstrap Farmer Spring Wire & Lock Channel - Greenhouse Spring Lock & U-Channel Bundle, 4 of Each, Greenhouse Plastic or Shade Cloth Attachment
Sentiment score: 0
Number of reviews: 2
High-quality, rust and maintenance-free Aluminum Alloy Lock Channel AND PVC coated Spring Wire. 6.5 ft. in length eachTightly secures poly film or shade cloth (up to 20 mil thick) to your greenhouse with minimal effortEasily attaches to frames, baseboards and hip boards. Will bend to the arch of you...
 Show Reddit reviews
2. Joyce Chen J51-0220 51-0220, Unlimited Scissor, Red, Pack-1
Sentiment score: 1
Number of reviews: 1
Unlimited scissor lives up to its name with a multitude of usesChrome/molybdenum/stainless-steel blades are sharp and preciseTorque engineering allows scissor to cut through chicken bones with easeComfortable, flexible handles designed for left- or right-hand usePatented design and excellent for kit...
 Show Reddit reviews
3. Inkbird C929A Smart Digital WiFi Temperature Controller for Aquarium Fish Tank Wireless Thermostat for Reptiles Terrarium
Sentiment score: 1
Number of reviews: 1
Equipped with 2 probes measure the temperature,double protection from overheating,peace in mind.WiFi & APP remote monitor & control, get alarms of high/low-temperature or errors from APP & deviceEasy to set up, plug and play, pre-wired and compatible with 110V heaters or fans.1200W maxAlarms if the ...
 Show Reddit reviews
4. Japanese Flower Scissors #M1065
Sentiment score: 1
Number of reviews: 1
6 1/2 inches longUse for trimming flower stocks and small branchesUsed for Ikebana and Ikenobo flower arrangingQuality iron scissorsMade in Japan
 Show Reddit reviews
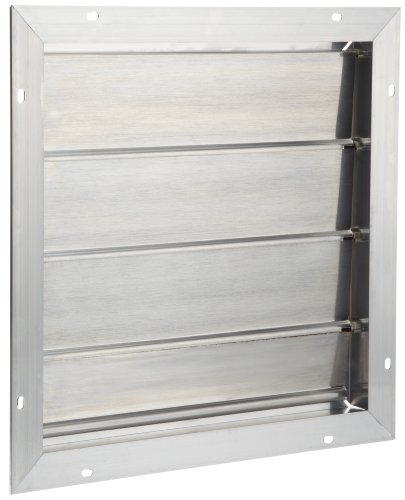
5. Broan 433 Automatic Shutter for 353 and 35316 Gable Mount Attic Ventilator
Sentiment score: 1
Number of reviews: 1
HIGH-QUALITY SHUTTERS: Automatic shutters for your Broan-NuTone 353 and 35316 models allow more air flow than conventional stationary attic louversAUTOMATIC: Shutters automatically open when fan is operating and close when the fan shuts off for hassle-free useDURABLE: Constructed of durable, counter...
 Show Reddit reviews
6. Espoma Organic Earth-Tone Insecticidal Soap - 24 oz Spray IS24,Brown/A
Sentiment score: 1
Number of reviews: 1
Controls pests such as aphids lace bugs mites grasshoppers scale insects earwigs whitefly and moreFor use on fruit and nut trees vegetables Ornamental and bedding plants Ornamental and shade treesMade from plant oils and contains no animal fatty acidsUsed indoors or outdoors
 Show Reddit reviews
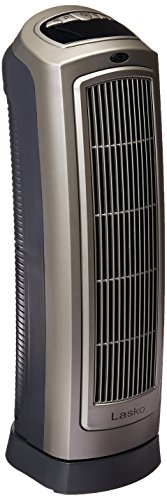
7. Lasko 755320 Ceramic Space Heater 8.5 L x 7.25 W x 23 H inches
Sentiment score: 0
Number of reviews: 1
2 Quiet Settings - including high heat and low heat plus an Auto setting make this electric space heater ideal for warming up an area in your home or home office. With widespread oscillation this heater distributes warm air throughout the roomAdjustable Thermostat - with digital display allows you t...
 Show Reddit reviews
8. JVCC DC-WGT-01 Double Coated Window Glazing Tape: 1/16 in. thick x 3/8 in. x 50 yds. (White)
Sentiment score: 1
Number of reviews: 1
Adhesive: solvent-based acrylicBacking/Carrier: closed cell cross-linked polyethylene foamRelease Liner: blue polyolefinCertifications: AAMA-certified testing and approvedThickness: 4 mils (liner)
 Show Reddit reviews
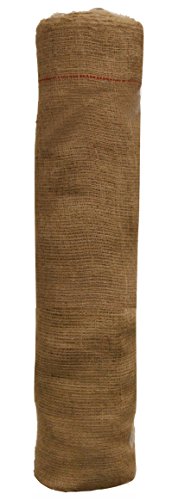
9. Easy Gardener 3103 3x150 Natural Burlap Weed Barrier Fabric, 3'X150', 3 ft X 150 ft Tan
Sentiment score: 1
Number of reviews: 1
100% natural burlap; Helps seeds germinate by holding in moisture and preventing wash-awayProtects plants from Windburn, freezing rain, snow and IceProtects shade sensitive plants from the sunIdeal for decorating and crafting; available in several lengthsBurlap for crafters, interior designers, wedd...
 Show Reddit reviews
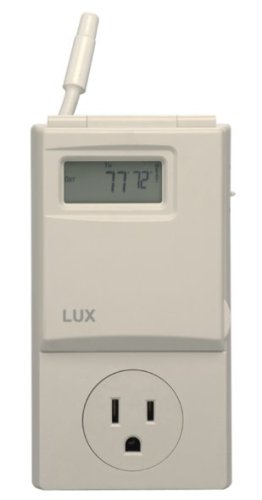
10. Lux WIN100 Automatic Heating & Cooling 5-2 Day Programmable Outlet Thermostat, Compatible with Portable A/C, Fans, and Space Heaters
Sentiment score: 1
Number of reviews: 1
PROGRAMMABLE: This 5-2 day thermostat allows you to program weekdays and weekends at different temperaturesEASY TO USE: Comes with easy to use touch keys and displays the current temperature for easy referenceINSTALLATION: No installation or wiring, easy to plug in and select the desired heatCOMPATI...
 Show Reddit reviews
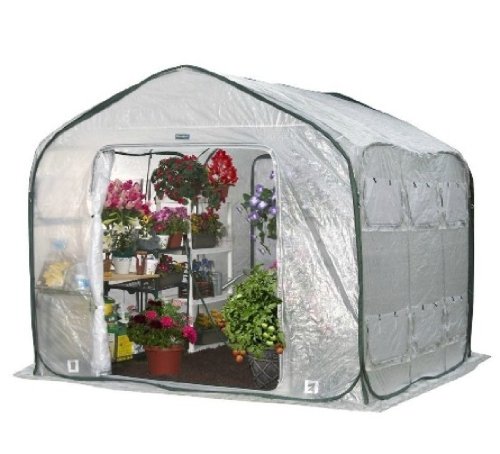
11. Flower House FHFH700 FarmHouse Walk-In Greenhouse
Sentiment score: 0
Number of reviews: 1
Start your garden early with this portable Self-Watering GreenhouseUnique design allows you to zip multiple greenhouses togetherCreate multiple temperature environments if desiredQuick and Easy Set up on Soil or Hard Surfaces in minutesProtects your plants and extends your growing season.Protects yo...
 Show Reddit reviews
12. Building Your Own Greenhouse (Greenhouse Basics)
Sentiment score: 1
Number of reviews: 1
Used Book in Good Condition
 Show Reddit reviews
13. Patton PUH680-N-U Milk-House Utility Heater
Sentiment score: 0
Number of reviews: 1
Milk-house utility heater with durable design and rugged steel housingQuiet, fan-forced convection coil heat; automatic thermostatLow and high settings; front guards and auto shut-off if tipped overGreat for heating open areas like the basement, garage, or workroom1000 & 1500 Watt heat settings
 Show Reddit reviews
15. Four-Season Harvest: Organic Vegetables from Your Home Garden All Year Long, 2nd Edition
Sentiment score: 1
Number of reviews: 1
Ships from Vermont
 Show Reddit reviews
16. Ball RedBook, Volume 2: Crop Production: 17th edition
Sentiment score: 0
Number of reviews: 1
 Show Reddit reviews
17. Grow a Little Fruit Tree: Simple Pruning Techniques for Small-Space, Easy-Harvest Fruit Trees
Sentiment score: 1
Number of reviews: 1
 Show Reddit reviews
18. The Greenhouse and Hoophouse Grower's Handbook: Organic Vegetable Production Using Protected Culture
Sentiment score: 0
Number of reviews: 1
Ships from Vermont
 Show Reddit reviews
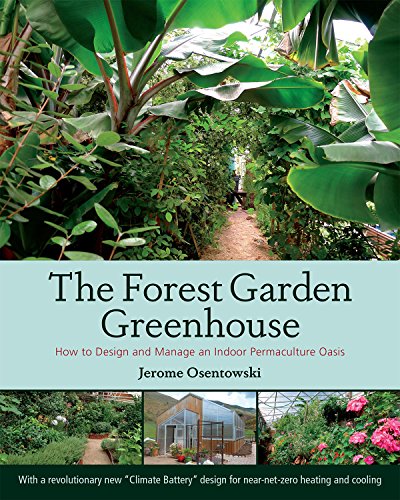

Full Cost break down and steps taken
Supplies (Total = $4153)
Planning steps
Construction steps
Future plans
Knowledge resources
Depends on how much you want to spend but a simple and easy route is a electric heater with a fan hooked to a thermostats like this
https://www.amazon.com/Lux-Automatic-Programmable-Thermostat-Compatible/dp/B000E7NYY8
Check all the panels to see how well they are sealed and consider heat mates for under the pots to keep the roots from getting to cold. You can also put down normal mats to insulate the cold from the brick floor.
https://www.amazon.com/Seedling-Hydroponic-Waterproof-Germination-Propagation/dp/B073RC58JN/ref=asc_df_B073RC58JN/?tag=hyprod-20&linkCode=df0&hvadid=216531753338&hvpos=1o2&hvnetw=g&hvrand=5024264790334445552&hvpone=&hvptwo=&hvqmt=&hvdev=m&hvdvcmdl=&hvlocint=&hvlocphy=1014966&hvtargid=pla-350506522936&psc=1
You might want to add a small second fan just to make sure you have a good circulation of air moving and don’t get any cold or hot spots.
Hi, your gh is just like one of my first. Here is what worked for me and is still working but slightly modified with my 16 foot gh.
Considering where you are, passive solar heating is a must for pots that will be on the ground. Easy to make .. just take 2 ltr bottles, paint matte black and fill with water. Lay them on their sides and put pots on top of them.
Next get a forced fan milkhouse heater, portable thermostat and either a small box fan or oscillating fan. Here is a link for the thermostat:
Portable Thermostat
Make sure you put the thermostat on the ground. I set mine to start the heater when the temperature got below 45°. The fan will circulate the air - keep the fan on 24-7.
Here is another link to the set up and also how I used the bottles for passive solar heating:
http://www.nerii.org/ghheat.jpg
Be advised that you are going to have an algae problem if you use the bubble wrap.
thanks, very much appreciated. If you don't mind taking a look, does something like this look correct so far to wire this up to the home outlet and remote access?
Greenhouse motor ,will need to run two of these
Power supply should probably be double the amp to run two of them?
LED Power Supply Adapter 24V 10A - 240W AC/DC Power Adapter Transformer
DPDT relay:
10 amp DPDT relay
wifi control:
stinkbird temperature control wifi outlet ( I already own this)
My assumption
toggling the wifi outlet on/off (by temperature or my phone app ) will flip the polarity at the relay(motor goes up or down)
I'm unsure how the wifi outlet connects to the relay, can you just wire an appliance plug directly to the relay? The wifi outlet part would then not be behind any sort of power supply/converter if that makes sense.
Also any recommendations on where/how to properly shop this hardware, for example maybe this "LED power supply" might not be exactly right.
thanks, don't mean to hit you up with a huge message. I'm realizing now this is more an electronics topic.
I just took a look at your post history and it looks like you are in Newfoundland, CA?
I think your best bet is leafy greens. The leaf arrives before flowers, fruits and seeds, so is a safer option than most. Many greens will grow while there is enough sun and then stop, but will not die in a greenhouse and so can still be harvested in December and January.
Here's a Mother Earth News article on winter hoophouse crops. If you are actually providing some supplemental heat you are way ahead of the game. If you've got twenty bucks to spare or have a good library, get a hold of Four Season Harvest by Eliot Coleman—a huge resource for winter growing.
You should be able to spot treat aphids with an insecticidal soap. Something like this (no affiliation with the company).
As with any new product always read the instructions completely but the soaps are pretty easy to use and you don't need to buy a lot of it.
here’s a couple of great links on amazon…
http://www.amazon.com/JAPAN-Bonsai-Tool-TinyGreen-Professional/dp/B00MGFB4Z2/ref=sr_1_cc_5?s=aps&ie=UTF8&qid=1448936379&sr=1-5-catcorr&keywords=japanese+flower+shears
heavier duty ones: http://www.amazon.com/Unknown-M1065-Japanese-Flower-Scissors/dp/B001H1A2OK/ref=sr_1_1?s=lawn-garden&ie=UTF8&qid=1448936417&sr=1-1&keywords=japanese+flower+shears&refinements=p_72%3A2661618011
And here’s a link to a website with the Tajika brand. Probably much better quality than the ones on amazon. http://shop.nalatanalata.com/collections/tajika
Hey OP, I'd also suggest you look at the book, "Grow a Little Fruit Tree". It's a super handy book and it shows you how to keep fruit trees of any variety really short! :) If you want to see any pages from the inside lemme know and I can snap some pictures for you when I get home tonight.
When I worked in a garden shop, we used Joyce Chen scissors to prune small plants. Made in Japan, lifetime warranty, dishwasher safe, and available in many supermarkets.
They cut very easily and cleanly. I enjoyed using them so much that I bought myself a couple pairs (after my boyfriend stole my first pair). The only thing I don't like is that they lack the spring action that pruners have, which makes them a bit tiring after repeated use; but for fine control, it's better to not have a spring, in my opinion.
Much like a boat, or an airplane, the original purchase price is only the beginning of the expenses. You have a lot more research ahead of you. Depending on where you plan on going with this, I'd suggest either Building Your Own Greenhouse, or So You Want To Start a Nursery.
I toured the author's greenhouse in the high mountains of CO. Pretty crazy to see bananas growing in a place that gets many feet of snow in the winter. https://www.amazon.com/Forest-Garden-Greenhouse-Design-Permaculture/dp/1603584269
I think it's called Spring Wire and Lock Channel. I have catalogs from a couple places in my area and I think their prices are much cheaper, but here's an Amazon example: https://www.amazon.com/dp/B01BC4HAPA/ref=cm_sw_r_cp_awdb_t1_-N2IAbF3219DN
the ball red books are not bad at all.
http://www.amazon.com/Ball-RedBook-Volume-Crop-Production/dp/1883052351
This is greenhouse.
This is heater.
well... if its getting cold in the porch it will get cold in there. that cover doesn't really insulate.
you should probably just get a small heater and heat the porch?
Buy this book.
https://www.amazon.com/Greenhouse-Hoophouse-Growers-Handbook-Production/dp/1603586377/ref=mp_s_a_1_1?
http://www.amazon.com/The-Winter-Harvest-Handbook-Greenhouses/dp/1603580816/ref=sr_1_4?ie=UTF8&qid=1376327754&sr=8-4&keywords=eliot+coleman
Wiggle wire and locking channel. http://www.amazon.com/Wiggle-Channel-Greenhouse-Spring-U-Channel/dp/B01BC4HAPA/ref=sr_1_3?ie=UTF8&qid=1458595181&sr=8-3&keywords=wiggle+wire
Screw the locking channel to a 2x4 or other piece of wood then wiggle wire your poly film into the locking channel.