(Part 2) Top products from r/PrintrBot
We found 21 product mentions on r/PrintrBot. We ranked the 63 resulting products by number of redditors who mentioned them. Here are the products ranked 21-40. You can also go back to the previous section.
21. 10 Pin to 6 Pin Adapter Board M/F for AVRISP USBASP STK500 Black Blue
Sentiment score: 1
Number of reviews: 1
Material£º PlasticColor £ºBlack, BlueNet Weight 3g
 Show Reddit reviews
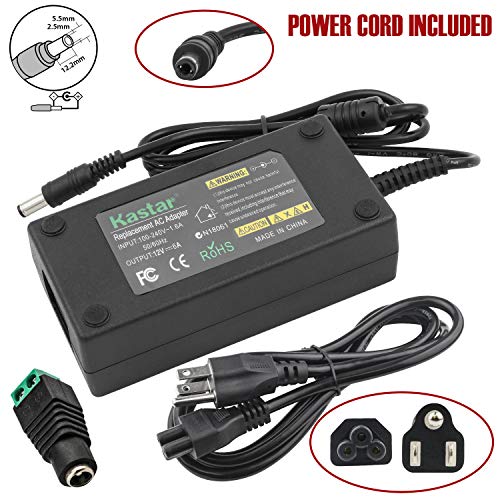
22. Kastar AC Adapter, Power Supply 12V 6A 72W, Tip Size 5.52.5mm for LCD Monitor, LCD TV, 5050 3528 5630 LED Strip Light, Tape Light, Rope Light, Wireless Router, ADSL Cats, Security Camera
Sentiment score: 1
Number of reviews: 1
Kastar AC Adapter 100% Guarantee to work as original LCD adapter, manufactured at the highest quality standards for ultimate reliability.Power Input: AC110-240V Worldwide Input Voltage, Please verify carefully that the DC Output (12V 6A) and connector Tip size (in the pictures) match your original a...
 Show Reddit reviews
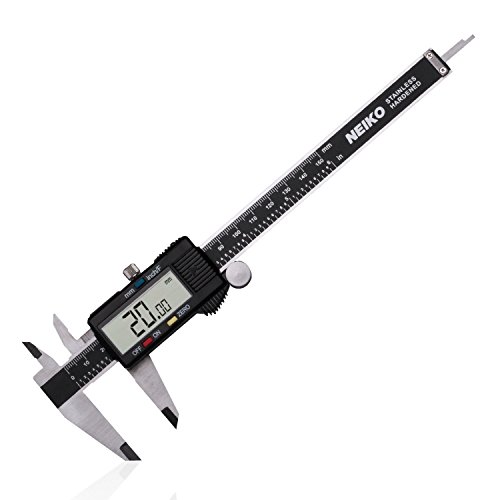
23. Neiko 01407A Electronic Digital Caliper Stainless Steel Body with Large LCD Screen | 0 - 6 Inches | Inch/Fractions/Millimeter Conversion,Silver/Black
Sentiment score: 1
Number of reviews: 1
THREE MEASURING MODES: one button quick change between three measuring modes: inch, fractions, millimeterPRECISION | ACCURACY: Measurement Range: 0 - 6” and 0 - 150mm; Resolution: 0.0005” / 1/128” / 0.01mm; Accuracy: 0.001” / 0.02mmSTAINLESS STEEL: finely polished stainless steel frame with ...
 Show Reddit reviews
24. Mommy's Helper Door Knob Safety Cover
Sentiment score: 0
Number of reviews: 1
Deters curious children from entering rooms or closetsFits all standard door knobsLock Guard covers the door handle lock protecting against accidental lock outsContains 2 door knob covers. Age recommendation: 18 monthsEasy to install
 Show Reddit reviews
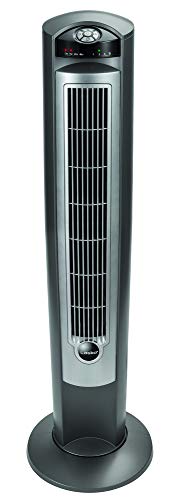
25. Lasko Portable Electric 42" Oscillating Tower Fan with Nighttime Setting, Timer and Remote Control for Indoor, Bedroom and Home Office Use, Silver T42951
Sentiment score: 0
Number of reviews: 1
BEAT THE HEAT – Powered by 3 speed settings H/M/L, fan is perfectly sized to aim over a high bed and powerful enough to blow across the room. If you live in the heat with no central air, and window AC units do a poor job of moving air around your whole house or apartment, this fan creates excellen...
 Show Reddit reviews
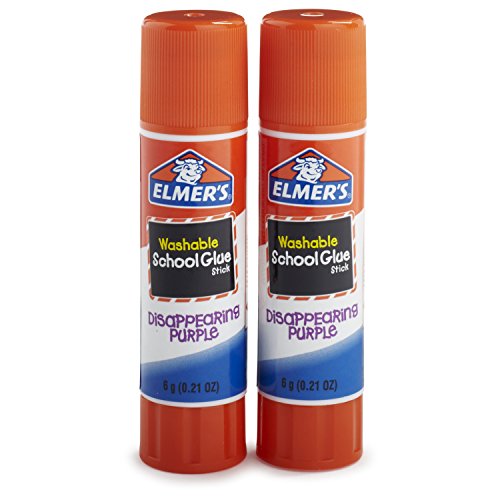
26. Elmer's Disappearing Purple School Glue Sticks, 0.21 oz, Pack of 2 (E522)
Sentiment score: 0
Number of reviews: 1
Goes on purple and dries clear so you can see where you are gluingSmooth for easy applicationAcid free, photo safe, non toxic and washablePack of 2 glue sticks
 Show Reddit reviews
27. THERMWELL PRODUCTS FV15, 2" x 1/8" x 15', Silver
Sentiment score: 0
Number of reviews: 1
Self adhesive foil and foam tapeInsulates hot and cold pipesMade in United states2-Inch X 1/8-Inch X 15-Feet Foam And Foil Pipe Insulation Tape WrapSelf-adhesive Insulation TapeOne Easy Step Way To Insulate Both Hot, And Cold PipesOn Hot Pipes, It Helps Stop Wasteful Heat LossOn Cold Pipes It Preven...
 Show Reddit reviews
28. Aqua Net Extra Super Hold Professional Hair Spray Unscented 11 oz
Sentiment score: 0
Number of reviews: 1
Quality you can trust from Lorna MeadGreat Value!Extra Super Hold
 Show Reddit reviews
29. Royal Purple 01312 NLGI No. 2 High Performance Multi-Purpose Synthetic Ultra Performance Grease - 14.1oz.
Sentiment score: -1
Number of reviews: 1
Flash point: 221.00 degrees_celsius
 Show Reddit reviews
30. Heatshield Products 210042 HP Fire Armor Sleeve Black 1/2" ID x 3' Heat Shield Fire Sleeve
Sentiment score: 0
Number of reviews: 1
Continuous operating temperature of 450 degree Fahrenheit, 700 degree Fahrenheit intermittentSilicone layer can be cleaned and protects against abrasionHelps to prevent vapor lock, protects wires from melting
 Show Reddit reviews
31. Edimax EW-7811Un 150Mbps 11n Wi-Fi USB Adapter, Nano Size Lets You Plug it and Forget it, Ideal for Raspberry Pi / Pi2, Supports Windows, Mac OS, Linux (Black/Gold)
Sentiment score: 1
Number of reviews: 1
Supports 150 Mbps 802.11n Wireless data rate - the latest wireless standard. Permits users to have the farthest range with the widest coverage. (Up to 6 times the speed and 3 times the coverage of 802.11b.).Power Saving designed to support smart transmit power control and auto-idle state adjustmentS...
 Show Reddit reviews
32. Black Plastic Drag Chain Cable Carrier 10 x 15mm for CNC Router Mill
Sentiment score: 1
Number of reviews: 1
 Show Reddit reviews
33. 8mm Shaft 330mm=12.992 Hardened Rod Linear Motion
Sentiment score: 0
Number of reviews: 1
Round steel shaft for use with linear support blocks and closed type slide units in linear motion applicationsChrome plated for corrosion resistanceCase hardened for wear resistancePrecision ground for consistent ball bushing radial clearanceShaft diameter and length specified for accurate fit
 Show Reddit reviews
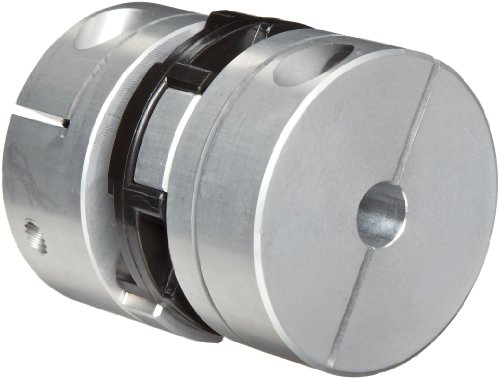
34. Huco 514H13.2222.Z Size 13 Oldham Coupling, Aluminum, Inch, 0.236" Bore A, 0.236" Bore B, 0.51" OD, 0.63" Length
Sentiment score: 1
Number of reviews: 1
For use in parallel misalignment scenarios requiring zero backlashAluminum alloy hubs for corrosion resistance and use in lightweight applicationsFlexible plastic torque disc for durability and low frictionTorque disc slides between the two axes of the hubs to accommodate misalignmentOperating tempe...
 Show Reddit reviews
35. Uxcell LJ18A3-8-Z/AX NPN NC Tubular Inductive Proximity Sensor Approach Switch, DC 6V - 36V/300 mA, 8 mm
Sentiment score: 0
Number of reviews: 1
Product Name: Inductive Proximity Switch. Model: LJ18A3-8-Z/AX. Theory: Inductive SensorWire Type:3 Wire Type (Black, Brown, Blue). Switch Appearance Type: Cylinder TypeOutput Type: NPN NC(Normal Close). Supply Voltage: DC 6-36V.Current Output: 300mADiameter of Head: 18mm. Detecting Distance: 8mm. R...
 Show Reddit reviews
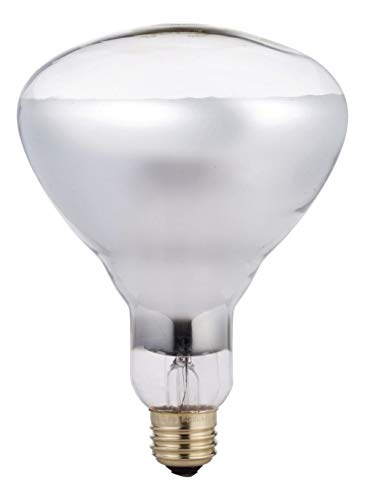
36. Phillips BR40 Heat Lamp Lightbulb, 250W, Infrared
Sentiment score: 1
Number of reviews: 1
Energy efficient: Philips Indoor BR40 Flood Light Bulbs have an estimated annual energy cost of $7.83 (based on an average usage rate of 3 hours per day)Eco friendly: These Philips BR40 light bulbs use recycled glass and packaging material, reducing environmental impactVersatility: Providing comfort...
 Show Reddit reviews
37. SUPERNIGHT 12V 30A DC Power Supply Driver,360W Universal Regulated Switching Converter AC 110V/220V Transformer Adapter for 3D Printer,CCTV,Radio,Computer Project,Industrial Automation,LED Strip
Sentiment score: 0
Number of reviews: 1
Input: 100V-240V, 50/60Hz; Output Voltage:12V DC, Output Current: 0 ~ 30A,Output Voltage adjustable range: ±10%High quality switching power supply, stable 12V output, protect your electronic products from destructionSmart chip provide overcharge/ overload/ short-circuit/ over-heat protection, Auto-...
 Show Reddit reviews
38. 3M 468MP Adhesive Transfer Tape, 1" Width x 5yd Length (1 roll)
Sentiment score: 0
Number of reviews: 1
High speed processing of parts in the medical, telecommunications and electronics markets (medical components, durable labels, flexible circuits).Bonding graphic overlays for membrane switches and for bonding the complete switch to the equipment surface.Bonding metal nameplates and rating plates in ...
 Show Reddit reviews
39. 3M 468MP Adhesive Transfer Tape, 12" squares (pack of 6)
Sentiment score: 0
Number of reviews: 1
High speed processing of parts in the medical, telecommunications and electronics markets (medical components, durable labels, flexible circuits).Bonding graphic overlays for membrane switches and for bonding the complete switch to the equipment surface.Bonding metal nameplates and rating plates in ...
Show Reddit reviews40. Woodstock PowerStrike Spectra Hollow Core Braided Line, 200-Pounds Test (50-Pounds Dia.) 100 Yards, White
Sentiment score: 0
Number of reviews: 1
Better than standard Spectra when using Loop to Loop or Mono insert/crimp set ups.Braided Spectra Line with virtually no stretch.Resin impregnated, gives better knot strength, and will not delaminate.Spectra gives you the high strength with a narrow diameter line.
 Show Reddit reviews
First off, using an ATX power supply is not a mod. That is the original intended power supply for the Printrboard. There is a socket for the six-pin video card power plug right on the board. In fact, the barrel socket power port is just a jumper to that socket and must be unplugged to upgrade to an ATX power supply.
Some ATX power supplies do require a short bit of wire running from the green wire on the large connector to any black wire on the connector before they will turn on, but that isn't scary, is completely reversible, and isn't even required on all power supplies. You can buy a premade jumper for precisely that purpose. Some ATX power supplies even include the jumper connector.
Now to answer your original question: You are looking for a 12 volt power supply with an ampere rating of 6 amps or more and a 2.1mm X 5.5mm, center positive, barrel style plug. Something like this one should work for you.
Let me be clear in why I prefer the ATX power supply. The ATX power supply is SAFER than the smaller barrel plug power supply. If I was going to run my Printrbot and leave the house for a while, I would feel much better using the ATX power supply. For fire safety, the ATX power supply is the better choice. Sure, the wiring harness looks a bit like an octopus, but a few zip-ties or velcro wraps will tame that beast.
The 10-pin AVR ISP connector is similar to the 6-pin, it just has a lot more ground pins. You'll need to make/buy an adapter to convert the connector down to a 6 pin.
Here's an instructable: http://www.instructables.com/id/Programming-adapter-from-10-pin-to-6-pin-for-AVRs/
Or for US $5 you can buy one from eBay: http://www.ebay.com/itm/USBASP-USBISP-AVR-Programmer-USB-10-Pin-Convert-to-Standard-6Pin-Adapter-Board-/180980285082 This also includes another programmer
Amazon Prime: http://www.amazon.com/Adapter-Board-AVRISP-USBASP-STK500/dp/B00FHHYJ7G
Lots of options to get down to 6 pins.
I don't know what bootloader the AVR on the printerboard uses, but Printrbot does have bootloading instructions on their web site. You may be able to discern from that site what bootloader is on your board. Printrbot support also seems to be quite good in my experience, you may be able to just email them asking for instructions on how to load the bootloader back onto the board.
Why do you think the bootloader is corrupt? A well built bootloader is pretty robust.
Nope. It was easy to install and its really easy to print from. If your comfy following some simple instructions using the command line you'll be fine. I still slice with Slic3r, I just use the stand alone program then upload the gcode to Octoprint.
By default the Octoprint package from Printrbot expects you to plug in a Ethernet cable so I would recommend getting a Edimax Wireless USB Adapter so the whole thing is actually wireless. The process for setting up this USB adapter with the Rasp Pi and Octoprint is pretty well documented. This way the only two cables you have are one USB for power to the Rasp Pi, and another USB going to the back of the Printrbot.
I have a Printrbot Simple Metal, and I replaced its crappier cable sleeve with a cable chain like all other high-end 3D printers:
http://www.amazon.com/Black-Plastic-Chain-Carrier-Router/dp/B00880AVL2. The Play's sleeve is really nice quality, and all you have to do is route a stiff wire from under the base and up through the sleeve.
I've posted this before.. install a heat lamp:
http://www.amazon.com/Phillips-416743-250-Watt-Clear-Flood/dp/B0066L0ZRU/ref=sr_1_14?ie=UTF8&qid=1414695390&sr=8-14&keywords=heat+lamp
Just put it right on your print bed, it will keep the ABS toasty. You still have to make sure there are no drafts, but its cheaper and easier than trying to build an enclosure.
I've got a Jr where I've got some intermittent wobble issues. Tried unscrewing my lower stepper motor with some success but I'm fairly certain this should help a lot. I got this guy http://www.amazon.com/gp/product/B004HW7190/ref=oh_details_o01_s00_i00?ie=UTF8&psc=1
I dont have experience with printrbot, but i used tom's guide from youtube to do my calibrating. Just watch his video.
https://www.youtube.com/watch?v=YUPfBJz3I6Y
Depends on the software for real time changes. I use octoprint. I know repetier host is really good also. If you do that, just set it as 100 in the slicer, then adjust in real time so you know what your setting should be always.
If you dont have a pair of calipers get these to measure the outside diameter of your filament, that may be why you have to adjust your extrusion. if the diameter is bigger, then it is shoving for plastic in thatn it really should.
http://www.amazon.com/Neiko-01407A-Electronic-Digital-Extra-Large/dp/B000GSLKIW/ref=sr_1_1?ie=UTF8&qid=1451996465&sr=8-1&keywords=caliper
I am a toolermaker by trade, and i actually use these everyday in the shop. I stopped using my expensive ones and just use these now.
When in the same predicament as you, I went ahead and just made my own new bed:
https://www.dropbox.com/s/e9mnlufak09vdc9/Bed_Frame_-_Left.stl
https://www.dropbox.com/s/e9mnlufak09vdc9/Bed_Frame_-_Left.stl
https://www.midweststeelsupply.com/store/castaluminumplate
(1/4" x 13.25" x 6.5")
https://www.amazon.com/gp/product/B0045DUX5A
All told, that's ~$50 for pretty much exactly the same thing. All you need to be able to do is drill holes in the corners of the plate.
What is your fan setup for cooling the print as it is printing?
I found I had a lot of problems without having a fan blowing on the print as it's printing. I'm currently printing Hatchbox PLA and Makerbot PLA at 195-200c, 60c bed at 20-30mm/s and don't have any more curling issues since I put a full size blower fan in front of my printer. I also use painters tape and alcohol for bed adhesion.
https://www.amazon.com/gp/aw/d/B000RL3UJA/ref=mp_s_a_1_3?ie=UTF8&qid=1504721952&sr=8-3&pi=AC_SX236_SY340_QL65&keywords=tower+fan&dpPl=1&dpID=31nkUhBj7fL&ref=plSrch
This is the fan I have setup in front of my printer. I start it once I've got the first layer down.
Don't use safe release. You want plain jane original 2090 blue 3m.
https://smile.amazon.com/ScotchBlue-Painters-Multi-Use-1-88-Inch-60-Yard/dp/B000A3DQGW/
You might get the safe release to stick with a layer of AquaNet ultra/extra hold no scent
https://smile.amazon.com/Aqua-Net-Unscented-Aerosol-Spray-11/dp/B002K33AFM
Or with some purple no show glue stick
https://smile.amazon.com/Elmers-Disappearing-Purple-School-E522/dp/B00178KMUC
But really, you'll want to eventually get a heated bed. Yes, this stuff can work, but you'll spend more on it over time than if you upgraded to a heated bed.
-----
What filament are you using, brand type and possibly color? Got any pictures? What are your print settings?
I saw somewhere else that people recommend using this one from Amazon.
Personally, it's still a big metal box, just in a different shape. I instead modified my PSU so that it only has the six 12v wires coming out of the box, plus the green wire jumpered to negative inside the box to allow it to run. I printed a (non UL-listed) flange for it (but then had to hack the top part a bit to get the big fan to work).
I got this on someone else's recommendation http://www.amazon.com/gp/product/B001AZYTGA/ref=oh_aui_detailpage_o02_s00?ie=UTF8&psc=1
It improved my temps by about 5C, but that's it. Will have to experiment with other options. This tape is as thick as you can go without interfering with the linear bearings.
Get this - http://www.amazon.com/Polyetherimide-Natural-Standard-Tolerance-Thickness/dp/B00CPRDDLY/ref=sr_1_1?ie=UTF8&qid=1421210514&sr=8-1&keywords=pei+sheet
Then get this - http://www.amazon.com/gp/product/B007Y7D5NQ/ref=oh_aui_search_detailpage?ie=UTF8&psc=1
Cut the sheet to the size of the bed. Put the glue on the sheet with the old windex+credit card deal. Put the sheet on the bed the same way.
Adjust your Z height to account for the thickness difference.
Never ever worry about bed adhesion again, ever.
http://www.amazon.com/gp/product/B005HKXKOG/ref=oh_aui_detailpage_o06_s00?ie=UTF8&psc=1
This is the NC version, which I recommend over NO ones.
I haven't looked at upgrading to belts yet, but I did have to replace the lines once. In case you're not quite ready for a large upgrade (or need to it to just work long enough to print the parts for the belt upgrade) here's the type of line to buy: http://www.amazon.com/gp/product/B0084OR2T6
I replaced mine with "Heatshield Products 210042 HP Fire Armor Sleeve Black 1/2" ID x 3' Heat Shield Fire Sleeve" http://www.amazon.com/gp/product/B002UPR1V4?psc=1&redirect=true&ref_=oh_aui_detailpage_o09_s00 from amazon. Cheaper than Printrbot and it's black. It works well and you get plenty extra.
In used this PEI sheet: https://amzn.com/B0013HKZTA
And this adhesive: https://amzn.com/B007Y7CZDM
Try to get the adhesive down as smoothly and evenly as possible. No overlaps or gaps if possible. I scored and snapped the PEI to match the build plate, then applied the tape to the PEI, then applied that to the bed.
I'm currently waiting on my simple kit, but one thing that I have waiting to try to print is a bracket or coupling for a wire shelf. (you can see them on the left in the pic.
Edit: I also have small kids, so I need a pretty much endless supply of door knob covers, outlet covers, cupboard latches and so on, as these things break, get lost, and need to be replaced constantly.
I have (less of a problem now) sticky bearing on my bed. I took the rod out and repacked the bearing with the stuff below.
What shocked me more about this goop was the harmonic I was getting on my Y axis as the belt was rubbing against the plate. I lubed up the side of the bet and that noise/harmonic went away. I had tried everything including constant tensioning of the belt and bolts of the stepper. It was seriously driving me nuts (and the wife) due to the noise. Now whisper quiet..
http://www.amazon.com/Royal-Purple-Performance-Multi-Purpose-Synthetic/dp/B002KCWWFC