Top products from r/RBA
We found 34 product mentions on r/RBA. We ranked the 75 resulting products by number of redditors who mentioned them. Here are the top 20.
1. ORGANIC Cotton Makeup Puff, Medium
Sentiment score: 3
Number of reviews: 4
This puff is made by cottons which use the cotton grown in the farmlandBleaching processing is not carried out but it is the tone of unprocessed cotton as it is.Which is not using agricultural chemicals and a chemical fertilizer.
 Show Reddit reviews
2. Artistic Wire JTECONWIN1 Coiling Gizmo(R) Deluxe Winder for Jewelry Making,Silver
Sentiment score: 2
Number of reviews: 3
Includes 5 crank-rods, instructions and a built-in table baseSmaller rods can be used to make tiny beads, for a more delicate design lookRods can also be used to make your own jump ringsProduct Dimension: 1.25"L x 3.5"W x 10.4"H
 Show Reddit reviews
3. The Beadsmith Round-Nose Pliers for Bending and Looping Wires, Jewelry Making Supplies
Sentiment score: 1
Number of reviews: 2
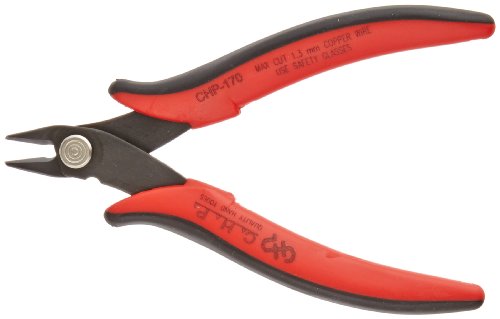
HEAVY-DUTY: This tool works with bendable metal wire, allowing you to create beautiful jewelry.CONE-SHAPED NOSE: The smooth, cone-shaped jaws can easily make different-sized bends and loops.CRAFT & JEWEL ACCESSORY: These pliers are great for jewelry kits for professional or hobby crafters.CONSISTENT...
 Show Reddit reviews
4. IRWIN QUICK-GRIP Bar Clamp, One-Handed, Mini, 6-Inch (1964742)
Sentiment score: 0
Number of reviews: 2
Non-marring pads grip firmly and protect workpiecesOne-handed Quick-Release trigger releases the clamp instantlyReinforced resin body with a hardened steel bar to prevent flexing and bending140 lbs. of clamping forceIdeal for clamping smaller workpieces and working in confined areas
 Show Reddit reviews
5. Micro Cutter
Sentiment score: 2
Number of reviews: 2
Flush-cut micro soft-wire cutter has 8mm long jaw with angled head for flush-cutting applications on up to 16 gauge (1.3mm) copper and soft wire21-degree2.5mm heat-treated carbon steel construction provides durability and long lifePrecision-ground holes and surfaces provide smooth movement, and spri...
 Show Reddit reviews
6. Loos Stainless Steel 316 Wire Rope, 7x7 Strand Core, 0.094" Bare OD, 25' Length, 700 lbs Breaking Strength
Sentiment score: 1
Number of reviews: 2
Stainless steel 316 is more corrosion-resistant than 304, due to the addition of molybdenum in the alloyStainless steel 316 is also called marine grade stainless steel because of its chloride corrosion resistance7x7 strand core has seven strands of wire rope with seven wires in each strand, formed h...
 Show Reddit reviews
7. Glycerin Vegetable - 1 Quart (43 oz.) - Non GMO - Sustainable Palm Based - USP - KOSHER - PURE - Pharmaceutical Grade - safety sealed HDPE container with resealable cap
Sentiment score: 2
Number of reviews: 2
Glycerin Vegetable KOSHER USP PHARMACEUTICAL GRADE - NON-GMO - 1 Quart (volume 32 fluid ounces, net weight 43 ounces)100% Palm Based - RSPO (Sustainable)Pharmaceutical GradeNon-GMO99.7%+ Pure (Certificate available upon request)
 Show Reddit reviews
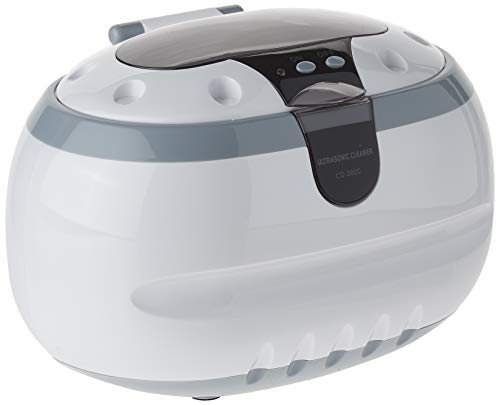
8. Sonic Wave CD-2800 Ultrasonic Jewelry & Eyeglass Cleaner (White/Gray)(package may vary)
Sentiment score: 0
Number of reviews: 2
Powerful unit that gently cleans in minutes without damaging delicate items42,000 cycle ultrasonic energy wave feature cleans dirt, dust and grime awayOne 3-min working cycle60 watts and 42,000Hz energy wave of cleaningPower Supply AC 100-120V 50/60 HZ
 Show Reddit reviews
9. Halcyon T. Premium 1, 1.5, 2, 2.5, and 3mm Wire Coil Winder/Jig
Sentiment score: 2
Number of reviews: 2
Micro coiler that creates perfectly tight and uniform coils.Creates 1mm, 1.5mm, 2mm, 2.5mm, and 3mm coils.Extremely easy to use: three simple steps creates coils in seconds.Size measurements (mm) etched onto jigs for convenience.Contents: Halcyon T. Coil Winder/Jig Set, mini screwdriver, and user ...
 Show Reddit reviews
10. Class 4.8 Steel Machine Screw, Zinc Plated Finish, Pan Head, Phillips Drive, Meets DIN 7985, 4mm Length, M2-0.4 Metric Coarse Threads (Pack of 100)
Sentiment score: 2
Number of reviews: 2
Class 4.8 steel is often used in applications where toughness is the primary considerationZinc plating resists corrosion resistance and has a reflective appearancePhillips drive has an x-shaped slot that accepts a Phillips driver and is designed to prevent over-tighteningPan head has a flat top and ...
 Show Reddit reviews
11. Ivation IVUC96W Digital Ultrasonic Cleaner with Removable 17oz S/S Wide Tank, Adjustable Power, Jewelry Basket, Watch & Earring Holder, CD DVD Stand, 5 Individual Cleaning Cycles, Auto-Shut-off Silver
Sentiment score: 1
Number of reviews: 2
Simply fill the tank with regular tap water and get professional cleaning results in minutes. Clean all your fine jewelry, watches, eyeglasses, contacts, lenses, filters, CD’s, DVD’s, dentures, shaver heads, retainers, ornaments or any delicate household items with this Professional Ultrasonic C...
 Show Reddit reviews
12. Stainless Steel Machine Screw, Plain Finish, Pan Head, Phillips Drive, 4mm Length, M2-0.4 Threads (Pack of 100)
Sentiment score: 0
Number of reviews: 1
Stainless steel provides corrosion resistancePhillips drive has an x-shaped slot that accepts a Phillips driver and is designed to prevent over-tighteningPan head has a flat top and short vertical sides with a rounded top edgePlain surface has no finish or coating
 Show Reddit reviews
13. DIY hand tool set 8 in 1 kit Keychain Screwdriver+Diagonal pliers+Tweezers+Folding scissors+Small stainless steel brush+Coil jig with carrying case for home DIY Repairs
Sentiment score: 0
Number of reviews: 1
【8 in 1 DIY tool set】:3 in 1 Keychain Screwdriver+Black Diagonal pliers+Folding scissors+Ceramic tweezers+Small stainless steel brush+Coil jig+Curved Tweezers+T shaped screwdriver【Pretty affordable DIY Tool Kit】perfect for electric repair, home DIY repair, and is the most needed tools for ...
 Show Reddit reviews
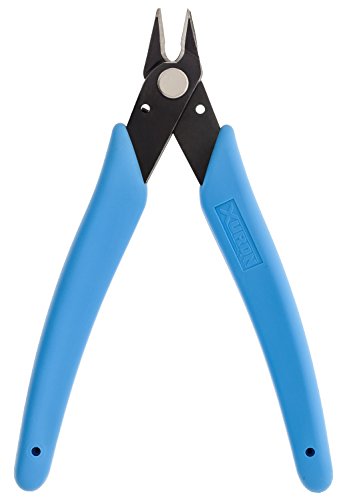
14. Xuron - Xuron - LX Micro-Shear Flush Cutter - LX
Sentiment score: 1
Number of reviews: 1
Type: Micro-ShearStyle: Full-FlushCapacity: 16 AWGOverall Length (Inch): 4-7/8Blister Pack With Generic Card
 Show Reddit reviews
15. Xuron - Xuron - 170-II Micro-Shear Flush Cutter - 170-II
Sentiment score: 0
Number of reviews: 1
Type: Micro-ShearStyle: FlushCapacity: 18 AWGOverall Length (Inch): 5-7/64Blister Pack With Generic Card
 Show Reddit reviews
16. M1.5x5 Buna-N O-Ring, 70A Durometer, Black, 5mm ID, 8mm OD, 1.5mm Width (Pack of 100)
Sentiment score: 1
Number of reviews: 1
Made of Buna-nitrile for use with a variety of fluids and hydrocarbonsCan be used across a wide temperature range from -30 degrees F (-34 degrees C) to 250 degrees F (121 degrees C)Round in cross-section to provide a seal between cylindrical overlapping surfacesDurometer (hardness) of 70A for resist...
 Show Reddit reviews
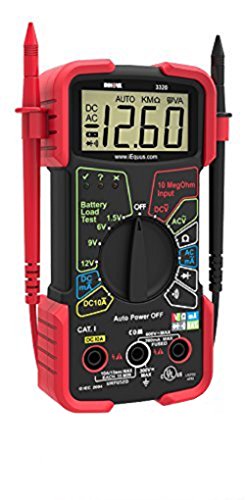
17. INNOVA 3320 Auto-Ranging Digital Multimeter
Sentiment score: 1
Number of reviews: 1
UL certified product designed to safely and accurately troubleshoot a variety of automotive and household electrical problemsAuto-ranging scales eliminate the need to dial in the correct range when making electronic measurementsFeatures large digital display and color coded LED's for battery quick c...
 Show Reddit reviews
18. Mr. Gasket 2842G Teflon Tape
Sentiment score: 0
Number of reviews: 1
Comes in a resealable plastic containerDesigned to work with any fitting needing a high-quality sealThe tape is 1/2 wide by 260 longPTFE sealing tape is impervious to fuel and oilEnsures a secure and tight seal
 Show Reddit reviews
19. Mag-Torch MT200C Propane Pencil Flame Burner Torch
Sentiment score: 1
Number of reviews: 1
This are arc welding accessoryThis are highly durableThis is manufactured in United States
 Show Reddit reviews
20. Commando Precision Drill Set and Blue Anodized Pro Series Handle with 12 HSS Drills, Scribe/Awl, Punch All Stored Inside Handle
Sentiment score: 0
Number of reviews: 1
Complete with 12 HSS Drills (1 ea. even sizes #52 thru #74) + Hardened ScribeAwl & PunchPen size 7/16" x 3-13/16" with attractive 3/8" diameter anodized aluminum body with pocket clipPrecision steel chuck firmly holds drills or other tools from #80 (.013") thru #52 (.064") diameterDrills, ScribeAwl ...
 Show Reddit reviews
Hey! Great questions! And good on you for asking them!
Part I
------
------
So first off, building your own coils is ABSOLUTELY the way to go, it is much cheaper, more customizable, a better vape, and just plain fun. You are going to need a few things though.
Now that you have everything you can go to town! Remember, all of this is just my personal opinion and experience, do what works for you.
------
Planning: The Kanger works best at around 1.19 ohms at 50 watts but can go as low 0.4 ohms. To get an idea of how factors like different wire gauges or multiple coils will affect your resistance try simulating it on this page.
------
Wire Work: There are plenty of videos and tutorials out there for different coils but my advice would be to start simple. Once you can build a coil that has good tight wraps and learn how to remove the hot spots from it and are generally just comfortable coiling then move on to more fancy builds. The advantage of (almost all) advanced coils is more surface area for better wicking and juice retention, there are also the offbeat ones like staged (dual) heating. I am a big fan of simple twisted wire coils, they are incredibly easy and work much better than simple single wire coils.
--------
Prepping The Wire: When you pull the wire off the spool be careful, if you don't hold tension the whole thing is prone to come unwrapped rather quickly. Work in longer lengths than you will actually need, screw ups are frequent and wire is cheap. Cut off a length of wire and you'll notice that it isn't exactly straight, or really at all, but this has an easy fix.
To straighten your wire: At one of the wire make a small 90 degree bend, insert this end into your drill with the wire centered and the bend sticking out the side, the bend allows the pincers to grab onto the wire. Grab the other end with a pair of pliers and apply light pressure (too much will cause the wire to snap). Start up your drill noting the direction it is spinning. It doesn't take more than a second or two, if the wire snaps it has spun more than enough (it tends to snap at either end but can be in the middle in which case you have to start over).
Annealing the wire: Thin wire like we use tends to be 'springy' making your coils unwind when you release tension, the thinner the wire the worse it gets. But again I have an easy fix. Holding the wire straight with tension, either with a vice grip or the drill or pliers or whatever you have, use a BIC lighter or a small flame to apply heat along the length of the wire. You want it to just start to heat up, not glow orange, if you see smoke coming off the wire move to another area because that one is done. Some people recommend dunking the wire in water when done but I just let it air cool.
[Optional] Making twisted wire: Take however many strands you wish to twist up and line up all of the ends with the 90 degree bend, cut the other end so that they are all equal lengths. Before inserting into your drill I find it helps to make a few 'starter twists' to keep the wires even and from coming undone. Remember how I said to make note of the direction your drill is spinning? Well it is time to spin in the opposite direction. Clamp your wire down in your pliers (not the drill) with the bent end sticking out a few millimeters. Grabbing the wires by the bends twist them by hand a couple times in the same direction as your drill is now spinning (opposite of the direction you used to straighten the wire). Now you can insert them into your drill. Start the drill slowly and don't go past a medium-high speed overall or the wire is more likely to snap, if it does it will 'unstraighten' on the end near the drill and become a mess to work with. If you are using a long length of wire (I would say over 8" but YMMV) it is best to release the wire halfway through and insert the opposite end into the drill (you do not need to reverse the direction of spin on the drill, it will work as is) because the end nearest the drill will twist the fastest this will provide a more even twist across the entire wire. It is totally up to you how much you want to twist the wire, if it snaps though it means you either went too fast on the drill or it has reached its limit of twisting (you can usually reinsert it and get a few more seconds of twisting out of it though).
-------
Building a coil with the linked jig: I'm only going to cover using the jig I recommended up above because if I didn't I would be here for all eternity, ask 10 people how to make a coil and you will get 12 answers. That jig is super easy to use, cheap, and makes coils better than you ever will be able to by hand.
Start by selecting the inner diameter of your coil, the jig provides nails ranging from 1mm to 3mm. Unscrew the cap from the base unit, insert your chosen nail, and screw the cap back on over it. Insert your wire from the top through the small hole on the base and grip down on the end of the wire with your thumb, you only need to pull the wire down to where the cap screws on to get plenty long leads. Taking the other end of the wire (the long portion sticking out the top) give it a small start around the nail, a quarter or half turn is all it needs. Put the piece with the corresponding size hole (the piece you the nail is originally stored in / marked with the sizes) over the top of the nail, push it down making sure the wire is between the screw and the nail. Twist the corresponding piece to wrap the wire around the nail, this requires almost no pressure if you do apply pressure you will end up with a pancake and not a coil.
Once you have however many wraps you want push down on the base piece and the corresponding piece to put pressure/sandwich the coil. Hold this for at least 30 seconds to a minute, it will help tighten the coils and keep them from unwinding. Some people pull on the wire leads with pliers to tighten them up but I do not like doing this personally because it changes the number of wraps as well as causes the leads to be made from part of the coil (as in not straight leads).
-------
Mounting your coil: Insert your coil leads onto your post and tighten them down. Be careful about over tightening or having your leads at strange angles as this can cause the coil to bend such that on one side the wraps do not touch and on the other overlap, it can also cause other weird deformities that ruin all the work up to this point. Roughly position your coils, using the nail from the coiling rig will help to keep the coil from getting bent. Make sure the coils are not touching anything as this will cause them to short. Clip your leads.
With your mod on a low to medium power setting begin to slowly pulse the device until the coils begin to glow. You want them to glow from the inside out, evenly, and at the same time. This will pretty much never happen right away. You are looking for spots that heat up unevenly. Using your ceramic tweezers squeeze and manipulate the coils, this is hard to describe but you'll understand it right away I'm sure. You can also use the coil jig nail to turn the coil and tighten the wraps (i.e. if the coil was originally inserted parallel to the deck insert the nail and twist it upwards to a 45 degree angle or even vertical, the amount varies from coil to coil but you can tell very easily by looking at it as you twist).
-------------
Permalink to Part II: https://www.reddit.com/r/RBA/comments/3xo2lv/rba_coil_question_newbie/cy6qbta
edit: Oh, and for those curious, I am currently running 3mm quad coils made from 2 strands of 32awg kanthal at 14 wraps each on the Sub Ohm Innovations RDA and the Kanger KBOX. They read in at 1.4 ohms and I fire them at 35-40 watts.
Glad it was helpful!
The RDA looks good, not sure the cost of a Plume Veil clone from eciggity, but you might wanna check - it'll come much faster and if you ever need to replace something, the chance of finding a part that fits is more likely, but again for $10, you probably wouldn't pay to fix that.
I'm not super familiar with mech mods, I've got two, but almost always use my Sigelei now, but just make sure you are familiar with battery safety, ohms law, battery limits, etc.
Other items you'll need (let me know if you need links for these items, you can get everything listed below of Amazon):
I hope this all helps, good luck and be safe, ALWAYS, ALWAYS use your ohm meter in conjunction with www.steam-engine.org
Here was my last RDA build that I took pictures of, if it helps at all
KidneyPuncher has a 10-pack of Phillips pan head screws for $1.95
If you want to go the Home Depot route, it will be cheaper, but they usually don't carry them at their B&M stores. However shipping to store is free and sometimes they are cheaper than Amazon.
Amazon and Ebay carry the fasteners your require, but usually in quantities of 25, 50, 100, and etc. Not expensive to buy in bulk, as well.
I personally replace the stock Phillips screws that usually comes with RDAs with flat set screws. It uses a 0.9mm hex key/bit instead of precision Phillips screwdriver, so there is no chance of stripping the head. Just my 2 cents. (A big thank you goes to /u/slumberland for giving me that gem of a tip!)
LINKS:
Amazon - QTY 100 for $3.67 PRIME eligible
Home Depot - QTY 3 for $0.30 FREE shipping to store (arrives Aug. 8 -Aug. 13)
Hope that helps you!
You're fine with 1 decimal, if you want to build super low ohm quads at some point yeah I'd recommend getting a standalone ohm meter.
Avoid the caravela as a first mod. The clones are good, don't get me wrong, but the caravela is supposed to come with 5 different length positive pins to adjust for your atomizer and the clone comes with 1. So basically you can only use it with atomizers with an adjustable pin, or you're risking having gaps or battery rattle or worse yet, no connection.
The nemesis clone is a solid choice. It's tried, true, great with magnets, and it's a standard 22mm size. Fasttech also sells colored aluminum tubes for it if you want a lower voltage drop or the look. If I were buying a new mod right now and I didn't have any, I'd get a brass nemesis clone off fasttech with the black or red tube kit.
For the atomize it just depends on how much you want to drop. You can get GREAT results from some of the cheap $5 fasttech atomizers simply by picking up a pack of m2x0.4 machine screws http://www.amazon.com/gp/product/B000NHXNPY/ref=ox_sc_act_title_1?ie=UTF8&psc=1&smid=ATVPDKIKX0DER and replacing the cheap screws most of the fasttech attys come with.
Cheap RDA's:
$6 Fasttech Omega clone
$3-5 Fasttech phoenix v5 nimbus clone (with the above mentioned screws)
Authentic igo-l/w (cheap on 101vape)
Mid end RDA's:
Igo-W + 22mm top cap (cap it all vapes) + optional copper posive pin (about 30-40bux)
Trident v2 clone (about 20bux)
Atomic clone (will be in the wild soon, be patient)
Low-High End:
Authentic Nimbus
Authentic Patriot (some sites are selling it for $50)
Don't be afraid of starting with something lower end, I have a zillion RDA's and my $5 fasttech nimbus clone and my igo-l/w's probably see the most use. Airflow control isn't really needed since you will probably find an airhole size you like and stick to it, that's what a drill's for. I like having it, but things like "how easy is this thing to build on" are much more important.
just saying http://www.reddit.com/r/DIY_eJuice doesn't help that much but yes read most of their posts, the best help and advice is to get
http://www.amazon.com/Glycerin-Vegetable-Kosher-USP-Quart/dp/B004C7MTLA/ref=sr_1_2?ie=UTF8&qid=1396993596&sr=8-2&keywords=vegetable+glycerine
^^ VG
and pick some flavors from TFA http://wizardlabs.us/index.php?route=product/category&path=79_85
also grab a 1ML syringe and a 10+ one for the VG
also look up flavors at
http://wizardlabs.us/index.php?route=product/category&path=79_85
hope it was some help to ya
Pretty much everything has already been said, I love this stuff though. I'm using the Labo organic Japanese cotton (as it was cheaper) and it's working great. I don't think I'll ever be going back to regular ole organic cotton. And the pads are extremely easy to work with.
Here's a link to where I bought mine, in case anyone is interested: http://www.amazon.com/gp/product/B000TCD51A/ref=oh_aui_detailpage_o04_s00?ie=UTF8&psc=1
I have this printed out at home in my vaping box. Or you can use the steam engine app android I just started myself and the best thing is to just do it. It is really intimidating but easier than you think. I went to my local B&M and got them to show me how to make a coil and then watch me make the second one. It was really helpful. I also got a coil jig and learned how to do the scottish rollwicking style. (One thing I didnt learn from the video, maybe I missed it is the fibers are in lines and you pull the cotton like you are pulling the lines apart.
like this |||| -> | | | | .
I've got this one and it's great. Can set it up to 8 minutes which is perfect. I use 1 drop of dawn detergent and give it a little swirl before I put everything in and it just cuts all the grime out of the little nooks and crannies you'd never be able to reach. It's really neat to sit and watch little bubbles of crud get shaken off your contacts, and much nicer than taking fine-grit sandpaper to them since you don't have to worry about taking off plating.
For those looking for an ultrasonic cleaner, spend a few more bucks and get one that's a few bucks more, you'll be glad you spent the extra $10-20.
this is what i use.
Does the job, super cheap and loads of it. Shipping might take a while, but im very happy with it.
I do 30G, 9 wraps around the 2nd-to-smallest jig from this kit. Make both, fit them, check resistance, check for even heating (both glow together) and good to go. Should land around 1.1ohm total. (2.2 each)
I've got 32ga (almost 100' due to a mis-order) but its super fiddly to work with, I always end up mangling the coil either putting it in the atty or trying to wick it.
The jig is roughly 1.5mm IIRC but I haven't taken a solid measurement.
You want a RTA or a RDA ? RBA is quite vague, it could refer to a tank that uses both pre-made coils and has a "RBA deck" or anything rebuildable really.
Cotton: amazon
Wire: lightning vapes
Cheap atomizers: fasttech
For a 30w device like an iStick, you can't power dual coils in a reasonable way, its range is from 0.4 to 2.13ohm. I think this is the optimal coil and this is an RDA you can't go wrong with and that supports single coil.
While those will certainly work I'd suggest getting a better torch setup. Something like this and thise. I've went through a 1 lb tank (slightly bigger than what I linked) since I started with RBA's around 6 months ago, I can't imagine how much butane I would have went through in that time.
Yes, I was just thinking that... bend the legs out of the way. The craft press he uses in his photos, this one is pretty cheap on Amazon.
Edit: Here's the one I bought: Quick-Grip 546 Mini Bar Clamp by Quick-Grip
I'm using 7x7 3/28 inch cable. 316 grade = surgical grade/marine grade stainless, more resistant to corrosion. Better than 304, what is used for many RBA construction.
http://www.amazon.com/dp/B0013HGP9Y/ref=biss_dp_t_asn 25 feet for 11 USD
THE ROPE IN THE UPPER LINK HAS SOME NYLON WRAPPED AROUND THE cORE, BUT IT IS EASY TO REMOVE.
http://www.youtube.com/watch?v=VmGfBFPi7bQ - how to remove
No matter which rope you choose, make sure you torch it till its red hot to remove anything from the manufacturing process. Some people just boil it, but I wouldn't.
Yes, get some nice cable cutters.
I use this Xuron Flush Cutter for wires/kanthal/silica and it cuts through anything like butter. Xuron makes great tools with lifetime warranties.
This is all I know of, probably the one you've already seen at the craft store. http://www.amazon.com/gp/product/B0068RQ85K/ref=oh_details_o03_s00_i00?ie=UTF8&psc=1
Other than that there's some fisherman sets like this http://www.amazon.com/gp/product/B000TBPT5Q that could be useful i guess.
This is concerning, the nominal voltage range for an 18650 is 3.6-3.7 and the maximum voltage on a full charge might hit closer to 4.3v. What charger are you using, and what volt meter.
I would still recommend picking up a true multi meter, it dosen't have to be a fluke or a klein, just something that gives an accurate reading.
I got a 100 pack from amazon, because every time my kayfun isn't hitting right I just swap a new one in (and it seems to help more often than not). Here is what I bought on Amazon, but I wouldn't be surprised if home depot sold the same thing. A 100 pack of rings is only ~2x as much as a kayfun spare part kit from vaperev.
One other thing I'd recommend is pre-lubing both the o-ring and the spot it sits with a few drops of juice.
Personally, beading pliers have become an invaluable tool for me when rebuilding. Perfect for bending the leads exactly how I want them, without marring the wire.
Are you wanting a tank with coil heads or build them yourself?
As far as VG, check out Amazon. This is a good deal http://www.amazon.com/gp/aw/d/B004C7MTLA/ref=mp_s_a_1_1?qid=1418647359&sr=8-1&pi=AC_SY200_QL40
I use a set like this: http://www.micromark.com/pin-vise-and-drill-bit-set,7804.html
There is a less expensive set that is similar on Amazon: http://www.amazon.com/Commando-Precision-Anodized-Series-Handle/dp/B0002BW6CW
I purchased one of these the other day, specifically to try out these prettier coils. I'll let you know if it works with this type of setup.
http://www.amazon.com/dp/B0068RQ85K/ref=pe_385040_30332190_TE_3p_M3T1_ST1_dp_1
I usually wash it with some dish soap and hot water, then throw it into an ultrasonic cleaner which is great because then you don't have to worry about losing small pieces down the drain.
Xuron 170-II Micro-Shear Flush Cutter
Doubles as a hangnail remover in a pinch, and vaping toe jam sounds like a bad idea. :)
https://www.amazon.com/Keychain-Screwdriver-Diagonal-Tweezers-stainless/dp/B07FPDRXQJ
One of the reviews says his wire cutters broke. I haven't used them yet but they don't feel that flimsy. And he also said he couldnt return but it shows I can so I don't know. I've used everything else in the kit and it works just fine. The scissors are the fold up kind and they work to but I just use regular scissors.
http://smile.amazon.com/gp/product/B001DKDAVW/ref=ox_sc_sfl_title_10?ie=UTF8&psc=1&smid=A3OI2CVBA9DB25
http://www.amazon.de/Cotton-Labo-ORGANIC-200pc-japan/dp/B000TCD51A/ref=sr_1_3?ie=UTF8&qid=1458012288&sr=8-3&keywords=cotton+pads
I use these and a pack has lasted me over a year.
Non-mobile: beading pliers
^That's ^why ^I'm ^here, ^I ^don't ^judge ^you. ^PM ^/u/xl0 ^if ^I'm ^causing ^any ^trouble. ^WUT?
Sorry about that: http://www.amazon.com/gp/product/B00E5PCX1A/ref=oh_aui_detailpage_o01_s00?ie=UTF8&psc=1
You most likely won't be able to find the correct screws at the hardware store. You can try a hobby shop or just order them online.
The post screws for the kayfun are stainless steel M1.6x3mm pan head
Not sure about the screw size for the patriot/clones, but the standard size that all of those 3 post drippers (nimbus, all the igo stuff..etc) use is M2 x .04. I would just buy some new stainless steel ones from Amazon
http://www.amazon.com/Quick-Grip-546-Mini-Bar-Clamp/dp/B00002244S/ref=pd_sim_hi_4?ie=UTF8&refRID=0S4R920E0M6Z81B471N4
cant tell you how handy that thing has been for ecig related uses! no scratches on any of my mods or atties to date.