Top products from r/RetroPie
We found 336 product mentions on r/RetroPie. We ranked the 755 resulting products by number of redditors who mentioned them. Here are the top 20.
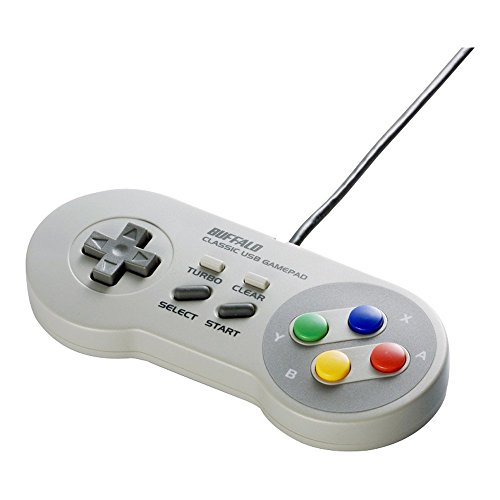
1. Buffalo iBuffalo Classic USB Gamepad for PC
Sentiment score: 13
Number of reviews: 34
8 Buttonsfor PCUSB ConnectionSupport Windows 7/ME/2000/XP/Vista
 Show Reddit reviews
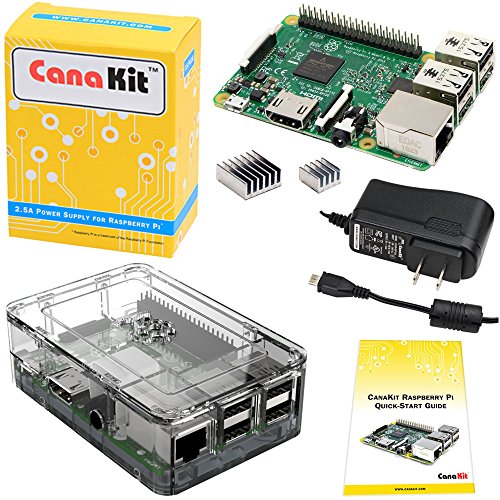
2. CanaKit Raspberry Pi 3 Complete Starter Kit - 32 GB Edition
Sentiment score: 18
Number of reviews: 34
Raspberry Pi 3 (RPi3) Model B Quad-Core 1.2 GHz 1 GB RAMOn-board WiFi and Bluetooth Connectivity32 GB Micro SD Card (Class 10) - Raspberry Pi Recommended Micro SD Card pre-loaded with NOOBS, USB MicroSD Card ReaderCanaKit 2.5A USB Power Supply with Micro USB Cable and Noise Filter - Specially design...
 Show Reddit reviews
3. Kintaro Classic – NES Inspired Raspberry Pi Case – Old Skool Entertainment System - Retro Emulation Housing (Raspberry Pi Model 3, 2, B+)
Sentiment score: 14
Number of reviews: 26
RASPBERRY PI CASE: Inspired by the Nintendo Entertainment System, the Kintaro Classic case is designed as an enclosure for Raspberry Pi 3, 2 and B+.RETRO GAMING: Perfect for reliving your favorite NES and other retro games, this classic Raspberry Pi case will appeal to any RetroPie enthusiasts.HIGH ...
 Show Reddit reviews
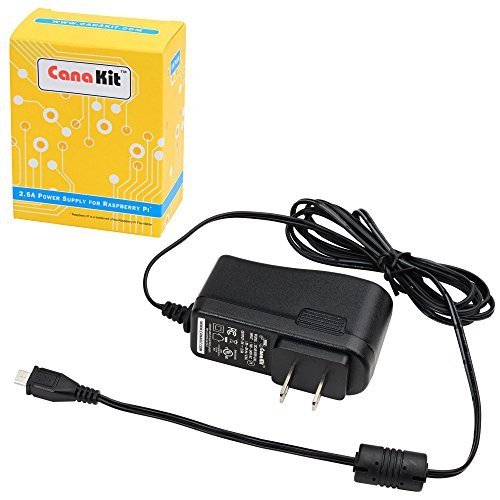
4. CanaKit 5V 2.5A Raspberry Pi 3 B+ Power Supply/Adapter (UL Listed)
Sentiment score: 8
Number of reviews: 22
Tested with all versions of the Raspberry Pi including the Pi 2, Pi 3 and Pi 3 B+UL Listed5-feet cable with integrated noise filterMicro USB plugOutput: 5V DC / 2.5A Regulated Input: 100 - 240VAC
 Show Reddit reviews
5. Flirc Raspberry Pi 3B Case
Sentiment score: 23
Number of reviews: 18
The best looking Raspberry Pi case made out of beautiful aluminumAll New Manufacturing Process with improved metal quality and designMade for the new Raspberry Pi 3 B+, works with Raspberry Pi 3, 2 and B+ ModelsGPIO and all the main connectors are easily accessible through the bottomBuilt in Heat Si...
 Show Reddit reviews
6. CanaKit Raspberry Pi 3 with 2.5A Micro USB Power Supply (UL Listed)
Sentiment score: 6
Number of reviews: 13
Includes Raspberry Pi 3 (RPi3) Model B Quad-Core 1.2 GHz 1 GB RAMOn-board WiFi and Bluetooth ConnectivityCanaKit 2.5A USB Power Supply with Micro USB Cable and Noise Filter - Specially designed for the Raspberry Pi 3 (UL Listed)Set of 2 Heat SinksCanaKit Quick-Start Guide
 Show Reddit reviews
7. SNES Controller to Adapter for PC USB
Sentiment score: 4
Number of reviews: 12
Connect your SNES or SFC controller to your PC USB PortTwo players can play simultaneously, USB self poweredStandard HID (Human Interface Device) compliant, no drivers needed, just plug and playSuitable for both Destop and Notebook PCsCompatible with Windows 98, ME, 2000, XP, Vista and Windows 7
 Show Reddit reviews
8. Buffalo iBuffalo Classic USB Gamepad for PC BSGP815GY
Sentiment score: 7
Number of reviews: 9
8 Buttonsfor Windows / AndroidUSB ConnectionSupport Windows 10 / 8.1 / 8 / 7(32bit/64bit) / Vista(32bit/64bit) / XP / 2000 / Me
 Show Reddit reviews
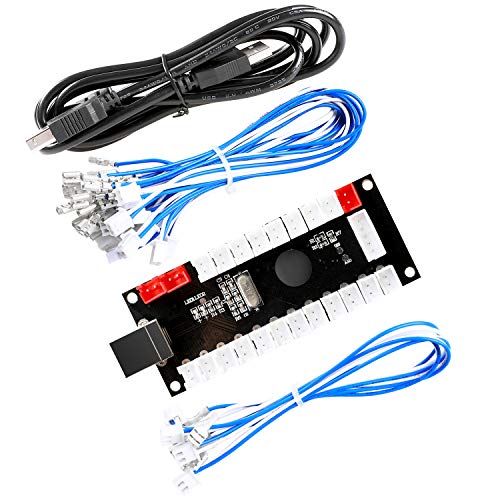
9. Easyget LED Arcade DIY Parts 2x Zero Delay USB Encoder + 2x 8 Way Joystick + 20x LED Illuminated Push Buttons for Mame Jamma Arcade Project Red + Blue Kits
Sentiment score: 2
Number of reviews: 9
Beautiful LED Arace Game DIY Parts for MAME JAMMA Project!100% Zero Delay USB Encoders and Perfect work for all windows systems!Perfect Parts for 2 Player Arcade MAME DIY Project!Made with highest quality materials!Heat resistant plastic!Perfect LED Kit for Arcade PC Game DIY Project! Easy Install!
 Show Reddit reviews
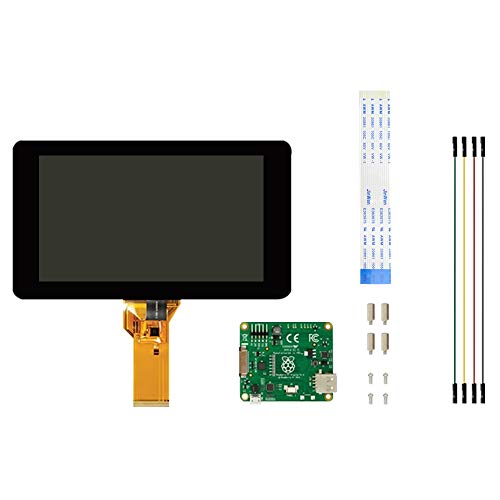
10. Raspberry Pi 7" Touch Screen Display
Sentiment score: 4
Number of reviews: 9
This 7" Touchscreen display for the Raspberry Pi is perfect for creating portable and embedded projects where a keyboard and Mouse would be in the way.The full color display outputs up to 800 x 480 and features a capacitive touch sensing capable of detecting 10 fingers.Only two connections from the ...
 Show Reddit reviews
11. CanaKit Raspberry Pi 3 Kit with Premium Clear Case and 2.5A Power Supply (UL Listed)
Sentiment score: 5
Number of reviews: 9
Includes Raspberry Pi 3 (RPi3) Model B Quad-Core 1.2 GHz 1 GB RAMOn-board WiFi and Bluetooth ConnectivityCanaKit 2.5A USB Power Supply with Micro USB Cable and Noise Filter - Specially designed for the Raspberry Pi 3 (UL Listed)Premium Clear Raspberry Pi 3 CaseSet of 2 Heat Sinks and CanaKit Quick-S...
 Show Reddit reviews
12. Smraza Raspberry Pi 4 Case, Acrylic Case with Cooling Blink Fan, 4PCS Heatsinks, 5V 3A Type-C Power Supply, Built in Fan with LED, Compatible with Raspberry Pi 4 Model B (Black and Clear)
Sentiment score: 4
Number of reviews: 8
The Nylon Braided Fiber Cloth makes these cables incredibly durable and tangle-free. No more worries about cords getting snapped or broken.The ultra-compact cable is not only small enough to perfectly fit most device casesHigh quality copper wire can increase cable charging and data transfer speeds....
 Show Reddit reviews
13. Enokay Power Supply for Raspberry Pi 2 3 b b+ 5V 2.5A Micro USB Charger Adapter with On Off Switch (UL Listed)
Sentiment score: 3
Number of reviews: 8
Input:AC 100-240V/ 50-60Hz ;Output:DC 5V/2500mACable Length: 1~1.5 MeterEnough power supply for your raspberry pi 2 3 and your USB deviceMicro USB Cable with ON / OFF Switch for your CONVENIENCE. No need to pull the cable to restart or reboot your PI, just press the button to turn your Pi on and off...
 Show Reddit reviews
14. Vilros Raspberry Pi 3 Kit with Clear Case and 2.5A Power Supply
Sentiment score: 3
Number of reviews: 8
Includes Raspberry Pi 3 Model B Quad-Core BROADCOM 64bit ARMv8 1.2 GHz 1 GB RAM (RPi3)Great Idea for the Technically Minded who enjoy Tinkering and CreatingUL Certified 2.5 Amp USB Power Supply with Micro USB Cable and Noise Filter - designed for the Raspberry Pi 3Cool transparent case with all port...
 Show Reddit reviews
15. NorthPada Raspberry Pi 3 Model B B+ A+ Plus Power Supply Charger AC Adapter 5V 3A PSU Micro USB 5 Feet with Power On/Off Switch (1 X Power Supply)
Sentiment score: 2
Number of reviews: 7
Brand: NorthPadaInput: AC 100-240V 0.3A 50/60Hz, Output: DC 5V 3000mA/3ACable Length: 150cm/5Feet with Power On/Off Switch, Inline Noise FilterFor Raspberry Pi 3 Model B B+ A+ Raspberry Pi 2 Model B Raspberry Pi A/A+/B/B+ Raspberry Pi Zero; ASUS Tinker Board S ; NVIDIA Jetson Nano30 Days Money back ...
 Show Reddit reviews
16. Plugable USB Bluetooth 4.0 Low Energy Micro Adapter (Compatible with Windows 10, 8.1, 8, 7, Raspberry Pi, Linux Compatible, Classic Bluetooth, and Stereo Headset Compatible)
Sentiment score: 3
Number of reviews: 7
START USING BLUETOOTH - Adds Bluetooth to your Windows 10, 8, and 7 PC. Supports Ubuntu, Mint, Fedora, and other Linux computers.CONNECT YOUR DEVICES - Supports wireless Bluetooth headphones, speakers, headsets, keyboards, mice, phones, and more!TINY DESIGN - This mini USB dongle can stay plugged in...
 Show Reddit reviews
17. LoveRPi Performance Heatsink Set for Raspberry Pi 3 B+
Sentiment score: 4
Number of reviews: 7
EXTREME PERFORMANCE: Straight-fin design with twice the height of other heatsinks for extra heat dissipation performance whether actively or passively cooled. Mandatory for applications in high temperature, sealed, or overclocked applications.LONG LASTING EXACT FIT: CPU and LAN chipset heatsinks are...
 Show Reddit reviews
18. Reyann Zero Delay Arcade USB Encoder Pc to Joystick for Mame Jamma & Other Pc Fighting Games
Sentiment score: 7
Number of reviews: 7
Zero Delay Arcade USB Encoder For Your Pc Game DIY!Generic Game Controller support PC & Raspberry Pi 1/2/3Use this Encoder you can build your own Arcade Game Machine!100% Zero Delay USB Encoder to Arcade Joystick! High Quality!Support All Joystick and Push Button types which with 4.8mm Terminal!
 Show Reddit reviews
19. Retroflag Raspberry pi case NESPi Case Plus with Safe Shutdown for Raspberry Pi 3 B+ (B Plus)
Sentiment score: 5
Number of reviews: 7
Safe Shutdown and Safe ResetFunctional POWER and RESET buttonsMetadata in emulationstation will be saved when rebooting and shutting downNES case specifically designed for Raspberry Pi 3 B+ (B Plus) 2Easy access to the SD-Card and all other ports without opening the case
 Show Reddit reviews
20. BW 3.5 Inch TFT LCD Monitor for Car / Automobile
Sentiment score: 5
Number of reviews: 7
Brand New and High quality. Portable 3.5Wide view angle, low illumination. D/N models with photo-sensor. Distance reference marking display. Easy installation.Screen Size: 3.5 inch. Ratio: 4:3 TFT screen. Power Supply: DC 12V.Visible Area: 72mm x 53mm. Power Consumption: 2W. Operating Temperature: 0...
 Show Reddit reviews
Disclaimer: I'm here, ready to answer any specific questions ... but the following is a copy & paste job. The topic of arcade parts comes up quite a bit.
(begin paste)
-------------------------------------------
There's a lot to consider when choosing a joystick. It all comes down to personal preference and how much you want to spend.
American Style:
Happ parts were infused in arcade machines in the 80's and early 90's. if you grew up playing Mortal Kombat and Street Fighter 2 at your local bowling alley, you were touching Happ parts. Also, these setups were designed to withstand a thrashing. The sticks have a very heavy re-centering spring. The buttons (when paired with with a 75g Cherry Microswitch) provide a ton of bounce.
Durning this era, Happ sourced parts from a European manufacturer, Industrias Lorenzo or "IL". Now, Happ is owned by Suzo, operating under the name "Suzo-Happ" and sources all of their parts from China.
Industrias Lorenzo still exists today and sells the same parts from the golden era of US arcade gaming. Their "Euro Joystick" is awesome.
Personally, I built a 12 button (Start, Coin, A, B, X, Y, L, R, L1, R1, L2, R2) w. joystick using all IL parts and Cherry Microswitches. It feels exactly like the arcades I grew up in.
Japanese Style:
Sanwa rules the scene. These joysticks are extremely tight and compact, allowing the user to quickly get off button combinations without misfires. There's quite a bit of customization too (dealing with directional gate/restriction plates, colors, etc).
Everything about the Japanese style stick is built for efficiency. The buttons are very sensitive and require less force to trigger.
USB Encoder:
If you're not doing any competitive play and aren't considering multi-purposing the controller for a modern console, the Zero Delay USB Encoder is magnificent. It's very easy to use, comes with the wires and works as designed. Note: You may need 1 extra cable if you're using a Japanese style joystick.
A heads up:
Be weary of the arcade joystick kits you find on eBay and Amazon. There's no way to vouch for the authenticity or quality of the parts. Again, it all comes down to budget. These kits will get the job done, but you may experience some in-game frustrations when certain things just don't feel like they're working (especially throwing a fireball in SF2).
I know this is a ton of information to absorb and research, but I found building an arcade stick to be quite enjoyable. Also, you don't need to be a master electrician to make this stuff work. It's mostly plug and play.
I've purchased parts from:
Paradise Arcade Shop
Focus Attack
UK Arcade World
The kits seem like a better deal, but if you piece together what you need, you gain a lot more customization (colors) and peace-of-mind (legitimate, authentic parts).
-------------------------------------------
(end paste)
It comes down to personal preference and budget. Also, take a look at the games you want to play the most. Arcade games used various hardware setups. Find the one that mimics the cabinet belonging to your favorite titles.
(Ex. As a Mortal Kombat fan, it would feel super weird to play with a Sanwa stick.)
Just wanted to give my thoughts on the case:
I like it better than the previous case I had (Smraza), but mainly for its aesthetics. The fan is a little louder than the Smraza, which was completely silent and had more ventilation slots, but both function the same as far as cooling. I can audibly hear the fan moving but it's not distracting once game audio kicks in, apparently it was even louder before it was recalled in February. Also, be careful of which heat sinks you use with this case. The fan gets pretty low to the board and my LoveRPi heat sinks did not fit. I had to instead go with the Mudder's, which again seem to function just as well. I have not overclocked with them yet but playing Gran Turismo 2 on PSX stays below 50 degrees C. Most importantly for me, the case is sexy, I love the wood and etched looked. I definitely recommend cleaning the plastic with some alcohol beforehand because it will arrive a little cloudy but clears up quite nicely. All in all it's a good looking case and will keep it cool, the Smraza may have a little more ventilation for better cooling, but this case is sturdier, feels like it can survive a drop, and looks much better.
Some people have PMed asking for more info, so I may as well put it here.
I used the following:
Monoprice
8inch 28AWG High Speed Male to Female HDMI® Port Saver - Black
For the hdmi port. I also bought another hdmi piece, like a corner basically, it's in some of the early pics, but I didn't use it in the final build.
Tiesto USB Hub 2.0 4-port/4 port hub USB 2.0 Speed Cute Octopus Design - BLACK
I removed the black case on this as well as the black rubber around the usb ports. Then basically hot glued the ports in place against painters tape to make it even and smooth.
Your Cable Store
6 inch USB Micro male to female OTG extension cable
I cut these in half and spliced it into the original Gamecube power switch/button. That way I can leave my pi plugged in and switch it on like a normal console.
Evercool 60x60X10mm 5v Ball Bearing Fan, 3 Pin EC6010M05CA
I set up these fans to run off the main power, so they turn off and on with the pi.
To take apart each Gamecube, i bought this screwdriver.
Also got each person a Buffalo Classic USB Gamepad for PC
And a Retrolink N64 Style Classic Controller For PC
I forgot to mention, I took apart and weighted the buffalo classic usb controllers to be closer to the weight and feel of the original snes controller.
The exact increase in weight is about 10 pennies, but I used 8, 4 on each side, inside the controller, in stacks, glued in, because 8 fit better than 10.
It's a really tiny thing, but if you weight one controller and then hold an unweighted and a weighted one to compare, the unweighted one feels like a toy.
The N64 controller felt decently heavy on it's own. (Plus the rumble pack used to make them super heavy and I wasn't going to try and match that weight.)
Other things, these have in them the pi2 with 1gb of ram. I bought the 2 amp power supplies that are recommended for the pi.
I also bought some other odds and ends: ethernet couplers, each pi has a 16gb sd card in it.
I also replaced the power switch in my final one (the silver one) because I damaged the original switch. I used these switches.
I bought Rust-Oleum metalic base and Dupli-color spray paints.
Tools/materials used:
Bought a dremel, didn't need it.
Used my soldering iron and clamps constantly.
Used a lot of hot glue and gorilla glue.
Mod podge for applying the logos to the top of the cases. I also had some spray sealant from another project I put on the logos, before I applied them to the cases, so the ink wouldn't smear.
I used a fair bit of heat shrink and electrical tape. Also wires with couplers so the entire bottom of the console can unplug from the top if I need to repair something. Basically these though not the same brand.
Much of my job is working with electronics and soldering so this was all fairly easy for me. If you're new to building and soldering, please be careful. I've cut myself and burnt myself quite a few times. Be more careful than me.
I wanted to show off an arcade cabinet that my brother in-law and I built.
Imgur Gallery
We designed the cabinet in 3d to make sure everything would fit. Then cut out everything using a CNC router. We used wood glue and wood putty to put everything together. For the monitor we used a Dell 17" (we had lying around) mounted portrait. The guts of the arcade are
In all it took us a couple of weeks to design in 3D. My brother in-law did all this work. He also cut out everything and assembled the shell. I did all the internal wiring and software side of things. It is running RetroPie 4.0.2. The only really PITA is that this is a cocktail arcade. Most if not all the games needed a custom shader to correctly implement the rotation and dual flipped screens. A big shout out to hunterk from (libretro.com)[http://libretro.com] forums for helping me with this. It turns out that NES, SNES, Arcade, etc... needed their own shader to correctly display the image to both users. Also, the mame emulator has the ability on some 2 player games, to set cocktail mode. That way, when it is the 2 players turn, the screen auto rotates so they can play on their side.
We were pretty impressed with ourselves when we finished. We built it to give away at a foundation raffle a couple of weeks ago and the winner was very excited to win it.
I'll be glad to answer any questions you guys/girls have about the build. I plan on putting the glsl shaders on my github so others using the RetroPie OS in cocktail mode can use them.
The CanaKit ones are usually good as a starting point (unless you don't want to buy the components individually, though as another person said, the power supplies that ship with them aren't the greatest.
If you DO want to buy the components individually, however, you only need to get the board itself, an optional case, and the power supply. Here's what I've seen most people use.
You could also invest in heatsinks or fans if you want to keep the Pi a bit cooler in temperature. Or, you could also buy a Flirc case, which is around $15 USD, which acts as a giant heatsink. It's one of the more popular cases around here, and for good reason. It's very reasonably priced in my opinion, and it does a good job at keeping the Pi nice and cool, so you don't need a fan.
Speaking of cases, if you want that retro console look, there are some pretty good options, with one of the most well known case makers being Retroflag. They don't come with any form of cooling like heatsinks and fans, so you'll have to provide those separately.
If you are asking about controllers, you can use both wired USB or wireless Bluetooth controllers as well (though you'll need to have at least a USB controller or a keyboard connected to the Pi for the first part of setting it up which will ask you to configure your controls which work across the RetroPie environment (that includes EmulationStation which is used to launch your games, and RetroArch which powers most of the emulators included with the default RetroPie install).
You can read the RetroPie documentation for more information on RetroPie itself too.
Good to find someone else in my shoes, lol. I was in the exact same position a couple months ago before grabbing a Pi, so I'm not an expert by any means, but I've learned a few things.
As for plug and play kits, I'd avoid the ones with NES/SNES style cases as they have horrible cooling. If you're planning on using it as a RetroPi, you'll definitely need some better cooling. For passive cooling, you'll need something like the FLIRC case, which basically turns the entire case into a giant heatsink (https://www.amazon.com/Flirc-Raspberry-Case-Gen2-Model/dp/B07349HT26/ref=sr_1_5?keywords=rpi+case&qid=1563297746&s=gateway&sr=8-5) or for active cooling, I'd suggest grabbing a cheap acrylic stack with a small 30mm fan off Amazon (https://www.amazon.com/s?k=rpi+case&ref=nb_sb_noss). Keep in mind that these are Pi 3 B+ cases, and they won't work with the Pi 4 as the USB and ethernet are switched around, plus different HDMI ports.
​
For your first Pi, a kit is nice as it includes heatsinks and a decent power supply. If you want to use RetroPi then having a kit with an SD card that includes NOOBS wont matter, as NOOBS doesn't let you install RetroPi. Also, the cases that come with CanaKit and Abox have terrible cooling if you're running something heavy like RetroPi, so I'd recommend getting these:
Rasbperry Pi 3 B+ Basic Kit: https://www.amazon.com/CanaKit-Raspberry-Power-Supply-Listed/dp/B07BC6WH7V/ref=sr_1_8?keywords=raspbery+pi&qid=1563297903&s=gateway&sr=8-8
FLIRC case: https://www.amazon.com/Flirc-Raspberry-Case-Gen2-Model/dp/B07349HT26/ref=sr_1_5?keywords=rpi+case&qid=1563297746&s=gateway&sr=8-5
​
Other than that, you'll just need an SD card to flash with RetroPi, maybe a USB stick to transfer ROMs over with, and a controller. 8BitDo make some really solid retro replica controllers so I'd suggest that possibly.
​
As for a gaming PC, you could easily run most ROMS on a low end gaming PC, so if emulation is your main goal then you could easily build a 500-600 PC that would kick ass for ROMS. I mean, my Chromebook can run RetroArch pretty easily, so you don't need a ton of power. It's just that the Pi is a tiny SoC running an ARM chip so it's different than a full fledged x86 PC.
​
The Pi 3 B+ struggles with N64 and PS1 some, so waiting for the Pi 4 to be RetroPi compatible would likely be the cheapest option to get yourself going. I have high hopes for it with regards to the N64 and other systems from that generation.
I haven't heard any word about 4.3 coming out, but updating is very easy from within retropie.
Some stuff from an old post that is applicable here:
Don't waste your money on the heat sinks, they don't do much without a fan. The nintendo case is cool, and it will work for the NES emulation, but it will not cut it for N64, since you'll probably overheat with an overclock. Overclocking is basically required for N64 to run even sorta smooth. Instead, get a better case that can handle heat effectively. I use https://www.amazon.com/BIQU-Aluminum-Raspberry-Case-Enclosure/dp/B01H8L4EM8; but others have used a Flirc with great success: https://www.amazon.com/Flirc-Raspberry-Case-Gen2-Model/dp/B07349HT26/ref=sr_1_3?s=electronics&ie=UTF8&qid=1500310306&sr=1-3&keywords=flirc.
It's worth going for function over form in this scenario.
As for other advice/tricks for setup:
Get video previews set up: https://www.youtube.com/watch?v=AqIu1whpw_M
Get slick loading splash screens set up when you start a game: https://www.youtube.com/watch?v=_aXerbx4TpA
I'd buy a Cana Kit since it has everything you'd need to have a complete pie.
https://www.amazon.com/dp/B01C6Q2GSY/ref=cm_sw_r_apa_Lc5Zzb0280WWW
That's the most full featured Pi3 kit they have but there are other more affordable options.
There are tons of tutorials online but I suggest you look up ETA Prime on YouTube because he helped me a lot with setting up Emulation Station and getting tons of games on my Pi.
As for controllers, the wired iBuffalo ones are great but if budget concerns aren't an issue then get the 8Bitdo SNES30. It's a Bluetooth SNES controller with a 1 to 1 look and feel. It's pricey but you really won't regret it.
Good luck and have fun! Hope she enjoys it!
Edit: As a side note you want to invest in a case with a fan! There are ones that look like a tiny NES or SNES and seem neat but have next to no ventilation so your pi WILL overheat. I made this mistake and wasted $20.
It's better to buy the parts separately. You'll need the following:
The Pi, obviously:
https://www.amazon.com/gp/product/B01CMC50S0?pldnSite=1
A MicroSDXC Card if you don't already have one:
https://www.amazon.com/gp/product/B01DOB6YQA?pldnSite=1
A power supply:
https://www.amazon.com/gp/product/B01MZX466R/ref=s9_acsd_hps_bw_c_x_1_w
A USB Keyboard if you don't have one lying around:
https://www.amazon.com/gp/product/B06WWDMZQL?pldnSite=1
Controllers - there's tons to choose from. Depending on which games you plan on playing. If you want to do 8-bit and 16-bit games, an SNES style controller is probably best, that would work for obviously SNES, but Genesis or NES games as well. If you don't mind wires, go with the Buffalo SNES USB Controller. If you want to go wireless, go with 8Bitdo. The 8Bitdo also gives you few more options in terms of colors, so you get get one that looks like an American SNES controller with the purple buttons, an international SNES controller with rainbow buttons, an NES style controller with an SNES button layout, etc. Just don't cheap out, you'll see some SNES USB controllers on Amazon for dirt cheap, but they're terrible. Either get the Buffalos or the 8BitDos, or if you have an original SNES controller, you can get an USB adapter for it.
For Playstation or N64 games and anything newer, you would need a controller with more buttons and analog sticks. Again, you have tons of options, you can get Dualshock, X-Box 360, or Wii U Pro controllers, plus Logitech has some controllers that also have the right amount of buttons. These controllers can also be used for older games if you only want one set of controllers.
As for the case, you have tons of options, just search Amazon and see what case fits your style. Just be sure it fits the Pi 3.
Oh, and finally, you'll also need an HDMI cable if you don't have one.
Once you get all that, setting it up is rather easy. It seems intimidating, but I'm a total newbie when it comes to tech stuff, and I was able to get mine up and running without any major hiccups. If I could do it, I'm sure you could. It is pretty easy if you just follow instructions. And if you get lost and need help, you can always post on Reddit and someone will be willing to help out.
The power supply needs to be a micro USB one (sorry I forgot to mention that). So like a phone charger. I find my Samsung phone charger works fine - it is only something like 2.1A so occasionally I get slowdown (a little lightning symbol appears on the screen which means "Low voltage"), so ideally find a 5V micro USB charger at 2.5A for optimal performance. On the USA Amazon site, this one is good: https://www.amazon.com/CanaKit-Raspberry-Supply-Adapter-Charger/dp/B00MARDJZ4 But if you have a micro USB phone charger already, you could just try it and see if it works.
For the control pads, yeah if they work with a PC through USB then it should hopefully work on the Retropie as well. It's pretty much plug and play - when you put a new controller in, it asks you to press some keys and it is all set up automatically.
Don't know which websites in Canada would be good sorry. Where I am from I just went into a local electronics shop and got everything (Raspberry Pis are actually pretty common, you don't even have to go to a dedicated computer shop).
Friendly warning, asking for the name of sites with roms is against the subreddit rules, so I advise you remove that question from your post. Posting links to such sites or the ROMs/BIOS themselves on the subreddit is also against the rules.
https://github.com/RetroPie/RetroPie-Setup/wiki/First-Installation
Follow that guide. Several emulators are included with the RetroPie image by default, and any others you find that you need later can be installed within the RetroPie Setup Menu.
As for controllers, some people like these
https://www.amazon.com/gp/product/B002B9XB0E/
but their price has been all over the place due to low supply, high demand, or sellers just realizing they can increase the price and people will still pay.
I can't attest to any other controllers, though someone else will probably give you better recommendations. You'll want a controller with analogue sticks if you plan to play PS1 or N64; I wouldn't advise getting your hopes too high with N64 though due to the fact that the Pi3 can't run N64 perfectly. Not sure if there are any other consoles that the Pi3 can emulate that need analogue sticks.
As for pitfalls...
You might want to get a case with a fan so you can overclock, though people mostly do that when they are trying to make N64 closer to playable, but I've seen some people say it does help push a few problematic SNES and PSX games to 100% speed. I couldn't stand the noise of the fan though and am waiting on a jumper cable pack from eBay so that I can under-volt the fan with the 3.3v pin 1.
A USB 3.0 card reader is another nice thing to have, if you have a PC with a USB 3.0 port that is. Backups take a fifth of the time they took compared to my USB 2.0 card reader.
I use a on/off switch as well, after properly shutting the Pi3 down and waiting ten seconds for all the shutdown stuff to complete of course. You don't want to be yanking the USB power out of the Pi3 because of port wear and unplugging from the outlet isn't very easy to do for most. You could always just leave it on all the time like many other people do and I get a lighting bolt (low power) alert for two seconds at boot during my custom startup video due to the one I posted below. Guess I'll see how it affects overclocking later.
https://www.amazon.com/gp/product/B01LY18WCP/
For safe shut downs, charging warnings, and charging status - Adafruit PowerBoost 1000 Charger - Rechargeable 5V Lipo USB Boost @ 1A - 1000C-Purchased from amazon, https://www.amazon.com/gp/product/B01BMRBTH2/ref=ppx_yo_dt_b_asin_title_o08_s00?ie=UTF8&psc=1
Shell used-Gametown® Full Housing Shell Cover Case Pack with Screwdriver for Nintendo Gameboy Classic/Original GB DMG-01 Repair Part-White (pick whatever color you want)-Purchased from amazon, https://www.amazon.com/gp/product/B01K1C2L1C/ref=ppx_yo_dt_b_asin_title_o06_s00?ie=UTF8&psc=1
Screen used- BW 3.5 Inch TFT LCD Monitor For Car/Automobile – purchased from amazon, https://www.amazon.com/gp/product/B0045IIZKU/ref=ppx_yo_dt_b_asin_title_o09_s00?ie=UTF8&psc=1 (side note here is that in order to make this fit nicer, I installed it upside down in the case.
Speak used - uxcell 16pcs 27mm External Magnetic Speaker Loudspeaker 8 Ohm 0.25W, purchased from amazon, https://www.amazon.com/gp/product/B010V4RAAW/ref=ppx_yo_dt_b_asin_title_o04_s00?ie=UTF8&psc=1 (do not put ANYTHING on the top of the speaker when you install or it will not work.
Prototyping bread board, I purchased from amazon but it is no longer available at the link.
I used this PCB for the buttons on 1 build, the drill guide is VERY useful for this project. - 4 Button PCB For Gameboy DMG-01DIY Pi Zero Made In USA With Grounds and Hole Guide BY:Atomic Market, purchased at amazon, https://www.amazon.com/gp/product/B01JKJCQVM/ref=ppx_yo_dt_b_asin_title_o07_s00?ie=UTF8&psc=1
L-R buttons- 100 Pcs 6 x 6mm x 9.5mm PCB Momentary Tactile Tact Push Button Switch 4 Pin DIP, purchased at amazon https://www.amazon.com/gp/product/B008420WOA/ref=ppx_yo_dt_b_asin_title_o08_s00?ie=UTF8&psc=1
28 Gauge Wire - Ribbon Cable - 10 Wire (15ft), purchased at amazon, https://www.amazon.com/gp/product/B007R9SQQM/ref=ppx_yo_dt_b_asin_title_o09_s00?ie=UTF8&psc=1 (I recommend going to a smaller (higher) gauge than 28. 30 or 32 would have made it a lot easer but 28 will do.
Indicator lights, Uxcell a11092800ux0119 Uxcell (Pack of 75), purchased at amazon, https://www.amazon.com/gp/product/B01F0TCXSW/ref=ppx_yo_dt_b_asin_title_o03_s00?ie=UTF8&psc=1 (these are totally optional)
Resistors and capicitors (audio), purchased from https://www.taydaelectronics.com Note: heres the guide I used for the audio too! https://sudomod.com/forum/viewtopic.php?t=480
Old Gameboy game cartridge. For aesthetics.
Headphone jack, ebay, https://www.ebay.com/itm/3-5mm-Stereo-Female-Socket-Audio-Jack-5Pin-PCB-Panel-Mount-Connector-PJ325-/400959590673
Volume wheel, ebay, https://www.ebay.com/itm/20pcs-B103-16x2mm-10K-Ohm-Double-Dial-Taper-Volume-Wheel-Duplex-PotentiometerBS/293146992835?epid=11009192051&_trkparms=ispr%3D1&hash=item4440ec20c3:g:NZkAAOSw3h1ZUavq&enc=AQAEAAAB0BPxNw%2BVj6nta7CKEs3N0qUCHDbWKwW7sKftQNu9OoIx7SAZoMMNoO7ZC%2BQU2m6tHizIeixg2Hdk8yQin%2B7yNcIdtTzT%2FneqdaLt1WntvDDMDNnZ9%2BCyBsPWRiKLCNPKdeaaZNnBjMoVA%2F0tK%2BtG7DVLtcUKV1a4ZUD8%2F3Lgu9eesPLoBiXZs77Vo7R%2FDaZVMV%2FquPTyLO%2FBFipuEkim1t7BIMiLOi2P3Z31r4yxIdLUw6SCVesvVeqBQuoKov776Dxzk8pUY7PZvu4Q3ULnqBWmlWXsKXc8iAp9juNxUBFHnDgW6A7iElTGYe0sQRXfFHW73jI62f5aO%2FnqGANNK%2F7KJlu474aR3Gae9%2FJCT%2FwoLqmBb4FfizrUJ6qKEuVeLAi31kJSoJXIv4msi3r0bMNSm2D7FL5DUBr0Bc4xsSPi7KFWI9AhmQjUn%2FsLVysgEKd8QEildi1DULaVOX11bv95PGoXvfAusYXSi5NQZk4oZJHr6QIjXu5w4e9Nd2lFtmG4ZB%2BkqROOwwliad72iafj6cbSLphBAjtWGZQVNbmcdKXG6S8h7cTVqt0aD4oej7%2BlDVihmo%2BV0Rc2MhA9FgkM%2BcyzPd0qc9vHvdxjpQUq&checksum=2931469928353c744c25da8843a496116014d4766745
Micro SD card (16 GB minimum)
Female Micro usb Port, (I know I did buy these but I can’t find the link. I bought female micro usb ports to make charging easier.)
I want to say this is the battery that I used, specifically because after taking the shell off it was the perfect fit inside of a gutted Gameboy Game cartridge-https://www.bestbuy.com/site/mycharge-razorplus-4000mah-portable-charger-for-most-usb-enabled-devices-silver/6292246.p?skuId=6292246
3d printed button wells-http://market.sudomod.com/3d-printed-gbz-button-wells/
Extra buttons-https://www.retromodding.com/collections/gameboy
Screw bracket-http://market.sudomod.com/3d-printed-gbz-screw-bracket/
I got A LOT of buttons, glass screen shields, the other three builds button PCBs, some stickers, seriously a lot of stuff from https://store.kitsch-bent.com/ his store is unfortunately closed as he has had life catch up to him and has some shit to attend to. If he comes back online show him some love.
Stuff I got from kitsch
PCB board with LR input points
Buttons for X/Y (you can opt to just get replacement snes or an extra set of Gameboy buttons.
Glass screen that fit the GB shell after removing extra plastic
And obviously you should have a pi zero/w as well a shit ton of patience.
I looked up Pitendo and my god is that a ripoff, there's maybe 60 bucks worth of things there. Here, look:
This
https://www.amazon.com/Vilros-Raspberry-Basic-Starter-Kit--Clear/dp/B01D92SSX6/ref=sr_1_2?ie=UTF8&qid=1469219491&sr=8-2&keywords=raspberry+pi+3
https://www.amazon.com/SanDisk-microSDHC-Standard-Packaging-SDSQUNC-032G-GN6MA/dp/B010Q57T02/ref=sr_1_1?ie=UTF8&qid=1469219519&sr=8-1&keywords=32+gb+microsd
And whichever one of these you want https://www.amazon.com/s/ref=nb_sb_noss?url=search-alias%3Daps&field-keywords=usb+controller
Is all you need, and you can honestly go for a Pi 2 Model B if you want to, and a smaller sd card maybe. Everything but the most demanding Dreamcast and N64 games work great on a 2, and N64 hardly works regardless of the model.
Honestly it's not a difficult set up, at least in my opinion. There's some troubleshooting you can do if you try and work out some more advanced things, but the basic set up is a breeze.
All you do is download the RetroPie image from the site, download Win32DiskImager, and write it to the card. It takes about 30 seconds to set up and maybe 3 clicks total.
After that, you put the microsd card into the pi, plug in your controllers, boot it up, follow the on screen controller config, and you're good to go.
Adding roms is as easy as putting in \\Retropie into any explorer window on you computer, if the pi is on your network, and dropping them into the console's folder. Everything else should be auto-configured and require little to no work on your end.
The old skool one which is now kintaro is popular, but known to make the pi hotter. I put a fan in it and run it fine with overclock.
small nes case
There's a another china one that's interesting and gained popularity. It has function power buttons, spot for a fan. NES style as well. Have to wait for in stock again though. Both run for $20
NESPi Case
Haven't had any issues with my China 5v 3A adapter -- but I'm not OC'd - try reverting back to standard clock and see if the bolt goes away - if it does you might need to get a larger/better power supply ( I've seen a few reports saying the Canakit supply doesn't actually provide 2.5A @ 5V )
For example this review on Amazon by Chris Satterleeon April 4, 2016 ( https://www.amazon.com/CanaKit-Raspberry-Supply-Adapter-Charger/dp/B00MARDJZ4 )
He does some Testing and includes a chart which shows it and says :
"
An interesting point is where the curves cross their rated current values. The Kootek 2.0A supply crosses 2.0A at about 4.6V (2.04.6 = 9.2W). The Canakit 2.5A supply crosses 2.5A at about 4.5V (2.54.5 = 11.25W). Both of these are well below 5V. Probably high enough that the RPi won't crash, but cutting it close.
Another interesting point is where the curves cross 5.0V. The Kootek 2.0A supply crosses 5.0V at about 0.8A (0.85.0 = 4.0W). The Canakit 2.5A supply crosses 5.0V at about 1.0A (1.05.0 = 5.0W).
People who are claiming that this supply doesn't deliver 2.5A are correct - if they are expecting it to deliver 2.5A at 5.0V. But what is important is whether the supply is sufficient for the RPi 3. All I can say for sure is that it does deliver proportionally more power than a 2.0A-rated power supply that has worked fine for me with the Gen 1 RPi B+. For that reason, I'm giving it four stars. "
So by the time it hits 2.5A the voltage has dropped to 4.5V which may be the reason the lightning bolt is showing if the case adds even a small amount more of drop by using the GPIO pins for the power in !
I got a canakit with the B, I feel like I’ve seen that there’s issues with Retropie and the B+, but maybe I’m thinking of something else... mine came with a sandisk microusb. Used etcher on my Mac to format and write the retropie image. I got the innext controllers and I think they work well (two for $14.99 on Amazon). In the future I may buy a case with a fan built in, but that’s just something I’m interested in, not too worried about it.
This is what I got and it came with everything as listed
https://www.amazon.com/CanaKit-Raspberry-Complete-Starter-Kit/dp/B01C6Q2GSY
I’ve had a lot of fun with it, hope it works out for you
You can make lots of cool stuff if you've got the skill/time, but if you just want something simple, the Old Skool Tools NES case rocks. Doesn't come as a kit that I know of, but just grab a Pi, power supply and microSD card and you're set. It's super easy to put together. And if you want an extra little DIY project, you can add a power indicator light or maybe a functioning ON/OFF button. That's what I did with mine, and I love how it turned out.
Parts List:
Power Adapter
Raspberry Pi
USB Super Nintendo Controller (This is the best one I have found so far)
HDMI Cable
WiFi Dongle
Other Items you will need:
USB Keyboard
Monitor or TV with HDMI Support
Now you dont have to use these parts exactly, there are plenty of other parts you can use. I am pretty sure that you can play Roms up to Playstation 1.
There is also a new Raspberry Pi 3 that is compatible with the RetroPie software which has WiFi and Bluetooth integrated into the board.
Helpful Video's to tackle technical issues with your RetroPie:
https://www.youtube.com/playlist?list=PLtht1mv6ty8xMBwgHX9RCkplqeSRxyHiC
Here is the Case I found on Etsy. There are plenty of other sellers but this guy was great!
SD Card: http://www.ebay.com/itm/122666926962
CanaKit Raspberry Pi 3 Kit with Clear Case and 2.5A Power Supply https://www.amazon.com/dp/B01C6EQNNK/ref=cm_sw_r_other_apap_Ho9w8DaJ48wXk Use the heat sinks it comes with. Mine got a little warm yesterday but I was using it for a few hours, nothing crazy though. I don't think you will need a fan, the case has an open rim around the top.
Classic USB Gamepad https://www.amazon.com/dp/B06XWD8QQJ/ref=cm_sw_r_other_apap_c5kHfMyYKj5hu
AmazonBasics USB 2.0 Extension Cable - A-Male to A-Female - 6.5 Feet (2 Meters) https://www.amazon.com/dp/B00NH136GE/ref=cm_sw_r_other_apap_rspym691O9zjf The controller cord is pretty long but I bought this because my couch and TV are really far apart, you probably won't need it.
You will need a keyboard to set up the controller for the first time, I borrowed my boyfriend's but I ordered this: Tripsky T9 2.4GHz Backlit Wireless Mini Keyboard, Handheld Remote with Touchpad Mouse for Android TV Box, Windows PC, HTPC, IPTV, Raspberry Pi, XBOX 360, PS3, PS4(Black) https://www.amazon.com/dp/B06XTF17JT/ref=cm_sw_r_other_apa_qLBPzbH96P1AG It is supposed to work with Pi but I'll have to get back to you when it gets here tomorrow.
I already had an HDMI cable but it's an Amazon Basics cable.
I was super pissed about not being able to get the SNES last week but this came out to around the same price for tons more games, plus Kodi. I don't think I'd be able to build it myself, so the card was awesome.
Power off by hitting quit on the main menu, then shut down. Wait until it's off (disconnected from TV screen) and unplug the power cord. Some people add buttons but this works just fine.
(When you load a game it says press any button to configure before it comes up, DO NOT PRRSS ANYTHING. It will do it on its own and start, you don't have to do any of that. I messed up and pressed it and didn't know how to get out.)
I just built one today. The popular 2.5A power adapter is this one, which is probably on your list
https://smile.amazon.com/gp/product/B00MARDJZ4/ref=oh_aui_detailpage_o01_s00?ie=UTF8&psc=1
Then I bought this case, which acts as a giant heat sink and was shown to cool the CPU more then the little heatsinks
https://smile.amazon.com/gp/product/B00QB6F9I0/ref=oh_aui_detailpage_o01_s00?ie=UTF8&psc=1
I followed the instructions that others posted and I've been trying it out all night, with a few hiccups for certain systems (Neo Geo, Family Computer Disk System), but Google searches fixed those issues.
I'm using my Xbox One controller, which has been working great and has extra buttons for different things (like save states, which I don't think can be done an an SNES controller)
It's pretty easy to do. Don't be too concerned about damaging your Pi, it will simply not boot if you put some 'out there' figures in config.txt. If that happens, you can just pop the SD card back in your PC and delete out any lines you've added or change them.
As mentioned however, you'll need to make sure that your Pi has sufficient cooling to deal with the increased temperatures that are a side effect of overclocking. Personally, I use a Flirc Gen 2 case (https://www.amazon.com/Flirc-Raspberry-Case-Gen2-Model/dp/B07349HT26/) and it keeps temps at a reasonable level due to it's impressive passive cooling. I think ETA has done a review on this case as well.
edit here is the review - https://www.youtube.com/watch?v=E4YuteuSEuA&t=1s
I'm also very new to Retropie and have had a ball experimenting with various settings and building an image that it just right for me. :)
Thanks! GBA games perform rather well actually as well as GBC games. I was playing oracle of seasons and it seemed to run great! I couldn't figure out how to use the original gameboy screen so I purchased and modded [this] (http://www.amazon.com/gp/product/B0045IIZKU?psc=1&redirect=true&ref_=oh_aui_detailpage_o03_s00) screen to fit my needs. It only draws about 270-300mA so it's not too power hungry making it a fairly good choice for this project. Unfortunately the resolution is crap and reading the small text in the OS menus is difficult.
Thank you for your reply. Based on what you've said, I think I will go with this 32GB Canakit here. I would like to see how well the Gamecube emulation works.
You seem to be experienced, so I hope you don't mind me asking a couple other questions real quick:
Thanks for all your help!
My favorite kit is this one:
CanaKit Raspberry Pi 3 Kit with Clear Case and 2.5A Power Supply https://www.amazon.com/dp/B01C6EQNNK/ref=cm_sw_r_cp_apap_He7LFsgm1pGXE
$50 for a $35 Pi3, an $8 case, a $10 PSU, plus some cheap aluminum Heatsinks.
This provides you with the bare minimum hardware, a good PSU, and a nice tool-free case, for cheaper than you could buy the individual components.
Add a good SD card (SanDisk or Samsung SDXC Class 10) and an HDMI cable, and you're in business.
The switch is front facing. It's set to 2-5 players.
Here's another thing that's plaguing me. I can't save the multitap settings in the software. Every time I load up a game I need to push select + x, go into the input settings and manually set player 2 to multitap, and add players 3 and 4.
One game is unplayable as a result, it appears it keeps whatever the settings are at boot, so player 1 controls player 1 and player 2 controls players 2 3 and 4.
When I click save core settings, or save any settings for that matter nothing happens. There's no confirmation, there's no visual cue that it's been saved, and there's no physical evidence because nothing ever does get saved.
Here's the product listing: https://www.amazon.ca/dp/B002IXZ5DE/ref=cm_sw_r_other_apa_i_ALIgDbQKDCYX2
It appears in the question section of the listing someone states that the multitap doesn't work.
Perhaps you could help me with configuration saving though? :)
I just built one from parts, do not be intimidated by what "could" go wrong. RetroPie has an amazing community (the Official Forum is a great place to get help and ideas from as well) behind it and a lot documentation. Both of which I did not need to tap. If you can follow the instructions to image the SD card, you should be just fine.
I bought:
for ~$80 and it was well worth it. The only things missing from this order is a HDMI cable and SD Card Reader (I have both already).
I just helped a friend of mine build his own, it's very easy to put together yourself. Here's our component list, that you may find helpful.
Raspberry Pi 3B
Flirc Raspberry Pi Case Gen2
8Bitdo Sn30 Bluetooth Gamepad
SanDisk 32GB Micro SD
AmazonBasics High-Speed HDMI Cable
NorthPada RPi3 Power Supply
Of course, there are many different cases and controllers you can use, you don't need to buy these specifically but it'll give you a good idea what you need to get started and what it will cost you when all is said and done. This is also assuming you just want something to play on TV. If you are a building a handheld, that's a different beast.
Looks like nespi by retroflag. Just got mine in yesterday. The power and reset button functionality is awesome. Though I’ve been reading I may need to link a python script to the reset button to be safer.
Retroflag NESPi Case+ Plus Functional POWER button with Safe Shutdown for Raspberry Pi 3 B+ (B Plus) https://www.amazon.com/dp/B07BRHDVTN/ref=cm_sw_r_cp_api_i_-ZD-AbM4V7RMH
Thanks for the offer! I may just take you up on it. I decided to order THIS from Amazon with a 32gb MicroSD card the other day. Still have to get ROMs and do more research, but that is this evening and tomorrow before Easter Sunday. Will probably just use my PS4 controller for the time being, but I really would like to get a classic looking NES/SNES controller for the aesthetics. I really want the kids to have the same sort of experience I had.
Basically I am just looking for the classics, and your link to Racketboy looks real useful. I have seen a few rom packs out there with basically every NES and SNES game out there, but I am always worried about authenticity. I was reading one site earlier this morning and it mentioned that some of the bigger games like Zelda were in spanish, which is a problem. Looks like there is a lot of work to get all this done, so I may have a few questions.
I'm not sure about using a breadboard. Honestly, I use two zero delay usb encoder boards for my controls and it works perfectly. They came in the gamelec kit I bought, but you can buy them separately here - super simple to wire and just plugs into the usb on the pi. One note, if you have two sets of controls, make sure you wire the boards the same way. And by that I mean the same buttons to the same slots on each board. Otherwise, your controls will constantly seem to remap themselves.
I have USB controller adapters for NES, SNES, and Genesis (which does Atari style controllers too) and they all work wonderfully.
This is the SNES one I bought
https://www.amazon.com/SNES-Controller-Adapter-USB-Super-NES/dp/B002IXZ5DE
I wouldn't doubt the one you posted works, but obviously I can guarantee anything.
I use this one for Genesis but it's honestly a bit pricy for what it does. You might be able to find something much cheaper that works, but I wanted the extra functionality.
http://www.2600-daptor.com/Vision-daptor.htm
This is the NES one. Works with the advantage too!
https://www.amazon.com/Tomee-NES-Retro-Controller-Adapter-Converter/dp/B00HM3QCN2
Personally, I'd recommend these over the ibuffalo controllers. I haven't had good luck with those. The only issue might be tracking down the controllers but if you're willing to do that I'd go for the adapters. Nothing feels like or beats the actual hardware, IMO.
CanaKit 5V 2.5A Raspberry Pi 3 Power Supply / Adapter / Charger (UL Listed) https://www.amazon.com/dp/B00MARDJZ4/ref=cm_sw_r_cp_apa_L-hFzb5RFN9E4
Sorry for the delay in getting back to you, but this is the power adaptor I use. It works great with the case. If you are having a mating issue with the power port, check to make sure that the pi is sitting correctly in the case, and also make sure that the ends of the case line up and aren't pushed too far one way or the other.
Power adapter I would say get the canakit for the rpi3b+
https://www.amazon.com/dp/B00MARDJZ4/ref=cm_sw_r_cp_api_H5qMBbF4WKVQQ
I have a case from wish that I spent 2 bucks on. So that’s totally up to you. If you plan to use it heavily I would say get some good fans and beat sinks
iUniker Raspberry Pi 3 B+ Dual Fan with Raspberry Pi Heatsink, Raspberry Pi Fan for Raspberry Pi 3B+/Pi 3 B/Pi 2 B https://www.amazon.com/dp/B07D5WWNH6/ref=cm_sw_r_cp_api_76qMBbD640R1H
Then get a new memory card and download the Retropie image and flash it using something like applepibaker.
Done.
Like u/Jack_Bohlen said - the documentation is really good and you should be able to find answers to most of your questions. Being able to read and follow instructions carefully is important, especially if you get into doing anything from the command line.
If you can follow directions, you should have very few problems going from a box full of components to a basic working system in a short time.
Here are the instructions I gave a friend recently:
Oh, and I guess you want to have a USB keyboard handy just in case. But it is a really easy process to get started.
I love my old skool nes case for my retropie!! Hey, why don't you include a link to the product and maybe an image?! Show people how awesome this little case is.
Amazon:
Old Skool NES case for Raspberry Pi 3,2 and B+ https://www.amazon.com/dp/B01M4OOY4U/ref=cm_sw_r_cp_api_PBI9ybVWN3C4N
I did this exact mod. I just used plain black electrical tape. Glad I did too as I had to open and recheck everything a few times after doing this mod and running into a few issues. The big one was the lighting bolt error caused by the cheap power wire. (The wires you cut to install the Pololu board between the rear USB micro port and the power button board.) You might consider replacing that whole section of +/- wires while you are in there.
I don't know how good it is, but there's also a brand new Nespi Case+ that is supposed to integrate safe shutdown with a script. I don't know if it's any better but here's a link. Hopefully we get some reviews soon. https://www.amazon.com/gp/aw/d/B07BRHDVTN
This is from a post I made on another thread like this:
Here is a list of the parts I used, from Amazon, to make an NES Mini.
Raspberry Pi
Case
Power Supply
Controller
Micro SD
You would also need an HDMI cable if you don't have one already. Some people use wireless Bluetooth controllers, (the PI has Bluetooth and WiFi built in), but I don't know how well they work, latency wise.
Edit: For SNES and N64 you would need a more robust controller. You can use just about any USB controller that works with a PC, and a corded Xbox 360 controller works fine. I have heard others have used he WiiU Pro Controller, but I haven't tested that myself.
Yes it is possible, I don't have my pi with me currently but I have hundreds of NES, SNES, game gear, master system, and Genesis roms all saved on my micro SD card with the retropie setup. If you haven't bought your pi yet I would suggest buying the whole package off Amazon, it's what I did and it was helpful.
CanaKit Raspberry Pi 3 Complete Starter Kit - 32 GB Edition https://www.amazon.com/dp/B01C6Q2GSY/ref=cm_sw_r_cp_apap_nZ8l33jxmjhpy
I have answers
I have the standard case that came with the CanaKit sold at Amazon (https://www.amazon.com/CanaKit-Raspberry-Complete-Starter-Kit/dp/B01C6Q2GSY/ref=sr_1_9?s=pc&ie=UTF8&qid=1503624521&sr=1-9&keywords=raspberry+pi+3).
I'm not very good at code or mod, but I found some guides and bought a small fan and made a script that control it. I fixed it at the case cover. When it is on it gets a little noisy for sure. Without a script it will be always on, but with the script it will turn on only when the Pi gets to certain temperature that you can set. As soon as it get below it, the fan turns off.
Works great for me!
This is the guide that I used to set the fan on the hardware side (https://hackernoon.com/how-to-control-a-fan-to-cool-the-cpu-of-your-raspberrypi-3313b6e7f92c) you will need a resistor for that. It's not hard tough. As I said, I'm a total noob and I actually did it.
The script that I use is this one (http://www.instructables.com/id/Automated-cooling-fan-for-Pi/)
One problem that I had is that the script, when started by crontab would not work properly for some reason. Solved by adding to the crontab a command to kill the script before it restart it. Can give you more details if you go trough this road.
I use this: https://www.amazon.com/gp/product/B009ZIILLI/ref=oh_aui_search_detailpage?ie=UTF8&psc=1
It's a pi3 but it worked out of the box like a charm, just plug and play (my onboard bluetooth is busted).
I think certain bundles are a good deal. The pi 3 bundle below is a good example- it comes w case, computer, and power. It’s cheaper to buy HDMI and SD card separately and you can get better controllers than the ones included in packages.
I’d use these bundles to get a sense of what you need to buy for the whole package and then buy those items a la carte.
https://www.amazon.com/dp/B01C6FFNY4/ref=cm_sw_r_sms_apip_8CVunakHrbo3A
https://www.amazon.com/CanaKit-Raspberry-Complete-Starter-Kit/dp/B01C6Q2GSY
Here's a 32 GB canakit package with case, power supply, HDMI, etc. Pretty much everything but the controllers. You save little by buying individually, and I've had good experiences with these (made about 12 thus far).
iBuffalo is the king of wired SNES controllers: https://www.amazon.com/BUFFALO-BSGP815GY-Classic-USB-Gamepad/dp/B06XWD8QQJ/ref=sr_1_2?s=electronics&ie=UTF8&qid=1503628239&sr=1-2&keywords=ibuffalo
8Bitdo gear is the way to go for wireless, but if your recipients aren't tech savy, wired might be better: https://www.amazon.com/SNES30-Game-Controller-PC-Mac-Linux/dp/B00VAQG5GQ/ref=sr_1_1?s=electronics&ie=UTF8&qid=1503628269&sr=1-1&keywords=snes30
I'd really stay awaay from controllers not made by those 2 brands. Everything else tends to be shit unless you're using an old Wii, Xbox, or PS controller.
Thank you, this Monday I bought this ( https://www.amazon.com/dp/B00UUROWWK/ref=cm_sw_r_cp_apa_b5WJAbJ5R08AZ ) (sorry for formatting, I'm on my phone) thank you for the hope tho. Do you have a recommendation to a guide or anything like that?
The FLIRC case is super clean, and it looks nice with one of these buttons installed in it as a soft power switch.
I recommend the Canakit.
https://www.amazon.com/CanaKit-Raspberry-Complete-Starter-Kit/dp/B01C6Q2GSY
For $70 everything is included. I put an RPie together last Christmas and instead of relying on the wife and family to find the parts as gifts, I just sent them to that link. Super easy, and it's been running non-stop all day since then.
> All i'm really looking for is something that I can plug in and play some old games on for a little while here and there.
You do realize it's not plug and play like the NES classic right? There's still some light software intallation involved with the Rpi. In fact it is illegal to sell/distribute a rpi with preloaded roms.
To answer your original post question, the price of the product is way to high for what you're getting. Taking 5 mins on amazon can get you much cheaper items especially with prime.
I still think this is too expensive, but it's still cheaper than the ebay link:
https://www.amazon.com/CanaKit-Raspberry-Complete-Starter-Kit/dp/B01C6Q2GSY/ref=sr_1_4?s=pc&ie=UTF8&qid=1501389466&sr=1-4&keywords=raspberry+pi+3
You just need to source your own controller which you can get here:
http://www.8bitdo.com/nes30pro-fc30pro/
Best controller you can buy for $30. Which in total is still cheaper than the ebay kit.
also depending on where you live and if you have amazon prime, you can get free 2 day shipping and it cost pretty much the same via amazon http://www.amazon.com/Buffalo-Classic-USB-Gamepad-PC/dp/B002B9XB0E/ref=sr_1_1?ie=UTF8&qid=1457068848&sr=8-1&keywords=ibuffalo
thats where i got mine last week
I happen to know a guy.
amzn.com/dp/B01M4OOY4U/
Good luck :)
The RetroFlag NESPI+, Super Pi, and Mega Pi cases have safe shutdown circuitry and scripts, and are pretty popular here.
If you don't want to deal with the noise of a fan the Flirc aluminum case is a amazing deal that really helps with overlocking. It fits over the raspberry pi CPU/GPU/RAM units and turns the whole case into a heat sink while providing a ton of protection to the Raspberry pi.
https://www.amazon.com/Flirc-Raspberry-Case-Gen2-Model/dp/B07349HT26/
This is my bartop arcade that I built and I really happy how it came out.
I used the following parts from Amazon:
Raspberry Pi 3 Kit
Joystick and Buttons
Monitor
I used 3/4'' MDF to build the structure and had a buddy who owns a print shop design and print the decals for me including the marquee. Most of the hardware used for electrical was bought at a local hardware store (Lowes, Home Depot, etc.)
Took about 15 hrs to build and was so much fun as is it to play with it. I mainly built it for my daughter which is just discovering retro gaming.
Maybe I will upload a video in action but everyone knows what it looks like and how it functions for the most part.
If there is anything you guys have a question about let me know in the comments.
Album not link?
A really fun Raspberry Pi project. My goal was to keep as much of the soul of the Atari 2600 as possible. It was important to me to keep the mainboard in the unit. Unfortunately both the chips for the Television Adapter Interface and the CPU had to be removed so that the HDMI connector would fit. I mounted the chips inside the body to still be present.
It cost a little more to build it this way but I'm extremely happy with the result. My total came to just over $150, with the majority of the expense being the Raspberry Pi 3 and a 256 GB Micro SD Card. I guess I’m an idiot because I meant to buy a 3B+ but just now noticed I got only a model 3. Oh well.
There are 3 USB ports and 1 HDMI port extended. The power switch for the Pi was wired to Game Reset switch since it's a momentary switch. A wireless keyboard with touchpad is connected directly to the Pi.
I'm currently running the 256GB VIRTUALMAN-PLAYBOX! v2.0-4.4.11 RHODIUM RETRO-PARADISE image.
The stuff I bought to build this mod:
I bought this one because it has 4.8/5 stars with 760 reviews, I have Amazon Prime, and multiple memory cards floating around. It'll be here tomorrow along with this controller. I'm super excited for this little project!!
I can't compare them as I haven't used the other brand. I got this 2P set based on the reviews. The buttons have screw rings on the back to tighten it. The easiest part about this set is the encoders. I was gonna a build one out if an Arduino but this is plug and play and saved me countless hours trying to make that work.
Yeah, I think that building your own is the way to go. It's not really that hard to do if you can follow instructions and can write an image to a micro sd. I recently put one together and you can get away with spending around $100 for a great setup. This was my parts list:
SNES wired controllers x 2 ($16.00 ea):
https://www.amazon.com/gp/product/B002B9XB0E/ref=oh_aui_detailpage_o02_s00?ie=UTF8&psc=1
The case ($27.99) : https://www.amazon.com/gp/product/B07872ZDCS/ref=oh_aui_detailpage_o01_s00?ie=UTF8&psc=1
Memory card 32 GB ($11.99): https://www.amazon.com/gp/product/B010Q57T02/ref=oh_aui_detailpage_o05_s00?ie=UTF8&psc=1
Raspberry Pi 3 Model B ($34.81): https://www.amazon.com/Raspberry-Pi-RASPBERRYPI3-MODB-1GB-Model-Motherboard/dp/B01CD5VC92/ref=sr_1_3?s=pc&ie=UTF8&qid=1521482606&sr=1-3&keywords=raspberry+pi+3
And then these optional luxury controllers - Wireless controllers x 2 ($47.16 ea): https://www.amazon.com/gp/product/B071SM6TDN/ref=oh_aui_detailpage_o00_s00?ie=UTF8&psc=1
As some else mentioned, it's not as detailed, but it's pretty cool.
https://www.amazon.com/case-Raspberry-Old-Skool-Tools/dp/B01M4OOY4U/
Overpriced. He built that using a $5 Pi Zero.
Personally, I bought this: https://www.amazon.com/gp/product/B01C6Q2GSY
It's about 10x more powerful and can play many more types of games. Has Bult-in WiFi and Ethernet.
Download RetroPie disk image from the official site.
There are a ton of videos out there to help you set it up.
I use my Xbox 360 Controllers.
https://github.com/retropie/retropie-setup/wiki/First-Installation
doesn't really matter. just make sure it has:
-2 heat sinks (just look on youtube how to install them. a toddler could do it)
-the circuit board
-the case- the standard cases are a bit boring so you might want to skip that and buy some awesome custom nes case like this
Anything else you need you can buy at walmart
I think I have this sorted out. Let me explain what I was shooting for, in case anyone is thinking about a similar setup.
First, the goal was for a bartop setup with a pair of arcade-style sticks built in. I got these: https://www.amazon.com/gp/product/B00WAY9848/ref=oh_aui_detailpage_o02_s00?ie=UTF8&psc=1
The set came with a pair of 'zero delay' USB encoders, that when hooked to the Pi together, produce the wonky results I described earlier. I finally found the solution in a previous post: https://www.reddit.com/r/RetroPie/comments/4p3uzo/2_zero_delay_usb_encoders_not_working_together/
The solution is a simple addition to a text file, noting the USB ID class of your type of controller.
The second goal of my build however, was to have a pair of external USB ports to plug in wired controllers like this one: https://www.amazon.com/gp/product/B003VAHYQY/ref=oh_aui_detailpage_o03_s00?ie=UTF8&psc=1 to play more console-centric games. The problem I kept running into is that many of the console emulators will only recognize the first two input devices. The external controller ended up always being #3 and wouldn't work.
The solution here is to use the USB port ordering on the Pi itself to dynamically (at boot time) reorder the controllers so you can use the one(s) you want. I can't find the link to the video I found describing the order, but if you're looking at the USB ports head-on, they are upper-left, lower-left, upper-right, lower-right ordered as 0, 1, 2, 3, respectively. RetroPi will number the controllers in that order, so generally anything plugged in to 0 and 1 are the inputs recognized by the console emulators.
In my situation for example, I wanted the SNES emulator to use the game pad(s) if plugged in, otherwise use the sticks. Since the zero-delay encoders needed extra power for the LED-lit buttons, I used the flat panel monitor's built-in hub to daisy chain them. The monitor's host USB connection went to port 2 (upper right) on the RPi. The two console controllers then, when connected, get ports 0 and 1 - making them the first two inputs.
Here's one that looks like a mini-NES. It's good quality, though kind of pricey at $20-ish.
The only thing I don't like are the HDMI/power ports are on the side, USB/Ethernet under the NES cart flap, and no access to GPIO without modification. Those are minor things, though, and the "That's dope" factor is high.
I paired it with this bluetooth gamepad which is surprisingly good.
I had this problem with Recalbox, so I tried installing Retropie. Well, still getting the same issue. Here's a video of it from Recalbox, but it's basically the same thing.
I tried forcing HDMI audio out, I tried switching the emulators to run Super Mario World (I'm using PiSNES), even tried redownloading the rom from somewhere else. Still having the issue.
It really makes it unplayable just because it's so irritating. By all accounts, the game is playable, I just don't want to play it.
Any ideas?
Also, I'm using Pi 3 B.
I'm currently making one to use with original SNES controllers. I've tried two different adapters and this one has worked the best for me.
https://www.amazon.com/gp/product/B002IXZ5DE/ref=oh_aui_detailpage_o03_s00?ie=UTF8&psc=1
Thanks, I appreciate the help.
This is the set I'm thinking of buying. What is missing besides the keyboard? https://www.amazon.com/gp/aw/d/B01C6Q2GSY/ref=mp_s_a_1_2?ie=UTF8&qid=1519609435&sr=8-2&pi=AC_SX236_SY340_QL65&keywords=retropi&dpPl=1&dpID=61MAJaKWgkL&ref=plSrch
I've found that one of the best cheap clone is the SNES controller made by Buffalo. There are others but I'm satisfied with it.
https://www.amazon.com/Buffalo-Classic-USB-Gamepad-PC/dp/B002B9XB0E
raspberry pi 3: $33.53
power supply: $7.99
case: $19.99
32GB SD Card w/ adapter: $12.31
2pk SNES USB iNNEXT Controllers: $16.99
So that's $90.81 before tax and shipping. Plus no choice in custom color of top and bottom of case, having to put it together yourself, download an image and configure it. So for a non-technical person it might be worth it since they'd be paying an extra $15 - $20 in this case for the labor/time involved.
(and yes, those controllers are garbage, but at least they can get replacements easily after the fact)
This is what I have for my heatsinks now, it will fit your board as the chips are the same sizes.
https://www.amazon.com/dp/B018BGRDVS/ref=cm_sw_r_cp_apa_i_CcDxCb2ZPQC30
The fan slot fits any 30x30x10mm fan powered by 5V. This one is cheap enough.
https://www.amazon.com/dp/B076WWR5PM/ref=cm_sw_r_cp_apa_i_jfDxCbGWTW28Z
Same here. Tried to be honest but Nintendo shipping 10 total minis to each store in Anchorage (insanity) pushed me over the edge. Amazon. Do it. https://www.amazon.com/CanaKit-Raspberry-Complete-Starter-Kit/dp/B01C6Q2GSY/ref=sr_1_3?s=pc&ie=UTF8&qid=1484331052&sr=1-3&keywords=raspberry+pi+3 that's the one I ordered. Complete kit. Join the resistance
Parts list for the interested
From amazon:
[perf baord](https://www.amazon.com/gp/product/B00ARTP1J4/ref=oh_aui_detailpage_o03_s00?ie=UTF8&psc=1
) $6, or any would do really.
[Battery](https://www.amazon.com/gp/product/B01LY0W11T/ref=oh_aui_detailpage_o03_s00?ie=UTF8&psc=1
) $8
[Screen](https://www.amazon.com/gp/product/B0045IIZKU/ref=oh_aui_detailpage_o02_s00?ie=UTF8&psc=1
) $18
[buttons for x/y and shoulders](https://www.amazon.com/gp/product/B0177ALAAE/ref=oh_aui_detailpage_o00_s00?ie=UTF8&psc=1
) $6
From Ebay.
[Shell](http://www.ebay.com/itm/GBA-Nintendo-Game-Boy-Advance-Replacement-Housing-Shell-Screen-Lens-Glacier-USA-/201114796639?hash=item2ed360425f:g:0Q4AAOSwV0RXufqw
) $12
[Speaker](http://www.ebay.com/itm/361510390912?_trksid=p2060353.m2749.l2649&ssPageName=STRK%3AMEBIDX%3AIT
) $5
[USB breakout board](http://www.ebay.com/itm/381578685439?_trksid=p2060353.m2749.l2649&ssPageName=STRK%3AMEBIDX%3AIT
) $0.99
From Adafruit.
Pi $5
Jst cable $0.75
Power boost 1000c $18
Mono audio amp $4
From Radio shack.
[Headphone jack](https://www.radioshack.com/collections/connectors-adapters/products/radioshack-1-8-stereo-panel-mount-phone-jack
) $3
[Volume wheel](https://www.radioshack.com/collections/trimmers-thermistors/products/radioshack-10k-ohm-wheel-potentiometer
) $2
Components for the low pass filter as also from radioshack, about $8.
Total without shipping: $100.
didnt think it would get that much attention :)
I can take mor picturesif you would like
I've chosen the Flirc case, looks nice and does a good job with cooling compared to heat sinks. Haven't had the chance of testing it out myself, I need to wait for it to arrive. My source was youtube, so you can check that out if you want.
https://www.amazon.com/Flirc-Raspberry-Case-Gen2-Model/dp/B07349HT26/ref=sr_1_2?ie=UTF8&qid=1499158370&sr=8-2&keywords=flirc+pi+case
buy this kit for $50
it includes the chip, case, and power.
the main thing you will need besides that is a microSD I'd recommend at least a 64gb. so that's about $22.
if you have a HDMI cable, and ps3 controller laying around, your pretty much done. so about $75 total.
Thanks! Maybe I will get a fan after all. I like how this kit comes with everything https://www.amazon.com/Smraza-Raspberry-Cooling-Heatsinks-include/dp/B01LWURJMI but there are some bad reviews about the fan dying. Let me know if you know of a better setup
I would highly recommend these for a true (NES) retro look.
https://www.amazon.com/dp/B01M4OOY4U/ref=cm_sw_r_cp_apa_NAYuzbJ3VX88Q
https://www.amazon.com/dp/B01LW7JJPJ/ref=cm_sw_r_cp_apa_bBYuzbDAJX59J
I ordered some from amazon that had 3M thermal tape on them. Some people recommend using something with more tac(thermal glue) but the plain janes work for me. I ordered the stock raspberry pi case. Both of mine are black. Nice and small and I leave both side panels out so there is more air movement.
LoveRPi Performance Heatsinks for Raspberry Pi 3 Model B (1 Set) https://www.amazon.com/dp/B018BGRDVS/ref=cm_sw_r_cp_apip_eSdSCcfJlqdfu
Official Raspberry Pi 3 Case - Black/Grey https://www.amazon.com/dp/B01F1PSFY6/ref=cm_sw_r_cp_apip_ahcikJCLScSM6
This seems like a better deal since it includes the raspberry pi: https://smile.amazon.com/dp/B01D92SSX6/
http://www.amazon.com/Plugable-Bluetooth-Adapter-Raspberry-Compatible/dp/B009ZIILLI/ref=sr_1_1?ie=UTF8&qid=1449239788&sr=8-1&keywords=bluetooth+raspberry+pi
This seems to work great for me!
If you don't want a new PC you can try overclocking your pi. I'd recommend buying heatsinks here:https://www.amazon.com/LoveRPi-Performance-Heatsink-Raspberry-Heatsinks/dp/B018BGRDVS and there's a guide for it here:https://www.youtube.com/watch?v=FTp3mfpCc2A&t=24s. If you do this you should get better performance.
Yes, it's the CanaKit here:
https://www.amazon.com/CanaKit-Raspberry-Complete-Starter-Kit/dp/B01C6Q2GSY
The tape was already on the sinks. Black in color, if that helps?
Correct, nothing tweaked as in software or settings. It's running all on default settings.
My research shows this is the best power supply: https://www.amazon.com/CanaKit-Raspberry-Supply-Adapter-Charger/dp/B00MARDJZ4/ref=cm_wl_huc_item
I used this one. It's cheap and it works but you need to solder it so it can run on 5v. https://smile.amazon.com/gp/aw/d/B0045IIZKU/ref=mp_s_a_1_4?ie=UTF8&qid=1504033324&sr=8-4&pi=AC_SX236_SY340_FMwebp_QL65&keywords=3.5+inch+backup+camera&dpPl=1&dpID=41qtbKk9UvL&ref=plSrch
The screens inside aren't all the same so if you check over at www.sudomod.com there is a thread in the forums showing where people have soldered them based on the different guts. Hope this helps!
I have a 3D printed NES case (http://pi-tendo.com/) that I enjoy though I wish it had a fan. I got it months ago before the whole craze really started so your case from Amazon is similar though a lot cheaper. When doing a lot of rewinding / fast forwading in SNES9x I've seen the thermometer icon come up on screen from time to time. I have heatsinks but I 'm guessing they are a little smothered because of the ventilation (or lack thereof).
That being said, I've built a few devices for people and I went with this and they've been very pleased: https://www.amazon.com/Smraza-Starter-Raspberry-layers-Heatsinks/dp/B01LWURJMI/ref=sr_1_14?s=electronics&ie=UTF8&qid=1493057841&sr=1-14&keywords=raspberry+pi+3
Has a fan and heatsinks and you build it in layers, little more work to be done putting it together but no harder than making a Lego set.
I use a couple of the Buffalo USB controllers. They feel, look, and work great.
https://www.amazon.com/Buffalo-Classic-USB-Gamepad-PC/dp/B002B9XB0E
I've got one of these, works great
I use this Mayflash adapter I bought in 2015 on my Retropie, and it works great.
SNES Controller to Adapter for PC USB https://www.amazon.com/dp/B002IXZ5DE/ref=cm_sw_r_cp_apip_qOswgC9vqSNfd
other than the issues described in this thread with controllers being assigned a player designation, this thing works great for me.
I got one for my Pi, definitely plug n' play.
https://www.amazon.com/Reyann-Arcade-Encoder-Joystick-Fighting/dp/B00UUROWWK
I had great results with this. The only other thing you need is a controller and keyboard.
I bought [this] (https://www.amazon.com/gp/aw/d/B01C6Q2GSY/ref=mp_s_a_1_1?ie=UTF8&qid=1469372205&sr=8-1&pi=SY200_QL40&keywords=canakit+raspberry+pi+3&dpPl=1&dpID=61LxoDAa3PL&ref=plSrch) one on sale during Prime Day. Has worked great so far.
Edit: words
This is the switch I bought and works great:
https://www.amazon.com/NorthPada-Raspberry-Supply-Charger-Adapter/dp/B01N336XEU/ref=sr_1_3?ie=UTF8&qid=1498302064&sr=8-3&keywords=power+switch+for+raspberry+pi+3
Just about any SNES USB controller will work well. The Buffalo ones are better than generic Chinese ones and they're 12 bucks :
https://www.amazon.com/Buffalo-Classic-USB-Gamepad-PC/dp/B002B9XB0E
It can be made to work with RetroPie, but you'll only get about 15fps out of it with that resolution. The 320x240 resolution screens are a bit better, but still nowhere near 60fps.
Right now the only option in that size with a decent frame rate is a composite screen. A lot of people use these.
I'd go with a Canakit, but not the complete one. This version is only the case, Pi, and power cable for $50. Your complete starter kit comes with a generic SD card and HDMI cable for an extra $20 which you can get better versions of for around the same price or cheaper (or you have an HDMI cable laying around).
It's the v3 starter kit purchased on Amazon: https://www.amazon.com/gp/product/B01C6Q2GSY/ref=oh_aui_search_asin_title?ie=UTF8&psc=1
The image is retropie-4.4-rpi2_rpi3.img
I did initially set everything up with the keyboard.
I did just start it up for the first time in months. I have two of the Buffalo USB controllers. One doesn't appear to work at all and I tried multiple USB ports. The other seems to work for navigating around RetroPie but once I get into a game nothing works.
Any ideas? Thank you for the help. I was so excited about this when I first set it up and it's mostly been a disappointment because I can't get the damn thing working.
I looked it up, it's "Vilros" not "Viros" apparently. No clue if it works and never heard of it before.
For that price you should get the flirc case instead. Kind of a famous case that's proven to work.
As others have mentioned, a micro SD and an adapter are necessary as well. I'd also recommend this power supply for guaranteed 2.5A, though the one you already have may be very similar: https://www.amazon.com/CanaKit-Raspberry-Supply-Adapter-Charger/dp/B00MARDJZ4/ref=sr_1_3?ie=UTF8&qid=1498077621&sr=8-3&keywords=raspberry+pi+3+power+supply.
What I haven't seen anybody note, though, is that Buffalo offers newer controllers that also happen to be cheaper: https://www.amazon.com/gp/product/B06XWD8QQJ/ref=s9_acsd_hps_bw_c_x_2_w.
Here's the one I went with. Has heat sinks and a fan, and the fan is so quiet I can't really hear it unless I'm right up on it.
It's just Amazon defaulting the price to the first person who has them in stock at this moment.
Give the original 3rd party seller time to restock and the price will drop back to 20.
This is a nice passive cooling option.
https://www.amazon.com/Flirc-Raspberry-Case-Gen2-Model/dp/B07349HT26/ref=sr_1_1_sspa?s=electronics&ie=UTF8&qid=1505430903&sr=1-1-spons&keywords=flirc&psc=1
Just a note in regards to the controllers-try this one:
https://www.amazon.com/gp/product/B06XWD8QQJ/ref=ox_sc_sfl_title_5?ie=UTF8&psc=1&smid=A393TJS9IUBRUJ
The controller model ending in 815 seems to be all they ship now. Yours is the 801 and currently at 18.88, but you will receive the EXACT same controller as if you ordered the 815 version above (there's also another listing for them), and they're 16.48. Just an FYI!
That is exactly what got me here... can someone confirm this as a decent option? For now I just want to do older sims up to SNES, I realize I would probably need an upgrade for PSX/N64/Wii.
https://www.amazon.com/gp/product/B01C6Q2GSY/
How about a good controller option?
https://www.amazon.com/iNNEXT-Nintendo-Controller-Raspberry-Windows/dp/B01MYUDDCV/
I can tell you from personal experience that the Flirc case is legit! I use it with an OC'ed pi @ 1350\525 and have yet to see temps rise above 60c! The catch is though, instead of using the thermal pad they include with the case, I use a small copper shim with thermal paste on both sides interfacing the soc and case, respectively. It's solid too, not like those cheapy acrylic cases! Plus you won't have to deal with any annoying fan noise!
As far as a ps goes, I use this:
https://www.amazon.com/NorthPada-Raspberry-Supply-Charger-Adapter/dp/B01N336XEU/ref=sr_1_1?s=electronics&ie=UTF8&qid=1510362231&sr=1-1&keywords=raspberry+pi+power+supply+3a
Edit:
To answer you original question: No, using a 2.5a ps with an OC'ed pi will either work or it won't be able to supply enough juice causing oddities or crashes... it will not "burnout the components" as the pi has a polyfuse so you will pop that before anything else.
Alright, here is how to install RetroPie (to play classic games)
For the raspberry pi, get this set and a class 10 micro SD card.
Yes, that is exactly what I have. It is the one that comes with the Canakits that I got from Amazon.
https://www.amazon.com/gp/product/B01C6FFNY4/ref=oh_aui_detailpage_o00_s00?ie=UTF8&psc=1
I got the canakit, a Bluetooth controller, and 32gb micro sd. Around $70 give or take.
CanaKit Raspberry Pi 3 Kit with Clear Case and 2.5A Power Supply https://www.amazon.com/dp/B01C6EQNNK/ref=cm_sw_r_sms_c_api_56HJybVC09JWK
Matricom G-Pad BX Wireless USB Rechargeable Bluetooth Pro Game Pad Joystick (Samsung... https://www.amazon.com/dp/B015YF3YZ8/ref=cm_sw_r_sms_c_api_H4HJybFKP1YC5
Samsung EVO 32GB Class 10 Micro SDHC Card with Adapter (MB-MP32DA/AM) https://www.amazon.com/dp/B00IVPU786/ref=cm_sw_r_sms_c_api_G7HJyb7D59XN7
Do you have a Sd card reader ?
Buying this kit will https://www.amazon.com/gp/product/B01C6FFNY4/ get you the same power Adapter and Pi for 2 dollar cheaper and some free heatsinks
https://www.amazon.com/CanaKit-Raspberry-Complete-Starter-Kit/dp/B01C6Q2GSY/ref=sr_1_1?s=electronics&ie=UTF8&qid=1483931991&sr=1-1&keywords=Canakit
The kit I got plus 2 Logitech 310 controllers. Well worth it!
That's pretty close. I just did a build, so here's some recent prices:
Pi 3 with 5v 2.5A power supply and heat sinks - Was $49.99, now $46.99
32GB MicroSD - Was $9.99, now $11.99
This plain case, which I put custom stickers on - $6.99
Two SNES-style USB gamepads - $12.20 each
I didn't include an HDMI cable because I had several laying around, so your minimum cost is about accurate.
Edit: Oh, and this case to keep it organized while traveling.
You can use the ones you have, or just buy the controllers you want.
Easy one lots of people use:
https://www.amazon.com/Buffalo-Classic-USB-Gamepad-PC/dp/B002B9XB0E/ref=sr_1_4?s=videogames&ie=UTF8&qid=1482002551&sr=1-4&keywords=snes+controller
Kit will save a few bucks if you don't mind the brand or parts they give you https://www.amazon.com/CanaKit-Raspberry-Complete-Starter-Kit/dp/B01C6Q2GSY/ref=sr_1_2?s=pc&ie=UTF8&qid=1503627652&sr=1-2-spons&keywords=raspberry+pi+3&psc=1
Got my first RetroPie for xmas. Now making one for my dad. Bought this for him to safely turn on the pi instead plug on/off.
https://www.amazon.com/dp/B01MZX466R/
Cases are like $12 on Amazon. You can't afford that?
EDIT
https://www.amazon.com/Flirc-Raspberry-Case-Gen2-Model/dp/B07349HT26
That was $12 a month ago when I bought 2 of them. Now they're $16. I put a pi 1B in one of them.
The items you linked are cheap, but won't really work for you, they could, but you will have to tinker and take a chance with those Items. The power bank you linked does not have enough amps output to run the Rasperry Pi correctly and the LCD might not work for the Retropie OS. I would go with something that can output enough amps for the Raspberry Pi to run without any issues, it needs 2.5Amps. If not, the Pi will be complaining about power or being throttled because it does not have enough power to run the Raspberry Pi without any issues, specially if you are running Retropie and doing emulation:
Anker PowerCore 20100 with has 20,000mah and outputs 2.4Amps per port
https://www.amazon.com/dp/B00X5RV14Y/ref=cm_sw_r_cp_apa_4yDpzbGZ20DB6
Anker PowerCore II 20000 Portable Charger it has 20000mah and outputs 3Amps per port
https://www.amazon.com/dp/B01LQ7MQG6/ref=cm_sw_r_cp_apap_jrXiWbBU7nUPA
------------------------------------------
As for the screen, I would go with something more compatible. The screen you linked only works a a custom built Raspian OS. Not sure it would work on the Retropie OS/img. It does come with drivers which you might need to compile within your Retropie OS to get the screen to work. I would go with a screen that can run off of the display port or HDMI port of the Raspberry Pi natively. Check out the specs and the compatability of the screen to the OS you will be using it for. One good example of a really compatible A LCD is the official 7" LCD/touchscreen that plugs into the display port and works with most all OS' on the Pi. You only need to change one small setting in the boot/config file for it to boot with the LCD screen attached. I think there is an official 5" LCD available, but I could be wrong. Looks like you want to use a smaller screen, check the Retropie forums or check instructables.com to see what other people have used.
Raspberry Pi 7" Touchscreen Display https://www.amazon.com/dp/B0153R2A9I/ref=cm_sw_r_cp_apa_DJDpzbEP8KVK4
I don't have any experience with those so I can't comment one way or another.
Do you have any other controllers that you can try? Or do you know anyone else with a pi you can try your controller on?
This is what I got
Buffalo Classic USB Gamepad for PC https://www.amazon.com/dp/B002B9XB0E/ref=cm_sw_r_other_apa_bWlyybVFCC9Q3
And it works great. The lag, if there is any, is so microscopic that I can't even tell.
I don't know anything about the ones you linked to. I use these. I believe they are already programmed in to the RetroPie image because they worked on most games without doing anything to them. :)
https://www.amazon.com/gp/product/B01C6Q2GSY
Well worth every penny
Your better off saving your money and building your own. I would suggest checking out ETA Prime on youtube or DrewTalks. I've watched those two explain how to ustom build my retropie unit from scratch. I've also provided a link here with the extact unit I got. Anything else would be a rip off.
https://www.amazon.com/CanaKit-Raspberry-Complete-Starter-Kit/dp/B01C6Q2GSY/ref=sr_1_2?ie=UTF8&qid=1525143583&sr=8-2&keywords=raspberrypi
https://www.amazon.com/CanaKit-Raspberry-Complete-Starter-Kit/dp/B01C6Q2GSY
Get this if it's available. Then buy your own SNES controllers. Most are trash. iBuffalo and 8bitdo appear to be the only companies that make good ones.
I have the Flirc gen2 case. It's fairly hefty and doesn't move all that easy.
Take a look at this version: Retroflag NESPi Case Plus Functional Power Button with Safe Shutdown for Raspberry Pi 3 B+ (B Plus) https://www.amazon.com/dp/B07BRHDVTN/ref=cm_sw_r_cp_api_i_fRk6Cb0MSVTD6
STOP!... Here u go buddy: https://www.amazon.com/dp/B01LWURJMI/ref=cm_sw_r_cp_apa_NDoBzbMJ3M4DX
Thank me later.
I highly recommend this controller for emulating NES and SNES (I also used for Genesis). You can find this controller for much cheaper than $35: http://www.amazon.com/Buffalo-Classic-USB-Gamepad-PC/dp/B002B9XB0E/ref=sr_1_1?ie=UTF8&qid=1462077116&sr=8-1&keywords=buffalo+snes
In addition to what everyone else said, these resources got me up and running:
http://www.sudomod.com/game-boy-zero-screen-alternatives/ - overview
http://www.sudomod.com/wiki/index.php/Screens - specific options and tutorials
https://www.amazon.com/gp/aw/d/B0045IIZKU - the unit I bought for my handheld. Sudomod says that these devices vary, so you’re not ensured to get the same board I did
My screen runs off of gpio without issue, in any event, I just had to mod the screen following sudomod directions to support 5v.
Eh. I was trying anything I could.
The kit I got was 50$
Vilros Raspberry Pi 3 Basic Starter Kit - Clear Case https://www.amazon.com/dp/B01D92SSX6/ref=cm_sw_r_cp_apa_5WTyybB2ZJ4WW
Total: $54 + tax
Round it off to $60 with tax, and I'd say that is around $50 since I didn't pick the absolute cheapest options. I'm certain that the $50 price point is more for people who don't have to pay online tax. This is basically the minimum needed to get going with RetroPie, and unless you are trying to do PSX, you really don't need the Pi3.
FYI all, this will be back in stock on Feb 14. @ $20/ea Get your orders in. https://www.amazon.com/dp/B01M4OOY4U/
I've always found the Pi USB port was able to charge it, I use this power supply for my Raspberry Pi, if you aren't able to charge it it is possible that you're Pi isn't getting enough power to power the USB ports. If the cable isn't allowing charging you may consider switching USB cables, I have a cheap Amazon Basics one and it seems to work fine.
It's what you plug into the wall to supply your device with power... Looks like this... https://www.amazon.com/CanaKit-Raspberry-Supply-Adapter-Charger/dp/B00MARDJZ4/ref=sr_1_3?ie=UTF8&qid=1493155225&sr=8-3&keywords=raspberry+pi+power+supply
I got this one https://www.amazon.com/gp/product/B01C6FFNY4
I wanted a different case and already had a lot of the other peripherals.
Also look into getting an SD card like Samsung or something. I keep seeing other people say the one that comes with the kit is substandard.
Even if you're buying components separately as I did I'd recommend the Canakit Pi 3 + power supply bundle since it was a few bucks cheaper than buying the two separately
I'd recommend this case: https://www.amazon.com/gp/aw/d/B01M4OOY4U/ref=ya_aw_od_pi?ie=UTF8&psc=1