(Part 2) Top products from r/SVRiders
We found 21 product mentions on r/SVRiders. We ranked the 141 resulting products by number of redditors who mentioned them. Here are the products ranked 21-40. You can also go back to the previous section.
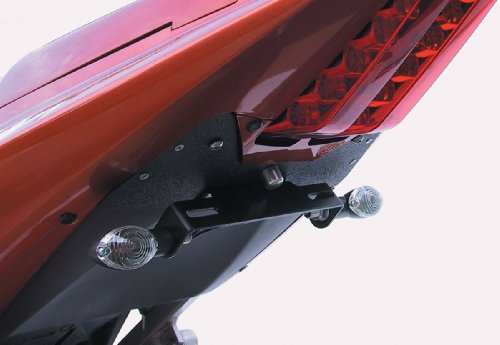
21. TARGA Fender Eliminator Tail Kit 2003-2009 Suzuki SV650 SV650S SV1000 SV1000S 22-350-L
Sentiment score: 0
Number of reviews: 1
Black anodized license plate bracketBlack anodized textured ABS filler plateMini oval turn signals; Turn signal cable adapters (no cutting of the stock wiring harness)LED license tag lightComprehensive mounting hardware pack and instructions
 Show Reddit reviews
22. RK 520 GXW XW-Ring Chain - 120/Gold
Sentiment score: 2
Number of reviews: 1
Chains feature quad-staked pin riveting, solid rollers and solid bushings,They are all pre-stressed and pre-stretched for better performance with fewer adjustmentsXW-Ring Sealed Chain GXW are the leading edge XW-ring features a Nitrile Butadiene composite construction with 6 sealing points and 3 lub...
 Show Reddit reviews
23. Berryman 0116 B-12 Chemtool Carburetor, Fuel System and Injector Cleaner, 15 oz. Easy Pour-in Can
Sentiment score: 0
Number of reviews: 1
Contains 100% high-energy solvent technologyHelps keep injectors or carb(s) and intake ports and valves cleanQuickly disperses moisture and dissolves gum, varnish, and other fuel residuesDisperses moisture in conventional gasolineCatalytic converter and oxygen sensor-safe. Item has less than 3% Acet...
 Show Reddit reviews
24. Suzuki SV650, 1999-2009: Maintenance, Troubleshooting, Repair (Clymer Powersport)
Sentiment score: 0
Number of reviews: 1
1999 - 2009 Suzuki SV650 Clymer Repair Manual
 Show Reddit reviews
25. Suzuki SV650 & SV650S '99 to '08 (Haynes Service & Repair Manual)
Sentiment score: -1
Number of reviews: 1
 Show Reddit reviews
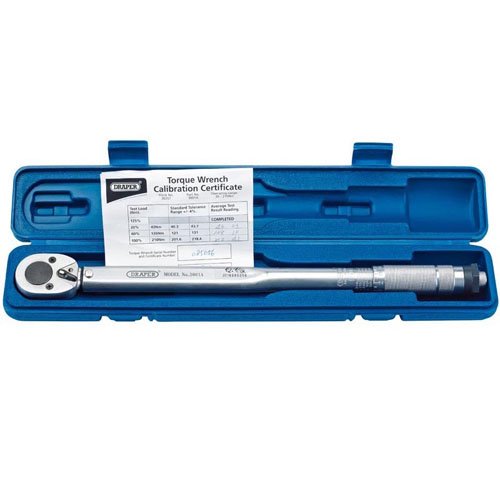
26. Draper 1/2" Square Drive 30 - 210Nm or 22.1-154.9lb-ft Ratchet Torque Wrench - 30357
Sentiment score: 0
Number of reviews: 1
The micrometer type sleeve allows accurate preset torque values to be setWhen torque is reached the wrench produces an audible click and a release of tensionMarked range: 30-210Nm/22.1-154.9lb-ftOverall length 475mm
 Show Reddit reviews
27. White Dog,9pcs L Shape Tamper Star Bit,TAIH0615
Sentiment score: 1
Number of reviews: 1
Torx wrenches are made of hardened chrome vanadium steel.Each torx wrench has a small hole in one end for use with security type fasteners.Torx wrench set includes the following sizes: T10, T15, T20, T25, T27, T30, T40, T45, T50.
 Show Reddit reviews
28. Sunex 9710M 3/8-Inch Drive Metric Crowfoot Flare Nut Wrench Set, Size-10 - Size 19, 10-Piece
Sentiment score: 1
Number of reviews: 1
Fully polished drop forged alloy steel3/8 inch driveMounted on a convenient storage railAlso available individuallySet includes in Metric - mm: 971010 size 10, 971015 size 15, 971011 size 11, 971016 size 16, 971012 size 12, 971017 size 17, 971013 size 13, 971018 size 18, 971014 size 14, 971019 size ...
 Show Reddit reviews
29. Auxbeam H4 9003 Led Headlight Bulbs F-M3 Series 50W 5000lm 6500K ZES LED Chip Hi/Lo Beam Headlight Conversion kit
Sentiment score: 1
Number of reviews: 1
【ULTRA-HIGH BRIGHTNESS】AUXBEAM F-M3 series led headlight bulbs with 12pcs of ZES double-sided chip, 360-degree clear beam no blind zone. Luminous Flux: 5000lm/set(2500lm/bulb), Xenon white light reflect road paint/signs better to show clearer road situation. Operating Voltage: DC 9-32V (fit 12V,...
 Show Reddit reviews
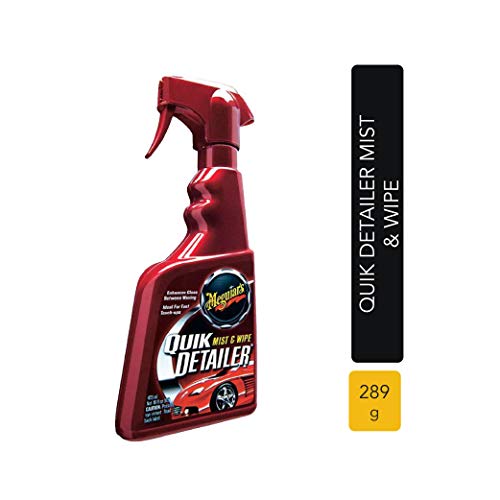
30. Meguiar’s A3316SP Quik Detailer Mist & Wipe, 16 Fluid Ounces
Sentiment score: 0
Number of reviews: 1
Fit Type: Universal
 Show Reddit reviews
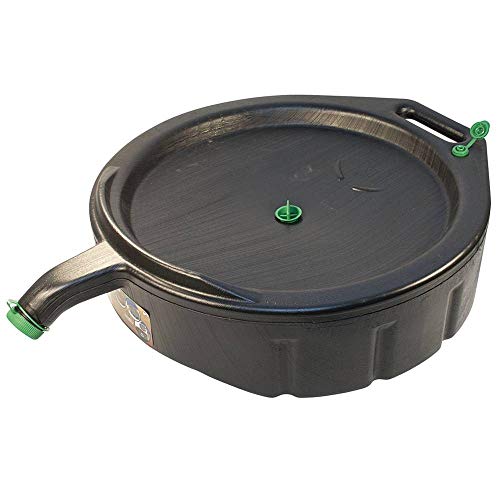
31. Hopkins (11838MI) FloTool Oil Drain Container - 15 Quart Capacity
Sentiment score: 1
Number of reviews: 1
Fit Type: Universal
 Show Reddit reviews
32. Krazy Glue KG92548R Instant Krazy Glue 0.18-Ounce All Purpose Brush
Sentiment score: 0
Number of reviews: 1
Glue, high quality productAll Purpose KrazyManufactured in JapanBrush on applicator stays fresh in clog free bottleGoes on purple, dries clearEasy to see, easy to useExcellent surface coverageBonds to wood, metal, ceramics, pottery, rubber, vinyl, leather and plastic
 Show Reddit reviews
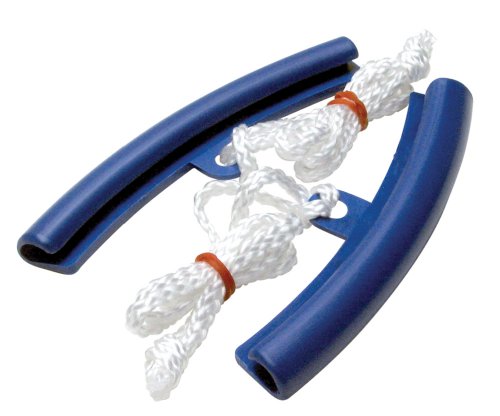
33. Motion Pro 08-0357 Rim Protector
Sentiment score: 1
Number of reviews: 1
Protects your wheel from scratches and dings caused by tire changing toolsRetrieval cords are included for easy useMade with new and improved nylon material that is tougher, stronger and more flexible
 Show Reddit reviews
34. Battery Tender Junior Charger and Maintainer: Automatic 12V Powersports Battery Charger and Maintainer for Motorcycle, ATVs, and More - Smart 12 Volt, 750mA Battery Float Chargers - 021-0123
Sentiment score: -1
Number of reviews: 1
STAY CHARGED: Provides a full charge to your machine’s battery before switching to float mode to maintain proper voltage levels for safe, long term storage without overcharging. Spark proof during lead connection, reverse polarity protected and includes a 12-foot output cord and 5-year warrantyEAS...
 Show Reddit reviews
35. VHT SP736 Gold Brake Caliper Paint Can - 11 oz.
Sentiment score: 1
Number of reviews: 1
Paint has been specifically designed for brake, drum, caliper and rotor custom detailingSuperior heat and chemical resistanceBest when used with primer color paint and clear coat processWithstands temperatures up to 900 degrees when cured properlyThis item is not for sale in Catalina Island
 Show Reddit reviews
36. K&N Motorcycle Oil Filter: High Performance, Premium, Designed to be used with Synthetic or Conventional Oils: Fits Select Suzuki Motorcycles, KN-138, black, Fitment
Sentiment score: 1
Number of reviews: 1
HIGH FLOW RATES: Designed to provide exceptional flow rates and a consistent flow of oil to your enginePROTECT YOUR ENGINE: Synthetic-blend filtration media removes most harmful contaminantsEXTENSIVELY TESTED: Laboratory tested to ensure excellent capacity and burst strengthVERSATILE COMPATIBILITY...
 Show Reddit reviews
37. RK Racing Chain GB520GXW-116 Gold 116-Links XW-Ring Chain with Connecting Link
Sentiment score: 0
Number of reviews: 1
Sealed XW-Ring chain features heat treated hi-carbon alloy steel components with seamless rollers and shouldered bushingsXW-Ring is made of an advanced nitrile butadiene composite featuring three contact lips and two convex outer stabilizers; this means three lubrication pools to protect against hig...
 Show Reddit reviews
38. Motion Pro 08-0007 16" Curved Tire Iron
Sentiment score: 1
Number of reviews: 1
Cold forged steel16 inch long double compound curved tire ironSold individually
 Show Reddit reviews
39. Yuasa YUA1200901 Smartshot 12V 900 mA Battery Charger/Maintainer
Sentiment score: -1
Number of reviews: 1
Fully charges and maintains conventional and sealed maintenance free batteriesFully automatic three level charge cycle for effective chargingReaches 14.4 Volts peak charge, then automatically switches to float chargingReverse polarity protection, spark free operation, durable construction and 6 foot...
 Show Reddit reviews
40. National Cycle F-15 Sport Windshield - Dark Tint N2520
Sentiment score: 0
Number of reviews: 1
Direct Mount F-Series fairing is available in different styles and heightsDirect Mount means the Lexan polycarbonate fairing mounts directly to the bike (in this case the headlight bracket), without any additional brackets, uprights or arm extensionsNo other structural mounting brackets are neededLe...
 Show Reddit reviews
Wheel weights can really just go anywhere on the wheel there's a flat enough spot to stick it to, but I try to get it as close to the center as possible. I use stick-on weights, but the guy who I had doing my tires before always used the clamp-on weights. Both seem just fine.
You throw the wheel with tire onto the balancer and the heavy spot will orient itself downward. Add the weights to the light end that is upward. I use a piece of electrical tape to hold weights on temporarily and add them until it's balanced enough that the wheel wont spin on its own. It's not as awesome as those big expensive machines that tell you where to put the weights, but I've personally never had issues. Just takes patience and forethought.
Here are the tool I use:
Rim savers These work very well, but I think if you have spoons that aren't flat and wide like the motion pros it can break the plastic it's made from. Mixed reviews. Some recommend three, but they're sold in pairs. I went ahead and got two sets in case I broke one somehow.
Wheel balancer I had heard horror stories about the cheaper end balancers and figured I'd just do it right the first time and went ahead and got this thing. Very solid piece of equipment.
Two smaller spoons - These work great I think. I have a slight bias toward motion pro since, in my experience, they make good stuff.
Large spoon - It's useful for the last part of the tire if you can't manage it with a shorter spoon. More leverage. Not entirely necessary, but three total spoons is ideal.
Air compressor - To set a bead you need one with a high enough PSI, but this was bought with the air tools in mind. I'm pretty sure it would be overkill for just mounting tires.
Bead breaker - There is a motorcycle specific one that I saw, but it seemed like it was designed for scooter wheels that are much smaller. I saw it in action at a friends house and it works fine as well.
There are competing brands and vendors for everything you can think of, so shop around for whatever you decide on doing. There's a good chance there's a better deal out there on something. I just use amazon for reference.
Barely...
I have three responses. 06 SV650S here. 520 kit (-1/+2, Chain and Sprocket below), K&N, DanMoto XG1 baffleless.
0) Do a Chain and Sprocket first. IMPO the PCV does little to increase acceleration, the changes are more dynamic the just raw power. (I don't know what a Zero Map is). Replacing your stock 530 pitch chain and sprockets with light weight (NOT Aluminum) 520 bits is one of the coolest upgrades. The 520 kit improve acceleration, wheel horsepower and torque by reducing rotating mass.
Note: I've had two NGK cr8e spark plugs fail/foul in the last 6 months. Care Extras with you if your running rich.
Here is the filter you need (just search for the model number on Amazon and you can buy it there. Your model number is KN-138). For oil, I run Rotella Synthetic, but any 5W-40 or 10W-40 will work (the 5 and 10 just designate the temperature at which it will still run well, ie 5 C or 10 C. I live in the north east so I go for 5 for peace of mind). Regardless of which you choose, you'll need about 2.9 quarts for a full (ie with filter) change.
Get some nitrile gloves (especially for spreading oil on the filter when you install it), shop towels for clean up, and you may want to look into getting a new crush washer for the drain bolt (not sure if/when yours has ever been replaced. They can last a while, but it's not a bad idea to replace it if you aren't sure). An oil filter clamp isn't a bad idea to help with getting them off, but I doubt you'll have issue with it. Don’t forget a good oil drain pan (I recommend this one with a screw in, top spout – this is what the oil would drain into – the oil filter holder on the top so it can drain over 24 hours, as well as a front spout), as well as a funnel to help you get the oil in.
Let me know if you need help with anything else. I've found these instructions helpful for those new to it and they are the exact same for you, too. What do you need to change the rectifier for?
https://www.amazon.com/Hozan-JIS-4-JIS-Screwdriver-3rd/dp/B00A7WAHTU/ref=mp_s_a_1_2?crid=13IVJB32CWN3L&keywords=jus+screwdriver&qid=1555384541&s=gateway&sprefix=jis+&sr=8-2
https://www.youtube.com/user/conleybuilt
https://www.amazon.com/gp/aw/d/B0039LBDK8/ref=ppx_yo_mob_b_old_o0_img?ie=UTF8&psc=1
Here's the shim kit
https://www.amazon.com/gp/aw/d/B000UKM6LG/ref=ppx_yo_mob_b_old_o0_img?ie=UTF8&psc=1
measure the shim before you put it in. You will be doing extra work if you replace a shim only to discover it's the wrong size after install when you're double checking everything.
Found the link, looks like I got most of it. There's other good stuff though.
https://www.reddit.com/r/SVRiders/comments/an7gab/you_guys_rock/?utm_medium=android_app&utm_source=share
https://www.amazon.com/gp/aw/d/B0002SRJF4?psc=1&ref=ppx_pop_mob_b_pd_title
Edit
For anyone who is interested, I used VHT Gold Caliper Paint.
I kept the brake lines connected but removed the calipers and pads. Then washed/scrubbed them with soap water, followed by a wipe down with denatured alcohol to remove any oils.
Then I masked everything off, as you can see in the first pic. After three coats I was happy with how they looked. Next came a heat gun to cure the paint. About 20 minutes on each caliper.
Reassembled and was done! I'm more than happy with the stock brakes on the SV but wanted a bit more color. I'm really pleased with how they turned out!
It's just the parking light bulb. It's just a t10 wedge bulb I believe.
Here's an LED headlight bulb that should be a lot brighter than the stock halogen: https://www.amazon.com/dp/B07WG1FL6R/ref=cm_sw_r_other_apa_i_sOHTDbTN1XDEV
That led bulb is nice because it replicates the placement of the filament on a halogen bulb so the beam pattern should be about the same, it'll just be brighter. Plus you won't be blinding oncoming traffic lol
If you're going to get an LED headlight bulb then you should get an LED t10 bulb for the parking light too or else it'll look weird having two different colored bulbs. Or you could just take the parking light bulb out and not replace it lol
I will probably end up ordering this L-shaped Torx screwdriver set, so I can also give T30 a try.
If it truly is stripped, then I may have to go with the dremel method. Thanks for the input everybody.
K&N filters are popular. I got lucky and scored one for 6 bucks but it's still only 12 on Amazon - https://www.amazon.com/dp/B000E2CVDI/
I don't know about you OP, but I wipe my bike down after every ride. It seriously just takes a minute and it is always looking clean (apart from the brake dust on my silver wheels). Buy Meguiar's Quick Detailer and a microfiber cloth. After every ride, spray this all over your bike and wipe down with the microfiber cloth. I spray this on the tank, tail, even on the front windscreen and mirrors.
eh
It cleans shit out and burns varnish and all that.
Seafoam these days is more of a fuel stabilizer (slightly) and a valve lube. as well as burns carbon :P
b12 burns crap out of passages.
seafoam es smokeh.
yes you put it in the gas.
I use seafoam when I buy a new vehicle to lube the valves as well as I like smoke :P
be careful how you mix. sometimes they don't play nice with cat converters
I just replaced my chain / sprockets. I went with Vortex steel sprockets (15/44) off revzilla, and a RK GB520GXW chain from Amazon. All in I think it was under $140 with 2 day shipping. The chain needs to be cut down to 108 links and don't forget a rivet tool.
Any particular reason you want to stick with 525 vs 520?
Krazy Glue KG92548R Instant Krazy Glue 0.18-Ounce All Purpose Brush https://www.amazon.com/dp/B000BQSFSM/ref=cm_sw_r_cp_apa_i_YR7VCbVTZ48T1
I don't know how tall or wide a screen needs to be before it becomes functional. I was considering this one.
Here, This will do the trick :P
https://www.amazon.com/Suzuki-SV650-1999-2009-Maintenance-Troubleshooting/dp/1599696274/ref=sr_1_1?ie=UTF8&qid=1524594344&sr=8-1&keywords=clymer+manual+sv650
From my Google doc:
I'm using this battery charger:
https://www.amazon.ca/Yuasa-YUA1200901-Smart-Battery-Charger/dp/B000GZL29M
I'm not installing a new battery at the moment. Just charging it and then will be checking it with the multimeter and doing a load test when it is fully charged.
And turning it in the lock handlebars position will not make the batter run right? But turning it into the "P" position will drain the battery? It's my first bike so I have very limited knowledge.
Charge the battery. Then start the bike. Get a volt meter and measure the battery. Does it read 13.6/14? Then your stator is working. If its reading below 12.2/12ish then no its not.
Any cheap multi-meter like this will do.
http://www.amazon.com/Etekcity-Digital-Voltmeter-Ohmmeter-Multimeter/dp/B00B7CS3UY/ref=sr_1_7?ie=UTF8&qid=1426052117&sr=8-7&keywords=multi+meter
To make it easier to check You may as well buy a battery tender if you haven't already. Run the lead somewhere (I ran it under my passenger seat so I can plug in a USB adapter to charge my phone while I ride. But then you can meter off that in a pinch also. Not to mention it will slowly trickle charge you battery (It won't be fast by any means, but I've done it myself after this past winter, as my shed has no close by power and I didn't have time to bring my battery inside)
http://www.amazon.com/Battery-Tender-021-0123-Junior-Charger/dp/B000CITK8S/ref=sr_1_1?s=automotive&ie=UTF8&qid=1426052180&sr=1-1&keywords=battery+tender
If its showing good when running you have a power draw somewhere. keep the meter connected while the bike is off. then pull one fuse at a time until it appears the load goes away(aka the voltage stays the same for a while without it draining down. Especially if its dead in 4 minutes you should be able to see it quickly). You may have a short in your lights. That's normally where I would expect it.