(Part 2) Top products from r/Warhammer40k
We found 70 product mentions on r/Warhammer40k. We ranked the 768 resulting products by number of redditors who mentioned them. Here are the products ranked 21-40. You can also go back to the previous section.
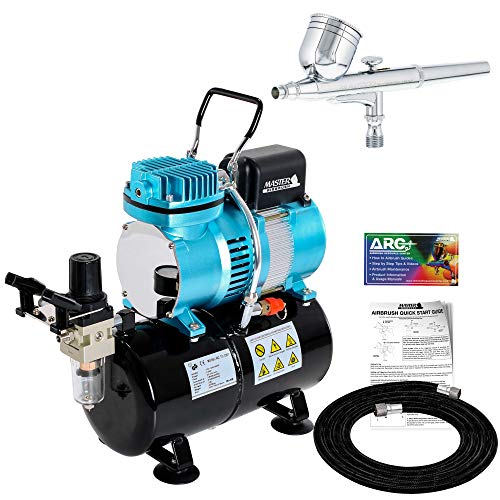
21. Master Airbrush Multi-Purpose Airbrushing System Kit with Portable Mini Air Compressor - Gravity Feed Dual-Action Airbrush, Hose, How-to-Airbrush Guide Booklet - Hobby, Craft, Cake Decorating, Tattoo
Sentiment score: 2
Number of reviews: 4
Professional Master Airbrush Airbrushing System with a Model G22 Multi-Purpose High Performance Precision Airbrush with a 1/3 oz. gravity fluid cup and a 0.3mm fluid tip. 6 Foot braided air hose with 1/8" fittings.Master Airbrush Model C16-B Black Mini Air Compressor that's portable, lightweight and...
 Show Reddit reviews
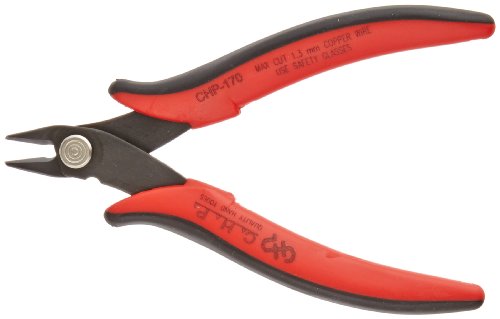
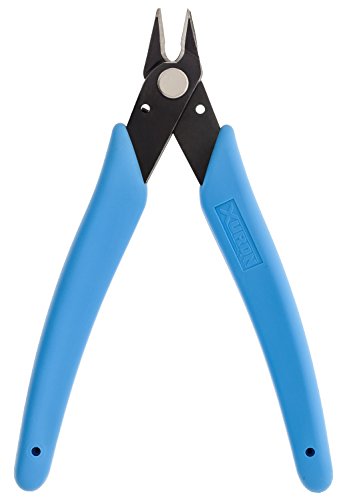
22. Micro Cutter
Sentiment score: 2
Number of reviews: 4
Flush-cut micro soft-wire cutter has 8mm long jaw with angled head for flush-cutting applications on up to 16 gauge (1.3mm) copper and soft wire21-degree2.5mm heat-treated carbon steel construction provides durability and long lifePrecision-ground holes and surfaces provide smooth movement, and spri...
 Show Reddit reviews
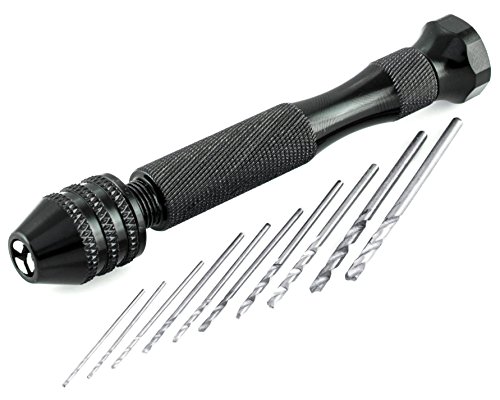
23. Bastex Precision Pin Vise Hand Drill with Twist Bits - Set of 11 Pieces. Great for models and Hobby.
Sentiment score: 4
Number of reviews: 4
BEST USES: A hand manual drill has many different uses given the diverse nature of this tool. Most common use is for precision drilling. Precision is required when you are working on small, fragile or important projects. The Bastex Hand crank drill is used to hold and rotate small drill bits for wor...
 Show Reddit reviews
24. Master Airbrush Cool Runner II Dual Fan Air Storage Tank Compressor System Kit with a G22 Gravity Feed Airbrush Set with 0.3 mm Tip - Hose, Holder, How-to Guide - Hobby, Auto, Cake, Tattoo, Body Art
Sentiment score: 1
Number of reviews: 3
Professional Master Performance Airbrushing System with a multi-purpose G22 precision dual-action gravity feed airbrush with a 0.3 mm tip and a 1/3 oz. gravity fluid cup. This versatile airbrush allows you to spray from hairline up to 1-1/2" wide patterns.Master Airbrush Model TC-326T Cool Runner II...
 Show Reddit reviews
25. Testors Spray Lacquer 3oz, Clear Coat
Sentiment score: 1
Number of reviews: 3
For use on many surfacesFinely ground pigments give superb flow and coveragelead free, fast-drying, and easy to applyContains one aerosol can with 3oz (85g) of enamel paintAvailable in a variety of colors
 Show Reddit reviews
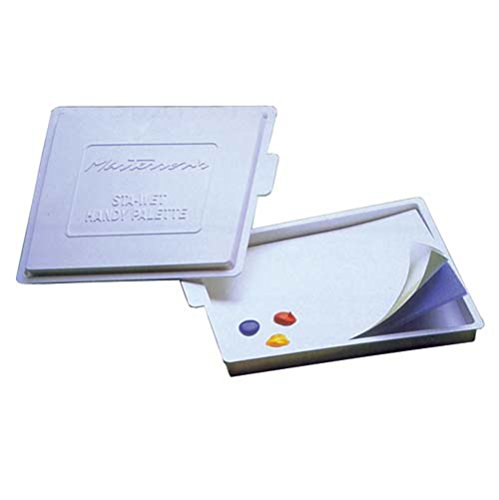
26. Sta-Wet Palette Keeps Paints Fresh For Days With Airtight Lid 857
Sentiment score: 2
Number of reviews: 3
The Sta-Wet Handy Palette is a unique system for water-based paintUnique sponge and palette paper combine to keep paint moistEven with the lid closed paint will stay workable for days or even weeksIdeal size for small projects or in the classroomMeasures 8. 5 x 7 x1 inches
 Show Reddit reviews
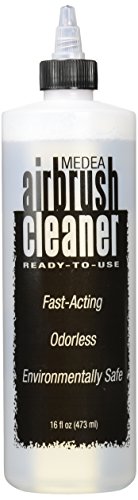
27. Iwata-Medea Airbrush Cleaner (16 Oz.)
Sentiment score: 3
Number of reviews: 3
A high-strength, general-purpose cleaner, great for cleaning any airbrush or any artist tools where acrylics, watercolors, gouache, inks or dyes are usedWorks well on all models of airbrushes, synthetic and natural-haired paint brushes, and is excellent for use in the ultrasonic cleaning of technica...
 Show Reddit reviews
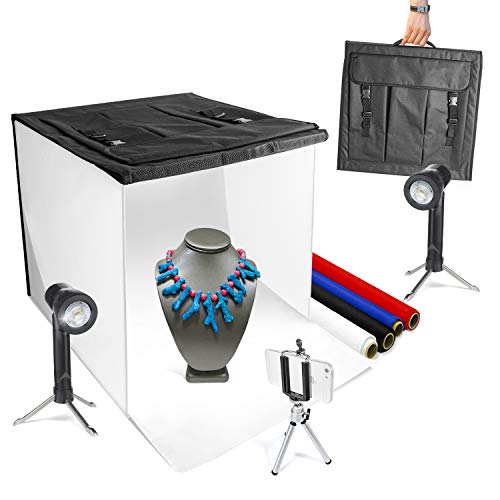
28. LimoStudio 16" x 16" Table Top Photo Photography Studio LED Lighting, Light Tent Kit in a Box, Photo Background Shooting Tents, AGG349
Sentiment score: 1
Number of reviews: 3
👍 Contents:[1 x] Folding photo box (16 inch x 16 inch) / [2 x] Table top LED lights with stand / [1 x] 8" Steady Tripod / [1 x] Phone clip holder with width 3.1 inches or smaller/ [4 x] Blue and Yellow Color filters👍 Professional photo table shooting tents and lighting / High power lights👍 ...
 Show Reddit reviews
29. Primal Horizon Super Pack of Magnets for Miniatures (154 Magnets, 6 sizes) PHZ210
Sentiment score: 3
Number of reviews: 3
154 Magnets, 6 sizesMagnets for Miniatures 40 x 1/16" magnets, 40 x 3/32" magnets, 40 x 1/8" magnets, 20 x 3/16" magnets, 10 x 1/4" magnets, 4 x 3/8" magnets
 Show Reddit reviews
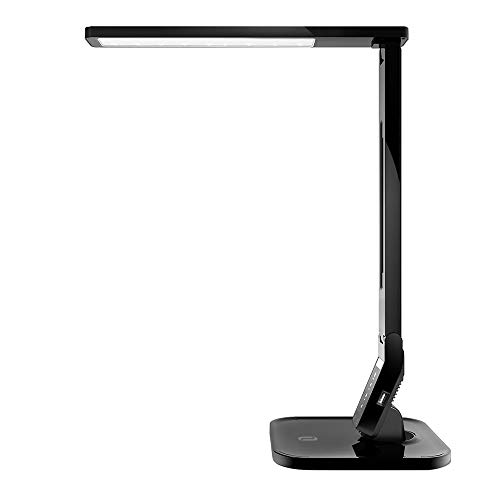
30. TaoTronics LED Desk Lamp with USB Charging Port, 4 Lighting Modes with 5 Brightness Levels, 1h Timer, Touch Control, Memory Function,14W, Official Member of Philips EnabLED Licensing Program
Sentiment score: -1
Number of reviews: 3
4 Lights Match Your Purpose: Choose between 4 unique lights with 5 custom levels of brightness for work, study, reading, or relaxingMulti-Angle Adjustments for Optimized Lighting: Rotate the lamp arm up to 140° or swivel the base by 180° for a more direct illumination1 Hour Auto-Off Timer: Turns t...
 Show Reddit reviews
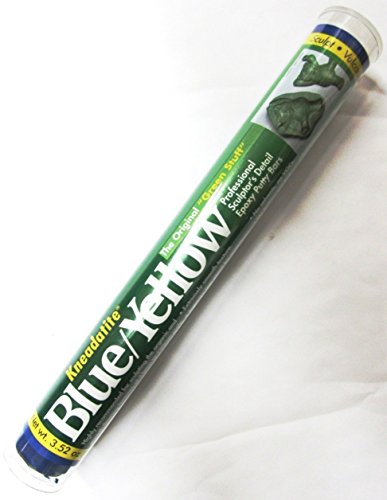
31. "Green Stuff" Blue/Yellow Epoxy Putty
Sentiment score: 2
Number of reviews: 3
Green Stuff Bars (Kneadatite Blue / Yellow Epoxy Putty) ArmsKeeperFunctional cure occurs in 4 to 5 hours when Blue/Yellow can be drilled, sawed, carved, sanded, stained, and painted.Ultimate hardness is reached in 20 to 24 hours.Cured color is green.Bars: Cut or twist off 1 part blue curing agent to...
 Show Reddit reviews
32. Pledge Floor Gloss Liquid, Sealed Wood Protector, Removes Dirt, Polish To Help Keep Floors Shiny, Original Scent, 27 fl oz
Sentiment score: 4
Number of reviews: 3
Ready to useMakes floors look like new againLong lasting shineOriginal scent
 Show Reddit reviews
33. Badger Air-Brush Company RK-1 Krome Airbrush 2-in-1 Ultra Fine Airbrush with Additional Fine Tip, Spray Regulator and Needle
Sentiment score: 2
Number of reviews: 3
Please refer User manual in technical description for any troubleshooting stepsThe Krome's "softer" trigger tension allows for greater detail triggering control, and the micrometer trigger stop setting allows the user to set and reference spray patterns to 1/1000 of an inchAn ergonomic under body f...
 Show Reddit reviews
34. The Soul Drinkers Omnibus (Warhammer 40,000 Novels)
Sentiment score: 0
Number of reviews: 3
Used Book in Good Condition
 Show Reddit reviews
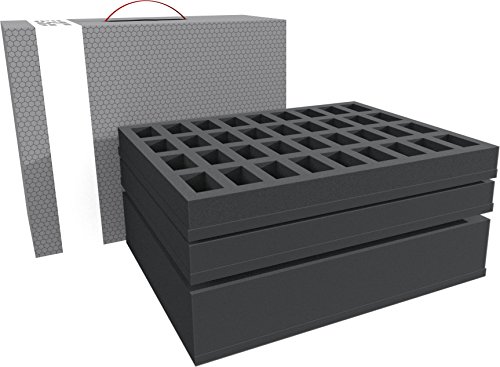
35. Feldherr Storage Box Compatible with 72 Miniatures Plus Tanks or Monster
Sentiment score: 1
Number of reviews: 3
stores up to 72 miniatures plus some tanks or monstersgreat valueMade in GermanyCFC-free; according to Oeko-Tex  Standard 100 / Class I - items for babies and toddlers
 Show Reddit reviews
36. Xuron - Xuron - 170-II Micro-Shear Flush Cutter - 170-II
Sentiment score: 3
Number of reviews: 3
Type: Micro-ShearStyle: FlushCapacity: 18 AWGOverall Length (Inch): 5-7/64Blister Pack With Generic Card
 Show Reddit reviews
37. TEKTON 6655 Needle File Set, 10-Piece
Sentiment score: 2
Number of reviews: 3
An assortment of cross-section styles for hobby models, jewelry, clocks, and watchesIdeal for use on smaller workpieces made of plastic, wood, and soft metalComfortable, nonslip rubber grips increase control and accuracyFiles are 5-1/2 inches longAlways Guaranteed
 Show Reddit reviews
38. EUBUY 15 Ml Empty Plastic 50 Packs Dropping Bottles Dropper Bottles for Eye Drops Solvents Light Oils Essence Saline Etc White
Sentiment score: 2
Number of reviews: 3
Material: PET/LDPEQuantity: 50pcs/bagCapacity: 15mlGreat for solvents, light oils, paint, essence, electronic cigarettes, eye drops, salinePackage included:50 pcs bottles & 1 pcs fridge magnet
 Show Reddit reviews
39. Games Workshop Warhammer 40,000 Codex: Space Marines
Sentiment score: 0
Number of reviews: 3
Hardcover book good for 8th edition rules set for Warhammer 40k.
 Show Reddit reviews
40. Master Airbrush Cool Runner II Dual Fan Air Compressor Airbrushing System Kit with 3 Professional Airbrush Sets, 0.2, 0.3 mm Gravity & 0.8 mm Siphon Feed - Hose, Holder, How To Airbrush Learning Guide
Sentiment score: 2
Number of reviews: 3
Professional Master Airbrush Multi-Purpose Airbrushing System with 3 of Master Airbrushes best selling & user friendly airbrushes. Includes bonus Master Airbrush Quick Start Guide and Airbrush Resource Center access card.Master Airbrush Model TC-320 Cool Runner II superior performance powerful 1/5 h...
 Show Reddit reviews
Long post incoming....
So, I don't think I've seen many airbrush discounts. Badger did a nice promotion where you could buy any airbrush for $55 for their 55 year anniversary this summer, but other than that it's kind of hard to find discounts. As far as Prime Day, I doubt they're going to have discounts on airbrushes, that's a pretty niche product they don't really get into. If you want to get started with that, I'd do something like this:
You then need a cleaning pot, some cleaning fluid, and an airbrush hose All told, that's like $300.
Then you need paint, paint brushes, a hobby knife, super glue, a mini hand drill, some small drill bits, sprue cutters, basing materials (cork board, model railroad ballast, etc) and I find a pair of tweezers helpful. That could add up to another $200 in materials (and obviously can cost way more, paint is expensive). So of your $550 budget, you would then have $50 remaining for models... which will buy you one model kit. So if you're looking to get started for $550, I'd probably forget the airbrush for now, and just get paints that can be used with one later. I recommend Vallejo paints. The eyedropper bottles work great for airbrushing, and you can just thin them with water. I haven't met one yet that doesn't work. A paint set like this would set you up nicely for doing an Imperial Guard army.
As far as what army to play... Guard is fun, but if you like the modern military aesthetic, Space Marines might be more what you're after. The new Repulsor Executioner tanks look awesome, and the new Primaris marines are great looking models... some of the best GW has produced. The Guard kits are looking kinda... dated IMO.
Hello friend, I just got into magnetizing and have done all my research and my models came out great. The best magnets to get are made by "Primal Horizon". For swapping out weapons use the 1/16"x 1/32" sized magnets
My final note, and this is my BEST piece of advice! ALWAYS CHECK POLARITY! I cannot tell you how many times I had everything set, magnets on both ends of what I was trying to adhere together and then arrrggghhh.... wrong polarity. The best approach to this I found is keeping the magnets stacked and stuck together... kinda like this > [[[[] I hope that crude picture helps haha. What I would do is keep them stuck to a piece of metal that has a good surface area, place my first magnet into the arm socket of the model while they are still stacked and then let the first magnet settle and dry. After that, remove the tool in which the magnets are stuck to and with the other piece you are trying to attach, just simply put the magnet on the opposite end into the hole on the piece in which you are attaching. This will ensure polarity is correct. I am sorry if that was a crude way of explaining it, but I would be happy to take photos and link them to explain this process.
Most of all, have fun! There is no better feeling being able to swap out all my Dread weapons, melee weapons on squads etc... I also put some magnets on the torso of my Dreads to give it some nice movement and rotation (almost makes it feel like a ball bearing). If you have anymore questions or need any clarification please let me know and I would be happy to help ya out, upload photos etc..
Good luck, have fun!!
>He mentioned that your armies go obsolete like every 2 years! Is this true?
No, not really. New rules will come out every few years, which may force you to alter the roster of models and wargear you’re fielding, but models are almost never written out of the game.
>Should they just start with A Start Collecting Pack?
Yes. Start Collecting packs are fantastic.
>This pack would be a 500pt or 1000pt?
Start Collecting packs are closer to 500 points. There isn’t an exact point number because you can change the number of models in a squad or give them different wargear.
>Co worker also suggested taking them both to GW to see if they can even get their head around playing the game as the rule book is pretty intense…
Yeah, going to a game shop and having someone experienced walk you through the game is a pretty good way to get a handle on the basic rules. GW shops love new people, although they tend to be very pushy salesmen.
>Or should they get a Rule book to read. Then their codex. One wants Necrons the other Dark Eldar. And then decide on a 1000pt army and start buying/building/painting etc?
I’d say see if a game shop can give them a demo first before you commit to models and books. This stuff is expensive.
Don’t worry about what a 1000 point army is. It takes time to get there. I say…
(Also don't let them buy new boxes unless the ones they have are already built.)
Good luck!
The brushes you need depend on what you do but a few different sizes are nice to have around. Personally I buy really cheap brushes that i don't feel bad about throwing away if they get clogged up with paint.
The Reaper MSP HD paints are some of the best I've used but I also use P3, Citadel and Badger Minitaire but I'm slowing moving away from Citadel as it seems to be getting worse as time goes on. Also Vallejo has a great reputation but I personally don't need any more paint lines.
Airbrushing is the best way to go to get a nice smooth coat like your example. I do my priming with Vallejo primer, base coat and sealer all with an airbrush and then the details with brushes. Here is the airbrush set i use http://www.amazon.com/gp/product/B00BF0MW9G/ref=oh_aui_detailpage_o08_s00?ie=UTF8&psc=1. For under $50 its a great deal and it works great for what i'm using it for. If you have a lot to paint, that with the Vallejo primer will actually save you money in the long run compared to buying Citadel primer at $16 a op.
And there are a lot of painting tutorials on youtube
I just went through this myself and am very happy with my purchases. This is a complete entry level set with the tools you will need to maintain it. Assuming you're US based, you could have everything Monday with Prime shipping.
This will allow you to setup a bare-bones station. You could also get a fume hood or just spray into a box in a well ventilated room. Get a good white led light (if you don't have on already) to illuminate your workspace and you're good to go.
Looks like a solid start to me! I would recommend not fully assembling your models before you paint them, some places can be hard to reach when fully assembled.
Necessary Hobby Items
Most people will suggest skipping GW for paint and hobby tools to save money. I suggest hitting amazon for a pair of flush cutters, set of needle files, and pack of testors model cement. Krylon camo black spray paint is a fine substitute for expensive primers. Vallejo paints are a top reccomended brand, and there is a conversion chart to convert old and new gw colors to vallejo colors.
A set of just standard tac marines is a great place to start, you'll use them for sure and theres plenty there to work on technique, hit up the warhammer youtube channel, as they have painting tutorials that are really great, watch as many as possible as each has something you can use even if they aren't painting space marine models.
http://www.amazon.com/gp/aw/d/B00FZPDG1K/ref=mp_s_a_1_1?qid=1459352340&sr=8-1&pi=SX200_QL40&keywords=flush+cutter&dpPl=1&dpID=414t7uLh8KL&ref=plSrch
https://www.amazon.com/gp/aw/d/B0013E68SU/ref=yo_ii_img?ie=UTF8&psc=1
(Starting out you should be fine with just a zero, but if you really have moneh burnig a hole in your pocket a 1 and 00 would also come in handy eventually. Never leave your brush sitting in your water cup, don't let paint dry in your brush, and keep paint out of the metal part.)
http://www.amazon.com/gp/aw/d/B0013D53CS/ref=mp_s_a_1_2?qid=1459352997&sr=8-2&pi=SY200_QL40&keywords=testors+model+glue&dpPl=1&dpID=51QQU8wrc-L&ref=plSrch
https://www.amazon.com/gp/aw/d/B000NPUKYS/ref=mp_s_a_1_2?qid=1459352697&sr=8-2&pi=SX200_QL40&keywords=needle+file+set+for+metal&dpPl=1&dpID=412lincr%2B5L&ref=plSrch
Add an xacto and tube of superglue from your local superstore and you have all the tools needed to crank out perfectly acceptable models. I'll admit the brush is a bit overkill, but you're saving so much money on the rest of the tools, and a good brush makes the experience much more enjoyable, I suggest splurging there. Also don't bee fooled into buying a basing kit, regular old sand does just fine,
well, the most important part of this is how thin do you want your paints to be? Most advice on the internet says to aim for "milky" consistency. This results in the paint being just thin enough that it takes multiple coats to apply a color, but not so thin that it just runs off of the model. Something you could do to acquaint yourself with the way this looks is to buy a small bottle of 2% milk, pour it into a plastic cup and use your paintbrush to "paint" it up the sides of the cup. This should give you an idea of what your final goal could be.
As for materials to thin paint with, you can use several different products:
As you may have noticed, water is a fairly consistent theme. I've hear that you can also use windex + water, but that seems like a waste of a good bottle of windex ;)
Another option, if you are finding it hard to consistently thin the paints, is to use a wet palette. If you keep the wet palette fairly full with water, it will automatically thin down the paint to a certain degree, after which you can add mediums or more water to push it further. It also has the added benefit of keeping the paints wet for an extended period of time. Here is a guide for making your own wet palette to try out: http://www.miniwargaming.com/content/Zpt5gLOoldY1
>brushes
If you use GW brushes, get the Standard, Fine Detail, and Wash brushes. These give you a good starting point for most of the stuff you'll be doing. Otherwise you'll want to find similar brushes in other ranges (Windsor & Newton make good brushes). If you go with third-party brushes I think the sizes you'll want are 1, 0, & 3/0.
>mats,
You can get any sort of sewing mat, where it's basically just a piece of rubber you lay on the table. Joann's Fabrics or any sort of sewing store should have this. Here's one I found on Amazon.
>thinners
The paint you're working with is water based, so water will work as a thinner. If you decide to airbrush things that will change what you need but for now, build a wet palette.
>cutters
Try these
>etc
You'll need some glue at the very least. You might also want some helping hands to hold things while you paint them/glue them together.
>is there a site that tells you what colours you need to paint certain colour styles?
I'm not aware of any one site as a catch-all for painting any scheme, but googling things led me to this site that goes into detail about painting Space Wolves. You could also consider this video from Games Workshop where they go through the steps of painting the model.
As for the paints themselves, I'd recommend working with the Vallejo Game Color paint range. They come pre-thinned (extremely helpful for new painters) and convert to Games Workshop colors pretty easily.
Some more hobby stuff to help you get started:
Zenithal Priming
Airbrushing
Object Source Lighting
Thanks!
Sure thing!
I started by mashing some aluminum foil into the general shape that I wanted it to be, and then hot glued that to a 40mm base. I then reinforced the foil with more hot glue with lengthwise bands of hot glue.
Once cooled, I covered the structure in a layer of Apoxie Sculpt, (AS) which essentially resulted in a smooth "tentacle" upon which I could add details.
My next step was sculpting the chitin plates along the back of the structure with AS. I started with the smallest one near the tip, and working one plate at a time, giving each one adequate time to set, worked my way to the largest one at the base. After each plate had set, I used heavy grit sandpaper to touch up the final shape and add some texture to them (think fingernail ridges), and these scraper tools to add the deeper cracks. This is an area where AS is superior to Green Stuff(GS); it cures rock-hard, so it can be filed, tapped, sanded, and drilled with very good results.
From this point on in the project, I used (roughly) 50/50 mix of GS and AS.
I then used a dremel tool with a tiny carving head to carve out space under the edge of each plate and sculpted in the connective tissue there. Looking back, I wish I'd left more of a "ledge" on the plates, so that that connective tissue was more recessed. Live and learn.
Next step was planning out the rest of the structure. I knew I wanted the inside of the tower to be 1) composed of different sections, 2) complex in texture, 3) "Squishier" than the outside, and 4) functional in appearance. I used pencil to draw sections on the model until it was broken up in a way that I liked, and then I planned a few of the details. (I settled on the vertebrae-like structures as a way to separate the sections, the defiler-like texture near the tip, and decided that I wanted structures at the base that looked like they were "rooted" into the ground--I didn't want it to look like it just sat on the surface.
I sculpted the vertebrae next, using this wonderful tutorial by Mr. Pink, one of my sculpting heroes. The defiler texture was added next, using a "Hydra tool"--a rounded off nail set into a handle. Just poke the tool in at an angle where you want a hole to be--I wish I'd done a better job of organizing the holes into a pattern of some sort.
the long lateral sections came next. I put putty down, and then used a large ball burnisher to make the large depression, a smaller ball burnisher to make a smaller depression in the middle of the large one, and a tiny ball burnisher to make the ring of tiny depressions around that second, medium sized depression. Once I had all of those in place, I went back to the medium burnisher for the depressions on the surface, between the large depressions. I can't think of a better way to describe this right now, but I can attempt to clarify if you like.
the tubes at the base were next. Fat cylinders of putty were rolled out and the ribs were sculpted with the back of the narrow scraper I used on the chitin plates. After they'd set, I blended them into the rest of the structure with the putty around it. the tiny spine structure was made similarly to the larger ones, and the concentric circles were made by making a hole, putting a ball of putty into it, and then turning the hole into a doughnut with a hydra tool, and then repeating.
The tiny spikes were shaped, and allowed to cure, and then glued to the model and blended in with texture and stuff.
If you want more general advice, I'll cut/paste an old comment below, or if you want further clarification or whatnot, let me know!
Happy sculpting!
This one has been working great for me. Pretty cheap and comes with a nice assortment of different size bits. Feels well made too. Good luck!
https://www.amazon.com/dp/B072M35LDZ?ref=yo_pop_ma_swf
Awesome work. Perfect for the table top. If you want to push yourself here are a few things you can do.
You want a gravity fed airbrush there are several compressors that are quite and portable and still offer the amount of psi you need for an airbrush. I spent $100 on mine on amazon and it came with 3 air brushes. I haven't used any of them and would be a bit skeptical but I may test them out again once I get back into painting. Here is the air compressor I purchased
Beyond that there are a lot of people recommending badger air brushes and you will see that a lot. But they are rather expensive especially if you are just starting out. That being said there is an Iwata Neo available at Hobby Lobby if you are in the states. As seen here. And hobby lobby offers a coupon (I think they still do) that is 40% off one item. This brings the price down considerably.
There are also some other neat things you can grab while you are at hobby lobby. The other most important one would be a Airbrush cleaning pot Again this is something you could get at Hobby Lobby and use your fancy coupon on the next day.
I hope this all helps if you have any other questions feel free to ask.
 
https://www.amazon.com/gp/product/B005CX9S8A/ref=oh_aui_detailpage_o03_s00?ie=UTF8&psc=1
 
https://www.youtube.com/playlist?list=PLJ94-fHMfAt1yQfGbeMQqOAS7c59mbiYt
 
Knowing the above, these photos aren't really that great, I just used the settings that I already had on. These could be greatly improved if I had taken the time to do so, regardless, I appreciate the compliment! Also even if you don't have a fancy camera and light box I HIGHLY recommend watching that tutorial series on miniature photography, a lot of people around the sub could learn a ton and greatly improve the quality of the pictures they post even with just a simple camera on a smart phone.
For what your needs are I would say you need a hand drill and a hobby knife (xacto) not files. I have used a cheap knife from my local hobby stores to slice off iconography before and it is very easy although you do need to file off some remains. As for magnitizing you want a hand drill with the right sized drill bits. As for recommendations I recently got a pack of files off amazon for cheap that I am loving.
https://www.amazon.com/dp/B000NPUKYS/ref=cm_sw_r_cp_apa_vcZvyb0CSA63A
Grab a pin vise and some bits off of Amazon, they’re cheap and work like a charm!
Bastex Precision Pin Vise Hand Drill with Twist Bits - Set of 11 Pieces. Great for models and Hobby. https://www.amazon.com/dp/B072M35LDZ/ref=cm_sw_r_cp_api_i_-tCaBb8K804S1
I buy these almost strictly. It has a cardboard case but they're very cheap and great value. I own 5 currently.
https://www.amazon.com/gp/product/B00W98CV26/ref=oh_aui_detailpage_o00_s00?ie=UTF8&psc=1
Pledge floor wax, under plastic wineglasses from Walmart to keep the dust out while drying.
Put the pledge into a dropper bottle, you can apply a drop directly to the area you want to work with and push around with a brush. Because it takes a few minutes to dry, it self levels out the brush strokes, but you should cover it while drying to keep clean of dust and hair.
Use as protective layer, mix with paint as glaze, apply before doing chipping, or seal whole mini and then airbrush, because overspray is much easier to remove from clear coat than from paint.
Thin coats, and try to leave surface level while it dries, since it dries slower than other products, you don't want it sliding down hill.
Frankly it has so many uses I'm still exploring.
Use anywhere you would use lahmian medium, and most places you would use ardcoat. It's about seventy times cheaper, so you can afford to experiment.
https://www.amazon.com/dp/B000ARPH4C/ref=cm_sw_r_cp_awdb_t1_xSd8BbJQS4J8Q
Dark angels cheap:
Caliban green Spray (GW) - $20
Biel-tan wash (GW) - $7.50
Warpstone glow layer (GW) - $4.25
Mephiston Red (GW) - $4.25
Leadbelcher (GW) - $4.25
Nuln Oil (GW) - $7.25
That's about your bare minimum.
If you want to do a step further (with plasma) grab Guilliman blue glaze, Celestra grey, and the layer paint white (can't remember name).
If you have a bunch of Robes in the army, grab zandri dust, and ushabti bone.
There is a paint conversion chart here: (if you aren't a fan of GW paints - though some colors aren't exact matches) https://www.dakkadakka.com/wiki/en/Paint_Range_Compatibility_Chart
Despite how expensive they are, GW does have a really solid system down that makes it easy to get the desired results. Also, get yourself a wet palette - it will make your paint last longer.
This one: https://www.amazon.com/Sta-Wet-Palette-Keeps-Paints-Airtight/dp/B000C18GTE (throw away the paper it comes with, it's shit. Replace with some baking paper (non wax).
In regards to the different subsections of paint GW has, it's mostly just for ease. You can technically use ANY paint as a drybrush paint, the ones labeled as such are just designed for that purpose ONLY.
TLDR: Any paint from any company will do, but they all go on differently. Some you may have to thin more than others, some may have worse coverage. GW's system is good and is popular for good reason. Get a wet palette.
FIRST, Read this guide (It should answer most questions)
https://miniarmyhugetimesink.wordpress.com/2014/05/15/so-you-want-to-airbush-a-beginners-guide-part-1/
Then, My intro recommendations: (I've included Amazon links, but you can likely find better prices elsewhere)
Badger Krome (a solid intro airbrush) https://www.amazon.com/Badger-Air-Brush-RK-1-Additional-Regulator/dp/B0078MEXX8/ref=sr_1_1?ie=UTF8&qid=1494523163&sr=8-1&keywords=badger+krome
Compressor (make sure it has a moisture trap and hose or purchase these seperately)
https://www.amazon.com/AIRBRUSH-COMPRESSOR-Airbrush-Published-Exclusively/dp/B001738DXU/ref=sr_1_5?s=arts-crafts&ie=UTF8&qid=1494523192&sr=1-5&keywords=airbrush+compressor
Respirator (a must have for safety):
https://www.amazon.com/3M-07193-Cartridge-Respirator-Assembly/dp/B00079FOK0/ref=sr_1_3?ie=UTF8&qid=1494523296&sr=8-3&keywords=respirator+mask
Cleaning pot (pipe cleaners optional)
https://www.amazon.com/Naturebelle-Airbrush-Cleaning-Holder-Nozzle/dp/B01D41W04U/ref=sr_1_6?ie=UTF8&qid=1494523444&sr=8-6&keywords=airbrush+cleaning
Other things you will probably want
I have a hand drill that i use for pinning, would probably work for the magnets. I got mine from amazon pretty cheep. On mobile but will try to get a link.
Edit: not the exact one but pretty close
https://www.amazon.com/gp/aw/d/B072M35LDZ?psc=1
Just starting off, Master's Airbrush is a great intro to the hobby. You can add a spray booth to that and be off and learning pretty quickly. I started with a Master's compressor(the TC-20T), and a Badger Patriot 105(which I got on sale on Amazon).
This stuff is the best. Goes on smooth is cheap and easy to use.
Testors Aerosol Spray Lacquer Paint, 3oz https://www.amazon.com/dp/B009FF6DN4/ref=cm_sw_r_cp_apa_qYubzbB3QAGQT
https://www.amazon.com/dp/B00OT7I0U2/ref=sr_ph_1_a_it?ie=UTF8&qid=1486410646&sr=sr-1&keywords=15ml+dropper+bottle
yeah, i ordered about 100 last time, got like 40 left. I also got some nail polish agitators which work in these well enough. I just ordered another 250 agitators as I need to add them to my Vallejo and Army painter paints. Plus there's some paints where the consistency makes me want to toss like 2 in.
They aren't perfect - I largely discard the lower ring that the cap is attached to. Also sometimes the caps are fused and might need to be cut free. So your likely going to loose like 4-5 to attrition. Plan accordingly. 15ml should be sufficient, I believe the other companies are using 17ml for theirs. Also don't fill it past the upper area. To make life easier I also processed all the caps, put the tips in a baggie, then put agitators in all the bottles and capped them. This makes bottling stuff later pretty easy.
I have this kit (more or less) https://www.amazon.com/Master-Performance-Airbrushing-Dual-Action-Airbrush/dp/B0017640RK
Definitely that compressor, and some similar Master branded airbrush. I'm lazy and inevitably end up fucking up the cleaning every few months and need to replace it, but at $26 it's not that big a deal. For a long time I just sprayed into a cardboard box near a window with a fan running, recently switched to one of the master branded spraybooths and while nicer, it's far from required.
Two things I'd tell you to start with.
​
At the start, thinning your paint with water is more than fine but when you get further into it look into making your own thinning medium.
I use these.
https://www.amazon.com/gp/product/B00OT7I0U2/ref=ppx_yo_dt_b_asin_title_o00__o00_s00?ie=UTF8&psc=1
Citadel pots are 12ml. These are 15. Add a few drops of liquitex flow improver to get the last of the paint out of the bottle and to make your paints flow better.
I'm a full-throated advocate of never buying anything that GW rebrands (clippers, greenstuff, brushes, primer, etc.)
For the cost of a small GW ribbon of greenstuff, you can buy more kneadatite (the manufacturer!) than you'll ever use. Unless, of course, you're a sculptor.
I love supporting my FLGS, but Amazon has a log of it for $13:
Green Stuff Sculpting Putty
Thanks!
I was thinking of putting some airbrush advice on here, but I figured that most newbies are a long way off from getting an airbrush.
Regarding thinning for airbrushing: I use future floor polish. It's a really thin, clear acrylic that I learned about during the hours of research I did before buying an airbrush. I think it's an old scale modeler's trick.
Purchase something to learn. Last year I bought a top of the line airbrush and compressor and ended up selling it. Seemed like overkill. High PSI compressors create a lot of over spray. Remember you're not airbrushing giant canvas or cars so you dont need a strong compressor. I purchased this for 30$ https://www.amazon.com/gp/product/B00BF0MW9G/ref=oh_aui_detailpage_o04_s00?ie=UTF8&psc=1
these were my first minis using it.
http://imgur.com/3jN5peb
http://imgur.com/kGzTS8x
Airbrushing is very different from painting with a brush so its smart to see if you like it before a high investment.
Remember painting is not about gear and money. Its about skill, technique and the tricks you learn along the way.
I have this and I love it. It even has a USB plug for charging stuff!
Thanks for the input guys. One thing to clarify, was it reissued? I see on Amazon this one from 2006
https://www.amazon.com/Soul-Drinkers-Omnibus-Warhammer-Novels/dp/1844164160/ref=pd_sim_14_6/185-9598647-7379142?ie=UTF8&dpID=51sOdDcLS4L&dpSrc=sims&preST=_AC_UL160_SR104%2C160_&psc=1&refRID=M0BZSM4QA9DRW55Q3QPT
And this one from 2013
https://www.amazon.com/Soul-Drinkers-Redemption-Ben-Counter/dp/1849704597
If so, were there any major changes?
Primal Horizon Super Pack of... https://www.amazon.com/dp/B00A6VZ832?ref=ppx_pop_mob_ap_share
Would this one be comparable? Costs a bit less but if the other would work better I don’t mind paying a bit more.
Would this be the most up to date Codex?
Thanks for the reply!
Do it. You can get a good quality setup for about $200
I use this
https://www.amazon.com/California-Air-Tools-CAT-1P1060S-Compressor/dp/B01LYHYHEA/ref=sr_1_4_acs_ac_1?s=power-hand-tools&ie=UTF8&qid=1540393854&sr=1-4-acs&keywords=QUiet+air+compressor
And this
https://www.amazon.com/Badger-Air-Brush-RK-1-Additional-Regulator/dp/B0078MEXX8/ref=sr_1_1?ie=UTF8&qid=1540393900&sr=8-1&keywords=Badger+krome
I went ahead and ordered this, my skills are noobish so i figger its a good starter airbrush
http://www.amazon.com/gp/product/B006HJCP8S/ref=oh_aui_detailpage_o01_s02?ie=UTF8&psc=1
I'm a big fan of the Feldherr storage boxes available on Amazon - https://www.amazon.com/gp/product/B00W98CV26/ref=od_aui_detailpages00?ie=UTF8&psc=1
Badger Air-Brush Company RK-1 Krome Airbrush 2-in-1 Ultra Fine Airbrush with Additional Fine Tip, Spray Regulator and Needle https://www.amazon.com/dp/B0078MEXX8/ref=cm_sw_r_cp_api_yJz7ybF57XSBB
I just picked up on Amazon a pin vise hand drill set, some flush cutters (the ones I've been using aren't flush and it's been annoying when trimming off sprue bits), and a lighted clamp magnifying class set, total was about 25 bucks.
Put paints into dropper bottles, with a tiny bit of flow improver. Use only what you need.
EUBUY 15 Ml Empty Plastic 50 Packs Dropping Bottles Dropper Bottles For Eye Drops Solvents Light Oils Essence Saline Etc https://www.amazon.com/dp/B00OT7I0U2/ref=cm_sw_r_cp_apa_i_dCjPDb6EADHH9
Testors Dulcote Spray, little blue spray can, can get it on amazon. Haven’t used another matte spray since! https://www.amazon.com/Testors-Spray-Lacquer-Clear-Coat/dp/B009FF6DN4
LimoStudio 16" x 16" Table Top Photo Photography Studio Lighting Light Tent Kit in a... https://www.amazon.com/dp/B005CX9S8A/ref=cm_sw_r_sms_c_api_OndeAbQWW4CRQ
Amazon also has an airbrush kit starting at about $50. It's got a compressor, and it's got control with the internal mix.
Master Performance G22 Airbrushing System Kit with Master TC-20T Compressor with Air Tank, Air Hose & G22 Dual-Action Gravity Feed Airbrush https://www.amazon.com/dp/B0017640RK/ref=cm_sw_r_cp_apa_AjwYAbM7FK796
this is what I started with, its a good deal not the best airbrush. I've since upgraded to a badger, but tge compressor still works 5 years later
https://www.amazon.com/dp/B00W98CV26/ref=cm_sw_r_sms_c_api_-3KuzbQWTTM6D
Was this the kit?
https://www.amazon.com/Master-Performance-Airbrushing-Dual-Action-Airbrush/dp/B0017640RK/ref=sr_1_16?keywords=master+compressor&qid=1550267610&s=gateway&sr=8-16
https://www.amazon.com/Green-Stuff-Yellow-Epoxy-Putty/dp/B002MB61RQ this or something similar. I usually buy at local shops because some of them have it cheaper than online does though.
Here's what I use: https://www.amazon.com/LimoStudio-Photography-Studio-Lighting-AGG349/dp/B005CX9S8A/ref=sr_1_51_sspa?keywords=light+box&qid=1572890154&sr=8-51-spons&psc=1&spLa=ZW5jcnlwdGVkUXVhbGlmaWVyPUEyNktWNjdLSjhTT1NPJmVuY3J5cHRlZElkPUEwNDA5NzE0V0VRSk9CQ0ExUlVHJmVuY3J5cHRlZEFkSWQ9QTA2Mzg0MjIxSTBORFdUNVFQREVRJndpZGdldE5hbWU9c3BfYXRmX25leHQmYWN0aW9uPWNsaWNrUmVkaXJlY3QmZG9Ob3RMb2dDbGljaz10cnVl
https://www.amazon.com/Master-Airbrush-KIT-VC16-B22-Portable-Compressor/dp/B00BF0MW9G/ref=sr_1_5?ie=UTF8&qid=1527377179&sr=8-5&keywords=master+airbrush
Salamanders Omnibus
Ultramarines Omnibus
Sons of Dorn (novel)
Soul Drinkers Omnibus
https://www.amazon.com/gp/aw/d/B00APAQSP6/ref=mp_s_a_1_sc_1?ie=UTF8&qid=1499438491&sr=8-1-spell&pi=AC_SX236_SY340_FMwebp_QL65&keywords=taoyronics+elune
What i have, I would reccomend it.
Apologies in advance if this breaks any sub rules, but I got these. for the troops I use the smallest size in the hands, and the next size up for the arms.
It does. This is the one I use, although I'm not sure if there are others.
It offers some level of protection, and I've only had one mishap (too humid). 9/10 would recommend. IMO the only problem is that the cans are too small.
In addition to whats listed here:
Self Healing Cutting Pad
Roll of paper towels
Exacto Knife with spare blades
Mini Files
Pin Vise (aka Mini Drill)
If this is the Codex you have, you'll definitely want to switch to the new Codex.
The new Codex doesn't just include the new Vanguard Primaris units, but is an over all refresh of the Space Marines, including rule and points adjustments across the range.
The older Codex is essentially obsolete, and the new one would be required if you were to enter any sort of competitive event.
This guy? https://www.amazon.com/Codex-Adeptus-Astartes-Space-Marines/dp/1785819496/ref=sr_1_1?ie=UTF8&qid=1510559081&sr=8-1&keywords=space+marine+codex+8th+edition
Does that mean Index: Imperium 1 is useless?
I picked up one of these when I was in similar situation, no complaints yet.
https://www.amazon.com/TaoTronics-Charging-Lighting-Brightness-Licensing/dp/B00APAQSP6/ref=sr_1_4?ie=UTF8&qid=1526931884&sr=8-4&keywords=TaoTronics+Desk+Lamp&dpID=31729IPCTYL&preST=_SX342_QL70_&dpSrc=srch
For the sprues you need some actual sprue cutters
https://www.amazon.com/dp/B00FZPDG1K/ref=cm_sw_r_cp_apa_n2UWBbBM7Y938
Nothing much more expensive than those as you really shouldn't run into a need for hard jobs from them
Should also consider some mini files
https://www.amazon.com/dp/B078MHF415/ref=cm_sw_r_cp_apa_b4UWBb9P1BYBP
Something that really let you get at small angles, ideally you do these things before glueing but can be done after.
Doing everything with the exacto is definitely dangerous, and theres not often a need to put your hands in that much danger.
Here is the book.
They may not have a homeworld, but that doesn't have to mean they don't have a mythos attached to them. I actually liked the concept of the inquisition skull with the third eye, maybe you can go with that. Are they a type of 'seer' chapter, on the edges of imperial jurisdiction, that other chapters come to when they are need information too dangerous to acquire through normal methods? You could weave a story where the scions have been involved in the background of many different conflicts while the main chapters were in the spotlight.