Top products from r/customGCC
We found 17 product mentions on r/customGCC. We ranked the 15 resulting products by number of redditors who mentioned them. Here are the top 20.
1. PLATO 170 SHEAR CUTTER, 1MM (1 piece)
Sentiment score: -1
Number of reviews: 1
Price For: Each Overall Length: 131mm Cutting Capacity Max: 1mm For Use With: Copper Wire Blade Edge: Flush Handle Color: Blue Size: 5" long RoHS Compliant: YesMade in USACutters/Shear/Wire/Clipper/Pliers For Arduino Electronics
 Show Reddit reviews
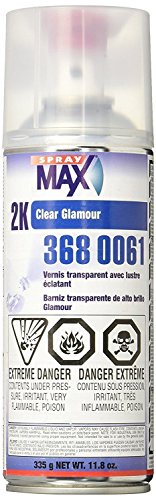
2. Spraymax 3680061 2K Clear
Sentiment score: 1
Number of reviews: 1
2 component aerosol clearcoat that is easy to apply, flows smooth and dries to a long lasting, high gloss finishEasy to use aerosol. Activate, shake and spray. Unique nozzle delivers spray gun resultsDries to a high gloss finish. Excellent weather and chemical resistanceFor use over all basecoatsMan...
 Show Reddit reviews
3. uxcell 10pcs New A3144 A3144E OH3144E Hall Effect Sensor
Sentiment score: 0
Number of reviews: 1
Power supply voltage: VCC 4 to 24V;Output reverse breakdown voltage: Vce = 50VOutput low current: IOL = 50mA; Ambient temperature TA = E profile : -20 - 85C , L profile : -40 - 150CStorage temperature range TS = -65 - 150 CWeigt:2gPackage Content: 10 x Hall Effect Sensor
 Show Reddit reviews
4. USC Spraymax Matte Clearcoat 3680065
Sentiment score: 1
Number of reviews: 1
2K clear coat with a flat, matte finish in an easy to us aerosolDries to a hard finishDurable and chemical resistantProfessional quality 2K automotive clear coat: cars, motorcycles, hobbiesSpecialized nozzle gives a spray gun like finish
 Show Reddit reviews
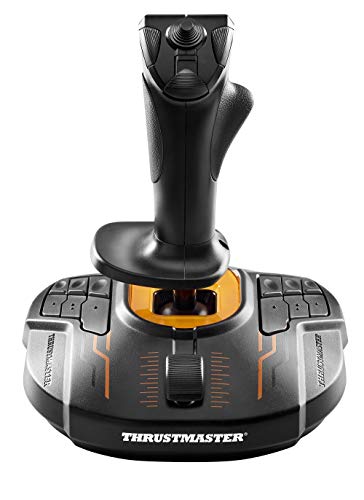
5. Guillemot Thrustmaster T.16000M Fcs Joystick (Pc)
Sentiment score: 0
Number of reviews: 1
The T.16000M FCS is compatible with PC via USB in Windows 10, 8, 7 and Vista (32-bit and 64-bit)The T.16000M FCS offers you a precision level greater than current systems, which will not decrease over time, thanks to the joystick's H.E.A.R.T technologyFully ambidextrous joystick: 3 removable compone...
 Show Reddit reviews
6. HIGHFINE Triwing 1.5 2.5 3.0 and Phillips PH00 Screwdriver Set Repair for Nintendo Products Wii DS Lite DSi 3DS GBA SP NDS
Sentiment score: 1
Number of reviews: 1
100% Brand New and High QualityExtremely Durable and Useful, Compact Design and LightweightTriwing 1.5, Triwing 2.5, Triwing 3.0 and Phillips 2.0 (PH00)Compatible with: Nintendo Products which have unique Y style screws, as Wii DS Lite DSi 3DS GBA SP NDS... etcPackage Includes: 1x PH00 + 1x Y1.5 + 1...
 Show Reddit reviews
7. ORIA Screwdriver Set, 64 in 1 Precision Screwdriver Kit with 56 Bits, Magnetic Driver Kit, Professional Repair Tool Kit, Flexible Shaft for iPhone 8, 8 Plus, Smartphone, Game Console, Tablet, Blue
Sentiment score: 0
Number of reviews: 1
1. Updated Bits: This screwdriver bits are made of premium S2 steel material which is stronger and more durable than others and can be used repeatedly without abrasion in a long time.2. High Quality : The Unique non slip driver in the market is machined from a single piece of aluminum, and cover wit...
 Show Reddit reviews
8. 720Pcs 2.54mm JST-XHP 2/3 / 4/5 Pin Housing and Male Female Pin Header Connector Adapter Plug Set
Sentiment score: 0
Number of reviews: 1
2.54mm JST-XHP 2 3 4 5 pin housing and male female pin header terminal connector kitMaterial : PVC , MetalPin Pitch : 2.54mmPacking Quantity:720 Pcs jst connector kit ,Packed in clear plastic box, convenient to install and store.Good for home electronics prototyping.ideal to build your own battery
 Show Reddit reviews
9. TBGS - 10 Piece Bundle Replacement Nintendo Gamecube Joystick Analog Stick Cap Covers (5 Gray Left Cap Covers + 5 Yellow Right Cap Covers)
Sentiment score: -1
Number of reviews: 1
Ten Piece Bundle Nintendo Gamecube Cap Covers5 Gray Left Analog/Joystick Cap Covers and 5 Yellow Right Analog/Joystick Cap CoversCompatible with all original genuine Nintendo GameCube controllers including Wavebird (both NTSC & PAL controllers)Excellent quality replacement GameCube parts - Color (sh...
 Show Reddit reviews
10. Nintendo Game Cube Controller Super Smash Bros. Black Japan Import
Sentiment score: 0
Number of reviews: 1
GameCube Controller Super Smash Bros Ultimate Edition Nintendo Switch
 Show Reddit reviews
11. ABXYZ Buttons +Thumbstick D-pad Triggers Full Buttons Mod Set for NGC Gamecube Controller White Color
Sentiment score: 0
Number of reviews: 1
11 in 1 full buttons kit replacement partsPerfect fits for your damaged, scratched and old controller, give your controller a new lookMaterial: Plastic Color: WhiteSpecially designed for Nintendo NGC Game ControllerABXYZ Buttons+Thumbstick D-pad Mod Set for Nintendo NGC Controller
 Show Reddit reviews
12. EL Wire 16.4ft/5m Tube Rope Battery Powered Flexible Portable Light Neon Tube Illumination Electroluminescence Wires Pack Drivers with 3 Modes High Brightness for Xmas Party Decoration Pub(Ice blue)
Sentiment score: 1
Number of reviews: 1
EL wire high brightness and low power consumption: 100% new. Length of wire: 5 m, wire diameter: 2.3 mm. 2 * AA batteries may shine more than 10 hours.EL wire 3 modes: fixed, fast flashing and slow blinking - simply press the driver button to change modes.EL wire use: fence and tree, Christmas light...
 Show Reddit reviews
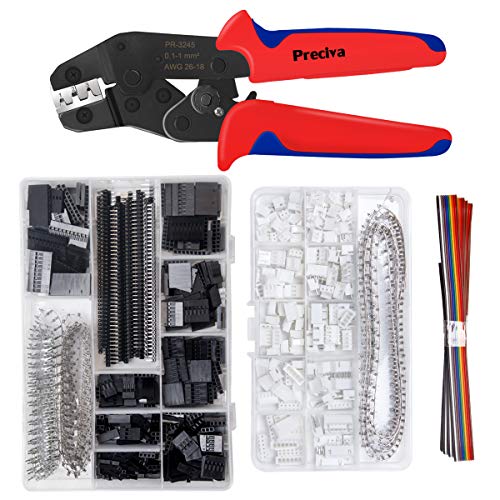
13. Crimping Tool Kit, Preciva Dupont Ratcheting Crimper Plier Set with 1550PCS 2.54mm Dupont Connectors and 460pcs 2.54mm JST-XH Connectors for AWG 26-18(0.1-1mm²)
Sentiment score: 1
Number of reviews: 1
[Precise and Perfect Workmanship]: This terminal crimping tool is produced with a wire-electrode cutting die set. It can make for a more perfect, precise, and accurate crimp result. It also has a ratcheting mechanism design which can also help you to save energy and strength.[Crimping Size Range]: A...
 Show Reddit reviews
14. Case for PowerA Wireless/Wired Gamecube Style Controller, PDP 500-100-NA-D1 Controller for Nintendo Switch (Black)
Sentiment score: 0
Number of reviews: 1
Case Only: Design for PowerA Enhanced Wireless/Wired Controller, PDP 500-100-NA-D1 Controller for Nintendo Switch.Premium EVA materials:Hard shell with shockproof, skidproof and water resistant material,protects your powera wireless/wired controller from scratch and damage, maximize the life of ...
 Show Reddit reviews
15. Ssgamer 8X 6ft Wii/Gamecube Extension Cables for Nintendo Wii Gamecube GCN
Sentiment score: 1
Number of reviews: 1
Extension cable for Nintendo Gamecube & Wii classic controllers.Shielded wires prevents signal loss from the console system to your controller.Plug various cables into another for even more extension.Play Gamecube games with much more freedom and space.Cable length: 6 Ft / 1.8m.
 Show Reddit reviews
Hey, I used this crimping kit from Amazon: https://www.amazon.com/gp/aw/d/B07R1H3Z8X?psc=1&ref=ppx_pop_mob_b_asin_image
The easiest way would be to only use two wires, only connecting the data and a ground (sacrificing rumble). The two pin connector fits nicely. Or if you're determined like I was you can bend the female connector pins of a 4 pin to fit into the header.
I will take a picture of my controllers PCB when I get the chance to show you.
Hey! The best thing to do is to apply some form of protectant. This Glossy Clear coat spray is pretty well-used in the community, just be careful to spray in a well ventilated area/ use a respirator, since this stuff is pretty dangerous if inhaled.
This guide is pretty good for controller maintenance: https://smashboards.com/threads/technical-knowledge-compilation-gamecubes-controllers-tvs-recording.335040/
2,4,5. Your best bet is soap and warm water or some other house hold cleaner. I use a toothbrush, you could use a cotton swab instead. I read that isopropyl alcohol damages/discolors the controller if overused. I use it anyway with cotton swabs for all the nasty bits. If you want to clean the the shoulder buttons, you will also need a Phillips screwdriver to remove the shield.
In terms of difficulty, your only problem is losing the buttons, pads, and screws. I dip my parts in soap water and scrub with a toothbrush, that’s it.
If you want to clean the stick box itself. I just use rubbing alcohol and a cotton swab to clean up whatever is exposed and dirty. As for the inside, you will likely need a soldering iron. Refer to the guide for disassembly and maintenance.
El Wire: https://www.amazon.com/Flexible-Illumination-Electroluminescence-Brightness-Decoration/dp/B07L6RPYV9/ref=mp_s_a_1_12?keywords=el+wire&qid=1566694684&s=gateway&sprefix=el+wire&sr=8-12
Its really cheap and looks like a neon light.
The idea im running with is taking 3xPink and 3xWhite 24awg wire and wrapping it around an El Wire. I can then use clear heatshrink around it and replace the black cable that plugs into the controller.
So when I plug the controller into the switch the entire wire will have a Neon Glow.
By the time I'm down it will look very "Outrun/Vaporwave" esque.
Thanks!
Amazon!
For triwing, you could just get a set like this: https://www.amazon.com/dp/B073ZWY386/ref=cm_sw_r_cp_awdb_t1_28c5Bb6EQ6SZ5
You could buy from an Amazon vendor:
https://www.amazon.com/Buttons-Thumbstick-Triggers-Gamecube-Controller/dp/B07JBC5Q8L/ref=sr_1_5?keywords=gamecube+buttons&qid=1571612323&sr=8-5
Another option is to pay the extra $10 to buy from a reputable vendor:
https://battlebeavercustoms.com/products/custom-gamecube-buttons?variant=39517584206
https://www.amazon.com/720Pcs-JST-XHP-Housing-Connector-Adapter/dp/B0752C431F/ref=sr_1_2_sspa?keywords=jst+connector+kit&qid=1564712737&s=gateway&sr=8-2-spons&psc=1&spLa=ZW5jcnlwdGVkUXVhbGlmaWVyPUExWjZVSTdNTFFTQzZPJmVuY3J5cHRlZElkPUEwOTU1MjE0Mjc4VjE2STc2MDZYUyZlbmNyeXB0ZWRBZElkPUEwNjg3MjM3MkNNMFpDVTRDOEhRUCZ3aWRnZXROYW1lPXNwX2F0ZiZhY3Rpb249Y2xpY2tSZWRpcmVjdCZkb05vdExvZ0NsaWNrPXRydWU=
I've been using a Crown Royal drawstring bag for year but I saw this today when I was browsing Prime Day sales and scooped one up.
Assuming the sensors take the same voltage and output in a similar range, there's no reason you couldn't hotwire it on the existing PCB. You might have to worry about mounting it securely if it has a different footprint though. If it has a different output range you'd have to modify the PCB to correct it. Personally I'd use an Arduino or similar just so I could fine-tune the sensor range, but you could probably get a working controller with the stock MCU if you aren't fussy about functionality.
The main advantage of using one of those sensor types is longevity: potentiometers rely on moving parts that make physical contact, and so suffer from wear over time. Hall Effect sensors work by detecting a magnetic field, and so don't wear down. I assume the same is true of optical and induction-based sensors. They are probably more accurate too, but thumbsticks are so small I doubt you'd notice.
The trouble is cost: pot-based thumbsticks are very cheap, but I'm having trouble finding Hall Effect thumbsticks that aren't prohibitively expensive. Hall Effect joysticks can be had for around £45, but that's a much larger sensor which wouldn't fit into a GC shell.
EDIT it seems you can buy Hall Effect sensors quite cheaply, so if you're willing to put in some work building your own stickboxes, PCB and programming an MCU to work with them you could build a controller with them for a reasonable price.
This has happened to me. You can’t pull the cord down to expose the copper. And you can’t just cut the paracording as it’s just too much. Here’s my advice. Get some crafting shears (I usethe Plato model 170 shears) and start from the top. Just clip, and pull. Start to cut the cord in half. It’s gonna be worth it because as you grow your collection of parts you’re gonna need cables and boards. They’re the most important supplies. Even if you gotta cut it all the way down you can still salvage the cord. Now everyone will tell you you dont need the copper. I like to keep it just as an integrity thing but a lot of people just scrap it. As I have no personal proof if it works or doesn’t work I just keep it to stay as close to the OEM cable as possible. Cut the cord down until you pass the problematic areas and then you can scrap the copper. I didn’t know to cut the cord like this and I lost my first cable and paracord. Eventually you’ll get your stride though.