(Part 2) Top products from r/ender3
We found 116 product mentions on r/ender3. We ranked the 702 resulting products by number of redditors who mentioned them. Here are the products ranked 21-40. You can also go back to the previous section.
21. SIQUK 3 Pcs Teflon Tube PTFE Blue Tubing (1.5M) with 3 Pcs PC4-M6 Fittings and 3 Pcs PC4-M10 Fitting Connector for 3D Printer 1.75mm Filament
Sentiment score: 2
Number of reviews: 5
 Show Reddit reviews
22. HATCHBOX PLA 3D Printer Filament, Dimensional Accuracy +/- 0.03 mm, 1 kg Spool, 1.75 mm, Black, Pack of 1
Sentiment score: 3
Number of reviews: 5
1 KG (approximately 2.20 lbs) Spool1.75mm Filament Diameter (Dimensional Accuracy +/- 0.03mm)PLA (Polylactic Acid) 3D Printer Filament Vacuumed Sealed With DesiccantRecommended Extrusion/Nozzle Temperature 180°C - 220°CSpool Diameter: 7.88" - Spool Width: 2.69" - Spool Hub Hole Diameter: 2.20"
 Show Reddit reviews
23. Authentic Capricorn PTFE Bowden Tubing (1 Meter) XS Series for 1.75mm Filament with PTFE Teflon Tube Cutter and Upgraded PC4-M6 and PC4-M10 Pneumatic Fittings with Metal Teeth and Blue Collet Clip
Sentiment score: 3
Number of reviews: 5
Capricorn PTFE is well regarded as the highest quality PTFE tubing in all of 3D printing. The tight tolerances make sure that the filament is lead directly to the hotend with as little room for error as possible between the extruder and the hotend.Capricorn PTFE XS Series is rated for withstanding t...
 Show Reddit reviews
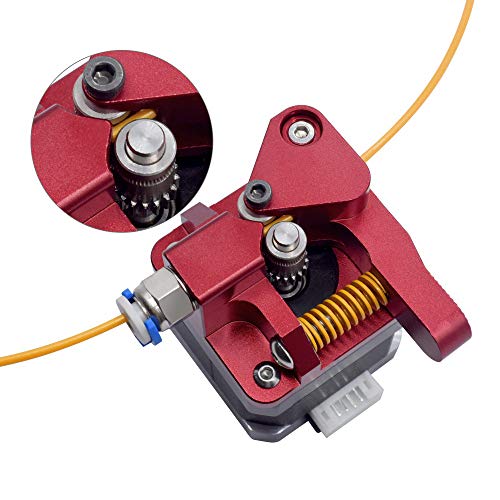
24. WINSINN Dual Gear Extruder, Works with Creality Ender 3 CR10 CR-10 Pro CR-10S Tornado Upgraded Aluminum Drive Feed for 3D Printer 1.75mm Filament
Sentiment score: 5
Number of reviews: 4
✔️New Double Gear Extrusion Mechanism. Had to change the extruder e-steps from 100 to 139✔️UPGRADE: Perfect replacement for Creality 3D Printers CR-10/ CR-10S/ CR-10S Pro/ Ender 3/ Tornado, etc.✔️All-metal aluminum alloy, High quality dual gear extrusion, stable and durable.✔️For 1.7...
 Show Reddit reviews
25. uxcell 400mm x 205mm x 0.5mm Silicone Thermal Pad for CPU GPU Heatsink
Sentiment score: 2
Number of reviews: 4
Product Name : CPU Thermal Pad;Material : SiliconeSize : 40 x 20.5cm/15.7'' x 8.1'' (L*W)Thickness : 0.5mm/0.02''Weight : 103gPackage Content : 1 x CPU Thermal Pad
 Show Reddit reviews
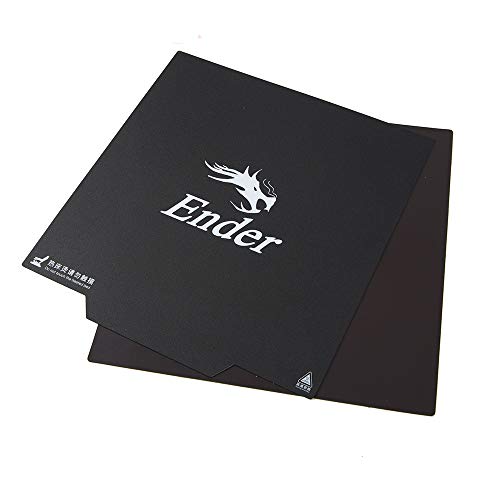
26. Creality Original Ultra-Flexible Removable Magnetic 3D Printer Build Surface Heated Bed Cover for Ender 3/Ender 3 pro 3D Printer 235X235MM
Sentiment score: 2
Number of reviews: 4
ALL NEW FUNCTIONALITY: Introducing the first ever removable, magnetically secured, build surface for hassle free model removal. Say goodbye to all those removal tools, spatulas, and knives with this genius design.EASY MODEL REMOVAL: The first 3D printing surface designed with model removal in mind. ...
 Show Reddit reviews
27. Wisamic 235x235x4mm Tempered Glass Bed for Creality Ender 3, Ender-3 Pro, Ender-3X, Ender-5, CR-20, CR-20 Pro, Upgraded 3D Printer Build Surface Platform Heated Bed
Sentiment score: 1
Number of reviews: 4
✅ EXCELLENT ADHESION - Covered by microporous coating, this tempered glass heated bed shows strong adhesion in printing. No need to use glue on printing.✅ EASY REMOVAL OF PRINTS - Reduce adhesion after cooling. It is easy to separate the model and the platform and remove the model. Avoid the iss...
 Show Reddit reviews
28. Creality Original 4010 Blower 40x40x10MM 24V DC Cooling Fan and 24V Circle Fan for 3D Printer Parts Ender 3/Ender 3 Pro
Sentiment score: 2
Number of reviews: 4
Use For :Creality Ender 3Material:PlasticOperation Voltage: DC 24VWeight: 0.078KGPackage included: 2Pcs 24v 4010 Fan and 24V Circle Fan
 Show Reddit reviews
29. CCTREE NEMA 17 Stepper Steel and Rubber Vibration Dampers with M3 Screw Upgrade for Creality Ender 3 Ender 3 pro CR-10 CR-10S 3D Printer,CNC (Pack of 3)
Sentiment score: 2
Number of reviews: 4
Nema17 Stepper Dampers are used to decrease noise and resonance in your CNC and 3d Printer1 Damper used per Stepper or Electric motor3d Printers see a 5-10dB reduction in noise when used on X and Y Axis steppers with the vibration damper for nema 17Works on both Cartesian and Delta style Additive Ma...
 Show Reddit reviews
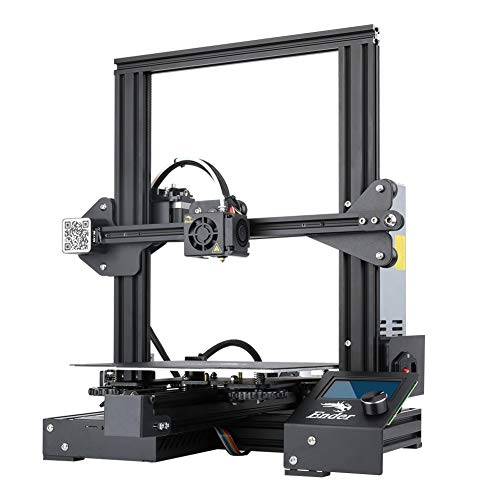
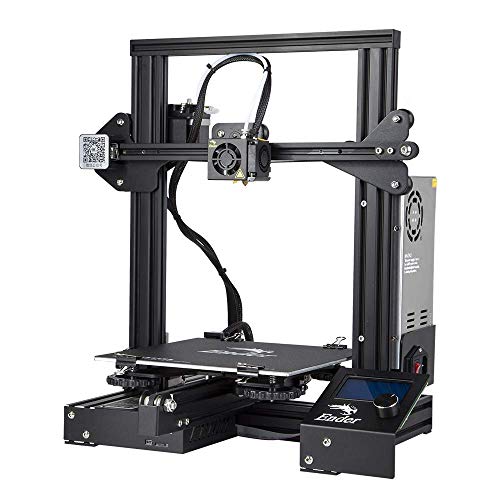
30. Creality Ender 3 Pro 3D Printer with Magnetic Build Surface Plate and UL Certified Power Supply Metal DIY Printers 220x220x250MM …
Sentiment score: 1
Number of reviews: 4
FAST HEATING & RESUME PRINT: The heated bed can reach its operating temperature in just five minutes. The printer is shielded by its power supply from voltage spikes and power outages. If electrical power is lost, prints can be resumed from the last layer, saving time and reducing waste.PRINTING S...
 Show Reddit reviews
31. Micro Swiss All Metal Hotend Kit for Creality CR-10 / CR10 / CR10S / Ender 2 / Ender 3 Ender 5 Printers .4mm
Sentiment score: 3
Number of reviews: 4
Fits: Creality CR-10 / CR-10S / CR-10-S5 / CR-10 MINI / CR-10-S4 / Ender 2 / Ender 3 / Ender 3 / TronXY X5SOrifice size: .4mmKit Includes: Aluminum Cooling Block, Grade 5 Titanium Heat Break, Aluminum Heater Block, Brass Plated Wear Resistant MK8 .4mm Nozzle, Silicone SockThis is a Drop in All Metal...
 Show Reddit reviews
32. Official Creality Ender 3 3D Printer Fully Open Source with Resume Printing Function 220x220x250mm
Sentiment score: 2
Number of reviews: 4
Resume Print Function: Ender 3 has the ability to resume printing even after a power outage or lapse occurs.Easy and Qucik Assembly: It comes with several assembled parts, you only need about 2 hours to assemble 20 nuts well.Advanced Extruder Technology: Upgraded extruder greatly reduces plugging ri...
 Show Reddit reviews
33. Creality Ender-3X 3D Printer Upgraded Version from Ender-3 with Tempered Glass 5PCS 0.4mm Nozzle Resume Printing Build Volume 8.7" x 8.7" x 9.8"
Sentiment score: 1
Number of reviews: 4
Ender 3 Upgraded Version: Creality Ender-3X comes with a tempered glass, which makes models are easier removed. It also makes the hot bed more flatResume Print: Ender 3x has the ability to resume printing even after a power outage or lapse occurs.Advanced Technology: Upgraded extruder greatly reduce...
 Show Reddit reviews
34. Adiyer 10 Pcs 8mm OD 20mm Length Compression Mould Die Springs for 3D Printer Ender 3 Stock Bed Leveling, Light Load
Sentiment score: 3
Number of reviews: 4
Fit for 3D Printer Ender 3 Stock Bed Leveling.8mm / 0.31-inch (OD), 4mm / 0.16-inch (ID), 20mm / 0.79-inch (Free Length)Loading Grade: Light Load, Model: TF 8*20, Color: Yellow PaintingPackage Included: 10pcs x Die SpringsDie Springs for die machinery or other applications.
 Show Reddit reviews
35. 3D Printer Silk Rainbow Multicolor PLA Filamentt 1.75mm 1KG Multi Color Printing Materials Gradually Changing Color PLA Rainbow Mulitcolor Multicolored Metallic Color Gradient Filament CC3D
Sentiment score: 2
Number of reviews: 4
No polishing needed, printing at a high detail results in a beautiful finish.Highlight silk pla filament multicolored color.Nice shiny Metallic Special Rainbow Multi Color GradientIndustrial & Scientific > Additive Manufacturing Products > 3D Printing Supplies > 3D Printing FilamentThe change from o...
 Show Reddit reviews
36. Teenitor Silicone Thermal Pad for CPU GPU Heatsink and Hold The Glass Plate On Heated Print Bed for 3D Printing 400mm x 200mm x 0.5mm
Sentiment score: 0
Number of reviews: 4
 Show Reddit reviews
37. WINSINN 40mm Fan 24V Hydraulic Bearing Brushless 4010 40x10mm - High Speed (Pack of 5Pcs)
Sentiment score: 2
Number of reviews: 4
✔️️Hydraulic Bearings 4010 Fan - High Speed version✔️High quality Hydraulic bearings, Better than Oil bearings, More stable and Long life, suitable for continuous work. The life expectancy is about 45,000 hours.✔️️Rated voltage: DC 24V✔️️Size: 40x40x10mm✔️Made by WINSINN.
 Show Reddit reviews
38. NTE Electronics 77-4010D24 High Speed Fan, Ball Bearing, Thermal Plastic Wire Lead, 40 mm L x 40 mm H x 10 mm T, 24 VDC, 7000 RPM, 7.73 CFM
Sentiment score: 11
Number of reviews: 4
High SpeedBall Bearings26 AWG Red (+) and Black (−) Leads11.8" (300mm) Lead Length
 Show Reddit reviews
39. Creality Heat Bed Platform Sticker Sheet,3D Printer Build Surface Plate for Ender-3 Ender 3X 3D Printer 235X235MM (Pack of 2)
Sentiment score: 2
Number of reviews: 3
Size:235mm x 235mm,Build sheet adheres to a print bed to help the filament stick during printing, while also enabling clean removal of the printed part afterwardCompatible with ABS, PLA, HIPS and other filamentSingle sheet design installs more quickly and with fewer bubbles than tape or filmsDurable...
 Show Reddit reviews
40. M3 Stainless Steel Hex Socket Head Cap Screws Nuts Assortment Kit, Allen Wrench Drive, Precise Metric Bolts and Nuts Set with Beautiful Assortment Tool Box for 3D Printed Project, 310 Pcs (Silver)
Sentiment score: 3
Number of reviews: 3
🔩【Wide Application】 XOOL M3 Hex Socket Head Cap Screws Nuts are great for professionals, amateurs, landlords, handymen, repair men, women, woodworking, construction, plumbing, HVAC and so on. They also worked well for 3D printed projects. The kit is perfect to replace broken lost. Use on shee...
 Show Reddit reviews
I've owned the Ender 3 for a few months now and have made a number of upgrades, both purchased and printed. Here's a list of what I have purchased and printed, sorted by importance/usefulness.
 
Purchased Parts:
 
Printed Parts:
 
Future Upgrades:
Spool Roller - One issue I've found is that the stock spool holder requires excessive force from the extruder to unwind filament. A replacement spool roller with bearings should reduce the friction significantly and produce more even extrusion.
Metal Extruder - A common problem with the Ender 3 is that it fails to maintain proper tension on the extruder gear, which leads to failure to feed and poor extrusion. An all-metal extruder has been known to fix the issue.
It's generally better to use it stock and upgrade as you discover the need to.
The only (purchased) upgrade you really need from the get go is [better bed springs] (https://www.amazon.com/gp/product/B07KF9LZ2L/ref=ppx_yo_dt_b_asin_title_o02_s00?ie=UTF8&psc=1). The stock ones are terrible at maintaining the bed at level. If the bed it comes with is warped, then also a glass bed, but that's the only reason you would need one. Mine wasn't warped and it's just fine. After that, aluminum extruder because the plastic one will start to wear eventually, and capricorn tubing.
A Pi, auto leveling, new electronics, micro swiss are all much more in the "luxury" upgrade category in my opinion. I don't have any of those and I don't feel any particular need to after three months of having the printer.
Make sure you also look into what's called "luke's hotend fix." I struggled with an underextrusion goblin for a while until I did that and upgraded to an aluminum extruder and capricorn tubing. Goblin banished.
I recommend also getting some calipers, though they're not necessary, and a set of feeler gauges has made bed leveling easier and more consistent than using a sheet of paper.
edit: I misread and thought you were trying to save money. Anyway, I still recommend using it mostly stock for a while to get familiar with it before upgrading a bunch of stuff. Out of those, after bed springs, extruder assembly and tubing I'd probably go for the electronics and hotend since bed leveling comes pretty easy to me now.
ahh, yep! hah, that's where I've landed as well--I want to go back and try the OEM fan. My problem is that one of my fan blades snapped off (accidentally touched it with PETG filament when I was changing it out). So I just need to find a good OEM fan I can buy new.
This is what I've found: https://www.amazon.com/Creality-Original-40x40x10MM-Cooling-3D/dp/B07FTNCC9B
Hopefully it'll be equivalent (although FWIW my original fan had 9 blades, the one in the pic has 7.... we'll see when it arrives).
And wow what a difference on your two prints, night and day difference! The yellow print looks very similar to the issues I dealt with all weekend (but mine has been on a much smaller scale). I tried soo many different combinations of speed, retraction/coasting, temperature, and had both under/over extrusion. Nothing would consistently give me good results.
Those couplers are trash and so is the PTFE tube they sent. They may work for a while but you'll want to swap them sooner rather than later. Here's a list of upgrades you'll probably want to do. You'll also want to look up a tutorial on how to upgrade your firmware so you can activate safety features (thermal runaway protection specifically). This also doesn't include a BLTouch or EZABL (auto bed levelers) as I have yet to make a choice personally.
Couplers and Tube:
SIQUK 3 Pieces Teflon Tube PTFE... https://www.amazon.com/dp/B07FPJHRTQ?ref=ppx_pop_mob_ap_share
Metal Extruder: ( original plastic one will wear out or break)
Ender 3 Creality 3D Upgrade... https://www.amazon.com/dp/B07KSS8FRQ?ref=ppx_pop_mob_ap_share
Bed Springs: (more than needed but oh well)
SIQUK 16 Pieces Heated Bed... https://www.amazon.com/dp/B07K9PBML5?ref=ppx_pop_mob_ap_share
Glass Bed: (goes on top of print bed which is usually warped, printing on an uneven surface not so bueno)
Creality Upgraded 3D Printer... https://www.amazon.com/dp/B07DS2LZF1?ref=ppx_pop_mob_ap_share
Raspberry Pi 3B+ for OctoPrint: (still need microsd card for it I believe)
CanaKit Raspberry Pi 3 B+ (B... https://www.amazon.com/dp/B07BC6WH7V?ref=ppx_pop_mob_ap_share
Stepper Motor Dampers: (silences the motors, no more sounding like dial up internet lol will need to print mounts from thingiverse)
Upgraded NEMA 17 Stepper Steel... https://www.amazon.com/dp/B07DNT72SF?ref=ppx_pop_mob_ap_share
Heat Sinks For Stepper Motors: (once stepper motors have dampers and aren't attached to the metal frame, they can get a little hot)
40mmx40mmx10mm Black Radiator... https://www.amazon.com/dp/B07KWVGGGK?ref=ppx_pop_mob_ap_share
Hot end silicone sleeve: (may not need, mine came with one instead of the old insulation)
Creality Original 3D Printer... https://www.amazon.com/dp/B07HNXJ39T?ref=ppx_pop_mob_ap_share
Extra Filament: (ender 3 only comes with a small sample "spool", this is just a brand I use and have had decent results with. The metallic silver hue shows off detail well)
3D Printer PLA Filament 1.75MM... https://www.amazon.com/dp/B00ME7YUIU?ref=ppx_pop_mob_ap_share
Some other things I'd recommend
TL-Smoothers https://smile.amazon.com/gp/product/B071WG3SZQ/ref=ppx_yo_dt_b_asin_title_o01_s01?ie=UTF8&psc=1
I know you already upgraded the extruder assembly but this duel geared version is nice: https://smile.amazon.com/gp/product/B07SY745CF/ref=ppx_yo_dt_b_asin_title_o01_s01?ie=UTF8&psc=1
PEI Bed surface (has to date been the best upgrade): https://smile.amazon.com/gp/product/B07GSJSDWR/ref=ppx_yo_dt_b_asin_title_o09_s00?ie=UTF8&psc=1
and if you don't have a glass: https://smile.amazon.com/Creality-Ender-Glass-Upgraded-235x235x4mm/dp/B07RD6D2ZQ/ref=sr_1_5?keywords=creality+glass&qid=1571456745&sr=8-5
I'd recommend applying the pei in the smooth side of the glass that way you can flip it over to have the textured side if you want.
Bought mine from Amazon.de, sold by Comgrow, shipped by Amazon. Ordered on Tuesday last week, arrived three days later. Price was 220€, but I got a spool of black PLA with it for free, so I guess I can round that down to 200€. I guess I did pay a premium, but the fast shipping and the added amazon safety is worth it I guess.
Got mostly lucky with quality control too. The extruder motor bracket is not bent to a perfect 90°, so I had to leave the Z guide screws on it pretty loose. But it prints well, so I'm not complaining.
What you absolutely MUSTTTTTTT!!!! order? Nothing. The printer works as is. But if you want to do yourself a favour, here's a list of what I consider essentials:
- New springs, both bed and extruder. I don't have a link for an extruder one as I upgraded my entire extruder drive frame and that came with a better spring
- A new removable bed. Creality glass bed or glass with a PEI sheet is my bed of choice
- Thermal pad to avoid the annoying bed clamps. Cut squares out of it, lay them in a checkered pattern alternating between thermal pad and nothing and place your bed on top. They will hold the bed in place and help with heating
- Stepper dampers if your printer is anywhere near where you spend your time, it sounds like a bloody jackhammer right out of the box
- New tube fittings, the stock ones are terrible and will give out in a matter of weeks at best. They also barely hold onto the tube
There are a ton of other great upgrades, but I think a good idea is to get a feel for it yourself.
What you can do, however, is check out some printable upgrades. I have this thread where people contributed with their choice of printable upgrades. It's a great list you can refer to later. Essentials on that are the fan guard and LCD back cover simply because the Ender 3 as is has the fan and back of the LCD exposed and that makes it crazy vulnerable to dust and gook damage
Unfortunately I can't say myself what printing with bad filament will do to your overall print as I have never had any go that far. Got worried with one but it still prints just fine. Maybe someone can chime in with that brand, or you should look up what others say about that brand. Seems like things arent quite right with it though. I'd suggest buying a different brand and try that out to see if it performs better. It's possible that you got a bad spool straight out of the gate. I'd personally suggest the hatchbox brand $20 for 1kg spool on amazon. And they seem to be pretty highly recommended across the board. Always got really good prints on mine with hatchbox so long as my settings were right.
Try calibrating it, also check the bearing.
More importantly you're much better off with a dual gear extruder like the one on the CR10s pro
https://www.amazon.co.uk/dp/B07SY745CF/
If you can wait for China, this is absolutely perfect - https://www.ebay.co.uk/itm/283585198053
Re: calibrating, I had to increase my steps/mm from 95 to 141. Smaller teeth = more steps
I LOVE MY ENDER 3'S. I have one running stock everything (except the bed) and the other is well, an ender 3 in name only now. (I know you mentioned you are in the EU, but I have provided links to my sources for US based distributors)
Printer setup:
Ender 3
MKS (MKS GEN L V1.0)
TMC (2208's)
Micro Swiss All Metal Hotend ( MS all metal )
Custom Modified heater block (installed 300°c heater cartridge and 450°c capable thermistor from slice engineering) (heater) & (thermistor)
Bantamfeeder Extruder ( bantam design ) ... will be changing this out soon when I decide what next. Works well just not my cup of tea for convenience purposes.
Bullseye Duct ( https://www.thingiverse.com/thing:2759439)
3-point bed conversion for leveling made easy (Leveling guide and 3 point leveling adapter). HERE IS A COMPLETED DESIGN OF THESE CHANGES( My bed setup ... < < < this is my stock ender 3)
Borosilicate glass bed w/ PEI (Glass bed & PEI Sheet)
PSU (Mean Well NES-350-24 24V 350 Watt UL Switching Power Supply 120 Volt)
&#x200B;
OCTOPRINT SERVER
RPI 3b+ (raspberry pi w/ octoprint)
Pi Cam (https://www.amazon.com/gp/product/B07L2SY756/ref=ppx_yo_dt_b_asin_title_o05_s00?ie=UTF8&psc=1)
&#x200B;
So now you see why I say not really an ender 3 anymore, only in name
Have a look at the bulldog extruder. It has a much higher clamping force on the filament. It does require you to have Marlin or T3HD firmware installed.
https://www.amazon.com/gp/product/B07FDSHVCN/ref=oh_aui_detailpage_o02_s00?ie=UTF8&amp;psc=1
It just works. There are a few gotchas that can be quickly resolved.
This should also allow you to easily print TPU
Thanks for the information!
&#x200B;
Fot the Hero me, i need this fan?: https://www.amazon.co.uk/gp/product/B07BS8334N/
Or this kind? https://www.amazon.com/gp/product/B00ZSA83EW/ref=ppx_yo_dt_b_asin_title_o09__o00_s00?ie=UTF8&psc=1
&#x200B;
I am litle confused about the correct fan! Thanks
Again, I am a super novice...
&#x200B;
I switched out to a glass bed simply because my stock bed was warped. The tip could touch on the corners and a sheet of paper would slide right through in the center. Once you get the bed level though, I don't think your adhesion problem will be as much of an issue. The magnetic bed it actually pretty nice. I actually ended up turning my bed down a little, to like 55. I was at 60, and it was working, but I was having adhesion problems as well and figured it might be a combination of speed and filament being too hot to stick with a temp that high. I also run my PLA at 210.
&#x200B;
These springs made leveling the bed much easier. Springs
This was the bed I went with. I like it a lot.
Just like my comment below this one, isn't the magnetic bed better? Do you know if the standard Ender 3 supports the magnetic bed if I bought the magnetic strip like this? Or is this only for the Ender 3 Pro?
Thanks for the detailed reply.
&#x200B;
I need to read more to understand the z switch and z screws you are referring to. I have no idea what those are. I assembled by watching some channel on youtube do it. It was like a tales from the crypt vibe channel.
&#x200B;
As much as it sucks, I probably need to completely disassemble it and start over. There has to be something done incorrectly for it to be this difficult. I am definitely going to get one of those gauges before I get back into. I returned the springs today and ordered different springs on amazon. When they get here, I might sit down one night and try again.
&#x200B;
As for the bed, the glass one I got was scratched to hell from those stupid springs. I didn't know I had to raise or lower whatever switch you were talking about. Like I said earlier, I already ordered a SD card reader so that will be a definite mod. As for the octopi, is there a list somewhere on this subreddit of everything you need to purchase before starting? I have a raspberry pi at the house. I originally bought it to build a retropie but I haven't gotten around to it yet. I could use it for the printer if needed. I really like the idea of remote printing, having a webcam to see the print live, and putting a part on there that stops the print if there is a filament issue.
&#x200B;
I have to go into the city tomorrow so I was thinking of stopping by ikea and getting some Lack Tables for the eventual enclosure but now I don't know if I am even going to keep the Ender 3. I am debating on returning it and moving up a tier. I really want to get started on this but it seems like I am never going to be able to print any of this awesome stuff. So many awesome files on thingiverse and I can't use any of them.....
&#x200B;
Here are the parts I have purchased so far....
&#x200B;
SD Card Extension
&#x200B;
Glass Bed
&#x200B;
Springs that I bought that would not lower bed enough
&#x200B;
Most Recent Springs I am going to try
&#x200B;
Metal Extruder Upgrade
&#x200B;
Filament Black and Red
Yes of course :)
Black PLA:
• HATCHBOX PLA 3D Printer Filament, Dimensional Accuracy +/- 0.03 mm, 1 kg Spool, 1.75 mm, Black https://www.amazon.com/dp/B00J0ECR5I/ref=cm_sw_r_cp_api_i_-Nn0Db9E2TV4N
•OVERTURE PLA Filament 1.75mm with 3D Build Surface 200mm × 200mm 3D Printer Consumables, 1kg Spool (2.2lbs), Dimensional Accuracy +/- 0.05 mm, Fit Most FDM Printer, Black https://www.amazon.com/dp/B07PGY2JP1/ref=cm_sw_r_cp_api_i_yPn0DbA5MFBZS
White PLA:
•HATCHBOX PLA 3D Printer Filament, Dimensional Accuracy +/- 0.03 mm, 1 kg Spool, 1.75 mm, White https://www.amazon.com/dp/B00J0GMMP6/ref=cm_sw_r_cp_api_i_IOn0Db4BZ8QWH
•OVERTURE PLA Filament 1.75mm with 3D Build Surface 200mm × 200mm 3D Printer Consumables, 1kg Spool (2.2lbs), Dimensional Accuracy +/- 0.05 mm, Fit Most FDM Printer, White https://www.amazon.com/dp/B07PGZNM34/ref=cm_sw_r_cp_api_i_LRn0Db62EBRN2
Here's the aluminum extruder assembly. The plastic one that comes on the printer WILL break. It's just a matter of time. They crack from stress after a while and even before that they creep and you'll start getting missed extrusion.
Here's the stiffer bed springs. You won't have to compress these as much to get a good stiffness.
Another really popular upgrade is this glass build plate. It has a special coating that makes it so parts stick without adhesive, and it leaves a really smooth surface on your prints. Parts stick really well then when it cools down they self-release.
The 3 upgrades I linked are extremely popular upgrades. You can get by without the glass bed, it's just an option because the stock bed will wear out eventually.
Yeah, that tube is toast. Try pulling the tube down through the coupler, as there is a huge bulge at the bottom... Though you've probably already tried that.
I would recommend all new couplers while you're at it. If you're on the stock couplers, they are pretty much crap.
If you don't have a length of tubing to replace it, I would recommend this kit:
https://www.amazon.com/gp/product/B07PS3NH82/ref=ppx_yo_dt_b_asin_title_o01_s00?ie=UTF8&psc=1
It's a full meter of tubing, two complete sets of couplers, a tube cutter and clips.
If you don't need the tubing, the couplers can be had for a few bucks.
Stock fan? Or do you want to upgrade?
Stock
Creality Original 4010 Blower 40x40x10MM 24V DC Cooling Fan and 24V Circle Fan for 3D Printer Parts Ender 3/Ender 3 Pro https://www.amazon.com/dp/B07FTNCC9B/ref=cm_sw_r_cp_api_i_7MEkDbBWP83RN
screw set.
Probably could use either. The recommended ones fit right into the heat sink fan, another set might sit over the fan and need to be a little longer?
Above is a simple kit.
The pro has a different bed surface, a neat magnetic one they sell by itself for around 18$ on amazon, an upgraded power supply that runs around 30$ on amazon, and a beefier Y axis bar. 40x40 instead of 20x40. The electronics area is inverted making a small fan cover print not needed. This is about all there is different from the regular ender 3.
Considering the two interesting parts are under 50$, I don't think it's worth going for the pro vs just getting those two parts yourself and upgrading.
Neither the ender 3 nor the pro have a bootloader, so be sure to add a tinyisp programmer to your aliexpress order.
It's most likely your PTFE tubing. I recommend you get this here: https://www.amazon.com/Authentic-Capricorn-Filament-Upgraded-Pneumatic/dp/B07PS3NH82
I just installed it and my prints are beautiful.
https://i.imgur.com/EhRSqPF.jpg
I'm in the middle of converting mine to an e3d v6 clone, bullseye mount, bltouch clone (that I had working well before), stock parts cooling fan and this 40mm heatsink fan:
https://www.amazon.com/gp/product/B00ZSA83EW/ref=ppx_yo_dt_b_asin_title_o00_s00?ie=UTF8&amp;psc=1.
How are you mounting everything?
Upgrade your bed springs: https://smile.amazon.com/Adiyer-Compression-Springs-Printer-Leveling/dp/B07KF9LZ2L/
In my opinion, this is the MOST necessary modification to do on any Ender 3. The springs that come with it are trash, and your bed will constantly shift up or down unless you get better springs. I haven't had to re-level my bed using paper in months.
I'd stick with the glass bed if I were you, it really helps if your bed is warped (which it probably is, judging by your first pic). Just from looking, it seems like your nozzle is too close on that second pic. If you're using a piece of paper to level, make sure to check the nozzle height at locations all over the bed, not just on the edge or the center (although the center is probably the most important spot).
Also, just a reminder to clean your bed with alcohol often. The Creality glass bed can be VERY sticky if clean, so it's actually pretty forgiving on that first layer. Your nozzle can be slightly farther away than it should be, but it will still adhere fine. But if the bed is dirty you'll have a lot of trouble.
Thanks. I will look into adjusting jerk settings. I had them at default values so far. Yes, rainbow silk filament fro amazon:
https://www.amazon.com/dp/B07PYDNQXS/ref=cm_sw_r_cp_api_i_2YAHDb1TVC70J
Was hoping for quicker transitions but turned out well for the cat.
It’s this brand:
3D Printer Silk Rainbow... https://www.amazon.com/dp/B07PYDNQXS?ref=ppx_pop_mob_ap_share
And I’m still relatively new so I can’t really give any sort of expert testimony, but as someone who has printed in the original white and again in some hatchbox black, I didn’t make any changes different than the out of box stuff. Worked really well.
Sounds like the part cooling fan! Mine is doing the same thing. I got this link as the recommended replacement:
https://www.amazon.com/dp/B07FTNCC9B
A genuine microswiss, sure https://www.amazon.com/Micro-Hotend-Creality-Printers-TronXY/dp/B0789V2D7C/ref=pd_cp_328_1/135-5486205-8497053?_encoding=UTF8&pd_rd_i=B0789V2D7C&pd_rd_r=e8b874f2-aefe-4408-a022-6a0c0272998d&pd_rd_w=RcLct&pd_rd_wg=Ravoy&pf_rd_p=0e5324e1-c848-4872-bbd5-5be6baedf80e&pf_rd_r=A9ZWV06R064NQD1A9VDT&psc=1&refRID=A9ZWV06R064NQD1A9VDT
But when it comes to clones, trianglelab is the only company that makes them as good or very close to the real thing.
I went with this one:
https://www.amazon.com/gp/product/B07BR3F9N6/ref=ppx_yo_dt_b_search_asin_title?ie=UTF8&psc=1
I had heard that the Comgrow and Sainsmart Ender 3's were the best ones to order when i was reading up on them.
Here's the extruder I bought
And here's the bowden tubing and connectors
There's a lot of similar items on Amazon that will work; I just personally went after the popular ones with the highest reviews
Also, if you get the tubing, don't forget to get cutters if you don't have any already
I have the exact glass bed. It's great! just be careful using a metal spatula on it, I accidentally left a few scratch marks on mine.
I also bought some of these and put one on the underside in case I want to use the textured bed.
https://www.amazon.com/Creality-Original-Replacement-3D-235X235MM/dp/B07FCBCS9K/ref=sr_1_4?crid=1QMLEI33P3KGL&keywords=ender+3+replacement+bed&qid=1568821453&s=gateway&sprefix=ender+3+repl%2Caps%2C146&sr=8-4
I bought my E3 Pro in February. The hot end fan got really loud a month or so ago. I replaced the hot end and motherboard fan with these two weeks age. So far, so good - much quieter.
I just installed these cheap dampers, like the ones you linked.
https://www.amazon.com/gp/product/B07C7FRLNX
The instructions I followed were here, and include good instructions for the extruder damper installation as well, if you choose to go that route:
https://letsprint3d.net/2018/07/07/how-to-install-stepper-motor-dampers-ender-3/
I did not bother with heatsinks, as the temp increase has been nominal, around 3-4c which is only 5-7 degrees F. This will still shorten the life of the stepper a bit, I am sure, but I doubt it will be terribly significant and for me the trade off is well worth it.
Additionally, I have noticed zero issues with my prints. I typically print at 0.2mm, but occasionally at 0.1 and my prints are still silky smooth at either res, enough that the tiny seam zits are the only defects I'm seeing. It did not effect precision either. My calibration items are usually within .00-.02mm in any direction, which is well within margin. That said, I calibrate regularly and at every filament change to keep things working as well as I can.
The motor is most likely burned. Those are pretty cheap so I would replace them directly.
I personally have those: https://www.amazon.fr/3010-4010-12-ventilateur-refroidissement-V6-V5-MakerBot-MK7-MK8-CPU/dp/B0757RPCN9/ref=asc_df_B0757RPCN9/?tag=googshopfr-21&amp;linkCode=df0&amp;hvadid=313731032140&amp;hvpos=1o2&amp;hvnetw=g&amp;hvrand=4817951201913718857&amp;hvpone=&amp;hvptwo=&amp;hvqmt=&amp;hvdev=m&amp;hvdvcmdl=&amp;hvlocint=&amp;hvlocphy=9056136&amp;hvtargid=pla-456526205934&amp;psc=1&amp;tag=&amp;ref=&amp;adgrpid=70887327988&amp;hvpone=&amp;hvptwo=&amp;hvadid=313731032140&amp;hvpos=1o2&amp;hvnetw=g&amp;hvrand=4817951201913718857&amp;hvqmt=&amp;hvdev=m&amp;hvdvcmdl=&amp;hvlocint=&amp;hvlocphy=9056136&amp;hvtargid=pla-456526205934
And they can also replace the hotend fan if you are willing to do so (they are more silent and blow more air so you can even drop the speed but I don't think the default mainboard allow for that).
Those one seems more silent but I haven't tested: https://www.amazon.fr/MagiDeal-Ventilateur-Refroidissement-Silencieux-Imprimante/dp/B0746CVVX8/ref=mp_s_a_1_7?keywords=ender+3+fan&amp;qid=1565280565&amp;s=gateway&amp;sr=8-7 and same price (only get 2)
Sorry this is in France where I am at the moment.
I was just trying this duct https://www.thingiverse.com/thing:3594440
Fans are 24V
WINSINN 40mm Fan 24V Hydraulic Bearing Brushless 4010 40x10mm for Cooling Creality Ender 3 / Pro - High Speed (Pack of 5Pcs) https://www.amazon.com/dp/B0757RPCN9/ref=cm_sw_r_cp_api_i_2Y1ODbBNB7YPQ
I found it didn’t work well, I’m trying the ring duct tonight
The official Creality one is on their Alixpress shop - but I can't find that thing right now.
Anyway, looks like this: https://www.amazon.co.uk/WINSINN-Extruder-Upgraded-Aluminum-Extrusion/dp/B07SY745CF
I put these aluminum spacers on my Ender 3 and CR-10S. They worked fine.
I already have stepper dampers and those solved any noise/vibrations I was worried about.
I should mention that I quit using glass beds, so I'm slinging around a half a kilo less mass than you might be.
I switched to this build surface directly on the aluminum plate and I'll never use glass again. Mesh-bed leveling solves the warped bed problem and prints stick like GLUE until I give them a solid tap.
Thanks and here you go!
3D Printer Silk Rainbow... https://www.amazon.com/dp/B07PYDNQXS?ref=ppx_pop_mob_ap_share
I ordered all of it on amazon. I got the dotbit bmg clone, although the triangle labs was recommended more, and the pancake stepper from stepper online via amazon. The direct drive kit I got was the basaraba dd upgrade kit. To attach a bmg style extruder to this kit, you’ll need a printed or machined adapter. I managed to have a connection and got someone to machine a mount for mine specifically
Stepper: STEPPERONLINE Nema 17 Bipolar Stepper Motor 0.7A 13Ncm (18.4oz.in) 17HS10-0704S https://www.amazon.com/dp/B01LESPDCQ/ref=cm_sw_r_cp_api_i_aeAWDbHDJ8A49
Bmg clone:
3D Printer Bowden Extruder,... https://www.amazon.com/dp/B07P6X7DKL?ref=ppx_pop_mob_ap_share
Ender 3 Direct Drive Upgrade Kit, Compatible with Creality Ender 3 & Ender 3 Pro, no firmware Modification Needed https://www.amazon.com/dp/B07P9S9KNC/ref=cm_sw_r_cp_api_i_rfAWDbZQWTYK1
It’s important to put the spacer in this dd kit in between the motor and bmg clone as the motor shaft will push against the outer shell of the extruder, and cause a lot of issues.
I also am using a microswiss hotend
Micro Swiss All Metal Hotend Kit... https://www.amazon.com/dp/B0789V2D7C?ref=ppx_pop_mob_ap_share
This Winsinn one on Amazon. You might not be able to get their supplied spring in there because it is normally a bed spring and it is really long and strong. I worried that it would wind up gripping too tight and not let you use the lever to loosen up the tension to get filament in.
Official Creality Ender 3 Pro 3D Printer with Magnetic Build Surface Plate and UL Certified Power Supply Metal DIY Printers 220x220x250MM
https://smile.amazon.com/dp/B07K3SZBHJ
had official in the description? ¯\_(ツ)_/¯
sold by ' Creality 3d direct'
the sidebar may have better info.
Here is a good kit
https://www.amazon.com/dp/B07PS3NH82/ref=cm_sw_r_oth_api_i_dK00DbAK3612M
Like this? https://www.amazon.com/Creality-Original-Replacement-3D-235X235MM/dp/B07FCBCS9K?SubscriptionId=AKIAILSHYYTFIVPWUY6Q&amp;tag=duckduckgo-d-20&amp;linkCode=xm2&amp;camp=2025&amp;creative=165953&amp;creativeASIN=B07FCBCS9K
Edit: Wait that's just a sticker.
Edit 2: here's a kit https://www.creality3donline.com/creality-3d-printer-removable-platform-hot-heated-bed-build-surface-sticker-fiber-board-for-ender-3-cr-20-235x235x3mm_p0099.html
Here is a quickly made fan blade based on a render of the Ender 3. It's assuming that your hotend fan blade broke, not part cooling. I have no clue if it will work or not. Use super glue to attach it. https://www.thingiverse.com/thing:3758044
Honestly, it probably won't work out well. You might consider a replacement fan from Amazon. But this might get you going.
I wouldn't use glass. I tried glass and I can say that supports don't stick to it at all. try this.
At those prices, I would go with the Tiny Machines version.
https://tiny-machines-3d.myshopify.com/products/ender-3-pro-3d-printer
Or if you really want to purchase from Amazon:
Official Creality 3D Ender 3 Pro Upgraded 3D Printer with Removable Magnetic Bed https://www.amazon.com/dp/B07K3SZBHJ/ref=cm_sw_r_cp_api_LAl.BbXNCPHAV
I believe because he's using a black-sheer topped glass (it's not clear) the reading looks to be accurate. It's only transparent underneath that black sheer. Here's a linkto the non-monetized glass plate he's using.
That still opens up the "well, maybe your prints are sticking because of that black stuff on top of the glass itself"? Someone will have to try this with transparent glass.
You're choosing between resellers and very small add-on differences. I bought this a few months ago and haven't regretted my decision: https://www.amazon.com/gp/product/B07H82CWWN/ref=ppx_yo_dt_b_search_asin_title?ie=UTF8&amp;psc=1
This is the glass I’m using:
Wisamic 3D Printer Heated Bed... https://www.amazon.com/dp/B07H339ZPN?ref=ppx_pop_mob_ap_share
In order, from the top down, I have:
-Textured Ender 3 Pro removable magnetic bed
-Adhesive backed magnetic layer
-Glass bed (linked above)
-3”x3” Silicon pads cut from this material:
uxcell 400mm x 205mm x 0.5mm... https://www.amazon.com/dp/B007PPEW52?ref=ppx_pop_mob_ap_share
-Original adhesive backed magnetic layer (I am testing to see if I could revert to stock at any point, no functional reason)
-Aluminum build plate
Edit: Corrected formatting
Looks like the coupon is only $30 now, it's at https://www.amazon.com/gp/product/B07H82CWWN and no it has only the normal ender 3 features not the pro ones.
I started with a spool of this: https://www.amazon.com/gp/product/B00J0ECR5I/ref=ppx_yo_dt_b_asin_title_o00_s00?ie=UTF8&amp;psc=1
https://www.amazon.com/HATCHBOX-3D-Filament-Dimensional-Accuracy/dp/B00J0ECR5I/ref=sr_1_3?crid=2B2P5SB0R7B5R&keywords=hatchbox+pla+1.75&qid=1573968481&sprefix=hatchbox%2Caps%2C160&sr=8-3
https://www.amazon.com/HATCHBOX-3D-Filament-Dimensional-Accuracy/dp/B00J0GMMP6/ref=sr_1_7?crid=2B2P5SB0R7B5R&keywords=hatchbox+pla+1.75&qid=1573968517&sprefix=hatchbox%2Caps%2C160&sr=8-7
&#x200B;
Would either of these work?
https://smile.amazon.com/gp/product/B00ZSA83EW/ref=oh_aui_detailpage_o01_s00?ie=UTF8&amp;psc=1
Why clamp it at all? I got a silicone sheet under my glass, keeps the glass steady and transfers heat more evenly.
And would these be the correct fans to do so? https://www.amazon.com/gp/product/B0757RPCN9/ref=ppx_yo_dt_b_asin_title_o01_s00?ie=UTF8&amp;psc=1
This is the official one from Creality.
Comgrow Creality Ender 3 3D Printer Aluminum DIY with Resume Print 220x220x250mm https://www.amazon.com/dp/B07BR3F9N6/ref=cm_sw_r_cp_api_i_gw5wCbSC4A6DF
It's the one I bought and is legit.
This was the one that I ordered. I ended up getting it during a lightning deal, so it was $170 at the time. https://www.amazon.com/gp/product/B07BR3F9N6/ref=ppx_yo_dt_b_asin_title_o06__o00_s01?ie=UTF8&psc=1
Hmmm. Maybe this?
Here you go.
SIQUK 3 Pieces Teflon Tube PTFE... https://www.amazon.com/dp/B07FPJHRTQ?ref=yo_pop_ma_swf
Extruder Cat found on #Thingiverse https://www.thingiverse.com/thing:2823786
Wisamic 3D Printer Heated Bed 235x235x4mm for Creality Ender 3, Upgraded 3D Printer Platform Tempered Glass Plate Build Surface https://www.amazon.com/dp/B07H339ZPN/ref=cm_sw_r_cp_api_i_BV60Cb0FHDV23
Here you go, comes with both the bed magnetic sheet and magnetic build surface (a spare is always good)...
https://www.amazon.com/Creality-Ultra-Flexible-Removable-3D-235X235MM/dp/B07HNWSMXY/
Replace the Bowden pneumatic clamps
https://www.amazon.com/dp/B073TTWWN1/ref=cm_sw_em_r_mt_awdo_uweXCbDCRQK7D
Capricorn Bowden tube
https://www.amazon.com/dp/B07B67GG75/ref=cm_sw_em_r_mt_awdo_VyeXCbA0WGRWQ
Springs
https://www.amazon.com/dp/B07KF9LZ2L/ref=cm_sw_em_r_mt_awdo_zBeXCbD24BJN2
I bought this
https://www.amazon.com/gp/product/B07PS3NH82/ref=ppx_yo_dt_b_search_asin_title?ie=UTF8&psc=1
CC3D 3D Printer Silk Rainbow
https://www.amazon.com/dp/B07PYDNQXS
Specifically I'm talking about these dampers:
https://www.amazon.com/CCTREE-Stepper-Vibration-Dampers-Creality/dp/B07C7FRLNX/ref=pd_ybh_a_52?_encoding=UTF8&psc=1&refRID=JG0WKDDM0VJE0BSHN7EF
I see instructions online about adding these to the stepper motors in order to make them a bit more quiet. The problem though is that my gears don't have the set screw shown in the screenshot there. So therefore I can't move the gear along the shaft. The result is that my gear is not aligned with the belt anymore once the damper is installed.
How do I fix this? I can't seem to pull the gear off by hand. I dunno if it's glued on or what.
I have had mine for 3 months and I only replace things when they break. I now have replaced my Bowden tube and couplers with a capercorn tube and metal couplers. https://www.amazon.com/dp/B07PS3NH82/ref=cm_sw_r_sms_apa_i_GltDDb67XDCT1
Then my extruder broke had to replace it. https://www.amazon.com/dp/B07QHBNYD9/ref=cm_sw_r_sms_apa_i_KmtDDb9WPKV3T
Also a glass bed just cuz also get a bunch of .4 tips cuz you don't want to mess with cleaning or a degraded hole when you are already replacing stuff. But that was all in the little time I have had it. I maybe have done 50 prints. Although some had tons of parts.
No fan shrowd or fan replacements yet....... I am running basic cuz I am new to this but I learned a ton in the short time doing this.
Seems the official Creality3d is the same price. Why risk it?
https://www.amazon.com/Official-Creality-3D-Removable-220x220x250MM/dp/B07K3SZBHJ/
I bought this because I had a glass bed and I was wanting to get it to stick to the carriage without having to use clips. So, you cut that sheet up into squares and place them in a checkerboard pattern on the aluminum bed. The consistency of heat on the bed is still good and it doesn't move around when printing. Just makes it annoying to take the glass bed off if I have to do something with the aluminum bed because the thermal pads will move or come off or stick to something else and I have to position them again.
No I have a thermal silicone sheet between the glass and the heat bed. Serves 2 purposes. Conducts heat to the glass and kinda grabs the glass and holds it in place.
https://www.amazon.com/dp/B06XX7ZMN7/ref=cm_sw_r_cp_tai_CWLzDbGGRP9RB
uxcell 400mm x 205mm x 0.5mm Silicone Thermal Pad for CPU GPU Heatsink https://www.amazon.com/dp/B007PPEW52/ref=cm_sw_r_cp_api_i_P81TCbXSHKGT7
You’ll have to cut it to cover the full bed, but that won’t affect anything. (The width is only 200mm, so you’ll have to cut another 35mm strip)
Also be careful, because this is very brittle and will rip in your hands.
https://www.amazon.com/Creality-Original-40x40x10MM-Cooling-3D/dp/B07FTNCC9B/ref=sr_1_3?keywords=ender+3+hotend+fan&amp;qid=1563636450&amp;s=gateway&amp;sr=8-3
This is an exact replacement. I had zero problems since.
https://www.amazon.com/SIQUK-Fittings-Straight-Pneumatic-Connector/dp/B07FPJHRTQ/ref=mp_s_a_1_1?keywords=ender+3+couokers&amp;qid=1566384028&amp;s=gateway&amp;sr=8-1-spell
Basically these. The ones that came with my printer couldn’t hold the tubing which made the printer unusable. The yelllow bed springs are similar - the stock ones are flimsy and may require you to cut some plastic on your z end stop to make it work out. To me those are really the only 2 “day one” upgrades just due to them sometimes being necessary for the printer to even function.
I used this one: https://www.amazon.com/gp/product/B06XX7ZMN7/ref=ppx_yo_dt_b_search_asin_title?ie=UTF8&amp;psc=1
and it has worked great. I cut it in half and let a friend use the otehr half. NO MORE BINDER CLIPS! I freaking hated those clips from day 1.