Top products from r/howto
We found 43 product mentions on r/howto. We ranked the 680 resulting products by number of redditors who mentioned them. Here are the top 20.
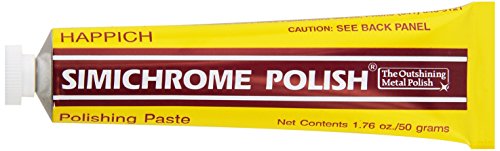
1. Simichrome 390050 All Metal Polish Tube - 1.76 oz.
Sentiment score: 1
Number of reviews: 3
Used by professionals for years, Simichrome does a beautiful job of removing surface rust from chrome, polishing aluminum until it looks like new, even sprucing up delicate, heirloom family silver without leaving scratches or abrasive marksIts unique, finely mixed formula produces a rich, brilliant ...
 Show Reddit reviews
2. USMYTHA 100Pcs/lot Magic Eraser Melamine Cleaning Sponge Multi-Functional Foam Pads 10x6x2CM
Sentiment score: 1
Number of reviews: 3
Pack of 100. Size: 4"x2.4"0.8"(10x6x2CM) for a piece. Magic erasers in bulk, Last for one year, very durable.This magic sponge removes stain or dirt with water. This sponge can be cut into any size for a suitable shape.This is a strong multi-functional cleaner. It can be used for kitchen, bathroom, ...
 Show Reddit reviews
3. Bar Keepers Friend Powdered Cleanser 21-Ounces (2-Pack)
Sentiment score: 1
Number of reviews: 3
NEW LOOK, SAME FORMULA. Cleans and Polish. As a bleach-free product, this cleanser is an ideal stainless steel cleaner and can easily remove rust, tarnish, mineral deposits, and tough stains from most surfaces.SURFACES: Stainless Steel, Porcelain, Ceramic, Copper Alloys, Fiberglass, Corian, Brass, B...
 Show Reddit reviews
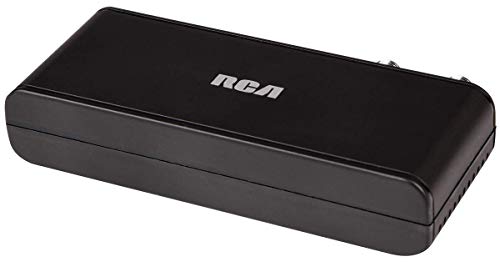
4. RCA Compact RF Modulator (CRF907A)
Sentiment score: 0
Number of reviews: 2
Allows connection of an audio video component to a TV without a jackHigh performance circuit design provides accurate picture reproductionConverts audio and video to RF using channel 3 or 4
 Show Reddit reviews
5. Leisureguy's Guide to Gourmet Shaving: Shaving Made Enjoyable
Sentiment score: 0
Number of reviews: 2
 Show Reddit reviews
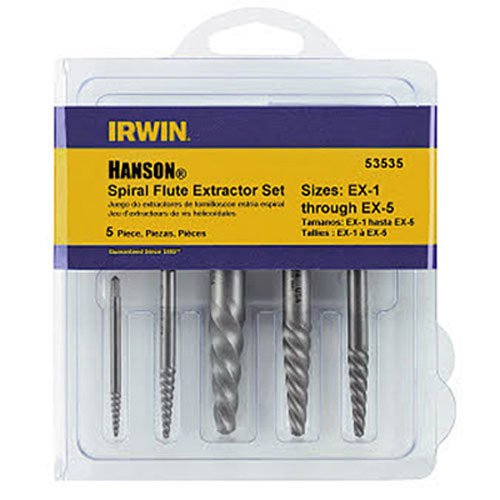
6. IRWIN Screw Extractor for Spiral Screws, 5-Piece (53535)
Sentiment score: 1
Number of reviews: 2
Designed to remove broken studs, bolts, socket screws and fittingsAggressive left hand spiral design for extra gripping powerSpiral flutes are designed to embed themselves deeper into the metal as you turn the tool, so as the fastener resistance increases, the extractor's grip increasesExtractor siz...
 Show Reddit reviews
7. National Hardware V528 Hinge Pin Door Closer, Brass Finish
Sentiment score: 1
Number of reviews: 2
Installs easilyReplaces hinge pinAutomatically closes doorSteel with aluminum cover
 Show Reddit reviews
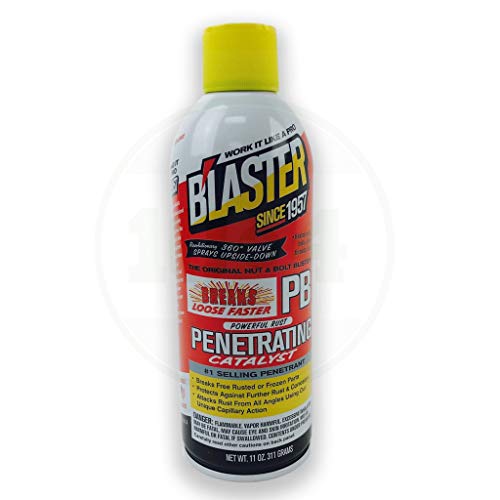
8. B'laster 16-PB Penetrating Catalyst - 11-Ounces
Sentiment score: 0
Number of reviews: 2
BEST SELLER - The #1-selling penetrant since 1957! The PB B’laster outperforms leading competitors with its high-performance formula.EFFECTIVE - PB B’laster quickly busts loose rusted or frozen parts caused by rust and corrosion. Attack rust from all angles using the unique capillary action.SAVE...
 Show Reddit reviews
9. How To Draw Comics The Marvel Way
Sentiment score: 2
Number of reviews: 2
Touchstone
 Show Reddit reviews
10. Ajax Powder Cleanser with Bleach, 14 oz (396 g)
Sentiment score: 1
Number of reviews: 2
Scratch-freeEasy rinse formulaStronger than dirtContains no phosphates
 Show Reddit reviews
11. Bar Keepers Friend Powdered Cleanser 12-Ounces (1-Pack)
Sentiment score: 1
Number of reviews: 2
As a bleach-free product, Cleanser & Polish is an ideal stainless steel cleaner and can easily remove rust, tarnish, mineral deposits, and tough stains from most surfaces.SURFACES: Stainless Steel, Porcelain, Ceramic, Copper Alloys, Fiberglass, Corian, Brass, Bronze, Chrome, Aluminum.KITCHEN: Sinks,...
 Show Reddit reviews
12. DataComm Electronics 50-3323-WH-KIT Flat Panel TV Cable Organizer Kit with Power Solution - White
Sentiment score: 1
Number of reviews: 2
Low profile design fits behind the industry’s thinnest mounts and TVsGrounded recessed receptacle allows you to install power behind your wall mounted TV and other similar applicationsConceal multiple AV cables behind your wall mounted TVMounting wings are molded into the cable pass-through sides ...
 Show Reddit reviews
13. Savogran 10621 Trisodium Phosphate (TSP) 1LB (16oz)
Sentiment score: 0
Number of reviews: 2
Use TSP to clean surfaces after using paint/varnish removersPreferred by painting and cleaning professionalsRemoves smoke and soot stains from wallsCleans chalked paintEffective deck and sideing cleaner
 Show Reddit reviews
14. Devcon 31345 2 Ton Clear Epoxy, 25 ml
Sentiment score: 2
Number of reviews: 2
Clear, extremely strong, non-shrinking adhesive; formulated for high-clarity and good impact strengthWaterproof; resists salt solution, unleaded gasoline, mineral spirits, oil and anti-freezeHandling time: 30 minutes, Set time: 30 minutes, Cure time: 8-12 hoursTemperature Range: -60°F to 180°FSugg...
 Show Reddit reviews
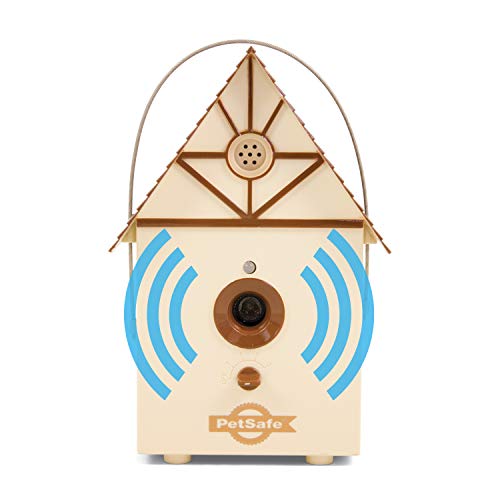
15. PetSafe Outdoor Ultrasonic Bark Deterrent, Up to 50 ft. Range, Outdoor Use Only, No Collar Needed
Sentiment score: -2
Number of reviews: 2
ULTRASONIC BARK CONTROL: When your dog (or your neighbor’s dog) starts barking, the unit emits a safe, but annoying high-pitched ultrasonic tone; when the barking stops, the tone also stopsDISCRETE DESIGN: Hang the cleverly designed birdhouse in various places around your yard or property line; ke...
 Show Reddit reviews
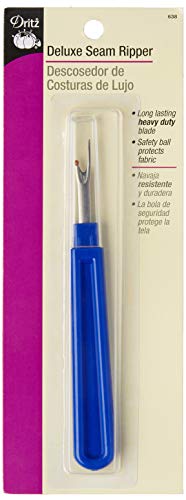
16. Dritz 638 Deluxe Seam Ripper
Sentiment score: 0
Number of reviews: 2
Use seam ripper to cut and remove unwanted stitchesThe Ditz Deluxe Seam Ripper is small and convenient; This tool is indispensable for removing stitchesIt comes with a clear plastic cap, a safety ball to protect fabric and it's made from hardened steel to last a lifetime
 Show Reddit reviews
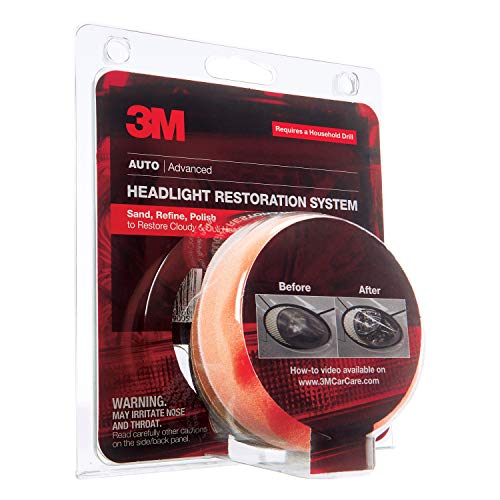
17. 3M Headlight Lens Restoration System, 39008
Sentiment score: 1
Number of reviews: 2
SEE BETTER AT NIGHT: Enhances visibility and safety for night drivingEasy, 3-step process requires as little as an hour to remove scratches and restore cloudy, dull lensesFor use on plastic lenses headlights, taillights, fog lights, directional lights and more3M abrasive technology removes yellowing...
 Show Reddit reviews
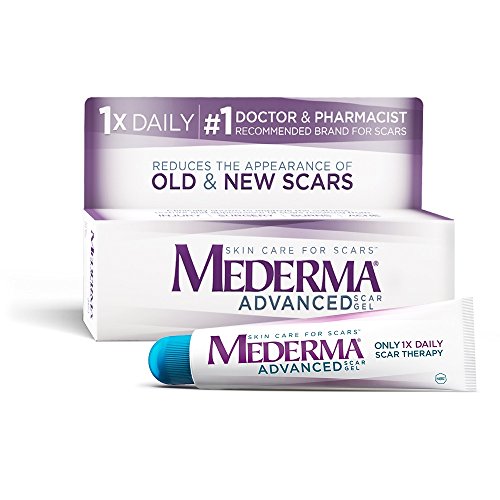
18. Mederma Advanced Scar Gel - 1x Daily: Use less, save more - Reduces the Appearance of Old & New Scars - #1 Doctor & Pharmacist Recommended Brand for Scars - 0.7 ounce, 0.7 Ounce
Sentiment score: 1
Number of reviews: 2
Clinically shown to improve the overall appearance, color, and texture of scarsThe ONLY 1x daily topical gel making it one of the most cost effective products availableWorks for many types of scars, including acne scars, surgery scars, and scars from burns, cuts, and other injuriesFrom Mederma – t...
 Show Reddit reviews
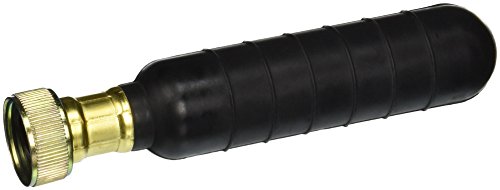

As long as this doesn't go in the oven (or get hotter than 180ºF / 80ºC) of course it can be glued, and with fine, strong (but still slightly visible) results.
u/GondorUr is probably right, it would be easiest to return it and that would have the best results, but...
u/pobroin has the right attitude, considering their appreciation of kintsugi, and so do you, I presume, since you are asking about repairing, rather than replacing.
u/BcookieOmonsterB is right, that cyanoacrylate (Super Glue, Krazy Glue, etc.) works well with ceramics, but cyanoacrylate works best on nonporous surfaces, and when the surfaces fit really well with the least possible gap. On ceramics, especially if not fired to the point of being vitreous, there's often a few grains that will get dislodged in the glue, while fitting the pieces back together, that will stand in the way of ever getting a truly close fit. So...
As this job is a nice clean break, and a simple two pieces. It's the perfect job for a two-part epoxy, which is plenty strong and will fill any small gaps with virtually no loss of strength, unlike cyanoactrylate.
Your best option to repair (rather than replace) is a two-part clear epoxy. Since you're asking about this, I assume you haven't worked with glues much, and are unfamiliar with the process, and may be a bit slower than someone more practiced. Different epoxies have different working or handling times, and since you don't want to rush it, look for longer than 5-minute epoxy (this one gives you a full 30 minutes, but that's a lot longer than you should need for this simple job - look for a 10-minute epoxy).
Edit: Yay! Silver! Thanks for the alms, secret Samaritan.
Edit 2: Clarification added to taping procedure
Ajax Powder Cleanser with Bleach, 14 oz (396 g) https://www.amazon.com/dp/B00005UVD9/ref=cm_sw_r_cp_api_i_1LxWDbMHJ0SG1
Use this, wear gloves, follow directions, basically sprinkle it on, toss on some water, give the tub a quick one time scrub (this one time scrub isn’t meant to clean anything, it’s just to lather up the powder and distribute it throughout the tub.)
let this lather sit in the tub for half an hour or so, then come back and use one of these on the tub with your power drill:
https://www.amazon.com/dp/B07D9M667G/ref=cm_sw_r_cp_api_i_8OxWDbYEPS81H
(note this item isn’t available at Lowe’s or Home Depot so order it now and get the shipping process started)
If you don’t have a power drill, you can also use those green scrub scour pads, but man you arm and especially your wrist will be exhausted and you risk hurting or injuring it (ESPECIALLY YOUR WRIST) again wear gloves because this is a dirty job lol.
Anyway rinse as you go, I use a little container of water to help rinse the rest of the tub and other hard to reach places.
You might have to repeat this process a couple more times to get it perfectly clean. There’s also a chance that once you get it all clean that the tub itself has harder discoloration or stains, at that point you might consider just replacing the tub. They can be relatively cheap, even under $300 or so.
source: I just really like cleaning tubs lol
You could get some 2-ton epoxy and carefully apply it around the hinges with a small disposable brush (like the ones that come with kid's watercolor paint sets). This stuff cures to be hard as a rock, clear, it adheres nicely to metal, and should provide the support you need. Don't get 5 minute epoxy because that isn't as strong and turns yellow.
Just be sure to carefully measure out equal parts resin and hardener and THOROUGHLY mix them. I mean mix them for like a full 2 minutes. Otherwise the epoxy may not cure properly and might come out tacky.
The epoxy starts to set up in about 30 minutes after you have mixed it, so you will have enough time to apply it to the hinges. After you apply it however, you will want to keep turning the glasses over in your hands otherwise gravity will cause the epoxy to sag. 2-ton epoxy is frequently used as a protective clear coat on custom fishing lures, and lure builders like myself make "turners" like this to prevent sagging. Obviously you're not going to want to build one but you can accomplish the same thing by slowly rotating the glasses around by hand for a minimum of 30 minutes, an hour would be better. After that is done just let it cure however long it says on the package.
Mederma Advanced Scar Gel - 1x Daily: Use less, save more - Reduces the Appearance of Old & New Scars - #1 Doctor & Pharmacist Recommended Brand for Scars - 0.7 ounce https://www.amazon.com/dp/B001PQBEAI/ref=cm_sw_r_cp_api_i_5DTwDb7S8M13C
Here’s a good one it relatively cheap and it works well I used it on a scar on my arm, I hope this helps good luck.
I really liked "drawing with your artists brain" https://www.amazon.com/dp/1581808119/ref=cm_sw_r_cp_apa_mWJhzb3MWYY09
And "drawing comics the marvel way" https://www.amazon.com/dp/0671530771/ref=cm_sw_r_cp_apa_kXJhzbAC00TH6
Both different but great for building your skill fast and fun.
Irwin Industrial Tools 53535 Spiral Screw Extractor Set, 5Piece https://www.amazon.com/dp/B00004YOBF/ref=cm_sw_r_cp_api_i_vq8ADbX1XMN94
Ez outs would probably work. Just go slow and keep it straight against the screw head. They are extremely hard but also brittle at the same time. You could break off the EZ out. Your local hardware store should have plenty of options and you might be able to just buy one small EZ out that will fit that screw.
The best method I've found is the 3M Headlight Lens Restoration System. It's easy and the results I achieved with it amazed me. I was able to do both headlights on my 17 year old cherokee in about 30 minutes or so and I only had to use one sanding disc of each grit for the entire thing. I even had plenty of polishing compound left. Just be sure to follow the instructions closely.
A seam ripper seam ripper, but look for one with a long, thin handle (long is better; if you have to, you can file or sand the plastic handle to be thinner)
Also a knit picker knit picker may fit help you reach in there
Bar-keeper's friend and elbow grease.That is sure to clean this up real nice.
https://www.amazon.com/Bar-Keepers-Friend-Powdered-12-Ounces/dp/B000V72992
[PB Blaster] (http://www.amazon.com/Blaster-16-PB-Penetrating-Catalyst-oz/dp/B000I2079E)
Really soak those screws good - leave it alone for about 15 minutes, come back and tap on it with a hammer on each screw - you can tap it pretty good, you'll be loosening that rust.
Spray it again and repeat this process like 3 or 4 more times. After a little over an hour of doing this, tap on it with a hammer, and then try to unscrew it. If it still doesn't turn, repeat previous process again. Eventually it will turn, it just takes patience.
You can get PB Blaster at any hardware store usually. Second choice would be Liquid Wrench, but PB Blaster has always worked better for me.
Barkeepers Friend: Bar Keepers Friend Powdered Cleanser 21-Ounces (2-Pack) https://www.amazon.com/dp/B008EN9XUI/ref=cm_sw_r_cp_api_i_pZiADbGKDFJQZ
She's not the original artist and the text is lifted as well from the book these images were taken from. It's "How to Draw Comic the Marvel Way"
It's kinda funny I recognize the boob drawings.
I use a [melanine sponge] (https://www.amazon.com/Baoer-100Pcs-Melamine-Cleaning-10x6x2CM/dp/B00XC32NMK) myself and it works pretty well.
simichrome .
Used this for years on my motorcycle chrome. Works awesome, and one tube lasts forever, as you only use a tiny bit.
I have one of these on my hollow core bathroom door and it works great.
http://www.amazon.com/Sony-211566803-Replacement-Single-Headphones/dp/B001DFX2OC/ref=sr_1_3?ie=UTF8&qid=1422645236&sr=8-3&keywords=mdr-v6+replacement+pads&pebp=1422645255579&peasin=B001DFX2OC
or if you want to get fancy, these are pretty comfy too:
http://www.amazon.com/Beyerdynamic-EDT250V-Headphone-Pads-Black/dp/B0016MF7W2/ref=sr_1_2?ie=UTF8&qid=1422645248&sr=8-2&keywords=mdr-v6+replacement+pads&pebp=1422645316011&peasin=B0016MF7W2
Another use posted this https://www.amazon.com/dp/B001PB7UVA/ref=cm_sw_r_cp_api_xyQHybSRV0P6H
I haven't looked to see if it is in accordance with the national electric code, but if it is, it would make the job a lot easier
Better yet, buy them in bulk on amazon Baoer 100Pcs/lot Eraser Magic Melamine Cleaning Sponge 10x6x2CM https://www.amazon.com/dp/B00XC32NMK/ref=cm_sw_r_cp_apap_V3TOXYIeXJSw1 they are way cheaper
Barkeeper's Friend, this stuff is a life saver!
https://www.amazon.com/Barkeepers-Friend-Powder-Cleanser-oz-2/dp/B008EN9XUI/ref=sr_1_2_a_it?ie=UTF8&qid=1495302948&sr=8-2&keywords=bartenders+friend
Easy out kit https://www.amazon.com/Irwin-Industrial-Tools-53535-Extractor/dp/B00004YOBF/ref=mp_s_a_1_6?keywords=easy+out+extractor+set&qid=1567354753&s=gateway&sprefix=easy+out&sr=8-6
Amen, although there are cheaper and better kits IMO.
Use an all purpose metal cleaning paste like Simichrome.
Here is one on Amazon.com in case you're a shut-in like me.
Also, on your digital converter box, if the red,yellow,white cables are marked as "input" and the thick cable with the metal end is marked as "output" or "TV" then you don't need to buy anything. You could plug the gamecube into the box and put the TV on the appropriate channel.
Something like this can be used - https://www.amazon.com/Datacomm-50-3323-WH-KIT-Panel-Organizer-Solution/dp/B001PB7UVA/ref=sr_1_3?ie=UTF8&qid=1519927920&sr=8-3&keywords=tv+outlet+recessed+box
TSP or trisodium phosphate Is the magic solution
http://www.amazon.com/Savogran-10621-Trisodium-Phosphate-16oz/dp/B0001GOGQW
I think the book is pretty real, but check out the reader reviews and see what you think.
get one of these
its a door closer that mounts to the hinge, so your hollow door doesnt matter.
EDIT: I accidentally a word.
In any hardware store by the paint. Or here: http://www.amazon.com/Savogran-10621-Trisodium-Phosphate-16oz/dp/B0001GOGQW/ref=sr_1_2?ie=UTF8&qid=1426228415&sr=8-2&keywords=tsp
you can get a pack of 100 for $8
a little of column A, a little of column B
http://www.amazon.com/Leisureguys-Guide-Gourmet-Shaving-Enjoyable/dp/1477436804
I haven't read the book but I've read enough copypasta from the guy to get the gist of it.
two pack
Mederma Scar Gel. Can also be bought at Wal-Mart, Target, CVS, WalGreens.
https://www.amazon.com/CLR-Calcium-Remover-Enhanced-Formula/dp/B00009EFEX
Or
https://www.amazon.com/Ajax-Powder-Cleanser-Bleach-396/dp/B00005UVD9
RCA to RF
https://www.amazon.com/gp/aw/d/B0014KKV7W/ref=mp_s_a_1_3?ie=UTF8&qid=1518826889&sr=8-3&pi=AC_SX236_SY340_QL65&keywords=rca+to+rf&dpPl=1&dpID=410NrfMBJsL&ref=plSrch
http://www.amazon.com/Bar-Keepers-Friend%C2%AE-Cleanser-Polish/dp/B000V72992
Don't use the rag, use this thing http://www.amazon.com/Cobra-Products-332-Cleaning-Attachment/dp/B000KKOZ6A/
Try one of these in your washing machine outflow.
https://www.amazon.com/Cleaning-Bladder-Garden-Attachment-Medium/dp/B000KKOZ6A
This and a brillo pad would probably do it, cover it with oil afterwards.
https://www.amazon.com/dp/B0002YUQ4E/ref=cm_sw_r_cp_apa_I7dKzbNHKJZZ1
Always keep this stuff handy! Warning, it removes paint.
These are either MDR-7506 or the MDR-V6 and either way, you have a stellar pair of headphones right there. I roll the MDR-7506 myself and for the money, you won't find a better technical listening experience. If you replace your pads with the Beyerdynamic Velour Earcups you will find slightly better isolation, increased comfort, and even clearer bass. Here's a link to them on Amazon, but shop around: https://www.amazon.com/dp/B0016MF7W2/ref=cm_sw_r_awd_LNbZub1T1DBBB
You'll need to pry off the old ones along the edges. Once you get a bit off, the rest should slide off with it. Just be gentle with the edges so you don't bend anything out of shape and harm the isolation quality.
You need something called a seam ripper.
http://www.amazon.com/Dritz-638-Deluxe-Seam-Ripper/dp/B0001DSIVY
Walmart sells them with the fabric and craft stuff too. Turn the pocket inside out and use the pointy part of the tool to cut the threads holding the patch. Word of warning that this will leave noticeable stitching holes until the pants have been washed a couple times. You can also try steaming the pocket to loosen the thread and massage the fabric. They might not ever go fully away.
I’m late to the thread, so I’m putting this here.
My next door neighbor specializes in various sorts of bad dogs. Over the years she’s brought in a rogue’s gallery of bark freaks. Now she’s outdone herself with a pit bull that wants to taste my cat’s blood. The cat is a veteran hunter and more cunning than the dog, so he’s managed to weather multiple close calls. During the last year I’ve caught the dog in the act four or five times and lit it up with my CO2 powered pellet pistol… problem solved, I hope. The gun doesn’t draw blood on the dog, but it stings like hell.
This is a dog that ran right past me, yelling at it, to go after my cat. Now it’s gotten to where, if the dog sees me outside, it slinks off and hides. If it’s barking interminably late at night, it shuts the fuck up when I go out and yell at it.
I don't have it now because my neighbor stole it, but my favorite thing for uncontrolled barkers was the PetSafe Outdoor Bark Control. It worked for me but, if it doesn’t work for you, added pellet gun reinforcement right on top of the ultrasonic might just do the trick. Don’t ignore the instruction about using hearing protection when you’re setting it up.
sound generators to stop dog barking 1 and 2 and 3 and 4 and 5 and 6 and 6 If you read reviews at Amazon you will see that those type of people are known as "inconsiderate assholes" My neighbors plunked a dog in their backyard on Feb. 7th this year. Obviously purchased the dog based on his barking abilities. Great Dane. Wiki says a lifespan of 6-8 years. Fuck if I'm am going to spend the remainder of my life(old person) listening to a dog barking nonstop for hours on end. Our city has a law that says > 30 min illegal. I started calling the cops after I saw nothing was being done to shut the dog up. After the forth time the cops showed up I think a cop that had been there before showed up and was pissed. That and the legal paperwork the city sent the "inconsiderate assholes" nipped the problem in the bud, at least temporarily. The type of people that allow their dog to bark nonstop feel entitled. I expect the barking to start back up one of these days. Then it will be lawsuit time.
If I end up getting a lawyer. Security system, DVR, with 4 cameras and 85 foot infrared range. Additional infrared illuminators. Microphone. Graphic equalizer software. Aim 3 cameras and illuminators into neighbors backyard. Aim 4th camera at graphic equalizer software display running on computer. It is against the law to record conversations here so the owners are in the backyard with just a microphone could end up being illegal. Related links. 1 and 2 and 3 and 4 and 5 and 6 and 7 and 8 and 9
Seinfeld: Elaine Benes dognapping episode.
In your case possibly"you can't squeeze blood from a turnip".
Another idea is to record the dog barking. Play it back as a loop at an increased volume. When the neighbors are sleeping would be a good time. If you have a few thousand bucks you could use an LRAD speaker to beam the sound.