(Part 2) Top products from r/mpminidelta
We found 11 product mentions on r/mpminidelta. We ranked the 29 resulting products by number of redditors who mentioned them. Here are the products ranked 21-40. You can also go back to the previous section.
21. BINZET AC to DC 12V 10A 120W Power Supply Adapter Converter Regulator, 5.5mm x 2.1mm DC Plug, 12Volt 10Amp Wall Power Plug for DC12V 5050 5630 Flexible LED Strip Lights
Sentiment score: 1
Number of reviews: 1
Input: 100-240V AC 50/60Hz;Output: DC 12V/10APower: 120 WattsEasy connection and simplicity to useFor flexible led strip power supply
 Show Reddit reviews
22. ARCTIC Thermal Pad 145 x 145 x 0.5 mm - Thermal Compound for Coolers, Efficient Thermal Conductivity, Gap Filler, Non-Stick, Safe Handling, Easy to Apply - Blue
Sentiment score: 1
Number of reviews: 1
EFFICIENT THERMAL CONDUCTIVITY: The Thermal Pad based on silicone and a special filler offers a conductivity of 6.0 W/mK, outperforming generic padsFILLING THE GAPS: Due to its low hardness and compressibility it works as the perfect gap filler, bridging uneven surface & gaps without any problemsSAF...
 Show Reddit reviews
23. Mcbazel On Off Power Switch Button Adapter for PlayStation 3 PS3 Slim Color Black
Sentiment score: 1
Number of reviews: 1
To avoid plugging in and out repeatedlyProfessional design, portable for convenient usageMade of fireproof, high pressure resistant material and it is very safe and reliableEasy to use, quickly power on or off. High quality power switch, easily turning on or off and guide consoleCompatible with PS3 ...
 Show Reddit reviews
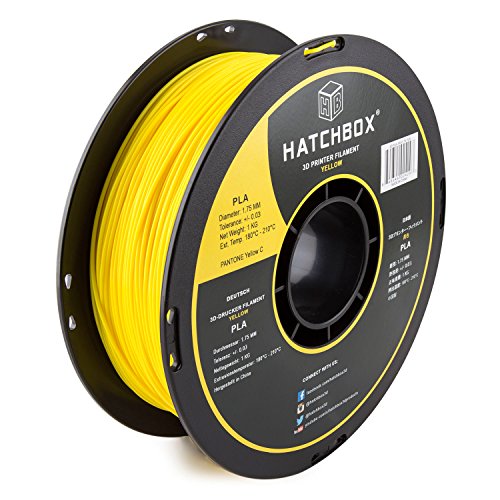
24. HATCHBOX PLA 3D Printer Filament, Dimensional Accuracy +/- 0.03 mm, 1 kg Spool, 1.75 mm, Yellow
Sentiment score: 0
Number of reviews: 1
1 KG (approximately 2.20 lbs) Spool1.75mm Filament Diameter (Dimensional Accuracy +/- 0.03mm)PLA (Polylactic Acid) 3D Printer Filament Vacuumed Sealed With DesiccantRecommended Extrusion/Nozzle Temperature 180°C - 210°C (356°F - 410°F)Spool Diameter: 8" - Spool Width: 2.50" - Spool Hub Hole Diam...
 Show Reddit reviews
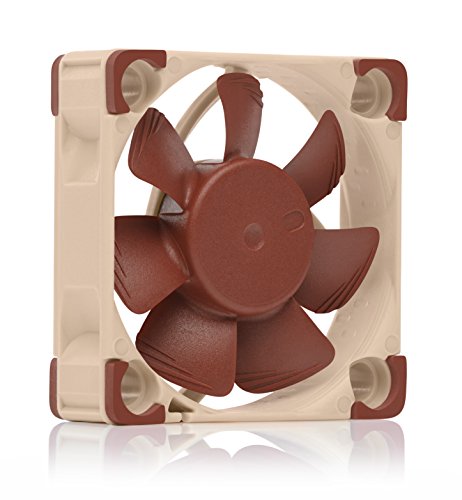
25. Noctua NF-A6x25 FLX, Premium Quiet Fan, 3-Pin (60mm, Brown)
Sentiment score: 1
Number of reviews: 1
Premium quiet fan, 60x60x25 mm, 12V, 3-pin Molex, 3000/2400/1600 RPM, max. 19.3 dB(A), >150,000 h MTTFAward-winning 60x25mm A-series fan with Flow Acceleration Channels and Advanced Acoustic Optimisation frame for superior quiet cooling performanceIdeal replacement for noisy or broken 12V 6cm fans i...
 Show Reddit reviews
26. Noctua NF-A4x10 FLX, Premium Quiet Fan, 3-Pin (40x10mm, Brown)
Sentiment score: 2
Number of reviews: 1
Premium quiet fan, 40x40x10 mm, 12V, 3-pin Molex, 4500/3700 RPM, max. 17.9 dB(A), >150,000 h MTTFAward-winning 40x10mm A-series fan with Flow Acceleration Channels and Advanced Acoustic Optimisation frame for superior quiet cooling performanceIdeal replacement for noisy or broken 12V 4cm fans in 3D ...
 Show Reddit reviews
27. Kingston 4 GB microSDHC Class 10 UHS-1 Memory Card with Adapter (SDC10/4GB)
Sentiment score: 1
Number of reviews: 1
High-Speed Class Rating - Class 10: 10MB/sec. minimum data transfer rateCompliant with the SD Card Association card 3.00 specificationOperating temperatures: -13°F to 185°F (-25°C to 85°C)Storage temperatures: -40°F to 185°F (-40°C to 85°C)File Format - FAT 32Reliable - lifetime warranty
 Show Reddit reviews
28. Officemate Micro Size Binder Clips, Black, 100 per Tub (31030)
Sentiment score: 1
Number of reviews: 1
A great alternative to small or mini binder clips or jumbo paper clipsHandles can fold up for handing or can be removed for bindingStrong heat treated steel grips papers securelyMicro binder clips have a width on 1/2-Inch and a capacity of 5/32-InchComes in 100 in a reusable storage tub
 Show Reddit reviews
29. Aleenes All Purpose Tacky Adhesive Spray, 11-Ounce
Sentiment score: 1
Number of reviews: 1
Perfect for adhering flat surfaces to flat surfaces, including: paper, cardboard and light wood,Before drying crystal clear, this tacky spray stays wet for about 60 seconds to allow your project to be movedAvailable in an 11-oz, spray can,Find inspiration and techniques at I love to create comNOTE:T...
 Show Reddit reviews
I picked up several 5" mirrors from Joann's yesterday, and thought to also pick up a can of Tacky Spray (https://www.amazon.com/Aleenes-Purpose-Tacky-Adhesive-11-Ounce/dp/B001689P10). The tacky spray has enough grip to hold the mirror to the printing bed, and also appears to create a great grippy surface for my prints. I just sprayed a bit over the top of the mirror, let it sit for 15 mins (during initial warm up) and it works great so far. I've done 4 prints without having to re-spray it, and the prints still release just fine.
For the bottom Fan, i printed a modified base i found on thingiverse (https://www.thingiverse.com/thing:3747339) and used a 120 fan with a 3pin to 2 pin adapter(included with the 40mm fan I bought), for the hot end i printed a modified fan duct also from thingiverse (https://www.thingiverse.com/thing:3471759) to mount a 40mm noctua fan and spliced the original 30mm fan connector onto the "omnijoin connector" included in the box with the 40mm fan(https://www.amazon.com/gp/product/B009NQLT0M/ref=ppx_yo_dt_b_asin_title_o08_s01?ie=UTF8&psc=1)
So I use Cura with my printer, but there's some stuff you have to do first.
The biggest thing for me in getting my printer to work was switching to only using the microsd card instead of the USB connetion, and taking the g-code header and footer from the cat print and applying it to all of my cura slices. At work currently, I'll try to take some screenshots of the screens and stuff that i'm referring to in cura.
Edit: Couple images to illustrate the process: https://imgur.com/a/Wibxzft
From cura: go to settings, then go to printers, then select Manage Printers. Select the MP Delta Mini profile that you've created, and hit Machine Settings. then put the cat header and footer in and voila.
Edit 2: If you've lost access to your auto00.gcode, I've made a paste with just the header and footer information. find it here: https://pastebin.com/DtZyuc1H
This is what I use and my glass doesn't move a muscle
ARCTIC - Thermal Pad, Thermal Compound for Coolers, Highly Efficient Thermal Conductivity,Gap Filler, Safe Handling, Easy to Apply (145mm x 145mm x 0.5 mm) https://www.amazon.com/dp/B00UYTTLI4/ref=cm_sw_r_cp_apa_i_0cYsDbYF4R8ZT
What size binder clips are you using? Is the bed free to move still up and down?
The bed needs to be free to click down in order for the autoleveling to function. I noticed that when I tried using "mini" binder clips, the bed was unable to move freely in order to trigger the button that the autoleveling routine uses to check whether the tool head is in contact with the base. Sure enough the nozzle would just slam into the glass bed using this.
What you need are "micro" binder clips. This will still let the bed move freely and autolevel correctly. I am not sure what country you are in, but these are the ones available in the US I got.
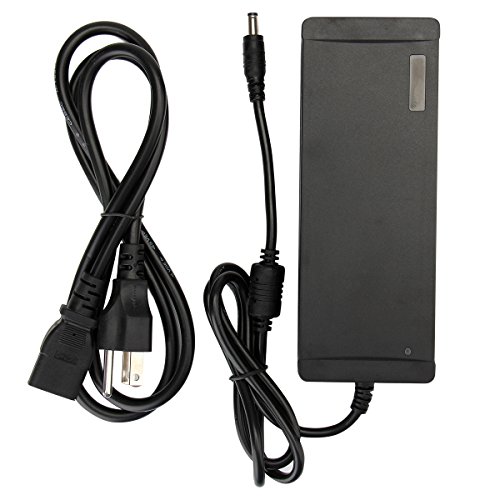
I got a 10a upgrade. The printer cannot fry itself. In fact, if it was designed correctly, it shouldn't be able to draw more power than the stock power supply, but giving it the availability to pull more amperage is only better. I wouldn't waste the money on 20 amps as that's way overkill.
Here's the supply I went with. The MiniDelta uses an odd sized barrel connector so if you go with this one you'll have to handle that.
https://www.amazon.com/gp/product/B00Z9X4GLW/ref=oh_aui_search_detailpage?ie=UTF8&psc=1
This is the fan for the electronics in the base, don’t worry it isn’t an affiliate link. It’s the Noctua NF-A6x25 FLX and it makes a big difference... However, the steppers are still super loud and so is the hot end fan.
Noctua NF-A6x25
I myself purchased this to solve that issue, and it works wonderfully. https://www.amazon.com/dp/B00RUV75D2/ref=cm_sw_r_cp_apa_i_pf45AbDCK7VVT
Hatchbox yellow
HATCHBOX PLA 3D Printer Filament, Dimensional Accuracy +/- 0.03 mm, 1 kg Spool, 1.75 mm, Yellow https://www.amazon.com/dp/B00J0GRREW/ref=cm_sw_r_cp_apa_i_0AiwCbF2GTDNQ