Top products from r/photocritique
We found 62 product mentions on r/photocritique. We ranked the 143 resulting products by number of redditors who mentioned them. Here are the top 20.
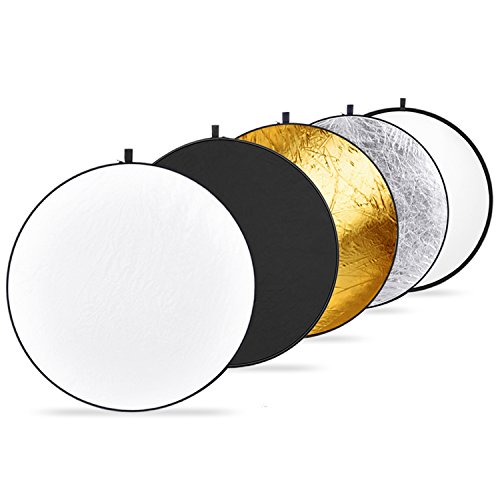
1. Neewer 43 Inch/110 Centimeter Light Reflector 5-in-1 Collapsible Multi-Disc with Bag - Translucent, Silver, Gold, White and Black for Studio Photography Lighting and Outdoor Lighting
Sentiment score: 3
Number of reviews: 5
5 in 1 Light Reflectorcheap 5 in 1 multi photo reflector disc 43" / 110CMquality Multi Disc Light Reflectorbest 5 in 1 Collapsible Multi Disc Light Reflector110CM 5 in 1 Professional Collapsible Multi Disc Light Reflector 43
 Show Reddit reviews
2. The Photographer's Eye: Composition and Design for Better Digital Photos
Sentiment score: 4
Number of reviews: 4
Awesome photography book!
 Show Reddit reviews
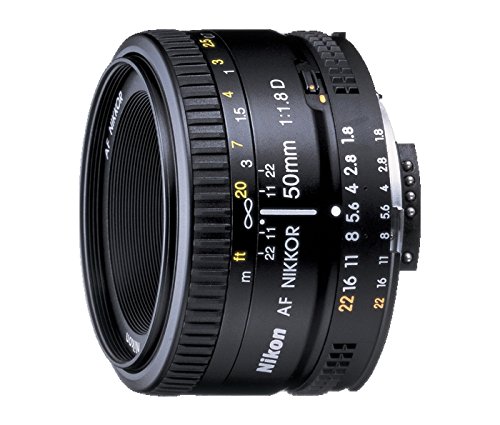
3. Nikon AF FX NIKKOR 50mm f/1.8D Lens for Nikon DSLR Cameras
Sentiment score: 2
Number of reviews: 3
Note : Autofocus system is compatible with select Nikon DSLRs that support D-type lenses, and offers quick and precise focusing performance. Autofocus is not supported by DSLRs lacking an autofocus motor, such as the D3000-series, D5000-series, D40, D40X, and D60, where the lens may be used with man...
 Show Reddit reviews
4. Understanding Exposure, Fourth Edition: How to Shoot Great Photographs with Any Camera
Sentiment score: 1
Number of reviews: 2
Watson-Guptill Publications
 Show Reddit reviews
5. Learning to Photograph - Volume 1: Camera, Equipment, and Basic Photographic Techniques
Sentiment score: 3
Number of reviews: 2
Used Book in Good Condition
 Show Reddit reviews
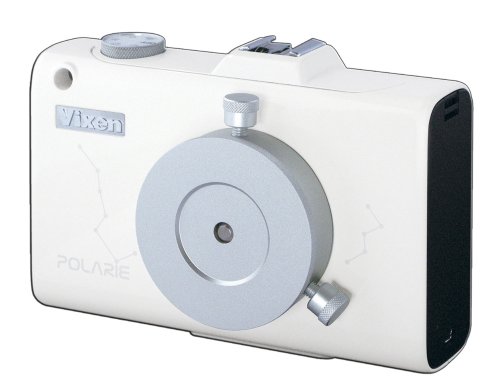
6. Vixen Optics 35505 Polarie Star Tracker (White)
Sentiment score: 0
Number of reviews: 2
Maximum loading weight is 7 lbsPolar sight hole About 8.9 Degree field of viewOptional accessory A dedicated polar axis scope for Polarize
 Show Reddit reviews
7. Yongnuo YN-565 EX TTL Flash Speedlite Canon 5D II 7D ,30D ,40D, 50D ,350D, 400D ,450D (Discontinued by Manufacturer)
Sentiment score: 4
Number of reviews: 2
An excellent companion for your top of the line Canon digital SLR camera, letting you produce amazing and breathtaking photographySuper fast recharging cycle, 3 second charging cycle after a full level output, can be accelerated by an external power packAuto/Manual zooming, covering a length range o...
 Show Reddit reviews
8. Learning to Photograph - Volume 2: Visual Concepts and Composition
Sentiment score: 5
Number of reviews: 2
Used Book in Good Condition
 Show Reddit reviews
9. Understanding Exposure, 3rd Edition: How to Shoot Great Photographs with Any Camera
Sentiment score: 1
Number of reviews: 2
 Show Reddit reviews
10. Canon EF 50mm f/1.8 II Camera Lens - Fixed (Discontinued by Manufacturer)
Sentiment score: 1
Number of reviews: 2
50mm focal length, Minimum focus distance : 0.45m/17.72 inch80mm equivalent focal length on Canon APS-C camerasF1.8 maximum aperture; F22 minimumMicromotor-type AF motor without full-time manual focusing52mm filtersLens not zoomable
 Show Reddit reviews
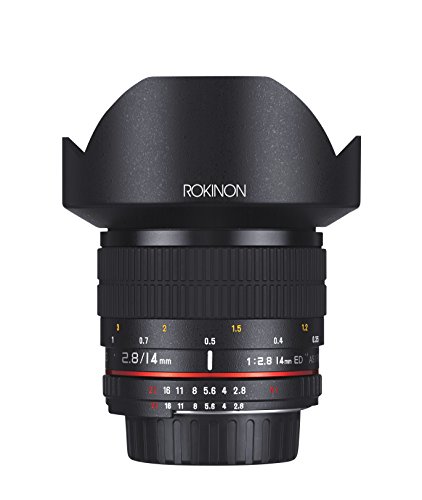
11. Rokinon FE14M-C 14mm F2.8 Ultra Wide Lens for Canon (Black)
Sentiment score: 2
Number of reviews: 2
Ultra wide-angle 14mm lens with an approximately 90° angle of view using an APS-C camera, for dramatic effectsLens has a minimum focusing distance of 0.9' (28 cm) for enhanced close-up shots. Lens includes a built-in petal-type lens hoodMaximum Diameter: 3.4”(87mm). Aperture Range: F2.8 to F22Foc...
 Show Reddit reviews
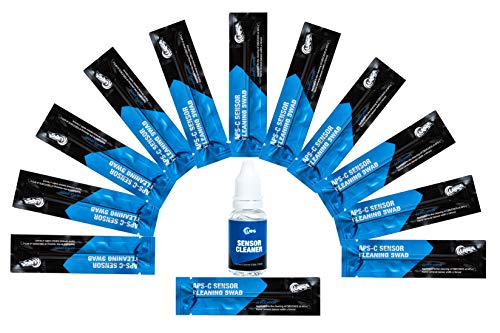
12. UES DSLR or SLR Digital Camera Cleaning Swab for APS-C Sensors
Sentiment score: 1
Number of reviews: 2
UES Sensor Cleaner is alcohol-free and ammonia-free, safe for cleaning both CCD and CMOS sensorsUltra pure water-based cleaner cleans sensors safely without leaving streaks or blemishes behindSuper soft swab head is fully covered by ultra fine microfiber - efficient cleaning and no scratchFlexible s...
 Show Reddit reviews
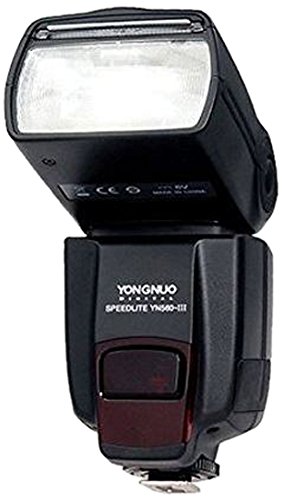
13. Yongnuo Professional Flash Speedlight Flashlight Yongnuo YN 560 III for Canon Nikon Pentax Olympus Camera / Such as: Canon EOS 1Ds Mark, EOS1D Mark, EOS 5D Mark, EOS 7D, EOS 60D, EOS 600D, EOS 550D, EOS 500D, EOS 1100D (Discontinued by Manufacturer)
Sentiment score: 1
Number of reviews: 2
It using Yongnuo RF-602 / RF-603 2.4G ultra-long range wireless flash system. The lead flashing distances up to 100 meters / 328 feet above.Large-size LCD display. The YN560-III is equipped with large-size LCD screen, with clear and intuitive view, easy to use.New Power Zoom Function: By pushing the...
 Show Reddit reviews
14. Storytellers: A Photographer's Guide to Developing Themes and Creating Stories with Pictures (Voices That Matter)
Sentiment score: 1
Number of reviews: 1
 Show Reddit reviews
15. The Fourth Way: An Arrangement by Subject of Verbatim Extracts from the Records of Ouspensky's Meetings in London and New York, 1921-46
Sentiment score: 1
Number of reviews: 1
Vintage Books USA
 Show Reddit reviews
16. The Photograph As Contemporary Art (World of Art)
Sentiment score: 1
Number of reviews: 1
 Show Reddit reviews
17. Play It Away: A Workaholic's Cure for Anxiety
Sentiment score: 0
Number of reviews: 1
 Show Reddit reviews
18. Vivitar 500mm f/8.0 T Mount Telephoto Lens & 2X Teleconverter for Canon EOS Digital SLR Cameras
Sentiment score: 0
Number of reviews: 1
 Show Reddit reviews

What were you going for here? My eyes go from the shoe to the two words that are starkly in focus, to the top of the busses and out of the frame. The woman seems an after-thought.
I get that things like the circular-mask blur and the contact-sheet-esque border create visual interest, but they don't add or enhance anything. They are crutches meant to obscure the lack of actual content from the casual observer. Any attempt at critique is thwarted by these elements - what are they doing there, how do they add to the shot? There are many techniques for manipulating a photograph to enhance visual interest, to make the subject stronger and the background less distracting. Some standards are dodge/burn, vignetting, or cropping the extraneous elements. Consider also the C-B technique of capturing the decisive moment - first find a compelling background, and then camp there until an interesting subject arrives. I believe true craftsmanship lies not in knowing what to include (typically a very short list), but what to cull, what does not belong in your work. That's why we have professional editors in almost every creative field.
The human brain is a marvelous thing, we do so much subconsciously. For instance if you were to put your hand on a hot stove, your nervous system moves your hand automatically, before sending the pain signal - you move your hand before you are aware that it hurts. I mean really, breathing, need I say more? An excellent primer on this idea is BLINK by Malcolm Gladwell (or THE FOURTH WAY by PD Ouspensky if you don't mind the occult). What I'm getting at is that elements like the blur in your composition are literally revolting to the human eye - our brains subconsciously register it as unnatural, sort-of wrong, and that feeling that something isn't right often manifests as revulsion. No matter how good the rest of this photograph is, all of that is negated by your blur.
On the subject of the blur, consider the frame as a container. You choose what to put inside of it. When you're packing a lunch, most of that container is filled with food and drink, with a small share for napkins/utensils/etc. Your frame is filled with forks - I have a hundred forks and only two bites of food to eat them with. It looks like you're focusing (oooh pun) on the shoe/sign/woman - ignoring their relationship or lack thereof, why do these three main elements fill less than a tenth of the frame? If this is a picture about the woman, what's with all this blurry bus bullshit? Crop the crap and be done with it. To further this idea of frame as container, why did you employ that border which only serves to reduce the size of the container? Digitally emulating artifacts of analog techniques can serve a purpose, but what purpose does it serve here? I can see how one may consider the border 'artish' but to add one to a shot it bares no relevance on belays the idea that, again, it is there because there isn't anything interesting in the photograph itself.
You have good material to work with here in your original photograph, I hope your editing was non-destructive because I would really love to see a more thought-out rework of this. Keep working, keep sharing, keep being the champion that you are; that will gain you a lot more respect than your actual work, in many cases.
To paraphrase Dali, "Begin by learning to photograph and edit like the old masters. After that, you can do as you like; everyone will respect you." This is in small part because you will have learned quality technique, but a large part of that respect comes from showing that you have the perseverance, the drive to improve. To end on another Dali quote, "Don't be afraid of perfection: you'll never attain it!"
Four books about art that I personally believe to be invaluable to any photographer: the Adams holy trilogy (Camera, Negative, Print), and Dali's "50 Secrets of Magic Craftsmanship."
Full disclosure: I am a Young Uneducated Male Pedant.
tl;dr: start from the top and then continue until you arrive back at this point.
A thread I can help with! Nighttime urban shots are my thing. First and foremost watch this video if you want to shoot low light handheld. By far it has helped me up my game more than any other advice I have receeived. Also, this has some great advice as well.
On your submitted photo
Good news:
Areas for improvement:
You have a good eye keep shooting! It gets easier every time you do it. I love this kind of work and I am happy to help with whatever advice I can. Feel free to message me with any questions.
Advice for the total newbie to lowlight shooting:
Time for some hard truths.
If you still want to shoot handheld.
Obligatory link to my work so you can get a sense of the style that I go for.
Full disclosure:
None of the links are affiliate links, they are simply products that I use every night I am out. I have bought all my own gear, this is strictly my own experience so your mileage may vary.
Edit: Whoops... my eyes completely skipped the word "skate". Ack. I'll leave this here since it's still good advice in general.
Do this for a year, and then you'll be ready to really start studying the "rules" of photography. I recommend getting The Photographer's Eye as a good all-in-one crash course in photography.
Get Photoshop (or similar program) and learn Brightness/Contrast, Color Balance, Levels, and Curves. Shoot in RAW. Get addicted to expensive pro-quality lenses. Have fun. :)
I don't think you can force a style upon yourself without blatantly copying someone else.
Based on the style you are currently shooting in, the fact that you have only 38 photos on flickr, and your approximate age (assuming you are the subject in the photos), you need to shoot a lot more.
Keep shooting the way you do maybe. Try to improve your technique both at the camera and at the computer in photoshop while thinking critically about what you like/don't like about your work. Your style will develop organically as you introduce or take away things that are either lacking or over pronounced in your work. Eventually you fill find a way of working that really flows well for you.
I think the best advice is to move slowly and try not to get too frustrated with yourself if you dislike your results.
There is a theory that it takes 10000 hours to master any craft: source. That's a lot of time, but think of any truly talented person you follow. People don't wake up one day with flawless photographic technique, much like someone that runs casually will not be taking any medals in the olympics.
Concepts may appear out of the blue, but the ability to translate it exactly as you wish into any artistic space is really the holy grail of any artform. And it takes a lot of practice.
Practice practice practice :D
Just try to be uncompromising while keeping yourself conscious of every artistic decision you make. Your style will flow out of you with little effort if you are practiced and confident.
And don't fake it - we'll know ;) :D :D
There are a lot in this photo that is great, but you don't want to know what you've done right, correct? Maybe that's how I am :P
Things to consider.
Otherwise, great shot. Keep shoot! I'd love to see more of your work.
Cheers.
I think what steffon meant is that, even though it has no glaring technical faults, nobody but the parents, or otherwise close family, will find anything interesting in it. It lack an interesting composition, nice colours or really anything interesting. It's just some random kid.
It's looks just like snapshot for us. Everybody with a digital camera from the last few years can shot this on auto without even reading more than a few pages of the manual.
And that you are new to photography doesn't really matter; saying that won't make the photo any better.
May I suggest you buy some good books, for example "Learning To Photograph" Volumen One and Volumen Two. I recommend especially Vol 2.
And lastly, here are the results of a quick Google search about Portrait photography for beginner.
Edit: I forgot to mention that I earnestly don't think that steffon was harsh to you /u/funnypumpkin , but simply honest.
Find photos that you like, and copy them as close as you can.
Notice the lighting, posing, composition, shutter speed, depth of field, and editing.
After perfecting each shot, you can then use the techniques you learn to explore different variations, eventually creating your own vision and style.
edit: I also recommend getting this lens (nikon 50mm, 1.8), it's cheap, will give you very shallow depth of field when you need it, nice bokeh, and will help with low light since the d70 gets pretty noisy when you bump the iso up.
The building on the left balances the picture. For one it frames the scene. Especially because it's relatively bland and uninteresting it guides the eyes back into the picture. Besides that, it is a similar facade as the beautifully lit building on the right. This gives the picture both symmetry and contrast as visual elements.
The image does adhere to the rule of thirds since all the lines are filled with interesting elements. Perhaps you've had trouble applying the rule of thirds because you've focused too much on the crossing points of the lines. The reason these four points are the most interesting ones for the rule of thirds, is because items on those points adhere to the rule twice.
If you want more background information on composition, I can recommend this book.
For myself, whenever I'm learning a new photography skill I do the following: As soon as I have taken the shot I'm after, I take at least five more where I play around with whatever element I'm practicing with. So for composition, I would take the shot I want. Then go look for alternative angles, other elements to in- or exclude, maybe a different foreground or background, whatever options are available at the time. After a while I start seeing the options beforehand and will be ready to incorporate it and move on to the next element to work on.
Point and shoot cameras have their uses but most of them are severely limited, unfortunately. If you're interested in developing your skills in photography further, I think you should probably buy a SLR camera. They give you a completely different way of shooting, it's so much more direct and controllable. You don't have to sell a kidney to afford one either, a used Canon d40 sells for about $500. If that's too pricey, look for a nice Canon 400D, if should only set you back $200 or so without a lens. Other brands are just as good ofc, Nikon has a few really good beginner models too.
Also, SLR or not, try to get your hands on a copy of The Photographer's Eye by Michael Freeman, I think it's a very good introduction to composition and thinking in frames and light and color. borrow it at a library if you can't afford buying it.
Other than that, I dunno. Ask if you've got any questions or want tips.
Honestly, since you're just starting out, I can't recommend this book enough. I think I bought the 2nd edition when I started, and have since given it to friends (and even bought a copy for a good friend when she was starting out). It's fantastic, and will get you shooting in manual mode before you know it.
huh! may I recommend this one? http://www.amazon.com/Yongnuo-Professional-Speedlight-Flashlight-Olympus/dp/B00BXA7N6A
I've always been a Nikon guy but this guy can do amazing things for a 10th of the price. And if you're going to use it off camera, just get one of the cheap wireless yongnuo remote triggers off ebay for like 30 bucks, the speedlight has an integrated wireless trigger. Besides it's twice as bright as an SB-600.
Two of these and an umbrella are all I need for a professional lighting in any situation.
The wide crop works well for leading your eyes for sure and would say looks better. It looks like some of the detail is back in the flowers, but still not very high. I believe that is due more to it being bright outside and just having detail bled out from the sun. Thinking about that did remind me, that if you have a light reflector with a translucent/shoot through (something like this: http://www.amazon.com/gp/product/B002ZIMEMW) you could have someone going around shading the plants for you so you have even lighting, but this could cause it to be too dark? You'd have to see, but the use of another reflector and then you could throw controlled light back in or use a flash to get the lighting desired.
It's pretty safe to do it yourself. I had to do it a few months ago, it was a lot easier than I thought it was going to be. Also the sensor has a piece of glass sitting in front of it to help protect it, it's quite durable.
Anyway, I used this kit, although there are many options just as good. Whare as a professional will probably charge about $40, but with that you also have peace of mind, so if they break it, they have to fix it.
Cool, I'll definitely try slowing down the shutter speed (going from 1/250th second to somewhere between 1/50th and 1/75th of a second) when using my Nikon 50mm f/1.8D lens (http://amzn.to/n4CwwQ) at an upcoming show! Thanks for your recommendations :)
I shoot almost exclusively at night. This photo isn't sharp because it is slightly out of focus. In-focus stars will look like this and your foreground at that distance should also be in focus. Focusing at night is obviously problematic. What I've learned to do is to find a bright star or a light on the horizon and use live view to focus on it. That should put your lens at infinity and if your foreground is far enough, it should be sharp as well.
If you stop down, don't go much lower than f5.6 or f8, any lower than that and you will have to compensate with longer exposures, turning your stars into streaks. Wider lenses are better for star shots generally, as they can see more of them while increasing. I use this great cheap 14mm f2.8 prime. A general rule to follow for exposure time on a crop sensor is 400/focal length, 600/focal length for full frame bodies. Sticking near this number will help prevent your stars from "pilling" or stretching out.
Shoot RAW if you can. If you can get Camera RAW with Elements, it will allow you tons of ways to adjust the image, most importantly white balance.
My best advice would be to buy a few books about photography and read them. Then shoot a few hundred pictures and come back with the best of them.
This picture has so many typical beginner shortcomings that it is apparent for me that you have (almost) no clue what you are doing. Of course this is normal, nobody is born with knowledge about photographic theory, but just throwing a few sentences your way won't help you.
These two books are very comprehensive and useful:
Learning to Photograph Book one and Book two.
Yeah that's probably because I used a bit too much of the exposure tool haha. And I agree a wider DOF probably would have been better. I used my Rokinon 14mm f2.8
hmm if you are interested in conceptual photography I would read this [book] (http://www.amazon.com/The-Photograph-Contemporary-Art-World/dp/0500204012/ref=sr_1_1?ie=UTF8&qid=1394500027&sr=8-1&keywords=photography+as+contemporary+art) I think it will give you a broader notion of what conceptual photography is as well as introduce you to some great artists.
I have the same camera and lens and I agree with the other commenter - Do yourself a favor and start reading/watching video - check out youtube for tutorials on how to take pictures and what all the settings mean and once you get into using manual made you can make this 100% better. Trust, me I was literally in the same boat as you, I have the t3i and the kit lens to start. If you really want to take good pictures or care about editing them in post then you should look at RAW vs JPEG - I started shooting RAW and haven't EVER looked back but I want that flexibility you might not need it.
So the focus on your girl is great, the rest of the photo was blurred due to movement. But movement wasn't really your issue - low light is what killed you here. Also, White Balance, you need to make this one colder, see how everything is a bit yellow? It's just a color balance issue that can be slightly corrected.
Since this will come up soon - If you want to make any upgrade purchases start with a 50mm prime
Story is key! I do a lot of photojournalism, so I focus on that a lot.
If you want a good read about including story in photos, here's a book that may help: http://www.amazon.com/Storytellers-Photographers-Developing-Creating-Pictures/dp/0321803566/ref=sr_1_1?ie=UTF8&qid=1345262080&sr=8-1&keywords=storytellers
You mentioned you just started, so you're going to take so many crappy photos. But, that's part of the fun.
I bought this book years ago. I don't think of it as particularly good or insightful, but it just describes how to think about composing photos. You should seek a similar book out at your local library. Post more to photocritique as well!
Vixen Polarie
https://www.amazon.com/Vixen-Optics-35505-Polarie-Tracker/dp/B006ZSRHKC/ref=sr_1_1?ie=UTF8&qid=1492963669&sr=8-1&keywords=vixen+optics+polarie+star+tracker
Definitely recommend it!
No prob. And a fill is just like something white you can bounce light off of and onto your subject. Like a white board, stretched out sheet or something to that effect. Or you could buy one if you plan on getting into portrait photography.
Having a hard time seeing if that would help you out much with the shot you want to get but i figured it couldn't hurt to mention. :P
If you don't want to send it out for service, you can lock your mirror up, and use THESE to very carefully, slowly and lightly swab the sensor. It is a pretty straight forward process, just don't use too much pressure. There are loads of videos on how to do it.
By any chance have you read Photoshop LAB Color: The Canyon Conundrum? It goes into a lot of detail about driving apart similar colors to different areas of the colorspace, and uses canyon images like this one for the examples in many cases.
The light is way too harsh on her face, causing some pretty dark shadows. As someone else mentioned, a reflector would have helped a lot, like this
You don't want to have your model facing the sun so much that she squints. Also, I think the color of her shirt isn't the best for her skin tone and surroundings. There's not a lot of contrast between her and the background. On the plus side, I do like the natural pose.
Here are some links for the product in the above comment for different countries:
Amazon Smile Link: Yongnuo
|Country|Link|
|:-----------|:------------|
|UK|amazon.co.uk|
|Spain|amazon.es|
|France|amazon.fr|
|Germany|amazon.de|
|Japan|amazon.co.jp|
|Canada|amazon.ca|
|Italy|amazon.it|
This bot is currently in testing so let me know what you think by voting (or commenting). The thread for feature requests can be found here.
Reminds me of the cover of this book, except the angle is better:
http://www.amazon.com/Play-Away-Workaholics-Cure-Anxiety/dp/0615918174/ref=la_B00IAVMZJ0_1_1?s=books&ie=UTF8&qid=1406661268&sr=1-1
It's a straight-up Canon Nifty Fifty. http://amzn.com/B00007E7JU
I only own two lenses at this point: the aforementioned 50mm and a kit 18-200mm.
There are fairly inexpensive t-mount lenses that seem to do an ok job if you don’t need autofocus or image stabilization. here’s one.. It’s kind of funny. I just inherited a 400mm version of this from 1976.
I read this book. Just downloaded an 'ahem' pdf on my phone and read it during my spare time at work. It was extremely well written and entertaining and really puts photography into understanding. You start to think about light differently after reading this.
Depends on your style, but I don't think you NEEd to pay for a course just yet. There's so much info out there already.
http://www.amazon.com/Understanding-Exposure-3rd-Edition-Photographs/dp/0817439390
Get a foldable bounce for super simple fill or shoot in shade and expose for the skin
Definitely go with the cheaper speedlights these days. A few Yongnuo YN 560 III's paired with the remote power control transmitter (here's a slightly cheaper limited option) will give you everything the more expensive canon/nikon speedlights offer, but hundreds of dollars less.
It's just the cheap kit lens, I plan to invest in http://www.amazon.com/Nikon-NIKKOR-50mm-Focus-Cameras/dp/B00005LEN4/ref=sr_1_2?s=photo&ie=UTF8&qid=1454084636&sr=1-2&keywords=nikon+50mm soon
This was the setup and this is the flash. Just a cheap Yongnuo
The standard Bible.
https://www.amazon.ca/Understanding-Exposure-Fourth-Photographs-Camera/dp/1607748509/ref=sr_1_1?s=books&ie=UTF8&qid=1510675108&sr=1-1&keywords=Understanding+Exposure&dpID=51RRgrqGUgL&preST=_SX258_BO1,204,203,200_QL70_&dpSrc=srch
If you REALLY wanna get into astrophotography, a good purchase would be the Vixen Polarie. They're a bit expensive, but basically it rotates your camera around the North Star so you can take reeeeeally long exposures with no star trails.
​