Top products from r/smartmirrors
We found 15 product mentions on r/smartmirrors. We ranked the 12 resulting products by number of redditors who mentioned them. Here are the top 20.
1. BDF S05 Window Film Daytime Privacy One Way Mirror Silver 5 (36in X 12ft)
Sentiment score: 1
Number of reviews: 2
EXCELLENT DAYTIME PRIVACY. Provides great intended privacy during daytime only; the mirror-effect is reversed at night since the interior will be exposed to more light than the exterior. The side with the most light will have the mirror-like appearance.EXTRA DARK AND REFLECTIVE to create a mirror-li...
 Show Reddit reviews
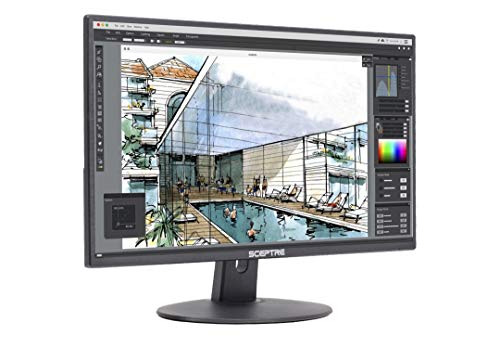
2. Sceptre E205W-1600 20" 75Hz Ultra Thin LED Monitor HDMI VGA Build-in Speakers, Metallic Black (2018 version)
Sentiment score: 2
Number of reviews: 2
True 16:9 Resolution 1600 x 900High Contrast Ratio: 5,000,000: 1.20 inches LED HD+ Monitor
(19.5 inches Diagonal corner to corner).
Dimensions
With Stand (Inches) 18.01 x 7.17 x13.57 (inches).
Without stand: 18.01 x 2.17 x 13.47(inches)HDMI, DVI or VGA Input. Power Range :100 – 240 VAC, 50/60 H...
 Show Reddit reviews
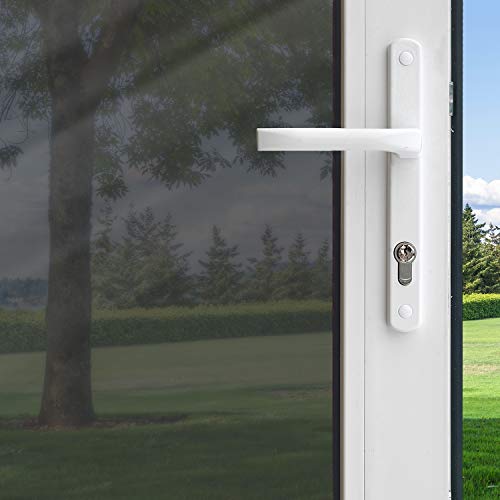
3. Gila Privacy Mirror Adhesive Residential DIY Window Film Heat Control Glare Control 3ft x 15ft (36in x 180in)
Sentiment score: 1
Number of reviews: 1
DAYTIME PRIVACY: Mirrored exterior appearance provides daytime privacy (when the sun is down and lights are on inside, film no longer conceals views)ENERGY EFFICIENT: Rejects up to 79% of total Solar EnergyPROTECTS INTERIORS: Blocks up to 99% of UV rays, helping to keep your interior from fadingINCR...
 Show Reddit reviews
4. Ultra Hardware 15293 Clips Mirror (6 Pieces)
Sentiment score: 0
Number of reviews: 1
RELIABLE CONSTRUCTION: Ultra Hardware brings you nothing but the best and these clips are no different. Designed to hold up standard mirrors of all sizes, you can rely on them to stay safely in place throughout your homeDISCRETE SECURITY: The clear plastic design of these clips makes them blend perf...
 Show Reddit reviews
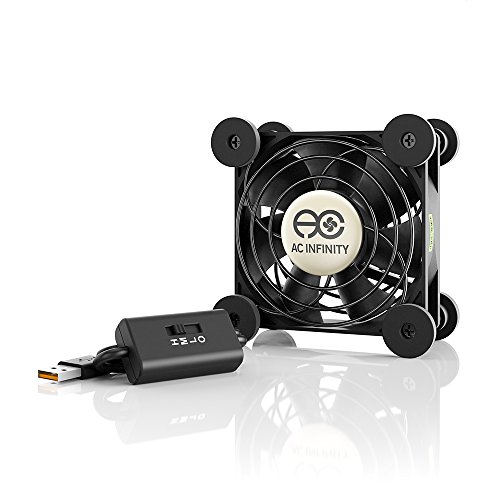
5. AC Infinity MULTIFAN S1, Quiet 80mm USB Fan, UL-Certified for Receiver DVR Playstation Xbox Computer Cabinet Cooling
Sentiment score: 0
Number of reviews: 1
Ultra-quiet UL-certified USB fan designed to cool various electronics and components.Features a multi-speed controller to set the fan’s speed to optimal noise and airflow levels.Dual-ball bearings have a lifespan of 67,000 hours and allows the fans to be laid flat or stand upright.USB plug can pow...
 Show Reddit reviews
6. SupremeTech 18 x 24 x 0.04 Inch Acrylic See-Through Mirror, 30% Transparent
Sentiment score: -1
Number of reviews: 1
17 15/16 inch x 23 15/16 inch x 0.04 inch see-through acrylic (approximately 30% transparent). Can be used for a smart mirror, surveillance, or theatrical application. Shatter resistant, unlike glass. Slightly bendable.A two-way mirror is coated with a thin, almost-transparent layer of metal. The re...
 Show Reddit reviews
7. ELEGIANT USB computer speakers for desktop,laptop speakers,Wired Computer Sound Bar, Mini Soundbar Speaker for PC Tablets Desktop Laptop MP3 TV
Sentiment score: 1
Number of reviews: 1
{NOTE}: If you want to hook it up with tv you should make sure it has 3.5mm audio output if the answer is no you could get the 3.5mm Audio female Cable to 2 RCA Male Cable to make it work. Size: 2.4 x 15.7 x 2.2 inches and audio cables are about 4ft long, not big but good for computer or tv.{Crystal...
 Show Reddit reviews
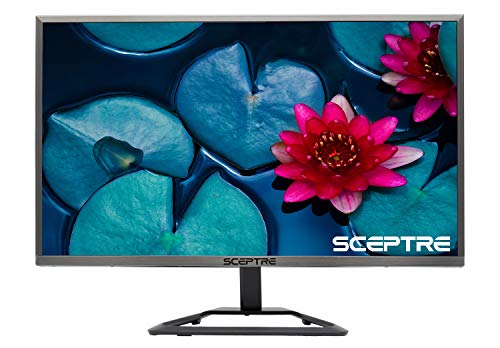
8. Sceptre 24 Inch Ultra Thin Ultra Slim 1080P 75Hz LED Monitor HDMI VGA, Metal Black (E248W-1920R)
Sentiment score: 1
Number of reviews: 1
Metallic Ultra Slim Design. OS Compatibility- Windows 10, Windows 8, Windows 7, macOS High Sierra, macOS Sierra, OS X El Capitan3.5mm Mini-Jack Audio Out. Dimensions without stand (inch, W x H x D): 21.45 x 12.52 x 1.24. With Stand (inch, W x H x D): 21.45 x 15.67 x 6.57HDMI and VGA Up to 75Hz refre...
 Show Reddit reviews
9. DotStone HDMI Switch Bi-Direction 4K HDMI Splitter 2 x 1/1 x 2 No External Power Required 2 Ports HDMI Switcher Supports Ultra HD 4K 3D 1080P for PS4 Xbox Fire Stick Roku
Sentiment score: 0
Number of reviews: 1
BI-DIRECTIONAL HDMI SWITCH: HDMI switch box can do bidirectional work, help you connect two HDMI sources to one HDMI display Or connect one HDMI source to toggle between two displays (2 TVs CANNOT display simultaneously.)4K RESOLUTION: 4K HDMI switch with High bandwidth 10.2Gbps data transmission, c...
 Show Reddit reviews
10. Two Way Glass Mirror - 12" x 24" - Mirropane - 1/4" Thickness - Flat Edge Polished - for Smart Mirrors, Hidden Televisions, Security and Surveillance Applications
Sentiment score: 1
Number of reviews: 1
High quality 1/4" thick two way mirror glass with flat polished edgesVisible Transmittance: 11%, Visible Reflectance (Coated Side): 68%, Visible Reflectance (Glass Side): 16%Use for smart mirror (popular Raspberry Pi project), hidden television, and other DIY applicationsUse for security, surveillan...
 Show Reddit reviews
11. uxcell Round Aluminum Standoff Column Spacer M3x6mm,for RC Airplane,FPV Quadcopter,CNC,Red,10pcs
Sentiment score: 0
Number of reviews: 1
PARAMETER - material: Aluminum Alloy;inner screw thread: M3;total length:6mm;outside diameter:5mm;color:Red.FEATURE - Light weight, high strength, corrosion resistance.COMPATIBLE WITH - RC Airplane,FPV Quadcopter,CNC,etc.APPLICATION - fit for DIY model or quadcopter fixing and connecting.PACKAGE CON...
 Show Reddit reviews
12. Vilros Magic Glass Mirror and Frame - 2 Way Mirror for Smart Mirror Project (Does not Include LCD)
Sentiment score: 1
Number of reviews: 1
Simple Plug N play setup via the Vilros Mystic Mirror Cloud PortalFrame Dimensions: 26 X 20 X 1 - InchInside cavity dimensions 21.5 x 15.25 inch
 Show Reddit reviews
Hey, the mirror came in the mail today.
This was my first magic mirror put together, however it was pretty simple, considering.
There's a particle board back with 18 screws, 8 of them dedicated to vertical and horizontal hanging hooks. They are in there tight, I had to use an electric drill.
Underneath the particleboard is a black coated foam, to prevent light leak
Initially I used a staple gun to attach shims as brackets for the monitor that I used, I already had it as a secondary monitor for a laptop. I'm going to need to get another, but hey :P
Removing the plastic case was very easy from that brand, I used a flathead and an 8 pound weight to pry apart the plastic housing. The bottom holds a couple of light wires, so be wary if using this monitor specifically. Also, the glass frame can fall off once the housing is removed. Finally, while the buttons are "behind" the monitor, it's actually just a wire PCB with buttons. I have it drilled down with the Raspi, on a single screw. Slide out to turn on when needed, slide back in to hide. It's underneath/behind the frame, out of sight.
Once everything was removed everything else, I used electric tape to seal the edges of the monitor in an attempt to prevent light leak (it worked, but I missed a spot.) I placed it in the center of the mirror and lined the black foam board, cutting out the width of the monitor. It ended up in 4 pieces (probably the light leak cause), however electric tape holds it firm. The edges of the foam are white, so I taped off the edges as well, making everything fight together very snug.
I initially used shims, however removed them as I felt the monitor is well held by the foam and the particle board backing.
Upon trying to drill the particle board back in, it's pretty clear that the monitor's PCB, HDMI, power inputs are in the way. Considering I'll also need room for the RPI, I made a 2 square overlay cutout.
I wasn't sure how to cut particle board from the centerish of the piece, so I took a drillbit and perforated my design, punched it out, and have a basically perfectly flush mirror frame.
Basically.
I drilled the RPI into the particle board, with the monitors control panel, into the bottom of the frame. However, the HDMI cable for the monitor juts out a bit.
My 2 solutions for this are to build some little backing... not exactly what I'm aiming for.
So, the PCB for the monitor is actually mounted with screws, which I had removed and shifted. I'm thinking simply removing them entirely may allow me to adjust the PCB in a way to let it sit flush, secure, and still within reach of all of its wires.
Option 1 is guaranteed but requires materials outside the purchase of just the mirror and frame. Option 2 lets me simply use the mirror that I bought "plug-n-play". """""". """"""""". Extra air quotes, just in case.
It looks good though. It's a little darker than base monitor, but that's to be expected. Definitely wish that I had used a larger monitor and remembered to seal off the front foam to the front of the monitor, as that would completely resolve the little eyes that are formed from light leak. I may end up coming to like it though!
___
As for the mirror and frame for $69.99...
Honestly, it's "good enough". It... "comes" with everything that you need for an amazing price. The mirror seems nice, the frame isn't falling apart, and it's quite hefty. However, the particle board is somewhat misaligned / improperly cut to shape. While this makes it clear which side goes where when trying to put the board back on, it does feel like the cut corner, next to the inside of the frame/edges of the inside of the mirror.
The foam pad came a little dirty, I ended up using the opposite side. Finally, these screws strip. Have a rubber band handy, luckily I actually had the exact same screws provided, so I was able to easily add an extra screw for the RPI and monitor PCB.
I'll make this a reddit post, but I figured I'd give you my first impression!
I don't think I'm afraid to hang it on the wall
I completed mine about a week ago, based on the square RIBBA I scored at a thrift store. If you use a flat screen that’s not too bulky you should be in great shape.
https://imgur.com/a/Fjo4n
I used a sceptre 20in monitor. Was going inexpensive.
https://www.amazon.com/dp/B00S8W8QMG/ref=cm_sw_r_cp_apip_jCtAxgzjSyHns
The biggest “mistake” I made was not realizing early enough the hdmi output and power cable stick out from the back which keeps it from fitting flush to the wall. :/ haven’t found a great solution yet. Maybe some stand offs and an adjustable VESA mount...we’ll see.
https://imgur.com/a/BK81f
Anywho, best of luck!!
EDIT: just measured. My 19 3/4” x 19 3/4” RIBBA is 1 3/4” deep.
It's a very good monitor - very THIN, light weight and low cost (under $100). I actually run it on eco mode which is perfect for a smart mirror. I would recommend using black electrical tape to mute the metal monitor frame if your (wood) frame is note sized well. Link below for the sceptre monitor.
https://www.amazon.com/gp/product/B01HIA63AU/
I bought this stuff from Amazon https://www.amazon.com/dp/B00CWGIHBE/ref=nav_timeline_asin?_encoding=UTF8&psc=1
Hopefully it is as good as the reviews. I may need to work on my technique though
Actually I built mine with
this
It turned out excellent!!
their are a few small imperfections but looks more or less just like a spec of dust on a mirror
So I actually went and bought myself a large shadow box from michaels, took out the glass put the tint on then mounted the tv.
the programming of the pie took longer then the build
we sell two way mirror glass on Amazon, which has the reflective properties of a standard mirror (see pics in listing). https://www.amazon.com/Two-Way-Glass-Mirror-Surveillance/dp/B01MSAZ3PN
this will be the nicest looking option if your primary purpose is to be a regular mirror (and you can afford it)
You could add an USB fan mounted in your enclosure and powered by your PI https://www.amazon.com/gp/product/B00G059G86
It mainly depends on the Display you use.
If you use an Android tablet, it is simple.
You just stick on the Android tablet to the glass and then use regular bathroom clips, with maybe 3/4” spacers (based on the tablet size) to mount them onto the wall. We have many users who have done this.
Here’s one way, you can just skip the frame part.
https://www.mangomirror.com/pages/diy-make-your-own-smart-mirror-in-under-10-minutes
Here is an example of the clips,
https://www.amazon.com/Ultra-Hardware-15293-Mirror-Pieces/dp/B002P0ZZCG?
just get longer screws and a spacers to match them.
https://www.amazon.com/gp/aw/d/B07MQ5L1BV/
If you want to use a larger display, it is harder as you need a mount for the display and much more robust mounting, so would not recommend large displays without a frame.
Hope this helps.
I will order it here from Germany. It got 1 bad review due to broken mirror (I guess due to postage). Check out answer from seller. It is cheap, other mirrors cost a lot more.
If you wanna try going cheaper, you can try this. Check out answer from this seller.