Reddit Reddit reviews Easy Gardener 3103 3x150 Natural Burlap Weed Barrier Fabric, 3'X150', 3 ft X 150 ft Tan

We found 2 Reddit comments about Easy Gardener 3103 3x150 Natural Burlap Weed Barrier Fabric, 3'X150', 3 ft X 150 ft Tan. Here are the top ones, ranked by their Reddit score.

Gardening & Lawn Care
Raised Beds & Plant Support Structures
Patio, Lawn & Garden
Garden Netting
Easy Gardener 3103 3x150 Natural Burlap Weed Barrier Fabric, 3'X150', 3 ft X 150 ft Tan
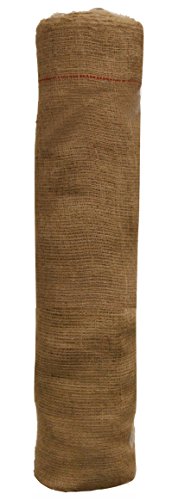
100% natural burlap; Helps seeds germinate by holding in moisture and preventing wash-awayProtects plants from Windburn, freezing rain, snow and IceProtects shade sensitive plants from the sunIdeal for decorating and crafting; available in several lengthsBurlap for crafters, interior designers, wedding décor, landscaping and horticultural practices
Check price on Amazon

2 Reddit comments about Easy Gardener 3103 3x150 Natural Burlap Weed Barrier Fabric, 3'X150', 3 ft X 150 ft Tan:

u/thethein11 · 11 pointsr/gardening

Thanks everyone for the support, advice and comments! We didn't realize we'd get such a response so here are the promised additional info and pics!

Supplies (Total = $4153)

  • Greenhouse Megastore (Total = $2345)
    • 8mm Triple Wall Polycarbonate panels ($120 crating charge)
      • 6’x8’ = $99 (per panel) x Qty 7 = $693
      • 6’x11’ = $136 (per panel) x Qty 5 = $680
    • 1 piece H profile 8mm
      • 8’ long = $15 (per profile) x Qty 5 = $78
      • 6’ long = $8 (per profile) x Qty 5 = $65
    • Anti-Dust bottom tape 1 roll = $30
    • Top sealing aluminum tape 1 roll = $17
    • 8/10mm “F” Gable end profile 6’ = $16 x Qty 2 = $32
    • 8/10mm “R” angle profile 8’ = $22 x Qty 4 = $90
    • Shipping = $540

  • Home Depot (Total = $1068)
    • Plywood Siding 4’x8’ = $35 x Qty 6 = $210
    • Framing lumber
      • 2”x4”x8’ = $4 x Qty 48 = $176
      • 2”x4”x12’ = $8 x Qty 18 = $144
      • 4”x4”x8’ = $13 x Qty 4 = $52
      • 1”x2”x8’ = $1.50 x Qty 8 = $12
      • Pressure Treated
        • 2”x4”x8’ = $5 x Qty 2 = $10
        • 2”x4”x10’ = $6 x Qty 4 = $24
        • 2”x6”x8’ = $7 x Qty 2 = $14
    • Cedar
      • Fence pickets 5/8”x5½ ”x6’ = $2.85 x Qty 52 = $150
      • Square end baluster 2”x2”x3’ (6 pack) = $22 x Qty 3 = $66
    • Storm door = $90
    • Fasteners and other odds/ends = $120

  • Amazon (Total = $450)
  • Soil (Total = $290)
    • Compost 2 cuyd (picked up) = $40
    • Topsoil 2 cuyd (delivered) = $100
    • Peat Moss 3 cu-ft (Lowes) = $10 x Qty 15 = $150


      Planning steps

  • We started with a known foot print and therefore decided to find what we thought would best fit within it.
  • Plan planter box layout; make sure you have enough room to walk around and squat/bend/kneel down.
  • Plan for excess space to have potting/seed starting bench and tool/supply storage.
  • Figure out how many doors you want to have, maybe you want to have a door at each end. Factor if you want to get larger items inside like a wheel barrow to see if the door is wide enough.
  • Look up and calculate ventilation requirements passive or active will result in different needs.


    Construction steps

  • Calculate all dimensions and cuts needed to make before taking out tools.
    • Use Roof calculators listed below in Knowledge section for the more complicated dimensions like rise/run and bird mouth cut.
      • In our case the front wall is ~ 8’ the back wall is ~ 6’ and we chose to rest the rafter on top of the back wall and butt it into the front wall. This gave us a pitch of 2 in 12 or 10 degrees. This is right on the border of being able to self-shed snow but we figured since we can easily brush it off this low angle would be fine.
  • Cut framing for front wall.
  • Frame front wall on ground at 3’ OC (on center).
    • Stand front wall up and prop with extra 2x4.
  • Add dwangs/sills between studs for additional support of panel and/or window locations.
  • Cut framing for back wall.
  • Frame back wall on ground 2’ OC.
  • Cut plywood siding and attach to wall.
    • We needed to do this because of the short concrete wall at the back of the patio wouldn’t allow access to attach the siding.
    • Stand back wall up and prop with extra 2x4.
  • Put layout marks on top of both walls for rafters 3’ OC.
  • Check measurements for rafters and cut to correct angle, length, and bird mouth.
    • We choose to have the rafter terminate at the vertical edge of the double top plate (on the front wall) instead of resting on top of it. This way we could utilize the “R” angle profile to seal the roof panels to the wall panels.
      • Joist hangers could be used here to increase strength and we may add them going forward.
  • Add dwangs between rafters to keep distance consistent, resist twisting, and additional support for panels.
  • Frame side walls using same angle (10 degrees) created to make the roof.
    • Leave openings for Door (32”x80”), Exhaust fan (18.5”x18.5”), and gable vent (16”x16”).
  • Prep H profiles by running glassing tape on back side to adhere to studs.
    • This will reduce the need for excess screws. I borrowed this idea from the Growing North blog listed below in the Knowledge section.
  • Tape top (Aluminum) and bottom (Anti-Dust) of 6x8 a panel.
  • Run glassing tape on perimeter of 6x8 panel to create a better seal and reduce need for fasteners.
  • Slide H profile on to first 6x8 panel and install both on wall fasten using neoprene washer fasteners (DON’T CRUSH PANEL).
  • Continue down the wall till complete.
  • Measure and cut roof panels to size.
  • Tape same as before with aluminum, anti-dust, and glassing.
  • Install Roof panels in similar fashion to wall panels.
  • Install “R” angle profile as you go along we found it best to slide it on to both panels from the side.
  • Cut, Tape, and Install side wall panels/siding in same fashion as above.
  • Install “F” Gable end to seal side wall to roof slide like on from side like “R” angle profile.
  • Install storm door according to instructions.
  • Build planter boxes according to layout.
    • Line bottom of planters with burlap and staple in place.
  • Fill with soil


    Future plans

  • Cut window openings and install automatic openers.
  • Bring water and electric into greenhouse.
    • Wire up exhaust fan and several outlets for:
      • Grow lights
      • Circulation fans
    • Design/Install irrigation system.
  • Potting/seed starting table.
  • Tool storage.
  • Vertical growing.
  • Solar lights.


    Knowledge resources

  • Roof calculators
  • Growing North
u/jman4c21 · 1 pointr/lawncare

I've had good success with this, a little pricey depending on yard size but it gets the job done
Easy Gardener 3103 3x150 Natural... https://www.amazon.com/dp/B000HQOGLQ?ref=ppx_pop_mob_ap_share