Top products from r/DIYRift
We found 16 product mentions on r/DIYRift. We ranked the 15 resulting products by number of redditors who mentioned them. Here are the top 20.
1. 10,000 Days
Sentiment score: 0
Number of reviews: 1
Tool - 10.000 Days - CD Brand New
 Show Reddit reviews
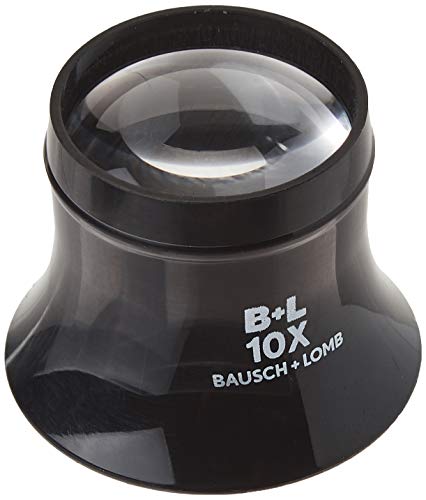
2. Bausch & Lomb Watchmaker Loupe, 10x, Black
Sentiment score: 0
Number of reviews: 1
Lightweight glass lens magnifierManufactured for headband attachment if appropriateProtective storage pouch included. Diameter is 25.4 mmLightweight glass lens magnifier. Focal Distance : 1 Inch (2.5 cm)Manufactured for headband attachment if appropriateProtective storage pouch included
 Show Reddit reviews
3. Bausch & Lomb Aspeheric Packette, 5X
Sentiment score: 1
Number of reviews: 1
Lens slides in and out of durable case for convenient, safe storageExcellent for crafts and hobbiesProtective storage pouch included
 Show Reddit reviews
4. Uxcell USB to 5.5 mm/2.1 mm 5 Volt DC Barrel Jack Power Cable (D132) (53832-A-5337
Sentiment score: 0
Number of reviews: 1
Power devices from a USB portFor small electronics and devices which use a 5.5mm barrel jack for a power cableProvides 5V DC from USBCable length: 1m / 3ftType A Male USB plug to 5.5mm(outer), 2.1mm (inner) male coaxial/barrel plug with positive center pin.
 Show Reddit reviews
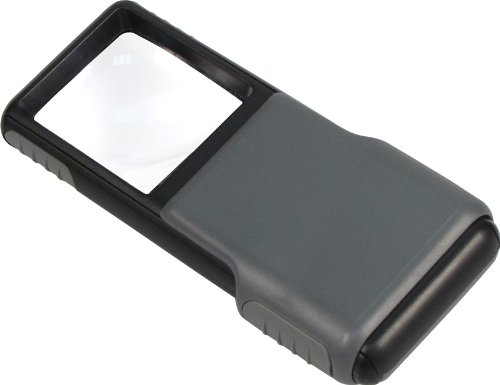
5. Carson MiniBrite LED Lighted Pocket Aspheric 5x Magnifier with Built-in Sliding Lens Cover
Sentiment score: 0
Number of reviews: 1
Pocket Magnifier contains a powerful 5x aspheric lensBuilt-In Sliding Protective CaseCompact, Lightweight, and PortableUses 3 AAA Batteries (Not Included) | Backed by Carson's Limited Lifetime WarrantyBright Built-In LED Light | Lens Diameter: 1.3 inch (L) x 1.5 inch (H)
 Show Reddit reviews
6. 10 Pack 2.1mm x 5.5mm Male CCTV Camera DC Power Adapter
Sentiment score: 1
Number of reviews: 1
Material: Plastic, Electric Parts. Condition: brand new.Connectors: DC 2.1 x 5.5mm male, "+" "-" terminal interface.Use for CCTV Camera power supply.Each Dimension: 3.8 x 1.4 x 1.3cm/ 1.5" x 0.55" x 0.5" (L*W*H). Color: Silver Tone, Black, Green.
 Show Reddit reviews
7. Uxcell BWDYM DC Power Cable Female Connector Plug (Pack of 10)
Sentiment score: 1
Number of reviews: 1
Product name: dc connector; use for: cctv cameraProduct name: dc connector; use for: cctv cameraBrand name: excel
 Show Reddit reviews
8. Cable Matters High Speed HDMI to Mini HDMI Cable (Mini HDMI to HDMI) 4K Resolution Ready 15 Feet
Sentiment score: 1
Number of reviews: 1
MINI HDMI CABLE connects a tablet, Pico Projector, NUC barebones desktop, camcorder, DSLR or other device with Mini HDMI to a 4K UHD TV, monitor or projector with HDMI input; Check that your device has Mini HDMIVIDEO RESOLUTION SUPPORT up to full 4K including 4096x2160, 3840x2160, 2560x1600, 2560x14...
 Show Reddit reviews
10. WeWood Phoenix Cotton Fiber Wood Watch | Teak Blue WPH46TB
Sentiment score: -1
Number of reviews: 1
 Show Reddit reviews
11. CompuLab Display Emulator (fit-Headless)
Sentiment score: 0
Number of reviews: 1
Display emulator for remote desktop accessSupports up to 1080p resolution. For higher resolutions up to 4K - check fit-Headless 4KWorks with any operating system, no software installation requiredPlugs into HDMI port, does not require additional powerWorks with Mac Mini, CompuLab fit-PC and Intense ...
 Show Reddit reviews
12. 1.5-Inch Round LED Magnifier 7X
Sentiment score: 1
Number of reviews: 1
2.5-Inch with 7X magnification.Unbreakable and scratch resistant.Great for reading small print, telephone directories, maps, etc.Comfortable grip handle.Built-in super bright LED light.
 Show Reddit reviews
13. Tontec 12V 2A Power Supply Adapter for Raspberry Pi 2 Model B Raspberry Pi B+ Raspberry Pi B Raspberry Pi A Banana Pi
Sentiment score: 1
Number of reviews: 1
Out put : 12V 2000mAInput: 100-240V AC 50/60HzCable length: about 110CMOut put adaptor : 5.5mm x 2.1mmIt can be used with the 7 inch 9 inch Lcd Screen/ touch screen/ high resolution for Raspberry Pi
 Show Reddit reviews
14. USB 3.0 A Male to A/B/C Male Cable Cord 3FT 6FT 10FT Data Wire Charger Printer Laptop Pc (6FT, (A - Male) to (B -Male))
Sentiment score: 1
Number of reviews: 1
Just plug-and-play for keyboards, mice, modems, printers, and other USB peripherals.Supports high speed USB 3.0 (4.8Gbps) devices and is backwards compliant with full-speed USB 2.0, and 1.1 (12 Mbps) and low-speed USB 1.0 (1.5 Mbps).This cable provides a transfer rate up to 4.8Gbps depending upon th...
 Show Reddit reviews
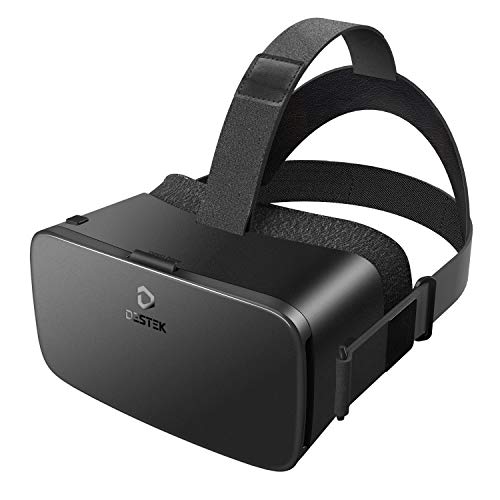
15. DESTEK V4 VR Headset, 103° FOV, Eye Protected HD Virtual Reality Headset w/Touch Button/Trigger for iPhone Xs X 8 7 6/Plus, Samsung s9 s8 s6/Edge Note 9 8, Smartphones w/ 4.5-6.0in Screen
Sentiment score: 1
Number of reviews: 1
★★We were attacked by malicious negative reviews, please check their review history.★★√ 103°VR View - Stand on the summit of Mount Lyell and overlook the surrounding mountains covered by snow; imagine the wind blowing across your face... Our 103 degree field of view makes you feel like an...
 Show Reddit reviews
Headset parts:
Optional positional tracking:
The headset assembly is pretty simple. Place the screen onto something the size of a cellphone to make it easier to take out or even place in another headset. I had to make some cutouts for the cables on the top. I didn't want to have it on all the time so I attached a usb hub on the side with velcro. I use some cable organizers to route the cables around the top and back. The STM32F I just stuck it on the front with double stick tape.
Truthfully the most important part is the software. It does work with windows 10 and is a bit of a pain to get it going. For the tracker you want to follow this guide to flash the firmware. I had to boot ubuntu off a usb flash drive to flash it. I did run into a problem with installing some dependencies which I solved by searching google for an install command until I found one that worked. If done properly the lights on the board will flash clockwise.
Install osvr runtime. Download OSVR-OpenHMD and OSVR-Fusion and move them to the osvr plugins folder (C:\Program Files\OSVR\Runtime\bin\osvr-plugins-0). Next install steamvr and the Steamvr-OSVR plugin. The installation instructions can be found here, You can use the official plugin release or you can use this one that was compiled by dogeitrade that has a functional vr dashboard. Lastly download oculus 0.2.5 sdk which is needed for the tracker.
Now we have to configure everything. To make it simple I'll just paste mine which should work for you. Keep in mind that you can run this on any monitor if you make a display descriptor for it and use a proper render manager config.
osvr_server_config.json
{
"display": "displays/Fiitvn_1440.json",
"renderManagerConfig": "sample-configs/renderManager.extended.portrait.HDKv2.0 - Copy.json"
}
In displays folder Fiitvn_1440.json
{
"meta": {
"schemaVersion": 1
},
"hmd": {
"device": {
"vendor": "TopfoisonLCD",
"model": "DIYRift",
"num_displays": 1,
"Version": "TopfoisonLCD",
"Note": ""
},
"field_of_view": {
"monocular_horizontal": 102,
"monocular_vertical": 102,
"overlap_percent": 100,
"pitch_tilt": 0
},
"resolutions": [
{
"width": 1440,
"height": 2560,
"video_inputs": 1,
"display_mode": "vert_side_by_side",
"swap_eyes": 1
}
],
"distortion": {
"distance_scale_x": 1,
"distance_scale_y": 1,
"polynomial_coeffs_red": [ 0, 1, 0.2 ],
"polynomial_coeffs_green": [ 0, 1, 0.24 ],
"polynomial_coeffs_blue": [ 0, 1, 0.32 ]
},
"rendering": {
"right_roll": 0,
"left_roll": 0
},
"eyes": [
{
"center_proj_x": 0.5,
"center_proj_y": 0.5,
"rotate_180": 0
},
{
"center_proj_x": 0.5,
"center_proj_y": 0.5,
"rotate_180": 0
}
]
}
}
In sample configs folder renderManager.extended.portrait.HDKv2.0 - Copy.json
{
"meta": {
"schemaVersion": 1
},
"renderManagerConfig": {
"directModeEnabled": false,
"directDisplayIndex": 0,
"directHighPriorityEnabled": false,
"numBuffers": 2,
"verticalSyncEnabled": false,
"verticalSyncBlockRenderingEnabled": false,
"renderOverfillFactor": 1.5,
"renderOversampleFactor": 1.0,
"window": {
"title": "OSVR",
"fullScreenEnabled": true,
"xPosition": 2560,
"yPosition": 0
},
"display": {
"rotation": 90,
"bitsPerColor": 8
},
"prediction": {
"enabled": true,
"staticDelayMS": 26,
"leftEyeDelayMS": 0,
"rightEyeDelayMS": 0,
"localTimeOverride": true
},
"timeWarp": {
"enabled": true,
"asynchronous": false,
"maxMsBeforeVSync": 0
}
}
}
For steamvr.vrsettings in C:\Program Files (x86)\Steam\config
{
"collisionBounds" : {
"CollisionBoundsColorGammaA" : 0,
"CollisionBoundsColorGammaR" : 255
},
"driver_osvr" : {
"cameraPath" : "/je_nourish_kinect/KinectV2/semantic/kinect",
"displayName" : "TopfoisonLCD",
"maxTrackingRangeMeters" : 4,
"minTrackingRangeMeters" : 0.5,
"scanoutOrigin" : "lower-left",
"verbose" : false
},
"modelskins" : {
"stage" : "C:\Program Files (x86)\Steam\steamapps\workshop\content\250820\735442946\Animus_128_Memory_Corridor\Animus_128_Memory_Corridor.obj",
"stage_PublishedFileId" : "735442946"
},
"notifications" : {
"DoNotDisturb" : true
},
"perfcheck" : {
"heuristicActive" : false
},
"psmove" : {
"meters_per_touchpad_units" : 0.075000002980232239,
"move" : "touchpad",
"ps" : "system",
"rumble_suppressed" : true,
"select" : "button_9",
"square" : "grip",
"start" : "button_10",
"triangle" : "application_menu",
"trigger" : "trigger",
"use_spatial_offset_after_touchpad_press_as_touchpad_axis" : true
},
"psmove_settings" : {
"psmove_extend_y" : 0.05000000074505806,
"psmove_extend_z" : 0.0099999997764825821
},
"psmove_touchpad_directions" : {
"circle" : "touchpad_left",
"cross" : "touchpad_down"
},
"revive" : {
"PerfHudMode" : 0
},
"steamvr" : {
"activateMultipleDrivers" : true,
"background" : "C:\Program Files (x86)\Steam\steamapps\workshop\content\250820\651288602\holodeckfloor.png",
"mirrorViewGeometry" : "465 75 720 1280",
"playAreaColor" : "#FFFFFFFF",
"showStage" : true
}
}
You can rename the osvr files but just make sure they match the names in the osvr server config files. Set the topfoison screen to portrait mode in display settings. Now that we have everything setup all you have to do is run the oculus configuration utility then close it before running osvr server. Not sure why this is required but it's the only way to get the tracker recognized by osvr. You can check to see if it's working by running osvr tracker. Then run steamvr.
I also added positional tracking with a kinect v2. I didn't want to waste money on the pc adapter so I just did this mod.
You need compatible usb 3.0 ports so you may need to purchase a usb 3.0 pci-e card. Install the OSVR-Kinect plugin. Then use
this osvr server config:
{
"display": "displays/Fiitvn_1440.json",
"renderManagerConfig": "sample-configs/renderManager.extended.portrait.HDKv2.0 - Copy.json",
"server": {
"sleep": 1
},
"drivers": [{
"plugin": "je_nourish_fusion",
"driver": "FusionDevice",
"params": {
"name": "DK1_Kinectv2",
"position": "/je_nourish_kinect/KinectV2/semantic/body1/head",
"orientation": "/je_nourish_openhmd/Oculus Rift (Devkit)/semantic/hmd",
"alignInitialOrientation": true,
"offsetFromRotationCenter": {
"x": 0,
"y": 0.01,
"z": -0.05
}
}
}],
"aliases": {
"/me/head": "/je_nourish_fusion/DK1_Kinectv2/tracker/0"
}
}
Then just repeat what you did before. Start oculus config utility and close it. Then run osvr server. Spread your hands out so that the kinect can see them so it can track your head. You just have to do this at the start so it can recognize your body. You'll notice that the config file include the server sleep command. This halves the polling to the trackers which greatly reduces cpu usage. You can use this on the other config too just make sure to run it through a json validator to make sure there are no errors. Also sometimes the z and x axis get inverted so you have to restart everything.
If you really wish to take it one step further you can add controllers with psmoveservice.
Damn, I forgot I posted this.
But, yeah - I have since updated my shopping list big time, however I am still looking into which headset to get.
I'm thinking either the DESTEK V4 or a form of the VR Shinecon. Already looked into using the Bobo, however I would rather use my own Headphones rather than a built-in pair.
As a note, I don't have a VR-capable phone (Yay, £10 Flip phone), and as such I will be fitting a 5.5" screen in where the phone would normally go. The Bridge Board *should* tuck behind the LCD, and the cable for the HDMI/power adapter board will come out from the sides (where the earphone cable normally fits), with the board itself hot-glued to the front. The entire thing will run through one of two (or three) different programs that I've found, including a full SteamVR driver (I think yours, but I can't quite remember) and Vireio Perception - depending on the game I'm trying to play.
Not entirely sure how well this will work, but theoretically it should be perfectly good to use.
Online! These were recommended to me by another redditor, they work pretty well (there may be better options out there though!)
The plugs come in different sizes, I know a 2.1 x 5.5mm male connector will fit the LCD controller I have.
I don't have this adapter, but it may work for you:
www.amazon.com/Tontec®-Supply-Adapter-Raspberry-Resolution/dp/B00LFBPL7K
it seems to be sold by the same people that I got the LCD controller from, and seems to be what Amazon calls "Frequently Bought Together" when you look at the Amazon LCD controller page:
www.amazon.com/gp/product/B00JOY5PGM
however the cable length is about 110CM or 43.3 inches, thats a little short for VR usage, but you may not find many alternatives with a longer cable, and may have to make an extension cable, I used male and female power connectors like this:
www.amazon.com/5-5mm-2-1mm-Female-Connector-Camera/dp/B005CMP434
www.amazon.com/gp/product/B0058RLD9C
and some wire to give me about 10 foot of cable.
Weird, I looked up the product ultraoptix, cause that's what was shown and found these. Are they the ones on the left?
The ones on the right looked really nice and I want to make sure I'm getting those.
Im using lenses from pocket magnifyers and jewelers tools from amazon
I have something like this:
Bausch & Lomb Watchmaker Loupe, 10x https://www.amazon.com/dp/B000LDG2HQ/ref=cm_sw_r_other_awd_57K3wbAM6ZXZ1
Lenses are a billion percent necessary for a DIY Rift. Along with the fact that you'll have a very small field of view, the software also warps the image for the lenses, therefore it'd be practically useless without lenses.
I can see why your family would think spending 20 bucks on cardboard is silly. Seeing how you don't want to order online, the only other place I can suggest getting a pair of lenses under 10 bucks is your local music shop. Really. Does your family think you like Tool? Because Tool's album "10,000 days" comes with two stereoscopic lenses. Check your local music shops for a new copy of the album with the lenses, and boom, you have your lenses.
Hope this helps!
I take it that it's the usual DIY Rift screen? You may be able to power as the screen's datasheet says IIRC 3.3v to 12v. You could use something like this.
Yeah, the ultraoptix 7x are the same ones that the DK1 uses. I am using http://www.amazon.com/gp/product/B00524H8MC/ref=oh_aui_detailpage_o07_s00?ie=UTF8&psc=1
Or, what if I flashed the EDID for this device, started the program while it was in, and then hot-swapped to the DIY Rift?