(Part 2) Top products from r/DRZ400
We found 21 product mentions on r/DRZ400. We ranked the 68 resulting products by number of redditors who mentioned them. Here are the products ranked 21-40. You can also go back to the previous section.
21. Thick Case Design Bike Motorcycle Phone Mount Handlebar Holder For Any Cell Phones with Thick Case Fit iPhone X XR Xs max 8 8s 7 PLUS Samsung Galaxy S10 S9 S8 Note 10 9 8 Metal Sliver
Sentiment score: 1
Number of reviews: 1
UPDATED LONG CLAW - The Claw have been lengthened, Now Perfect Compatible with all Phones with Thick case like OtterBox, Lifeproof CaseADJUSTABLE WIDTH - Compatible With Most Mobile Phones, you can adjust the width from 50mm to 100mm to fit the cell phone.Can hold 4 to 7 inch phonesMORE STRONG - Alu...
 Show Reddit reviews
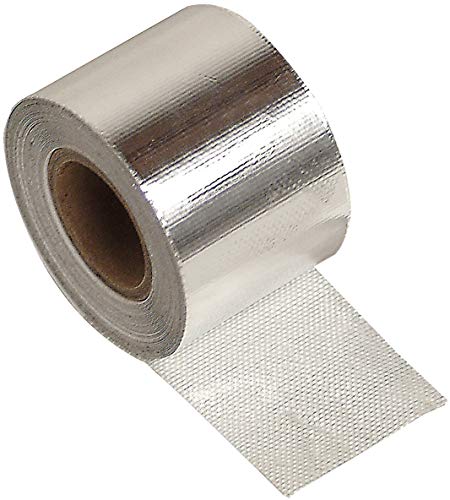
22. Design Engineering 010408 Cool-Tape Self-Adhesive Heat Reflective Tape, 1.5" x 15' Roll
Sentiment score: 0
Number of reviews: 1
fit type: Universal Fit
 Show Reddit reviews
23. DRC Motoled Edge-2 Aluminium Tail Light Holder w/ LED Light Red DRZ400
Sentiment score: 1
Number of reviews: 1
Waterproofed circuit.Detachable lens.Comes with Flasher stays for DRC LED flashers.
 Show Reddit reviews
24. K&S Technologies 12-0055 Off-Road Multi-Function Handlebar Switch
Sentiment score: 1
Number of reviews: 1
The off-road multi-function handlebar switches slim design takes up as little space as possible on your handlebars while still giving you a full set of controlsFeatures off/low/high headlight switch with a blue LED high indicator, a 3-way turn signal switch and a horn buttonSwitch width is 28.5 mill...
 Show Reddit reviews
25. Renthal 609-01-BU Fatbar Blue 1-1/8" Aluminum Handlebar
Sentiment score: 0
Number of reviews: 1
Dimensions - overall width: 802mm, total height: 119mm, rise: 80mm, clamp area width: 105mm, sweep: 54mm, control length: 190mmThe Renthal Fatbar features a tapered outer wall resulting in a 1-1/8 inch (28.6mm) clamping diameter and 7/8 inch (22mm) diameter at the control endsThis profiled wall and ...
 Show Reddit reviews
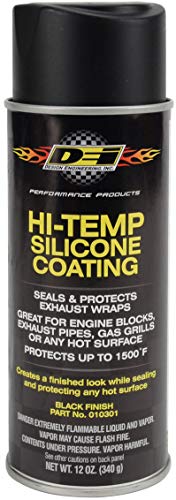
26. Design Engineering 010301 High-Temperature Silicone Coating Spray - Black
Sentiment score: 1
Number of reviews: 1
Lasting protection for any hot surface up to 1500 degrees FahrenheitPenetrates, seals, protects and prolongs the lifespan of exhaust wrapWorks equally well on exhaust headers, pipes, engine blocks, and other applications where coatings are requiredProtection from abrasions, hot oil spills, and road ...
 Show Reddit reviews
27. Acerbis Supermoto Front Fender White Universal Each
Sentiment score: 1
Number of reviews: 1
Universal design can be used on Supermoto bikes for its great styling and aerodynamic looksFit most older and freestyle bikes, too
 Show Reddit reviews
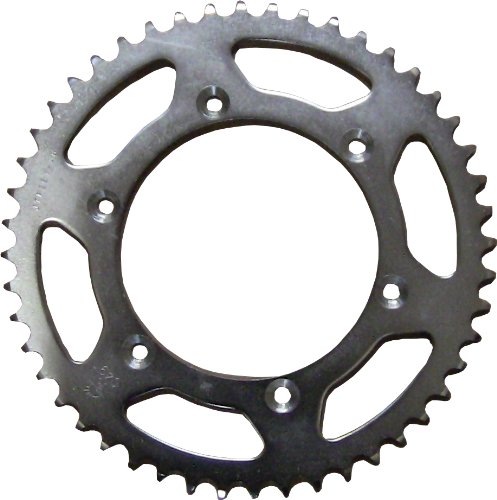
28. JT Sprockets JTR808.41 41T Steel Rear Sprocket
Sentiment score: -1
Number of reviews: 1
Made from C49 high carbon steelHeat treated and hand finished to meet or exceed OEM standardsOutlasts any mild steel or surface hardened sprocket41 teeth steel sprocket
 Show Reddit reviews
29. Pro Taper EVO 1-1/8" Oversized Handlebars - CR High/Black
Sentiment score: 1
Number of reviews: 1
Color: BlackSize: One SizeManufactured to exact rise and pullback specifications and tolerances to provide a consistent and accurate feel4mm computer profiled wall designUnique inner tube coating to resist corrosion
 Show Reddit reviews
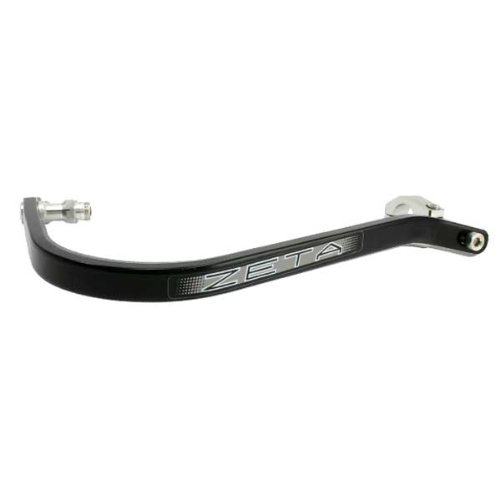
30. Zeta XC Flasher WHITE Hand Shields (Pair) for Armor Handguards
Sentiment score: 1
Number of reviews: 1
XC Protector with a flasher (Removable, orange lens)OEM# ZE72-3410
 Show Reddit reviews
31. Zeta Armor Aluminum Handguards (Pair) for 7/8" Handlebars Black
Sentiment score: 1
Number of reviews: 1
Mounting Bracket included: YesFits on: MotorcycleCompatible Brand: Fits Honda, Fits Yamaha, Fits Kawasaki, Fits Suzuki, Fits KTM, Fits Pitster Pro, Fits Husqvarna, Fits Konker, Fits HusabergColor: BlackMaterial: NA
 Show Reddit reviews
32. Yuasa YUAM62T7B YT7B-BS Battery
Sentiment score: 0
Number of reviews: 1
12 Volt, 6.5 amp-hour, 120 cold cranking amps, maintenance-free batteryTotally sealed and spill-proof - all acid is absorbed in special plates and absorbed glass mat separatorsNo need to ever add waterAdvanced lead-calcium technology hold its specific gravity more than 3 times longer than convention...
 Show Reddit reviews
33. Acerbis 2042690001 Cyclops Black Headlight
Sentiment score: 0
Number of reviews: 1
It can be used on anything from non-fairing bikes to streetfightersExclusive customized design built with nylon, polypropylene, polycarbonate, cast aluminum, and tempered glassHigh beam: 12 volts, 55 watts
 Show Reddit reviews
34. Goodridge BL Banjo Bolts With Built-In Pressure Switch - Single Bleed - 10mm x 1.25 PBL992-32CH
Sentiment score: 1
Number of reviews: 1
Brake light switch banjo bolt replaces OEM when changing master cylinder or using rear set conversionsChrome-plated steel construction
 Show Reddit reviews
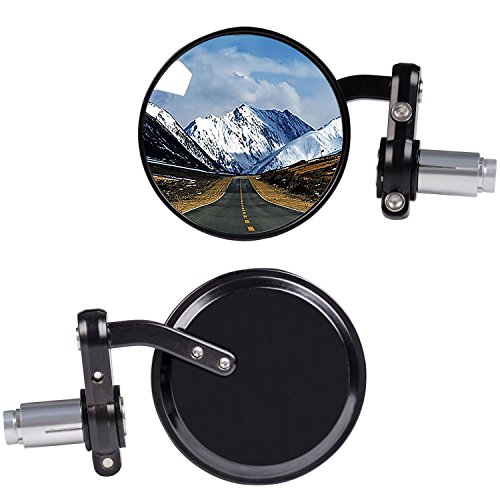
35. KAWELL Rear View Side Mirror Round Bar End Convex Hawk Eye Motorcycle Mirror for 7/8" Handle Bars Fits Most Harley Davidsons Suzuki Honda Kawasaki Cruisers
Sentiment score: 0
Number of reviews: 1
★CLEAR VISION & SAFE DRIVE: 3 inch glass lens, 6061 Billet Aluminum Light Weight Bar End Mirrors,it provides you a high definition and wider vision, easily seeing the upcoming cars and obstacles★BEST ANGLE ADJUSTMENT: Ball-type universal connecting joint, can be 360 degrees rotated, allows you t...
 Show Reddit reviews
36. Kenda K270 Dual Sport Tire - Rear - 5.10-18 , Position: Rear, Tire Type: Dual Sport, Tire Construction: Bias, Tire Size: 5.10-18, Rim Size: 18, Tire Ply: 6, Tire Application: All-Terrain 15992035
Sentiment score: -1
Number of reviews: 1
DOT approvedDesigned for todays high-performance, dual-purpose motorcyclesDeep, aggressive knob pattern has rounded profile for more biting edgesSpecial rubber compound offers great off-road grip without compromising wear on the streetThe use of the tire and other vehicle data and information access...
 Show Reddit reviews
37. Tusk Spark Plug Socket 5/8" (16mm) Hex
Sentiment score: 1
Number of reviews: 1
Special thin wall design for water-cooled 4-strokes with 5/8" (16mm) hex spark plugs.Unique 2 step extension design that can move from a fixed position to a swivel.
 Show Reddit reviews
38. TUSK Compact Control Switch with Headlight Options
Sentiment score: 1
Number of reviews: 1
Compact design – only 1 1/8" wide.Switches for lights, horn, and turn signals.
 Show Reddit reviews
39. Tusk Hydraulic Brake Switch Nissin Brakes
Sentiment score: 1
Number of reviews: 1
Universal brake switch used on machines with hydraulic brakes.Switch replaces the stock banjo bolt in the brake's master cylinder.Nissin brakes have a 10mm x 1.25 thread (Honda, Yamaha, Kawasaki, Suzuki)
 Show Reddit reviews
40. NGK (3521) CR9EIX Iridium IX Spark Plug, Pack of 1
Sentiment score: -1
Number of reviews: 1
Designed specifically for the performance enthusiast, Iridium IX offers extreme ignitability, improved throttle response and superior anti-foulingThe 0.6mm laser welded fine Iridium tip ensures high durability and a consistently stable spark and the tapered ground electrode minimizes electrical quen...
 Show Reddit reviews
Do not buy an SM harness... That is exactly what someone who owns an SM would say (although I own one too).. but, I have both an E and an SM and have done plenty of swapping of parts between the two, i can assure you there are far more differences than you realize and you will not be happy when you are trying to mate up everything You simply just need to add a new extra, more simple harness for street legal applications. Lots of places sell these, but if you are convinced on doing your own I will write something up below.
As I mentioned above.. the SM harness will have neutral light wiring, clutch wiring, kickstand wiring, fan wiring, entire cluster wiring, a different run/stop switch wiring and so on... The harness is ~$250 new.. used will be ~$70 and up before shipping. And, unless you want to buy all the oem bar/lever switches, instrument cluster, and so on you will be cutting all the factory connectors off anyway and buying new ones. So really, you just spent $100 bucks on wires, and now you have a harness tied into your frame with any number of wires that are not used but are still wrapped in with those that are needed. Need I even mention, that there is the level of effort in removing your existing harness to put the new one in. If you haven't done it before, then I reserve the "i told you so" card for when you start thinking you should have just ran new wires. Why rip out all the current working wiring on your bike just to run lights and a horn? You really just need to take your time and snake some new wiring through on top of the existing ones.
What you will need:
A spool set of multi colored stranded wire for $30 https://www.amazon.com/dp/B00N51OO7Q/ref=cm_sw_r_other_apa_ZOwHxbBZEX0R4
black electrical tape
wire loom if you want it.. lots of black tape will work
If you want to get fancy and connect things up nicely, get a handful of universal auto connectors, nice and pricey ones are "deutsch" connectors but spade connectors will work just fine. all the turn signals are 2 pin. the taillight is 3, headlight is 2 pins per light.. (high and low) depending on which you get. Brake light switches are 2 pins each (front and rear). All the relays are typically spade connectors, and there will probably be 6 of these. You will also need 2 for the horn.
Tap into power anywhere after the ignition switch.. so that your lights only come on when you have key-turned.. there is a number of places to do this then run power to your control on the handlebar.Ground will be from all over, best place is the battery though.
Taillight might as well be powered directly from the ignition.. it comes on all the time when the key is turned. Same with headlight, but you will need to switch that between high and low. this takes care of your rear running light.
Typical handlebar control you should get.. i didnt look long and this one may be a bit pricey, but it has all the switching you need. https://www.amazon.com/Technologies-12-0055-Off-Road-Multi-Function-Handlebar/dp/B000IOO4KK/ref=pd_sim_263_33?ie=UTF8&dpID=414eakRFE3L&dpSrc=sims&preST=_AC_UL160_SR160%2C160_&psc=1&refRID=0XT37ZA8388WFWNJSQQK
You can use 2 relays for the whole setup.
For the headlight.. http://www.oreillyauto.com/site/c/detail/CTI0/84601/N0381.oap?ck=Search_N0381_-1_4631&pt=N0381&ppt=C0335#compatibilityTab_ will work fine. the switch i made above goes before the relay and has two wires coming out of it(one high, one low).. and one common going in.. Connect a +vdc going into the common.. the other two outs will be going to relay.. one for high beams on 87, the other for lows/running + on 86. ground goes on 85. Headlights done.
Flasher relay for your blinkers.. .. http://www.oreillyauto.com/site/c/detail/NOV0/EP34/01546.oap?year=2001&make=Suzuki&model=Swift&vi=1375130&ck=Search_relay_01546_1375130_4631&keyword=relay&pt=01546&ppt=C0117
This also goes before your turn signal switch.. the relay has a power in.. B, and then a ground.. E, then a flashing VDC out, L. L goes to the handlebar common input and the controls have 2 going out.. one goes to Front & rear Left.. the other Front and Rear Rigtht. each turn signal has a ground as a second wire. here is a simple picture.. http://i281.photobucket.com/albums/kk204/freddyflatfoot/Signal0_zpsd66b34a5.jpg.. for the relay i linked, the B is X in the pic.. L is L and the E is for ground or P in the picture. turn signals should work now.
The annoying part of all this will be the brake switches... E model frames do not have the welded bolt holes for the S/SM switches for the rear. Also your front brake levers do not have bolt holes for switches. Yet again, another failure point if you go with an SM harness. To get these working, I would go with banjo bolt pressure switches for both front and rear.. just need to make sure that you get the right size to replace the oem banjo bolts. Here is an example.. (may not be the right size)..https://www.amazon.com/dp/B000GTV0RC/ref=pd_lpo_sbs_dp_ss_2?pf_rd_p=1944687542&pf_rd_s=lpo-top-stripe-1&pf_rd_t=201&pf_rd_i=B0039ZTQEO&pf_rd_m=ATVPDKIKX0DER&pf_rd_r=G97BJBWZ2KJBAABS9H7T If you dont go with banjo bolts, you need to rig something up for spring activated switches on the factory E levers, which dont have any mounting points, unlike the SM models. Once you do this, you will run two grounds to the brake light. +vdc will go directly to the light, the two grounds will go to the light via the two switches. When either one of the brake switches is hit.. it completes a path to ground and the light will come on. Brakes are only annoying because of the need to refill your brakes. (good opportunity for steel braid lines! if you wanted them anyway).
The horn works just like the brake.. power to the horn, ground through the momentary switch built into the controls.
Put a fuse or (multiple if you prefer) inline for the wiring you just.. somewhere between the ignition and the components.
Your last bit you need to figure out is a speedometer, and you could get an S/SM cluster to make it easy.. except on money.. but a Trail Tech Endurance is much cheaper ($89.99 new) than a used factory instrument panel and comes with the wheel sensor you need. If you get the striker or vapor you can get a sweet looking indicator panel to go over it that will give you turn signal indicators, and so on (extra wiring needed though). Trail Techs are accurate once wheel speed is set correctly and they are really.. really easy to install. So much that KTM/Berg/Husky uses the same reed switches mechanism for speedo function. If you do this, remove the old speedo cable, plug the hole in the stock wheel sensor up with a rubber plug or epoxy(if you never will use it again) and then leave the sensor there as a spacer for your wheel. I think some sites sell a spacer to eliminate it.. I cannot remember.
Thats it.. You would have horn, signals, headlights, taillights/ brake lights, speedo and you didnt mess with your factory wiring one bit, which means the only thing that will possibly NOT work when you are done is your lights or horn.
I could try to draw up a crude wiring schematic if you really need, or I can answer questions as you do it if you feel it is something you want to try. Either way, I have faith most people can figure this out with some guidance from the forums, youtube, and google.
The DRC Edge tail light seems to be pretty common. That's the integrated one with an upgraded circuit board but the one that's just a tail light can be bought here. The Acerbis supermoto fender seems to be popular for the front. My friend has a pair of these Zeta hand guards with turn signals that I really like. As far as racks, my favorite is the b&b rack but they're based out of Australia. Any all metal shift lever such as this or this will probably help with black marks from the rubber on the stock one. I have a Corbin seat from the previous owner and I don't really like it much more than stock. I'd probably get a Seat Concepts or a Renazco. As far as foot pegs, I had a bike with IMS pegs and I liked those for the short time I had it.
Unfortunately, for some reason, the third hose is included in the airbox microfiche, not the crankcase one or whatever one the oil return tank is located in. Found this out when I was repairing mine. Check it out. It connects on top of the large rear carb boot (#6, sorry, not the airbox. Technically called the outlet tube :P ) with a little plastic L piece.
Parts 11, 16, and 17 is what connects to the oil return tank.
I would use something higher heat resistant. Air duct material is usually only rated for about 180° degrees Fahrenheit radiant heat. This and related material is rated for 2000° F radiant, and like 400° F direct contact I believe.
They also have a black spray on coating. This would look perfect I imagine. Give it a couple coats, and I'm sure it'll protect it just as well.
DEI stuff is sold in O'reilly's, Pep Boys, etc. if you can't wait and don't mind paying a couple bucks more than Amazon Prime.
Any tape or sealant, make sure the oil return tank is SUPER clean. Any residual oil (oil in plastic even) can make adhesives not want to stay attached.
I bought [this one] (https://www.amazon.com/Tusk-Compact-Control-Switch/dp/B0039ZMOCA/ref=sr_1_fkmrnull_1?keywords=tusk+compact+control+switch&qid=1554751995&s=gateway&sr=8-1-fkmrnull) for my DRZ400E. It isn't plug and play, but wiring these things is straightforward. For the price it's pretty good, but the OEM switch is better quality. My next suggestion would be to find an OEM switch on a bike you like and retrofit it.
I did this to my 2001 E last year. I used this kit: https://www.amazon.com/gp/product/B00RNI4QIE/ref=oh_aui_detailpage_o02_s00?ie=UTF8&psc=1 It was easy wires to the battery and wires to the head light everything else is plug and play. The DRZ already has a high low beam bulb you just have to play with the three wires coming out of the headlight assembly until you figure which is high, low and ground. Other than that, it is tucking wires along the existing harness until you get to the rear. Remove the stock LED taillight and drill some holes to hold on the new light and blinkers. Disclaimer: you will drill holes in the tail fender and probably you headlight housing. I would also buy an additional tusk brake switch: https://www.amazon.com/gp/product/B0039ZTQEO/ref=oh_aui_detailpage_o01_s00?ie=UTF8&psc=1 to replace the bolt on your front brake lever. This will light up your brake light whether you use the front or back brake. Also this kit requires that you turn it on/off manually (easy switch on the handle bars), but you could wire it in to the ignition I just never did. Bottom line is that it is very easy. took me about 3 beers, that's one evening in normal time.
ProTaper -CR High Bend Bend with a 1-2" riser.
Mind you, standard bar size is 7/8", the fatter bars are 1 1/8" so if you up size you'll need to make sure you get the adaptor for the mount etc... But everything else should just fit right on, recommend getting new grips.
I bought this and it works great
https://www.amazon.com/gp/aw/d/B0039LB8PI/ref=mp_s_a_1_2?ie=UTF8&qid=1510099229&sr=8-2&pi=AC_SX236_SY340_FMwebp_QL65&keywords=tusk+spark+plug+socket&dpPl=1&dpID=31hdTR5ZzbL&ref=plSrch
I picked up this phone mount for my iPhone XR wrapped in an Otterbox Defender. It works well. Still have my phone. Had to use a strip of card stock and some masking tape to get the handlebar mount thickness right -- the plastic rings it came with were not large enough. I mounted it all the way left next to the bar clamp. My phone covers about half the dashboard, but I can easily still see the speedometer half.
I recently installed This Yuasa battery in my wife's DRZ, it works fine.
Its these bar ends:
https://www.amazon.com/gp/product/B002GTKAHQ/ref=ppx_yo_dt_b_asin_title_o03_s00?ie=UTF8&psc=1
You can take the clamp off of the bar end portion and clamp them directly to your handle bars.
I picked up the acerbis Cyclops.
Cyclops
Installed:
-Trail Tech 752-119 Vapor computer
-FMF PowerCore 4 exhaust
-JD rejet 39mm FCR carb
-Aluminum skid plate
Purchased (will install):
-Kenda K270 (3.25-21 front, 5.10-18 rear)
-JTR808.41 41T Steel Rear Sprocket
-DID 520VX2GB-110 Gold X-Ring Chain with Connecting Link
-MCCT, red billet
-Silicone coolant hoses
-FMF PowerBomb header
-Kick Start V162
-2011 DR-Z400S subframe
-2-port USB charger / voltmeter
-Weego JSPT524 Powersports Tether
Need to do:
-Free power mod
-Loctite clutch bolts and stator bolts
Cargo, haven't bought anything here yet:
-PMR rear rack and sissy bar.
Haven't decided between side racks:
-Option 1 - metal looks sturdy but has just 2 mounting points
-Option 2 - great that it attaches around back for extra stability, not sure how many actual mounting points it has
-Option 3 PMR again, I like that they seem to hug the bike well but not sure if metal panniers can be used, or just bags. And in fact these only seem to have 2 mounting points as well... what's the weight capacity on any of these setups if they all only have 2 mounting points?
Still researching:
-SM footpegs or similar wide option
-LED headlight bulb
-Steel brake lines
-Windscreen
-What the hell taillight I have and where to find a flat metal sheet to get my license plate to mount on it, since the existing metal plate is broken
-Ceramic coating for FMF PowerBomb header
-Ceramic wheel bearings link link link. Expensive, but would be neat if price were no object. Will be doing mostly street riding.
-Lithium battery or capacitor - this looks appealing, and ThumperTalk carries a capacitor that would cut down on weight but would mean no electric start. I have a kick start kit though so maybe I want to live without a battery, not sure.
-Iridium CR9EIX plug
-Tool kit in one of those black plastic canisters at the rear of the bike on the left, opposite the exhaust tip
-Seat Concepts seat
-Find passenger pegs & mounts to add to the S subframe
Frivolous but tempting:
link
link
link
link
link
link