(Part 3) Top products from r/HomeImprovement
We found 128 product mentions on r/HomeImprovement. We ranked the 6,507 resulting products by number of redditors who mentioned them. Here are the products ranked 41-60. You can also go back to the previous section.
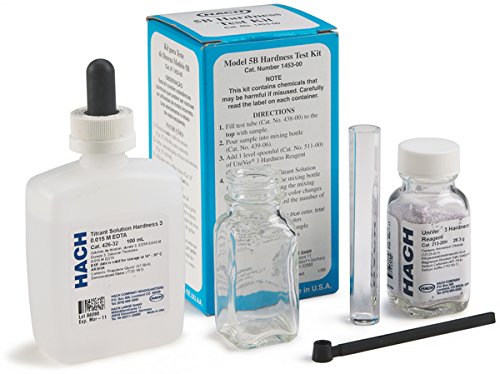
41. Hach 145300 Total Hardness Test Kit, Model 5-B
Sentiment score: 1
Number of reviews: 6
Water hardness is caused almost entirely by calcium and magnesium ionsHardness increases soap consumptionHardness test kits include the inexpensive Models 5-B and 5-EP
 Show Reddit reviews
42. Lutron MA-LFQHW-WH Maestro Fan Control and Dimmer Kit, White
Sentiment score: 4
Number of reviews: 6
Only works with incandescent/halogen bulbs and is not compatible with CFL/LED bulbs.Sets and recalls 7 light levels and fan speeds. Not for use with bathroom or exhaust type fans. Control your fans with no pull chains, and dim your lights all from one wall controlInstalls with almost all existing wi...
 Show Reddit reviews
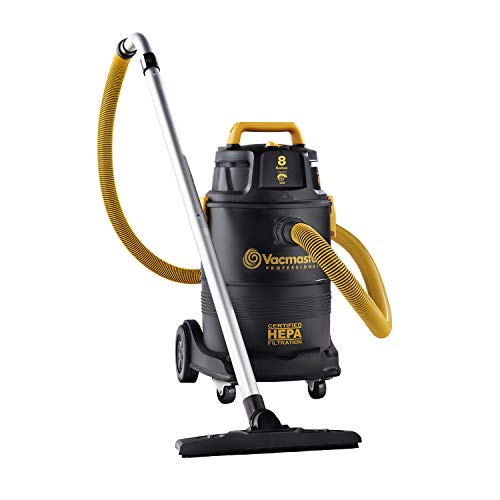
43. Vacmaster Pro 8 gallon Certified Hepa Filtration Wet/Dry Vac
Sentiment score: 5
Number of reviews: 6
8 Gallon* Crush Proof Polypropylene TankCertified HEPA System (99. 97% efficient on . 3 microns)2-Stage Industrial MotorWaterlift: 78 InchCFM 125 @ 2-1/2 In. Orifice.Cord Length: 30 Ft
 Show Reddit reviews
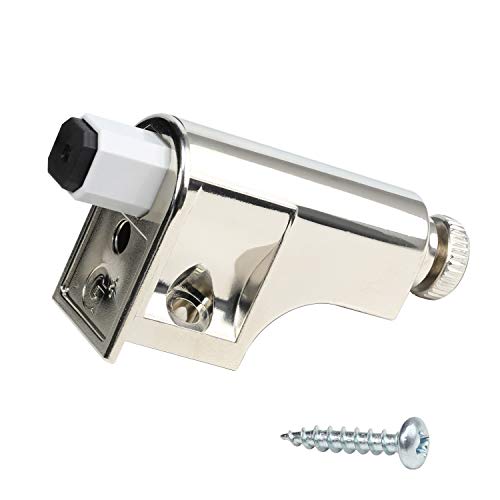
44. Rok Hardware 25 Pack Soft Close Damper for Cabinet Doors/Compact/Soft Close Adapter/Hardware/Nickel/Hinge
Sentiment score: 5
Number of reviews: 6
Instantly allows cabinet doors to close smoothly and quietly. Brushed Nickel blends well with the hinge.Works for face frame cabinets on all door overlays & frameless cabinets on full overlay doorsEasy to mount in the corner of the cabinet. WORKS FOR CABINETS WITH FULLY CONCEALED SELF-CLOSING HINGES...
 Show Reddit reviews
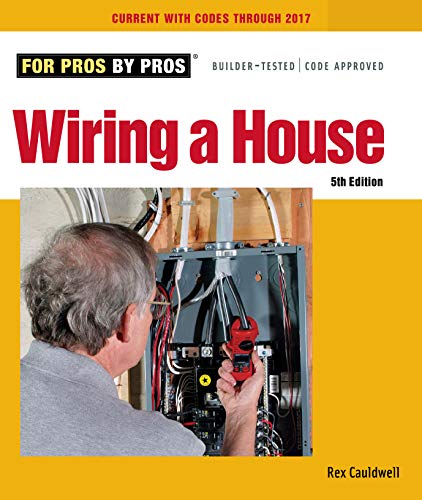
45. Wiring a House: 5th Edition (For Pros By Pros)
Sentiment score: 4
Number of reviews: 6
Wiring a House
 Show Reddit reviews
46. Vastar 3 Pack 19.6 Inch Drain Snake Hair Drain Clog Remover Cleaning Tool
Sentiment score: 2
Number of reviews: 6
3 pack of plastic plumbing snake drain auger19. 6" flexible barbed wand can easily grab & remove clustered hair, food, garbage, and other obstructions easilySoft enough to bend in many kinds of strainers and pipes, great for kitchen, bathroom & utility sinks, bathtubs and showersGreat drain tool for...
 Show Reddit reviews
47. Duck Brand Indoor 10-Window Shrink Film Insulator Kit, 62-Inch x 420-Inch, 286216
Sentiment score: 2
Number of reviews: 5
Reduce your energy costs by insulating your windowsCrystal clear film heat shrinks to seal out drafts and coldContains 62 x 420" of crystal clear film and 1/2-inch by 168-feet (2016") roll of double-sided tapeHelps increase energy efficiency - Home Smart and Earth FriendlyKit insulates ten 3' x 5' w...
 Show Reddit reviews
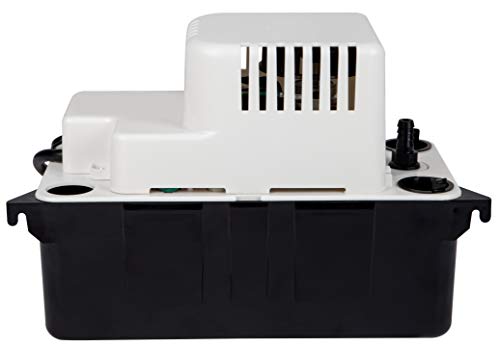
48. Little Giant 554425 VCMA-20ULS Condensate Removal 1/30 HP Pump with Safety Switch
Sentiment score: 2
Number of reviews: 5
CONDENSATE PUMP: Little Giant VCMA-20ULS (554425) 1/30HP Condensate removal pump features safety switch, ½ gallon ABS plastic tank and 6ft power cord.AUTOMATIC CONDENSATE PUMP: Little Giant VCMA Series is ideal for collecting, detecting and the automatic removal of condensate from air conditioning ...
 Show Reddit reviews
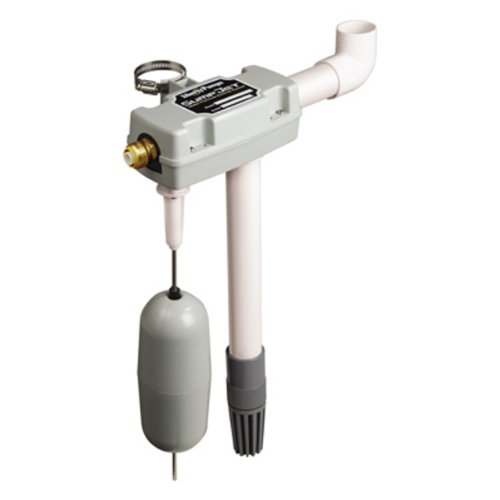
49. Liberty Pumps SJ10 SumpJet Water Powered Back-Up Pump, GRAY
Sentiment score: -1
Number of reviews: 5
Made In AmericaMECHANICAL COMPONENTSCommercial Brand: LibertyPackage Dimensions: 18. 0" L x 18. 0" W x 21. 0" H
 Show Reddit reviews
50. DEWALT 20V MAX Cordless Drill Combo Kit, 2-Tool (DCK240C2)
Sentiment score: 2
Number of reviews: 5
Ergonomic design: Lightweight tools designed to fit the user’s needsIncreased Visibility: The DCF885 features a built in Led with 20 second delay after trigger releaseIncludes: (1) DCD771 drill/driver, (1) DCF885 1/4 inches impact driver, (2) 20V Max Lithium Ion 1.3 Ah battery packs, 20 volt max c...
 Show Reddit reviews
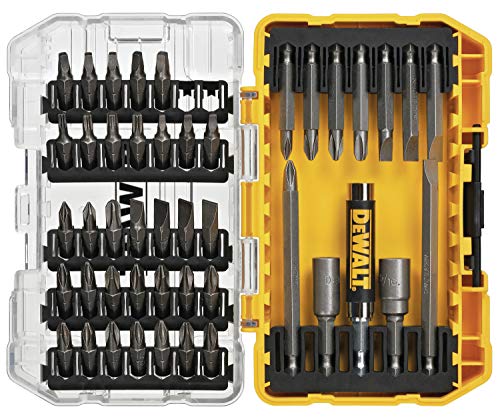
51. DEWALT Screwdriver Bit Set with Tough Case, 45-Piece (DW2166)
Sentiment score: 2
Number of reviews: 5
Value: Dollar 40 value vs. purchasing separatelyBit retention: Tough case container bit retention system keeps bits secureMagnetic drive guide: Magnetic drive guide reduces stripping and wobblingBit fit: Includes 12 double ended bitsBit tip count: 54 total tips. Clip latch for secure closingSteel bi...
 Show Reddit reviews
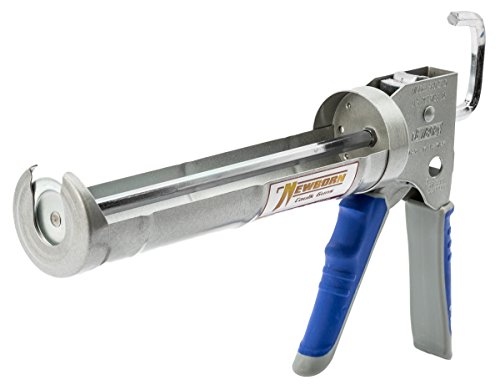
52. Newborn 930-GTD Drip-Free Smooth Hex Rod Cradle Caulking Gun with Gator Trigger Comfort Grip, 1/10 Gallon Cartridge, 10:1 Thrust Ratio
Sentiment score: 3
Number of reviews: 5
Steel half-barrel (also called cradle) frame caulking gun for 1/10-gal. cartridgesThrust ratio of 10:1 for use with low viscosity materialsSmooth pressure rod requires less force and is quieter than a ratchet-style pressure rodRod retracts after each pull of the trigger to help prevent drippingHandl...
 Show Reddit reviews
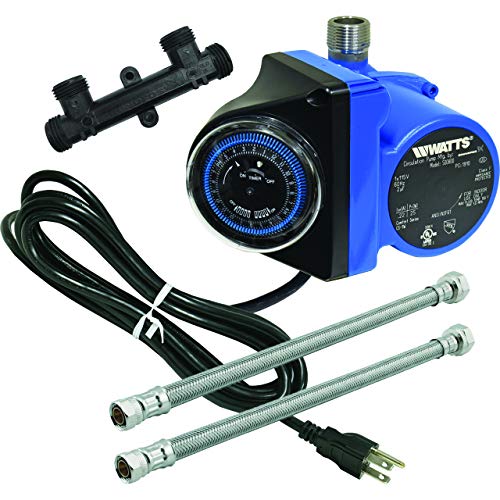
53. Watts Premier Instant Hot Water Recirculating Pump System with Built-In Timer
Sentiment score: 0
Number of reviews: 5
WATTS RECIRCULATING HOT WATER PUMP: Provides hot water at every faucet or shower when needed, eliminating wasted water, 0.5 inches bypass value.BEST SELLING RECIRCULATING SYSTEM: Conserve up to 15,000 gallons of water per year. Save up to 10% of your water bill. It costs only $0.05 per day to operat...
 Show Reddit reviews
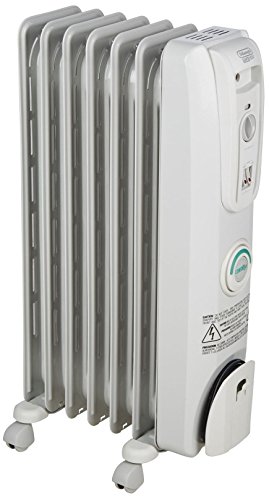
54. De'Longhi Oil-Filled Radiator Space Heater, Quiet 1500W, Adjustable Thermostat, 3 Heat Settings, Timer, Energy Saving, Safety Features, Nice for Home with Pets/Kids, Light Gray, Comfort Temp EW7707CM
Sentiment score: 3
Number of reviews: 5
Lower energy bills by heating only the room you’re in, you can lower your thermostat and lower your energy bills.No assembly required only De’Longhi has patented SmartSnap pre-assembled wheels that require no assembly and make it easy to move from room to room.Comfort temp technology: Cuts your ...
 Show Reddit reviews
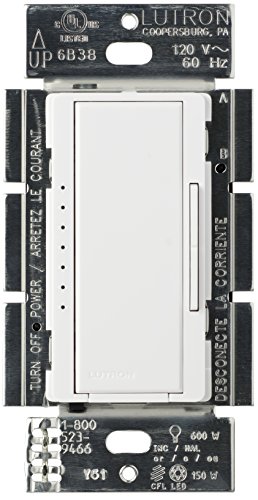
55. Lutron Maestro LED+ Dimmer for Dimmable LED, Halogen and Incandesent Bulbs | Single-Pole or Multi-Location | MACL-153M-WH | White
Sentiment score: 2
Number of reviews: 5
Tested on 1, 000s of bulbs and dozens of brands for flicker-free dimming. For list of recommended bulbs view "Technical Specification" belowProvides over 250 lighting levels so you can create the perfect light for any activityWorks with up to 150 Watts of dimmable LED/CFL bulbs or 600 Watts of Incan...
 Show Reddit reviews
56. Wagner Spraytech 0282018 1-Gallon Wallpaper Steamer for Wallpaper Removal
Sentiment score: 2
Number of reviews: 5
Electric wallpaper steamer; uses only tap water, no chemical messEasy way to remove vinyl, painted, and multiple layers of wallpaperLightweight durable plasticIncludes reservoir and 8-by-11-inch steam plate, 6-foot power cord1 gallon reservoir; 5.6 pounds; 1-year home-use warranty
 Show Reddit reviews
57. Compare-N-Save 016869 Concentrate Grass and Weed Killer, 41-Percent Glyphosate, 1-Gallon , White
Sentiment score: -2
Number of reviews: 5
Rainproof in 2 hoursVisible results in as little as 2 to 4 daysContains 41-percent glyphosateCovers over 25,000 square feetMakes up to 85 gal. of ready-to-use spray. Note: Packaging may vary
 Show Reddit reviews
58. Gardus RLE202 LintEater Rotary Dryer Vent Cleaning System, Removes Lint & Extends Up to 12’ with 4 Flexible 3' Rods, Includes Bonus Lint Trap Brush, Blockage Removal Tool, Vacuum & Dryer Adapters
Sentiment score: 1
Number of reviews: 5
Most valuable tool you can own to ensure the safe operation of your clothes dryer; Reduce drying times and save money on utility bills while ensuring the safety of your homeEasy to use with your cordless drill and provides a means for regular cleaning of your dyer vent system; Included adapters enab...
 Show Reddit reviews
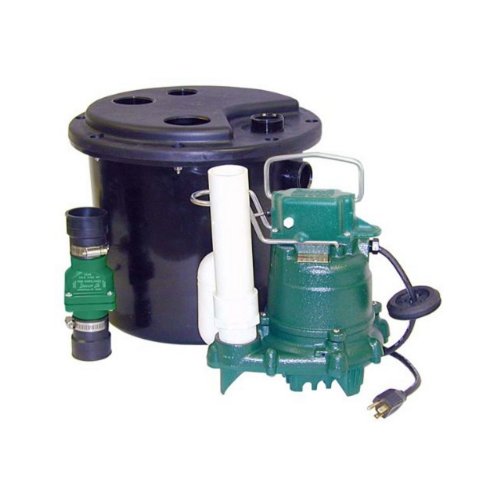
59. Zoeller 105-0001 Sump Pump, 12.50 x 14.50 x 14.50 inches, 19 Pound
Sentiment score: 2
Number of reviews: 5
Automatic, float operated mechanical switch 115V/1 Ph1-1/2" NPT discharge9 ft. UL listed 3-wire cord and plug1550 RPM, 60 Hz on 50 series modelsNon-clogging vortex impeller
 Show Reddit reviews
60. Hyde Tools 09165 Dust-Free Drywall Vacuum Hand Sander with 6-Foot Hose
Sentiment score: 0
Number of reviews: 5
Drywall hand sander attaches to any wet/dry vacuum for sanding without dust throughout your worksiteProtects furniture, floors, electronics-and your lungs-from invasive drywall dustEasyClamp system allows sanding screen replacement quickly and easilyComes with 6" hose, coupling adapter that fits all...
 Show Reddit reviews
As an old house lover (and fellow old house owner), I'm begging you to please restore those windows! It can be done!
I'm making this response extra long and detailed since this question comes up from time to time. Hopefully it can be a resource for others.
But I say this as a guy who bought a real wreck of a house where the previous owner had let everything go. We needed to fix all 45 openings at once as part of a major rehab, and after 6 weeks of effort, about $3000 of experimentation (including taking a week off work and hiring two people to help me), I finally gave up and put in vinyl windows. It completely broke my heart, and my house is uglier because of it. But sometimes, an old window is just too far gone to save. But in that process I learned a lot and I'd like to share a few things.
OK, on to your questions.
General resources and tools I found useful:
I am currently dealing with this. I had to take down a small portion of a plaster ceiling and dust covered the entire house. I also did some small wall repairs that caused a layer of dust on every surface of my house. I went on a research tear (internet and talked to every expert I know as I work in the hvac industry). Here’s what I learned and what I now do to protect me and my family:
First, some facts:
With that, when you’re on the job, here’s what you do:
This 3M face mask with 2091 filters will protect you:
https://www.amazon.com/dp/B00OZZZ7JU
If you buy filters other than 9021 make sure you read the specification to ensue that they’re rated for particles at least as small as .3 microns.
Vacmaster 8 Gallon HEPA
https://www.amazon.com/dp/B007ULBA4W
It’s rated for the type of work we’re doing. You can attach a sander to it and it’ll suck up most of the dust before it hits the floor/air. It’s not 100%, but It’s way better than 0%. It’s also the most affordable one I could find.
Here’s a short video on what negative air looks like:
https://youtu.be/JvAOVT9CVVY
Now, when you’re done with the work, it’s time to clean up. Here’s the safest way to do that:
Hope this helps!!
Edit: changed when asbestos was banned from 1978 to the 1970s as it was phased out until 1980.
Dropping this here just in case..
Obviously, actual soft close hinges are ideal, but we hope to redo our kitchen in the next few years, so I didn't want to go thru the hassle or cost of replacing all the current hinges. So I installed these instead: https://smile.amazon.com/Rok-Hardware-Cabinet-Compact-Adapter/dp/B00J9XB6BQ
They work much better than I expected.
Again, yes, hinges are far better. But these are super easy on time and money. Cheers.
Tech: Smart plugs / switches. I'm partial to Wemo and second to TP-Link. Could get a few plugs for under $100. Pair them up with logitech pops someday (the starter kit is $100 right there, I'm just mentioning it because the two work well together.
Universal fan controllers, I can't speak to any brand/style I could recommend. You would have to research that one, but something like this https://www.lowes.com/pl/Ceiling-fan-remote-controls-Ceiling-fan-parts-accessories-Ceiling-fans-accessories-Lighting-ceiling-fans/4294395598 I personally like the wall mount ones with a remote. So you can use the wall switch as normal and the remote as a bonus.
​
Non Tech:
Easy off toilet seats. Ever take a seat off before? Years of poo under the seam. Something like this: https://www.homedepot.com/p/BEMIS-Lift-Off-Elongated-Closed-Front-Toilet-Seat-in-White-1500EC-000/100120881
Pair it up with a plunger that doesn't suck. IE buy an expensive one that won't get stuck and splash poo water all over your walls because you have the $10 cheap one from wally world.
​
Garbage disposal. You can get a little badger for $100. But that's gonna end up being a DIY project to keep your $100 budget.
Soft-close cabinet door dampers. Something like this: https://www.amazon.com/Rok-Hardware-Cabinet-Compact-Adapter/dp/B00J9XB6BQ Again, you're on your own to research a brand/style. But they sell them at big box stores too.
​
Edit:
Bathroom fan timer switch or humidity based. Either get one with button for 10 20 30 whatever min run time, so you can let your bathroom vent humidity out after a shower. Or one that auto turns on at X% humidity. All sold in big box stores.
Thanks for the update! The discharge pipe is 1.5 inches, pit is about 22 inches deep, 18 inches in diameter. The current pump has worked fine for ~10 years now, but the power outage ruined that streak. I just figured since the 3/4 was essentially the same price as the comparable 1/2 I would go with that, didn't realize the other factors to consider that you mentioned.
​
I'm now debating on whether to go with a battery backup combo unit or water powered backup. Someone else recommended the Wayne WSS30V 1/2 HP Combination System which seems like it may be the perfect replacement. Looks like it recommends a 75Ah deep cycle battery. The one from Wayne is $270, but I found this Duracell Ultra Deep Cycle Battery for 12V Sump Pump for about ~$100. Would this be sufficient to use? That would put the system at about $550.
​
The other option would be to get a solo 1/2 HP pump like this Wayne CDU800 and Liberty Pumps SJ10 water powered backup. Comes out to about $350, but that doesn't count for having a plumber install the Liberty, and I have no idea what that would roughly cost, maybe you would know?
​
I think these are my two best options, just unsure on which route to go.
Yes that is safe. But you need a HEPA vacuum that is certified under the EPA's RRP program. Many "HEPA" vacuums leak air that is contaminated with the exact stuff you're trying to filter out, so the certified part is important. This one is the best deal you'll find -- there's a used "like new" one right now for $185. That's exactly what I got and it works great.
I can't speak to plaster, but I didn't know much about drywall until I owned a house. A project like this is the perfect time to start working on those skills. Every home owner (with drywall) should have some hot mud and a drywall knife in the garage. And I highly recommend one of these vacuum sanders as well.
Get a real hardness test first. Money well spent.
Hach 145300 Total Hardness Test Kit, Model 5-B https://www.amazon.com/dp/B008FM7WLU/
Then get a water softener. Put it after your filters. They are easy to install if you have done any plumbing work. I got this one, it’s great (edit: size your water softener based on your hardness test! I had 19 grains hardness. You want to run a week between regen, give or take, with a 20% buffer. 19 grains x 4 people x 75 gallons per day x 7 days x 1.20 buffer is 47,880. I got a 48,000 grain softener):
Metered water softener with 3/4" Fleck 5600SXT control, 48,000 grain capacity with by-pass valve https://www.amazon.com/dp/B000GBZ2P6/
My water was quite hard, around 19 grains. The softener fixed that, but made it taste like mud.
So I got an RO system and plumbed it to my fridge only. That was easy too. Took me a couple hours total.
I got this one:
iSpring RCC7 High Capacity Under Sink 5-Stage Reverse Osmosis Drinking Water Filtration System and Ultimate Water Softener- WQA Gold Seal Certified https://www.amazon.com/dp/B003XELTTG/
It’s been a trouble free year now with great tasting water. The showers are a bit slipprier, yes, but my kids are less itchy, and gross shit doesn’t grow over every water source in my house any more. Worth it.
I had really good luck with a wallpaper steamer. It heats the water really hot, in a plastic square. You hot it in one place for 20-30 seconds, then scrub with a cleaning liquid. It's not the fastest process, but it worked really well. One of these things:
https://www.amazon.com/Wagner-0282018-Steamer-1-Gallon-Wallpaper/dp/B0009XEL4O
It's not a process you really want to repeat, so I concur with sealing it well, once it's clean.
I installed this switch for my kitchen fan/light combo that only has one set of wires going to the switch: https://www.amazon.com/gp/product/B000MOIDA8
There is a receiver that goes up in the canopy of the fan, and the wall switch works like a wired remote control. As far as I understand, it is constantly passing power to the control module, then uses the neutral to send commands from the switch that the module interprets and does whatever you say. It has independent power and dimming/speed settings.
Unlike a remote, there aren't any batteries, it always works, and it looks like a normal switch and not like you just stuck your TV remote on the wall.
A few things to note about it:
That's quite the situation. Quotes to undo what's done are probably going to be huge and finding someone willing to sort it all back out will probably be even harder.
I would take this opportunity to install an HVAC system that is much more efficient, or at least start planning for it. Radiant ceilings are woefully inefficient. Mini splits are a great option if the home is older and ductwork would be difficult for Central air.
In the meantime you could get a handful of these to buy yourself some time
https://www.amazon.com/DeLonghi-EW7707CM-ComforTemp-Portable-Oil-Filled/dp/B000TGDGLU/ref=mp_s_a_1_3?ie=UTF8&qid=1542718836&sr=8-3&pi=AC_SX236_SY340_FMwebp_QL65&keywords=radiator+heater&dpPl=1&dpID=41tj-HqpmzL&ref=plSrch
Thing to remember is electric heat is only as much as the wattage. So a 1500w radiator will be able to make the same amount of heat as a 1500w fan element heater no more no less it's just how it does it. I like the radiators because once they're warm they keep the heat retained and cycle as needed, also no noisy fans. If you go this route just be sure that your home electrical is up for the task of running multiples of these, find out which outlets go to which breakers and really only put one per.
Good luck, as far as I know there's really no quick fix for what you got going on so try and do it right and not worry about it again as long as you live there
This vac is the one I have and is half the price.
https://smile.amazon.com/gp/product/B007ULBA4W/ref=oh_aui_search_detailpage?ie=UTF8&psc=1
I also have an old house and a young kid (7, 4, 2). My toddler has gotten a positive lead test after living here for about a year. I work from home, so he's basically here with me 24/7. 7 micrograms per deciliter, which is two over the current limit. For what it's worth, the old limit was 10 (changed in 2013) and neither the Department of Health or his pediatrician is particularly concerned.
He's getting a second test in a couple of weeks, which will be about 3 months since his initial positive test.
I had knob and tube replaced, which involved cutting into all the walls. Dust was everywhere and nothing was sealed off when the cuts were made in the walls. A cleaning service did come out and clean the entire house after the renovation was complete, which took 3 full days. Since the positive test, I've hired a cleaning service to come out every other week, since one of the main recommendations is to wipe down surfaces that might be contaminated with lead dust.
I don’t have any great suggestions for fixing the doors, but as far as installing slow close hardware I like these:
Rok Hardware 25 Pack Soft Close Damper for Cabinet Doors / Compact / Soft Close Adapter / Hardware / Nickel / Hinge https://www.amazon.com/dp/B00J9XB6BQ/ref=cm_sw_r_cp_api_221-Bb03M09E0
I installed them probably 3 years ago and they still work great, for a fraction of the cost of replacing the hinges with soft close hinges.
If it is paper-like, get a wallpaper remover (like this: http://www.amazon.com/Wagner-0282018-Steamer-1-Gallon-Wallpaper/dp/B0009XEL4O/ref=sr_1_1?ie=UTF8&qid=1418328051&sr=8-1&keywords=wagner+wall+paper+steamer) and let it do it's thing on small sections at a time.
My Fiancee and I (really her though :) ) removed lots of glued-down linoleum paper backing after scraping up the top part. Worked great, just took a while with the steamer and a good putty knife.
I would get this:
https://smile.amazon.com/DEWALT-DCK240C2-Lithium-Driver-Impact/dp/B00IJ0ALYS/
I have that set and I use the impact driver 90% of the time. It is lighter, smaller (easier to fit in tight places) and more powerful. I pretty much only use the "regular" driver from the set when I have a special bit that won't work with the impact driver.
Edit: I actually just realized I have this brushless impact driver:
https://smile.amazon.com/DEWALT-DCF887B-Li-Ion-Brushless-3-Speed/dp/B0183RLW8A/
but the "regular" driver from that set. Brushless generally gets a bit more life out of a battery, not a ton of other difference.
Also, you can do most exterior work (drill into brick, concrete, etc) with the impact driver and the correct bit(s) (or the other driver and correct bits). I've put in concrete anchors in slab, drilled holes to mount things in a brick wall, etc with pretty much the first set I linked.
You seem to be doing it backwards. The dimmer on the wall should control the light. Heres a link to a great dimmer for that purpose.
Dimmer
The fan should be controlled by the 3 speed pull chain. You have three wires going to your fan. White is neutral, black is for the fan, blue is for the light.
I had the same thing and I extended mine anyway. I bought 6 feet of some heavy duty clear hose with the same I.D.
My drain is like 6 feet off the ground. I had to drain into a bucket and put a pump in the bucket. Its a self contained system My plumbing buddy set up.
https://www.amazon.com/Zoeller-105-0001-Laundry-Package-Including/dp/B0009TCDZ2
This might be overkill for your needs but it works great for me.
You wanna look for "RRP" on or in the description of whatever vacuum you go with. That's the EPA standard for renovation, repair, and painting. Something like this.
And happy to help!
I know everyone here likes to DIY stuff but if you can get an installer in, you can replace those windows with new vinyl ones for <$700 each (at least in my city) and you might get a rebate from your electric company. Those windows look like they're pretty old and single pane.
If thats too much, you can also buy a window insulation kit for $10 to seal up the air gaps. That'll probably be way easier than trying to repair the damage.
https://www.amazon.com/Duck-281506-10-Window-Insulator-420-Inch/dp/B002GKC2GW/ref=sr_1_1?ie=UTF8&amp;qid=1494374413&amp;sr=8-1&amp;keywords=window+insulation+kit
I have this one and had a nearly identical experience as OP. For $9 I didn't have very high expectations, but the 800+ reviews convinced me to give it a try. Glad I did, too.
"Wiring a House" by Caldwell is incredibly useful for any electrical work at all. He goes over everything you need to know from 'This is how electricity works' to 'here is how to rewire your entire house to be above code and pass inspection'. Massive amounts of pictures, circuit diagrams with explanations etc. Just a great book and the standard for electrical DIY.
I rewired my entire 4 bedroom house with this as a reference and that included adding 8 or so circuits and rerouting all electrical for our major kitchen remodel.
+1 “for pros.”
I am taking on a diy rewriting project and found this book to be quite helpful.
https://www.amazon.com/Wiring-House-5th-Pros/dp/162710674X/
That said, I have a degree in electrical engineering, have taken a hands on electrical wiring class at the local community college, and I am still nervous about rewriting our house. It’s not the principles, but a knowledge of electrical codes and “how to do it right” that you might miss as a diy-er.
Right now I’m thinking of hiring someone to check over my work and to rely on the inspector as well. If others have any tips on how to do this safely, it would be much appreciated!
Look into "self-leveling compound" to fix an uneven concrete floor.
I would assume you dont want to make the floor 100% flat, since there is a drain there. If you can level out any bumps & ripples, ceramic tile would be fine for a floor with a gentle downslope. Tile is used in the floor of showers all the time
Example of a [condensate pump](Little Giant 554425 VCMA-20ULS Condensate Removal 1/30 HP Pump with Safety Switch https://www.amazon.com/dp/B000SM342Q/ref=cm_sw_r_cp_apa_v.2IBbME5NADG). I don't know where you're located or local plumbing codes there. But you could look into it draining into a sump pump pit? Or doing a little bit of plumbing work so it can drain into a sewer line? We know sewer line must be accessible in basement because the washer drain goes somewhere.
We have similar room as well. I do leave my door open to the house so its little bit heated or at least not freezing there. I do have a radiator heater similar to this which helps to at least provide some heat. I did not want to add any heating elements that blows hot air, since its very temporary and you get the heat when its working only.
You should calculate how much heat you will use from your house - assuming its gas furnace. Gas is cheaper than electric so you need to decide which one you want to use. This year I am planning on covering the windows with plastic, similar to this. And slowly insulate the room to better improve its performance.
I feel you its so hot in the summer, and so cold in the winter. It sucks to lose a room for 2 seasons. Let me know if you can figure it out another solution.
&#x200B;
Get an oil filled radiant heater, very quiet and safe, I use several of them in my house to heat individual rooms.
https://www.amazon.com/DeLonghi-EW7707CM-ComforTemp-Portable-Oil-Filled/dp/B000TGDGLU/ref=sr_1_5?ie=UTF8&amp;qid=1523193900&amp;sr=8-5&amp;keywords=oil+filled+radiator+heater
Rex Cauldwell's book is quite thorough:
https://www.amazon.com/Wiring-House-5th-Pros/dp/162710674X
There are cheaper and simpler ones out there, but if you want an all inclusive, this one is very good.
That's standard placement.
Relocating would be very costly and not useful. Instead, focus on improving the efficiency of your home. New windows and more insulation.
If new windows are too much $$$, look at window film.
A kit like this works for winter or summer:
Duck Brand 281506 Indoor 10-Window Shrink Film Insulator Kit, 62-Inch x 420-Inch https://www.amazon.com/dp/B002GKC2GW/
You can buy these now. Much easier to install and accomplishes the same goal (sorry for the long link). https://www.amazon.com/dp/B00J9XB6BQ/ref=cm_sw_r_cp_api_i_D.u0Db0RP3NYH
In the spirit of LED related advice: replacing your ceiling fan bulbs with 60w LED equivalents makes a world of difference in lighting quality in the room. But so far the only candelabra LEDS I've found that don't have interference issues are the Philips bulbs. Best upgrade I did was to put Philips LEDs and the Lutron Maestro controller on all our fans. Separate control of lights and fan, and the Philips LEDs dim fairly well.
Lutron MA-LFQHW-WH Maestro Fan Control and Dimmer Kit, White https://www.amazon.com/dp/B000MOIDA8/ref=cm_sw_r_cp_apa_K-cuyb0AP1JZN
Philips 458687 60W Equivalent Dimmable B12 Decorative Candle LED Light Bulb with Warm Glow Effect (4-Pack) https://www.amazon.com/dp/B0191YKS0C/ref=cm_sw_r_cp_apa_daduyb5K0AK1R
Note: I tried the LOHAS bulbs and their brightness and color temp choices are excellent, but horrible interference. Couldn't operate the Lutron switches if a LOHAS bulb was switched on. If you don't have any devices where interference might matter, check out the LOHAS bulbs.
I have this but honestly there's so many options in there and I don't even know what the difference is between them all, so I've just been using the basic Phillips head driver that came with the cordless screwdriver (it just came with one Phillips head and one flathead).
I love these DeWalts:
https://www.amazon.com/DEWALT-DW2166-45-Piece-Screwdriving-Tough/dp/B002JWSNIS
Keep an eye out for deals (sites like slickdeals.net can help with this). I started with this set of Dewalt 20v Impact Driver/Drill and have just bought additional tools as needed for projects. Plenty of power and the batteries last forever.
I have this oil filled radiator:
https://www.amazon.com/gp/product/B000TGDGLU/ref=oh_aui_search_detailpage?ie=UTF8&amp;psc=1
It was great in my cold chicago apartment. Basically silent.
I have these with LEDs and their great, you can even program them: Lutron MACL-153M-WH Maestro 150-Watt Multi-Location CFL/LED Digital Dimmer https://www.amazon.com/dp/B008X3CHM0/ref=cm_sw_r_awd_cbWkub03B9HK3
There may be better answers, but I used caulk on a recent project. If you're finding caulk to be messy, I recommend buying a higher-quality caulk which will be more viscous (I like the AlexPlus 60 year one, not the regular 40 year one), and a better caulk gun. Using better product means almost no drips or mess. I applied the caulk to fill the hole, and then wiped over it with a damp rag so it kept the trim's profile.
I bought one of these kits and cleaned my dryer vents myself. the amount of lint I got out was amazing. enough to fill a tall kitchen trash bag.
>Buy the stuff you mix with water and double up.
When you buy concentrate you have control over the mixture strength. Also I would buy offbrand as namebrand Roundup is pretty damn expensive.
I buy this:
https://www.amazon.com/Compare-N-Save-Concentrate-41-Percent-Glyphosate-1-Gallon/dp/B00ARKS3XO/
This is the setup I have....was all pretty simple:
https://www.amazon.com/gp/product/B00UWP07LK/ref=oh_aui_search_detailpage?ie=UTF8&amp;psc=1
https://www.amazon.com/Little-Giant-VCMA-20ULS-Condensate-Removal/dp/B000SM342Q/ref=sr_1_1?ie=UTF8&amp;qid=1469043771&amp;sr=8-1&amp;keywords=condensate+pump
I haven't researched it yet. And since her daughter divorced me, I can't exactly call and ask :)
I'm pretty sure it's something like this:
http://www.amazon.com/dp/B0013H94MO
Though on this one I'd want professional installation. Get that one wrong and it could be very bad.
I have this set: https://smile.amazon.com/DEWALT-DCK240C2-Lithium-Driver-Impact/dp/B00IJ0ALYS/ I used this set to built a 10x30 deck, predrilled holes for screws and used the impact driver to run the screws in.
Get this impact driver bit set: https://smile.amazon.com/DEWALT-DW2166-Piece-Screwdriving-Tough/dp/B002JWSNIS/ref=pd_sim_469_4?_encoding=UTF8&pd_rd_i=B002JWSNIS&pd_rd_r=89a3035b-cdb0-11e8-ab44-9143b7b890b1&pd_rd_w=vQWg3&pd_rd_wg=vqt4n&pf_rd_i=desktop-dp-sims&pf_rd_m=ATVPDKIKX0DER&pf_rd_p=18bb0b78-4200-49b9-ac91-f141d61a1780&pf_rd_r=NMZEJE4DZECRHVJVWV50&pf_rd_s=desktop-dp-sims&pf_rd_t=40701&psc=1&refRID=NMZEJE4DZECRHVJVWV50
The five bits in the lower left hand corner of the box fit the impact driver. The other bits fit into the middle three bits.
This is the guy that I bought. Any good?
I use a Newborn one from Amazon. Get one that has a high thrust ratio, that will help your weakling arm. The rubber handle also helps your hands.
What about using a HEPA rated shop vac? I've been considering getting one of these for vacuuming after home improvement projects now that I have a kid.
These are good:
https://www.amazon.com/Wiring-House-Completely-Revised-Updated/dp/162710674X
https://www.amazon.com/Ultimate-Guide-Installations-Step-Step/dp/1580117872
https://www.amazon.com/Homeowners-DIY-Guide-Electrical-Wiring/dp/0071844759
Little Giant 554425 VCMA-20ULS Condensate Removal 1/30 HP Pump with Safety Switch https://www.amazon.com/dp/B000SM342Q/ref=cm_sw_r_other_apa_i_oKDtDbKHE70PY
This is the one I have.... It pumps strait to my laundry basin
https://www.amazon.com/gp/aw/d/B0009TCDZ2/
I'd get that one. It's a beast and they're very good about warranty service.
Tie into the shower line if you can. I would skip putting in a ball valve. If the check valve, on the wye, is going to be exposed, you can put in a clear one so you can see what's going on on case there is a problem later on.
http://www.pvcfittingsonline.com is my go to place for cheap PVC fittings.
Grab one of these sprayers off amazon.
https://www.amazon.com/gp/product/B0039EEN0M/ref=ppx_yo_dt_b_search_asin_title?ie=UTF8&psc=1
and a gallon of the goods
https://www.amazon.com/gp/product/B00ARKS3XO/ref=ppx_yo_dt_b_search_asin_title?ie=UTF8&psc=1
A splash of the goods and fill the rest up with water and away you go.
I have a ton of cracks and I spray every couple months. I kind of like doing it too.
This is what I have at my house. It is an on/off switch with a little dimmer rocker and indicator lights that do stay on when you turn the light off. The indicator lights will get very dim when the light is switched off, and are brighter when you turn the light on
https://www.amazon.com/gp/aw/d/B008X3CHM0/ref=mp_s_a_1_1?ie=UTF8&amp;qid=1466895048&amp;sr=8-1&amp;pi=SY200_QL40&amp;keywords=lutron+led+dimmer&amp;dpPl=1&amp;dpID=51aViAG9viL&amp;ref=plSrch
I assume something like this: Duck Brand Indoor 10-Window Shrink Film Insulator Kit, 62-Inch x 420-Inch, 286216 https://www.amazon.com/dp/B002GKC2GW/ref=cm_sw_r_cp_apa_i_p0DVDb75HZMW
I put it on some really drafty windows and you can tell they work during the days with 30mph winds the plastic will start to creek as it's keeping the windy cold air out.
This is the least expensive real hepa vac I was able to find. Filters and bags get expensive.
Like others have said, read the EPA guide.
Oh i didnt think about going to attic and disconnecting the vent pipe. But what if I cannot find any way to disconnect event other than cutting it. Is that OK? I just ordered
http://www.amazon.ca/Gardus-RLE202-LintEater-10-Piece-Cleaning/dp/B0014CN8Y8
Here the one I use... It's amazing.
https://www.amazon.com/gp/aw/d/B00097D2K4/ref=mp_s_a_1_2?ie=UTF8&amp;qid=1518569189&amp;sr=8-2&amp;pi=AC_SX236_SY340_FMwebp_QL65&amp;keywords=Drywall+sanding+vacuum
There's also a cieling version, but I never bought it.
Sorry to be so slow replying. I had the same problem -- this is the only one that I have found that had an acceptable catch vs flood ratio. (About to re-order for myself after a few years; and trying several other new alternatives.)
https://smile.amazon.com/gp/product/B00314YBPM/ref=ox_sc_act_title_4?ie=UTF8&amp;psc=1&amp;smid=A28E0CMT55SCS4
You may also need to use one of these: https://smile.amazon.com/dp/B01DP87IF8/ref=pd_luc_rh_bxgy_01_03_t_img_lh?_encoding=UTF8&amp;psc=1
to clean out the current clogs.
Can you say what a decent caulk gun is, and why that's one? I've been through a few, like most people probably have, and never really been satisfied.
This is the one I currently use, and is probably the best I've had so far, but still runs for the first 1/3 of the tube for silicone or acrilic latex.
I just added this switch. I think its 2hat your describing.
Lutron MA-LFQHW-WH Maestro Fan Control and Dimmer Kit, White https://www.amazon.com/dp/B000MOIDA8/ref=cm_sw_r_cp_apa_i_XplxCbBR8Y0D3
yep, that's what these little pumps do:
https://www.amazon.com/Little-Giant-VCMA-20ULS-Condensate-Removal/dp/B000SM342Q
Yep. I have to use them every year because the windows are ~30 years old with aluminum frames. Get the Duck brand: https://smile.amazon.com/Duck-281506-10-Window-Insulator-420-Inch/dp/B002GKC2GW/ref=sr_1_1?s=hi&amp;ie=UTF8&amp;qid=1510673743&amp;sr=1-1&amp;keywords=window+plastic
Home Depot sells a different brand that's already pre-cut and doesn't really work if you're trying to apply it to large windows.
Plumber here, buy this pump and this check valve . For your backup,it is a bit pricey but if you are on city water (well water wont work in the event of a power outage) I would recomend this pump It is powered by a stream of water so you don't have to worry about battery maintenance.
Been in my new home for a little over a month with no washer/dryer (made sense to wait for black friday pricing). Water is in, 120v for washer is in, 240v for dryer is in. Utility sink is ready (not pictured). One last trip to home depot after work to get a breaker and elbow for vent and I will be up and running. https://i.imgur.com/ocpORPV.jpg
Granted, somewhat temporary setup as I need to install a pump under the utility sink the washer drains into. I just have a hose adapter on the utility sink to go into basement drain. I have the pump already ( https://www.amazon.com/dp/B0009TCDZ2 ), just need to plumb it up and over to the main stack, might have the motivation to do that this weekend.
Part of the reason I didn't buy earlier was also because my water wasn't suitable for washing clothes (super high in iron). So the prerequisite for this was getting clean water. Now that I've got my new pressure tank and water filtration system running, it's time to tidy it up and actually run the electrical properly (cap is on pressure switch now). https://i.imgur.com/6a9miaj.jpg Planning on making a post showing all that once it's ready. Kinda conflicts with my need to run a half dozen loads of laundry, but hey, never-ending amount of cleanup to do in that room anyways.
Most any hardware store carries a full selection. Or Amazon of course. I got this set: https://www.amazon.com/DEWALT-DW2166-Piece-Screwdriving-Tough/dp/B002JWSNIS
If you want to go radical, run a hot water recirculator loop to the sink and back to the water heater. a la Hot Water Recirculating System with Built-In Timer This provides rapid hot water response. Then insulating the whole loop reduces energy loss.
Electrical : Wiring a House: 5th Edition (For Pros By Pros) https://www.amazon.com/dp/162710674X
Not a power sander, but one of these:
https://www.amazon.com/dp/B00097D2K4/
don't think the washer will pump that high,you need a reservoir with a float controlled pump
https://www.amazon.com/Zoeller-105-0001-Laundry-Package-Including/dp/B0009TCDZ2
You can get a spiky tool that will puncture the wall paper and make it possible to either spread a wallpaper release agent or steam the wallpaper off.
I don't know anything about any of those products, but figured they would give you a place to start more research.
EDIT: you will probably need to skim coat some areas of the walls and retexture.
https://www.amazon.com/Lutron-MA-LFQHW-WH-Maestro-Control-Dimmer/dp/B000MOIDA8
Just be aware that these don't with with LED's
http://www.amazon.com/Lutron-MA-LFQHW-WH-Maestro-Control-Dimmer/dp/B000MOIDA8
This would be a condensate pump, and you could hook up a garden hose from your dehumidifier to this pump, and then use some vinyl tubing to bring that out to a utility sink or some other drain– that's how I have mine set up at least.
here you go
Not OP but here http://www.amazon.com/Gardus-RLE202-LintEater-10-Piece-Cleaning/dp/B0014CN8Y8
As /u/abc1001xyz said, 30 feet would be longer than what residential code normally allows. Get this https://www.amazon.com/gp/product/B0014CN8Y8/ref=ox_sc_act_title_1?smid=ATVPDKIKX0DER&amp;psc=1 along with the 12 foot extension kit. That'll take you 24 feet. Or if you can do it from both the outside and the inside, you should be able to cover that distance.
Have you tried one of those window sealing kits? https://www.amazon.com/Duck-10-Window-Insulator-420-Inch-281506/dp/B002GKC2GW/ref=sr_1_4?ie=UTF8&amp;qid=1538260548&amp;sr=8-4&amp;keywords=window+seal+kit
My father used to work for the city water department and this is one of the ones they used regularly. http://www.amazon.com/gp/aw/d/B008FM7WLU/
This is the water hardness test kit we use: https://www.amazon.com/gp/product/B008FM7WLU/ . It's slightly more expensive than the test strips, but it's a lifetime supply.
https://www.amazon.com/DEWALT-DCK240C2-Lithium-Driver-Impact/dp/B00IJ0ALYS/ref=sr_1_3?ie=UTF8&amp;qid=1487274792&amp;sr=8-3&amp;keywords=dewalt
Rok Hardware 25 Pack Soft Close Damper for Cabinet Doors / Compact / Soft Close Adapter / Hardware / Nickel / Hinge https://www.amazon.com/dp/B00J9XB6BQ/ref=cm_sw_r_cp_apa_i_G83iDbZV34G40
Add these
https://www.amazon.com/Rok-Hardware-Cabinet-Compact-Adapter/dp/B00J9XB6BQ/ref=pd_lpo_vtph_60_tr_t_2?_encoding=UTF8&amp;psc=1&amp;refRID=HH9PZAHVK79YMX24J3RR
Draino let sit for awhile and then run hot water
If that doesn’t work then buy a snake
If that doesn’t work then call a plumber
not sure on that overflow cap. what year was your house built? once you get it cleaned up, i use one of these every other month in all the bathroom drains i can for maintenance. https://www.amazon.com/Vastar-Drain-Snake-Remover-Cleaning/dp/B01DP87IF8
Push the tab in. that releases the pressure, and lets it stop caulking.
or get a dripless caulk gun. somthing like this. They have a rod that only advances when the trigger is squeezed, and don't usually drip. They're much nicer than the cheap stuff at the hardware store.
A hot water recirculating system might work for you. It circulates hot water through the hot water lines into the cold water lines then back into the hot water heater. That should keep your shower from freezing, at least up to the mixing valve.
You need one of these. It will keep the water hot at a distant tap. It also cuts down on wasted energy heating water that eventually just get cold anyway. Insulating the hot water supply line to the bathroom will help too.
There is no "common setting." You need to figure out how hard your water is. I'd recommend this kit since it's very accurate and not too expensive: https://www.amazon.com/Hach-145300-Total-Hardness-Model/dp/B008FM7WLU
Otherwise, your municipality probably has a water report that you can lookup online or request from them that might have hardness information.
If you just want the softener to work, set it to 50 and see if you end up with any hard water before it regenerates. If so, adjust up as needed. If not, adjust down until you find the right number. A higher number won't hurt anything, it will just waste salt.
If it is just the washing machine, something like this would work https://www.amazon.com/gp/product/B0009TCDZ2/ref=s9_acsd_hps_bw_c_x_6_w.
If you have a utility tub and bathroom or wet bar, you would install something of the same concept, but larger.
To install it will require you to cut a hole in your basement floor
Did you remove the P trap (under the sink) and check it?
Also have you tried a
Vastar 19.6 Snake Hair Drain Clog Remover Cleaning Tool, 19.6 Inch, Orange, 3 Pack https://www.amazon.com/dp/B01DP87IF8/ref=cm_sw_r_cp_apa_i_kAHuDbJFRFX0M
First, get a test kit. test your water for hardness.
https://www.amazon.com/Hach-145300-Total-Hardness-Model/dp/B008FM7WLU
should be <1
you should only need to add salt when it runs low. Put two 40 lb bags in every few months. if you have plenty of salt and your water is testing hard after a backwash, you have an issue with the softener that requires service.
/u/blueskies95 has your wiring answer but there is no need to give up on the dimmer. This Lutron dimmer will do the trick, and can be coupled with the 18 dollar companion dimmer if you want to use it from both switch locations.
This stuff works really well: Compare-N-Save Concentrate Grass and Weed Killer, 41-Percent Glyphosate, 1-Gallon
Your issue is that you need to buy a set of phillips head bits. If you're only using the two that came with the screwdriver then for most of your screws the philips bit will either be too small or too big. You need to choose the right sized bit for the screw you're using. If you do that they should not strip.
Something like this will solve your problems: https://www.amazon.com/DEWALT-DW2166-45-Piece-Screwdriving-Tough/dp/B002JWSNIS/ref=sr_1_4?ie=UTF8&amp;qid=1487958667&amp;sr=8-4&amp;keywords=bit+set
If you have city water, a better and more reliable option is having a water powered backup sump pump. It requires no electricity and works by using the pressure in your water lines. I find this to be a better and more reliable option because battery backups have two main issues: sometimes the batteries go bad, happened to my father, he had a battery backup that hadn't been used in years, and when it was finally needed, the battery was dead and we were down there bailing out the basement using buckets. The other reason I recommend water powered backup sump is in the case of extended power outages. After the first fiasco, my dad installed the water powered backup sump, which was the best thing he could have done, because a year later we got hit with Hurricane Sandy and wound up without power for 2 weeks. A battery backup would not have lasted long enough to keep the sump running that long, but the water powered backup doesn't need any electricity, so it didn't matter, it kept the basement dry the whole time. They aren't that expensive, nor are they that difficult to install, the only requirement is that you are on city water and not a well.
&#x200B;
This is the one we have: https://www.amazon.com/Liberty-Pumps-SJ10-Discharge-SumpJet/dp/B0013H94MO/ref=sr_1_3?ie=UTF8&qid=1537969458&sr=8-3&keywords=water+powered+sump+pump
Install a [barrier] (http://www.bamboogarden.com/barrier.htm) to prevent the spread.
Cut and apply [grass + weed killer] (https://www.amazon.com/gp/aw/d/B00ARKS3XO/ref=mp_s_a_1_2?ie=UTF8&amp;qid=1494359755&amp;sr=8-2&amp;pi=AC_SX236_SY340_FMwebp_QL65&amp;keywords=bamboo+killer&amp;dpPl=1&amp;dpID=51OxXnmvDdL&amp;ref=plSrch) to shoots/rhizome to kill since bamboo is a grass.
>>Sanding screen connected to a vacuum handle because it prevents dust from going everywhere.
>I have a $25 kit from Hyde that makes me wonder WTF I was doing all of these years without it.
The screen sander that connects to your vacuum that you two (& /u/kendrickshalamar) are referring to are the Hyde Tools 09165 (hand version) and Hyde Tools 09170 (pole version).
Hyde actually makes a sponge sander that connects to a vacuum which is similarly priced (Hyde Tools 09160). Does anyone have experience with this model?
I am skeptical about its efficacy, considering that a sponge has no holes, so the only way that dust can be sucked up is through the small gap around the sponge's outer edge.
Is it more effective than the method suggested by /u/fateislosthope (ie, just holding the vacuum hose under the sponge)?
You got city water???? Water powered backup pump!!!!!
Example https://www.amazon.ca/gp/aw/d/B0013H94MO/ref=mp_s_a_1_1?ie=UTF8&amp;qid=1519349285&amp;sr=8-1&amp;pi=AC_SX236_SY340_FMwebp_QL65&amp;keywords=water+powered+sump+pump&amp;dpPl=1&amp;dpID=31fEc3IpodL&amp;ref=plSrch
Some use like 1 gallon of water to push 2 gallons out.
I have a battery back up one. This is my next purchase. Batteries can fail or die. Your city water will always be on.
However for the sewage I wouldn't use your below grade pumping during an outage.
This mixture is as close as you can legally get to Agent Orange. I use it on my 200ft gravel drive, paver walkways, along fencerows, under my deck and anywhere else I don't want stuff to grow. Lasts for weeks, maybe months depending on rainfall:
Glyphosate and Triclopyr attack through the leaves, Pramitol attacks through the roots and acts as a ground sterilizer so new plants won't grow. The Triclopyr is optional, I simply include it because it's more effective at killing woody plants (young trees or other brush) than Glyphosate.
Dish soap helps break the surface tension so it sticks to the leaves better. It won't kill quickly, but you'll notice the plants yellowing and drying up within a few days. Two weeks, they will be brown and dead.
A few things to note. Don't spray around the base of any trees or other plants you don't want dead. It will kill a 50yr old oak tree as easily as it kills dandelions. Also, don't leave this stuff sitting in your pump-sprayer for weeks, anything leftover needs to be used up within a day or two. Not sure what chemical reaction is going on there, but if you leave it in your sprayer too long, it will start to crystallize and clog everything up.
EDIT: These chemicals are all available at Tractor Supply if you have one nearby. If your county has a noxious weeds department, you can usually get it from there as well. The Pramitol is available in a granular form as well so you could use it in a push-spreader.