(Part 2) Top products from r/Homebrewing
We found 428 product mentions on r/Homebrewing. We ranked the 3,215 resulting products by number of redditors who mentioned them. Here are the products ranked 21-40. You can also go back to the previous section.
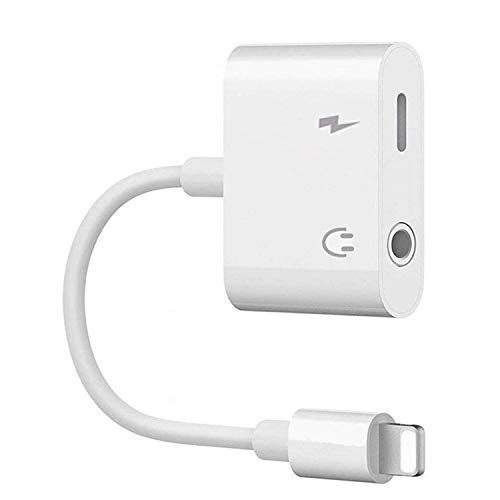
21. EIGELIU Headphone Jack Adapter Cable Car Charger Dongle AUX Audio Jack Earphone Extender Jack Stereo Cable (White)
Sentiment score: 8
Number of reviews: 21
It contains a decoder chip so you don't have to worry about system upgrades. It is compatible with the phone's original protection line and headphones.Headphone Audio support up to 24bit 48kHz lossless output. make it perfect to keep moving during daily workouts. Perfect match all 3.5 earphone.Dongl...
 Show Reddit reviews
22. American Sour Beers
Sentiment score: 16
Number of reviews: 21
American Sour BeersPaperbackby Michael Tonsmeire
 Show Reddit reviews
23. Foxx 4048Sankey to Ball Lock Quick Disconnect Conversion Kit
Sentiment score: 10
Number of reviews: 21
Ball-lock posts easily attach to Sankey coupler air and beer line fittingsMakes it easy to toggle between commercial and homebrew beersEasy to installIncludes both gas and liquid side ball-lock postsFits standard US 7/8" x 14 female straight pipe thread draft fittings on US Sankey coupler
 Show Reddit reviews
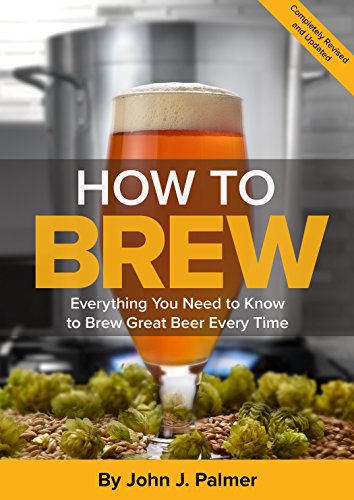
24. How To Brew: Everything You Need to Know to Brew Great Beer Every Time
Sentiment score: 19
Number of reviews: 20
BREWERS
 Show Reddit reviews
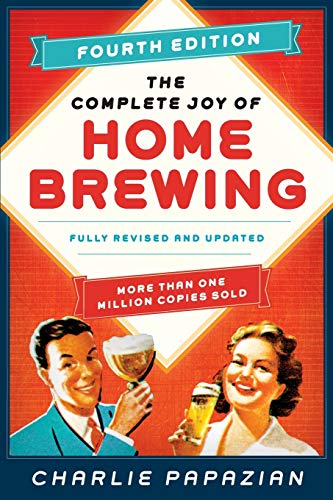
25. The Complete Joy of Homebrewing Fourth Edition: Fully Revised and Updated
Sentiment score: 18
Number of reviews: 19
The Complete Joy Of Home BrewingTen Easy Lessons For Making Your First Batch Of BeerBrewing with Malt Extracts for an Unlimited Range of Strengths and Flavors
 Show Reddit reviews
26. The Compleat Meadmaker : Home Production of Honey Wine From Your First Batch to Award-winning Fruit and Herb Variations
Sentiment score: 12
Number of reviews: 19
Brewers Publications
 Show Reddit reviews
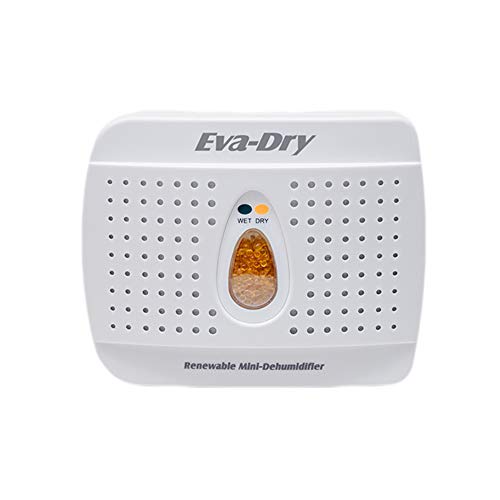
27. Eva Dry Wireless Mini Dehumidifier. Top Moisture Absorber for Small Spaces. Rechargeable & Portable. Perfect for Bedrooms, Closets, Cars, RV & Gun Safes. Removes Humidity & Helps Prevent Mold Growth
Sentiment score: 9
Number of reviews: 18
EASY TO USE: This mini dehumidifier is spill and mess free. Just hang and go! Non-toxic, child and pet safe! Your small rooms will be dry and odor free. Works for areas up to 333 cubic feetMINI DEHUMIDIFIER GOES A LONG WAY: Super dry dehumidifier unit lasts 20-30 days before recharging the silica ...
 Show Reddit reviews
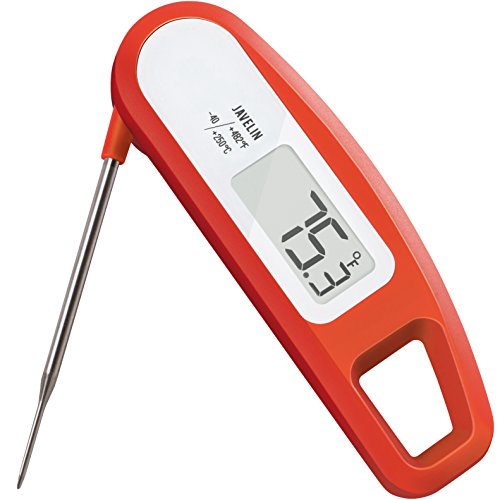
28. Lavatools PT12 Javelin Digital Instant Read Meat Thermometer for Kitchen, Food Cooking, Grill, BBQ, Smoker, Candy, Home Brewing, Coffee, and Oil Deep Frying (Chipotle)
Sentiment score: 10
Number of reviews: 18
3-4 second ultra-fast response time with an accuracy better than ±0.9°F.Large 1.4" easy-to-read display and IP65 splash-proof construction.Integrated magnet for convenient storage on refrigerators or ovens.Meat thermometer also perfect for oil fryers, bread, candy, coffee, and homebrews.NSF certif...
 Show Reddit reviews
29. Sacred and Herbal Healing Beers: The Secrets of Ancient Fermentation
Sentiment score: 11
Number of reviews: 18
Brewers Publications
 Show Reddit reviews
30. Home Brew Stuff The Carboy Carrier, Black, 1.5, Model: 5307
Sentiment score: 4
Number of reviews: 18
Makes carrying a full carboy easierConstructed of sturdy polypropylene webbing that creates handles for carboysCan be easily moved from one carboy to anotherItem Package Weight: 3.2 oz
 Show Reddit reviews
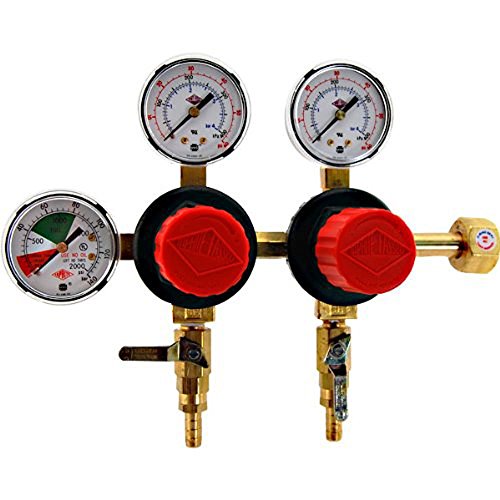
31. Taprite T752HP Two Product Dual Pressure Kegerator CO2 Regulator
Sentiment score: 11
Number of reviews: 18
Large easy adjusting knob to increase or decrease delivery pressureEach regulator has a sentry shut-down safety built into the body that instantly protects the dispensing system in the unlikely event of regulator failureOutlet features shut-off with back flow check valve and 5/16" I.D. hose barb nip...
 Show Reddit reviews
32. Igloo 10 Gal Orange Seat Top Cooler w/Cup Dispense
Sentiment score: 6
Number of reviews: 18
Double loops on lid allow it to be secured to handles on both sides for added water securityLarge-button spigot that will be easier to use for both gloved and smaller handsRecessed and Angled drip-resistant spigot for easy dispensingReinforced comfort-grip handles for improved strength, comfortable ...
 Show Reddit reviews
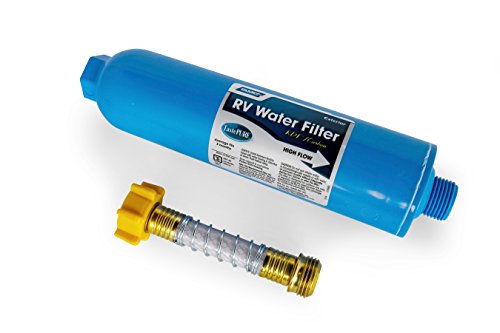
33. Camco 40043 TastePure RV/Marine Water Filter with Flexible Hose Protector | Protects Against Bacteria | Reduces Bad Taste, Odors, Chlorine and Sediment in Drinking Water
Sentiment score: 8
Number of reviews: 17
Safe water matters: GAC (Granular Activated Carbon) filtration greatly reduces bad taste, odor, chlorine, and sedimentLarge capacity filtration: Large capacity in line water filter lasts an average of 3 monthsMultiple uses: Can be attached to any standard gardening or water hose to provide healthier...
 Show Reddit reviews
34. Soda Bottle Preforms and Caps (30/pk)
Sentiment score: 10
Number of reviews: 17
Related Products:GB-5B,SAFE-500,TT-100,BOT-600We cannot honor tax exemptions.
 Show Reddit reviews
35. Update International (FW-24) 24" French Whip
Sentiment score: 3
Number of reviews: 16
Thicker wire for whipping eggs, egg whites, thick sauces and battersLonger whip to keep hands away from foodMade of 18/8 stainless steel materialComes with stainless steel handleMeasures 24-inch length
 Show Reddit reviews
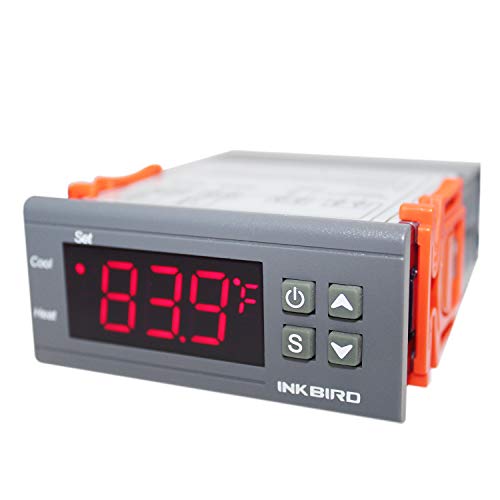
36. Inkbird All-Purpose Digital Temperature Controller Fahrenheit and Centigrade Thermostat with Sensor 2 Relays ITC-1000 for Refrigerator Fermenter
Sentiment score: 7
Number of reviews: 16
🌟🌟【Two Modes】Have two relays. Switch between cooling and heating modes. Support °F/°C display.🌟🌟【Setting Value】Control the temperature by setting the temperature set value and the difference value.🌟🌟【Different Functions】Refrigerating control output delay protection, a...
 Show Reddit reviews
37. AGPtek Digital All-purpose Temperature Controller STC-1000 w/Sensor
Sentiment score: 8
Number of reviews: 16
Switch the modes between cool and heatControl temperature by setting the temperature setting value and the difference valueTemperature calibrationRefrigerating control output delay protectionAlarm when temperature exceeds temperature limit or when sensor error.
 Show Reddit reviews
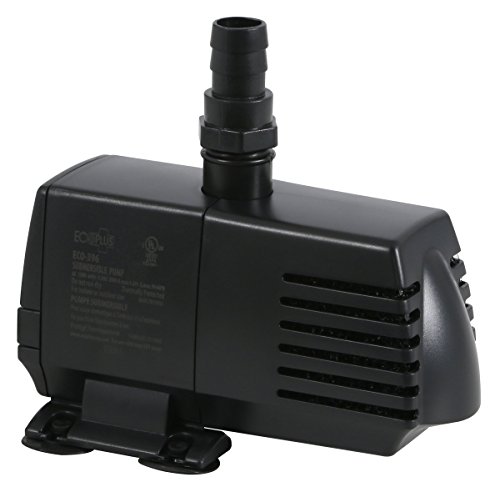
38. EcoPlus Eco 396 Water Pump Fixed Flow Submersible Or Inline For Aquariums, Ponds, Fountains & Hydroponics - UL Listed, 396 GPH, Black
Sentiment score: 8
Number of reviews: 15
396 Gallons per hour; 36 watt motorIncluded fittings: three-.75" Barbed x .75" Threaded, two-.5" Barbed x .75" Threaded and Nozzle x .75" ThreadedSuitable for installation on dry land for in-line use or submersibly into the waterPre-wired 69 inch 120v power cordSuitable for use in hydroponic systems...
 Show Reddit reviews
39. ATP Vinyl-Flex PVC Food Grade Plastic Tubing, Clear, 3/16" ID x 5/16" OD, 100 feet Length
Sentiment score: 3
Number of reviews: 15
Vinyl-flex PVC NSF 61 is suitable for general, low-pressure, industrial applications for the conveyance of liquids and semi solidsMade from a PVC compound that complies with FDA regulationsTubing provides good chemical resistanceIt is lightweight, flexible and economically pricedNSF 61 compliant for...
 Show Reddit reviews
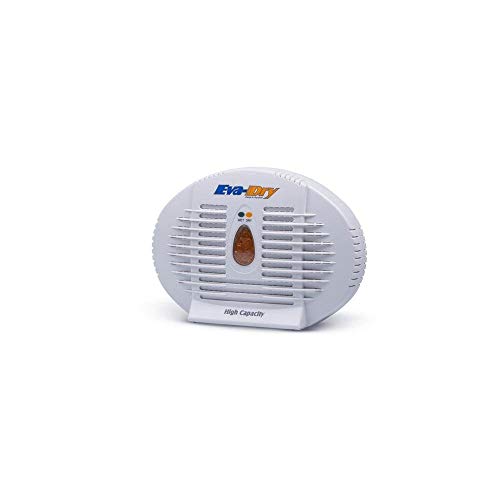
If there are red flags I'm doing in these pictures, please let me know.
edit:
1st batch: Craft-A-Brew APA Kit
2nd batch: Northern Brewer's 1 Gallon Bavarian Hefe Kit
3rd batch: DrinkinSurfer's Milk Oatmeal Stout Recipe @HBT
If I could start over I would go straight to the 3-gallon batches. I hovered around them but I think it's the perfect batch size for beginners -- 1) Most people have a stockpot lying around the kitchen big enough to hold three gallons, 2) The batches are small enough so you don't have to drink two cases of bad brew, but big enough so if you enjoy it [which I'm thoroughly enjoying my first APA], you'll have plenty to taste and rate the evolution of the flavors over various weeks of priming and give out to family friends who are interested to try out what you made, 3) I ordered 3 Gallon Better Bottles for several reasons including worrying about shattering a glass carboy as a newbie. They also qualify for free shipping on MoreBeer's website with purchases above a certain price. 4) Even though I brewed a 5 gallon batch, and since I'm brewing solo, I'm already not looking forward to bottling the whole batch at once so I plan on breaking up bottling between two days.
For resources, I lurk this sub like a crazy stalker. The Daily Q&A is full of information both crucial and minute. I listen to James Spencer's Basic Brewing Radio podcast and practically substituted it for all music recently. It's family friendly and entertaining [I heard the other podcasts aren't so much]. I read Charles Papazian's Complete Joy of Homebrewing, 2nd ed. and For the Love of Hops by Stan Hieronymus to get a better understanding of the hops varieties and characteristics. I plan on reading John Palmer's How to Brew and Ray Daniels Designing Great Beers in the future, as well as Brew Like a Monk. Also, the HomeBrewTalk stickies in the forums provide good picture tutorials for several different styles of brewing.
I got into homebrewing so I can brew the, then, only beer style I liked: Imperial Stouts. But as I learned more about the balance and flavors of beer I surprised myself by branching out to enjoying other beers [even the odd IPA every so often]. My narrow scope of beer has broadened more vast that I ever would've imagined it. My brother got me this beer tasting tool kit used for blind taste tests so I try to keep good records and actively taste and appreciate craft beers. I even keep a couple in my wallet for tasting beers on draft.
I really wish I had an immersion wort chiller, a bigger boil kettle, a mash tun, and a propane burner. Those few equipment pieces hinder me from exploring more advanced style of homebrew. I intend to upgrade to all-grain but making the switch is really expensive. I'm still in the look-to-see-what-I-have-lying-around-the-house phase equipment-wise.
Which leads me to: don't be scared to spend money while DIY-ing. Many of you have probably seen my (and many others', most likely) shitty stir plate. DIY should be a balance of doing things on the cheap, but still making it work and function well. There's no point in DIYing if you're not going to be happy with it and just end up buying the commercial equivalent anyway. That's where I am right now.. I'm currently trying to salvage a cooler [no-spigot] I found in my garage and turn it into a mash tun instead of just buying a new cooler with a plastic, removable spigot. I'm certain it would make DIY easier but slightly more expensive.
But the suckiest thing for me about homebrewing is that I don't have a car so getting local, fresh ingredients and supporting my LHBSs is a piece of PITA bread.
>what do I need to know before I start on my journey?
Aside from this forum and the FAQ, there are two books to choose from that are both fantastic but are from different points of view. For more engineering minded people I suggest How To Brew by John Palmer. For more art minded people Mastering Homebrew by Randy Mosher is fantastic. Either way you'll get a wonderful introduction introduction to brewing your own beer.
>What kit should I get?
There are many beer kits out there by you can also start with a simple cider instead. This will teach you about the basics of fermentation and help you find out if this type of activity is for you before you spend more than you need to on a kit. When you do go for a kit you will probably start with an extract kit. Just look for a style that you like to drink and go for it.
>What types of beer are best for learning?
To me a classic SMASH (Single Malt And Single Hop) is a perfect way to learn all grain brewing. For extract just any kit that you want to drink should be fine. Be sure to use a good online retailer if you don't have a local homebrew shop. MoreBeer is a popular, independently owned online retailer that I've had good experiences with.
>Anything else that you think may help.
RDWHAHB - Relax, Don't Worry, Have A Home Brew. This line from the great Charlie Papazian is probably the most often repeated line of advice in homebrewing. It's important to not freak out about anything. Brewing beer has some weirdness when you're new to it. There's a lot of vocabulary, acronyms, techniques, style guidelines, etc. Don't let it overwhelm you. Take it easy, follow basic good practices, and you will make beer.
Also, don't be afraid to look for local homebrew clubs. I didn't join one for many years and kinda regret that now. Some clubs are competition focused, some are social, some are event-centric. Look around for one that fits your interests and make some friends!
Finally, do not get tied down to styles or what beer is "supposed" to be. Brew what you want to drink and kick the haters to the curb.
Welcome to the obsession and cheers!
In this post, I'm going to link to examples. They are examples: I'm not necessarily recommending that specific item. (I'm pretty much doing a search on Amazon and linking to the first thing in the search results that is actually what you need.) It's just an example to let you know what you're looking for.
Yes, you will need a metal stockpot. Five gallons should be sufficient.
You will need some type of stirring apparatus. Some would recommend a large metal spoon, but I recommend using a plastic mash paddle.
I would recommend getting some type of thermometer to put on your stock pot. A candy thermometer is where I'd start, but, if this is a hobby that you'll stick with, it's probably worth investing in something better.
Also, I see that they put a hydrometer in your kit. If you want to take measurements with the hydrometer, you'll need either a turkey baster or a wine thief. I'd start with the baster.
If you need a book on homebrewing, Palmer's How to Brew is pretty much the standard, but Papazian's The Complete Joy of Homebrewing is well regarded. Palmer's book is in its third edition, but you can get the first edition of the book online for free.
Depending on the ingredients that you use, you may need common kitchen items like scissors or can openers.
You'll also need bottles. If you brew a five gallon batch (which is pretty typical… at least in the United States), you'll need about fifty-four twelve-ounce bottles. However, you can't use twist-off bottles; they're no good.
Lastly, you'll need ingredients. Different recipes call for different ingredients. My advice is to buy a kit from a local homebrew store (LHBS) or one online. Some kits make you buy the yeast separately. If so, make sure that you purchase the right strain of yeast.
For temp control, use a cooler. This is the cooler I use. It is perfect to hold any fermenter I've seen. Fill with 65f water. Put your fermenter in the cooler. Add frozen 16-oz soda bottles to keep water temps at around 65f. Monitor your fermenter temps (using the stick-on fermometer ... just be sure the fermometer isn't under water!). I've found adding 1 frozen bottle in the morning and 1 in the evening keeps temps exactly where I need them..
If your fermenter has a spigot in the bottom - place the fermenter inside a contractor trash bag (the super thick durable kind) before placing in the water. You don't want to risk infection by having the spigot exposed to the water.
For BIAB and All-Grain ... #1 - BIAB is all-grain. It is just easier. The ingredients are the same. The end result is the same (Beer!). The complexity, cost, and time are different. So, I'll just list out a 2-vessel BIAB-in-a-cooler hybrid system.
Total - $255 shipped to your door.
This setup will be a setup that you can use for all types of Ales. You can even do low-temp ales that ferment at 50-55f by adding more ice/colder water to the cooler. Don't think it would be efficient enough for lagering.
Process:
EDIT - you will need an extra 5-gallon pot to heat sparge water.. forgot that. They can be found anywhere for about $20. As always - check craigslist to save even more $$$$. This is the cheapest and most efficient setup I've been able to put together. If you really want to get fancy - then you can add a stainless steel fermenter from Chapman Brewing Equipment for an extra $99. The fermenter is well worth it!
EDIT 2: As always SANITIZE everything at all stages. Also - with all-grain, you'll eventually want to get into water chemistry. Read up on that. AND a good kitchen scale is needed for measuring out hop additions (and later water chemistry adjustments). Kitchen scales can be had cheap. You'll want one that is accurate and can be calibrated.
All the LHBS staff in my area swear by The Complete Joy of Homebrewing: Fourth Edition by Charlie Papazian.
I’d recommend it as a good read but with a few caveats. Some of the advice is a little outdated compared to methods that homebrewers are using these days, for instance, I haven’t seen a single mention of brew-in-a-bag in the advanced chapter of the book. The author also regularly plugs his other book intended for a more advanced audience. I don’t find this too egregious because the quality of the information he provides is sufficient for a beginner IMO, but if you really want to know everything the author knows/thinks about a certain topic, you essentially need two books.
There are also a few things I like about this book. First off, the history of beer and brewing is covered to an extent, and I found that to be a great read. Secondly, there are some pretty good charts and reference tables that you can use as a guide if/when you start thinking about developing your own recipes. Also, on the topic of recipes, the author provides a selection of 45 recipes to get you started (in my experience, your LHBS will also have some recipe sheets available most likely). Finally, the author also cracks dad jokes routinely, so you’ll get a chuckle every once in a while to break up the information overload.
Overall, my opinion on this book is that it’s a great entry to homebrewing, but it shouldn’t be the only resource you use.
I'll echo the other comments - you're basically already set up to do BIAB. You'll need to buy a bag (a 5-gallon mesh paint strainer works great) and ingredients. A small kitchen scale (at the gallon level being off a few grams on your hops can mean big changes in IBUs) and a quick-read thermometer (https://www.amazon.com/Lavatools-PT12-Javelin-Thermometer-Chipotle/dp/B00GRFHXVQ) will be good purchases as well.
I tend to buy in bulk because it's hard to justify shipping on 1 gallon's worth of ingredients. Crushed grain won't last as long as uncrushed, but if you keep it sealed and dry, I don't think you'll have an issue keeping it for a few months. If you have a local shop, it'll be a little easier. If possible, get your grain double crushed - it'll help with efficiency.
You can make a pretty good beer with a couple pounds of Maris Otter, an oz of Mosaic (~30 ibus at 60, 1/2 oz at 0 min and the rest at dry hop), and some US-05. I'll add 1 gallon of water to my pot (use a ruler to mark the height of the water so you'll have 1 gallon into your fermenter) and begin heating this to strike temperature - I've found about 162*f will get my mash temp to about 150-152. Go ahead and treat this water and about a 1/2 gallon of sparge water with campden to remove any chloramines in your water (no one told me about this when I first started, and it's one of the best things you can do for your beer. Maybe you are already adding campden, but if not, it's time to start). Put the mesh bag into your pot, add your grains, stir, and then stick the mash into the oven for an hour. I preheat my oven to 170 and then turn it off when I put my pot in there. You want just enough heat to keep your mash from dropping in temperature.
After an hour, pull your grain bag out and place it into a second bucket or pot to sparge. Repeat the rinse / drain / squeeze sparge process until you have 1 gallon of wort in your main pot. Boil as you have done previously, occasionally adding sparge water to the boil in order to maintain 1 gallon of wort. I find this much easier than trying to account for boil-off by starting the boil with excess wort.
Also, remember that a pack of yeast is meant for 5 gallons. It's maybe not the most sanitary practice, but I'll pitch 1/4 packet and then save the rest by folding, taping, and storing it in a plastic bag in the fridge. It's an easy way to save a couple of dollars per batch.
I built this for about $20 (not including the erlenmeyer and the stir bar).
I got the cigar box a while back at a second hand store.
Here's the USB powered PC fan I used:
http://www.amazon.com/Thermaltake-Mobile-Fan-External-Cooling/dp/B00080G0BK/ref=sr_1_2?ie=UTF8&qid=1381376532&sr=8-2&keywords=usb+pc+fan
I chose a usb fan so that I could power it with an android usb phone charger and not screw around with splicing wires.
Here's the magnets I used (just needed one though):
http://www.amazon.com/gp/product/B00B1M37MY/ref=oh_details_o00_s00_i02?ie=UTF8&psc=1
Aside from that it just took a few odd nuts, washers, and a bit of superglue. I had to bore the hole in top of the cigar box because the box turned out to be a bit too thick (sorry Pepin Garcia!) to get enough attraction between the magnet and the stir bar. I think I might have had better luck with stronger magnets or a different stir bar but oh well.
As someone suggested I first glued a washer to the fan so that I could move the magnet around a but to find the sweet spot where it didn't shake too bad then I glued the washer in place.
I used the long bolts/nuts that came with the fan to attach it to the lid (you can see the bolts in the first picture). Between the top of the fan and the lid I had to add washers to keep the fan from rubbing on the cigar box.
That's pretty much it. The fan has a variable speed control but I get a small vortex on the lowest setting, and higher settings throws the bar off the magnet.
Now I just need to wait for my soda preforms to show up so I can start saving a bit more yeast after I use the stir plate!
http://www.amazon.com/Soda-Bottle-Preforms-Caps-30/dp/B008MB1QNY/ref=sr_1_1?s=industrial&ie=UTF8&qid=1381377304&sr=1-1&keywords=bottle+preforms
I got the idea for using the soda preforms from here:
http://www.mikebeer.net/reuseyeast.htm
Cheers
Thanks! Good question. I definitely spent more than was necessary trying to figure everything out but the most expensive item was the king carousel. I was able to get it for on sale for about $45 brand new Amazon prime. Here it is but when I found it, it was on sale http://www.amazon.com/gp/product/B0055OWLFI/ref=oh_aui_detailpage_o03_s03?ie=UTF8&psc=1.
Fridge I scored for free.
I'd say for the rod extension, coupler, bolts, screws, caulk, fasteners and glue was about $30. Used these to keep the front door closed with the seal they work great! http://www.amazon.com/gp/product/B00N2H50XA/ref=oh_aui_detailpage_o05_s00?ie=UTF8&psc=1
The wood was one 8' board 8" x 1" I got at Home Depot and they trimmed to my specs, about $10.
The cost of stain and chalk paint 8 oz cans ~$6 each x 3 (primer for chalk) = ~$20.
I had all the keg lines already I just adapted them from old picnic taps.
Elbow shanks I got for 13.99 a piece plus shipping from Adventures In Homebrew with shipping $36.98 (46.98 actually now that i look back had a $10 credit). http://www.homebrewing.org/Chrome-Plated-Elbow-Shank_p_1187.html
Regulator off Amazon for $114.13 with Prime. http://www.amazon.com/gp/product/B0060NOX40/ref=oh_aui_detailpage_o00_s00?ie=UTF8&psc=1
$29.90 for both chrome faucets off amazon free shipping http://www.amazon.com/gp/product/B00370AT2Y/ref=oh_aui_detailpage_o00_s00?ie=UTF8&psc=1
Quick Connect I used for the top tap area $6 http://www.amazon.com/gp/product/B0000DD23N/ref=oh_aui_detailpage_o01_s00?ie=UTF8&psc=1
So I guess when all is said and done 292.01.
But if you have the regulator and other bits laying around it could be around $177.88.
Kinda pricey but I guess I had to use that x-mas bonus somewhere!
Oh - and the thing takes about 6 pounds of nuts and dried fruit to fill. That gets pricey but gum balls sell for pretty cheap in bulk from here http://www.gumballmachinefactory.com/gumballscandy.html
Gonna copy and paste one of my previous replies to a similar question last year. Hopefully that helps a bit.
Your question about ballpark cost is a bit "how long is a piece of string..?". It totally depends on your choices. Mine ended up costing me around $1k all up, but I'm in Australia and everything is bloody expensive over here.
------
Recently built a keezer myself so I can offer a bit of advice. I think the main reason most people shy away from kits is they tend to bundle cheap and nasty parts. Here's a list of parts you'll need and my insights to go with them:
I'm super happy with my system, the 650ss are awesome and let me use less than a metre of beer line. I also shelled out a little extra for a ball lock gas post and bulkhead to replace the gas-in barb on my gas manifold. That combined with another quick disconnect just lets me easily remove the gas bottle from the freezer and gas another keg for storage or something. Hope that helps a bit, feel free to ask any more questions.
I got started using this book Complete Joy Of Homebrewing I felt this book was super friendly as introductory material.
There is also this book How To Brew I think most people will tell you John Palmer's book is better but honestly both will contain all the information you need to get started. I am sure someone more resourceful than me will be able to direct you to some great (and free) internet resources to take a look at as well.
Edit: A quick Google search yielded This Have fun and welcome!
It's approximately 2-3 pounds of honey to a gallon of water, or a 5 gallon batch is 10-15. For a 5 gallon batch, the rule of thumb I heard is every pound of honey adds approximately 1% ABV. Example: a one gallon batch with 2 lbs honey is equivalent to a 5 gallon batch with 10 lbs of honey, or a mead at 10%. But this doesn't account for if you want it to be sweet.
Also: 1 gallon of honey weighs approximately 12 pounds. So a 5 gallon batch of mead using 12 pounds of honey comes out to 1 gallon of honey and 4 gallons of water.
Every time your honey gets processed (Def'n processed: heated above 160'F), you lose the honey flavor. It's up to you to decide your final priorities, but to be perfectly frank, I'm cheap and use cheap, over processed honey. I make up for this by picking tasty recipes (JAO, or Orange vanilla cinnamon metheglin which is easily my favorite so far.) The honey I use is Sue Bee, 6 lbs for ~$11 at Save Mart ($1.83 /lb, the cheapest I've seen.)
The flavor of the honey to use depends a lot on the recipe. Some call for a specific honey.
There are a lot of people on here (/r/homebrewing) that insist that sanitizing your honey/water by boiling them is unnecessary. If/when I'm in a hurry (a bad idea), the most I do is sanitize whatever ingredients are going in. Quick trick that I've been meaning to try is to soak whatever it is in as little vodka as possible.
If you happen to live in the Bay Area, there's this excellent honey they sell at Save-Mart (might be sold elsewhere in the country, I've never been able to figure that out.) The honey is something like "Raw mountain" something. I don't have any handy. It comes in a 5 pound can, with a large yellow sticker across the front. Usually about $15, but I've seen it on sale for $12.
Yeast: Depends on what you want, really. Champagne yeast will go up to 18%, some say 20 if you push it. If you want it sweet, you'll either need a weaker yeast or some way to kill the yeast. I've only ever used champagne yeast (EC-1118, will eat anything), but then, I don't have a very delicate touch.
This book is definitely recommended.
And really, come see us in /r/mead. It's a lonely subreddit. The last post was 4 days ago. And feel free to ask questions.
One thing I've learned about mead: there are a few dozen categories of mead. Almost every culture has invented their own. Just figure out what you like. And experiment. Experimentation is the best, especially when you end up with some mead.
Without a doubt it is my Counterpressure Bottle Filler. I hate bottling, and almost exclusively Keg these days. However, sometimes A beer turns out so well I want to either save a couple bottles for later, or bring it to people who won't be drinking it quickly enough for a growler to be reasonable. Option one was to bottle while kegging and bottle condition. The problems with this involve A) Not knowing if your beer is great yet, possibly wasting time. B) Having to clean the bottles and bottling equipment along with kegging equipment, adding time. C) Having trube build up during bottle conditioning, contributing to off flavors for long aging. D) unavoidable high DO / Oxygen levels in the bottles, also causing oxidization and other off flavors after long periods of sitting. The counter pressure filler allows me to bottle beers directly from a carbonated keg. The bottles are cold and carbonated immediately. But more importantly, allowing you to cap on foam like at most craft breweries, you can insure very low DO levels. Combined with the lack of trub, your bottles are likely to age very well for archival purposes. And for people asking, whats the best reason to save a good beer? Well, if you are trying to perfect a recipe, being able to sample the last several batches with your current one together really helps point out what your method changes do to your beer quality.
Another important purchase from the last few months is a combo of these two items: Faucet line Jumper and Submersible Pump. I use these in combination to clean my beer lines. I have a twin faucet tower kegerator. I keep two kegs on, and when they both cash, i clean my lines. I disconnect the line from my first keg, and attach it to this submersible pump, which is sitting in a gallon of caustic liquid line cleaner (from five star, but PBW would work too). I use the Faucet jumper to connect the ends of both faucets, and I disconnect the line from keg 2, and have it dump back into the bucket. What i have created is a recirculation that I let run for 30 minutes. It doesn't need to be supervised. This is so much better than how I used to do it, which was using a squeeze bottle and doing one faucet at a time. It took forever, and required me to be there. This new solution allows me to walk away and let it do its thing. Furthermore, I also use this time to defrost my kegerator if it needs it.
Edit: I would like to add that I think this might be the most interesting and useful post on this sub in a long time, good job OP. I have spent quite a lot of time googling other peoples purchases, some I haven't heard of, and am planning some purchases.
Wait, Home Depot sells homebrewing specific items? Awesome! And congrats on the first brew, looks great. Welcome to the addiction!
Edit: for the thermometer, I highly recommend a Javelin or Javelin Pro. Great thermometer and significantly cheaper than the competition. You'll find other folks on here singing their praises as well. I love mine.
It depends on how much you want to spend, but the easiest way to control temps is with a dedicated fermentation fridge with a temperature controller to regulate the temperature. I generally only need to regulate down (i.e., cool the fermenter to keep it from getting too warm), but some climates require a dual regulator to be able to either increase or decrease temp, especially depending on the seasons.
The cheapest regulator that's gained a lot of popularity in the community in the last few years is the STC-1000. There's a bit of DIY involved in connecting this controller to an actual electrical outlet. But it does dual control for around $30 total (once you buys the outlet, etc.).
If you're less handy but have the money, you can get a controller like this Ranco. There are tons of other options, so just Google "refrigerator temperature controller" or something.
There are also much less robust, but also much less expensive options. Google "fermentation swamp cooler" or "son of a fermentation chamber" for some good, low-cost, DIY options.
Mash tun cooler (this is probably cheaper at your local hardware store or wal mart) Also, this isn't the only cooler that works. Pretty much any plastic cooler works. But you'll need a different false bottom if you use a chest cooler, which may allow you to mash bigger batches.
Weldless Ball Valve Just take the plastic valve off the cooler and screw this one on. Will work on most any cooler you choose.
False bottom Put this at the bottom, connecting the silicon hose to the ball valve and the top of the false bottom.
3/8" barb You'll need to screw this onto the ball valve on the inside of the mash tun to connect the silicon hose to.
Honestly, if you've already got a kettle that can boil 6 gallons, you're good to go there, and just add this to the mix. Otherwise, pick up a Stainless Steel Brew Kettle.
This whole setup comes in just under $200 but you'll need some hoses and some hose clamps as well. But I'm sure that if you shop around (even on amazon) you might find better deals than I linked. But that's the gist of it. And there's no need to stick with the specific brands I linked. But just make sure to stick with stainless steel for the kettle, ball valve, and connecting accessories and food-grade plastic for the cooler. And any hoses need to be high temp hoses. Silicon is ideal.
This is by no means the "only" way to do it, but a great start down the road. You may also choose to use a pump. It has advantages and disadvantages. You can make great beer with and without one.
Stick with your Mr. Beer kit for a few more sessions. Refills are $20 for two gallons which seems reasonable. Just stick with ales and don't brew lagers. The more flavorful the beer is supposed to be the easier flaws are turned into tasty features. I'd go with this porter: https://www.amazon.com/Mr-Beer-Churchills-Homebrewing-Sanitizer/dp/B01D5J7ZIW/ref=bdl_pop_ttl_B01D5J7ZIW
The amber ale and stout would be on my list too. If you like IPA's try that.
If you want a piece of equipment I'd buy a hydrometer or a bottle capper. https://www.amazon.com/Homebrew-Guys-Hydrometer-Specific-Potential/dp/B012YLS62G/ref=sr_1_21?s=home-garden&ie=UTF8&qid=1524334825&sr=1-21&keywords=brewing+hydrometer
Make sure you do a good job sanitizing everything and you'll be 90% there. Star-san is an excellent sanitizer. I don't know what Mr. Beer uses. Bleach or iodine can also be used if done correctly.
If I were to suggest one thing to buy, it would be a good book. The John Palmer How to Brew is an excellent choice. What you learn will apply to Mr. Beer kits and as advanced as you want to go. https://www.amazon.com/How-Brew-Everything-Great-Every/dp/1938469356/ref=sr_1_cc_1?s=aps&ie=UTF8&qid=1524335575&sr=1-1-catcorr&keywords=palmer+how+to+brew
Lastly, I'll double down on my advice to stick with flavorful ales and stay away from lagers and pilsner. Best of luck.
I've got three STC-1000s that I've ordered from multiple places and they have all been flashable - so I guess I've been lucky. The first two I bought from Amazon and the last one I bought from Alibaba although it took about 6 weeks to arrive. Mats has this link set directly on his Github page for the software so I figured this would be a really safe bet and it worked fine.
The flashing is pretty easy and there's a great instructional video on the blackboxbrew.com website. You'll need an Arduino Uno and some jumper wires which cost me about $20 at a specialty electronics shop. Best thing to do would be to ask around your homebrew club or brew shop if anyone has one that you could borrow. One guy brought his to a brew club meeting and flashed a whole bunch of peoples all at once.
Good luck with the build and feel free to hit me up for any questions. Go Leafs!
First I will say brewing extract isn't necessarily "cheating". Brewing with extract is the same thing as baking a cake with one of those mixes from the supermarket - at the end of the day you still have cake, you just didn't have to measure out all the ingredients.
That said, if you want to jump into all-grain first that's fine but I think you might have read way too much into it! It's not nearly as difficult as it sounds like you might have convinced yourself. You don't need to worry about water chemistry, washing yeast, or quantum physics to brew beer. Your best bet to start would be the online version of How To Brew. It is the 1st edition of the popular How To Brew. I would recommend picking up the book, however, since the print edition is the 3rd edition, and there have been some updates. You can also check out The Complete Joy of Homebrewing.
For your first batch you can do something simple, you don't need to worry about water chemistry or getting crazy with your yeast. If you have any more specific questions, there is a daily Q&A on this sub as well.
The complete Joy of Homebrewing by Charlie Papazian
I think is by far the most approachable book for any novice. Palmer's book is certainly great, but far more technical and just plain overwhelming for a beginner. Perhaps unless you have a strong science or engineering background (as I understand Palmer does) I find Palmer's book more like a textbook, and Papazian's more like a handbook.
How to Brew was my first book and it was tough, I was often confused and just powering through chapters trying not to get confused. The Joy of Homebrewing takes a much softer approach and simplifies a lot of the more advanced concepts, and is written in much more casual language.
"Relax. Don't worry. And have a homebrew."
Best book ever: http://www.amazon.com/The-Compleat-Meadmaker-Production-Award-winning/dp/0937381802
Best cyser I've ever had: http://www.ratebeer.com/beer/b-nektar-zombie-killer/141980/
Pick both up, read, read, read, and practice! Practice makes perfect with homebrewing. Pitch a healthy amount of yeast for meads and you won't have an extended ageing period (although I would plan on taking your time with it, be patient!) Very cool hookups you have there, use them to your advantage and learn everything you can about cider apples, cider blends, and honey. Bees are actually quite fascinating, and the history of honey/mead is really cool. Ken Schramm's book is phenomenal.
It's all about taste and palettes. If you don't like sours, that's fine. A lot of folks don't. I gather the recent shift isn't far different than the lupulin threshold shift. It's my perception that sour fan-boi's are a bit more strong in their opinions and beliefs due to the amount of time and effort that goes into creating proper, delicious sour beers. An excellent IPA can be cranked out in less than a month, while sour beers require many months, even years to make, and require some advanced techniques such as blending in order to achieve a desired flavor or for consistency. Some may come off as elitists, or beer snobs because of this extra effort required, which isn't going to help them bring more to their cause.
It also may have something to do with the recent release of /u/oldsock's book back in June, which is one of the only really well written books on sour beers. Even if you don't like them, it's a great book to read through, as it really does open your eyes to just how complex they can be, and why their is such an appreciation for them among their loyal tasters.
ha, loud and clear! I'm on call now, so you lucked out!
I wish I could give you some definitive advice, but without seeing what he's got, I can't comment with authority. He's probably got standard sanke couplers and I've not seen a good solution there. If you live close, I'd pay him a visit and see what you're dealing with. It's probably going to come down to you just making up some new lines to mate with your corny.
We're getting ready for our Strausstoberfest this weekend and over the summer I reconfigured all of my kegging lines to use 1/4 MFL's for an easier change out than barbed fittings. I may have a last minute surprise myself, as a friend has offered to bring a 1/6 barrel to the party, but it will be sanke. Fortunately, I already have a sanke connector and these from Amazon:
https://www.amazon.com/gp/product/B00C30F75I
If there is anything I can help with, let me know!
I made this exact recipe back in October 2010. Eventually I took a bit out and bottled it with various spices. I now have only a few precious ounces left, but it is more delicious than I can possibly describe.
Mead is quite forgiving and not (often) prone to infection. It just needs lots of patience. Even a crappy mead made through a simple method (ala this recipe) can produce amazing results given time.
I can only imagine what properly prepared batches will taste like as mine are all aging far in the back of a cupboard and I'm trying to forget they're there.
If you're interested in learning about mead making in greater depth, there's always The Compleat Meadmaker and don't forget the fine folks over at r/mead.
Hey guys, I've been brewing Gruit for a couple of months now. Got turned onto it by my neighbor who has been doing it for years. Here is a video of his process Brewing Beer Over A Fire Pit, and we will try to upload more as we go.
The brew bible we are working from is Sacred and Herbal Healing Beers, by Stephen Harrod Buhner. I've been doing research trying to find more information and recipes for gruits, and this book seems to be a major resource for almost everyone. It's also a great read, exploring the history of brewing around the world.
The main reason I love gruit, is that without the hops you don't feel tired or full when drinking it. And with the yarrow and wormwood you get a mild psychotropic effect so you feel pleasant and alert. My friend drinks it every night during the winter because these herbs are used for skin care and drinking a bottle or two a night keeps his skin from cracking when he's working outside the next day.
I'm starting to experiment with new recipes, just tried a sage ale and a ginger beer. Bottling tonight, if there is interest I will post info/pictures.
You are asking an excellent question.
Extract is good starting point; most of us started with that and made very drinkable beer. It is nice as all of the variables are taken care of for you - all you need to do is boil the extract, add the yeast, and make sure kept everything sanitary. If you follow the directions, you will have a beer at the end of it.
It is my belief that most people will encourage that route as it is a nice way to ease into homebrewing.
The downside of extract kits, especially in Canada, is that they can be pretty darn pricey. My LHBS (local home brew store) sells the Brewer's Best 5 gallon extract kits for between $80-90 a pop (probably cheaper other places - don't get me started on my LHBS...) whereas I can throw together a similar 5 gallon all-grain brew for around $20-40 depending on what I am making.
Most brewers will transition from a few extract brews to all-grain, or at least to the BIAB (Brew in a Bag style) all-grain brewing. And, most people will then need to purchase a larger kettle, somewhere in the realm of 8-10 gallons is often suggested.
I would have no qualms about someone jumping straight into all-grain brewing right away. Most of us get there anyways, and really it is not all that difficult after you get the hang of it.
Pick up a copy of John Palmer's How to Brew and Brewing Classic Styles and you will be set with a good resource on brewing and quality, tested recipes. A bit reading, this sub, and YouTube will make a good homebrewer out of you. Also, Homebrew Talk is a great resource for all things beer making.
Others want to just dabble in some beer making before spending that kind of cash on a set-up to discover that they actually don't like doing it or don't have the time/space/patience for brewing.
So, my personal recommendation is, if you are up to the task of taking on all-grain brewing sooner than later but want to do a few extract brews first, is to buy a kit that doesn't have a kettle and instead purchase an 8-10 gallon kettle separately. It will handle extract brews and all-grain. Everything else that comes with the basic kit you will use whether you are an extract brewer or an all-grain brewer so you don't lose anything, and are actually ahead if you do go all-grain.
Don't do the open refrigerator thing, you will waste a ton of electricity and won't actually be able to temperature control even close to enough to lager with any reasonable degree of certainty. If I had to guess, leaving a fridge with an open door for a month will probably waste far more than $16.
Instead of wasting that $16 in electricity, you can get one of these, which is perfect for a fermentation chamber made from a fridge. A small amount of wiring work is required, but it's relatively easy.
If you aren't willing to invest $16 and an hour figuring out how to wire it together, I would suggest just letting it ride without temperature control (or maybe a swamp cooler or similar). Most lager yeasts will be fine in the low-mid 60s.
Edit to note: it's not too late by any means to get that temp control part now. You could start it warm and chill down in the refrigerator when you have the part, possibly even complete fermentation warmish and then stick in the refrigerator on its highest setting for a few weeks. Or you could start it in the refrigerator on its highest setting and let it warm up a bit more when you have the part. Leaving the fridge open is probably the worst choice you could make out of all the options above.
Double edit: If you don't want to mess with wires, you could get one of these, but it's more expensive. It's basically the same thing as the cheaper one, but with plugs.
Bonus fun fact edit: Refrigerators make the room warmer in general, but peaving the refrigerator door open will make it even warmer. You would be effectively making a really really ridiculously inefficient space heater.
Probably the best way to start is with a starter kit. Most all brewing supply stores have these kits available at various levels. As an example, here's a basic kit:
https://www.morebeer.com/products/home-brewing-kit.html
Most people start with malt extract kits and brew a few to become familiar with the basic process. This kit, along with a 5 gallon kettle and about 2 cases of 12 oz. bottles will suffice. You'll also need an ingredient kit.
This kit includes a kettle, ingredient kit and a few other handy goodies. All you need with this are the bottles. https://www.morebeer.com/products/deluxe-home-brewing-kit.html
If you drink craft beer the bottles shouldn't be a problem. They come free with the beer. Twist tops don't work well and you want brown glass. You can also purchase new bottles:
https://www.morebeer.com/products/beer-bottles-12-oz-case-24-1.html
Last, but not least, I highly recommend How to Brew by John Palmer. It starts at the beginning, with instructions for your first brew and continues on to move you into the more advanced techniques.
https://smile.amazon.com/How-Brew-Everything-Great-Every/dp/1938469356/ref=sr_1_1_sspa?crid=1GIVLHG1JENP4&keywords=how+to+brew+john+palmer&qid=1562623249&s=books&sprefix=how+to+brew%2Caps%2C488&sr=1-1-spons&psc=1
If you enjoy the hobby and move on to more advanced methods, you'll find a place for most everything in these kits.
Happy brewing.
My top suggestion would be "How to brew" By John Palmer or "The Complete Joy of Homebrewing" By Charlie Papazian and read before buying anything. You will get a strong understanding of the process and be able to make sure it's something you will want to do before dropping $100 dollars on getting started.
If you want to jump in with smaller batches (1 Gallons) I would suggest buying one of Brooklyn Brew Shops kits or another small batch kit. The process is pretty much the same just in smaller portions. If you decide from there you want to go bigger you always can and then you have a better grasp on the process and what will be needed to make better beer.
I haven’t seen it yet but The Complete Joy of Homebrewing Fourth Edition: Fully Revised and Updated https://www.amazon.com/dp/0062215752/ref=cm_sw_r_cp_api_i_XiQoDbVWK4YK0 is worth a read.
Also like everyone else was saying, just take it one step at a time. Just enjoy it. And start kegging ASAP because bottling sucks.
I’d say try not to make too many changes to your brewery all at once, so you can stay familiar with how long different things normally take, and it limits the hiccups you might have. Obviously there’s going to be pretty big steps, like going all grain.
This is the cooler I use for a mash tun. It works great. It's selling for a record low Amazon price and ships for free. I link to some pictures of it in that post. The seat top makes it easy to run a thermometer under the lid to monitor mash temps. The product link in that post helps support hbf. Thanks in advance if you use it. If you do not want to help support hbf here is a direct link.
If that's the case might I recommend a fermentation chamber? It's not going to fit a conical fermenter but I can easily put 3, 6.5 gallon, carboys in there.
https://www.homebrewtalk.com/diy-fermentation-chamber.html
The Inkbird is usually on sale for about $30 on Amazon. Follow http://homebrewfinds.com to get one on the cheap!
I built mine using an STC1000, but I had to go to Radio Shack and grab a project box to make it look pretty.
For the heating unit, I purchased a $12 mini heater from Amazon and also installed a 12V fan that is on 24/7. Eventually I tossed a unit to help with moisture in there as well. I can't remember the name of it...found it on Homebrewfinds.
I'd run outside to take photos of my build but it's raining something hard right now ;(
If you are still pretty new, you'll want to be comfortable making clean beers before trying your hand at sour and wild beers. There are so many factors that go into sour/wild ales, that you'll definitely want to have your brewing process down because one small variable can have a huge impact on the final product more so than a clean beer.
That out of the way, nothing says you can't start reading up on it. A good resource on sours is American Sour Beers by Michael Tonsmeire and his website The Mad Fermentationist, which has a bunch of recipes. I also highly recommend the Milk the Funk website, wiki, and Facebook group.
A lot of people have recommended How to Brew, and I cannot recommend that enough. Click this link to start reading the free version of the book. This was my single best resource when I started last year. Here is a link to the book on Amazon. The book is less than $17 and worth MORE than every penny if this is a passion for you. I hope you enjoy, and feel free to message with any questions at all that you may have.
Can I recommend a different thermostat? I think you would be much better off with an STC-1000, with a probe that can be immersed in the beer with a thermowell, or stuck on the side of a carboy/bucket. They are really cheap, and easy to wire. It needs 120v to power the unit, and then you can switch the input voltage for the fan with the built in relays.
If you ever wanted to add a heater it would be easy too.
The [Inkbird](https://www.amazon.com/dp/B00OXPE8U6/ref=cm_sw_r_awd_spS8ub02194G2
https://www.amazon.com/dp/B00OXPE8U6/ref=cm_sw_r_awd_spS8ub02194G2) seems to be a pretty great option that has F instead of C
they used herbs like mugwort and wormwood in everything, read this book
some ale spoiled
some ale was exquisite
Belgian Lambic is a great study in natural fermentations
I don't have any problems with bacterial infections, but I use all glass or stainless steel and any hose or air lock or cork I use gets rinsed in Starsan so that the surfactant and phosphoric acid form a no rinse layer of acid that is uninhabitable for the spoiling bugs.
Just start some good brewing habits, brewing GREAT beer is easy, when you know how
I do a similar thing, but these are the tubes I use. I bought two sets of them several years ago and they still work great. I replace the caps every so often. For the rack, I just keep them in six pack holders and put them in the keezer. I fill the unused vials with StarSan solution and store them that way.
I'd also like to add that, after I have racked a new beer into the fermentor, I pour the leftover trub into a mason jar, and then let it sit in the fridge for a day. Usually the trub separates to the bottom leaving a fair bit of usable wort. I give it another quick boil just to make sure its sterile and then make a small starter of something. After pouring off much of the beer, I can usually get about 10 vials of slurry.
Here's my advice to a beginner from a recent beginner.
A lot of people start with a small batch kit like Mr. Beer or Brooklyn Brew Shop that they got as a gift or bought on a whim. However, if I were going to recommend a 1-gal starter kit, I'd probably go with something like the one from Northern Brewer. Or you can get a 5-gal setup for just a little bit more and you get a lot more beer for you money, and it's really not that much more work. However, it was nice learning the process on a 1-gal batch, because it's a lot more manageable and you can easily do it on your stove with a pot you already have. Also, if you stick with it, and upgrade to bigger batches, you will still be able to find good uses for your old 1-gal equipment.
Whether you decide to test the waters with a small batch or jump right into a 5-gal batch, I would do an extract w/ specialty grain kit for your first brew. All grain is not that much harder, especially with small batches, but for your first few brews it's nice to just learn the process without having too many variables to worry about.
Also, buy a copy of The Complete Joy of Homebrewing or How to Brew or both and read the first chapter or so and you will have a good idea of what you're in for.
http://www.amazon.co.uk/Brew-Your-British-Real-Camra/dp/1852492589 is excellent - gives clear simple advice, as well as having a good selection of British ales, milds, porters and stouts - if that's your thing.
http://www.amazon.co.uk/Sacred-Herbal-Healing-Beers-Fermentation/dp/0937381667/ref=sr_1_1?s=books&ie=UTF8&qid=1368899642&sr=1-1&keywords=sacred+herbal+beers is also a really interesting book - an anthropological of the history and mythology of brewing, complete with recipes! A lot of the recipes are a bit simple, or sugar-based, but it (like Radical Brewing) is a really good source of inspiration and historical knowledge.
Advice? Get a bottling wand and a vinator and bottle draining rack and shave tons of time off your bottling day.
If you find making mead enjoyable and want to read some more up on it i can recommend The Compleat Meadmaker by Ken Schramm
A great source of information both for beginners and more advanced meadmakers. He's also a beekeeper, so he has a whole chapter dedicated to various types of honey too :)
Absolutely!
Almost everything came from Amazon, it was a little more in some cases... but you cant beat their support. If something is broken its replaced immediately and I wanted that reassurance.
Here is a list of the important stuff:
Nitro Regulator: https://www.amazon.com/gp/product/B07DY9SBMB/ref=oh_aui_detailpage_o09_s01?ie=UTF8&psc=1
CO2 Regulator (dual tap):https://www.amazon.com/gp/product/B0060NOX40/ref=oh_aui_detailpage_o08_s00?ie=UTF8&psc=1
Stout Faucet: https://www.amazon.com/gp/product/B000BO1KFY/ref=oh_aui_detailpage_o08_s00?ie=UTF8&psc=1
Shank for the stout faucet (beer faucets came with shanks): https://www.amazon.com/gp/product/B00829HN7E/ref=oh_aui_detailpage_o09_s02?ie=UTF8&psc=1
Beer Faucets: https://www.amazon.com/gp/product/B01D6MSELA/ref=oh_aui_detailpage_o08_s00?ie=UTF8&psc=1
Thermostat: https://www.amazon.com/gp/product/B0152LYY0I/ref=oh_aui_detailpage_o09_s00?ie=UTF8&psc=1
Drip tray: https://www.amazon.com/gp/product/B002NQIROA/ref=oh_aui_detailpage_o04_s00?ie=UTF8&psc=1
This was the nitro tank (probably the best deal IMO), its a nitro coffee place but it holds beer gas fine :) - I had to use this specific one because of the space it had to fit into, I wanted everything to be self contained in my build: https://beveragelements.com/beverage_elements_shop/cold-brew-nitro-coffee/cold-brew-coffee-nitro-coffee-cylinders/23-cu-ft-nitrogen-cylinder-nitro-coffee/?gclid=Cj0KCQjwlqLdBRCKARIsAPxTGaVyfeABi5S7mFR-ByXCWkDGRbyimzJ52J-2TXkyxDyYABYQxXios2oaAiDuEALw_wcB
​
Obviously this thin wasn't cheap, but 3 tap kegerators aren't cheap either and this one does nitro! It was a decent investment spread over about 2 months of the build so that eased the pain on the wallet.
​
If you can splice a few wires yourself, here is a cheaper option for temp control. You would still need to buy a couple of extension cords, and a heating element (I use a light bulb in a paint can). Set up a search alert on Craigslist for a cheap fridge or chest freezer and you are in business. If you are looking to go super cheap, your best bet is to submerge your carboy about 3/4 of the way in water, add ice, and wrap a towel around the top of the carboy to encourage evaporation. You really have to stay on top of the ice though.
Seconding the water report suggestion, but it's a good guideline...don't take it as gospel. Tap water chemistry changes throughout the seasons so it's a moving target. I'd be surprised if you need anything more than a carbon filter and campden tablets. MUCH cheaper than a RO system. Something like this.
http://www.amazon.com/gp/product/B0006IX87S
My tap water starts smelling like pond scum late in the summer, and an inline carbon filter like the one i linked takes that aroma out. Campden to get hit of chlorine and chloramine and i'm golden.
Fermenter
If you like glass fermenters and have a power-drill get this or something like it. I absolutely love mine, makes cleaning my glass ones a cinch
Heating Element
Water proof and cheaper than any "brew belt" with same power density: Seed Germination Mat such as this one
Gloves
What you linked to are generic vinyl-dipped or nitrile gloves. I'd go for silicone barbecue gloves such as this for more insulation from the heat
Thermometer
If you're on a budget and Thermapen/MK4 is not an option, most reviews conclude this is the best bang for your buck: Lavatools Javelin
Microbrewed Adventures by Charlie P. is a great read. The idea is basically he pairs homebrew recipes to stories about his adventures discovering new beers.
Edit: Also, it's a great companion to his more famous The Complete Joy of Homebrewing
Not Safe For Lager!
Damp rid works but if you want a reuseable option these are pretty great. https://www.amazon.com/Improved-Eva-dry-333-Renewable-Dehumidifier/dp/B000H0XFCS/ref=sxin_2_ac_d_pm?keywords=dessicant+reusable&pd_rd_i=B000H0XFCS&pd_rd_r=95d24195-00f7-441d-be92-b5ba6849133f&pd_rd_w=OPVGR&pd_rd_wg=PEhdF&pf_rd_p=64aaff2e-3b89-4fee-a107-2469ecbc5733&pf_rd_r=B67YVD8TBNMHZA22X1TR&qid=1563110968&s=gateway I rotate a few between keezer and ferm chambers. IIRC I bought them last prime day so might be worth looking out for.
A few questions about beer line. I got a great deal on a chest frezer and am building a keezer. I have almost all the parts picked out but need some help with beer line. I was planing on just using this tubing but am now concerned about vinyl flavors in my beer. Honestly the beer will most likely sit in the line for around 48 hours between pours. The two other things I am considering are Accuflex Bev-Seal Ultra or Ultra Barrier Silver. I am concerned that I with Accuflex Bev-Seal Ultra I will need to extend the lines to much in order to reduce foam. I would really like some insight on the problem I have spent 2 days debating this in my head and would really just like to order some parts so I can enjoy some beer.
I based it on the Son of Fermentation Chiller plans but made modifications to the dimensions to allow it to fit two carboys. Originally I just had a cheap thermostat from Home Depot and only cooling, but had some issues in the winter months with the beer getting too cold at night and the yeast dropping out before it reached the targeted FG. So eventually I upgraded the temp controller to the STC 1000 which does both heating and cooling and picked up a 4" duct fan, some 4" duct, foil tape, and cut up an old brew belt I had laying around. I would highly recommend building one if you have the resources. It's probably the single biggest improvement to my brewing process I've ever made.
How To Brew: Everything You Need to Know to Brew Great Beer Every Time https://www.amazon.com/dp/1938469356/ref=cm_sw_r_cp_apa_i_LOFNDbTQ8KM55
This book has been recommended to me by multiple people. It's well written and breaks everything down in a way I believe is easy for anyone to understand. It's been a great resource so far.
Wild Brews is a great book if you're interested in Belgian style wild beers (i.e. Flanders and lambic style). As others mentioned, /u/oldsock's blog is a great all around resource, and he's also coming out with a book that's bound to be good.
I've read Designing Great Beers and it's a great resource as a style guide, but it leans much more towards the empirical side when it comes to explaining things. If you're looking for something a little more scientific and data-driven there are some other really good options.
Suggestions:
/ Yeast
/ Malt
/ Hops - Very specific and science driven focus on each element.
Very good than. Now you can just piece the rest togethers. For the Regulators, I'd recommend the Taprite T752HP. These regulators are awesome, super accurate and the knobs lock. 20-30' of 3/16" of Bev Line. Buy your gas in and liquid out keg fittings, some hose clamps and cobra taps. You should be able to get all that and a tank for not much more than $200 if you already have the kegs. Faucets will run you $40-50 a piece for a decent faucet and shank.
You're in luck. I bought the 396gph ecoplus pump just a few weeks ago, for exactly the same purpose. It's been used twice now with my immersion chiller, and has the perfect flow rate.
In Houston, ground water is over 80 degrees right now. An IC simply can't get things below 100. So I run regular hose water through until I get below 110 (about 8 minutes if I keep the wort constantly moving). Then I switch the hookup to that pump sitting in ice water, and another 8 - 10 minutes gets me to 70 degrees. Best $22 spent.
Notes:
1- The pump has a 1/2 inch female output, and a handful of different size hose barbs, none of which are useful. I went to a hardware store, and got a connector to go from that to a male hose receiver for a few dollars.
2- Yes, you could use this to save water by recirculating. However, as your source water heats up, you get less efficient. (Unless you had like a swimming pool or something to draw from)
3- It works fine lifting from ground level, but it works even better if you can raise it to an even level. I have my kettle on the propane burner, so my ice chest (with water and pump inside) sits on a chair.
4- If you can avoid it, don't waste your money on corner store ice. It's insanely over-priced. There's a "Twice the Ice" vendor by my house that sells 20lbs for $1.75. This suffices for the day.
Ask any other questions you have.
I realized over the weekend, to give credit where it's due, I got this information from Michael Tonsmere's book and not from Chad Yakobson. Sorry!!! (It's a great book FYI, definitely worth a read)
http://www.amazon.com/American-Sour-Beers-Michael-Tonsmeire/dp/1938469119/ref=asap_bc?ie=UTF8
My post from another question like that, might help you to see what's needed.
From that list the required things are - the keg, CO2 tank and regulator, gas hose, quick disconnect gas side, quick disconnect beer side, beer hose, faucet. You can get picnicking tap.
...........................................
Here, while not basic, but a list that might help. This is a 4 keg setup. Some items are not exactly needed, for example hose clamps, MFL push to connect (you could just get barb ones), but helpful for disconnecting/cleaning. You can save a lot on faucets - my 4 costed me $280 total all in. You could also get a cheaper freezer.
I got a regulator with 2 possible pressures so I can have carbonation pressure plus serving pressure at the same time - also not a requirement.
Name|Price|Quantity|Total|URL
:--|--:|:-:|--:|:--
Inkbird Itc-308 Digital Temperature Controller Outlet Thermostat 2-stage 1100w w/ Sensor|$35 |1|35|https://www.amazon.com/gp/product/B011296704
Intertap Self Closing Faucet Spring|$1.99 |4|7.96|https://www.morebeer.com/products/intertap-closing-faucet-spring.html
Intertap Stainless Steel Faucet Shank|$32.99 |4|131.96|https://www.morebeer.com/products/intertap-stainless-steel-faucet-shank-4.html
Duda Energy HPpvc025-100ft 100' x 1/4"" ID High Pressure Braided Clear Flexible PVC Tubing|$28.50 |1|28.5|https://www.amazon.com/gp/product/B00LX6LS7E
Brewer's Edge UX-CAOO-IQIT Keg Lube 1 oz.|$5.98 |1|5.98|https://www.amazon.com/gp/product/B0064OK99S
Hilitchi 60 Piece Adjustable 8-38mm Range Stainless Steel Worm Gear Hose Clamps Assortment Kit|$12.99 |1|12.99|https://www.amazon.com/gp/product/B01IOE4RQQ
Taprite T752HP Two Product Dual Pressure Kegerator CO2 Regulator|$89 |1|89|https://www.amazon.com/gp/product/B0060NOX40
KegWorks Beer Tap Faucet Handle Black|$4.30 |4|17.2|https://www.amazon.com/gp/product/B000VI753Q
Intertap Forward Sealing Beer Faucet (Stainless Steel)|$31.54 |4|126.16|https://www.amazon.com/gp/product/B01NAGS3ST
4 Way Co2 Manifold|$42.99 |1|42.99|http://www.farmhousebrewingsupply.com/4-way-co2-manifold/
Accuflex Bev-Seal Ultra (3/16) 50'|$15.99 |1|15.99|http://www.farmhousebrewingsupply.com/accuflex-bev-seal-ultra-3-16-50/
Pin Lock Disconnect- 1/4 MFL Gas Side|$5.99 |4|23.96|http://www.farmhousebrewingsupply.com/pin-lock-disconnect-1-4-mfl-gas-side/
Pin Lock Disconnect- 1/4 MFL Liquid Side|$5.99 |4|23.96|http://www.farmhousebrewingsupply.com/pin-lock-disconnect-1-4-mfl-liquid-side/
1/4" MFL Push To Connect|$3.79 |4|15.16|http://www.farmhousebrewingsupply.com/1-4-mfl-push-to-connect/
5/16 x 5/8 BSPP (Shank Connector) Push To Connect|$5.99 |4|23.96|http://www.farmhousebrewingsupply.com/5-16-x-5-8-bspp-shank-connector-push-to-connect/
Igloo 7.1 cu ft Chest Freezer Black|$219.99 |1|219.99|https://www.walmart.com/ip/Igloo-7-1-cu-ft-Chest-Freezer-Black/31136433
Set of Four 5 Gallon Pin Lock Kegs Used|$28.90 |4|115.6|http://www.homebrewing.org/Set-of-Four-5-Gallon-Pin-Lock-Kegs-Used_p_3179.html
20 CO2 tank|$60|1|60|craigslist
2 in. x 8 in. x 10 ft. #2 and Better Prime Douglas Fir Board|$9.86|1|9.86|http://www.homedepot.com/p/2-in-x-8-in-x-10-ft-2-and-Better-Prime-Douglas-Fir-Board-604364/206182008
ZMAX 7 in. 16-Gauge Galvanized Reinforcing L-Angle|$3.27|4|13.08|http://www.homedepot.com/p/Simpson-Strong-Tie-ZMAX-7-in-16-Gauge-Galvanized-Reinforcing-L-Angle-L70Z/100375233
||||1019.3.36|
You would also need a wrench if you don't have one yet to unscrew the posts on the keg.
Well you can spontaneously ferment the beer using wild yeast in the air, use the yeast leftover from the cider, or pitch a lab culture of sour yeast, just as you would for regular yeast. The easiest method would be to clean and sanitize the 1 gal carboy and your 5 gallon carboy on your brew day, and then rack 1 gallon into the smaller carboy then rack the rest into your 5 gallon. Then, pitch a sour culture into the smaller and your other yeast as you would normally into the 4 gallon carboy. http://www.milkthefunk.com is a good place to read about these other yeasts, and I would recommend reading http://www.amazon.com/American-Sour-Beers-Michael-Tonsmeire/dp/1938469119 as well.
You sya you don't have the tools to make the mash tun and brew pot. I assemlbe my mash tun, HLT, and brew pot with two 10inch adjustable wrenches, a standard dewalt drill, a carbonate cutting bit, a stepped cutting bit, and some cutting oil. If you have the drill everything else would cost around 50 bucks, then you also gain tools with your equipment. The hardest part is cutting holes in the pot for a thermometer.
Either way to make the Mashtun and MTL you would only need 2 10 inch adjustable wrenches.
Up to you, but here is some all grain kits you could look at:
http://www.austinhomebrew.com/10-Gallon-Igloo-Cooler-Mash-Tun-With-False-Bottom-AND-Hot-Liquor-Tank_p_6699.html
https://www.amazon.com/Gallon-Cooler-Stainless-Steel-Screen/dp/B013KJKAC0/ref=sr_1_9?ie=UTF8&qid=1486068034&sr=8-9&keywords=10+gallon+mash+tun
You can make a 10 gallon mash tun for under 100 dollars:
10 Gallon cooler (~$50)
https://www.amazon.com/Igloo-Gallon-Beverage-dispenser-Dispenser/dp/B000F6SHTK/ref=sr_1_1?ie=UTF8&qid=1486068151&sr=8-1&keywords=10+gallon+cooler
Ball Valve(~$15)
https://www.amazon.com/Eagle-Brewing-Wl301-Stainless-Weldless/dp/B00OC8DXPA/ref=sr_1_sc_2?ie=UTF8&qid=1486068175&sr=8-2-spell&keywords=wedless+ball+valve
Screen (~$8)
https://www.amazon.com/Stainless-Steel-Bazooka-Screen-Fitting/dp/B003ISY2DC/ref=pd_sim_468_4?_encoding=UTF8&pd_rd_i=B003ISY2DC&pd_rd_r=45GNPGH763R20241728C&pd_rd_w=MCZcu&pd_rd_wg=n4Wsv&psc=1&refRID=45GNPGH763R20241728C
1/2 female npt fitting(~$5)
https://www.amazon.com/Stainless-Steel-Fitting-Coupling-Female/dp/B003GSKXUU/ref=pd_sim_328_6?_encoding=UTF8&pd_rd_i=B003GSKXUU&pd_rd_r=SMJAVJR6CYZ7P9ZBQBQQ&pd_rd_w=h6v7j&pd_rd_wg=eclPX&psc=1&refRID=SMJAVJR6CYZ7P9ZBQBQQ
Total: 78 dollars. You can buy 2 10 inches adjustable wrenches for 20 dollars (https://www.amazon.com/Stanley-90-949-10-Inch-MaxSteel-Adjustable/dp/B000NIDIXA/ref=sr_1_1?ie=UTF8&qid=1486068379&sr=8-1&keywords=10+inch+adjustable+wrench)
so even having to buy tools its still under 100 dollars to make the Mash tun. The hot liquor tank will be the same price minus the screen, npt fitting, and tools. I personally made mine even cheaper buy using a 5 gallon htl instead of a 10 gallon and that will drop the price 25 more dollars. There is 0 drilling involved you simply unscrew the old plastic tap and put the weld ball valve in its place, it took me less than 10 min to make my new HTL on Monday.
Also, and this is really important to why I say build yourself, any mash tun you buy is going to be put together the same way it just matters whether you put it together or someone else does, either way the quality will be identical.
If you need a sparge arm for fly sparge you can make that out of pvc pipe: https://www.youtube.com/watch?v=Q-jgmgbwvg4
My two cents, even though you don't believe in you. I do, if you feel like saving money you can absolutely make all this stuff yourself and it doesn't require you be good at anything more than thinking like a logical person.
If you're into that, you might like to read this book: Sacred and Herbal Healing Beers. I think the author gets a little too caught up in the sacred/spiritual malarkey behind the beverages, but there are really quite a lot of interesting beer-like creations in there, most of them with recipes of various levels of detail (most will at least take some guesswork and creative sourcing of ingredients).
Here's mine. I run a magnetic drip tray, magnets are strong enough to support a full growler. I recently moved the gas manifold and CO2 tank outside because I had a series of leaks and that was an effort to eliminate one of the potential causes. I use an Eva Dry and a small USB fan and together they do a great job keeping things fresh and dry.
I've made a lot of mead. I'd recommend getting Ken Schramm's book. He talks about fermenting with fruit. My recommendations:
After that, put an airlock on it and let it sit. After a month or two, rack it off the lees & fruit into a carboy with minimal headspace (purge with CO2 if you can) and hide it away again. It should be ready to drink in another month or so, but letting it sit for a while will let it get even better. So delicious.
For anyone looking to up their brewing game, I always recommend Brewing Better Beer. It's all about fine tuning your process and simplifying your recipes to only include what you need. It's a sort of zen approach that seems applicable to abbey ales.
Although it's getting a bit out into the weeds, if you're more interested in the farmhouse/wild side of brewing, you might want to have a look at The Drunken Botanist and Sacred and Herbal Healing Beers. It gets into using things that aren't hops in your fermentations. Even though Belgian brewing only grazes herbs and spices, you might find some value there.
Fridge's temperature controls are crap and incapable of controlling temperatures for ales, and inadequate for controlling temperatures for lagers or cold crashes.
You need a digital temperature control. You plug your fridge into it, you tape your temperature probe in the fridge, and you plug the control into the wall. Leave your fridge on the coldest setting and this will power your fridge on based on your set temperature to accurately control temperature within a couple degrees.
Complete solution: https://www.amazon.com/Inkbird-Itc-308-Temperature-Controller-Thermostat/dp/B01MDSWXY4/
Or you can do what I did and scavenge a computer cable and wall outlet and build one out of something like this: https://www.amazon.com/Inkbird-All-Purpose-Temperature-Controller-Fahrenheit/dp/B00OXPE8U6/
These are perfect for:
As a bonus, you can flip these into heating mode, wire up an element and use it to control mash temperature in a recirculated mash scenario, or to just make perfect sous vide.
Once you get more into mead making, give The Compleat MeadMaker and Making Great Mead a read. Both are great to provide a more detailed view on meadmaking, and different ways to go about it. :)
I have a pool, so I have a kit to test chlorine, alkalinity, pH, etc... It's accurate from 0-5 ppm of chlorine.
I get between 1-2 ppm of chlorine in my tap water depending on the time of year. My fridge filter and this Filtrete take out 100% of the chlorine.
I tested a different Camco RV filter last year, and it only removed about 50% of the chlorine. It also affected the total alkalinity which was very strange. I'm not even sure how that's possible, but I repeated the test multiple times.
Anyway, it looks like your Camco is superior (e.g. 5 micron vs 100), so hopefully you get good results.
I agree with the reading bit but I did too much reading on the internet and got overwhelmed with all the different advice. I wish I'd brought The Complete Joy of Homebrewing earlier. It's got all the information you need to get started extract brewing through till all grain.
I can't speak for Damp-Rid but I've been using this in mine and it is awesome. I just take it out once a week to dry out for a few hours and then its good to go again.
I actually just posted about this in another thread if you'd like to read about my process.
Thread
You need to look into an upgraded submersible pump and a tub/cooler for ice water. Being able to whirlpool would help as well.
Edit : This is the pump that I use and it does a great job.
your process looks pretty good, i have the 15gal ss brewtech and i would get it without the thermo. you are just going to cause problems with the bag. another thing i would get is a giant whisk for mashing and creating whirlpools/oxegenating
also i use this giant colander on top of my 15 gal brewtech kettle to rest the bag in and squeeze with some silicone gloves. the gloves are a must with BIAB.
i used to use a hop bag but ever since going away from it i have found my beers have gained some hop character they were lacking before.
also make sure you are treating your water for chlorine with campden tablets before brewing, and if you want to go one step further you can build your water up from scratch. i fill up 2 6 gallon containers at the windmill express for .25c a gal and add gypsum, cacl, epsom etc from there.
The advice in these comments is good. Also, Beginner's brewing books like The Complete Joy of Homebrewing and The Brewmaster's Bible have sections with generic recipes by style. The also have good general descriptions of various varieties of hops and their typical uses for bittering, flavoring, or aroma.
I use two of these in my fermentation chamber. It keeps everything really dry. I've found it helps the most when fermenting ales in the 60 degree range. It's a perfect environment for mold to grow. Moderate temperatures and high humidity. Since I started using those things several years ago that problem has been eliminated. Great thing is, when they're full you can just plug them into an outlet overnight and they're ready to go again.
Could be, yes. Make sure the fermonster isn't cracked, but most likely condensation. Get an Eva Dry from amazon - it's a great, inexpensive dehumidifier.
I've been using these: http://www.amazon.com/gp/product/B000OF8V5W/ref=oh_o02_s00_i00_details
with glass carboys to help make carrying easier (and eliminate some dropping risk)
Don't know much about the other differences, but if you decide to go glass, get something like these :)
Check to see if there are any local home-brew shops or brewing clubs in your area, pop in and start picking their brains, I've found the brewers in my area to be very open and welcoming to people interested in picking up the hobby. Other than that John Palmers book ( https://www.amazon.com/How-Brew-Everything-Great-Every/dp/1938469356/ref=sr_1_1?ie=UTF8&qid=1519527151&sr=8-1&keywords=how+to+brew ) is a great read and you'll learn a lot from it.
Here's a link to those tubes. They're pretty common, you might be able to find a better price than that.
They're food-grade (obviously) so they supposedly work well. Haven't used them myself though. These should only be used for starters though. After storage you're likely not going to have enough viability in a single vial for a healthy pitch.
I have one of these digital controllers which does exactly what you're looking for. I'm super happy with it.
If you're thinking cheaper, there's an analog version as well.
A quick Google search provided me this. Seems easy enough. I'm sure there are cheaper prices out there if you do a little more searching than I did. All hail the almighty Amazon. Cheers!
Stand by:
Ball Valve
False Bottom
10 gallon cooler
False Bottom - Valve adapter
Please shop around. I have no doubt you could get some of this stuff for cheaper. I was restricted in that my only form of currency was Amazon gift cards. Especially the adapter could be built / constructed for much cheaper than I paid.
Additionally, instead of the false bottom / adapter, one could simply employ a Bazooka Screen instead of a false bottom, I have just read that false bottoms are more effective and less prone to problems.
DISCLAIMER - Always do your own research and make sure the parts that you are buying are all compatible and properly sized, etc. etc.
Having said that, the parts I listed above are exactly what I ordered and all fit together perfectly, I just needed to go out and buy a female coupler (to attach the valve to the hose from the false bottom) and a washer (per the included instructions with the valve, which had a additional washer for my configuration).
Actually, a lot of northern tribes didn't have beer or fermentation. Tobacco was traded all over N. America and used for ceremonial purposes, and certainly hallucinogens, but most of the non-corn-dependent tribes did not use alcohol until contact with Europeans. If you're really interested in traditional beer styles, though, check out Sacred and Healing Herbal Beers. It's a good bit of research that traces a lot of indigenous brewing techniques.
http://www.amazon.ca/Sacred-Herbal-Healing-Beers-Fermentation/dp/0937381667
this book has everything you're looking for: sacred and herbal healing beers: the secrets of ancient fermentation. it covers everything from old norse mythology surrounding mead to the cultural practices surrounding traditional south american beers (e.g. chicha which requires the brewer to chew the maize or manioc in order to convert the starches into sugars) to the history of traditional gruits, and has tons of useful historical recipes for whatever you'd be interested in making. it's interesting to read as well as providing a lot of practical tips for using unusual ingredients in your brews.
http://www.amazon.com/Sankey-Ball-Quick-Disconnect-Conversion/dp/B00C30F75I
So I can hook up sankey kegs to my ball lock disconnect system. Works great
Great book. Probably the best beer brewing book available. On another note check out The Compleat Meadmaker : Home Production of Honey Wine From Your First Batch to Award-winning Fruit and Herb Variations
Excellent suggestions. Well written. As far as getting stuff in and out of a chest freezer, most kegs have handles so that's take care of. But for getting carboys in and out these work fine.
I would advise against getting the NB cooler kits because of the crazy markup on the coolers themselves. If you look at the products, you have to assemble everything yourself anyway. They charge $100 for the igloo coolers, but you can get them for $42 on Amazon. Actually, the fittings that NB offers are a pretty comparable price to other places. Maybe just get the fittings, but uncheck the cooler and order it separately.
Also, as others have said, you may not really need the HLT. Just try to visualize your brew day and see how you can finagle things optimally. Personally, I use my boil kettle as my HLT, and things work out well.
Is this a full boil, or partial boil? I use a simple pump like this for partial boil to do immersion in a sink, so it gives me the cooling effect of immersion and water on the kettle itself. I do wish I went with a slightly stronger version like the 1083 GPH version. The different versions come with different sized connectors, so you may need a step up in tubing size for the higher GPH versions depending on the tubing you use.
It's very good. I bought it. I also got the compleat meadmaker, http://www.amazon.com/Compleat-Meadmaker-Production-Award-winning-Variations/dp/0937381802/ref=sr_1_1?s=books&ie=UTF8&qid=1397588733&sr=1-1&keywords=compleat+meadmaker and it's very good if you're interested in mead.
Short answer if you just freeze yeast the freezing water solidifies and punctures cell wells, killing most of the yeast.
Long answer if you add a 50/50 solution of (water or beer) with food grade glycerin the water will get cold but never freeze.
My process:
Harvest yeast- overbuilding a starter is the easiest way or you could harvest and wash your yeast.
Decant Beer from your starter or use water and half fill a 1 pt mason jar and top off the rest with food grade glycerin. Boiling at this point is probably unnecessary but I do it anyway just to make sure no bugs get transferred in. Cool.
I then spray everything I use with Starsan and then dip everything I’m using in to the boiling water.
I use Soda Preforms but will switch to 1.5 ounce glasses once I burn through my preforms because I can boil them killing anything and not have to worry about melting plastic plus they’re cheaper.
I fill them halfway with my Decanted Yeast Slurry and let it settle. You want the settled yeast to be about half of the Preform which is approximately 100 billion cells. I then Decant excess liquid off and top off with your 50/50 (Water or starter beer) and glycerin.
Cap/Label place in an insulated bag with an ice pack to protect from freezing/thaw cycles and place in the freezer.
If your looking to get into mead Definately look into reading Ken Schramms The Complete mead maker http://www.amazon.com/Compleat-Meadmaker-Production-Award-winning-Variations/dp/0937381802/ref=sr_1_1?ie=UTF8&qid=1318922141&sr=8-1
the standard ratio for a medium mead is 3 pounds per gallon. A quart is about 6 pounds. In honey your looking for as little processing as possible eg dark is better. Be carefull about varietals as some can get pretty dark flavored eg buckwheat. Clover or orange blossom are good starts.
To follow up on /u/unsungsavior16's comment, I'd suggest The Complete Joy of Homebrewing. I read this after Palmer's book and loved both of them!
Can you link to that Amazon deal? I don't see it there. A friend of mine is looking for a mash tun and that would be perfect for him.
Edit: Never mind... I found it. Was looking for Gott and it is an Igloo.
You're efficiency will likely improve, especially if you double-crush your grains or set your mill to a finer setting, and squeeze your bag.
One trick I've started doing is when my mash is done I heat it up to 170 while stirring before taking the bag out. I seem to get a bit more of the sugars out this way. (I have a thick bottom pot so I don't have to worry about scorching the bag).
Also, buy one of these giant whisks. I used mine for the first time on my last brew and it made stirring the mash so much easier! Much better than a spoon or paddle.
Not to take business away from Midwest, but I think there are better options for water filters. The RV water filters are easier to find, and so are replacement parts, plus they'll hook right into your lawn hose.
@$20, 100 micron filter
@$50, 5 micron fliter
8 gallon kettle, 6+ gallon fermenter (buckets are fine), airlock, bottling bucket, racking cane or autosiphon, good instant read thermometer, hydrometer, sanitizer (i use StarSan religiously), cleaner such as PBW or oxiclean free, about 70 - 12 oz bottles, bottle caps, capper. You can find all of these items sold together as a starter kit at many online retailers - except probably the thermometer and bottles. Or check your local homebrew store.
I say those measurements so you won't be rebuying in a month when you want to do a full boil. You can boil a full 5gallons batch in an 8 gallon kettle.
Yes, you can spend $10k and want more. But there is no need to spend anywhere near that to make excellent beer.
And unless you've read and understand a few books or have a mentor that's gonna watch over you, start with extract and some specialty grains. It's easy to get in over your head with all grain and no experience. Start with a kit for sure. That way of it doesn't come out as advertised you will know it's something wrong with your process and not something wrong with the recipe you concocted. Sanitize everything that it going to come into contact with your beer after the boil. If you have questions post again.
And read a book. I started with Charlie Papazian's The Complete Joy of Homebrewing. Others will recommend Palmer's book but I haven't read it.
Cheers. RDWHAHB.
Just reading his book The Complete Joy of Homebrewing now. It's a fantastic resource!
I have 5/16" OD tubing in my keezer. Never had a problem with kinking. Once the tubing gets cold it is pretty stiff anyways. (although the 5/16" OD line is more flexible than the 7/16" lines I have, which is actually nice).
My personal preference for beer line is to buy it cheap and replace it often. Not sure what you ordered but this 3/16" x 5/16" beer line is what I use. When you buy it in 100 ft lengths it is extremely cheap... costs me about 70 cents to replace a beer line, which I do a couple times a year. So much easier than trying to do a thorough clean on a line that has had a sour or very dark beer in it. I flush with a little BLC and Star San between kegs but if it looks at all questionable I just replace the line.
Since I drink commercial beer from the kegerator when I haven't had time to brew I had the need to use both. I got sankey to ball lock adapters. I also got a 90° elbow for the beer line, so it wouldn't kink against the top of the fridge with the adapters on.
I took the lines off the sankey, put the ball lock quick disconnects on the hoses, and that's it. Works well. I can take a pic of the huge hunk of metal on top of my commercial keg if you would like.
Mine (American Sour Beers) is coming out in a couple months. Loads of specifics on how various breweries (Russian River, Cascade, Bruery, Jolly Pumpkin etc.) do their thing (plus all sorts of other stuff). Until then, Wild Brews is probably your best bet.
I just put mine together this weekend.
Around $220 for everything, but you can fit two 6 gallon carboys and two 3 gallon carboys or a few 1 gallon jugs on the hump.
This is the newest, updated version of How to Brew. Now to be fair, I haven't read the 4th edition of The Complete Joy of Homebrewing, it could have been modernized a bit. But the folks I deal with sure could use an upgrade in their new-brewer processes.
I am building a keezer. New to kegging. need some help with what gas and liquid lines I need. I bought a 10# CO2 tank, dual body regulator, and a 3 way gas manifold. My plan is to have a high pressure line out of the regulator for a seltzer water keg and also to force carb. then one line to the 3 way manifold for the 3 other taps at serving pressure.
I'm not sure what type of hose I need for each application, length for beer lines/ seltzer water line etc. Any help is much appreciated.
Edit: what about this for beer line? found on HBF... reviews look good. Is the thin wall a concern?
https://www.amazon.com/ATP-Vinyl-Flex-Plastic-Tubing-Length/dp/B00E6BCXQ8/ref=cm_cr_arp_d_product_top?ie=UTF8
Shouldn't need to go that far. Most temp controllers out there have their own temp probes that dangle inside the keezer, and the keezer is plugged into the temp controller. This allows the temp controller to decided when to cycle the keezer on and off. I have one of these and it works great. Easy to set up too!
There is no reason you can All grain first. You will just need more time and some extra equipment. Find a good book that will walk you through the steps and set aside 4-5hours for brewing and clean up.
The Complete Joy of Homebrewing is the book I started with.
My copy is from 1991 so I haven't seen the changes in the newer version.
Once you test it, these guys (https://www.amazon.com/gp/aw/d/B0006IX87S?psc=1&ref=ppx_pop_mob_b_asin_title) are pretty cheap and work well. They hook up to a hose and last a good while.
LME - Stainless steel mash paddle
DME - Giant whisk
Adding DME to cold water helps ALOT with dissolving. Wooden utensils look nice by stainless is shiny and oh so much easier to clean. IMO its never worth the cost savings to buy aluminum utensils.
here's mine, i started like you just opening the lid before i added the collar.
it holds 5 kegs, ball lock.
i use a johnson for control.
advice: just jump in, you won't regret it. buy a 20lb co2 tank. i would buy a double regulator from the get go if i was doing it again. also seconding the perlick taps, they are awesome
I'm BIAB, so that helps cut down on the space and equipment, but I'm looking at adding [240V Heating Element] (https://smile.amazon.com/gp/product/B000BPG4LI/ref=ox_sc_act_title_2?smid=ATVPDKIKX0DER&psc=1), Inkbird Controller, and [a basket to make raising the grains a bit easier to manage] (https://smile.amazon.com/gp/product/B000VXKJJI/ref=ox_sc_sfl_title_5?ie=UTF8&psc=1&smid=ATVPDKIKX0DER). Which doesn't seem like too much of an investment to make my brewday a LOT shorter, and a bit easier.
edit: [alternative inkbird controller] (https://smile.amazon.com/gp/product/B01KJZMWSI/ref=ox_sc_act_title_1?smid=A1RUFFFCQ74BCW&psc=1). This is the one i am currently considering, but i don't know the real differences.
IMO the best thing to do is just replace them periodically. You can buy the line in bulk and it should only cost a dollar or so per line to replace.
If you do want to clean the existing lines you don't really need any equipment. Just put some cleaning solution in an empty keg, pressurize, and run it through.
Get a better thermometer. I have the Javelin and it works great.
I would definitely recommend picking up How To Brew and reading the first chapter. I had many of the same reservations you did about being overwhelmed so I bought that book before I bought any homebrewing gear, and Palmer breaks the process down in very easy-to-understand steps that really put be at ease. It's also a handy reference guide packed with 600+ pages of reference material so you grow along your homebrewing journey https://www.amazon.com/How-Brew-Everything-Great-Every/dp/1938469356/ref=pd_lpo_sbs_14_t_0?_encoding=UTF8&psc=1&refRID=0MB11TKD818134B92P01
I'm looking to purchase the parts for a 2 tap sankey kegerator and wanted some feedback on before I go ahead and order. everything is through amazon because I have a large amazon gift card.
I already have 2 intertap flow control faucets
coupler-kegco KTS97D-W x2
beer line assembly x2
10 feet of gas line
20# luxfer co2 tank
taprite dual regulator
intertap shanks x2
I'm hoping to pick up a used chest freezer on craigslist. Anything I'm missing? Anything I should change?
I use this cheap little pump for a ton of stuff in the brewery
my only gripe is that it did not come with a 3/8ths barb, other than that, super useful for cleaning kegs, draftlines, post brew day cleanup and recircing ice water through my IC.
I've got two, one I built from a PID temp controller from ebay. The other is a pre fab johnson digital controller this one They both work fine, I prefer the pre fab one for the quality though.
It's a little over your budget, but I have this one and love it.
Lavatools PT12 Javelin Digital Instant Read Meat Thermometer (Chipotle) https://www.amazon.com/dp/B00GRFHXVQ/ref=cm_sw_r_cp_apa_G-2Kyb17PTGZY
For about the same price you can get http://www.amazon.com/The-Brew-Hauler-Carboy-Carrier/dp/B000OF8V5W/ref=sr_1_1?ie=UTF8&qid=1331790769&sr=8-1 yes there is shipping added that too. BTW i made my own as well, but it comes pretty close that price.
Looks good. I would suggest installing a computer fan to circulate air. You can wire it into an old cell phone charger to power it. And if you notice the freezer is getting damp inside, you can get a dehumidifier like this: https://www.amazon.com/gp/aw/d/B00BD0FN8A/ref=sxts1?ie=UTF8&qid=1494472933&sr=1&pi=AC_SX236_SY340_FMwebp_QL65
Northern Brewer was bought by AB-Inbev. Those are the guys that make Budweiser and whatnot. They're extremely focused on profit margins and so they'll provide the cheapest product they can get away with. I suggest you look into alternatives, including Adventures in Homebrewing, MoreBeer, and of course your local homebrew store if you've got one.
If you aren't entiiiiirely sure what you should be doing I suggest buying the newest edition of How to Brew https://smile.amazon.com/How-Brew-Everything-Great-Every/dp/1938469356 or at the very least look at the guy's site www.howtobrew.com
If you're just going to look at the site I very, very hardily recommend against secondary. While his concerns are fair, the average beginner has nothing to even worry about. You'll know when you need a secondary just from experience.
Also, don't use a snowbank for cooling. Just... Just don't.
You should never worry about beers going bad. With the exception of extraordinarily hopped beer you won't have to worry about them "turning" (and even with really hopped beers it's not so much turning as much as it is losing the hop nose on it). As a matter of fact, some beers require aging of a year or even more! You're more in the danger of running out of space than your beer going bad.
So what do you like drinking? Got a style or a brand you've liked in the past? I might be able to whip up a decent, low-cost pack that will get you through it.
Also, what's the biggest pot you've got at home, and are you willing to pay for a new one?
Ken Shram's The Compleat Meadmaker has a handful of melomel recipes. I don't know if there's a raspberry-only recipe, but he has a multi-berry melomel recipe that's got strawberries, raspberries, blueberries, and cherries. If you go to Amazon do a Search Inside This Book for black raspberries you should be able to find it.
Also, that book is a great in general for meadmaking tips and information.
If you're going the sour route and venture away from strictly Belgian styles, u/oldsock has a great book called American Sour Beers that I would recommend picking up.
You should try those 'carboy carriers', like this. I have some for my plastic carboys and they work great.
Do you just want a kegerator/keezer for under 600 or a whole brew setup plus kegerator for 600?
If just a kegerator and assuming you are in the US then it is totally feasible.
STC-1000 $17.98
Keg, Faucet, Shank, Regulator CO2 tank $251.99 but cheaper if you use a picnic tap
7.1 cu ft Freezer $178
Total of $447.97
You could possibly get a CO2 tank of CL cheaper and a keg cheaper. I have paid well less then $100 for a keg and 5lb CO2 tank. But the point is a kegerator takes a bit of an initial investment but you can upgrade as you see fit once you make the initial jump.
I’ve been freezing yeast for a couple years. The process in that link is a lot more complicated then it needs to be.
I use a variation of this process.
Tips
You’ll want to be as sanitary as possible.
I can reliably fill 4 soda preforms.
I’d recommend one have a different color cap to let you know you’re almost out of that particular yeast strain.
I keep the beer/glycerin mixture in a mason jar and bring it to a boil from time to time since you won’t use as much of it as you’d expect.
Save used preforms to re-use.
Only do this for yeast you’ll use or have a hard time getting ahold of. You’re not saving money by saving yeast you’ll never use.
If I plan on reusing yeast within 6 months I’ll wash the yeast and place in a mason jar.
In my experience it takes the yeast a day or two longer to wake up once pitched into a starter. Make sure you build that time into your brew schedule.
Glass carboy supporter here. I use the nylon brew straps whenever moving my glass. Next to my wort chiller, it's probably the best tool I have in my arsenal.
I just bought a chest freezer off of craigslist for $80. Then I bought a STC-1000 from amazon for $25.
I wired up the STC-1000 with a 4x4x2 junction box, an extension cord, and an outlet (all from Lowe's).
I completed everything 2 nights ago and it has been working great. The controller will both heat and cool if you live in a colder climate. And the whole setup will allow me to ferment Ales and Lagers at proper temperatures, longer term lagering, and store beer or freeze food if I need to. No mods are done to the freezer, so I can unplug the controller and sell it off later if I choose to.
One warning: The STC-1000 is Celcius only, but just print out a conversion chart and you're good to go.
If you decided that you don't want to do the wiring yourself with the STC-1000 you could grab one of these. Very simple plug and play temperature control. I used one for my keezer and I am quite happy with it.
So, you want to think about how many kegs you want in service at any one time. As others have mentioned, second-hand and sales are the shit. But there's something to be said for shiny and new.
A quick note in case you're not familiar with regulators. If you are, skip this. Basically when you get a tank of gas, it's holding a shitload PSI worth of gas. Whether or not the gas is in a liquid or gas state varies, but is largely irrelevant for this treatise. If you straight open that valve, it comes out at the highest speed that the nozzle on the tank will allow. So you screw on a gas regulator. The one that you attach to a tank is a primary/secondary combo. The Primary Regulator gauge is the left part of the regulator. It shows how much gas is in your tank. Co2 turns to liquid under pressure, so don't worry too much about what that gauge READS, just know that the internal mechanisms of the primary portion of the regulator are dropping 500-800PSI down to 0-100PSI or so. The second part of your regulator is the top gauge, which shows your Secondary PSI, or the output PSI, if you will. Depending on the sensitivity of the gauge and internal mechanisms, it can max out anywhere from 40-100. The screw on the front is how you adjust what PSI is coming out of that barb post at the bottom. This is the number you care most about. I only go into this much depth because when I first started kegging, I really didn't have a good grasp on these distinctions
If you plan on building a Keezer with space for 6 kegs, but only want to serve 3 at a time, I would get a single primary regulator with a secondary out and run that to an array of 6 Secondaries. That way you can carbonate and serve at variable pressures/volumes. However, even if you build that from scratch from used/new parts, it's still a pricey proposition.
Or, you could use that single regulator above and run the secondary to a 6 way manifold. The downside is each keg would receive equal pressure and therefore all carbonation in the kegs would be the same.
You could also mix and match for a more even approach: get a regulator like this and run the two outputs to two different 3-way manifold so 3 kegs could be X PSI and 3 kegs could be Y PSI. Meaning 3 kegs would be carbing and serving at 1 pressure, and 3 kegs would be carbing and serving at another.
I'm from Scotland myself, but I've been transplanted to California. Mugwort is all over the place here, too.
I pulled a recipe from Buhner. I haven't made it before, so I plan on reducing the recipe by 1/4 so I can make a gallon tester.
>Mugwort Ale
>
>(Buhner, pg 379)
>
> 3 pounds brown sugar
> 24 oz molasses
> 4 gallons water
> 2 ounces dried mugwort herb
>* yeast
>
>Boil sugar, molasses, water, and herb for 30 minutes. Cool to 70 degrees F, strain into fermenter, and add yeast. Ferment until complete, approximately one week, siphon into bottles brimes with 1/2 teaspoon sugar, and cap. Ready to drink in 10 days to two weeks.
>
>
http://www.amazon.com/Johnson-Controls-Digital-Thermostat-Control/dp/B00368D6JA
This is what I have. It plugs into the wall, the fridge plugs into it. You set the temp at what you want and it cuts the power to the fridge when it cools to that point. The temp is read by a probe that you put in the fridge. Mine is belted to the side of whatever I am brewing under a piece of foam to try and get the most accurate temp for what is fermenting. It works greats, and the only thing that would be better would be a glycol jacketed conical. It is still the best investment I have made in homebrewing.
> $549 retail
Damn it, I have to do math again....
For $550 you can also purchase the following:
That's really everything you need for one batch and we're only up to $218...
To fill the gap of $282, how about 7 extract kits estimating about $40 per kit?
So with my plan of $548 (that's one dollar cheaper!) you get 40 gallons of beer! How much does the competitor make per batch?
> The newer keg, which is the same volume (1.75 gallons) as the old keg will have simplified connectors.
Have you considered bottle blanks? Pretty cheap option and just like what White labs used for years. Bottle Blanks
There are a couple conversion kits. This one adapts the sanke tap to have ball lock connects. https://www.amazon.com/Foxx-4048Sankey-Quick-Disconnect-Conversion/dp/B00C30F75I
This kit swaps the sanke barb fittings for the flare fittings found on nicer ball lock connectors so you can easily swap lines over.
https://www.homebrewing.org/Kegerator-Homebrew-Conversion-Kit_p_720.html
edited links to not be a mess.
Coincidentally, I just read a tiny bit about this topic in American Sour Beers this morning! Russian River tops off their barrels and haven't noticed a significant difference. It's recommended to rack it in to keep the pellicle intact as much as possible.
The 396 gph version isn't much more expensive. To keep from using too much ice, you could start by letting the pot rest on its own for a few minutes (try a hop stand!), then switch to cold tap water through the pump, then switch that out for ice water. The key is just maintaining a high differential between the wort and whatever you're cooling with.
Another option -- and this is a little off the wall -- is to use your shower. You could switch to a handheld shower, get a diverter, or get a showerhead with a splitter that would let you easily swap in your wort chiller. Handheld showers use a pretty standard 1/2" thread.
check out www.themadfermentationist.com There is a lot of good information there about sour beers. There is also a book on American sour beers that was recently released. If you are really interested on learning everything about making sour beers you should get this book.
Easy! You can build the exact same thing, but you'll have to slightly modify your Sanke keg coupler with something like these. Basically, you put those ball lock conversion couplers onto your Sanke coupler and add ball lock disconnects to your existing gas/liquid lines. Now your system will work with the device in the hbt thread, and you'll be able to tab ball lock kegs too!
No you do not want those. You want these. http://www.midwestsupplies.com/5-16-barbed-shutoff-valve.html
the 4 way should already come with them. You need a way to turn the CO2 on and off as well as preventing any beer from back flowing into your gas lines. These will accomplish that
I currently have this one. http://www.amazon.com/Taprite-Product-Pressure-Kegerator-Regulator/dp/B0060NOX40
That is a good price for the 4 way
I have one of those but found that I'm happier with the eva-dry
Thanks, yes it is a Sanjay keg. Is it one of these I need along with the regular co2 set-up?
https://www.amazon.co.uk/Sankey-Ball-Quick-Disconnect-Conversion/dp/B00C30F75I
If anyone is interested, I have owned both and this thermometer is better (more water resistant) and cheaper too
/u/Auwardamn, this is also my suggestion. I've followed in the footsteps of others in using an EcoPlus pond pump. I have a $20, 290-gph, but this one is just $4 more and more powerful (396-gph).
/u/oldsock's new book comes out April 7th. That seems like a prudent time to do an ABRT on Cat 17 :)
I usually go 100 billion - same as comes in a commercial yeast pack.
I save them back in my original White Labs vial, or in one of these.
Cool, thanks! Do we know the difference between this and the one you got, which is 5 bucks cheaper?
Johnson digital. So far I love it.
http://www.amazon.com/gp/product/B00368D6JA/ref=oh_details_o00_s00_i02
I am using this one, NeverKink Teknor Apex, 7612-50 Boat and Camper, Drinking Water Safe Hose, 1/2-Inch by 50-Feet Hose though I have only used it for brewing water a couple of times. It doesn't leave discernible taste to the water. I primarily use it for supplying my immersion chiller (with a clothes washer hot water hose on the drain side).
For filter I assume you mean something like https://www.amazon.com/Camco-TastePURE-Flexible-Protector-40043/dp/B0006IX87S?
That depends on whether or not you add additional sugar before bottling it. If you ferment to completion, rack into the secondary, and then bottle from there, then you'll get still mead. But if you add mix some additional honey or other sugar into the secondary right before you bottle, then you'll get sparkling mead.
Check out The Compleat Meadmaker for everything you need to know about making mead.
Do note that mead takes about a year to hit its stride. The ones I've made have all had some astringent taste after primary fermentation and even tasted hot from the alcohol, but they mellow nicely after a year.
I run all my tap water through this https://www.amazon.com/Camco-40043-TastePURE-Flexible-Protector/dp/B0006IX87S along with a "drinking water hose" it works out great!
You're welcome! Hope you're able to connect with some folks to help you get started... but if you can't, watch some YouTube video tutorials, get yourself a starter kit and John Palmer's How To Brew, and jump right in!
Please help me decide how to spend $250.
I have a $100 gift certificate for my local homebrew store and $150 cash. US Dollars.
Below I explain how I brew and what equipment I have. I'm thinking of upgrading to a better immersion chiller. Or, I'm thinking of buying a stirplate and Erlenmeyer flask. I do step up starters using a jug. I have an general concern a big Erlenmeyer flask will break. I don't have a gas stove so I think I'd boil in a pot and transfer. I mostly do 2 to 3 liter starters.
QUESTION: before I buy a stirplate and flask, or a better chiller, do you think I should buy something else? Critiques are appreciated.
Please take a look at what I have already and help me decide:
How I Brew
All grain. Buy grain at store, they grind for free. Buy hops and yeast from them too. 5.5 gallon (20.8 liter) batches (volume before into fermentor). Ales. Brew in a Northern Californian garage with doors open. Igloo cooler. 60 minute mash. 2x Batch sparge. Single burner. Heat strike water, dough-in, mash. Heat sparge water 20 min before end of mash. Vorlauf. Drain wort into bucket. After first running drained, batch sparge in two phases. Vorlauf into same bucket as first runnings. When last sparge water is mixed in, start heating first two runnings. Add third runnings to boil kettle when done. Boil etc. Immersion chiller on until down to 100F (37.7C), then circulate ice water through chiller with pond pump to pitching temp. Oxygenate with diffusion stone. Pitch yeast. Seal. Rock fermentor. Pour a beer. Clean. Sanitize. Worry.
Equipment:
Comments / Concerns
tl;dr I have $250 to spend, given what I already have, how should I spend it?
I've been reading this book lately and it's pretty out there, but a fun read still. I've not made any of the beers in it, but they have several examples of using millet and buckwheat in their recipes. Like I said tough, the recipes in this book are way off the beaten path... just sayin'.
Caraway Ale (From Sacred and Herbal Healing Beers by Stephen Harror Buhner)
Original Recipe:
My adaptation of the recipe:
This came out to be a very malty beer. There are no hops in it to balance out the maltiness. This is probably the reason why it calls for unmalted rye. Nevertheless it is a delicious beer. There is something to be said though for the aroma. It is quite strange, and if you brew this I strongly suggest waiting 2 weeks after primary for conditioning because the aroma can be overwhelming at first. I thought I was going to have to dump it because of how awful it smelled, but the smell cleared up nicely after 2 weeks. The aftertaste is a bit unusual too.
If I were to brew this again, I'd probably lighten up on the malts a bit. Probably would raise the % on the pale malt and reduce the chocolate to no more than 2%.
Caraway supposedly has medicinal properties that help you digest food, making this a fantastic beer to have with a meal. So far even with its minor flaws it has been a hit with everyone who has tried it.
As far as cheap temp control, if you are somewhat handy you can get one of these. There are instructions to add an outlet to it like this otherwise this is plug and play.
I'd recommend an inexpensive thermometer like this, rather than the probe--I'm not sure quite how warm a probe can get, but I'd be surprised if it's over 100 F. https://www.amazon.com/gp/product/B00GRFHXVQ/ref=oh_aui_search_detailpage?ie=UTF8&psc=1
I'm looking to build my ferm chamber in the next several months. So far the only components I have are a mini fridge and this Inkbird Temp Controller. I was planning on using OSB sheathing for the walls, lined with foam board insulation, and throw in a 60 watt bulb for a heat source and perhaps a small fan to circulate the air.
I'm pretty handy. I do a lot of home/auto repairs myself so I imagine this will be a pretty simple endeavor, but what are some common pitfalls/mistakes that people make when building these things?
I use this thing to prevent this problem. Works great.
This is the one I have and I love it
https://smile.amazon.com/dp/B00BD0FN8A/ref=sr_ph_1?ie=UTF8&qid=1480791019&sr=sr-1&keywords=dehumidifier
Javelin thermometer, best thing in my kit and I use it though out the kitchen
https://www.amazon.com/dp/B00GRFHXVQ/ref=cm_sw_r_cp_apa_rE8VAbF1HFB4G
Get a copy of The Complete Meadmaker by Ken Schramm. Best book on the subject IMO. http://www.amazon.com/gp/aw/d/0937381802/ref=mp_s_a_1_1?qid=1369915766&sr=8-1&pi=SL75
I use this and it keeps my chest freezer bone dry. Love it.
Check out Bruce (George) Heilshorn's book "Against All Hops". https://www.amazon.com/Against-All-Hops-Techniques-Extraordinary/dp/1624143792
Another good read which Bruce recommends is Buhner's "Sacred and Healing Beers" https://www.amazon.com/Sacred-Herbal-Healing-Beers-Fermentation/dp/0937381667/ref=sr_1_2?crid=3VDTYQE3LECM4&keywords=sacred+and+healing+herbal+beers&qid=1568459625&s=books&sprefix=sacred+and+hea%2Cstripbooks%2C139&sr=1-2
Camco 40043 TastePURE Water Filter with Flexible Hose Protector https://www.amazon.com/dp/B0006IX87S/ref=cm_sw_r_cp_apa_44Gvyb81DXKYH
I get my water from my hose outside, since it's so near the garage.
Is this comparable to the quality filter you're speaking of?
Or is it better to run water from inside with said filter you replied with?
I have a similar set up with room for a carboy. When I started I had issues with leaks as well. Several inexpensive purchases have made all the difference:
Hopefully those four things should help cut down on any leaks. You can do all of them for under $20. You can also buy a cheap dehumidifier on Amazon to help with condensation issues:
https://www.amazon.com/dp/B00BD0FN8A/ref=sxr_rr_xsim_1?pf_rd_m=ATVPDKIKX0DER&pf_rd_p=9ddc66f6-9fc0-49ff-b2fa-06a39d9859e6&pd_rd_wg=ujPbX&pf_rd_r=KKB8W3MC2HPWZV3JBFZS&pf_rd_s=desktop-rhs-carousels&pf_rd_t=301&pd_rd_i=B00BD0FN8A&pd_rd_w=LrMBC&pf_rd_i=dehumidifier&pd_rd_r=c9839b3f-1124-4437-89f1-47d030cfa844&ie=UTF8&qid=1541099547&sr=1
Last, I found who fills the CO2 bottle can make a huge difference. The bottle actually needs to be chilled to get a full charge of CO2. My local fish store is significantly cheaper to fill, but they never give a good fill; I have to pay extra at the Homebrew store to have them do it right.
I used this and these and just use ball lock quick disconnects on all tubing -- works great.
I have been using the slightly smaller E-333 and its been great so far.
https://www.amazon.ca/gp/product/B000H0XFCS/
I use this pump to pump cold water through my chiller, works great for me.
Something like this might fit the bill.
Yeah, I suppose I read that incorrectly. I thought he was advocating for these which are popularly referenced and ones that I use. I guess in my mind I was thinking cumulative not individual.
As much as I love Canada, sometimes it really sucks for getting access to goods at a decent price. I see so many posts of people picking up brewing supplies off of craigslist for cheap, and there is nothing in my neck of the woods like that.
This cooler on .CA : http://www.amazon.ca/Igloo-42021-Beverage-Dispenser-10-Gallon/dp/B000F6SHTK/ref=sr_1_3?ie=UTF8&qid=1422645011&sr=8-3&keywords=igloo+10+gallon $106 CAD (approx $83 USD)
Charlie Papazian's - The Complete Joy of Homebrewing is what got me started. It's not overly technical, but it gives you step by step instructions on what equipment you need, what the brewing process actually entails, and how to store and care for your beer. One stop shop.
If you're up for a little diy you could always build an STC 1000 and hook a heating pad up to it. It should only cost you about $30 to build the STC 1000 and you can get a heating pad pretty cheap at CVS or on Amazon if you don't already have one.
Edit: These are the instructions I used to build my STC 1000.
Amazon has them for pretty cheap.
https://www.amazon.com/Sankey-Ball-Quick-Disconnect-Conversion/dp/B00C30F75I
It's 25, but should be good. http://www.amazon.com/Lavatools-Javelin-Digital-Thermometer-Chipotle/dp/B00GRFHXVQ/ref=sr_1_1?ie=UTF8&qid=1458858087&sr=8-1&keywords=thermapen