(Part 3) Top products from r/PrintedCircuitBoard
We found 8 product mentions on r/PrintedCircuitBoard. We ranked the 47 resulting products by number of redditors who mentioned them. Here are the products ranked 41-60. You can also go back to the previous section.
41. Hakko T18D16P Tip for Fx-888 Station, 1.6mm
Sentiment score: 0
Number of reviews: 1
This product is made from high quality materials, and it is designed for lasting performanceUse Hakko for all of your hobby soldering needs and experience the differenceThis is for use with FX-8801/907/900M/913Shape: ChiselDimensions: 1.6 mm x 14.5 mm
 Show Reddit reviews
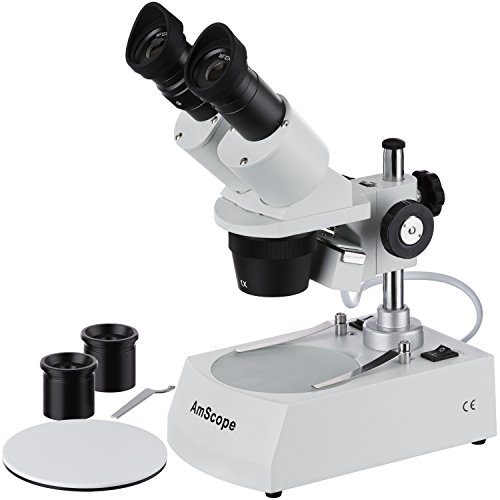
42. AmScope SE305R-PZ Forward Binocular Stereo Microscope, WF10x and WF20x Eyepieces, 10X-60X Magnification, 1X and 3X Objectives, Upper and Lower Halogen Light Source, Pillar Stand, 120V
Sentiment score: -1
Number of reviews: 1
10X-20X-30X-60X stereo magnification settingsHigh quality widefield optical glass lensesForward widefield binocular headSturdy pillar stand with metal frameworkBuilt-in incident (top) and transmitted (bottom) lights
 Show Reddit reviews
43. AmScope SM-4B-FRL Professional Binocular Stereo Zoom Microscope, WH10x Eyepieces, 7X-45X Magnification, 0.7X-4.5X Zoom Objective, 8W Fluorescent Ring Light, Double-Arm Boom Stand, 110V-120V
Sentiment score: 1
Number of reviews: 1
Professional stereo microscope with boom stand has long working distance to enable users to perform work or manipulate large items, including circuit boards and dental appliancesBinocular viewing head with pair of 10x super-widefield eyepieces, adjustable interpupillary distance, fixed 45-degree ver...
 Show Reddit reviews
44. SRA Low Temperature Lead Free Solder Paste T3-15 Grams
Sentiment score: 1
Number of reviews: 1
This is a low temp solder paste with a no clean fluxMelting Point 137C 278F (Eutectic)87% Metal Particle Size 25-45 MicronsProtect Sensitive Parts with this low melting Lead Free Solder Sn42/Bi57/Ag1This alloy is better than Sn42/Bi58 because it contains Ag which makes it stronger and less brittle
 Show Reddit reviews
45. New ATTEN AT 858D+ 858D SMD Hot Rework Digital Station Air Solder Blower Gun
Sentiment score: 0
Number of reviews: 1
 Show Reddit reviews
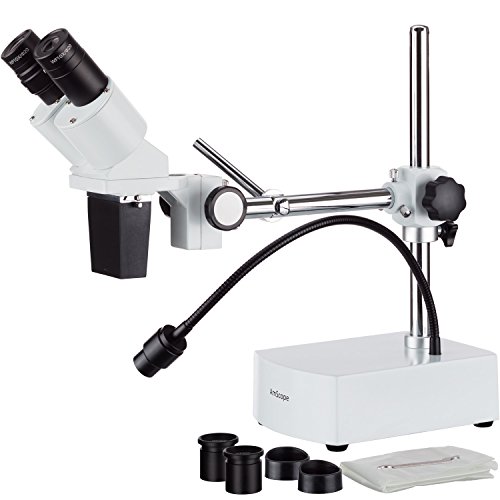
46. AmScope SE420Z Professional Binocular Stereo Microscope, WF10x and WF20x Eyepieces, 20X and 40X Magnification, 2X Objective, Tungsten Lighting, Boom-Arm Stand, 110V-120V
Sentiment score: -1
Number of reviews: 1
Professional stereo microscope with boom arm has long working distance to enables users to perform work or manipulate large items, including circuit boards and dental appliancesBinocular viewing head with interchangeable pairs of 10x and 20x widefield eyepieces, adjustable interpupillary distance, a...
 Show Reddit reviews
Look I do not want to jump in and try to tell you things I know nothing about but I would like to say that maybe you should put this on a PCB and not a perfboard. OSHpark.com is great (and cheep) and you can use eaglepcb for free for something like a class project. Surface mount is a lot easier than I thought it would be. Solder paste is great!!!!! Something like this: http://amzn.com/B005C6H26C Put in where you need it, put the parts down with tweezers and toss it in the toaster oven for a few minutes... let cool and you are ready to go. Mixing surface mount and through hole is not a problem either..... just solder the through hole after you toaster oven it.
Sorry this does not answer your question (I think Enlightenment77 did) but after building a lot of stuff on perfboards and then trying surface mount on an etched pcb... I will never go back to perfs for anything with more than 3 parts.
Sorry for resurrecting a two-week old thread, I didn't see this earlier for some reason.
I don't bother with a lot of the steps you're talking about here. For example, I don't heat/agitate in the etching tank at all. I just wear nitrile gloves and dip the board in a plastic container of etchant, pull it out, dip it in, pull it out, occasionally turning it over... it gets enough oxygen from the air to make the process go fairly quickly. No need to get fancy, especially when working with nasty chemicals. Keep it simple, keep it safe.
My purpose in DIY PCB fab is to prototype a board and verify that a design works with a turnaround time of hours rather than days. So I aim for "good enough." If I want it pretty, with solder mask, silkscreen etc., then I'll send it off to a fabricator.
Building your own spin coater is going to be potentially dangerous work (possibly flinging carcinogenic solvents everywhere, if not the board too) and it's really, really not worth it for solder mask. When I used a spin coater for photoresist at school, we had it going at 3000 rpm, under a fume hood and yellow lights, in a cleanroom. The board was held in place on the spindle by vacuum. You can get really, really nice results etching with a 5 micron layer of photoresist.
But at home, I use a negative dry film photoresist with a laminator and UV light. I use it to etch, not for solder mask, but I'm sure you could use it for that if you wanted.
https://www.amazon.com/INSMA-Photosensitive-Circuit-Production-Photoresist/dp/B01C5SUMAC/
Use cellophane tape to separate the protective plastic film layers. Then you can use a clothes iron on the lowest setting to apply the photoresist to the board, but you'll get more consistent results with a few passes through a laminator set at about 110C.
Make sure you follow the recipe for the developer solution closely (~1% by weight of sodium carbonate to warm water, or about 10 grams per liter). If you use too much of the soda it actually takes a lot longer to develop. Even with the right mix, it's not like those presensitized boards you can buy that develop in seconds. Normally it takes about 5-10 minutes to develop, I use a soft toothbrush and nitrile gloves and just scrub gently in the developing solution for about twice as long as it looks like I need to.
Other random stuff:
I don't do solder mask, but I do put my boards in liquid tin for 5 minutes after I'm done etching them. You can re-use that stuff almost forever. It is kind of nasty, but I don't think it's any nastier than used etchant. It keeps the copper from oxidizing on the hot plate, which can make rework soldering a bitch. I also use a dremel drill press, but drilling sucks so I use SMT/SOIC parts as much as possible.
For the UV light, I don't think polarizing film will help. Sunglasses don't keep you from seeing stuff that's not directly in front of you, right? You'll still get radiation at incident angles. You probably won't need it anyway unless you're doing super fine work, in which case you would need a collimator. I guess you could make one by cutting strips of plastic and gluing them into a grid or something like that, but like I said, I wouldn't bother. If you do this, put it close to the light, you don't want it too close to the photoresist. I'd probably try moving the UV sources farther away first if I was having trouble with exposure angles. You can get really nice results with angles up to about 20 degrees, it doesn't have to be perfect.
I don't like transparencies, and neither does my laser printer, or my wallet. The good ones are a dollar each. Heavy clear vellum (tracing paper) is much cheaper, seems to take more toner, and is still UV transparent. It's a little harder to get layers lined up if you don't have a light table, but still no big deal. The thin vellum you can find at the office supply stores will work too, but tends to jam in a laser printer. I can't find heavy 95gsm clear vellum (65# in freedom units) locally, so I buy it online:
https://www.amazon.com/Vellum-Value-Pack-Pkg-Clear-95gsm/dp/B0086XIBCW
Spend $400 on a proper binocular (or even trinocular if you expect to take lots of pictures) scope with a ring LED to light your work from the top, and a proper base at the bottom.
The SM-3B series (-3T for trinocular) is great. And the more secure double-boom of the SM-4B/-4T series is even better.
I would get the 3.5x-90x combo set which includes the 0.5x and the 2x len attachment. Most of the time, I'm in the 7x-45x range, so if you just get this guy with the ring light, you'll be good to go.
The $400-$600 you spend now will last you for the rest of your life.
Similarly, spend a little more on your first good iron. I bought my Hakko 926 when I was in college. Spent $300 on the setup then. That was about 20 years ago. Still my primary iron.
Reviewed:
http://www.eevblog.com/forum/blog/eevblog-167-atten-858d-hot-air-rework-review/30/
http://www.youtube.com/watch?v=vva2t21sOAs
UK source from Amazon: http://www.amazon.co.uk/858D-Rework-Digital-Station-Solder/dp/B007F9HM28/ref=sr_1_fkmr1_1?ie=UTF8&qid=1373922972&sr=8-1-fkmr1&keywords=WEP+858D
well let's see, not so good iron, not so good solder, wrong flux = no mystery there.
Amscope is a reputable dealer but you can get the same microscope even from Amazon (btw, I have no popup but then I am browsing with a fairly aggressive adblocker).
https://www.amazon.com/AmScope-SE420Z-Professional-Microscope-Magnification/dp/B0080L0FYC
If you are in Europe, the GTVision (https://www.gtvision.co.uk/) sells these (among others) and they offer first class service - I have got mine from them.
Ditch the USB microscope and get a real scope. I tried the USB and it was terrible. I ordered this scope and have had no regrets.