(Part 3) Top products from r/diyelectronics
We found 22 product mentions on r/diyelectronics. We ranked the 295 resulting products by number of redditors who mentioned them. Here are the products ranked 41-60. You can also go back to the previous section.
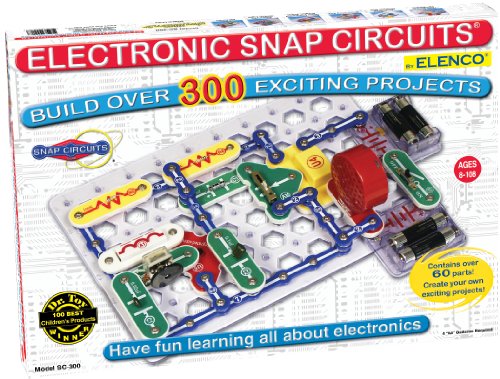
41. Snap Circuits Classic SC-300 Electronics Exploration Kit | Over 300 Projects | Full Color Project Manual | 60+ Snap Circuits Parts | STEM Educational Toy for Kids 8+,Black,2.3 x 13.6 x 19.3 inches
Sentiment score: 1
Number of reviews: 1
Build over 300 experiments with 60+ partsExperiments include: photosensitive electronic organ, a Lie detector, an AM radio, and a two-finger touch lamp and much more!Parts included: snap wires, a slide switch, a resistor, a microphone, and capacitorsNo soldering - no tools - it's a snap! Snap Circui...
 Show Reddit reviews
42. Maxitronix 75-in-One Electronic Project Lab | Explore Electronics with 7500 Experiments
Sentiment score: 1
Number of reviews: 1
A classic electronics trainerLearn basic principles of electronics and electricity, physics and magnetismUses the spring-wire connection and bred board methodsIncludes easy-to-read, lab style, illustrated manualBrought to you by Elenco Electronics, the same company the brings you Snap CircuitsA clas...
 Show Reddit reviews
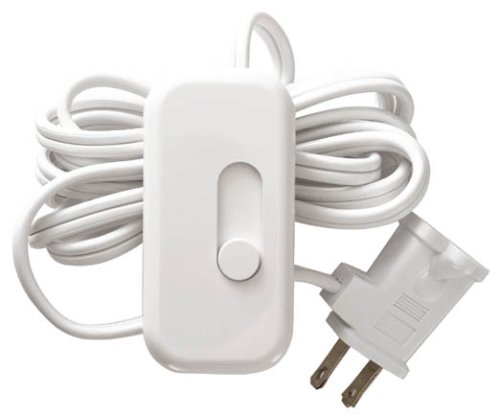
43. Lutron Credenza Plug-In Dimmer for Halogen and Incandescent Bulbs, TT-300H-WH, White
Sentiment score: 1
Number of reviews: 1
For use with 300 Watts of Halogen or Incandescent Bulbs (for LED version, please see TTCL 100H WH)Dims table and floor lamps to suit any activityEasy plug in installation; no wiring requiredEasy slide operation allows you to adjust lights to desired levelCord included with product is 6 feet longIncl...
 Show Reddit reviews
44. Energizer L91BP-8 Ultimate Lithium AA Batteries (8-Pack)
Sentiment score: 0
Number of reviews: 1
GUINNESS WORLD RECORD holder for the longest lasting AA batteries!Energizer Ultimate Lithium is the #1 Longest-Lasting AA BatteryLeak-proof construction protects the devices you love (based on standard use)Powers your most critical devices—ideal for your smart home devices, outdoor surveillance sy...
 Show Reddit reviews
45. Elenco Snap Circuits Extreme SC-750 Electronics Exploration Kit | Over 750 Projects | Full Color Project Manual | 80+ Snap Circuits Parts | STEM Educational Toy For Kids 8+
Sentiment score: 0
Number of reviews: 1
Build over 750 experiments with 80 partsExperiments include: sound activated switch, Lie detector, adjustable light controller, Am radio, rechargeable battery and many more!Parts included: Photo resistor, power amplifier, variable capacitor, Analog meter, solar Cell, computer interface, full color m...
 Show Reddit reviews
46. Elenco Breadboard | 3742 Total Contact Points | Make DIY - College - High School - Prototyping Projects Easier | 9440C
Sentiment score: 1
Number of reviews: 1
3220 Test Points504 Separate 5 Point Terminals14 Horizontal Bus LinesBinding Posts Coded Black, Red, Yellow and GreenFrom Elenco Electronics
 Show Reddit reviews
47. Hyperkin RetroN 1 Gaming Console for NES (Red/ White)
Sentiment score: 1
Number of reviews: 1
Compatible with original NES controllersTop loading mechanism
 Show Reddit reviews
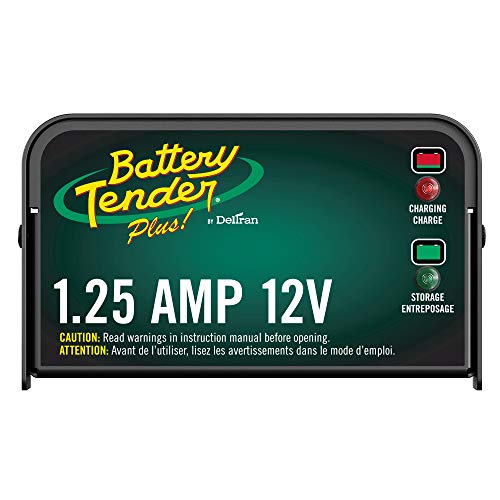
48. Battery Tender Plus Charger and Maintainer: 12V, 1.25 Amp Powersport Battery Charger and Maintainer for Motorcycles, ATVs, UTVs, and More - Smart 12 Volt Automatic Float Chargers by Deltran - 021-0128
Sentiment score: 0
Number of reviews: 1
STAY CHARGED: The 1.25 amp charger provides a full charge to your powersports battery before automatically switching to float mode to maintain proper voltage levels without overcharging the batteryEASY, FAST CHARGING: A low maintenance design to be quick and easy to use even in small storage spaces,...
 Show Reddit reviews
49. Honeywell WAVE-2 Two Tone Siren
Sentiment score: 1
Number of reviews: 1
12VDC500mA106dBTwo-Tone SirenWave Series
 Show Reddit reviews
50. Eeejumpe 6 inches Stereo Splitter-3.5mm Jack to 2-RCA Jacks Audio Adapter
Sentiment score: 1
Number of reviews: 1
Gold-Plated ConnectorsLength: 6 inches3.5mm Female to Dual RCA FemaleStereo SplitterColor Coded
 Show Reddit reviews
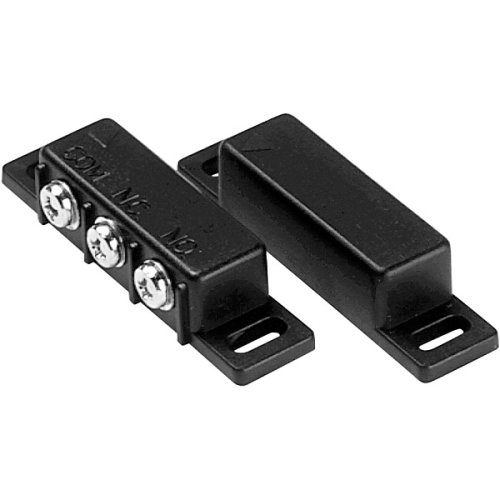
51. Magnetic Switch, Standard Packaging
Sentiment score: 0
Number of reviews: 1
Normally OpenNormally ClosedEffective for Theft DeterrenceOne of the only switches with both normally closed contactsGreat for pick-ups with sliding rear window
 Show Reddit reviews
52. PanaVise Model 201 "Junior" Miniature Vise
Sentiment score: 1
Number of reviews: 1
Easy-to-use single knob controls head movement through 3-planes: 210 degree Tilt, 360 Turn & 360 RotationFine/coarse adjusting knob controls jaw pressure for delicate workGrooved jaws are excellent for holding small objects and are made of reinforced thermal composite plasticContinuous heat toleranc...
 Show Reddit reviews
53. Weller WES51 Analog Soldering Station
Sentiment score: 1
Number of reviews: 1
Receptacle For Easy Iron ReplacementDesigned For Continuous Production SolderingSlim, Comfortable Pencil With Eta Tip Reduces Operator FatigueTip Temperature Offset CapabilityAllows User To Reset Station Temperature To Match In Tip Sizes & StylesStation Includes Power Unit, Soldering Pencil, Stand a...
 Show Reddit reviews
54. Plano 23700-02 Stowaway with Adjustable Dividers
Sentiment score: 1
Number of reviews: 1
Plano Tackle Storage | Protecting your passion since 1952Creates 4-24 adjustable compartments for versatile organization optionsSecure ProLatch closuresTransparent for quick and easy identification of contents3700 Series FootprintIncludes Plano 3700 size StowAway, Plano brochure, nameplate order for...
 Show Reddit reviews
55. Plano StowAway Tackle System, Includes Four removable organization storage boxes, Premium Tackle Storage
Sentiment score: 1
Number of reviews: 1
Plano Tackle Storage | Protecting your passion since 1952Stay Hands Free and keep your tackle organized with the Plano A Series 2.0 Tackle Backpack | Includes: Five 3600 3600 StowAway Utility BoxesThree removable spinnerbait racksIncludes: Four 3700 Series StowAway Utility BoxesMade in USAFour remov...
 Show Reddit reviews
56. Aopen Kb Kb-858 107Keys USB Cool Gray
Sentiment score: 1
Number of reviews: 1
Weight - 1.74 lbConnectivity - USBSwitch Technology - Membrane Tactile SwitchesWeight - 1.74 lbWeight - 1.74 lb
 Show Reddit reviews
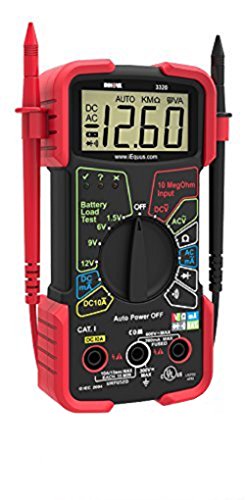
57. INNOVA 3320 Auto-Ranging Digital Multimeter
Sentiment score: 0
Number of reviews: 1
UL certified product designed to safely and accurately troubleshoot a variety of automotive and household electrical problemsAuto-ranging scales eliminate the need to dial in the correct range when making electronic measurementsFeatures large digital display and color coded LED's for battery quick c...
 Show Reddit reviews
58. Leviton 102-WP 016-00102-0WP 15 Amp, 125 Volt, Cord outlet, 1 Pack, White
Sentiment score: 1
Number of reviews: 1
Brass plug blades and connector contacts for maximum conductivityHinged design for easy wiringPlastic devices resist grease, oils and acids2P2W
 Show Reddit reviews
59. RCA Audio Piggyback Cable, 2 RCA Male to 2 RCA Male + RCA Female Piggyback, 6 foot
Sentiment score: 1
Number of reviews: 1
Length: 6 feet, Color: Black, Wire: 26 AWG, Shield Type: spiralThis RCA piggyback cable is for connecting audio components together and will allow you to connect multiple stereo audio cables to one jack without using separate splitters
 Show Reddit reviews
60. Extech SL130G Sound Level Alert With Alarm (Discontinued by Manufacturer)
Sentiment score: 0
Number of reviews: 1
Built-in desk, wall and tripod mountUser settable high or low limit with output to drive external relay moduleContinuous monitoring of sound level in 3 rangesBright LEDS to alert users when sound level is too high or too lowLEDs can be read from 100 feet out
 Show Reddit reviews
First of all props to you to introduce your son to electronics and ask to find a good method for him to learn it out of interest.
I remember having electronics kits which had a bunch of simple components connected by those metal spring terminals. They often came with booklets to go step by step through simple projects to gain some understanding.
Perhaps you could look at toy shops and see if they carry some educational electronics kits? I remember book shops also sold them though I'm not sure if they'd still.
I found this on Amazon, seems a bit different with magnets snapping together but looks like it goes step by step in explaining: https://www.amazon.com/Snap-Circuits-SC-300-Electronics-Discovery/dp/B0000683A4/. Looks a bit expensive but not sure if that's different in the US.
Oh boy I even found one of those kits with the spring terminals: https://www.amazon.com/gp/product/B00000IUD2
Best of luck!
I like your setup. If you don’t have one already, Panavise makes some nice stuff. Like this:
PanaVise Model 201 "Junior" Miniature Vise https://www.amazon.com/dp/B000B61D22/ref=cm_sw_r_cp_api_i_986RDbYZT1M85
Also some version of the helping hands;”:
US $5.58 23% Off | Helping Third Hand Tool Soldering Stand With 4X Welding Magnifying Glass led Adjustable 2 Alligator Clips 360 Degree Rotating
https://s.click.aliexpress.com/e/Ea8dD8yg
And depending on what you end up doing, a hot air smd rework might be helpful to have. I initially got one to repair my arduino after blowing out a chip on it and have found it useful for heat shrink tubing and other projects that are repair work. Especially since nothing you buy nowadays comes as a through hole board. It’s all smd.
US $25.07 41% Off | 700W 858D Hot Air Gun Desoldering Solder Rework SMD Station Set
https://s.click.aliexpress.com/e/Bblg8Wyo
Congratulations on the wedding! I have actually just wrapped up the same project for my step-moms 50th birthday! I went a slightly different route, instead of a mouse, I used a keyboard. Instead of that done switch I used an Easy button. Instead of sparkbooth I used dslrPhotoBooth.
My plan is the same as your, press button trigger system.
I used a keyboard just like this:
I dont know the exact model. It was one I had lying around, it was also black. Point is the chip inside was small. Took the keyboard apart, grabbed a sharpie and on the top layer of the keyboard "circuit" traced from the space bar button back to the top, then moved to the bottom layer and did the same thing.
This is the button I used:
The global edition has some electronics in it, about half of you will throw away and the rest you will "modify". Basically, take it apart, take out the speaker, take out the batteries. The buttons are on the side of the selector in the middle, I soldered to one side with (two wires, then I cut the traces to the rest of the circuit (leaving the traces connecting the two buttons together).
I then soldered the two wires to the traces on the keyboard that matched the space bar.
I had to cut the traces, if you dont, you will be feeding +5v from the keyboard circuit back into the easy button circuit and you will get weird results.
When you put it all back together make sure you line up the button with the selector, that adds to the "button" feel so I left it in there. I was able to fit the keyboard PCB where the speaker was after I filed out some of the plastic for the battery compartment. Then I used my soldering iron to melt a hole/slot in the side and started to reassemble the button.
Software: Nothing fancy here, software is decent, does what I want/need. Is triggered off the space bar (if your software is triggered off a different button just trace that button from the keyboard, hopefully it can be triggered from the keyboard, the mouse might require the pointer to be on a certain spot.) Also there is a decent ipad app that will allow for people to see the photos and send them to themselves if they want that plus the print. I believe you can even to facebook uploads if you have setup a page for your wedding, I have only tested the email portion.
I know I didn't directly answer your question but I hope that it helps in some way.
I will post a picture tonight of the final thing. I thought I had one on my phone, guess not.
Just gonna straight copy this from a post awhile ago. These are things that I use consistently in my engineering labs. The ones with the will probably be good for you
These are parts I use consistently in my labs
Capacitor kit
Resistor kit
Jumper wires
Bread board(s)
Larger breadboard. Recommended for larger projects but I haven’t used it too much. Best for large IC circuits
*Multimeter. This has all the right features
Other things that can be useful:
•Wire strippers
•Pliers
•Electrical Tape
•Tackle Box or tool bag (to carry everything)
•Flat jumper wires
I have one of these Plano boxes and I really like it. There's a large area on top that fits tools (wire strippers, crimpers, tweezers, desoldering supplies, etc), and then three drawers. The two bottom drawers are double-depth, so they fit prototyping supplies like jumper wires, breadboards, etc very well.
I've since outgrown that box but bought a four-pack of these Plano 3700 boxes. Apparently that is a pretty standard size and other companies make holders and stuff for them if you end up with a ton of them.
For smaller components (SMD) these tiny little boxes are great. One of those boxes holds a whole reel of 5,000 0603-sized resistors. Some people also use small paper envelopes to hold their components.
Thanks for the reply! For reference I live in Canada so sadly, the prices are more by default. The WES51 looks good, I found it on amazon.ca for CAD$140. I'll either get that or something like a Hakko, it seems like they sell high quality soldering stations.
I had one of these: https://www.amazon.com/Maxitronix-75-in-One-Electronic-Project-Lab/dp/B00008BFZJ
Real easy to use, comes with a bunch of circuits to build, but leaves plenty open to exploration. Biggest thing is if you have a simple idea you can make it really fast and hassle free.
I just did this, I bought a siren, hooked up directly up to a power supply and plug the power supply into a smart outlet. Works fine. the only trick is to match up the voltage and current requirements of the siren with an appropriate power supply.
The siren was this: Honeywell Wave 2 siren
Takes 12 volts, 500 milliamp. Pretty sure I used this power supply (I've been buying a lot of power supplies lately) DC 12V 3A Power Adapter which was gross overkill (I would have been fine with a 1A) but it was handy, and I might hook up a flashing light too.
The siren does want to be hardwired, but I had a bunch of these power jack adapters so I put a female one on the siren so I could swap power supplies or add an extension easily.
I keep the majority of my individual components in a Plano 7592-01 tackle box. That gives me 4 trays that seal really well (so components don't change bins), plus the top has a larger area where I keep some arduino shields (in their boxes) along with a standard-sized breadboard. The lid also has a few storage spots. The dividers in the tray can be rearranged as well. I'd just look for one that has trays that seal really well so your parts don't shift around.
All of my larger stuff (in-progress projects, etc) go in a 2' L x 1_1/2' H x 1_1/2'W plastic bin.
I use the word Edison for incandescent lights too! Anyway, simple dimmers work great on those. Would this do? https://www.amazon.com/Lutron-TT-300H-WH-Electronics-Plug-Dimmer/dp/B0000BYEF6/ref=sr_1_3?s=lamps-light&ie=UTF8&qid=1497088085&sr=1-3&keywords=dimmer+switch
If I'm understanding you right you're saying the piggyback cable I linked and the 3.5mm connectors I linked and wore them together?
Yes you could do that.
Could also get the piggyback cable I linked and something like this:
Female RCA to Female 3.5mm
It's that simple.
The switch is a 3-way switch, and they would typically either use 30/60/90 watt or 50/100/150 watt bulbs. Probably the former in this case.
If you go with LED lights, they take only about 3 watts per string, and the switch will handle that easily.
You need a plug like this:
https://www.amazon.com/Leviton-102-WP-016-00102-0WP-Outlet-White/dp/B000H5WIR6
Cut off the current bulb, wire in that socket, and you'll be golden.
I've made a couple of NES portables in my life time. I would recommend using a Retron NES Clone system. Check out my article here: https://kamselectronics.com/2019/01/22/nes-portable-v2/ . The Retron Clone can be bought here: https://www.amazon.com/Hyperkin-RetroN-Console-Nintendo-Entertainment-System/dp/B000MFHH6I
If you have any questions let me know!
If you want to keep it permanently mounted, I would adapt influx's idea to a 120v signaling relay, that connects the wire between the tender and the battery. Plug it in, relay closes, tender gets connected. Unplug it, relay opens, tender can't pull juice.
Also, I don't know how many places you plan on charging your bike up but the Delran tenders have detachable cables. When I want to put it on the tender, I untuck the cable from the storage compartment, plug it in, and when I'm done, unplug and tuck again.
I assume you could use a reed switch setup (a magnet on the gate, the switch on the fence)... the same thing you see on doors and windows in security systems. The pushbutton in your wireless remote would be replaced with wires running to the reed switch. I'm making a lot of assumptions about how that remote works, but just an idea.
I agree with the above comment that the alarm will likely just trigger the dogs more. But since this is diyelectronics, I will throw you a bone (ha).
A microphone connected to a signal filter/amplifier then a comparator circuit, outputting to a ssr that activates your alarm. The details of the circuit obviously depends on the parts you get.
OR, this guy here may be easier, but a little less DIY.
In addition, i was planning to use this as a power supply https://www.aliexpress.com/item/NCH6100HV-High-Voltage-DC-Power-Supply-Module-For-Nixie-Tube-Glow-Tube-Magic-Eye/32697870152.html?spm=2114.01010208.3.108.vZwTcL&ws_ab_test=searchweb0_0,searchweb201602_5_10065_10068_10000009_10084_10000025_10083_10000029_10080_10082_10081_10000028_10110_10111_10112_10060_10113_10062_10114_10056_503_10055_10054_10059_10099_501_10078_10079_10000022_10000012_10103_10073_10102_10000015_10096_10000018_10000019_10052_10053_10107_10050_10106_10051-501_503,searchweb201603_1,afswitch_5,single_sort_2_default&btsid=01248acb-17a1-4726-9719-91c4e298ac25 and this as a battery https://www.amazon.com/Energizer-L91BP-8-Ultimate-Lithium-Batteries/dp/B0000DC4EL/ref=sr_1_1_s_it?s=hpc&ie=UTF8&qid=1484880138&sr=1-1&keywords=lithium%2Baa%2Bbatteries&th=1
Not really worth it with prices for real multimeters starting from from literally $0 and decent ones under $20 (when on sale).
I used to put nails in boards when I was five and tie little trinkets in between them to make little circuits. I even tried plugging some into the wall.
when I was eight my grandpa bought me this www.radioshack.com/products/elenco-electronic-playground-130 I made a lot of the circuits too without really understanding much. when I was nine I tried making a dynamo for a science fair that didn't work because I didn't know the schematic symbol was just a symbol. my coil was literally a giant bent up piece of wire shaped like the schematic. I even got it to spin between a giant horse shoe magnet that my mom went through hell trying to find for me. it never worked.. My mom and dad had no idea how to help me so it was pretty frustrating. If I saw that contraption NOW I would say damn kid that's a nice model there! even though it was made of boards glue nails and wire , the concept was easy to see for the average person I think. It would have easily surpassed anything else the other kids made but I never took it to the science fair.
what I'm trying to say is he's just not old enough to really "get it" yet. thankfully he'll have some guidance from you. I used to rip apart nearly every piece of electronics we had and it really pissed off my parents. I shocked myself numerous times. even from an old TV once. that was fucking painful and my arm hurt for like a week.
when I was 15 I actually was able to take a electronics class and learn a few simple things from the teacher but the kids were distracting and I liked fucking around too so I would build me and my friends circuits real quick and then we would skip out or just melt solder.
I'm 34 now and starting to get back into it after I found some stuff in the attic. I've been looking around for breadboard and kits. your kid Might like this: https://www.amazon.com/gp/aw/d/B0002AHQWS/
when I was a kid my grandpa also bought me an erector set and an advanced student level chemistry set. He was the only one who seemed see my potential and would get me those things. My parents would just get mad if I set anything on fire. My parents were idiots...
side thought: I need to make my own customized bread board and was thinking of using something like the spring pegs in that radio shack kit. any ideas on what those things are called?