 Reddit reviews ALITOVE Wireless Bluetooth Magic Dream Color LED Light Controller iOS Android DC5V~24V Great for WS2811 WS2812B WS2801 SK6812 Individually Addressable Programmable LED Strip Pixel Module Panel Lamp
We found 4 Reddit comments about ALITOVE Wireless Bluetooth Magic Dream Color LED Light Controller iOS Android DC5V~24V Great for WS2811 WS2812B WS2801 SK6812 Individually Addressable Programmable LED Strip Pixel Module Panel Lamp. Here are the top ones, ranked by their Reddit score.
Easy to use. iOS and Android app control via Bluetooth 4.0 or later version. Long control distance, convenient to use. Support IOS 8.0 and Android 4.4 or later. Your smart Phone should support Bluetooth 4.0 or later version.Wide compatibility. Support almost all the one-wire or two-wire LED driver IC, such as WS2811,WS2812B, WS2801, SK6812, SK6812-RGBW, LPD6803, LPD8806, APA102, APA105, TM1804, TM1814, TM1914, TM1913, P9813, INK1003, UCS1903, DMX512. You can choose R/G/B channel order.Rich color modes. Come with 200 kinds of color change modes, auto mode and static color mode, which are vivid and beautiful. Save user setting automatically when power off. Brightness is adjustable.Support setting controlled total pixels number, able to control up to 2048 pixels. It supports WS2812B, but there is no WS2812B option on the setting page. Please choose WS2811 if you use it to control WS2812B.DC5V~24V wide working voltage, preventing reverse connection of power supply, protecting LED light and controller very well.
Alright, I’ll do my best to explain what I did. First off, material list:
4 x WS2811 5m 30LEDS/m addressable LED strip 12V in IP67 waterproof tube
https://www.amazon.ca/gp/product/B01CNL6EG2/ref=oh_aui_detailpage_o00_s00?ie=UTF8&psc=1
1 x 12V 30A DC power supply
https://www.amazon.ca/gp/product/B01EWG6YT8/ref=oh_aui_detailpage_o00_s00?ie=UTF8&psc=1
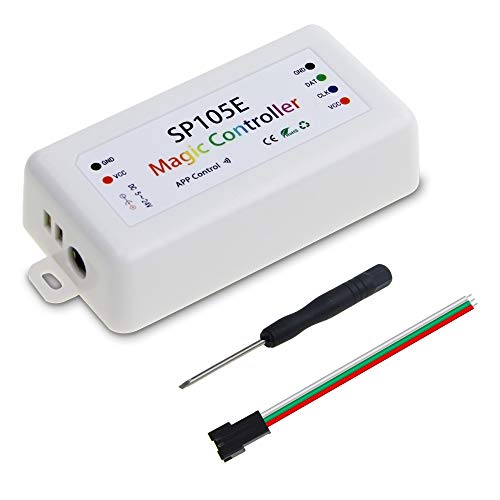
1 x Magic LED Bluetooth controller
https://www.amazon.ca/gp/product/B01LW1J10W/ref=oh_aui_detailpage_o00_s00?ie=UTF8&psc=1
1 x Sound activated controller
https://www.amazon.ca/gp/product/B0792T73VB/ref=od_aui_detailpages00?ie=UTF8&psc=1
10m (cut in half to get 20m) of Gorilla Mounting Tape Clear (link is for black, but I bought clear)
https://www.canadiantire.ca/en/pdp/gorilla-glue-mounting-tape-black-0671081p.html#srp
14 gauge wire
https://www.canadiantire.ca/en/pdp/southwire-30-metre-in-wall-speaker-wire-yellow-14-2-0529814p.html#srp
18 gauge wire (brown thermostat wire)
Can’t find a link, but I had it in my garage from another project
There is a strip that holds the soffit in place on the far side from the house that was a perfect channel for the LED strip. You can buy white aluminium channels for LED strips with nice frost glazing that diffuses the light. I would have bought them, but soffit and house trim are all brown and I could not find it in brown. I cleaned the surface of the house, then suck the tape to the strip and ran a knife down the side to cut it in half. I then attached it all to the house. 20m fit perfectly around the lower level trim on my house.
I have built-in shelves all around the inside of my garage. So I put the power supply on an upper shelf near the centre of the strips. I picked 12V strips over 5V strips to minimize voltage drops. There are numerous online voltage drop calculators, I used this one:
https://www.calculator.net/voltage-drop-calculator.html
My electrical engineering friends tell me I need to size the wire for no more than a 3% voltage drop. That might be a bit overkill for low-voltage LED lights, but that’s what is in the CEC for building wiring. I ended up using 14-gauge wire and ran power to each strip. It worked out to be a bit more than a 3% loss. I used the brown thermostat wire to tee off the main line indoors and ran it through the wall to power the strips. Each connection was done using crimp-style splice connectors that I had left-over from wiring a stereo in my boat.
On the far end I mounted the Magic LED Bluetooth controller (inside) and ran an extra run of the thermostat wire for the data signal. The controller worked great once I put in the right settings. I also set the wiring up so I can connect the sound activated controller outside. On Halloween I plan on setting up some singing pumpkins and have the lights dance to the music.
I hope this helps and good luck with your project. A key thing to keep in mind is you need to run power to each strip, otherwise, you will have too much line-loss, generate lots of heat, and the colours will be different on the far end. It can, and should, come from the same power supply, but just run additional power lines out to each strip.
You want to use 24v strip in these cases in order to not have to deal with power injection, which is where novices can easily get into trouble. With 24v you can run up to 10M, or 32.8ft, and is such often sold in 10M reels. Purchase four of these and cut each down to the length of it's respective wall, being sure to only cut on the line in the center of the copper pads every 6 LEDs.
{With addressable strip, the pixel "size" is TYPICALLY determined by voltage, so for 24v strip, each 6 LEDs will act as a single "pixel," when playing back patterns, 12v strip is 3 LEDs, 5v is 1.}
After cutting the strip to length, you will want to remove the connectors from the cut off ends and solder them to your new ends. IT IS IMPORTANT FOR THIS SCENARIO TO NOT solder on the RED (+24v) wire, as it will be safer to use 4 smaller power supplies, you are only wanting to interconnect the green Data wire and white Ground wire between each strip. If using IP68 waterproof strip, don't forget to remove the silicone endcap from your cut end, replacing it on the new end with a dab of silicone sealant.
Attach the 2.1mm socket adapters to the RED (+) and White (-) bare wires at the beginning of each strip using a jewelers screwdriver. Connect the 3-pin connectors between each strip, and tape off the bare wires with electrical tape, then connect the PSUs to the last three strips. For the first strip, connect it's PSU to the 2.1mm splitter, plugging one end into the strip and the other into the controller. Wire the 3pin connector included with the controller to the Data and Ground of the controller, again in this case, DO NOT CONNECT THE RED (+24v) WIRE to the controller; just wrap the end in electrical tape. Finally, connect the 3-pin connector from the controller to the first strip and power up your PSUs. From here it's just configuring the controller with your phone or tablet.
4x: https://www.amazon.com/Waterproof-Visdoll-Flexible-Addressable-Programmable/dp/B075GCKPHB?th=1&psc=1
4x:https://www.amazon.com/gp/aw/d/B074GJ22P6/ref=ox_sc_act_image_1?smid=A325274ZEF9XYZ&psc=1
1x: https://www.amazon.com/ALITOVE-Controller-Individually-Addressable-Programmable/dp/B01LW1J10W/ref=mp_s_a_1_1?ie=UTF8&qid=1541825064&sr=8-1-spons&pi=AC_SX236_SY340_QL65&keywords=4+output+ws2811+controller&psc=1
1x: https://www.amazon.com/Chanzon-Female-Connector-Security-Adapter/dp/B079RCNNCK
1x: https://www.amazon.com/dp/B00G6G5DJ0/ref=sspa_dk_detail_1?psc=1
check out the controller in the "frequently bought together" for the color legend:
https://www.amazon.com/ALITOVE-Controller-Individually-Addressable-Programmable/dp/B01LW1J10W/ref=pd_bxgy_267_img_3?_encoding=UTF8&psc=1&refRID=W2RF1W1QSN92WMD0XDSX
Thank you so much for your response! I was thinking that the Pi wouldn't be feasible on it's own for just that reason.
​
For the driver, would something like this be able to run all 8 strips separately if I were to run the output signal through an 8-way splitter?
​