 Reddit reviews Cable Matters Combo Pack Assorted 200 Self-Locking 6+8+12-Inch Nylon Cable Ties (Tie Wraps, Zip Ties) in Black and White
We found 7 Reddit comments about Cable Matters Combo Pack Assorted 200 Self-Locking 6+8+12-Inch Nylon Cable Ties (Tie Wraps, Zip Ties) in Black and White. Here are the top ones, ranked by their Reddit score.
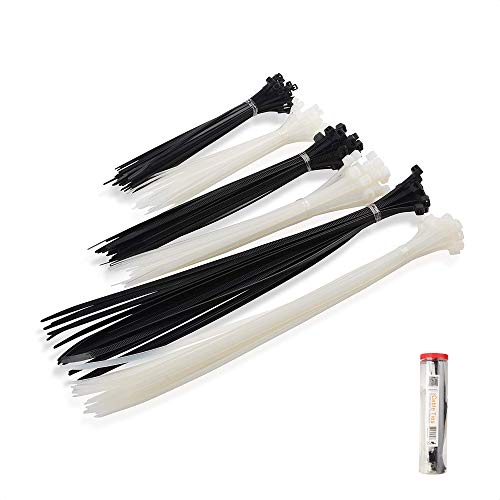
LIGHT & MEDIUM DUTY CABLE TIES in black and white for home, office, garage, workshop and moreINDOOR USE WIRE TIES are designed with rounded edges to provide easy handling and prevent snagging in tight spacesDURABLE SINGLE-USE TIES are rated with a 17 lb or 48 lb tensile strength; Increase the tensile strength by using two or more together in a rowCOST-EFFECTIVE 200-PACK of plastic ties for many uses; Comes in a re-sealable container for convenient storageNYLON ZIP TIES are constructed with fire resistant materials; Locking teeth in the cable tie head secure cables or wires
https://www.amazon.com/Cable-Matters-Combo-Self-Locking-12-Inch/dp/B00L2LGMO4/ref=pd_lpo_23_bs_t_2?_encoding=UTF8&psc=1&refRID=CXQF9ZBEYSWY2ZNBXP3P
so you can have white laces too
Nice, just drop in some zip ties and some other shit into his stocking to take care of cable management to neaten that out.
> building PC's isn't as fun as you think it is
Depends what you like of course, for me.. It's a lot of fun! I love to thinker around with hardware. I hope to be able to make it my job eventually.
> you should just get this Alienware Aurora
>> I'm like dad it's the same price for equal specs for the computer alone, it doesn't include the monitor and keyboard..
I think you get better "specs" in terms of quality on a custom made PC compared to a Dell Alienware. They use cheap RAM, PSUs and sometimes OEM motherboards just to keep the price down and get more margin/profit.
> The last time I was really spoiled or anything for Christmas was way back when I first got a Nintendo DS Lite ahahah!
Hah, I think the last time I got spoiled for Christmas... was perhaps the Nintendo 64! I mean, I always got spoiled a little bit I guess, but that was one I won't remember.. god time flies tho.. I was, 13 I think! I've doubled this now..
---
> Oh yeah, with the new case and everything, do you know the best way to go about putting everything together?
I do!
Then you place the motherboard on the box, not on the bag!
Plug those into the PSU!
You've tested your systems (aside from the storage) and are ready to start building.
Add two SATA / Peripheral cable into the PSU. This is needed to power up the storage devices, and you want two because you will place them far away from each other, so one cable won't be able to reach both of them.
Grab the IO shield (came with the motherboard) and put that into the case! The round holes for the audio are at the bottom. Be careful, this can be a bit sharp - I've cut myself a few times before. It does require a good push on the corners to snap in most of the time.
The HDD needs to be placed into a bay behind the big cover. I would probably suggest to place it either at the bottom or at the top. Depending on how long your SATA power cable is. Bottom is probably easier, but you have to see for yourself a bit here, I haven't used the H440 personally yet.
If they are, then lower the motherboard into the case, you can do this very easily by grabbing the CPU cooler. Push it into the IO shield first at a slight angle, then lower it down further and voila. Screw in all the screws, don't go too tight. It just needs to keep it in place, it won't vibrate and go out of place.
If you did not make any mistake with the power switch and plugged in all the power cables correctly, it should turn on just as before.
---
If you have any questions, ask away! Most of these steps can clearly be seen in the video on how to build a PC.
I used light fixture hangers that raise and lower and zip tied them. I pretty much zip tied everything lol.
https://imgur.com/a/xLozmRy
https://imgur.com/a/YjJ7xrQ
https://www.amazon.com/dp/B01E89NRNU?ref=ppx_pop_mob_ap_share
https://www.amazon.com/dp/B00L2LGMO4?ref=ppx_pop_mob_ap_share
Or you can buy a100 pack of Plastic Cable Zip Ties 100 for $2.04
https://www.amazon.com/Plastic-Cable-Ties-100-Pack-Black/dp/B002C0SKBW
Or 200 of various sizes for $8.99
https://www.amazon.com/gp/product/B00L2LGMO4/ref=s9_acsd_top_hd_bw_b2872_c_x_1_w?pf_rd_m=ATVPDKIKX0DER&pf_rd_s=merchandised-search-3&pf_rd_r=8SC7SZKKB12HE6B1R3PF&pf_rd_t=101&pf_rd_p=0d8c1e4e-8bfd-54f4-99ad-add0e5a7e72b&pf_rd_i=507844
You could do something as simple as zip ties and tie mounts. They really just need to be run in a clean manner.
https://www.amazon.com/Startech-HC102-Adhesive-Cable-Mounts/dp/B00008VFBE
https://www.amazon.com/Cable-Matters-Combo-Self-Locking-12-Inch/dp/B00L2LGMO4/ref=pd_lpo_23_bs_img_2?_encoding=UTF8&psc=1&refRID=5DYNP9R4B5H3AEXY4DNY
http://www.amazon.com/Startech-HC102-Adhesive-Cable-Mounts/dp/B00008VFBE
+
http://www.amazon.com/Cable-Matters-Combo-Self-Locking-12-Inch/dp/B00L2LGMO4