 Reddit reviews Dunlop 202 Glass Slide, Regular Wall Thickness, Medium
We found 4 Reddit comments about Dunlop 202 Glass Slide, Regular Wall Thickness, Medium. Here are the top ones, ranked by their Reddit score.
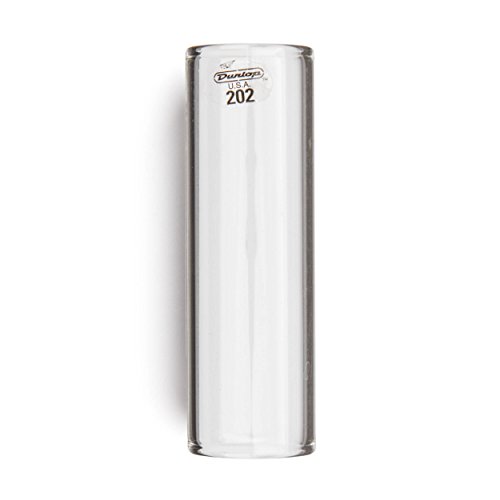
Dunlop bottleneck glass slideRegular wall thickness - medium diameterGood for pros and beginnersCountry of Origin: United States
It's an induction heater. Everything is available on Amazon. It's very easy.
(For anyone else interested) Here it is: https://imgur.com/a/3i4UmNQ
Circuit: https://www.amazon.com/gp/product/B01CNM24YM/
Power Supply Unit (PSU) https://www.amazon.com/gp/product/B07DNW1CNB
Glass insulator https://www.amazon.com/gp/product/B0009EQMZE
Beyond this, all you need is 2 small wires (unbraided, thick copper wires will work best), cutters to make them, a small jeweler's screwdriver to screw them down, and a power strip for a poor-man's power switch. If you don't have any of these things, they are also cheap.
First, untwist your induction coil one wrap and spread it out and around the glass insulator slide to match the pic. This spacing gives you a 20-second light with a Ti vapcap sitting at the bottom, which is pretty heavy. If you want it lighter, either leave the coils tighter or just put a cork plug in the bottom of the tube to raise the bottom where the vapcap sits. You can get it down to about 4 seconds with this PSU. Basically, holding it in the center of the coil or keeping the coils tighter will speed it up. 20 seconds is ideal for me. Makes about 2-3 big bong rips per load.
Screw in the ends of the induction coil into the side closest to the circuit coils going in the same direction (see pic). Screw your 2 small wires into the other end of the circuit, and clip the other ends of the wires into the little adapter that comes with the PSU. Don't worry about polarity. The circuit simply won't work the wrong way (blue light won't come on).
Plug in the AC side of the PSU to your power strip (turned off) and the other end into the adapter that came with it, now clipped into your induction heater (this part is covered with tape in the pic, but it's as simple as it sounds).
Hit the power strip switch to operate. Be sure to turn it off before removing the vapcap so you don't forget. Forgetting will result in an overheating unit (yes, the coils get very hot very fast) and early failure. I had one circuit board melt this way. Pretty cheap if it happens but beware. I've used this one for many months now without issue just being mindful. Good luck!
Good morning, frients!!! I just completed my IH build based on A LOT of research/lurking around these parts. Here are a few more pictures of the setup/internals:
​
https://i.imgur.com/pEex7Xh.jpg
https://i.imgur.com/ntdy5qi.jpg
https://i.imgur.com/HoTzHAi.jpg
https://i.imgur.com/JDlo2FV.jpg
https://i.imgur.com/Hiz0sea.jpg
​
**Update/Parts List**
Box/Enclosure
Induction heater board w/coil
Glass tube
(I shoved a cork in there from an old craft beer bottle. I just shaved it down with an x-acto knife until I was happy with the fit/spacing)
Mosfet
Power supply
Red toggle switch
Momentary switch
DC panel-mount jack
Insulated crimp connectors
I used 16-gauge red/black wiring and insulated crimp connectors I had left over from previous projects.
​
Here's the bubbler I was using with the optional glass mouthpiece.
​
Total: ~$65 USD
​
TL;DR This thing is badass and easy to put together. Do it!!!
GOLDEDIT: omg my first gold! Thanks anon!
THE TRIGGER WIRE CAN BE CONNECTED TO Vin + or Vout +
How it looks now: https://i.imgur.com/Xmro9I5.jpg
Parts list (canadian, but you can find everything on amazon and/or ebay, or locally):
Heater Board and Coil: https://www.amazon.ca/BAQI-5V-12V-Voltage-Induction-Heating/dp/B0747NBTBX
MOSFET Relay (for operating the momentary switch): https://www.amazon.ca/DROK-Transistor-Driving-Electronic-Controller/dp/B01J78FX9S (if you want to do this project with NO SOLDERING you could get this higher wattage MOSFET relay)
Power Supply (or if you have one from an xbox 360 it'll work) This one also includes the female jack: https://www.amazon.ca/Signcomplex-Supply-Transformer-Switching-Adapter/dp/B075R3RW6J
Glass tube: https://www.amazon.ca/Dunlop-202-Dun-Bottleneck-Slide-Reg/dp/B0009EQMZE
Main power switch: https://www.amazon.ca/Pilot-PLSW26-Safety-Racing-Toggle/dp/B000GTMUUI
Momentary Switch to activate the coil ONLY while pressed: https://www.amazon.ca/Ulincos-U16A1-Black-Button-Switch/dp/B015X34IP6
You'll also need some 18ga stranded wire, an enclosure, and some soldering skills/equipment.
It's actually pretty simple. At it's most basic, try this comment from /u/improvaper
https://www.reddit.com/r/vaporents/comments/a4xzkk/finally_jumped_on_the_dynavap_bandwagon_and_got/ebij6op
Make an induction heater! It's cheap and easy. I've been blasting my instructions everywhere around here lately. If you're interested, let me know and I'll blast them again here. :)
It's definitely worth the (extremely little) effort.
Edit: blasting:
I made mine for about $30 with parts available on Amazon:
Here it is: https://imgur.com/a/3i4UmNQ
Circuit: https://www.amazon.com/gp/product/B01CNM24YM/
Power Supply Unit (PSU) https://www.amazon.com/gp/product/B07DNW1CNB
Glass insulator https://www.amazon.com/gp/product/B0009EQMZE
Beyond this, all you need is 2 small wires (unbraided, thick copper wires will work best), cutters to make them, a small jeweler's standard screwdriver to screw them down, and a power strip for a poor-man's power switch. If you don't have any of these things, they are also cheap.
First, untwist your induction coil one wrap and spread it out and around the glass insulator slide to match the pic. This spacing gives you a 20-second light with a Ti vapcap sitting at the bottom, which is pretty heavy. If you want it lighter, either leave the coils tighter or just put a cork plug in the bottom of the tube to raise the bottom where the vapcap sits. You can get it down to about 4 seconds with this PSU. Basically, holding it in the center of the coil or keeping the coils tighter will speed it up. 20 seconds is ideal for me. Makes about 2-3 big bong rips per load.
Screw in the ends of the induction coil into the side closest to the circuit coils going in the same direction (see pic). Screw your 2 small wires into the other end of the circuit, and clip the other ends of the wires into the little adapter that comes with the PSU. Don't worry about polarity. The circuit simply won't work the wrong way (blue light won't come on).
Plug in the AC side of the PSU to your power strip (turned off) and the other end into the adapter that came with it, now clipped into your induction heater (this part is covered with tape in the pic, but it's as simple as it sounds).
Hit the power strip switch to operate. Be sure to turn it off before removing the vapcap so you don't forget. Forgetting will result in an overheating unit (yes, the coils get very hot very fast) and early failure. I had one circuit board melt this way. Pretty cheap if it happens but beware. I've used this one for many months now without issue just being mindful. Good luck!