(Part 2) Best air conditioning line repair tools according to redditors
We found 98 Reddit comments discussing the best air conditioning line repair tools. We ranked the 41 resulting products by number of redditors who mentioned them. Here are the products ranked 21-40. You can also go back to the previous section.


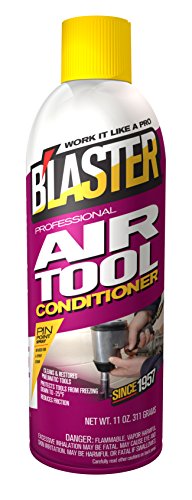


Depends on your compressor. If it's shitty with no water separator you should do it more often. One squirt before each use goes a long way to helping a cheap tool last. https://www.amazon.com/dp/B003V5E9HG/ref=cm_sw_r_other_awd_UmKjxb7RM3J56
Without tools, the best you can really do is look for oiliness on the pipe. When you find a joint that feels oily (look for dark colours on the pipe, usually covered in very fine dust. Once you rub the dusty area with your fingers you'll feel the oiliness), spray/pour a small amount of washing up liquid over it and look for bubbles. If there's any refrigerant left in the system, you'll usually see bubbles appear (or over a longer period, foam). Of course if the gas has all escaped already - and we're only talking a couple of hundred grams here - then you won't see any bubbles.
Most domestic gear has no access fitting at all so even locating the leak can be difficult if there's no visual indication. You need to get pressure in there so you can leak test - this means adding a bullet piercing valve (like this).
Then you need to put something in via your bullet piercing valve to raise the system pressure. It's best to use dry nitrogen to leak test to save wasting refrigerant, but since you most likely don't have that on hand you could buy yourself some refrigerant (most likely R134a) and pressurise with that. That's a big no-no here (both disposable cylinders and dumping gas to atmosphere by charging a system with a known leak) but I'm guessing your in the US, and those sorts of laws seem remarkably lax so go for gold. It's not like you'll be ruining MY ozone layer too, right? ;)
You also need to regulate the pressure going in to the system. This is where you need gauges. Connect the yellow line to your bottle, connect the blue line loosely to your bullet piercing valve, purge from cylinder to piercing valve by opening the cylinder tap + gauges tap, and releasing some pressure via the loose fitting, then tighten the fitting and close your gauges tap. Open the bullet piercing valve. Open the gauges tap slowly and give it ~50psi of system pressure.
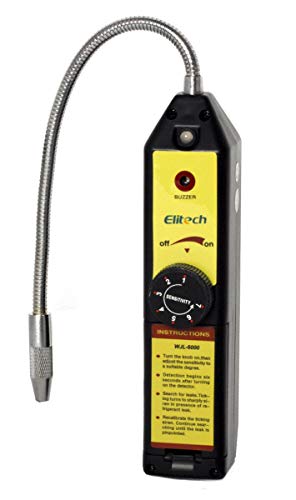
Then you can go for gold with your soap, or you can lash out and grab yourself some "proper" leak detection fluid (like this), or better yet an electronic leak detector (like this one).
Once you've found your leak, you want to release your nitrogen (or reclaim your refrigerant using a reclaim plant and a spare cylinder), then repair it using an oxy/acetalyne set, or since it's only tiny pipework you can get away with a MAPP gas set.
If it's a copper->copper joint, you're laughing - polish the pipework up with emery cloth, heat the pipe until it's just this side of glowing red, and feed the joint with brown tip silver solder.
If it's a copper->steel joint, then it's a bit more of a pain. You need blue tip silver solder and flux. Clean your joint with the emery cloth, give it a nice coating of flux on every surface you need solder to stick to, then heat it up until it's a fair way short of glowing red. Feed the blue tip solder in and STOP. Unlike brown tip (15% silver) you can't just keep feeding blue tip (45% silver) as it ruins the weld.
Now, since you put on a bullet piercing valve and they leak like a sieve in the long term, we need to replace that with a schrader access valve. Since it's most likely going to be in a straight through piece of pipe, you can save time and grab yourself a pre made access valve in 1/4" pipe. Cut away the hole left by the bullet piercing valve, polish the copper and cut the pipework with a ~10mm gap using a tube cutter. Then slip your access fitting assembly in there, and follow the copper->copper joint procedure.
Of course, now that we've done all that you need to change the liquid line filter drier too. I'd recommend a 1/4" solder in core drier in place of the original copper spun drier because... well, copper spun driers are terrible. Follow the pipe cutting procedure from the piercing valve instructions and the soldering instructions from the copper->copper joint instructions and that's done too. Remember - always try and mount the drier so it's outlet is LOWER than its inlet. This turns the drier into a small liquid receiver and helps ensure a good liquid seal over the capillary tube. Speaking of capillary tubes, if it was inserted straight into the original copper spun drier CUT the capillary, don't try and unsweat it. The chances of blocking it up are about 82.5634% (approximately) when you unsweat capillarys. You're much better off chopping it with a set of capillary tube cutters and ensuring a good clean capillary. The ~30mm of wasted capillary will affect performance, but almost certainly not to any sort of measurable degree.
Then give the system a good evacuation using a vacuum pump and ensure it reaches a good vacuum (sub-500 micron) with a digital vacuum gauge.
Then using a set of electronic scales, charge your freshly evacuated system (remembering to purge!) to the charge recommended by the manufacturer.
Voila! You have just fixed your chest freezer.
..... Alternatively, pay someone to do it for you and/or recycle the components and buy yourself a new one.
It will withstand it mechanically but you will not be able to get down to those levels with a glass vacuum jar and a regular pump. The seal at the base won't be good enough for that. You need scientific grade stuff for that, and $600 is more like the cost of a few flanges. You'd want another zero or two to get a system that can get to 10e-8 torr.
Here's a starter system that's still probably not able to get that low:
http://www.lesker.com/newweb/chambers/std_boxchamber.cfm
What pump are you planning on using? A normal vacuum pump won't even come close. Like, not even remotely close.
This unit:
https://www.amazon.com/HomCom-Single-Stage-Rotary-Vacuum/dp/B00TUGWKAS/ref=sr_1_1?ie=UTF8&qid=1480446818&sr=8-1-spons&keywords=vacuum+pump&psc=1
goes to about 0.04 torr (4e-2) and is a fairly common pump. I think you'd need cryogenic pumps to get down to 10e-8.
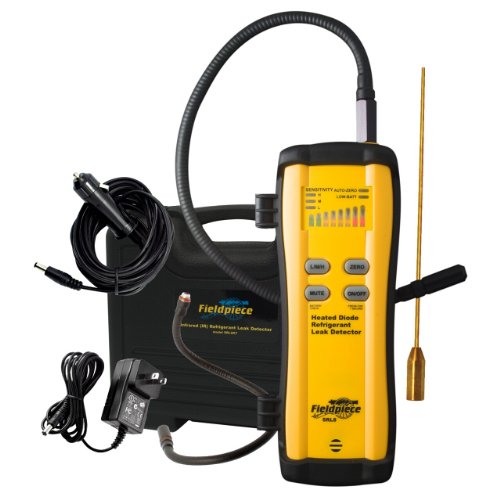
Dye takes time to leak out. I'd suggest coming back in a month. If you can find it with dye in an hour, you could most definitely use a sniffer to find it. My sniffer is bad ass I only use dye as a last resort.
Sniffer: Fieldpiece Heated Diode Refrigerant Leak Detector - SRL8 https://www.amazon.com/dp/B0023SMJL0/ref=cm_sw_r_other_apa_i_LF4YCbR4D2DT7
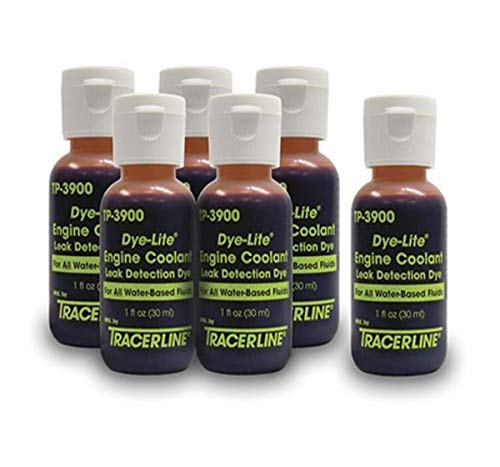
Based on the pictures you linked and the fact you said the fluid looks orange/green, I would bet it is coolant. Looks like it may be coming from a radiator hose. If you can't easily find it, you can confirm by putting a shot of tracer dye into your coolant tank and let the engine run for a bit, then shining a UV flashlight around your engine bay at night. The florescent tracer dye in the coolant will glow brightly where it's dripping out, letting you easily find out where the leak is coming from.
Tracer dye can be bought off Amazon or from most automotive stores. It looks like this: https://www.amazon.com/dp/B000NPIYM8/
Can tapper:
http://www.amazon.com/Tapper-R12-Can-FRE8000-Category/dp/B0015DMIJM/ref=sr_1_10?ie=UTF8&qid=1422003133&sr=8-10&keywords=can+tapper
Valve core tool to remove valve core in can tapper: http://www.autozone.com/exterior-accessories/tire-repair-and-tire-wheel/tire-valve-stem-core-remover-tool/slime-4-way-tire-valve-tool/487510_0_0/
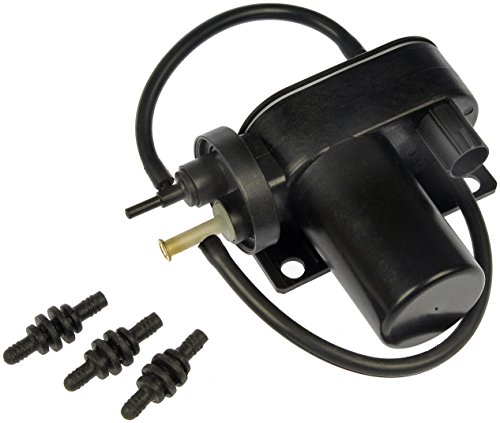
On my car yes, because it's gasoline. I'm trying to say that vehicles with low manifold vacuum like diesels often have external vacuum pumps. Didn't realize this was such a controversial opinion. Like this: https://www.amazon.com/Dorman-904-214-Electrical-Vacuum-Select/dp/B001KQF6PC
​
Now, if the brakes are powered by hydraulic assist from the power steering instead then fair enough. I ain't a diesel guy.
​
Will seppuku restore my honor?
Elitech WJL-6000 Freon Leak Detector Halogen Leak Detector Refrigerant Gas Leakage Tester HVAC Air Condition R22 R410A R134A CFCs HCFCs HFCs Detects High Accuracy https://www.amazon.com/dp/B015FK1EH2/ref=cm_sw_r_cp_api_i_FLVWDbSWK60M7
Similar type detectors are what we used to find leaks on our old perc machine. This also is useful to see if your end product has too much solvent left in it.
Yeah, then this is no problems. Just a ton of steps.
Before you go out and do all this, let's make sure your compressor is trying to start. Turn your car off. Plug in your bottle of AC pro. It should be in the red "overcharged" range. Have someone start the car, and then watch the value on the gauge, you should see the value drop into the green when the compressor turns on. That means you just need a proper recharge to fix your AC. Follow the directions below. If it doesn't do that, then you have something else wrong, and we need to fix that first.
Call a bunch of Autozones in your area. A couple of them rent out vacuum pumps + manifold gauges. Call enough of them and you'll find one that will rent you both. Look in the side of the vac pump, it should be full of oil to the fill line. If not, buy a bottle of vac pump oil, and fill it to the "Full" line.
Here's general information:
You need to buy a can tap, even if the gauges come with one. You'll want to save your bottles for later. https://www.amazon.com/Mastercool-85510-R134a-Valve-Screw-Model/dp/B000LQODJC They'll have them at autozone as well. To use a vampire tap, open the silver handle (CCW) all the way. Buy bottles of 134a, screw this onto the top of the bottle, get it handtight. Then close the silver handle all the way. The last few turns it will pierce the top of the top of the can. That'll let you pull the 134 out of the bottle.
Always operate the can with the valve at the top, right way up. Never turn it on it's side, bad things can happen.
When using a vac pump, do not turn the pump on or off while the yellow line is attached. Always turn the pump on, attach the yellow line, let the pump run, then detach the line, turn the pump off.
PPE! Wear leather gloves & safety glasses. Freon burns are not good. Eyes don't grow back.
Find the label on your car that says how much 134a your vehicle takes. It'll be listed by weight. You'll also need a small kitchen scale.
There's 3 different weights of AC oil. Find the correct weight for your car.
Buy a bottle of green or yellow dye, and a blacklight. Hunting for leaks at night/in the evening works much better then during the day. The darker you can get it, the more the dye stands out.
You need a dye/oil injector. https://www.amazon.com/DIY-UV-DYE-INJECTOR-CLAMSHELL/dp/B001DKP0ZG How to use: Unscrew the two parts from each other. Clean out any old oil. Fill up the small part with oil or dye. You must inject a full thing of oil/dye, no half-full, because you'll also be injecting a half-amount of air as well. Hold it level while you screw the other side back on. Tighten it to just past snug. Make sure both both knobs are closed. Take off the lowside (blue) connection. Connect the injector onto your car. Then connect the lineset to the injector. You now need to do something to force dye into the car. Either open the red valve if there's pressure on the red side & nothing is attached to the yellow cable or you can open the valve on can if there's no freon in the system. Then very slowly open the blue valve. You'll see the blue needle spike up, close it down a bit and figure out how to get some small amount of freon going through the lineset. You've now got freon flowing through your injector. Turn it so the black part is straight up and down, you're trying to force all the dye out of the injector and let it flow into your car.
Disconnecting your lineset: If your car is running, you want to try to get as much freon out of the lineset as possible. Make sure your gloves are on. Disconnect the yellow line if connected. Hold down the port on your car and pull up on the red connector's ring. It'll pack a bit of a punch. Put the dust cap back on immediately. Now we'll SLOWLY pull all the freon out of the lineset. Too much at once might damage your compressor. Open the blue knob slowly, watch the blue gauge, open the valve slowly, don't let it go above 60 or so range. Then slowly open the red VERY slowly, same thing, don't let the blue gauge over 60 or so. Once you've got as much freon out of the lineset as possible, disconnect the blue port, and put the dust cap back on. Keep your connectors out of the dust. Dust is your enemy.
Always make sure both knobs are closed before attaching or detaching anything from the lineset.
NEVER EVER EVER EVER open the red valve with anything attached to the yellow line & the car running. This could cause the freon can to explode. You will have a bad day. Check every step you do in here, and make sure you're not breaking this rule.
Steps:
Start by vaccing out the lineset. You need to get any crap out of it that was left by the previous guy. Turn on the pump, attach the lineset. Open both knobs all the way. Let the pump run for ~30 minutes. Disconnect the yellow line, shut off the pump.
Close both knobs. Take off both the dust caps. Pull the collars on the connector back, with your other hand, hold the fitting stable, you don't want to put stress on it. Press the connector in with a smooth motion. It's easier to do with the car off. AC OFF. Start up the car. Watch the values on the two gauges. They have different scales. Both values should be pretty close. Turn on the AC, while watching the gauges. If the needles move, that's the compressor trying to come on. If the pressure gets too high, or too low, the compressor will turn off to protect itself. You may see it cycling on and off as it tries to run. If it's cycling on and off, inject dye into into your system. Follow the directions above for disconnecting your lineset. Find your leak, and fix it.
When you're ready to properly refill your car: CAR OFF! Hook the lineset back up, turn on the vac pump, connect the yellow line to the vac pump. Open both knobs. Listen for the sound of the vac pump as it pulls air out of the system. Listen to the sound, and what the pump is telling you it's doing. At first it's pulling out a lot of air. Then it'll start pulling less and less. Then you'll hear it pulling little bubbles every few seconds, and those seconds will get more and more spread out. Wait for the sound to stabilize, then wait 30 more minutes. This chases all the moisture out of the AC. After 30 minutes, you shouldn't hear any of the sounds of air bubbles. Close both knobs. Wait ~10 minutes. Open the knobs. The sound shouldn't change if you open or close the knobs. If it does, you either didn't vac long enough, or you have a leak. Once you're sure you don't have a leak, disconnect the yellow line from the vac pump. Your system is now at a hard vac! You're in the home stretch.
As you start filling the AC (next paragraph), Inject an injector full of compressor oil. Being at a hard vac tends to boil some of the oil off... the pros have a gauge that measure how much oil that was pulled out, we have to guess. I normally inject 1/4 oz (one injection) or 1/2 (2 injections) of oil. On that large of a car, you might choose 3. Especially if you vacced for a long time. This is more guessing. If your compressor is making a terrible racket, add oil. We unfortunately have to guess on this part. Too little oil, and the compressor won't be lubricated, and will tear itself up. Too much oil, and the compressor will have problems with slugging, and tear itself up.
Connect the injector, and your lineset (Valves closed!), and get out your scale. Car still off. Most ACs will require 2-3 small bottles of freon. Figure out how many full bottles you need to put in, and how much out of the last bottle you'll need. Connect the first bottle. Open the valve on the first bottle. Open the blue knob a little bit for a few seconds to inject the oil into the low side.
This step will injure you if you do not follow directions CAR OFF Really, make sure the car is off, valves closed. Invert the can, valve side down (remember I said not to do this. This one time is an exception. Car off. seriously) Car off. Close the BLUE valve. Open the RED valve. This will dump liquid freon into the high side of the car, which is designed to take high pressure freon, the low side isn't. Let it take as much as quickly as it can. This will quickly dump most of the first can into your AC system, and have it part-way charged. When you stop hearing it flowing around, RED SIDE CLOSED.
Is your compressor turning on?
Also, please don't vent refrigerant into a rag. R134 is a major greenhouse gas about 1500 times worse than C02, venting into a rag does nothing and I believe it's illegal. Lastly, never use the ac pro hose thingy. It sucks. Get a proper set of ac hoses.
This is what I purchased http://www.amazon.ca/Robinair-10994-300-Watt-Blanket-Refrigerant/dp/B000NP3KQI/ref=sr_1_fkmr1_1?ie=UTF8&qid=1414970377&sr=8-1-fkmr1&keywords=refrigerant+bottle+heater
As far as repair. unless it's in warranty, it's likely going to be cheaper to replace it. many of these units are closed, and aren't easy to charge. If the condenser is all flat on the back, try straightening it yourself with a condenser comb (http://www.amazon.com/automotive/dp/B000JFL8HK). If you need help with install, well, it isn't difficult, and you can likely do it yourself. If it's a particularly big unit, have a friend help you lift and support it while you get it in the window.
They make a tool for changing shrader valves without losing charge.
https://www.amazon.com/SY66-Automotive-Conditioning-Pressure-Installer/dp/B01N0GZ9GT/
https://www.amazon.com/MASTERCOOL-81490-R134a-Remover-Installer/dp/B000KITSMI/
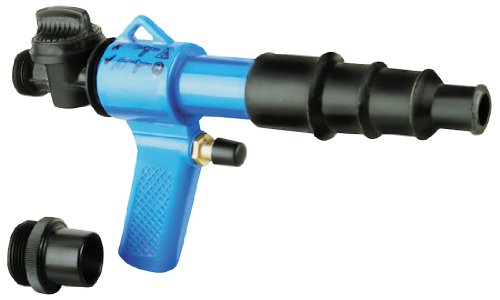
Flushy-thingy: TSI 27361 A/C Flush Gun
Bad?
I've used them on cars before using the same process, I thought it was basically the same thing. But I also don't know what the hell I'm really doing, so there's that too :)
Most likely. I was just trying to think of something that someone may have at thier house.
I personally one this: https://www.amazon.com/OTC-6043-Blast-Vac-Multipurpose-Cleaning/dp/B000F5ECRW/ref=pd_sim_263_11?_encoding=UTF8&pd_rd_i=B000F5ECRW&pd_rd_r=D96R655WJB59CR56QT04&pd_rd_w=gV6j3&pd_rd_wg=qENoW&psc=1&refRID=D96R655WJB59CR56QT04 Hooks up to shop air and water and really blasts stuff.
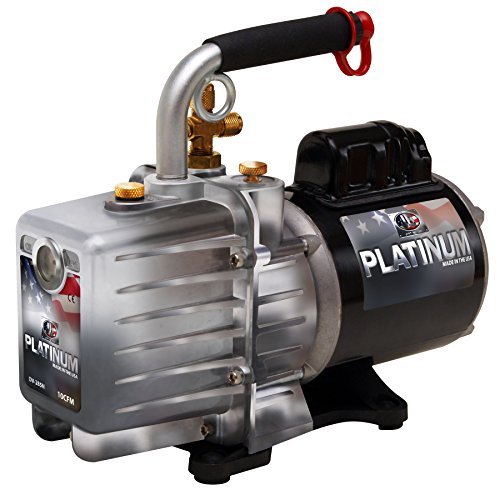
Nope. This is my new one. Got it used and a great deal from a guy getting out of the business.
https://www.amazon.com/Industries-GIDDS-131245-Platinum-Vacuum-Pump/dp/B003M5NCKU
Air line
Ok. Here is what you need to do and it’s what a mechanic shop would also do. If you do not have the following then you can get them from amazon. I have included the links below.
Interdynamics Certified A/C Pro UV Leak Detection Kit, UV Light with Glasses, 438 https://www.amazon.com/dp/B003JOB594/ref=cm_sw_r_cp_api_i_NWX7CbJHG1TTV
Tracer Spectronics Corp TP39000008 Dye-Lite Coolant/Auto Body Dye https://www.amazon.com/dp/B000NPIYLO/ref=cm_sw_r_cp_api_i_MZX7CbMADX2P3
It’s about $40 in detection parts but totally worth it. Fill your radiator and overflow tank with coolant (super cheap concentrate with water mix from Walmart is fine) and then add about .5- .75 ounces directly into the radiator. Keep track of your coolant levels and within a day (maybe more it depends on the size or location/locations of the leak) you can use the uv light and glasses to pinpoint the leak. If you have a garage you can do this in then great if not wait for nighttime and make sure you are not near any street lights.
This will pinpoint the leak and we can go from there. Hopefully it’s just something that was not tightened correctly/a hose.
https://www.amazon.com/Robinair-16355-Dye-Injection-System/dp/B000HTLPOY