Best beer brewing wort chillers according to redditors
We found 46 Reddit comments discussing the best beer brewing wort chillers. We ranked the 19 resulting products by number of redditors who mentioned them. Here are the top 20.
We found 46 Reddit comments discussing the best beer brewing wort chillers. We ranked the 19 resulting products by number of redditors who mentioned them. Here are the top 20.


Yes, that's even better, and if you add another layer of metal to create a seperate channel for a different liquid to flow through, you've created a counterflow chiller. It lets you use cold water flowing through one pipe to rapidly cool down liquid in the other pipe without mixing the two.
I own this one and it can bring ten gallons of boiling wort (unfermented beer) down to room temperature in about five minutes.
https://en.wikipedia.org/wiki/Heat_exchanger
Sorry for hijacking your thread. Here's what I'd recommend as a long time homebrewer and now pro-brewer. First, get an all-grain kit from someone like the Brooklyn brew shop. It's cheap, the batch size is small enough to use your current equipment and gives you a great introduction to the craft. They are basically doing a modified version of brew in a bag which is a simpler all-grain method and definitely what I'd recommend as you move forward. If you find you like it and want to upgrade to the standard 5 gallon batch sizes here's a list of items to get you going.
https://brooklynbrewshop.com/collections/beer-making-kits
Bayou Classic 800-144 44 quart Boil and Brew Kit, Stainless https://www.amazon.com/dp/B06XHGRC67/ref=cm_sw_r_cp_apa_oSgeAb11KM78Q
With a 11 gallon total capacity you'll be able to brew most beers with a moderate alcohol level. If you have a local Homebrew shop, have them drill a hole and add a valve at the bottom or do it yourself (fairly easy). This will save a lot of time, effort, and make better beer.
For a fermenter, you can start with the bucket, but they leak and scratch easily. Glass carboys are heavy, expensive, hard to clean, and you can't pull samples without risking contamination. I highly recommend these guys.
Fermonster 7 Gallon Carboy - Ported https://www.amazon.com/dp/B074D9YBV8/ref=cm_sw_r_cp_apa_30geAb75CWCK0
You will also need a hydrometer set (this will work for now) Hydrometer (Beer/Wine) & Glass Test Jar. https://www.amazon.com/dp/B01DUPMZJK/ref=cm_sw_r_cp_apa_41geAbRM5KQA6
A brew bag: The Brew Bag - Fits a 30 to 40 Qt Brew Pot for Home Brewing Beer https://www.amazon.com/dp/B00QJ4GM6M/ref=cm_sw_r_cp_apa_O3geAbW9J0HSV
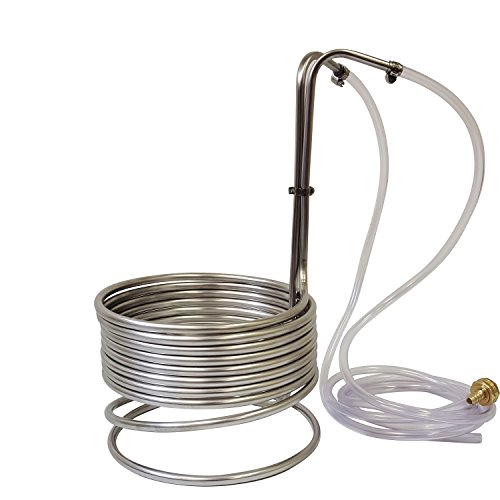
This is probably a down the road buy, but a chiller is essential. Ice baths took hours to cool to temperatures safe for yeast (and tasty beer). This brought it down the 20-30 minutes. Stainless Steel Immersion Wort Chiller https://www.amazon.com/dp/B0064ODYKE/ref=cm_sw_r_cp_apa_m.geAbESZE44N
Sanitizer (starsan or iosafe)
Cleaner (pbw, one-step, or oxyclean free) - don't use dish soap!
Bottles + bottling wand
Bottling bucket w/ spigot
Silicone tubing
The big stuff shop around online. You can definitely find better deals than what I linked. The small stuff, brew bag included check your local homebrew shop. Brewing all grain is a lot cheaper and better quality than the extract kits.
I started with a kit almost exactly like the one you linked, but soon found that other stuff would make my life a lot easier and ended up replacing almost everything in the kit, basically wasting the $130 I spent on it. It's a glorious hobby one I never imagined would take me to where I am today.
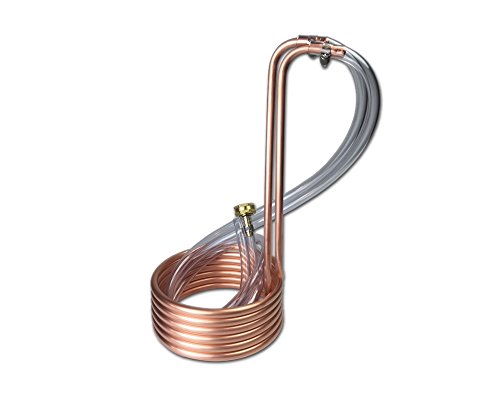
If you're going with a five gallon batch for your first batch, you DEFINITELY need a wort chiller. They're like $50 and will save you hours of headache. I suggest the one here: https://smile.amazon.com/HomeBrewStuff-Copper-Immersion-Wort-Chiller/dp/B00Q0JZX2K
I did my first five gallon batch without it. I was cooling 3 gallons of wort with a 20 pound back of ice and a sink that wasn't nearly deep enough. It took me two hours to get it down to pitchable temperature. I immediately bought that, and it now takes me about 20 minutes.
I hate to be a wet blanket, but you can get a completed 25' immersion chiller on amazon for less money.
Freebie: You know how homebrewers (beer/moonshine) in America use copper tubing for heat transfer? They need to cool the beer down quickly.
That shit sells for $60 on amazon Guess how much it costs in China? $15. How much retail? Last time I was in the States... almost $100. What's the difference with a Global 500 company in Ningbo and a small extruder in Montana? MOQ. MOQ is like $10,000. Shipping to LA is $1900. Tariffs and VAT? NONE (HTSUS, anyone?). Amazon fulfillment is like $100/month (if you put ALL of your stock in their warehouse) and $2/product for shipping. Throw it on eBay and you got a stew going. Call 600 niche retail stores in America and get an order of 40 of these at $30 and you're going places.
If you're an English teacher, look out for shit like this. I sell something tangentially related to this product, and there is money to be made with that community. /r/entrepreneur
Subscribe to this subreddit, good first step.
Visist www.homebrewtalk.com and join up there too, a HUGE treasure trove of knowledge.
Buy this: http://www.northernbrewer.com/shop/essential-brewing-starter-kit.html
Watch the DVD.
Now, I don't know your budget, if you want to just make some beer this should get you going.
If you want my recommendation for stuff to get now:
A good brewpot, large enough to boil all grain and do brew in a bag, here's a pretty badass one:
http://www.amazon.com/Bayou-Classic-1144-44-Quart-Stainless/dp/B000FTLY1K/ref=sr_1_8?ie=UTF8&qid=1396500991&sr=8-8&keywords=stainless+stockpot
A wort chiller:
http://www.amazon.com/Copper-Immersion-Chiller-Length-Drain/dp/B007ZDIIOA/ref=sr_1_6?ie=UTF8&qid=1396501051&sr=8-6&keywords=wort+chiller
A good propane burner, I got this one for free on special a while back and love it:
http://www.northernbrewer.com/shop/the-dark-star-burner.html
This is basically all I use to brew all grain beer, I don't like to get too fancy I just want to make some good beer, and I produce pretty good beer, if I do say so myself.
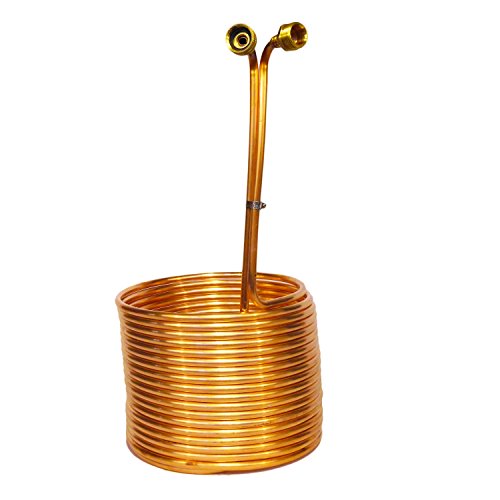
I upgraded from a 3/8 25' SS chiller to the King Cobra. I just used it yesterday for the first time and was blown away with how fast it chilled the wort. Like you I was thinking about the Hydra but I was worried it would stick out above my wort; I have a 15 gal pot but do 5 gal batches. I got the cobra because of its lower profile. One of the best purchases I've made to make my brewday more enjoyable and quicker. No more wasted water from my wimpy chiller running for 30+ minutes! I can't recommend Jaded's chillers enough, not sure why their customer service is slow but my chiller was shipped to me very fast after purchase.
A good option if you have Amazon prime: https://www.amazon.com/dp/B003UCCLG6
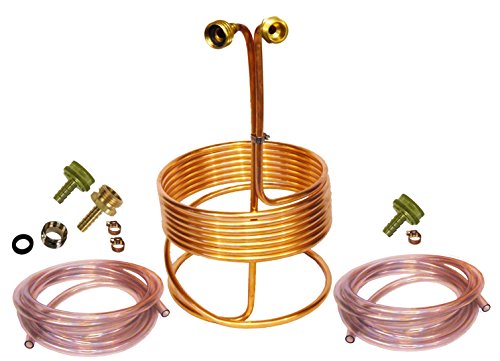
Not sure what your setup is, but I found having an immersion wort chiller in my starting brew days was incredibly efficient and time-saving (I did full 5 gal boils). These start ~$50 on Amazon, but you can buy coiled copper piping (the most expensive part) at any hardware store, bend yourself and use some inexpensive plastic tubing (make sure it’s heat resistant to handle the initial wort temp), some clamps and a faucet adapter. Cools wort remarkably fast and if you keep it clean and sterile (like all brew equipment), it will last as long as you brew beer.
Immersion wort chiller
There’s a few other quality of life equipment upgrades I’m sure you’ll find out along the way as you brew, but I felt this was well worth the money for the time and hassle it saved me.
Butterbeer candle (Harry Potter)
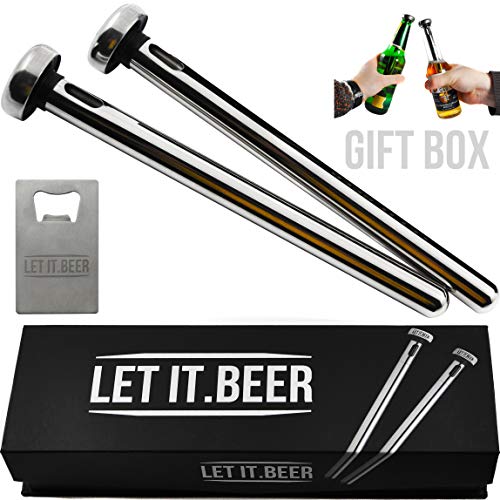
Beer chilling sticks + bonus bottle opener card
personalized pen
have you considered just using a stainless wort chiller? I'm not sure how you'd go about drilling the holes but I would think that could accomplish the job
If you do this significantly or frequently, I highly recommend an immersion chiller.
http://www.amazon.com/Copper-Coil-Immersion-Chiller-Length/dp/B002NZNJG2
I purchased this one off amazon and it works well. It came with hoses, fittings welded on, and a faucet adapter for inside use. What more could you need?
Considering the cost of copper, tubes, and fittings... if you can find a chiller pre-made for ~$50-$60 you'll probably end up breaking even at least. And not having to risk messing up the copper... worth it to me. Link
Using an ice bath never really bothered me before, but using a wort chiller simplifies and speeds up chilling considerably. I found that cooling the wort to <100f was pretty quick but it took quite a while to get down to ~70f...then even longer to mid or low 60's with an ice bath. With my 25ft wort chiller I've been consistently chilling from boil to low 60s in about 15 minutes.
As far as sanitary goes, as long as the tube is properly sealed during the soldering you should be fine.
The first worry I would have is whether or not the solder contains metals or other impurities that will easily come into solution with the wort (ex. lead). While the temperature will be nowhere near high enough to melt the solder, it will be high enough to promote the dissolution of these lower melting-temp metals or impurities.
If you are using a silver solder like I saw suggested in another comment you have the possibility for corrosion issues. Yes, I know that silver is a noble metal but when in contact with copper, especially in an aqueous environment, you open youself to a range of issues corrosion-wise. Source: https://www.jstor.org/stable/3179729?seq=1#page_scan_tab_contents
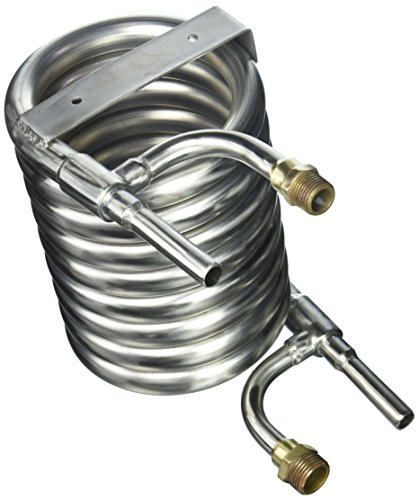
What I decided to do for my wort chiller was buy a stainless steel immersion wort chiller. The overwhelming preference seems towards copper chillers but after doing a bit of mathing, thinking, and experimenting on the subject it occured to me that since the water was leaving the end of the copper tube at the same temperature as the wort then there was an unnecessarily amount of surface area, making the high heat transfer coefficient of copper rather unnecessary. With my stainless wort chiller (I bought something like this one I found on amazon. https://www.amazon.com/Super-Efficient-Stainless-Steel-Chiller/dp/B013S1TBIO) the water coming out of the exit tube is still at the same temperature as the wort as it cooled, indicating that it was cooling just as effectively as the copper wort chiller would have. At worst you add a minute or two to your cool down time, and if you start brewing larger batches you can always invest in a better heat exchanger. (Those counter current exchangers are niceeee.....)
Source for the above: Am chemical engineer
Well my dilemma is that I broke my copper immersion chiller, and now I want to find a new method to chill and until I do, I can't brew... and it's been tooooo long since I last brewed haha! I don't have a pump or can afford to go the pump route (plate chiller, counterflow etc) esp since I fear of clogs haha... immersion just always has seemed to be the best setup for my hobby.. so if I went stainless, would I be happy with cooling times? Are there any highly rated SS immersion chillers you'd reccomend?
I found these two on amazon for instance:
https://www.amazon.com/dp/B00WQ8CRN2?psc=1
https://www.amazon.com/dp/B0165WFYSE?psc=1
You should be able to fit one of these in one of these, which should work fine unless you are really cranking through the kegs.
Very cool, looks good! There's definitely a satisfaction that comes with building something with your own hands.
If anyone needs a good cheap chiller, I recommend this one. 25' for $51.50. It becomes an even better deal if happen to need anything else from the same seller. I tacked on an auto siphon, some air locks, and some yeast and the shipping only went up slightly.
Anybody think buying this wort chiller for $50 is a good deal? 20' of the same tubing at Home Depot is $27 before tax, and I have a $50 Amazon gift card.
I'm not sure what you consider pricey as hell, but I have this one, available for $45. If you are doing extract with partial boils, I might just do an ice bath in the sink. That's what I used to do. If you are doing all-grain and/or full boils, I'd save up the $45.
I LOVE my Mash & Boil, especially after I upgraded it. Here are the things I bought for it to do my upgrade. It’s a good amount of money up front but worth it.
CHUGGER PUMP CPSS-CI-1 Stainless Steel 115 Volt Center Home Brewing System Beer Pump, 55” Cord WITH Plug, Inlet 3/4” x Outlet 1/2” MPT, ETL-Certified, USFDA Food Compliant Materials https://www.amazon.com/dp/B01N9HERFS/ref=cm_sw_r_cp_api_vECLBbD3PTY36
HFS(R) Homebrew Beer Wort Chiller... https://www.amazon.com/dp/B06Y41HCFP?ref=yo_pop_ma_swf
White SiliconeTubing, 1/2"ID, 3/4"OD, 1/8"Wall, 10' Length https://www.amazon.com/dp/B000FMWU38/ref=cm_sw_r_cp_api_VECLBb3CM7H5Q
MRbrew Quick Disconnect 304 Stainless... https://www.amazon.com/dp/B074TCQF6Q?ref=yo_pop_ma_swf
CONCORD 304 Stainless Steel Quick... https://www.amazon.com/dp/B079J5X3XD?ref=yo_pop_ma_swf
Anderson Metals Brass Garden Hose... https://www.amazon.com/dp/B006PKMU7U?ref=yo_pop_ma_swf
LOKMAN Hose Clamp, 20 Pack Stainless Steel Adjustable 13-19mm Range Worm Gear Hose Clamp, Water Pipe Clamp for for Plumbing, Automotive and Mechanical Applications https://www.amazon.com/dp/B077R2PNVT/ref=cm_sw_r_cp_api_yHCLBbB7TH7W8
Dernord Full Port Ball Valve Stainless Steel 304 Heavy Duty for Water, Oil, and Gas with Blue Locking Handles (1/2" NPT) https://www.amazon.com/dp/B076D7WM9D/ref=cm_sw_r_cp_api_wKCLBbEH1QPR0
HomeBrewStuff Stainless Steel... https://www.amazon.com/dp/B00UI995XG?ref=yo_pop_ma_swf
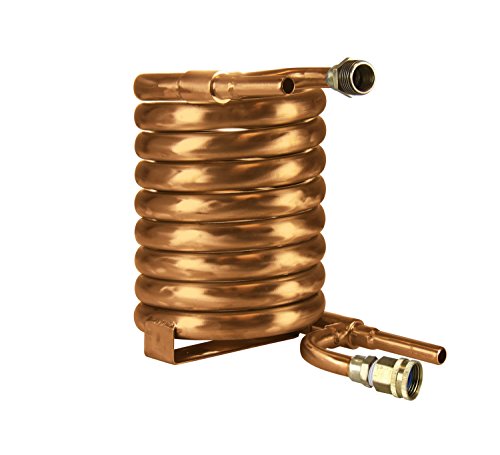
I have a very good answer for you. I'm a fellow homebrewer (second generation) and I just took a heat transfer class where the final project was to design a heat exchanger. My father uses this wort chiller which is called a counter flow plate exchanger. It's the most effective heat exchanger design in most cases. My dad claims that it cools his six gallon batches in 5 minutes. You have to run cold tap water the entire time it's cooling, but it will be the most efficient way to do it.
tl;dr My dad has a great heat exchanger (see link above). it's the most efficient way to go. about 5 minutes for 6 gallon batch!
Edit: Drain some of the water that you run through the exchanger into a bucket with a little soap so that you have hot water for clean up later. The rest you can boil and run through the wort side of the exchanger later to clean it out for star-san
I bought this one and love it:
NY Brew Supply Deluxe Counterflow Wort Chiller with Copper Tubing, 1/2", Bronze https://www.amazon.com/dp/B01893T10E/ref=cm_sw_r_cp_api_R3AHzbH7C60NG
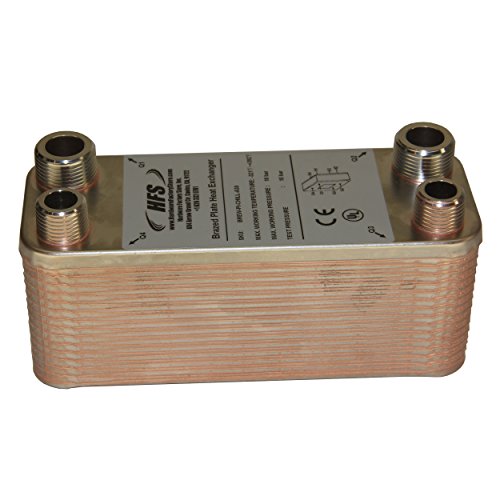
Just thougt it better and i'll need a pump to recirculate it back to the BK and that's not an option right now. Gravity was feeding the wort at around half a gallon per minute, ambient temperature was around 88f , the chiller i used its an HFS 30 plate chiller from amazon.
Chiller
There are a couple...Here's a Kegco example from Amazon. I've been thing of going that route, but I do like the idea of being able to dismantle the chiller for cleaning periodically. On the other hand, the big Duda Diesel I have clogs if I try to whirlpool with it, but a CF chiller might not.
Before you make it, you could return those parts and buy one on Amazon for 49.99. I'm assuming you have prime of course, because who doesn't have prime these days.
http://www.amazon.com/gp/product/B00WQ8CRN2/ref=s9_simh_gw_p79_d0_i1?pf_rd_m=ATVPDKIKX0DER&amp;pf_rd_s=desktop-2&amp;pf_rd_r=1XPACGAMJXSXSMXBFAMD&amp;pf_rd_t=36701&amp;pf_rd_p=2091268722&amp;pf_rd_i=desktop
Finalizing my shopping list to move from 1 gallon to 2.5-3 gallon batches, BIAB, all to be done on my condo glasstop stove. Can anyone tell me if I'm missing anything on my shopping list?
5 Gal Kettle w/ thermometer and valve
Hose Barb Fitting
Elbow Barb Fitting for bottling (assuming I use my kettle as a bottling bucket)
Fresh Grain Bag
Grain Mill to replace Corona Mill
3 Gal Carboy (or should I get a 5 gallon bucket? Or something else?)
Hose for clean transfer to fermenter
Wort Chiller (and all the necessary plumbing to add a t bar and valve to my kitchen sink)
I have a larger auto-siphon (although I'd rather find something else - I hate auto siphons) to rack to a bottling bucket.
What am I missing? Do I need a false bottom?
Thanks!
Strange that they don't even say how many linear feet that chiller is. I'm guessing 25, since they also sell a 50. FYI, you can get a 50 footer here for $60: https://www.amazon.com/gp/product/B004XWBRBM/
>Only thing would be getting larger volumes up to boil temps on the stove
Get one of these: https://www.amazon.com/Precision-Premier-Line-742G-Submersible/dp/B000BDB4UG
>then down to fermentation temps quickly with only an ice bath.
Get one of these: https://www.amazon.com/Superior-Pump-Thermoplastic-Submersible-91250/dp/B000X07GQS/ref=sr_1_4?s=hi&amp;ie=UTF8&amp;qid=1521643823&amp;sr=1-4&amp;keywords=sump%2Bpump&amp;th=1
Place it in the ice bath (I used between 30 and 40 pounds of ice); use it to pump ice water through one of these:
https://www.amazon.com/Stainless-Steel-Wort-Chiller-Fittings/dp/B004XWBRBM
And recirculate the water back into your ice.
With this method, I got ~6+ gallons to a violent boil, and down to pitching temps in about 12 minutes. You can then use that water for cleaning.
The only danger is that your stove may not like the weight of 7+ or - gallons of water on it.
Couldn't you try using a coil immersion chiller?
Or you could always just use one of these: https://www.amazon.com/Copper-Coil-Immersion-Chiller-Length/dp/B004E22PIA
For temp control, use a cooler. This is the cooler I use. It is perfect to hold any fermenter I've seen. Fill with 65f water. Put your fermenter in the cooler. Add frozen 16-oz soda bottles to keep water temps at around 65f. Monitor your fermenter temps (using the stick-on fermometer ... just be sure the fermometer isn't under water!). I've found adding 1 frozen bottle in the morning and 1 in the evening keeps temps exactly where I need them..
If your fermenter has a spigot in the bottom - place the fermenter inside a contractor trash bag (the super thick durable kind) before placing in the water. You don't want to risk infection by having the spigot exposed to the water.
For BIAB and All-Grain ... #1 - BIAB is all-grain. It is just easier. The ingredients are the same. The end result is the same (Beer!). The complexity, cost, and time are different. So, I'll just list out a 2-vessel BIAB-in-a-cooler hybrid system.
Total - $255 shipped to your door.
This setup will be a setup that you can use for all types of Ales. You can even do low-temp ales that ferment at 50-55f by adding more ice/colder water to the cooler. Don't think it would be efficient enough for lagering.
Process:
EDIT - you will need an extra 5-gallon pot to heat sparge water.. forgot that. They can be found anywhere for about $20. As always - check craigslist to save even more $$$$. This is the cheapest and most efficient setup I've been able to put together. If you really want to get fancy - then you can add a stainless steel fermenter from Chapman Brewing Equipment for an extra $99. The fermenter is well worth it!
EDIT 2: As always SANITIZE everything at all stages. Also - with all-grain, you'll eventually want to get into water chemistry. Read up on that. AND a good kitchen scale is needed for measuring out hop additions (and later water chemistry adjustments). Kitchen scales can be had cheap. You'll want one that is accurate and can be calibrated.
Here is the desktop version of your link
Do you have a wort chiller? http://www.amazon.com/Homebrew-Immersion-Wort-Chiller-Copper/dp/B003UCCLG6
You could also make or buy a flight glass set.
Just found my notes:
I don't think it's a very good deal. You can buy one already made for less.
That's beautiful! And it could double as a huge wort chiller :D
$52 on amazon.