Best hair color developers according to redditors
We found 33 Reddit comments discussing the best hair color developers. We ranked the 11 resulting products by number of redditors who mentioned them. Here are the top 20.
We found 33 Reddit comments discussing the best hair color developers. We ranked the 11 resulting products by number of redditors who mentioned them. Here are the top 20.


Sure, its no secret :)
I used this: https://www.amazon.com/gp/product/B004OKDW20/ref=oh_aui_detailpage_o06_s00?ie=UTF8&psc=1
PUT GLOVES ON.
I placed a piece of plastic wrap flat on a table. Put a good amount in the middle and spread it with a paint brush. I applied some directly to the plastic as well. I placed the gameboy face down and wrapped it up. Next I put it in the sun and the yellowing came out pretty easily.
WHAT IN THE FUCK BRO.....
>I've heard sandpapering helps
As a fellow sneaker restorer I just cried tears of death.
If you're serious, there's a few options, depending on how much time you have on your hands.
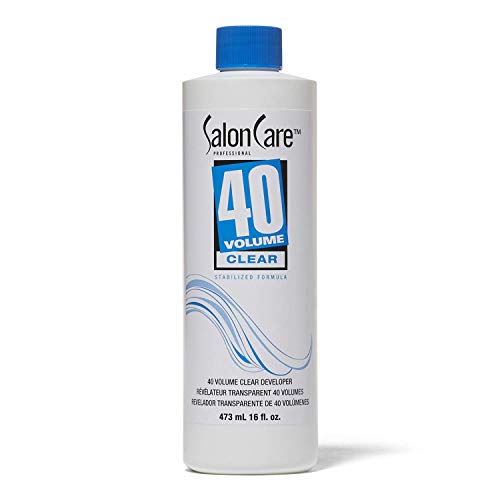
Salon Care 40
Sole Bright
and as others have said the magic eraser.
The 40 solution is practically the main ingredient which other knock off brands have used for their "de-yellowing, of mid soles, process".
Oh no! Bleaching red hair is one of the hardest things to do (according to my mom who was a hairdresser for many years).
Start using a blue or purple tinted shampoo to make it less brassy, let your conditioner set for 10mins before washing it, and then bleach again.
My friend just tried to get his hair a gray-ish lavender color and messed it up leaving parts of it wayyy brassy, so this was the advice she gave to him without seeing him in person. YMMV, but it could be a start.
She said you should be fine bleaching it again tonight if you can get the supplies. This was what she recommended was okay for him to do after the failed bleaching. She doesn't recommend bleaching twice in a row, but if it bothers you enough that you can't wait a week, then yeah.
Copied and pasted from my FB convo with said friend:
> https://www.sallybeauty.com/bleach-hair-lightener/SBS-283080,default,pd.html
> mixed with:
> http://www.amazon.com/Salon-Care-Clear-Developer-oz/dp/B004OKA0B6
>
> If you can't dye it tonight, buy a shampoo like this (and hell, just buy it in general to keep it from yellowing:
> http://www.sallybeauty.com/blonde-shampoo/CLAIRL3,default,pd.html
>
> Mix the 30min bleach and 20 volume peroxide. You may need to activate it with heat - putting a bag or cap over it can help too. Start with the center/back and work your way forward.
>
> She said your scalp MAY blister a little, but just be gentle with it anyways - condition it, wash only wish cool water, don't brush at all or only very gently and as little as possible.
>
> She also said for something more sensitive you could mix equal parts bleach, peroxide, and blond-safe conditioner like the stuff I linked. Also an option to sleep with conditioner and a bag on your head to try and soften the hair to keep it from looking as fried from bleaching.
L'Oreal Oreor Creme 40 Volume... https://www.amazon.com/dp/B000A3ZN7W?ref=ppx_pop_mob_ap_share Brush some on, wrap it in plastic wrap and put it in the sun for a few hours. It only needs a thin coat. Wash it and reapply if it needs it.
Protip: You can make "Retr0bright" which is a special gel that is intended to remove yellowing from old plastics, restoring them to their original color. Or just buy cream hair developer (creame peroxide) and carefully apply it (wear gloves), then cover with plastic so it doesn't dry out, and let it sit in the sun for a few days. This will also eat up the yellow, especially on the middle of the toy where it's noticeably yellowed (note that I am not a pro toy restorer, just used this on old C64 keyboards in the past)
The 5181 never came with blue alps, you are probably confusing them for Blue SMK "Monterey" switches. Good switches but nothing like blue Alps.
retr0brite is the ONLY solution for yellowed plastic. It's not dangerous or time consuming. Just buy this hydrogen peroxide hair cream paint it all over the plastic with a brush and wrap it in seran wrap. Let it sit in direct sunlight for a few hours, rotating occasionally.
There aren't really any PCB's or plates for these SMK switches so your best bet is to just refurbish the keyboard and use as is.
Probably about $20. All you need is some hair bleach and hair dye.
You can just buy some 40 volume creme from amazon or a hair salon. I used it on my NES 2 years ago and it still looks like its brand new.
Heres the link to the stuff I use
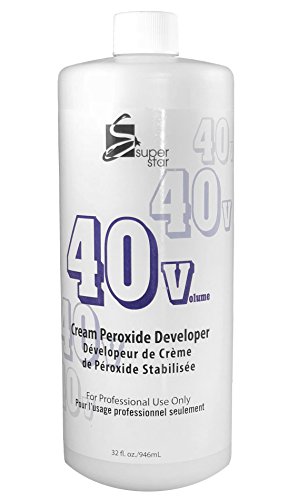
https://www.amazon.com/Marianna-Super-Star-Creme-Developer/dp/B00FKVYCHQ/ref=sr_1_2_s_it?s=beauty&ie=UTF8&qid=1499263024&sr=1-2&keywords=40+Volume+Creme
For those interested, here is the process I follow. This is the second skull I've done and both have turned out nicely. I know it looks like a lot of work at face value, and there is a lot of time that goes into it, but I was super nervous the first time I tried this, did a lot of research on how to do euro mounts and ultimately almost bailed out and paid someone $150 to do it for me. I ended up sticking it out and am glad I did both times. I know it's cliche, but if I can do this, anyone can do it and there is an immense amount of self pride that you get from seeing it hanging on your wall. Good luck and I look forward to seeing pictures of others who attempt to do their own DIY euro mount!
Some folks will use a pressure washer instead of steps 9 and 10, but I prefer this method as it removes the grease which can cause the skull to yellow over time.
At this point your skull can be mounted if you are satisfied with the appearance. The remaining steps are my preference and help with the cosmetics only.
Once the skull is entirely covered, wrap the entire thing in Saran wrap and place in front of a space heater. The heat is necessary to activate the bleaching agent. Heat the skull for about an hour, rotating every 10 minutes or so to ensure even heating.
While the skull is heating, prepare a new cooler full of hot water; no soap this time. Once the skull had been heated, cut the Saran wrap and submerge the skull to the base of the antlers and use your air compressor to bubble the surface and cavities again to remove the bleach and clean the skull.
Let the skull dry thoroughly. As the skull dries out will lighten up, but if you're unsatisfied with the color you can repeat the cleaning process as needed.
This also brings out a lot of unseen character in the antlers. Let the stain set for 10 minutes or so and wipe them down with a clean dry cloth.
Now you should have a beautiful skull with a nice, dark rack ready to mount. My mount of choice is the Walnut Hollow Country Solid Wood Deluxe Euro Skull Display Kit from Amazon.
-------------------------------------------------------------------------------
Product Links:
RaptoRazor Scrambler - https://www.amazon.com/dp/B07K3KQ6DR/
Salon Care 40 Volume Creme Developer- https://www.amazon.com/gp/product/B004OKDW20/
Salon Care Quick White Powder Lightener - https://www.amazon.com/gp/product/B004OKG9PW/
Walnut Hollow Country Solid Wood Deluxe Euro Skull Display Kit - https://www.amazon.com/gp/product/B003UV9QH4/
​
------------------------------------------------------------------------------
Sources of inspiration/information:
EDIT: Here are the two articles I found that inspired me and were sources for my slightly modified process:
https://www.instructables.com/id/European-Mounted-Deer/
https://www.huntaddicts.com/do-it-yourself-european-mount/
find someone with Dermestid Beetles would be the best and easiest.
for DIY, you can soak/cook it in simmering water and baking soda (do not boil). 1lb baking soda per gallon of water.
but first you need to get the brains out. get into them with a piece of wire/coat hanger and scramble them up. then take a garden hose with a strong nozzle or a pressure washer and spray in there to get them out, it will be messy. be careful if using a pressure washer you could damage some of the more delicate bones.
then simmer in water and baking soda mix for 30 minutes. take it out and remove as much material as possible that isn't bone. you might have to soak it a couple times to get it all off. you can use the garden hose and pressure washer to help. a good pick, needle nose pliers, exacto knife, and wire brush will help.
once everything is removed from the skull, soak it in a water and dawn dish soap mix for another 10-20 minutes to help degrease the skull. might want to repeat this a couple times also.
once the skull is clean and dry you can whiten it with volume 40 hair developer. I use the cream developer for deer skulls but you could use the clear liquid stuff since you can soak the whole head.
Seconding Manic Panic. My friends and I use the Amplified version. Easy to use, cheap, amd works really well. Amazon link for Manic Panic Flash Lightning Hair Bleach Kit 40 Volume
Its called 40 Volume cream. Also check out 8-bit guy like stated, but a good how to is here
You can just use hair developer. The main active ingredient in RetroBright is hydrogen peroxide. There are much easier ways to get hydrogen perxoide gel than making it yourself. Here is some on amazon
You still follow the same process. Paint it on the part, wrap it saran wrap to keep it from drying out etc.
Came here to post this. The sun has the power to destroy and restore. https://www.amazon.com/Salon-Care-Volume-Clear-Developer/dp/B004OKDW5W#customerReviews and coat the plastic, place in clear plastic bag like ziplock bag then put in sunlight about 5 or 6 hours
As someone with zero brows. Dying them makes lives so much easier.
Cream and tint. Mix in a little glass or metal container, I prefer to use a small angled brush. Clean skin and eyebrows from any oils. Non oily makeup remover works great. Apply paste, wait 3-4 min (take of excess paste with cotton swap because it will stain your skin for a day). Wipe off with a cotton pad. Wake up with eyebrows every day! Last for 3 weeks. Products probably 6+ years (1.5 year in, not even used a quarter of the container).
Edit: to dye as many hairs as possible “rub” it in a bit and go in both directions with and without the hair grow.
A strong Hydrogen peroxide plus sunlight works wonders on the yellowing. I recently restored a C128D and keyboard.
Can you talk a bit more about the specs and show pics of the hard drive setup? I'm actually fascinated that you were able to hook one up, presumably the sidecar port?
Here's a link to the stuff: http://www.amazon.com/Salon-Care-Creme-Developer-oz/dp/B004OKDW20/ref=sr_1_1?ie=UTF8&qid=1449641807&sr=8-1&keywords=salon+40
The top review explains the process.
I just used the solution without mixing. It's 12%.
If you get the aek ii, then use hydrogen peroxide to make the plastic white again, or search up retr0brite
Get yourself a bottle of this: https://www.amazon.com/dp/B004OKDW5W
Take the SNES apart and place the plastic outer shell pieces into a clear or translucent container with water and the above product.
Leave them out in the sun on a bright and sunny day for 4-8 hours.
Clean them off with water and you'll have a brand-new, non-yellow look for your SNES.
(Edit for clarity.)
Retr0Bright those working ones for full glory.
This stuff works very well. Pre-mixed, stable, effective:
https://www.amazon.com/Salon-Care-Creme-Developer-ounce/dp/B004OKDW20
I'll make it easy. Just buy a bottle of this stuff, and watch this tutorial.
If you don't own a UV light, just use the sun.
Bleach is a must, but I have a suggestion. This bleach smells good, doesn't hurt your scalp, and keeps the damage to a minimum. They carry it at Sally Beauty, but if you don't have one nearby, you can buy it online. You do need a developer to go with it, the volume depends on your natural hair color.
there is an easy to obain(at least in the U.S., not sure about elsewhere) hair care product that takes care of the yellow plastic. Video below is of "The 8 Bit guy" using it with before and after results.
https://youtu.be/VU7vXMezW_I
EDIT: Forgot to link the product: http://www.amazon.com/Salon-Care-Volume-Creme-Developer/dp/B004OKDW20
wear gloves, spread this on evenly with a brush https://www.amazon.com/Salon-Care-Creme-Developer-ounce/dp/B004OKDW20
wrap up the yellowed plastic in clear plastic wrap
put it in the sun outside, rotating every 30 minutes for even spread, for a few hours depending on temp
I mean you clould get away without bleaching it, BUT it wont be the same shade as the color the dye says it is. I highly recomend the manic panic bleach lightning kit i think its called. its like 10 bucks comes with mixing bowel, brush, gloves, bleach, and developer!https://www.amazon.com/Manic-Panic-Flash-Lightning-Bleach/dp/B002GENWU8
You can buy similar products on Amazon as well. 40V Peroxide
After doing some researches I've decided to use exactly the same product as yours... So it's a bit reassuring you are using the same ! I've chose to buy these products:
https://www.amazon.co.uk/LOreal-Quick-Blue-Powder-Bleach/dp/B000A409J8/ref=sr_1_1_a_it?ie=UTF8&qid=1465485489&sr=8-1&keywords=bleaching+powder+for+hair+l%27oreal
https://www.amazon.co.uk/LOreal-Oreor-Creme-Developer-oz/dp/B000A409CK/ref=pd_sim_194_8?ie=UTF8&dpID=31sFNtiGQbL&dpSrc=sims&preST=_AC_UL160_SR160%2C160_&refRID=DF93VB9TYF18VMXJPTWJ
The last part I'm struggling to understand is the immediate after bleaching process. I understand that I shouldn't stay with bleached hair, and I should use either a toner or a hair dye on my hair. Idk what colour should I expect to get (probably yellow) after bleaching. Can I put any tone of blonde in my hair in order to cover the yellow or am I oblige to use a ash colour?
I really like that colour but I'm afraid it would not really look like this over my bleached hair.
http://www.superdrug.com/Garnier/Nutrisse-8-32-Natural-Gold-Pearl-Gold-Pearl-8-32/p/564800
Otherwise there's this one I like but I fear that my hair won't be light enough to hold the colour.
http://www.superdrug.com/Hair/Hair-Colourants/Permanent/Garnier-Nutrisse-Cr%C3%A8me-Hair-Dye-9-13-Light-Ash-Blonde/p/211608