(Part 2) Best masonry tools according to redditors
We found 49 Reddit comments discussing the best masonry tools. We ranked the 35 resulting products by number of redditors who mentioned them. Here are the products ranked 21-40. You can also go back to the previous section.


Well if you want one this is just $4.55 on Amazon and you can attach it to your drill.
No its just bright fluorescent string. Here and Here are the ones I used. I have blacklights in this room, which is the reason the strings look like that. As for a tutorial, I kind of found a way to connect the patterns without needing to cut the string. Here is the pattern that is repeated.
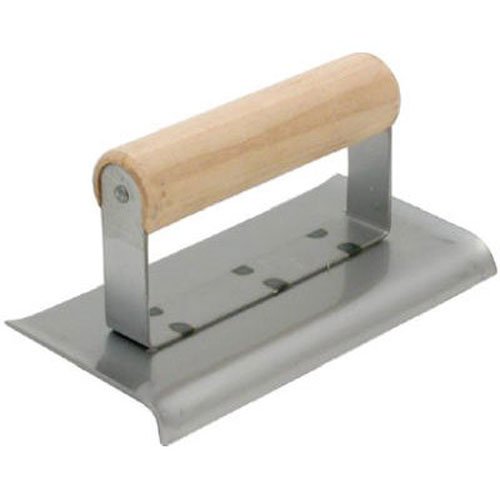
if you buy a couple concrete tools, edger and trowel, (this kit is an awesome buy) you can finish the bottom in the video and use it for the top. this way you won't have any voids to repair.
Brass bristle brush. Don't use steel wire, it'll damage the knurling. Most nylon are too soft to really get in there.
I use this for all of my knurling needs.
Allway Tools Soft Grip Wide... https://www.amazon.com/dp/B000KKRG4I?ref=ppx_pop_mob_ap_share
https://www.amazon.com/dp/B00002X233/ref=cm_sw_r_sms_awdb_t1_vcizDbD0MGQVN
Don't add to much water to your mud to acheive the sharp peaks.
Levelquik works great, and it's easier to use than most other cementious materials. It works on thicknesses from 1" to 0, so having it only cover parts of your floor and feather to nothing is not a problem. Follow the directions on the bag EXACTLY and use a graduated bucket to measure out the water you add. The best way to mix it is in a 5 gallon bucket with an electric drill and a paddle mixer. A cordless drill, if that's all you have, will not be sufficient and in this case you'll have to do it by hand, but that isn't the end of the world. Although it is a self-leveling product, you'll want something to help it along for best results, like this:
http://www.amazon.com/gp/aw/d/B00002N5Q0/ref=mp_s_a_1_6?qid=1398201752&sr=8-6&pi=AC_SX110_SY165_QL70
Both levelquik and an appropriate float can be purchased at Home Depot. For around $55 total.
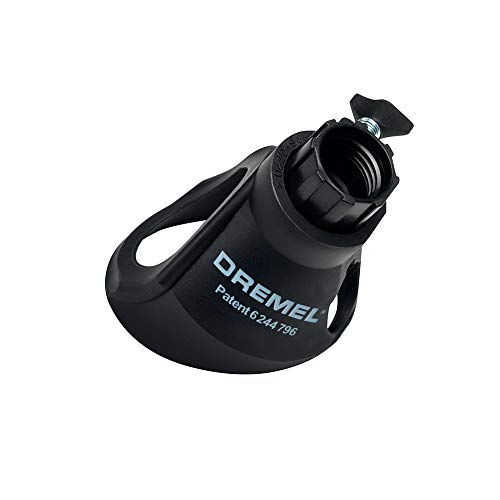
A dremel maybe? I'd make a little jig for the extension cable (see amazon ) but there's Dremel brand adapters & tools you might be interested in.
Ooh, it was about 8 years and 3 moves ago. I'm remembering less than £200, which at that time was ~US$400. I had no plastering tools at all, so would have been starting from scratch -- Tool costs in the UK figure even £ for $, so a $25 hawk in the US would be a £25 hawk in England
The basics are pretty easy, and can usually be found at a standard Ace, or even easier, just on Amazon.
Metric tape, 5m.
Folding ruler, 2m.
Trowel. Most archaeologists in the US tend to use Marshalltown 45-5 pointer trowels. Some like the margin trowels as well.
Line level.
I'll add more later...
edit:
Honestly, those are the only things you really need. You could also throw in things like a file for your trowel or to touch up a shovel if needed, but usually that's not really necessary. You could buy a Munsell book, but they're quite expensive and someone running a project will have one available.
For reference, the rubbing brick looks something like this.
They work pretty well for smoothing and minimal removal.
it is really beyond repair and anything you might do to it is just going to crack up again. If I was you and wanted to make things look nice I would remove all the loose stuff around the tree and pull up all those bricks and regrade the yard so its level with the slab.. looks like you have a nice rake there.. then get yourself a 2 gallon pump sprayer and put half a gallon of bleach in it and the rest water and spray it down real good and keep it wet for half an hour with bleach solution then wash everything away.. looks like you have some patching to do near the corner of the house near the grate and you can dig out some of the dirt and put in a couple inches of concrete there. as for patching cracks its not going to last long especially if you're in an area where it gets cold in the winter. you can use a mortar mix and then add portland cement to it to make it stronger .. then use a concrete brush to apply a skim coat of portland cement to the surface of the concrete just to make it look uniform.. but it won't last more than a year or two depending where you live.... its like doing your driveway or staining your deck.. every couple years.. maybe maybe not
but the big thing is making it better than it is now.. and put maybe 2 weekends into this.. its not rocket science heh its just a lot of raking that dirt back and washing it down.
Howdy - sorry for the slow reply! First off, I apologize for the detail but I have no idea if you know all this already or not. I'm no expert and learned all this as part of building our own house and thousands of hours of research. I figure it's better to overshare than provide too little.
Our walls were not parged. Based on what you have said, I'd think the tapcon-equivalent screws and glue would be the way to go though almost certainly overkill. If it's worth doing, it's worth overdoing. In this case, you put glue on the board and spread it with a spreader. You then put the board on the wall and it will lock in place a bit with the glue. Then you drill into the wall through the foam for the screws/anchors. Finally, you just drive the anchors into and it's all locked together - solid and secure and very well insulated. After that, you tape the seams and you now have a tightly insulated basement and a great vapor barrier all in one.
This is the glue we used for the boards we did glue down:
https://www.amazon.com/dp/B0043G3NYC/ref=asc_df_B003YHIAHQ5453396/
It worked very well and wasn't too nasty to work with. We used a spreader to avoid wasting glue. It also ensures you get good adhesion:
https://www.amazon.com/MARSHALLTOWN-6287-Plastic-Notched-Spreader/dp/B000GARZ9S/ref=pd_bxgy_60_img_2
Drilling that many holes in concrete is a pain so you need a rotary hammer (at least I'd highly recommend it - useful tool all around as well). I used the 1 1/8th inch one from Harbor Freight but wished I'd picked up the larger one as it can get bits all the way up to 1 /12 diameter or more. Those huge bits are used to put holes in concrete for things like piping. Either way, it's a lot higher quality than I expected and makes short work of each hole:
https://www.harborfreight.com/catalogsearch/result/index/?q=rotary+hammer
We used Simpson anchors as they were a LOT cheaper than tapcons. We got em from a large construction supply house locally:
https://www.strongtie.com/mechanicalanchors_mechanicalanchoringproducts/ttn2_screw/p/titen-2
These need to be driven in along with some large washers. It takes some force so I'd suggest an impact driver using a socket or you'll kill your arms by the third board :)
As an alternative, Hilti and a few other companies make insulation anchors as well - here is a picture of them on Ebay:
https://www.ebay.com/i/352329215437?chn=ps
These require you to drill the wall and then hammer the fastener in. I didn't use those as I was in a hurry and couldn't get a quick local source of them without costing even more than the concrete anchors I used.
We used pressure treated 2x4 lumber for the fire block - every ten feet horizontally and eight feet vertically. For that reason, it's useful to get the "score board" type XPS foam. It has scoring that makes it trivial to split it in 1/2. That means two full sheets and one half sheet then a 2x4 screwed to the wall. The concrete screws and glue work great for the 2x4 as well.
Finally, you use good tape to seal all the seams to create a proper vapor barrier. This is what we used and it does adhere well to foam:
https://www.amazon.com/gp/product/B005FQFROI/ref=oh_aui_detailpage_o04_s00?
Whew, lots of stuff. Again I apologize if you already knew this. Please let me know if you have any questions and I'll try to respond more quickly. Thanks and good luck!
-Mike
Buy a cheap stamp mold for the top.
Here's an example. You might be able to rent one for less. Also a small chance you can call companies that do stamping in you area and ask to borrow one for the project.
BonWay 32-403 12-Inch by 12-Inch Seamless Concrete Texturing Skin, Italian Slate Pattern https://www.amazon.com/dp/B000L3LVT0/ref=cm_sw_r_cp_apa_i_o7KEDb4AA9RJ9
See if you can borrow a saw from someone or a splitter even.
http://www.amazon.com/Bon-11-590-Buster-10-Inch-Capacity/dp/B0002264M4