(Part 3) Top products from r/Autoflowers
We found 28 product mentions on r/Autoflowers. We ranked the 337 resulting products by number of redditors who mentioned them. Here are the products ranked 41-60. You can also go back to the previous section.
41. Botanicare HGC732485 Silica Blast Helps Plants Flourish In Extreme Environments, For Hydrogardens & Coco, Quart
Sentiment score: 1
Number of reviews: 2
Great for hydrogardens, container gardens or soilWorks in coco media or soilWorks with all plant typesStandard strength dilution will achieve approximately 105ppm Silicate
 Show Reddit reviews
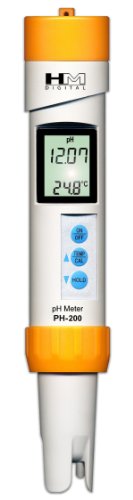
42. HM Digital PH-200 Waterproof Temperature PH Meter, 3.3" x 8.5" x 2", White
Sentiment score: 0
Number of reviews: 2
Measures pH and Temperature, Range: 0-14 pH, 0-80 °C, 32-176 °FAutoranging three point calibration with digital fine tuningWaterproof housing (IP-67 rating)Includes storage solution in a sponge embedded in a clear capAuto-off function, data-hold function and low-battery indicator
 Show Reddit reviews
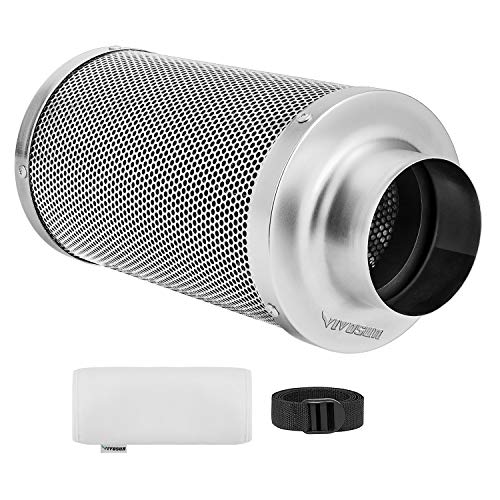
43. VIVOSUN 4 Inch Air Carbon Filter Odor Control with Australia Virgin Charcoal for Inline Fan, Grow Tent Odor Scrubber, Pre-filter Included, Reversible Flange 4" x 14"
Sentiment score: 1
Number of reviews: 2
SUPERIOR CARBON QUALITY: Made of imported Virgin Australian activated charcoal, delivering 100% filtered airflow. 1050+ RC 48 carbon captures three times more air contaminants than average due to optimal surface area per carbon particle.ELIMINATES ODOR AND CHEMICAL IRRITANTS: Protects from chemical ...
 Show Reddit reviews
44. Hydro Organics J05299 Meta-K Earth Juice, 1-Quart
Sentiment score: 0
Number of reviews: 1
Formulation for potassium deficient plantsApply prior to and during flowering/fruiting to support productionIncrease drought resistance and maximize nutrient assimilationBrand: Hydrofarm
 Show Reddit reviews
45. Holmes Mini High Velocity Personal Fan, HNF0410A-BM
Sentiment score: 0
Number of reviews: 1
Compact yet powerful personal fan is perfect for use on a table or desktopHigh-velocity motor delivers concentrated blasts of cool, refreshing airTilt-adjustable head allows you to precisely direct airflowNo assembly requiredMeasures approximately 6 x 4 x 6 inches
 Show Reddit reviews
46. Holmes Carbon Filters HAPF60, Filter C, 4 Pack,Black
Sentiment score: 1
Number of reviews: 1
PERMAtech filter never needs replacement with ordinary care and is easy to cleanHEPA-type filtration removes 99% of airborne particles from the air that passes through the filterThree speed settingsOptional Ionizer assists in particle removalContains 4 replacement carbon filtersFiltered with Arm & H...
 Show Reddit reviews
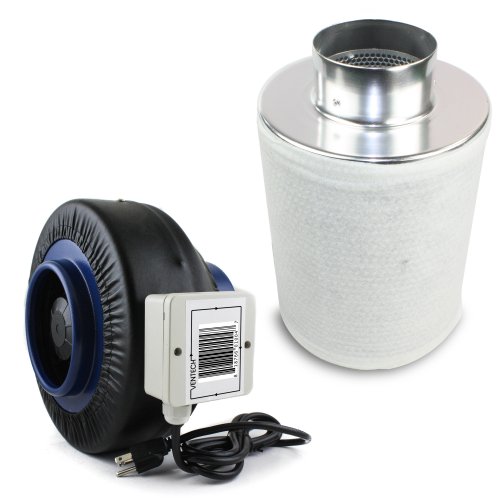
47. VenTech VT IF4+CF4 IF4CF412 Inline Duct Fan with Virgin Charcoal Carbon Filter Combo, 190 CFM, 4"
Sentiment score: 0
Number of reviews: 1
Fan Air - CFM Dimension: Diameter 7.50" / Size: 4"Fans 2565 / 70 1.5)Power 65 ; Voltage AC 110v/60HzCarbon Features: - x Duct - 4"Package 1 4" Fan 1 Fan Mount 1 4" Filter 2 Instructional Pamphlets
 Show Reddit reviews
48. Apollo Horticulture GLK400CTAC 400 Watt Grow Light Digital Dimmable HPS MH System for Plants Air Cool Tube Hood Set
Sentiment score: 2
Number of reviews: 1
1- 400 Watt Dimmable Electronic Fan Cooling Ballast; Acceptable input: 110v - 240v. Dimmable Option: 50%, 75% & 100%1 - HPS Bulb: Lumen - 56,000 & 1 - MH Bulb: Lumen - 36,0001 - Air Cool Tube: 26" x 25" x 7" Duct Size: 6" Made of Glass & German Aluminum1- Pair of Rope Hanger : Weight Capacity - 150 ...
 Show Reddit reviews
49. VELCRO Brand Plant Ties | 45 ft x 1/2 in Roll | Alternative to Twine, Reuse and Adjust with No Knots | Garden Tape has Strong Hold for Tomato and Vine Support | Green (91384)
Sentiment score: 1
Number of reviews: 1
SECURE AND DURABLE - Strong VELCRO Brand ONE-WRAP Garden Ties with non-slip grip keeps flowers and plants staked, supported, and securely bundled together so that your flowers can flourish, and your garden can growSTRONG YET GENTLE ON PLANTS - Soft side won’t scratch or damage plants; wraps onto i...
 Show Reddit reviews
50. Wooster Brush R405-13 Hefty Deep Well Metal Tray, 13 Inch
Sentiment score: 1
Number of reviews: 1
Heavy gauge rust resistant bright finish steel withstands daily useSturdy ribbed roll off area and legs to keep the tray level for even loadingHefty three quart working capacity19 inch L x 13 inch W x 4 inch D
 Show Reddit reviews
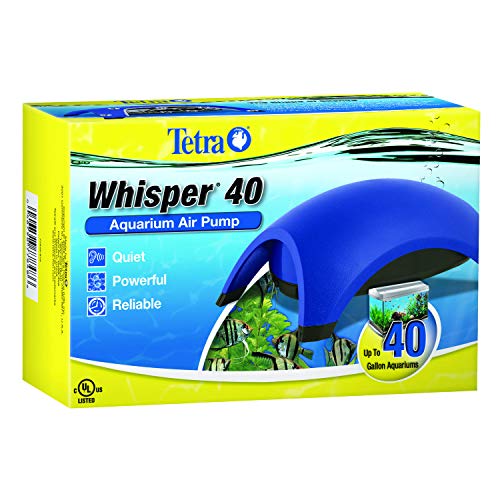
51. Tetra 77848 Whisper Air Pump 20 to 40 Gallons, for Aquariums, Quiet, Powerful Airflow
Sentiment score: 0
Number of reviews: 1
POWERFUL Tetra Whisper Air Pump provides dependable airflow to your aquariumQUIET Patented dome shape suspended motor and sound-dampening chambers for quiet operationELIMINATES VIBRATION Designed with a wide footprint and rubber feetAVAILABLE SIZES Select the proper size for your tank – 10 20 and ...
 Show Reddit reviews
52. EcoPlus 126 GPH (480 LPH, 3W) Air Pump w/ 2 Outlets | Aquarium, Fish Tank, Fountain, Pond, Hydroponics
Sentiment score: 0
Number of reviews: 1
Ideal for indoor gardening and hydroponic applicationsDual chamber oscillatiing pump for high output and stable pressureHigh enery efficiencyDouble damping noise reduction system for quiet operationHeavy duty water resistant housing
 Show Reddit reviews
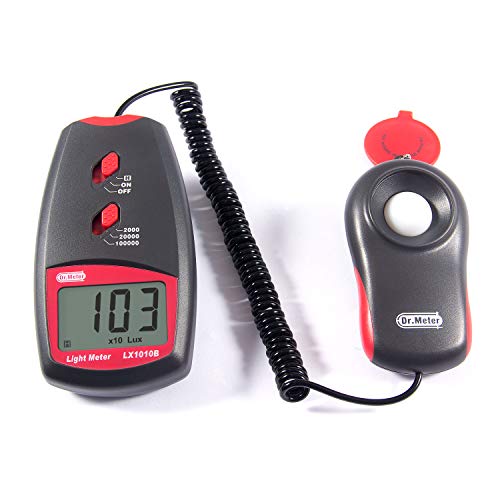
53. Dr.meter LX1010B Digital Illuminance/Light Meter, 0-100,000 Lux Luxmeter
Sentiment score: 2
Number of reviews: 1
▶【Easy-Read LCD】: Whether you're in a bright sunny field or in a tight space, you can always read the Dr.meter Digital Illuminance/Light meter thanks to the large 18mmLCD display with 3-1/2 digits of info.▶【Large Range】: Whatever you're measuring, you can be sure that this light meter wi...
 Show Reddit reviews
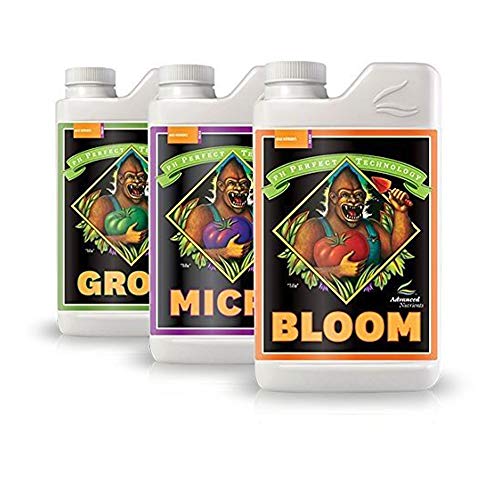
54. Advanced Nutrients Bloom, Micro & Grow, Pack of 3, 1 L Each
Sentiment score: 0
Number of reviews: 1
Lush, sturdy growth from 3-part nutrients designed specifically for high value3 Part solution in 1 package: You get advanced nutrients bloom, micro and grow in 1 liter size eachState-of-the-art carrier molecules to ensure their plants get the maximum amount of nutrientsYou will never have to worry a...
 Show Reddit reviews
55. WENKO 5410010100 24 x 15 x 15.5 cm 1 Kg Room Damp Killer by
Sentiment score: 1
Number of reviews: 1
Wenko 5410010100 24 x 15 x 15.5 cm 1 Kg Room Damp Killer
 Show Reddit reviews
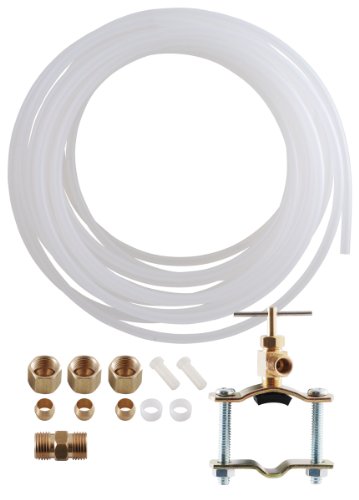
56. LDR Industries 509 5100 Ice Maker and Humidifier Installation Kit 1/4-Inch x 25ft Flexible Hose for Potable Water Filter System, Poly Tubing
Sentiment score: 2
Number of reviews: 1
FUNCTIONALITY: This Ice Maker and Humidifier Installation Kit will provide you with clear and sparkling ice cubes and drinking water at your refrigerator by routing purified water from your existing water filter system.COMPATIBILITY: Supply pure water from your water filtration system to your refrig...
 Show Reddit reviews
57. Enermax Marathon 120mm Silent PC Case Fan - UC-12EB
Sentiment score: 1
Number of reviews: 1
Exclusive ENLOBAL Bearing with magnetic-barometric design to run friction-free and noiselessNano-technology for lowest abrasion and highest durabilityDetachable fan blades for cleaningBest wire management and 3 to 4 pin adapterNoise level (dBA): 17; airflow (CFM); 44; speed range (RPM): 1000 10%
 Show Reddit reviews
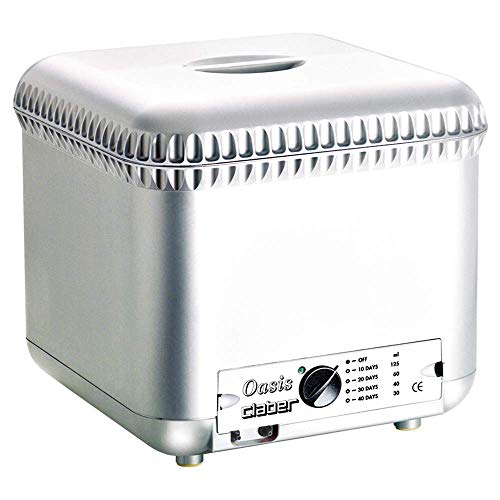
58. Claber 8053 Oasis 4-Programs/20 Plants Garden Automatic Drip Watering System
Sentiment score: 0
Number of reviews: 1
Timer has 4 program settings: 10, 20, 30 and 40 days to water up to 20 plantsOpens twice daily to deliver 4-ounce, 2-ounce, 1.5-ounce or 1-ounce of water per dripperIncludes: a 6.6 gallon polypropylene plastic reservoir, 33-feet of PVC hose, 20 drippers and 20 spikesOperates on a gravity feed; one 9...
 Show Reddit reviews

Introduction
setup: - 80x80x180 tent - 600W Viparspectre - carbonfilter etc ;) - medium: coco perlite 70/30 - temp: around 18.5°C-22°C - rh: 50-70% - containers: 1 11l Liter plastic pot, 3 5-Gal/ 20l smart pots with about 15l medium - PH: 5.6 - ppm: about 650
So we are now entering week 5 i guess? Around 50 days. As u can see i had some major height problems but some late lst helps out a bit.
I also repositioned the carbon filter to the right so i can put that light higher. It is now not perfectly centered but i tilt it until the light spreads evenly.
I am sorry for some low quality photos but it gets hot and humid pretty fast in my room. But now let’s get to the babies
Problems:
Purple:
Was stunted pretty early and is super skinny now. She is also loosing some lower leaves but bud is developing pretty good for her overall health. She doesn’t look that good to me.
WhiteWiddow:
Well thought she would be way faster, like she was in the beginning. Now she ist he slowest? Not super happy about her but i increased her height using some books so she gets some light atleast. She is sitting in the right back so it’s totally crap with the light setup atm. Still having awesome stems and guess i can just put her under the main light when the first one gets chopped.
Moby Dick: A fucking monster now. So many budsites and leaves. She is pretty healthy but also loosing some leaves in the bottom. No LST needed for her she is spacing her colas up pretty good and i just let her go.
Critical: wow…awesome plant. She just exploded in height but some light lst to the main colas did an awesome job. I really like the way she grows now.
Questions
Overall they are pretty healthy, but i am not sure where to locate the problem of my girls.
I thought yellowing of the leaves would come from not enough nitrogen? But there are also some slight signs of nute burn i guess?
I didn’t increase my nutrients, just shifted the amount of bloom and gro. So i would get more nitrogen.
Also they start to drink fast i now consider buying a small watering system. But for now just have to adjust the watering table.
My Humidity is always pretty high(40-70%) while the temps are between 18.5 and 22C. I am concerned about but rot and other bad stuff so i defoliated them a bit. Well this didn’t change that much so i am not thinking about buying a small dehumidifier.
Or do u guys think i am fine since i added a second clip fan?
If u made that far thank u very much! I would love to spend more time with my plants but university :/
I would love to hear some insights of you and maybe u can confirm my nitrogen deficiency or nute burn :D
Have an awesome day guys :)
Tools required:
Parts required:
Process:
Now you have a clean water supply in a hassle-free implementation. When you're ready to make water, just snake your waste line securely down the bathtub drain, open the shutoff valve, give the filter a few minutes to push water through the system and flush, and make water. Easy breezy beautiful cover girl.
If you don't have access to be able to do this in your bathroom, the same setup can be performed anywhere you have access to a fresh cold water pipe and a drain line.
Thanks for the replies, man, super appreciative.
I haven't dropped anything into lights yet, trying to complete my research before getting anything, so I don't slap myself in the head later.
With the light you posted:
Also, in terms of cooling and keeping temps low, Would I need a separate exhaust fan, as well?
I'm sure it's easier to explain by me actually seeing it as opposed to trying to imagine, I just can't quite grasp it.
Also, with that ventech fan, is it easy to attach some form of carbon scrubber? Has to be ~somewhat concealable, for the random inspection here and there.
edit:: found this: what you're talking about?
http://www.amazon.com/Apollo-Horticulture-GLK400CTAC-Digital-Dimmable/dp/B00547RGI8/ref=sr_1_5?ie=UTF8&qid=1452216208&sr=8-5&keywords=Apollo+Horticulture+400w+mh%2Fhps+dimmable
I'm really hoping I'm allowed to link here. Will remove if I need tooo.
It depends on a lot of things. Depending on your light, it may be simpler to get a cheap lux meter (I have this one) and measure. I was pretty surprised by how much of a difference it made being at slightly different angles from the light, but otherwise the same distance. Also, check what your light manufacturer recommends. (You didn't say what kind of light you're using.)
Before I got the meter, I just kept it at 18-20" away, which may have been a bit too far -- since, I've adjusted things once a week or so, based on actual measurements. Of the two plants, one is a couple inches taller than the other, so I've trained it to bend the top colas away from the light a bit. (Some got too close and started to burn.) I'd also prefer to dim the light, rather than running it at max power but further away.
Note that a lux meter won't be very accurate with a blurple (blue/purple wavelength) light, but they should work well with QBs and COBs.
This is what I use: https://www.amazon.com/dp/B00132G102/
Get a big bottle of the General Hydroponics pH 7.0 calibration and storage solution. You need to rinse the electrode with clean water after every use and change the storage solution regularly (1-2 weeks), but if you keep up with the maintenance they'll stay accurate and last quite awhile.
Those drops suck IMO, same with the strips. I feel that the nutrient ions somehow interfere with the reaction on the strips, and you get color interference like you said with the drops. A glass electrode pH meter is what you want.
Proper pH is fundamental to the plant thriving just like light, temperature, humidity, etc. because it's so closely tied to root health and nutrient absorption. It's worth paying close attention to.
I like Silica Blast on Amazon. I've used it for multiple grows now and it's only helped. Makes the leaves stand up really straight I find which is always good when you're trying to maximize how much light gets to all the leaves.
https://www.amazon.com/gp/aw/d/B000EJZAWA/ref=mp_s_a_1_1?ie=UTF8&qid=1498245476&sr=8-1&pi=AC_SX236_SY340_QL65&keywords=silica+blast&dpPl=1&dpID=41niBGp%2B15L&ref=plSrch
Check out garden velcro. I use it for my girls in smart pots. It grips the fabric perfectly for LST.
i replaced the stock pc fan with one of these... almost COMPLETELY silent.
the phresh duct silencer is also a great way to reduce the sound.
Purchased these on Amazon for about $9
One filter is not quite big enough to cover the entire intake, but two are more than enough. They stick right do the Velcro, and although they don't block 100% of the light they do a far better job than nothing.
That's kind of high. Do you have intake and exhaust fans set up? If you already do, I'd consider a supplement to help it do better in higher temperature.
I got a few paint trays that I have some cooling racks like these resting on.
The water just drips down into the tray, comes towards my tent door, and I vacuum it out with a little wet/dry vac.
You can't overwater. Don't use too much perlite in the coco mix or you may have to water multiple times a day(I mixed nutes once a day). I just got a blumats drip kit because I was getting tired of mixing nutes and watering nonstop.
You'll be able to tell if it needs it based on look/weight/feel soon enough. Just stick your finger in knuckle deep to feel if it's damp and don't worry about overwatering until then. I can even tell the color difference in my smartpot fabric/feel that there is a good amount of water in the bottom by touching the outside fabric.
VIVOSUN 4 Inch Air Carbon Filter Odor Control with Australia Virgin Charcoal for Inline Fan, Grow Tent Odor Scrubber, Pre-Filter Included, Reversible Flange 4" x 14" https://www.amazon.com/dp/B01DXYMBU6/ref=cm_sw_r_cp_api_i_LVqSDbXCFH66J
This was my first carbon filter and it worked well. 35 bucks.
Thanks a lot for the info, I'm gathering all I need to make a DIY system now. One last question hopefully (though I might pick your brain in PM's down the line) do you suggest going with one pump for each bucket or one for both? I'm deciding on which of these to get but I'm not sure which size I'd need since they're rated in how many gallons the "aquarium" holds instead of LPH, and depending on whether I go with one or two. Thoughts?
Either something like this (pictured in use above) or this.
https://www.amazon.com/Hydroponics-Inline-Scrubber-Carbon-Filter/dp/B004Q2ER5C/ref=sr_1_1?s=hi&ie=UTF8&qid=1349241681&sr=1-1&keywords=4%22+inline+fan+combo
That's a 4" fan/filter though I might consider a 6" - three plants (especially in hydro) can get surprisingly large.
Oh, got it. I’ve just got a really basic one and it seems pretty quiet. It’s this style, but mine doesn’t have a brand on it so I don’t know if it identical.
4” desk fan
If you aren’t planning on getting a bigger tent I would stick with a 4” exhaust and a 4”/6” carbon filter. Here’s the link for the fan and one for the filter . I use a bigger fan and filter personally, but that’s because I plan on getting a bigger tent after my third or fourth grow. Based on the dimensions of your tent this should be a solid setup for you even if you go up a bit in the future.
https://www.amazon.com/Advanced-Nutrients-Bloom-Micro-Grow/dp/B004FYSDFQ
This is what i used. I haven't been PHing my water while using this and it's worked fine so far.
I use that same setup. But I use this pump and two airstones for more bubbles.
​
https://www.amazon.com/EcoPlus-Outlets-Aquarium-Fountain-Hydroponics/dp/B004LOWF7W/ref=sr_1_26?keywords=air+2+air+pump&qid=1569417444&sr=8-26
I've used this with success...
https://www.amazon.com/Claber-8053-4-Programs-Automatic-Watering/dp/B000U5YFR4/ref=sr_1_1?ie=UTF8&qid=1497888143&sr=8-1&keywords=Claber+8053+Oasis
would this be good for more potassium? https://www.amazon.com/Hydro-Organics-J05299-Meta-K-1-Quart/dp/B0001YC41S/ref=pd_sbs_86_5?_encoding=UTF8&pd_rd_i=B0001YC41S&pd_rd_r=6WK75FY6TGDZAJS9YNFQ&pd_rd_w=o8OQi&pd_rd_wg=JUxSM&psc=1&refRID=6WK75FY6TGDZAJS9YNFQ
That's over $136 here :( http://www.amazon.ca/gp/aw/d/B00132G102/ref=mp_s_a_1_13?qid=1453661143&sr=8-13&pi=AC_SX236_SY340_FMwebp_QL65&keywords=ph+meter