(Part 2) Top products from r/Fixxit
We found 32 product mentions on r/Fixxit. We ranked the 253 resulting products by number of redditors who mentioned them. Here are the products ranked 21-40. You can also go back to the previous section.
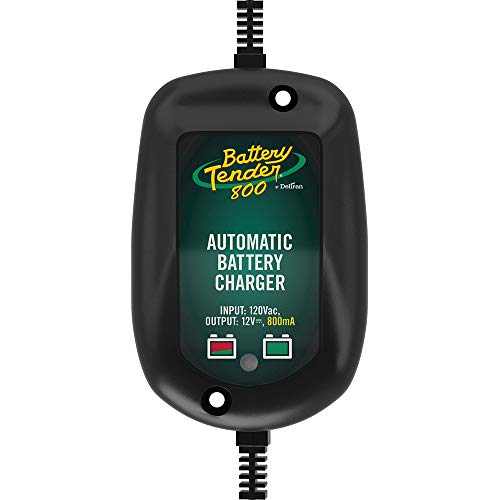
21. Battery Tender 800 is a SuperSmart Battery Charger that will Constantly Monitor, Charge, and Maintain your Battery. It's Encapsulated and Protected from Moisture by an Electrical Insulation
Sentiment score: 4
Number of reviews: 1
All the charging characteristics of the Battery Tender Junior: fully-automated “SuperSmart” charging and maintaining, spark proof, reverse polarity protection, and short circuit protectionThe interior is completely encapsulated, protected from shock, vibration, and moisture by an electrically in...
 Show Reddit reviews
22. CruzTOOLS EKM2 EconoKIT M2 Metric Tool Kit
Sentiment score: -1
Number of reviews: 1
Contains four exclusive PowerDrive wrenches, an eight-inch adjustable wrench, 2-in-1 spark plug socket, tire pressure gauge, 6-in-1 screwdriver, hex keys, zip ties, shop rag and bailing wireUnlike OEM kits, you can count on the M2 anywhere, anytimeHigh functionality in a quality, compact pouchDon't ...
 Show Reddit reviews
23. Permatex 12020 Instant Gas Tank Repair, 1 oz. stick
Sentiment score: 0
Number of reviews: 1
Easy-to-use, two-part epoxy ribbonPermanent, hardened seal in 60 minutesSticks to 'gasoline-wet' metalInstantly seals small holes in gas tanks without tank removalSuggested Applications: Gas tanks in cars, trucks, farm equipment
 Show Reddit reviews
24. ATE Pro Tool 8 piece Easy Out Screw Bolt Extractor Set
Sentiment score: 1
Number of reviews: 1
High Carbon steel construction.Extractor sizes: 5/32", 5/16", 1/4", 9/32", 7/16", 5/8", 15/16"Includes Blow molded caseRemoves broken screws easily
 Show Reddit reviews
25. Permatex 20539 Indian Head Gasket Shellac Compound, 2 oz.
Sentiment score: 0
Number of reviews: 1
Hard setting, economical sealantFormulated to lubricate under the most adverse brake conditionsSeals all common gasketing materialsResists diesel fuels and most auto shop fluidsDesigned for temperature range -65 F to 350 FFlash Point: 24.44
 Show Reddit reviews
26. Walton 10254 1/4", 4 Flute Tap Extractor With Square Shank
Sentiment score: -1
Number of reviews: 1
For removing Machine Screws and Broken Hand TapsTapered square shank fits into manual brace tools and drivers handles for added cutting pressureThreads per inch need not be specified as Tap Extractors will fit both NC and NF tapsHardened steel fingers of Walton Tap Extractors fit in the flutes of a ...
 Show Reddit reviews
27. Stop & Go 1000 Pocket Tire Plugger
Sentiment score: 1
Number of reviews: 1
Revolutionary device that easily installs mushroom shaped rubber plugs into all tubeless tires while staying on the wheelThis technology insures maximum reliability while reducing your downtime in any situation;Reamer/Rasp Tool and Probe Tool;(15) Mushroom Shaped Rubber Plugs;No rubber cement requir...
 Show Reddit reviews
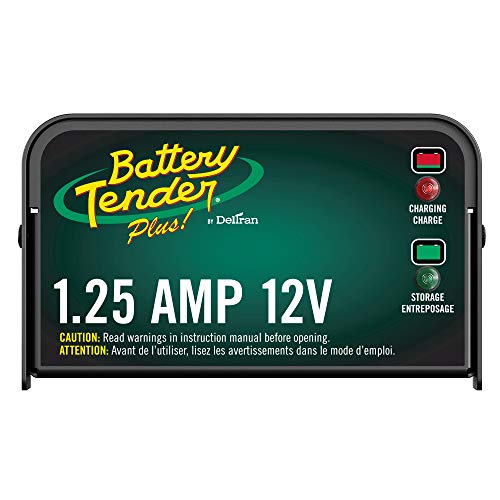
28. Battery Tender Plus Charger and Maintainer: 12V, 1.25 Amp Powersport Battery Charger and Maintainer for Motorcycles, ATVs, UTVs, and More - Smart 12 Volt Automatic Float Chargers by Deltran - 021-0128
Sentiment score: 0
Number of reviews: 1
STAY CHARGED: The 1.25 amp charger provides a full charge to your powersports battery before automatically switching to float mode to maintain proper voltage levels without overcharging the batteryEASY, FAST CHARGING: A low maintenance design to be quick and easy to use even in small storage spaces,...
 Show Reddit reviews
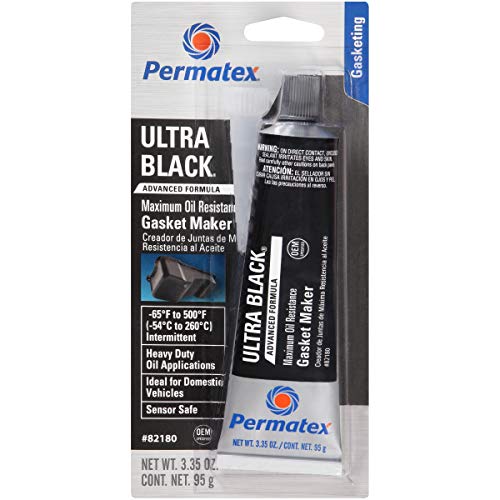
29. Permatex 82180 Ultra Black Maximum Oil Resistance RTV Silicone Gasket Maker, 3.35 oz. Tube
Sentiment score: 0
Number of reviews: 1
Sensor-safe, non-corrosive formula designed for superior adhesion to oily surfaces and long term durabilitySuperior resistance to powertrain fluids including engine oil, transmission fluid, gear lube and coolantsRetains high flexibility and eliminates the need for pre-formed, pre-cut, paper, rubber ...
 Show Reddit reviews
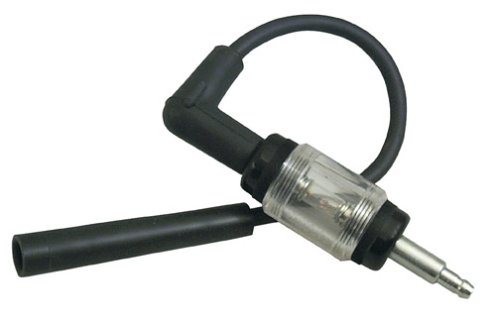
30. Lisle 20610 Inline Spark Tester
Sentiment score: 1
Number of reviews: 1
Gives a Visual Check of the Ignition System.Quickly diagnose problems with all ignition systems. Connect the tool between the spark plug and the plug wire.The tool is double-ended to offer a straight boot and a 90boot on one tool. With the engine running, the tool flashes a mirror image of ignition ...
 Show Reddit reviews
31. Helicoil 5543-10 M10 x 1.25 Metric Fine Thread Repair Kit
Sentiment score: 1
Number of reviews: 1
Includes 12 inserts, complete instructions, Heli-Coil tap and installation toolUsed for repairing tapped holesMade from high quality materialComes in a carded packageEasy to use
 Show Reddit reviews
32. Nilight GA0004 5Pack 12AWG Inline Wiring Harness 12 Gauge ATC/ATO Automotive Holder with 30A Fuse Blade Standard Plug Socket-5 Pack, 2 Years Warranty
Sentiment score: 0
Number of reviews: 1
Safety protection: Heavy duty 12 gauge (AWG) Red Color wire, great look and added protection to the circuit. And easy to add additional circuits for all Cars, CD players, fax machines, etcSuitable fuses: fits for 1A, 2A, 3A, 4A, 5A, 7. 5A, 10A, 15A, 20A, 25A, 30A ATC/ATO blade Fuse of 19. 1 x 18. 5 ...
 Show Reddit reviews
33. Sea Foam SF-16 Motor Treatment - 16 oz.
Sentiment score: 3
Number of reviews: 1
Cleans injectors, carb jets and passagewaysCleans and lubricates intake valves, pistons and cylindersDissolves and cleans fuel residue in fuel systemsDissolves oil deposits in crankcaseClean timing chain tensioners and VVT actuators, quiet noisy lifters100 percent pure petroleumEPA registered produc...
 Show Reddit reviews
34. Garryson Garryflex Abrasive Block - Fine 240 Grit
Sentiment score: 0
Number of reviews: 1
Proven reliable Garryson technologyLightweight construction at just 0.13 KgsHigh performace for the home or tradesman
 Show Reddit reviews
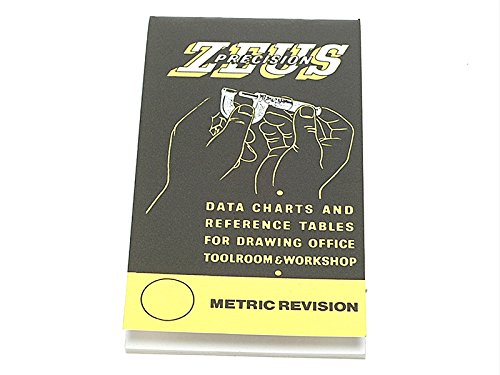
35. Zeus precision data charts and reference tables for drawing office, toolroom & workshop
Sentiment score: 1
Number of reviews: 1
 Show Reddit reviews
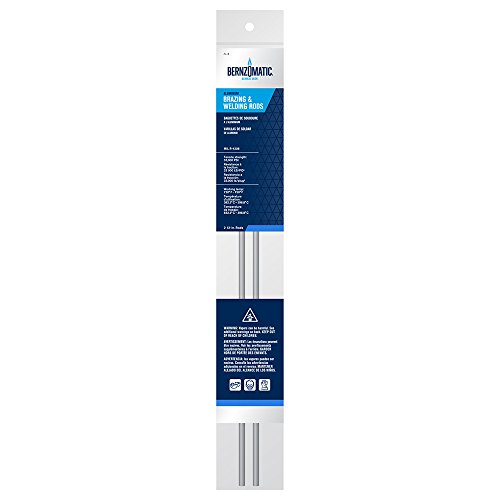
36. Bernzomatic AL3 Aluminum Brazing/Welding Rods with 12-Inch Rods of Working Temperature 720-750 Degrees, 2-Piece
Sentiment score: 0
Number of reviews: 1
Package Weight: 0.01 poundsBrinnell hardness: 100Working temp: 700-750 degreesMade in United States
 Show Reddit reviews
37. IRWIN Tools T-Handle 1/4-Inch Capacity Tap Wrench (12001)
Sentiment score: 0
Number of reviews: 1
Designed For Use With Taps And Many Other Tools Turned By HandAdjust And Tighten To Size By Twisting Knurled NutAdditional Holding Jaws Are Recessed Inside The Hole For Gripping Onto Smaller Sized TapsPackage Dimension : 13.72 Cms L X 8.13 Cms W X 1.02 Cms H
 Show Reddit reviews
38. DEWALT Drill Bit, Black Oxide, 1/2-Inch x 12-Inch (DW1614)
Sentiment score: 0
Number of reviews: 1
135 degree split point drills on contact and prevents walkingExtended Length drills in hard to reach spacesBlack Oxide coated for greater wear resistance
 Show Reddit reviews
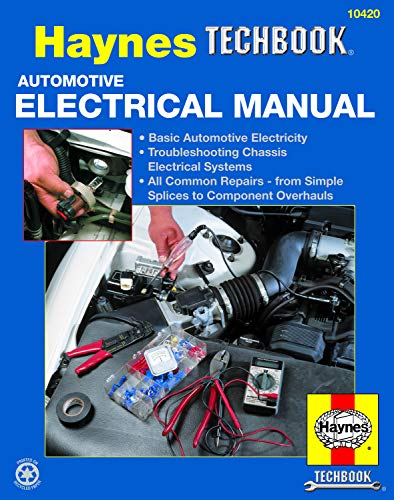

Where to begin.
First off, never again put a meter lead on a spark plug wire. I have no idea why that meter didn't stop working forever. You are hitting the meter with 30,000 volts when it's probably not designed to measure over 1000 volts. You check for spark using a spark plug, or one of these: http://www.amazon.com/Lisle-20610-Inline-Spark-Tester/dp/B0002STSC6 and a video how to use it is here: https://youtu.be/eQBtzk-dGYM
Second, Your starter clutch is fine. It's allowing the starter to turn the engine over. That's the first function. The second function comes into play when the engine starts, and you haven't gotten there yet. IT allows the engine to run without the engine driving the starter motor. The thing you see moving in that window is the flywheel, and it's connected to the crankshaft, so it's going to spin whenever the engine is turning over to start or when it's running. Cover that hole up. your problem isn't there.
Third, the little philips head screw on your carburetor is a drain to empty your carburetor float bowls for winter storage, or to set the float height. It's not going to help you start the engine, although the fact gas is coming out of it is a good sign that that carb, at least, is getting fuel. But, tighten it down and leave it.
Fourth, and this part scares me, is how do you know the left carb needs a vacuum diaphragm (as they're more commonly called)? Good on your for being able to repair your starter motor and get it back together so it turns the engine over, but it's very easy to screw up a carburetor without even knowing it if you don't know what you're doing.
You need to get a socket for your spark plug, they need to come out to see if they're wet, or fouled, or even have a proper gap.
I could go on forever, but go HERE and start reading. You could go straight to chapter 13, "Trouble Shooting a Bike that Will Not Start," but you'd be doing yourself a favor by starting at the beginning and reading everything.
Good luck, man. I know you're trying and I commend you for that, but I saw so many things in just that short video that made me cringe. I don't know where you live, but if you live anywhere near Syracuse, NY, I could probably help you get that running in short order. I've repaired bikes professionally (and in fact am a very busy industrial electrician/mechanic,) and was a service manager at a Kawasaki dealer for a while. I've been repairing motorcycles on and off for over 45 years, since I was 13, and fixing mowers and chains saw even before that. I know what I'm doing and if I come across something I don't know, I'll find out and won't bullshit you in the meantime. For example, the guy who asked about valve adjustment is not wrong, he's just jumped too far ahead. The fundamentals of a viable engine are fuel, compression, and spark. It seems like you have all 3, so it's probably something relatively minor preventing you from getting started.
The trickery in those systems is not in their electrical wiring, but in that they're increasingly computerized. ABS and EFI in particular. With increasing model-specific complexity also comes increasing variety, so you're going to need a model-specific service manual.
If you're unfamiliar with 12V electrical systems in general, I'd probably start by reading the generic automotive electrical books. Haynes would probably suffice to get you up to speed, so that terminology used in the service manual makes more sense.
The main differences you'll find will be in charging systems and accessory wiring (both covered in a model-specific service manual), but pretty much everything else follows a similar
(+)->Distribution/Fuse->Device->Groundcircuit.Where it gets complex is the ECU. I know a few bikes use a variation of OBD-II (Triumph comes to mind), but the rest are completely proprietary, requiring their own set of scantools and protocols. Pretty much all EFI and ABS diagnostic procedures will be done with one of these scantools (or at least pricey cable and software) if you want live or freeze frame data where supported.
The same trend continues in the automotive world as well. ABS and electronically-controlled transmissions were a big deal when they first hit the market (pre OBD-II), and now they're adding drive-by-wire and hybrid technologies to the mix. The only thing standard between manufacturers and even model years is engine management data (emissions). Airbags, ABS, SRS, and body electrical control data still require dealer scantools to access. They don't make their PIDs public knowledge, so these scantools are often priced out of reach of all but the big shops.
Finally, not that you're gonna botch anything, but electrical is only worth doing if it's done right, so take pride in your work! No half-ass duct tape and twist splice crap. I've had tons of vehicles come to me in sorry shape after being "fixed" with electrical tape and prayers, many of which have required a new harness ($$$, time, patience, sanity). Doing it right takes skill and patience, but it's worth the reward when your car/house/bike doesn't burn down in the course of normal operation :)
Sorry, that was long.
TL;DR: It's not much different from cars; computers are weird
remove the whole seat so you can get at what's left of the bolt. Hit it with some WD40 , PB Blaster or whatever your favorite penetrating oil is. Now let it soak in there for a good long time. Then hit it again with the WD40 and let it soak again for a good long time...like an hour or so. After it has been lubed and penetrated get some vice grips and clamp those fucker on there as tight as you can perpendicular to the direction of the bolt. Make sure they are on there real good and then slowly try to back the bolt out. It looks like there is enough left of the bolt for this method to work. If it doesn't you can always try one of these , but I have had mixed success with them and always try the TONS OF PENETRATING OIL and vice grips method first. Also , make sure you let the penetrating oil soak in there real good.
You didn’t mention what bike you had, but if you have carburetors be sure to drain all the fuel lines and the carb float bowls also. Treat your first tank of gas with something like seafoam and hopefully you’ll be OK.
https://www.amazon.com/dp/B0002JN2EU/ref=cm_sw_r_em_api_c_6NKYAbKYPQ8AH
A helicoil is a coil of "wire" that can get threaded into a larger diameter hole, which will then become the threads for a smaller diameter bolt or stud. Here's a kit so you can get an idea of what you'll need:
Amazon Helicoil
That would definitely be your best route, especially since you have all the tools you'll need. Keep in mind that link was just an example. You will need to find the correct size and thread count for your application.
Obviously the safest answer is to replace your tire. With that said, some have managed to go many thousands of miles using plugs on rear tires (specifically the temporary mushroom type plugs). Below is a link of a highly regarded temporary tire plug kit. THE NAIL MUST BE IN THE CENTER OF THE TIRE NOT ON THE SIDEWALL for this to work.
https://www.amazon.com/Stop-Go-1000-Pocket-Plugger/dp/B0006NE3KE/ref=sr_1_4?s=automotive&ie=UTF8&qid=1521179487&sr=1-4&keywords=stop+%26+go+tire+plugger
-Ideally if you can call around and find a mechanic to take off the tire and plug the inside of the puncture that would be a theoretically permanent and much more affordable fix than buying a new tire.
Take out one of the other fittings.
Use a thread gauge and something like http://www.amazon.co.uk/Precision-Reference-Drawing-Toolroom-Workshop/dp/B0000CLZUO - There will be something on the web I suspect, to find out what thread it is.
Congrats on someone actually doing preventative maintenance, and noticing something not right!
If that blade fuse is blown, I'd suggest replacing it with a newer fuse holder with some ring connectors crimped on. Way easier and cheaper than finding a new blade fuse.
Fuse Holder
Ring Connectors
if you do accidentally poke a hole, you can repair the pokie-pokie by brazing. I did it recently after a rock hit my radiator - incredibly surprised how easy it was. All you need is some Bernzomatic AL3 Aluminum Brazing/Welding Rods and a small propane torch. youtube for instructions
black rtv like [this] (http://www.amazon.com/Permatex-82180-Maximum-Resistance-Silicone/dp/B0002UEN1U/ref=sr_1_1?ie=UTF8&qid=1453094641&sr=8-1&keywords=rtv+silicone)?
You don't need jeweller's rouge at all. Very fine wet & dry paper, and/or polishing blocks. There used to be a product in the UK called Loyblox: grit impregnated rubber blocks, in different grades.
They're long gone (I still have mine, though!) and the modsern equivalent seems to be this:-
http://www.amazon.co.uk/Garryson-Garryflex-Abrasive-Block-240grit/dp/B0001P08UG/ref=cm_cr_arp_d_product_top?ie=UTF8
Then finish off with metal polish like Solvol Autosol or any decent proprietary polish.
Don't bother trying to re-lacquer, either. If you ride the bike, the lacquer is going to come off anyway, sooner or later. Just keep the naked alloy polished.
You can use paint stripper to remove old lacquer, by the way.
If the threads are just a little wonky and not completely destroyed, you could try chasing them with an M6 tap.
But, that kit should work if chasing doesn't. Make sure the hole is deep enough for the tap to fully cut threads deep enough for the insert, though. The 'bullet' type taps usually have a ~1/4" (~6mm) taper at the tip, so the threads will not be cut the full depth of the hole. Also be careful that the tap does not bottom out in the hole. You will also need a t-handle (not included in the kit) to hold the tap along with some cutting oil (3-in-1 works well). Both can likely be had at your local hardware store, including the Helicoil kit. Go slow, follow the directions, and you will be fine.
Use blue loctite on the insert when installing, and switch to a stainless bolt (no loctite on bolt) to prevent dissimilar metal corrosion. Helicoils are not as strong, and not as deep as the original threads, so don't torque on it too much.
If the Helicoils fail, you can always step up to solid bushing inserts like BigSert from TimeSert, but this is a pretty low-torque application so the coil should be fine.
Home mechanics have used Indian Head gasket shellac on air-cooled cylinder heads which get up to around 450 degrees, but your cylinder base gasket will only see about 250 degrees at most.
http://www.amazon.com/Permatex-20539-Indian-Shellac-Compound/product-reviews/B0008KLOG6
Most people don't like the round applicator that looks like it belongs in a bottle of liquid shoe polish.
Hmmm. Who polishes shoes anymore?
Here's the one I use:
"Fully Charge and Maintain a Battery at Proper Storage Voltage without the Damaging Effects Caused by Trickle Chargers"
https://www.amazon.ca/Battery-Tender-021-0128-Maintain-Damaging/dp/B00068XCQU
It's not cheap, but this permatex stuff worked on a buddy's Mazda gas tank.
I'm not too sure about that auger. I used something akin to this. This was back in 2006, though, so I don't recall the actual bit size at this point.
Yeah that wasn't too clear, huh. Here's the bend where it's more mild where it goes behind the right headlight mount and working apparently, and here's where it's sharp and not working. It could also be the angle of the fitting on the handlebar - where it's not working the fitting is angled in, and where it is working the fitting is angled out.
This is the only pic I have, sorry for potato quality. I'd take one now but it's all wrapped in plastic since I'm preparing to make a fiberglass seat pan for it! Since that picture I've cut the back off and welded a tail hoop on. It is really obscure, I had no idea until I started buying parts for it. Apparently it's a GS750E and GS750L combined, though there seem to be parts unique to the T like the brake master cylinder. Here's the resources I've been using:
A note, in case you haven't run into it yet: You'll see in the schematics there's different versions for Z and D - that's the year code, Z is for 1982 and D is for 83.
I don't carry a tool kit but that's mainly because I commute. I don't think you'll have to worry about adjustments as much as having something fail.
In either case, you'd probably be better with something new. I think that OEM parts/equipment are many times inferior because theres a focus on keeping costs down, etc. Nevertheless, if I were to get some sort of toolkit it'd be something like this. I was actually planning on buying that kit a while ago but didn't because I don't need it.
You can't drill an extractor or tap. I have gotten them out of the way by making many tiny holes all around one with very small drill bits so that I could remove it and go back to work on one.
This is a tap extractor. You will find several bad reviews because they were unfortunately used and assessed by people who didn't know how to use extractors in the first place.
Pro tips:
1.) extractors are rarely the solution and frequently compound the problem. They are not for stuck bolts ever. As you have learned, they are far too brittle to put any real force on.
2.) penetrating oil sometimes takes up to a day to get where its going. spray, tap with mallet, spray, leave, spray, wait, etc.
These are tiny channel locks. The pair I have is actually smaller and a couple of versions older. You can grab tiny screws with these and break them loose without issue.
These work really well too. Take an impact driver and get a receiver that takes general screw driver bits. These have that same hex shape. Put one on slightly smaller than the screw head on there and pop it. It'll bite in the screw head and pop it loose almost every time.