(Part 3) Top products from r/MPSelectMiniOwners
We found 44 product mentions on r/MPSelectMiniOwners. We ranked the 307 resulting products by number of redditors who mentioned them. Here are the products ranked 41-60. You can also go back to the previous section.
41. QIUYE 20Pcs PC4-M6 Pneumatic Fitting Push to Connect and PC4-M10 Straight Quick in Fitting for 3D Printer Bowden Extruder Air Straight Fitting
Sentiment score: 0
Number of reviews: 2
【Material】: M6 Pneumatic Fittings are made of premium copper and plastic which is oxidation-resistant and rust-resistant. PC4-M10 Fittings are made of stainless steel which is high-hardness and anti-corrosion, sevring for a long time.【PC4-M6 bowden fitting】: (gold+blue) Thread M6/3mm, inner ...
 Show Reddit reviews
42. Redrex Upgraded Aluminum Bowden Extruder with 40 Teeth MK8 Drive Gear for Creality CR-10 Series Ender 3 and Other Reprap Prusa 3D Printers [Right Hand]
Sentiment score: 1
Number of reviews: 2
Original Upgrade Replacement for Creality CR10 Ender 3 Series:CR-10 Series,Ender 3, CR-10 S4, CR-10 S5, CR-10 Mini, CR-10S, CR-10 Plus.This durable aluminum extruder frame works more stable than plastic parts.Bowden extrusion is supported:It comes with a nema stepper motor mount,works great on TEVO ...
![Redrex Upgraded Aluminum Bowden Extruder with 40 Teeth MK8 Drive Gear for Creality CR-10 Series Ender 3 and Other Reprap Prusa 3D Printers [Right Hand]](https://m.media-amazon.com/images/I/41a+7ZYGjsL.jpg) Show Reddit reviews
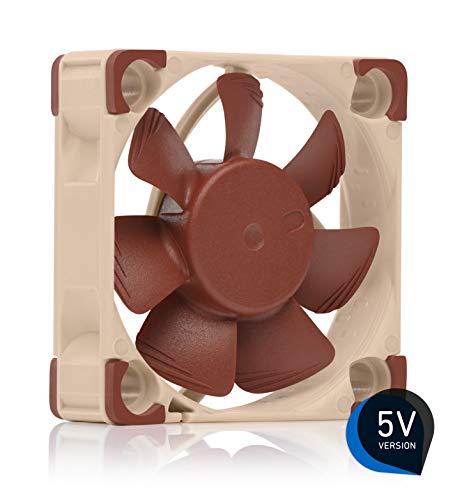
Show Reddit reviews43. Noctua NF-A4x10 5V, Premium Quiet Fan, 3-Pin, 5V Version (40x10mm, Brown)
Sentiment score: 1
Number of reviews: 2
Premium quiet fan, 40x40x10 mm, 5V, 3-pin Molex, 4500 RPM, 17.9 dB(A), >150,000 h MTTFAward-winning 40x10mm A-series fan with Flow Acceleration Channels and Advanced Acoustic Optimisation frame for superior quiet cooling performanceIdeal replacement for noisy or broken 5V 4cm fans in 3D printers, DV...
 Show Reddit reviews
44. OctagonStar Hotend Barrel M6x26MM Teflon Nozzle for MK8 Tube Makerbot 1.75mm 3D Printer Extruder Hot End Reprap Prusa I3(5PCS)
Sentiment score: 0
Number of reviews: 2
OctagonStar Hotend Barrel M6x26MM Teflon Nozzle.Brand Listing, If you buy is not OctagonStar brand product, You Can Apply for a Refund and Compensation.
 Show Reddit reviews
45. RepRap Champion Metal J-Head V6 Hot End for RepRap 3D Printer 1.75mm Filament Bowden Extruder 0.4mm Nozzle Kossel Mini Prusa i3
Sentiment score: 2
Number of reviews: 2
 Show Reddit reviews
46. SHNITPWR 12V 10A 120W DC Power Supply Adapter 100V~240V AC to DC Converter 12 Volt 10 Amp Transformer 5.5x2.5mm Tip for 5050 3528 LED Strip Light 3D Printer LED Driver CCTV Security System LCD Monitor
Sentiment score: 1
Number of reviews: 2
Input: AC 100 - 240V, 50 / 60Hz ; Output: DC 12V, Max 10A, 120W ; It can supply with all amperage less than 10A. ---such as 500mA, 800mA, 2.5A,6A, 8A,10A. If your device draws 7A then 7A will be supplied. But if draws more than 10A, only 10A will be supplied and power supply will be damaged soon. NE...
 Show Reddit reviews
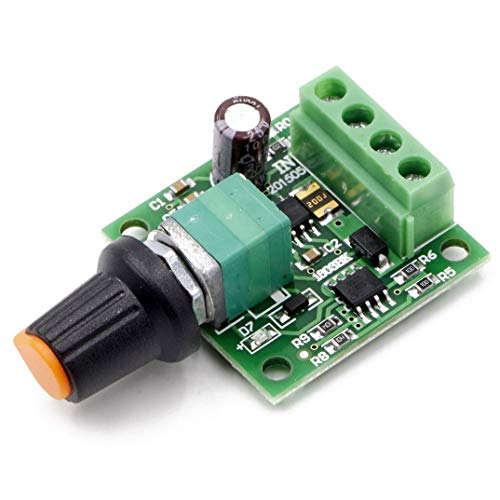
47. RioRand RR-PWM-15V Low Voltage Dc 1.8v 3v 5v 6v 12v 2a Motor Speed Controller Pwm,
Sentiment score: 2
Number of reviews: 2
Low Voltage DC 1.8V 3V 5V 6V 12V 2AMotor Speed Controller PWMThe maximum output power: 30WDuty Cycle adjustable: 0%-100%
 Show Reddit reviews
48. Scythe Mini Kaze 40mm Silent Case Fan (SY124010L)
Sentiment score: 4
Number of reviews: 2
Airflow: 4.11CFMBearing Type: Sleeve BearingConnector: 2pin (3pin adaptor included)Noise: 14.00dBARated Voltage: 12V
 Show Reddit reviews
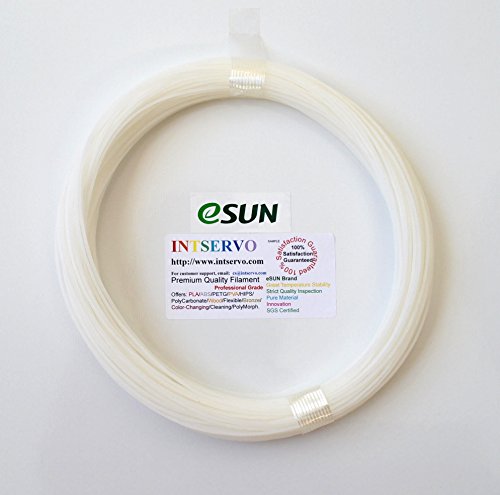
49. eSUN 3D Printer Cleaning Filament 1.75mm Natural 0.1kg for All 1.75mm FDM 3D Printers, 1.75mm Cleaning
Sentiment score: 0
Number of reviews: 2
Industry's first 3D cleaning filamentExcellent heat stability, Wide cleaning temperature range of 150 to 260 celsius.Cleans the extruder's interior by removing accumulated residual filaments.Possesses a certain level of adhesive quality. Will not clog extruder.Clean the 3D printer's extruder before ...
 Show Reddit reviews
50. Wago 222-412 Lever-Nuts 2 Conductor Compact Connectors 50 PK
Sentiment score: 1
Number of reviews: 2
Cross section: 28 ? 12 AWG (stranded and solid)Electrical specs: 600 V (1000 V signs and fixtures) 20 A maximumStrip length: 9 - 10 mm / 0.37 inMaximum operating temperature: 105? C
 Show Reddit reviews
51. Genuine E3D V6 All-Metal HotEnd 1.75mm Universal w/ Bowden Full Kit 12V (V6-175-B)
Sentiment score: -1
Number of reviews: 2
01. Print the Widest Possible Range of Materials02. High Temperature Performance03. Compact04. Easy to Use05. High Quality Printing
 Show Reddit reviews
52. Anycubic Barrel Stainless Steel 30mmM6 Nozzle Throat with PTFE Tube for MK8 Tube Makerbot 3D Printer Extruder Hot End
Sentiment score: 0
Number of reviews: 2
Material: Stainless steelSize: 30mm*M6Compatible with MK8 extruderPack of 5 PCSWith PTFE liner inside
 Show Reddit reviews
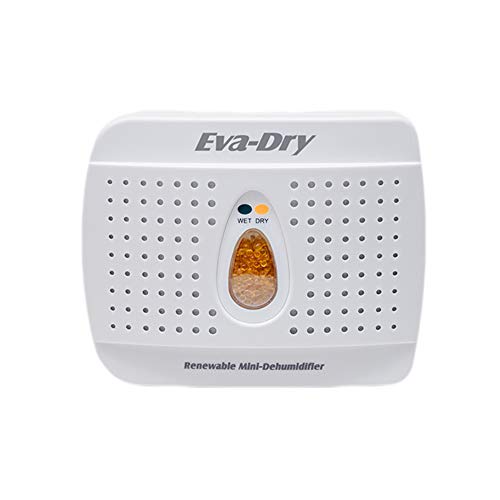
53. Eva Dry Wireless Mini Dehumidifier. Top Moisture Absorber for Small Spaces. Rechargeable & Portable. Perfect for Bedrooms, Closets, Cars, RV & Gun Safes. Removes Humidity & Helps Prevent Mold Growth
Sentiment score: 1
Number of reviews: 2
EASY TO USE: This mini dehumidifier is spill and mess free. Just hang and go! Non-toxic, child and pet safe! Your small rooms will be dry and odor free. Works for areas up to 333 cubic feetMINI DEHUMIDIFIER GOES A LONG WAY: Super dry dehumidifier unit lasts 20-30 days before recharging the silica ...
 Show Reddit reviews
54. Signstek 10 PCS Reprap 12V 40W 620 Ceramic Cartridge Heater for 3D Printer Prusa Mendel
Sentiment score: -1
Number of reviews: 2
Cartridge heaters is consist of a cylindrical stainless steel tube and thus provide a high corrosion prevention.Compatible with Creality CR-10S Pro, CR-X, Ender 3, Ender 3X, Ender-3 Pro 3d printer, etc.Widely used for manufacturing plastic and rubber parts in the car industry or in the food processi...
 Show Reddit reviews
55. uxcell Glass Cutter 5-12mm, Pencil Style Oil Feed Carbide Tip Black Metal Handle for Glass Tiles Mirror Cutting
Sentiment score: 2
Number of reviews: 2
【Size】Large range of cutting, can cut glass with thickness of 5-12mm; 6.6" (168mm) total length.【Carbide Glass Cutter Wheel】With high hardness, sharp cutting, and the shaft is made of high strength alloy steel to ensure smooth operation and durable to use.【Cutter Head】It can be rotated 3...
 Show Reddit reviews
56. EAONE 14PCS M6 3D Printer 0.2mm 0.3mm 0.4mm 0.5mm 0.6mm 0.8mm 1.0mm Extruder Brass Nozzle Print Head for E3D Makerbot (2pcs/Each Size)
Sentiment score: 0
Number of reviews: 2
 Show Reddit reviews
57. Anycubic NEMA 17 Stepper Motor with Integrated 300mm TR8x8 Lead Screw for CNC Mill Router or RepRap 3D Printer Prusa i3
Sentiment score: 1
Number of reviews: 2
Integrated 300mm Nema 17 lead screwLead screw diameter: 8mmMore stable than the traditional one
 Show Reddit reviews
58. Uxcell a15101300ux0150 M3 x 16mm Metric Hex Socket Countersunk Flat Head Screw Bolts 50PCS (Pack of 50)
Sentiment score: 0
Number of reviews: 2
Model Number: a15101300ux0150Item Package Length: 3.99999999592"Item Package Width: 3.99999999592"Item Package Height: 0.49999999949"
 Show Reddit reviews
59. Redrex 310mm T8x8 Lead Screw Integrated with Nema 17 Stepper Motor 1.5A 40Ncm/57.1 oz.in Upgrading Z Axis Motor for Prusa i3,Reprap Corexy,MP Select Mini 3D Printers and CNC Mile Routers
Sentiment score: 0
Number of reviews: 2
High Stability:No shaft coupling needed,integrated with stepper motor and lead screw.High torque Nemga 17 stepper motor:It provides 1.5A 40Ncm/57.1 oz.in holding torque.Easy to plug:80cm stepper lead wire with XH2.54 connector,no soldering or peeling works.Motor rotor is covered by magnetic filling ...
 Show Reddit reviews
60. 1.75mm Black PLA 3D Printer Filament - 1kg Spool (2.2 lbs) - Dimensional Accuracy +/- 0.03mm
Sentiment score: 0
Number of reviews: 2
Diameter: 1.75mm; Weight: 1kg/Spool;Dimensional Accuracy: ± 0.03 mm;Vacuumed Sealed With Desiccant;Recommended Extrusion/Nozzle Temperature 180 - 210℃;Recommended Build Platform Temperature 0 -50℃;
 Show Reddit reviews
I too am new to 3D printing with the MP Select Mini v2 being my entry into the process. I have yet to make the bed reroute changes that everyone seems to keep suggesting, but that is next on my list now. I have done 2 things I think have made easy and "relatively" cheap improvements.
Personally I got a 3D printer to get into some of these more one off type projects, so it was well worth it IMO.
No, but if you are going through the hassle of doing the mod it would be better to use a good quality stepper with the integrated screw since they are very 'wobble free' due to the direct connection. If you dont currently have a stepper and 8MM lead screw collecting dust it makes a lot of sense to drop $30-40 for a good quality stepper with a screw that will only require trimming for installation. Keeps it simpler.
FWIW, this option is far superior to the cheaper on that is commonly used, they look similar but they are not. The SainSmart unit at $40 has a much more precise screw and better micro-stepping or just better tolerances in general than the Anycubic option at $30. I sent 2 of the Anycubic steppers back, both were sloppy, but the SainSmart has been perfect. It might just be luck of the draw but IMO it is worth another $10 to not gamble.
Good one: https://www.amazon.com/gp/product/B00JTSEFQY/ref=oh_aui_search_detailpage?ie=UTF8&psc=1
Not as good one:
https://www.amazon.com/gp/product/B019TRKAPO/ref=oh_aui_search_detailpage?ie=UTF8&psc=1
It is also worth noting that both of these steppers are wired differently. Easy enough to sort the pairs with a multi meter. Google it if you are not familiar.
There are lots of options, but for just getting started I suggest:
Hatchbox PLA 3D 1.75 mm. This particular one is black, but get the color(s) that suit your fancy!
I suggest this one because:
There are dozens of brands of PLA and most of them will work just fine. Feel free to experiment. I use $20/kg as my standard "this is an OK price" limit for standard PLA
Be more mindful when switching material types. PLA is forgiving, but hates heat/sun. Its also not overly strong. ABS is apparently strong, but a pain to print on these monoprice printers (requires high temps) and the fumes are toxic. Wood was fun - until it clogged my nozzle. Apparently you need a larger nozzle to print wood without clogging frequently. Whoops!
Anyways, when getting new filament:
Side note: store your filament is a dry place. 3D material tends to absorb water from overly humid air. When the filament does this, it doesn't print as well. I keep mine in air tight storage containers with one of these Renewable Dehumidifiers
I've had great luck with AIO Robotics PLA sold on Amazon for around $13 per 0.5 kg. The other PLA brands I've purchased work, but the prints aren't as smooth. I believe it's because the tolerance is better on the AIO Robotics PLA (+/- 0.02 mm). The 3D MARS PLA I bought that doesn't print as smoothly has a wider tolerance of +/- 0.05 mm.
Also, I bought a E3D Full clone hotend on Amazon that is way better than the stock hotend (that often clogged on me).
https://www.amazon.com/gp/product/B01GD8LCFO
And here's the mount you'll need to print for it (there are others that are probably better, but this works for me):
https://www.thingiverse.com/thing:1728736
I've replaced both the hot end fan and the case fan with these. Print the 40mm version of this first though. Replacing the hot end fan will require cutting the wires and soldering. I actually cut the wires on the printer, then cut the "3" end off the 3-2 adapter included with the fans. Then I soldered on the "2" end so I'd have a plug to plug in the fan and any other fan I may get in the future.
Also, My V2 was super loud as well.
I followed this guy's tutorial, it now incredibly quiet.
The bed bushings were really easy to replace, the X axis was much harder. I ended up drilling a few holes in the plastic carriage and securing the PLA bushings with zipties, as they kept slipping out when it went back and forth.
My printer is so quiet now, it's incredible. I didn't need to remove the X-axis shield on mine.
Something I learned later was to heat up one of the metal rods on the stove a bit. Just one end so you can still hold it. Slip on the plastic bushings you printed one at a time, the heat will melt them and make them super smooth and glide easy.
Amazon stuff:
Printed parts:
Anything directly touching the hotend is printed in PETG (on the Mini) so it (hopefully) doesn't melt under normal use. ABS should work too.
This Hackaday article has lots of good upgrades and was the best guide I could find. Although he has posted his version of the zero-offset adapter, he goes into all sorts of craziness with the fans and his clamping piece doesn't allow for the 2-in-1 fan thing I wanted to use.
And if anyone is interested in just sticking a 40mm fan on the original shroud, this is the adapter I had in the before pictures. File called "adapt_30mm_to_40mm_at_0_deg". I rescaled it a bit to make it shorter. I've actually gone and attached it to the blue clip-on fan piece that came with the hotend kit so I can use that if I want my big fan without part cooling.
I just did this swap today so I haven't done extensive testing yet... but that cube sure looks smooth and shiny, doesn't it?
Edit: Gold? You shouldn't have... Also minor update, all-metal heatbreak is on the way and I've got an idea for attaching the hotend to the adapter that I'm gonna try out. Nothing major, but hopefully it'll make things easier.
Yes the fan A header on the board is software controlled and not really suitable for being used to cool the v6 unless you leave it at always 100%. Wire it to your part fan and you will be fine. Alternatively, if you're lucky and your fan B header works and you can just plug into that instead. I shorted out my fan A header and had to go with wiring in two of these for my cooling needs: https://www.amazon.com/gp/product/B00N30UK2M
Edit / tldr yep 10A
I got this one but paid too much ($40!) because I'd gotten it in my head that I had to have a level 6 efficiency rating: https://www.ebay.com/itm/120W-12V-10A-AC-DC-Efficiency-Level-VI-Switching-Power-Adapter-w-6ft-Power-Cord/401068677983
The unofficial wiki is an amazing resource: https://mpselectmini.com/parts/power_supply has an Amazon listing for ~$22:
https://smile.amazon.com/dp/B07FFKL7CR
Just found this one for $18, level V efficiency:
https://smile.amazon.com/dp/B07PWZQ33N
Key specs: The barrel jack is 5.5mm OD, 2.5mm ID, that's the key to search for as a lot of the cheaper ones have 2.1mm ID which won't fit.
Thank you so much!
As for the hot end, if i just wanted to replace the 30mm fan with a Noctua 40mm fan using this, and i didn't want to splice wires, which ones of these two fans should i get? This one (5V) or this one?
i've had this problem many times.
its almost certainly that your wires are making intermittent contact. i've had to replace my bed sensor wiring and power wiring about 4 times.
once however my actual temp sensor cracked in half and i had to replace it with a 100k thermistor.
https://www.amazon.com/Gikfun-Thermistor-Temperature-Sensor-Printer/dp/B018QL5LPI/ref=sr_1_4?ie=UTF8&qid=1481397650&sr=8-4&keywords=100k+thermistor
here are the thermistors and as for the wiring, if thats what it turns out to be(most likely is)
sensor wiring
https://www.amazon.com/gp/product/B01708AYYQ/ref=oh_aui_detailpage_o05_s00?ie=UTF8&psc=1
power wiring
https://www.amazon.com/gp/product/B00TG1TRL2/ref=oh_aui_detailpage_o05_s00?ie=UTF8&psc=1
i also recommend using https://www.amazon.com/Wago-222-412-LEVER-NUTS-Conductor-Connectors/dp/B00HIOP6SC/ref=sr_1_5?ie=UTF8&qid=1481397789&sr=8-5&keywords=wago+connector
for the wiring inside the unit, so that your wiring can be replaced easily without buying a new wiring harness.
No major strain on the fan, it just lowers the voltage, not perfect but probably not going to set a fire pulling .3a. I use them on my RC cars for LEDs and stuff. This is the one I have used many times on different projects. It takes 12v and lowers it to either 6v or 5v, up to 3a. I had it at 6v first, but I could feel blowback so lowered it to 5v. Works perfect and is whisper quiet.
No cant be used as a speed controller. It's constant output. If you want to adjust speed, you want a PWM like this. That will allow you to adjust the speed. The good thing about PWMs are they dont lower voltage, they lower the pulse width.
I think many would be interested if you find a source for better replacements.These might be suitable replacements.
Yeah I don't know what you are seeing for 20 or 30. I got this on Amazon for like 6 bucks and it feels really sturdy.
A new heatbed is around $30. Another option is to buy a $10 square silicone heat pad from aliexpress, stick it underneath the stock bed and clip a sheet of picture frame glass to the top.
Don't be discouraged by a jam, it's a simple system. Take the fan shroud off, unscrew the fitting and take the tube out. Heat up the block and try to push filament through by hand. This usually clears blockages. If still a no-go, use cleaning filament instead. It's does wonders for cleaning hotends.
RepRap Champion Metal J-Head V6 Hot End for RepRap 3D Printer 1.75mm Filament Bowden Extruder 0.4mm Nozzle Kossel Mini Prusa i3 https://www.amazon.com/dp/B01GD8LCFO?ref=yo_pop_ma_swf
I’ve only had my printer a short time too (I think it is is 8 or 9 days old).
If you want to go down the route of replacing the extruder, I recommend the right-hand MK8 aluminium extruders you can find on Amazon. Don't use the bearing in the kit, pick up a MR104ZZ bearing on eBay instead and then you won't need to take the metal extruder gear off of the stepper motor on the printer. I followed this guide on Hackaday to install and get back to printing.
Also, I've had varying results with the PC4-M6 included with the MK8 extruder to attach the bowden tube.
I can't seem to find a 12V Noctua 40mm fan. Will this 5V one from amazon work?and will it require any soldering?Edit: Found a 12V Noctua
I'm in Canada as well. I have been using the AMZ3D PLA off of Amazon. I have 8 differnet colors and haven't had any problems.
Honestly, that's sort of my biggest hangup. I don't even own a soldering iron, and if I get one, I'll need to practice on junk electronics before I try to do something I can use. I do have a bunch of these though.
https://www.amazon.com/Wago-222-412-LEVER-NUTS-Conductor-Connectors/dp/B00HIOP6SC/ref=lp_16347583011_1_1?srs=16347583011&ie=UTF8&qid=1499343102&sr=8-1
Any of these should work. You'll have to.cut the lead screw of course. Well actually there is a Z-axis extension mod or two that you may want to look into before cutting the lead screw.
Also be sure to check the shipping dates since it may ship from overseas.
Anycubic NEMA 17 Stepper Motor with Integrated 300mm TR8x8 Lead Screw for CNC Mill Router or RepRap 3D Printer Prusa i3
TriGorilla NEMA 17 Stepper Motor for CNC Mill Router or RepRap 3D Printer Prusa i3 + Iintegrated 300mm TR8x8 Lead Screw
Nema17 stepper 210mm or 250mm Tr8*8 leadscrew threaded
"MK8 right handed extruder" is what you're looking/searching for. I bought this one https://www.amazon.com/gp/product/B07DDGGN92/ and it worked fine (there will be leftover parts since youre not using the bracket). I think they ranged in price from $11-$20.
/edit one more thing, you'll need a lighter to get the toothed pulley off of the stepper motor axle.
I recently had this problem. I used a heat gun on the tube to warm it up and get it out. However if your not VERY careful you melt the liner as well. You can order replacements from amazon
Uses these inserts.. I just got them and they worked perfect.. Plus gigdigit was out if then them
OctagonStar Hotend Barrel M6x26MM... https://www.amazon.com/dp/B01HAG12S0?ref=ppx_pop_mob_ap_share
https://www.amazon.com/SHNITPWR-100V-240V-Converter-Transformer-5-5x2-5mm/dp/B07PWZQ33N/ref=sxbs_sxwds-deals?keywords=12v+10a+power+supply&pd_rd_i=B07PWZQ33N&pd_rd_r=9709cb90-1708-4f84-acbd-a627f13c5d45&pd_rd_w=J9Bu1&pd_rd_wg=XiR51&pf_rd_p=62c0bc00-cb5f-4333-ba0d-0918447ada19&pf_rd_r=BY8F435JCWQFM0MPQ4VX&qid=1558756752&s=gateway&sprefix=12v+10a
Would I just put a voltmeter on the output of the power supply?
EAONE 14PCS M6 3D Printer 0.2mm 0.3mm 0.4mm 0.5mm 0.6mm 0.8mm 1.0mm Extruder Brass Nozzle Print Head for E3D Makerbot (2pcs/each size) https://www.amazon.com/dp/B071PB1R72/ref=cm_sw_r_cp_apa_j-9FzbQZ3BZ1R
Buy this https://www.amazon.com/dp/B01HAG12S0?ref=ppx_pop_mob_ap_share
I think this is it..
https://smile.amazon.com/gp/product/B07G94TSWV
https://www.amazon.com/dp/B07G94TSWV/ref=cm_sw_r_oth_api_i_4PwBDbSJWATVM, I only have the bulk link but these should work, I’ve used them
Get a plastic tub and a thing of reusable desicant.
Is this what you are looking for?
I havent been abel to find any either, but these are only 1mm longer than stock, so youd need a 1mm z-spacer for them to work. Doing the spacer means you don't have to lower the print bed more, but you will lose 1mm off your z-axis height.
Now i'm not 100% sure on the spacer height, so if anyone can correct me id appreciate it.
Here's the link for the complete E3D upgrade. I have no idea where to get a stock replacement.
https://www.amazon.com/Genuine-E3D-All-Metal-Universal-V6-175-B/dp/B00NAK9L6Q/ref=sr_1_3?ie=UTF8&qid=1526851047&sr=8-3&keywords=e3d+hotend
This is my PLA https://www.amazon.com/1-75mm-Black-PLA-Printer-Filament/dp/B01BZ5ND8O
And yeah Cura does still do,
But only when the surface area is sufficiently large enough (~ > 4 square cm) but when I was printing the cube (Area 1 square cm) or when it's printing some sort of screw or a column that doesn't necessary have a lot of surface area, both Cura and S3D decide to do the infill in two parts. However Cura does the outline all at once, but S3D does the outline in 2 stages.
You might have partially cleared the jam, but left a layer of plastic still inside the nozzle. I know I was surprised at just how much plastic stayed in the nozzle even after repeated cleaning in acetone.
If you're really adverse to taking it apart, there are also these cleaning tools:
I haven't tried them, but they are an option.
Cleaning Bits
https://www.amazon.com/JOYSA-MakerBot-Printer-Cleaning-Registered/dp/B01CCF46EQ/
Cleaning filament
https://www.amazon.com/dp/B00MVIYNFW/
I use the plastic from monoprice and it's reasonably good, I wouldn't be able to speak about the quality of the stuff you have.
http://www.monoprice.com/product?c_id=107&cp_id=10724&cs_id=1072402&p_id=10552&seq=1&format=2
Another way I can tell mine is flowing properly is by heating it up to 200 and using the manual extrude option on the move menu. Clogged nozzles will look stringy and/or the filament will curl up. When it's extruding properly, the plastic will drop straight down and have an even consistency. When you forced the filament through, it will melt and pass through, but won't necessarily clean off the old crud stuck to the walls of the nozzle.
You're very welcome for the limited insight I have on this topic. I saw your post and said, that was me a couple weeks ago, and it was a lot of trial and error to figure out how to solve this issue of just getting it to print consistently.
I bought this stepper motor and followed the HackaDay guide to replace my stepper motor. My original one was slightly bent and was causing z banding. As it shows in the video, when I try to tell the printer to raise or lower on the Z axis, it just makes a thunk-like noise and barely moves. The video shows me using the controls to move the motor three time (twice “up”, once “down”). I have also tried just sending g code with Ponterface.
I unfortunately didn’t test out the motor before cutting it down to size and installing it, but does this look like a bad motor or have I messed up something? I hooked up the original motor and it spins just fine.
Hey I got you... Trust me I've fucked up more hotends than you'll ever think possible... Thermisistor is the wire on your left and it may be broke but seems to be intact. Now your thermocouple/heater cartridge is not intact(its the cylinder with 2 wires sticking out of it. Still inside ths heater block)
Here are a few things you can do to remedy the situation.
Here is a link to my hot end troubles it might be useful.
FYI I'm a firm believer in be able to fix everything yourself. I believe that this philosophy is very applicable in 3d printing. Otherwise you'll just be throwing money at problems witjout every getting to the source of the problem. Hope this helps. Let me know if you have more questions.