Top products from r/MTB
We found 223 product mentions on r/MTB. We ranked the 1,557 resulting products by number of redditors who mentioned them. Here are the top 20.
1. Mastering Mountain Bike Skills - 2nd Edition
Sentiment score: 34
Number of reviews: 33
Human Kinetics
 Show Reddit reviews
2. Zinn & the Art of Mountain Bike Maintenance
Sentiment score: 8
Number of reviews: 14
Author: Lennard ZinnISBN: 1934030597
 Show Reddit reviews
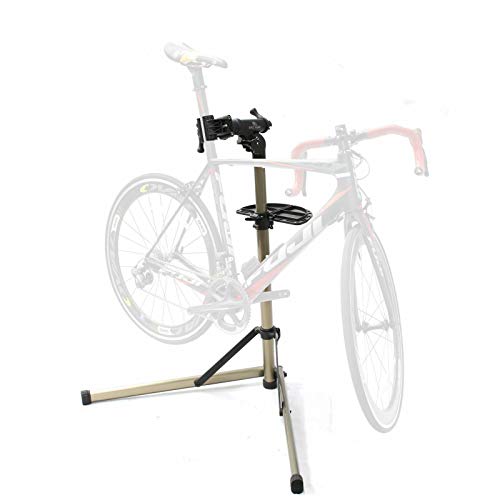
3. Cycle Pro Mechanic Bicycle Repair Stand Rack Bike
Sentiment score: 8
Number of reviews: 12
LIGHT , STRONG & PORTABLE: The repair stand is made of full light alloy aluminum with heavy duty plastic strong head and clamps. It is light weight, and compact when folded. It is very convenient, durable and well-designed.HEIGHT ADJUSTED: Quick Release Adjustable (1m-1.5m or 39"-59" Fully extended)...
 Show Reddit reviews
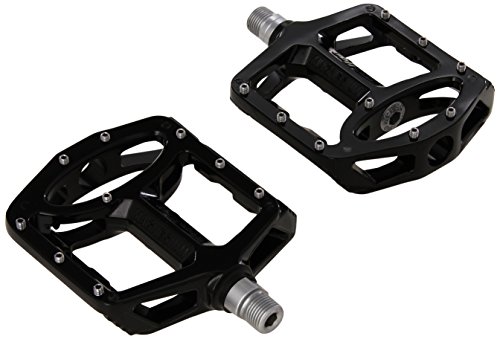
4. Wellgo MG-1 Magnesium Sealed Platform Pedal
Sentiment score: 6
Number of reviews: 9
Body: Magnesium/Painted ColorSpindle: Cr-MoBearing: DU/SealedSize: 114.6 x 106.2 x 30.8mmWellgo MG-Series BMX Pedals made with magnesium bodies, Cromoly spindles and complete with MG-1 sealed bearings
 Show Reddit reviews
5. Wellgo MG-1 Magnesium Sealed Platform Pedal, 9/16-Inch, Black
Sentiment score: 4
Number of reviews: 8
Body: Magnesium/Painted ColorSpindle: Cr-MoBearing: DU/SealedSize: 114.6 x 106.2 x 30.8mmWellgo MG-Series BMX Pedals made with magnesium bodies, CroMoly spindles and complete with MG-1 sealed bearings
Show Reddit reviews6. Mastering Mountain Bike Skills
Sentiment score: 5
Number of reviews: 8
Used Book in Good Condition
 Show Reddit reviews
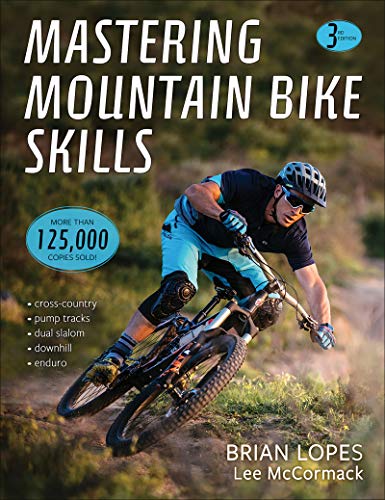
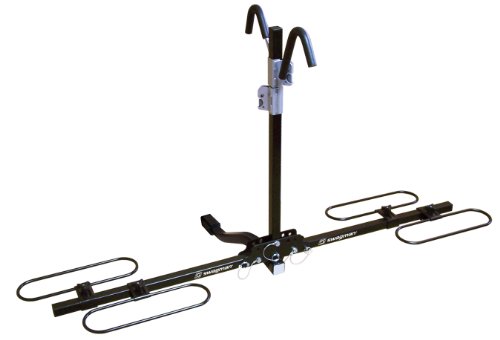
8. Swagman XC2 Hitch Mount Bike Rack
Sentiment score: 2
Number of reviews: 7
EASY TO ASSEMBLE & USE: Only takes a few minutes to assemble and the upright ratchet arms easily adjusts to different bike frame sizes, will accommodate bike frames up to 59 cm (23.2")KEEPS YOUR BIKE STABLE: Sturdy design includes a built in anti-wobble hitch device to keep bikes in placeSAVES YOU S...
 Show Reddit reviews
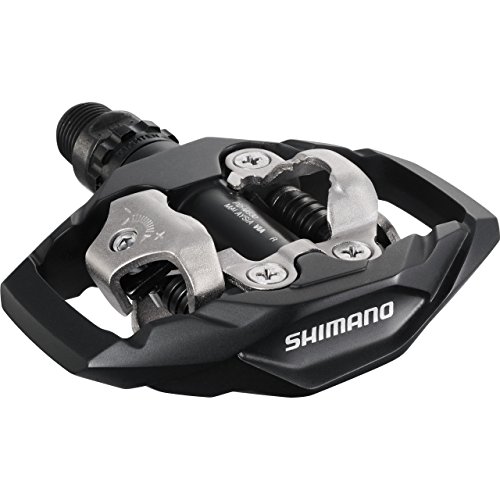
9. SHIMANO PD-M530 Mountain Pedals
Sentiment score: 7
Number of reviews: 7
Shimano pedaling dynamics - spd performs whether you're on or off the bike; makes pedaling more efficient with a wide variety of shoe and pedal styles; and the recess cleat makes walking more comfortableInnovative - by eliminating toe-clips and integrating the pedal and outsole into a single; unifie...
 Show Reddit reviews
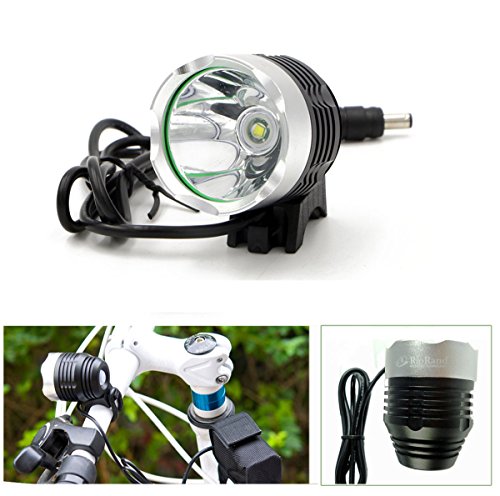
10. RioRand 4 Mode 1200 Lm Cree Xml T6 Bulb LED Bicycle Bike Headlight Lamp Flashlight Light Headlamp
Sentiment score: 5
Number of reviews: 7
Powered by RioRand advanced technologyRioRand 4 mode 1200 Lumen CREE XML T6 bulb LED bicycle bike headlight lamp flashlight light headlampMade of CREE XM-L T6 LED, ultra bright4 switch modes: strong brightness, normal brightness, weak brightness and strobe( press button for 3 second)Rechargeable 440...
 Show Reddit reviews
11. RaceFace 104mm Single Chain Ring, Black, 32T 9/10/11 Speed
Sentiment score: 0
Number of reviews: 6
7075-T6 aluminum, aerospace grade strengthWeight 50gm (36T)Compatible for 9, 10 and 11 speedNarrow Wide tooth profiling ensures ultimate chain retentionStiff 4mm plate thickness and I-beam construction transfer loads without flexingReversible laser etched graphics
 Show Reddit reviews
12. SHIMANO SM-SH56 SPD Cleat Set
Sentiment score: 2
Number of reviews: 6
Fits: All Mountain SPD pedals except PD-M858 Float: 0deg Pedal Color: Silver Pedal Model: SH56 Unit of Sale: Pair
 Show Reddit reviews
13. Shimano PD-MX80 Platform Pedals
Sentiment score: 2
Number of reviews: 6
Unique shape with concave platform for better control and efficiencyExtra-wide and especially low profileLonger; replaceable pins; screwed in from the back for easy maintenanceDeveloped and dedicated to Downhill racingAllows responsive levels of acceleration and deceleration
 Show Reddit reviews
14. Wide Angle Lens for MagicShine, Gemini, and many other Bike Lights / Headlight. Includes O-Ring
Sentiment score: 2
Number of reviews: 6
Changes the factory 10 degree spot to a 10 degree x 30 degree floodWide angle lens spreads the beam out horizontally so light is not wasted in the sky were you don't need itSized to fit the Magicshine MJ-808/808E/808U or Gemini Titan (39mm dia.)Also fits most Magicshine copies with included O-ring (...
 Show Reddit reviews
15. Bright Eyes Newly Upgraded and Fully Waterproof 1200 Lumen Rechargeable Mountain, Road Bike Headlight, 6400mAh Battery (Now 5+ Hours on Bright Beam). Free Diffuser Lens/TAILLIGHT (Silver-Gray)
Sentiment score: 5
Number of reviews: 6
UL Tested and Passed in 7 different Extreme Tests!! No Other similar Bike Lights can say this! - - SERIOUSLY BRIGHT and now FULLY WATERPROOF 1200 Lumen CREE T6 LED Technology - Our Newly UPGRADED Bike Light Battery Lasts now over 5+ Hours on High, 10+ hours on medium, 26+ hours on Low. The Longest R...
 Show Reddit reviews
16. TEKTON 1/4 Inch Drive Click Torque Wrench (20-200 in.-lb.) | 24320
Sentiment score: 3
Number of reviews: 6
Includes: 1-pc. 1/4 in. drive torque wrench; Storage case; Product manual with torque conversion chartWrench emits a click that can be heard and felt when the preset value is reachedHigh-contrast dual-range scale is easy to read, even in low lightReversible ratchet head drives in both directions and...
 Show Reddit reviews
17. Delta Michelangelo Two-Bike Gravity Stand
Sentiment score: 0
Number of reviews: 5
Original Design: Leans against wall & holds bike using gravityVersatile: Elegant design looks good in any room or garageConstruction: Industrial-grade powdercoated steel & custom molded arm coversDimensions: 86" x 23.5" x 13.75" / 2184 x 597 x 350 mmFully Adjustable: Independent arms accommodate any...
 Show Reddit reviews
18. Meiser Presta-Valve Dial Gauge with Pressure Relief: 30psi
Sentiment score: 0
Number of reviews: 5
Brand NewNever UsedIn the manufacturers retail Packaging.With Full Factory Warranty!Buy it now!
 Show Reddit reviews
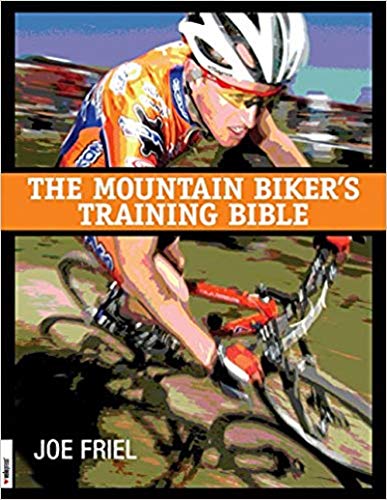
19. The Mountain Biker's Training Bible
Sentiment score: 4
Number of reviews: 5
Develop a systematic and comprehensive training program using a proven scientific approachTrain more efficiently with weekly goals and workouts that build skill and improve techniqueBenefit from strength work, stretching, record-keeping, and smart nutrition specific to mountain biking
 Show Reddit reviews
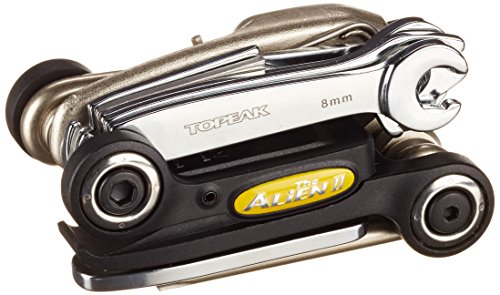
20. Topeak Alien II 31-Function Bicycle Tool
Sentiment score: 5
Number of reviews: 5
Used by both professional and amateur riders alikeMade using high quality materials and componentsTested to ensure quality and durability31 Tools Total2 Piece Body270g / 0.60 lbHardened Steel (Tools), Engineering Grade Plastic (Body)Includes HD Nylon Bag With Clip
 Show Reddit reviews
I raced a bunch up until about 2 years ago when college got too busy. I worked my way up from racing in the 12-13 year old age class to junior expert to expert 19-29 at nationals (combined with the pros at local events).
Fitness wise, circuit training is awesome, sounds like your upper body should be good to go. I never did any weight training during the race season, but a lot of guys do.
If you don't have a road bike, I'd definitely try to find a long gravel road or multi use trail to simulate road on and get in some long rides that will spare you the pounding of trails. The biggest gains in performance I had were when I added structured road training, including intervals, to my regimen. Check out Joel Friel's book, as it's a great introduction to what is known as periodic training.
There's really nothing like being in a race, but I'd try to simulate one before doing it- take your gear out to your favorite trail and go as hard as you can for the appropriate distance. Bike handling is way different from when you're just cruising to when you're at your limits.
Gear: I was too dumb to carry a spare tire for a long time, but then I got tubeless with Stan's and didn't have to worry about it. I would definitely carry one if you need it and practice changing it once or twice before the race.
I also carried a multi-tool (with tire lever) just in case and energy gel in my pockets, with one bottle on the bike. That's about it for the race itself. I also had a small toolbox with the essentials (pedal wrench, chain tool, screw drivers, tire and shock pumps). There will generally be mechanics on site (who may charge) for anything major.
Clothes: if I was traveling for the race, I made one bag for street clothes and one bag for race day gear. Shoes, helmet, jersey, bibs, socks, gloves, spare tire, tool, and gels go in here. That way I only had to worry about grabbing stuff for one bag on race day. Extra safety pins are never a bad idea.
Nutrition: I think it's more important to eat healthy the night before rather than trying to cram down a lot of pasta. Chicken, rice and veggies was my favorite. Start hydrating 2 or 3 days before. Eat a light breakfast (banana, bagel, yogurt- stuff you're used to)2-3 hours before the start time. If you have a friend/parent/SO going to the race with you, have them hand you bottles every lap. I liked water on the first lap, sports drink mixed half and half the second lap and flat Coke the third lap. On hot days, I'd ride by and my dad would hand me the bottle with one hand and dump cool water on me with the other. If you don't have anyone with you, see if the organizers are cool with setting your bottles on top of a cooler in the feed zone and grab them as you pass.
Post race: Cool down for about 10-15 minutes, then change into some fresh clothes. There will usually be a bathroom, but bring a towel you can change under if necessary. I always like to wipe down with something (wet wipes, a washcloth etc.). Eat a snack when your stomach has settled to start recovery as soon as possible, I usually go with ginger ale, a recovery drink and a PB&J.
General:
I think that's about it- wall of text, sorry. Any other questions, please let me know.
Hello there, I'm relatively new as well but I can hopefully help! Firstly, on the sidebar is a very helpful book, Mastering Mountain Bike Skills This is the second edition, the first one is cheaper, I'm not sure how much has changed but it has a ton of helpful things, such as a few answers to your questions. They recommend deadlifts as a great exercise to build strength, I can imagine that would help a lot. Conditioning is also a big part of it, long rides focusing on pedal stroke and perfecting form to make sure there is no wasted effort.
As far as a trail bike, depends on how rough the trails are. I'm currently riding 2014 Giant Talon 4 and it's holding up fine on easy-moderate trails without too many large bumps or big rocks, I've done some pretty rough accidental off-roads and nothing has broken yet, so I'd say for your price range a hardtail would be the way to go, though for rougher trail a full suspension bike is recommended, though good ones of those start around $1600-$2000 range.
Also for what it's worth, I'm 220 pounds and ride with a 8-10ish pound backpack so I imagine you'd be a lot easier on the bike in that regard
I have a 2008 Gary Fisher Marlin Disc, which is similar to your bike in a number of ways, though most of your components are higher-end. Though I got the bike 6 or 7 years ago, I didn't really start riding much until recently. So I'm still a noob, but I'll let you know the handful of changes I've made, and why, in case it helps. I do XC riding in the PNW for what it's worth.
Pedals - the platforms that came with my bike were not great. Trek's specs for both bikes list "alloy pedals" so I assume they're the same. I recently switched to clipless pedals (SPD) and it made a huge difference for me since I'm not sliding all over the place. Better platforms and good shoes are a good choice too.
Tires - Trek's site says we have the same tires, assuming you haven't changed them. I'm still rocking the original tires since they do the job, but they don't get good traction in wet and muddy conditions. Others online say similar things (http://www.mtbr.com/cat/tires-and-wheels/tire/bontrager/jones-xr/prd_416565_151crx.aspx). So picking up a set of new tires that match your riding style and trail conditions may be good. I will probably do this when mine wear out (soon).
Drivetrain - All I've done is dump my largest chainring, since I never use it, and put a bash guard in its place to protect my legs and help roll over logs and such more easily.
edit: you know what, I may have misinterpreted your question. If you're looking more for how to improve your skills I found this to be very helpful: https://www.amazon.com/Mastering-Mountain-Bike-Skills-2nd/dp/0736083715. The tips in the threads toomuchdolphin linked are great resources as well.
there is tons of stuff that a new rider should know, too much to list generally, but if you search for older new rider threads and browse through them, you'll pick up a ton of info from people who have been in your exact position.
beyond that, the best investment you can make is in this book:
http://www.amazon.com/Mastering-Mountain-Bike-Skills-Edition/dp/0736083715
it's huge but you don't have to read it all at once, just look up the relevant section when you start to wonder how you can do something specific better
also, this video is a bit long but it was and is still very helpful to me when it comes to basics
https://www.youtube.com/watch?v=PiQGFX_RlW4
your brakes probably are a bit weak, as they were made to be that way so a beginner rider wouldn't fly over the handlebars if they braked too hard, but i wouldn't worry about them right now. at some point you may want to upgrade them, but i would focus on the basics for now.
your shifter might not be calibrated correctly which is causing the clicking- if you bought the bike at a shop, you could have them look at it.
as far as money to spend right now, assuming you already have a helmet (that's numbers 1 through 10 in priority) upgrade your contact points, the things that connect you to the bike-
better pedals like, say, these:
http://www.jensonusa.com/Deity-Compound-Pedals
and better grips like these:
http://www.jensonusa.com/ODI-Yeti-Lock-On-Grips
and gloves. i'm partial to these:
http://www.specialized.com/us/en/ftr/gloves/long-finger-gloves/enduro
and better shoes like fiveten mountain bike shoes
all these things will allow you to stick to the bike and spend less effort staying that way, which means more ability to just focus on the trail
There's a really good section on climbing in that stupid book I keep recommending.
Your height to weight ratio is fine, so don't worry about that. If you're a flabby 98, just keep riding and your body will get to where it needs to be. Don't worry about.
As for the climb, a couple things to remember are:
As for SPD (clipless) pedals, I love them, but it's mostly rider preference. Professional XC racers use them, and professional downhill racers don't, so you can use that as your guide. For me (XC racing with some freeride), I love riding clipless; you never have to worry about your foot position (which is great for climbs and rooty/rocky downhill sections), so all of your pedaling energy is focused where it should be.
Of course, if you're a DH or DJ rider, clipping in will probably result in a broken collar bone. It really depends on how you ride.
One quick note on terminology: "Clips" are the basket things you put your foot into. (It's short for "toe clip.") The pedals that attach to your specially made shoes don't have the basket (clip), so they're called "clipless," even though you clip into them. (So yes, you clip in to clipless pedals.) It's confusing if you don't know the history behind the terms, but pretty easy to remember once you do.
Good luck!
That's terrific! Comfort her and be patient. Let her cry and be there for her. Sometimes it just has to get out. It sounds like you are already doing just what you should be.
Can I give you some advice for you and your girlfriend? Sorry but I'm long-winded :)
-Speed is almost always your friend. Your instinct is to hit those brakes when you come up on something scary. Your bike WANTS to keep going. Your bike is literally designed to make it over that obstacle. If you hit it at speed, you've got a good chance of clearing it. If you run smack into it with nothing behind you, you're not gonna make it over. When in doubt...remember a high-speed crash is almost always preferable to a low-speed one.
-Breaks are important. It took me so long (like, as in about 10 months ago) to get that in my brain. I always felt like stopping indicated I was weak, my boyfriend must be so bored stopping all the time, the objective is to complete the ride, etc. If you are tired, stop. Catch your breath. One of my favorite trails has two mega bitches of hills essentially right before a rock garden. I always wanted to keep going, and by the time I hit that rock garden, I was so tired my technique was sloppy and I struggled. If you stop ahead of that rock garden, hydrate and breathe, you'll hit it fresh and be much more successful.
-You're gonna have days when it's just not happening. The most basic stuff you know how to do...you'll just blow it every time for some reason. Everything is gonna be a fail. It's okay. Everyone has those days, and it's completely normal and no reflection on you. Pack it up, have a beer, get over it, and look forward to next time.
-Do not give up. Just don't do it. That moment you feel like you've got absolutely nothing left? Hang on for 2 more minutes and make sure it isn't your mind lying about your body. 99% of the time for me, that's my head giving out before my lungs and legs do. You're maxed out and have nowhere else to downshift going up that hill? When that happens to me, I reach deep inside and tell myself, "Your bike has gotten you this far. The rest is up to you." Then I hit it and every time I would downshift if I could, I press the shifter anyway and translate it to "I just shifted my own legs into that gear and I'm gonna get it."
-Talk to yourself. You might feel stupid, but I promise it helps. When I've almost crested that hill and I'm about to lose it, I shout, "GET IT! YOU'VE GOT THIS! HIT IT!" When I'm dying trying to get over something, I'll just primal scream if I have to get that struggle out. It feels great and it is often that boost I need.
One last thing...get this book. Mastering Mountain Bike Skills. This has been one of my best resources. Explanations are clear and concise, tons of pictures that help you see how you should be positioned, and covers every topic you could imagine. Best investment I made in my riding, and it was under 20 bucks.
I hope you guys have a great experience together. Keep up what you're doing today and you will give her everything she needs :)
Looks like a lot of stuff has been covered already.
As far as pedals, I ride with these Faceoff 13's and they've treated me well. If you can afford a decent pair of riding shoes, you can't really go wrong with 5.10's. If you decide to go clipless later, you can get 5.10's that you can ride clipless or on flats (see the Hellcat's). I recommend a good shoe with a sturdy sole. I rode with Vans for a while and dabbed my foot to catch my balance and ended up dabbing it right into a rock. The Vans crumpled and my toe took the brunt of the force. Not fun. I couldn't walk very well for a while. Good riding socks are awesome, too just to keep your feet from getting really sweaty.
Someone mentioned the Camelbak MULE. That's what I ride with and highly recommend it.
As for a helmet, I've been riding with a Fox Flux this season and I've been really impressed with it. I wear a skullcap under it to help keep my head cool and keep sweat from dripping into my face. You'll want something well ventilated over the BMX helmet for sure.
I do highly recommend a good pair of riding shorts with a comfortable chamois. I have some shorts from Fox, Dakine and Pearl Izumi and the Fox shorts have the best chamois and fit most comfortably.
You'll definitely want to bring an extra tube or two, tire levers and a hand pump or CO2. As far as tools, I take this multi-tool. It's a bit heavy, but it's treated me well. I would also throw some zip ties in your bag as well. They're light, but when you need them, they're worth their weight in gold.
As far as position goes, you typically want to go "long and low" or "short and high." You can change your stem out for something longer/shorter and more/less rise, or you can swap out bars for something wider/narrower or more/less rise.
I'm pulling the following numbers and information from this book: If you're more XC and like to climb, you may want to go long (90-120mm) and low (0-10 degrees rise), but if you're more into descending and jumping, short (40-70mm) and high (10-15 degrees) may be better for you.
In addition to the stem, you can get a bar with rise if you'd like. For "long and low" XC, flat or 1" rise is good. For "short and high," 1.5" to 2.5" is better.
As far as bar width goes, it really depends on your build. If you have wide shoulders, you'll probably need wider bars. Basically, it should feel comfortable.
Since you say your frame is small, you'll probably need to go to the edges of the ranges above (e.g. if you like "long and low," you might try a 120mm stem rather than 90mm). I don't know enough to give you specifics for your bike, but it does sound a little small for you. Your LBS probably has hundreds of different stems in a drawer and could fit you pretty well.
Sucks to hear about your broken arm. I go crazy when I'm hurt and can't get out to do things. You've definitely got the heart and drive to progress on a bike. Best advice I can give you is:
1- don't give up! Mountain bikes really are fun a great way to exercise once you get a little fitness and skill built up.
2- You just jumped right into, maybe not the deep end, but at least the end of the mtb pool where your feet can't touch. Riding off even small drop takes practice and technical skills take a while to learn. While you're recovering check out Mastering Mountain Bike Skills by Brian Lopes and Lee McCormack. By far the best break down of how to learn technical bike skills out there.
3- Even the best of the best still crash. It's a good idea to work on learning to "tuck and roll grandma!". I think I'd have way more broken bones than I do now if I hadn't learned how to fall. I took some entry level judo classes when I was young that taught me, but there's plenty of info online on how to break your fall properly. In the words of Wade Simmons:
>I’ve always said this, you’ve gotta be a better crasher to be a better rider.
I checked out a copy of Joe Friel's Bible, read it cover-to-cover three times, and set up a comprehensive training plan including weight training, intervals, long efforts, and rest days. Then, just as he predicts, I completely abandoned the program when my life got in the way. It's a great book with a lot of helpful advice, but in reality it's impossible for a person with a full-time job and a social life to follow a training plan in the first year of trying.
I ended up cobbling together a basic plan of long rides on the weekends (6-8 hours a day) and a couple after-work rides every week (for a total of about 20 hours of riding weekly), and making sure every single ride included a substantial climb. I'm lucky because I live in Colorado, where every road and trail turns upward eventually and most of the rides are beautiful and fun. I did end up skipping a lot of parties to make those 8AM roll-outs on Saturdays, but it was worth it!
At the expense of feeling your pain over-and-over, I watched that sequence a few times to look for what you did wrong. I can't really see the jump from the quality/angle, but in terms of posture, your elbows looked pretty stiff as you went into that launch. As a result of this, I think you ended up distributing too much of your weight forward (putting weight on the bars, it looks like), which caused your front wheel to hit the ground at a non-preferential angle.
I'd suggest starting small: Find roots, moguls, dips, hell, even curbs. Manhole covers can also make a good small starting spot, but roots tend to be the best -- generally things that are only a few inches high.
Get yourself used to riding up to them and popping over them. Once that's comfortable, start learning how to launch off of them. Don't pull too hard on your bars, it should come fairly naturally once you're used to it -- you'll sort of loosen up your elbows, position yourself in 'attack position,' then naturally glide over the roots and get a few inches of air. It should feel reaaally natural once you're used to it, which is why I'm having a hard time explaining proper positioning. I'm sure someone can jump in with more technical advice.
As for how fast to go... that's a call that you'll have to make when there. It should sort of feel right when you're going a good speed - I can't really tell what the configuration of that huck is from the angle, though.
I learned everything I know from getting hurt ... a lot, but someone bought me this book last year and it taught me a lot. It's nothing revolutionary, but the book is loaded with timelapse photos that show exactly how a rider is positioned during corners, drops, hucks, jumps, etc. and should help you get started! Hope that helps!
Where was this, by the way?
Edit: I asked about 'how to fall' in this subreddit a while back. I found this video to be helpful, albeit tougher to do in a real scenario.
There are a couple different levels to this question.
I would lean away from getting a full suspension given your budget, and would STRONGLY recommend riding several different options before buying. If your shop doesn't offer trail demos/rentals, look for factory demo tours from Trek, Specialized, Giant, etc. They're usually going around the US this time of year offering free bike demos at trails all over the country. You may not get to ride the exact bike you're looking at, but it should give you at least an idea of what to expect.
Throwing in my 2 cents. Everyone has their opinion on what is better so this should be taken as what I have learned with trial and error.
​
I use SPD clips with Shimano PD-M647. The outer cage acts as a flat so that I can alternate if needed (I rarely use them now). This was especially good for starting out. The resistance can be adjusted so you get used to clipping out, adding resistance as needed.
​
Buy a shoe with a rigid sole, I started with a pair of specialized tahoe and it had so much flex that every time I tried to unclip, my foot would move but not the shoe, resulting in a fall. I since switched to Shimano ME2 and they're way better. I'm sure there are better shoes out there. but these work well for me.
​
There are 2 types of SPD cleats, one way (SM-MH51) and multi-directional (SM-MH56). I would advise to use the multi-directional as it is easier to get the hang of.
​
Unclip early before you stop, most falling happens mostly at slow speeds. For me its mostly during a climb or trying to get over a rock where I lose speed or the wheel slips, as long as you're moving it's tougher to fall, because physics.
​
I would say that if you like to send it over jumps and you bail a lot, you may not want to use clipless. There's a reason people use flats, and that's one of them. Small jumps aren't a problem for me but I'm not doing transfers or big stuff.
​
There's a learning curve to going clipless. The more you do it, the more it becomes second nature. Good luck!
I recently picked up some SPD pedals (these specifically) and absolutely love them. Two things to make sure of from my experience:
I love them, and I find that I'm more willing to take on sketchier terrain. Plus I feel like I could jump over a house now. So there's that.
I transitioned into working on my bikes almost entirely by myself (Wheel building/suspension service/bearings excluded) and this is the exact path I went down as well. Here is everything I bought from Amazon:
The same $50 tool kit
Torque wrench
Cable/housing/wire cutter
Chain/quick link pliers
Wet/Dry Chain lubes
Park Tool grease
Degreaser
Blue Loctite
Carbon grip paste
And some additional small things like cables, cable end caps, ferrules, zip ties, etc. A set of needle nose pliers can be handy to help push/pull stubborn cables/housings as well.
Also, to make working on the bike 10x easier, I recommend getting a stand. I use this one because I am space constrained and it folds up nice and small, but there are probably better ones out there.
It seems like a lot of $$ to lay out at first, but it pays for itself pretty quickly compared to taking the bike to a shop every time you need to do something to it. Basically everything you need to do can be found on YouTube as well.
I got 2 of these lights: http://www.amazon.com/Best-Rechargeable-Lumen-Bicycle-Light/dp/B00GJZ015Y/
Slightly more expensive at $40 each, but is one of the best reviewed "Magicshine 808 clones" on Amazon and the seller apparently has some of the best customer service (I haven't had to deal with issues yet, but they did send me 2 wide angle lens for FREE after I emailed them).
Real world test is probably nowhere up to claimed 1.2k lumens, closer to 800-900, which is enough for me now. I might grab another one so I can mount 2 on the handlebars side by side.
Note that many of the higher 1.6-3k lumen lights, even the $100-200 MagicShines, have heat issues when running on high for long periods of time, which could affect component lifespan.
I'm no expert mechanic but this is a really good book.
Regular maintenance mostly includes stuff like lubing your chain, keeping everything clean, checking bolt tightness, and making minor adjustments to keep your drivetrain and brakes working smoothly. Occasionally you'll need to do something more in-depth like bleed your hydraulic disc brakes or replace suspension seals - your local shop will be happy to do that stuff if you don't want to mess with it.
To narrow down your search: I purchased a Camelbak MULE last April along with a Topeak Alien II multitool. Both of these items were fantastic purchases, and I'm so glad I bought them.
If you're interested in gloves, I bought a pair of Fox Inclines a while back and am happy with that purchase as well.
Congratulations on your new bike! You are going to enjoy it.
Personally i like the M-530s better. Especially for a first time clipless rider. While they may be a tad heavier, they have more of a platform. This comes in super handy in many "oh shit" scenarios and in regular use. The 520s can flip over easily when trying to clip in, and especially getting started in a technical section or an uphill, that can be frustrating as hell. The outer platform of the 530s prevents them from rolling or flipping. Also if you, cant quite get your feet clipped in, at least you have something to stand on until you get a chance to clip in correctly. Also, when you just want to hop on your bike to go to the store, or test ride some new tweaks, in your regular shoes, you actually have a pedal and not a nubbin under your foot. Lastly, if you have weak shoes that dont have a stiff sole, you might feel a "hotspot" on your foot where the small 520 is. I had cheap flexy spd shoes and found my feet to be pretty sore after long descents.
The 520s are great but i definetely like the 530s way better for all around use. Espcially since they are under 40 bucks on amazon right now.
good luck!
Don't feel bad if you'd feel more confident riding flat pedals rather then clipless. I used to be a clipless snob but ride flat now. Its worth considering.
You might want to get off your bike and scope out the line you want to take before hand. You can also session the obstacle to get more practice.
When riding a step down slowly its important to keep your wheels rolling, especially your front wheel. Do the majority of your breaking before the drop.
When you near the drop, get off the front break entirely. You can feather the back break but don't lock it up. Higher end brakes modulate better.
You want to get your butt behind the seat and down. I recommend you get a dropper seat post. It will make these types of moves so much easier. Keep in mind that the further back you get your weight, the more likely your front wheel is to get light and possibly move around on you. You'll need to experiment with how far back you need to get on your bike. Start with too far back since you tend to go over the bars.
If you can seek out in person training from a coach with a good rep that will help.
Here's a book to consider.
https://www.amazon.com/Mastering-Mountain-Bike-Skills-2nd/dp/0736083715
You mentioned that your tubes have given out on you. Since they are cheap, replace these first. When replacing the tubes, run your finger along the inside side walls of the wheel. Do you feel any burrs or anything sticking out? If so, sand it down and get some rim tape. Bikes like these usually come with cheaper tires varying in quality. When the tire is off, check a couple things;
Remember, if you replace the tire don't go crazy and buy tires that are 80$ each. Go with something like this;
http://www.amazon.com/Geax-Goma-Enduro-Race-Tire/dp/B00J07F72K
After this, if you're going to be doing any agressive mountain biking, I would highly recommend replacing the pedals with something that has metal pins. Once again, no need to go crazy! Something like this:
http://www.amazon.com/Wellgo-Magnesium-Sealed-Platform-Pedal/dp/B00GDF87GU
The two best upgrades in my opinion are:
Do not patch these tubes. The tubes this bike came with are not great. Tubes are so cheap they aren't worth patching unless you're out and run out of tubes. Don't buy a tube from target or walmart, make sure you buy a tube from an actual bike shop as they are a much higher quality.
I got a couple of cheap Bright Eyes Headlamps off Amazon. They're not the best head-lamps in the world, but more than good enough for riding, and the price is right.
Night-riding is the best way to beat the heat, and also gives you a nice perspective on the trails that you ride. I really like it - it kind of strips away a lot of distractions, and leaves just you and the trail.
It keeps me riding through Australian summer, and through the heat in Houston.
I highly recommend the book in the side-bar it goes over lots of little tips like this about weight distribution, when to brake, lean, etc. The book is really a great help in learning to ride safely while pushing your abilities.
I picked up this Topeak Alien II but it doesn't have pliers or a knife but I do have an small leatherman which does. I figured a 26-function would cover most of things that could come up but I'm interested in what you dig up.
Edit: You're awesome. Thanks, man!
The feedback sports stand(s) get a lot of love.
But some friends and I have this Bikehand one from amazon. Pretty well reviewed and has worked fine for me over the past year:
https://www.amazon.com/Bikehand-Mechanic-Bicycle-Repair-Stand/dp/B00D9B7OKQ/
Luckily indeed. This is the first weekend it's getting about 50F. The ground has been frozen up until now. You'll definitely have a lot of time to improve. You'll find yourself getting better and better the more you ride. Also, if you want to look for more material on riding techniques I would check out: http://www.amazon.com/Mastering-Mountain-Bike-Skills-2nd/dp/0736083715/ref=sr_1_1?s=books&ie=UTF8&qid=1395620576&sr=1-1&keywords=mountain+biking
I only have two legs and I rarely fall over.
Seriously though, unless you're being careless they are plenty sturdy. I'd recommend this one:
https://www.amazon.com/gp/aw/d/B00D9B7OKQ/ref=ya_aw_oh_bia_dp?ie=UTF8&psc=1
And I've heard good things about the Aldi stand if you want to go super cheap.
You should definitely get a torque wrench. I've been happy with the Nashbar branded one.
Just ordered my brand new Rocky Mountain Altitude 730. Il should have it in the next week. Thanks everyone for your help.
And I ordered Mastering Mountain Bike Skills to improve my technique and Magellan Echo Fit to see my progress via Runkeeper.
I'm ready for this summer!
You might be leaning forward and putting more weight on the front than the back. It's one of those things that your brain tells you to do, but is opposite of what you need to do. You want to keep yourself centered over the cranks and your weight on the pedals.
It sometimes helps you get out of the saddle in corners, put most of your weight on the outside pedal with it at the 6 o'clock position, and lean the bike while keeping yourself vertical.
Going downhill you want to keep most of your weight centered over both pedals only using the handlebars and seat as control points. Depending on the steepness of the trail your butt might be just over the back of the seat or completely behind it.
This book by Lee McCormack and Brian Lopes is a good read and they do a good job explaining the techniques. The point they constantly talk about is heavy feet, light hands.
I have the Tekton 1/4in 20-200 in/lb wrench, I have not had any issues with it. I also have the 10-150ft/lb wrench, but that's pretty much just for the car.
It's not a premium tool, but it works well, and I find them to be a good value for the price. I paid $30 for the torque wrench.
Also remember when you store torque wrenches to set them to 0. That way you remove the load from the ratchet mechanism while it sits around.
I did break one of their box wrenches before, it was 100% my fault. They sent me a new one for free no questions asked.
Last week, I bought the XT Trail PD-M785, which is about half the price ($80 vs $161) of the XTR and only like 10 grams heavier (398 vs 408) and I absolutely adore them. I've been riding clipless for a couple years now and I've used Time's and Crank Brothers mostly and these Shimano's are in a whole different league.
The platform is big enough to give you something to stand on if you want to clip out going down some techy stuff or if you need to do an uphill start. The tension adjust is also a really nice feature so that you can leave them loose when you're just starting out and then tighten the engagement as needed. Those pedals and my dropping seatpost are absolutely the best upgrades I've done to my bike recently.
EDIT: If you're looking for something even more reasonably priced, there are the Shimano PD-M530, which is the same style of pedal, just $40. I'm looking into a pair of these for my girlfriend right now. I haven't ridden them personally, but people say really good things about them.
All good advice. I second the thought that buying from a shop is better than buying from Dicks or whatever for a lot of reasons, especially if you are a relatively new rider. And that Diamondback does not look that good for actual trailriding. The components on the Felt are just ok, but the Diamondback is not very good. If you are serious about riding I'd suggest trying to get something 1 notch above the Felt, but if that is the price limit that is okay too.
For bike maintenance one of the standard books is: Zinn and the Art of Mountain Bike Maintenance . Although I think you can get by for the most part with the internet these days, it is supposed to be a good book and the author is very knowledgable. For internet resources, there are many, but Park Tool's website has some very good guides available.
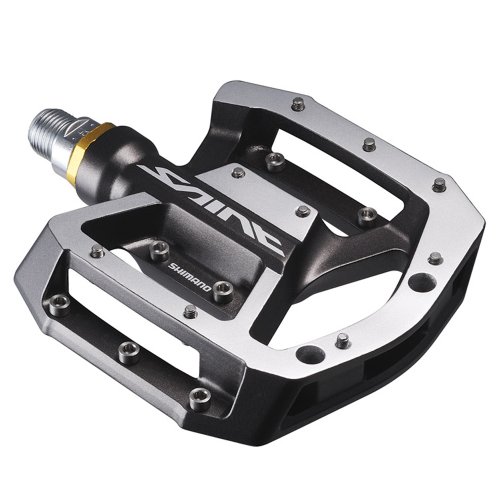
I use the Shimano MX80 (Zee) and I really like them. They look really nice and work well. Good price on Amazon too.
http://www.amazon.com/Shimano-153054-Pd-Mx80-Platform-Pedals/dp/B007Q4PBO8/
I posted this at r/cycling with no responses so I'll try here since it seems more active.
I am in need of a light (soon).
I am starting to ride my bike to work, and with winter setting in I'll be riding in the dark when it's not freezing out. I ran across these two lights on Amazon, are they any good?
1st choice: http://www.amazon.com/Best-Rechargeable-Lumen-Bicycle-Light/dp/B00GJZ015Y/ref=sr_1_1?s=cycling&ie=UTF8&qid=1410199224&sr=1-1
2nd choice: http://www.amazon.com/Rechargeable-LIFETIME-GUARANTEE-SHIPPING-INTENSITY/dp/B00GGR0XD0/ref=sr_1_3?s=cycling&ie=UTF8&qid=1410199224&sr=1-3
Those were the top two ranked so I'm not married to them, just trying to get a feel for what I should look at.
I'm riding on streets/frontage roads for 10 miles each way, about 40 minutes of ride time each way. I'm not opposed to an external battery pack. If it matters my bike is a Trek 3900 that is a few years old.
Thanks!
I'm sure you can get great advice here and there is always costly clinics. But I would definitely check out this book. Really well written, for anybody to understand.
http://www.amazon.com/Mastering-Mountain-Bike-Skills-2nd/dp/0736083715
I have several feedback sports products, but yeah unless you are transporting it a lot, the extra sturdiness isn't worth the cost. The bikehand stand i have was like $90 on Amazon, and has been going strong for 2 years of twice a week use now, and the clamp is superior to all but the most expensive FS stand, which are, what, triple the price?
>Cheap repair stands have crap adjustments, fold poorly (if at all), have weak and hard to adjust heads, and are generally not very stable, which is a serious issue when tuning a drivetrain for example
The bikehand stand definitely has none of these issues
Zinn & the Art of Mountain Bike Maintenance is a great resource. Also check out a picture like this and then google "How to install x". You'll find plenty of youtube videos that will help you along the way.
Nod, when I read Joe Friel's Mountain Biker's Training Bible it said that if you haven't been riding for two years, that you shouldn't do anything in his book - but merely go out and ride. I'm looking forward to this next year for sure!
Going to go out today for a quick ride, tomorrow I've got another VQ prep ride planned, and then Sunday I'm going to see if I can clock 85 miles in on my MTB. Starting 2015 off strong!
These things will pertain more to riding on trails, but you might want:
I've been using some Wellgo MG-1s on my AM bike. Solid pedal. Even better price. Love it.
This book. Only $14 Kindle version. Written very well by professional mtb riders(Brian Lopes, anyone?). It will teach you from the beginning the basic and more advanced riding skills, so you can enjoy your rides even more. I'm reading it right now after 5 years of regular mtb'ing and still find a lot of new and insightful info.
All the answers you need are here:
http://www.amazon.com/The-Mountain-Bikers-Training-Bible/dp/1884737714
As /u/milliken says, having a structured training plan is definitely beneficial. I'm just now starting to develop my plan as I get back into racing after a long layoff, and I've found this book indispensable.
FWIW, I also recommend:
Ride more, and work on body positioning. Get the Mastering Mountain Bike Skills book and read it to learn a bunch of proper technique. Then, ride even more and practice.
One trick I like is to take a flat, easy piece of trail, and ride it without brakes. No matter how slow you have to go, ride it without brakes. This will give you a good feel for controlling the bike. Then you can bring the speed up more and more... Then eventually start using your brakes where it's really needed, which'll be far less than before.
Go on your own. Have fun. And read this at your own pace. https://www.amazon.com/Mastering-Mountain-Bike-Skills-3rd/dp/1492544493 Great book for all skill levels.
I'm gonna take some flak for this but I bought three of these guys ($20x3=$60) 1200 lumen is probably overrated a bit but not by too much. Maybe ~900:
http://www.amazon.com/RioRand-Bicycle-HeadLight-Flashlight-Headlamp/dp/B006QQX3C4
And then I bought one wide angle lens.
http://www.amazon.com/MagicShine-Gemini-Lights-Headlight-Includes/dp/B004WLCLQY
I am into my lights for $70ish bucks and have one unfocused beam, one trail sized focused beam and a spare light & battery. Nothing worse than getting stuck in the middle nowhere - in the dark.
So yeah, I took the cheap route. The bike specific brands do offer a stronger light but my light output matches or beats all of my riding buddies with brand name lights.
Worst thing I can say about the setup is that they are bound to the bars with a rubber strap. You have to tighten it down pretty well or it can slip on the bar. I didn't like helmet mounted because I blind my friends by looking at them when talking. So yeah probably not the most popular post but they work and they work well. They've lasted about 3 years already and no issues. One word of advice, some of the newer LEDs use a different battery connector so order yours at the same time so all of your lights & batteries are interchangeable.
Been rocking mine for a year now, you'll love yours!
Do yourself a favor and grab a pair of Wellgo MG-1 Pedals, they're infinitely more durable and grippy than the plastic ones the bike comes with.
My setup.
Light, get 2: http://www.amazon.com/gp/product/B00GJZ015Y
Kit for helmet: http://www.amazon.com/gp/product/B004QOVA00
Wide angle lens: http://www.amazon.com/gp/product/B004WLCLQY
Put one on your helmet. Put the wide angle lens one on your bars, means when you turn it has less effect on what you can see.
I've had no problem with battery life, but my night rides do tend to be a bit shorter, in the 90 minute range. Use half strength during the climb, full strength on the down.
That bike looks like it was barely ridden! Great catch. Now just get out there and ride.
The only thing that I can't quite tell re: the bike is what kinda pedals it has. If those are the plastic pedals that came with it then I'd consider changing them out to something with more grip or you'll soon be slapping your in-between-naughty place with metal tubing. I've used these which aren't too expensive...
http://www.amazon.com/Diamondback-Bigfoot-Pedals-16Inch-Axle/dp/B002BVUGA0/ref=sr_1_10?ie=UTF8&qid=1404235658&sr=8-10&keywords=bike+pedal
http://www.amazon.com/Wellgo-Magnesium-Sealed-Platform-Pedal/dp/B00GDF87GU/ref=pd_sim_sg_12?ie=UTF8&refRID=0VH4A4CHB2K4V82PCXBN
This is basically a knock off of the magicshine. Works just as well for a lot cheaper. I have a magicshine mj-808 and my friend has one of these. It is almost identical. This particular one claims 1200 lumens too. So it might be even brighter than the mj-808.
http://www.amazon.com/Lumen-Bicycle-HeadLight-Flashlight-Headlamp/dp/B006QQX3C4/ref=sr_1_1?ie=UTF8&qid=1367445162&sr=8-1&keywords=magicshine
If you want platform pedals welgo mg-1's are fantastic and affordable.
https://www.amazon.com/gp/aw/d/B00E7UZ5OK/ref=mp_s_a_1_1?ie=UTF8&qid=1483136257&sr=8-1&pi=AC_SX236_SY340_QL65&keywords=wellgo+mg+1&dpPl=1&dpID=41MHClFiruL&ref=plSrch
If you want clipless you'll need pedals and special shoes
I bought a Swagman XC last season to use a bike rack and I haven't had any issues so far. All of the weight of the bike is still on the wheels. I just make sure the frame is nice and clean where the frame holder comes into contact with it.
Topeak Alien II - Just got it a few weeks ago and it feels pretty sturdy and well made plus I like the fact that it breaks jn two plus comes with a carrying pouch. http://www.amazon.com/gp/aw/d/B000FIE4AE/
I bought this one from Amazon.
Venzo Pro Mechanic Bicycle/Bike Repair Rack Stand
Wanted something with a small footprint when setup. So far it has been working great for me but most of the time I've been clamping it on the top tube of my hard tail which is also the balance point. So haven't tested it out clamping other things, like the the seat post.
We used to recommend Wellgo MG1s around here. I have a set and I love them. Fairly cheap too.
Attack Position
When I first started riding, my friends kept giving that same tidbit about get your weight back as far as possible. No matter what. Drop? Weight back. Steep descent? Weight back. Rock garden? Weight back. I think it's one of those good intention mantras for mountain biking. But I prefer showing someone the proper attack position along with "heavy feet, light hands."
I picked up this book and quickly became one of the better riders in my group. A couple of them might climb faster than me, but they all let me go first on the descents. Highly recommend it.
I have two of these:
http://www.amazon.com/gp/product/B006QQX3C4/ref=oh_details_o05_s00_i00?ie=UTF8&psc=1
One on the handlebars and one on my head. The batteries need a little modification to be waterproof, but besides that, they work great.
I just got a Cree bike light to mount to my handlebar. I already have a Magicshine mounted on my helmet.
I'm surprised that the Cree is much brighter than my Magicshine which cost double the price, which still isn't much for good lights. I just ran the Cree at the lowest light setting so it blended better with my other light.
I just doubt that flashlights like the one shown in the picture here are bright compared to a real bike light. Plus, the battery lasts 3 hours which is more than enough time to cover 20mi on most trails.
I have these shoes with these pedals.
Excellent traction while walking and the pedals are great for the price. I also ride a fair amount of road and have no complaints so far.
Buy this. Get an older/used copy to save money if needed because this really does have a lot of useful info: Mastering Mountain Bike Skills 3rd Edition https://www.amazon.com/dp/1492544493/ref=cm_sw_r_cp_apa_cnyKzb0K9MYZ1
Someone else suggested these MG-1 pedals to me when I was looking, they are pretty darn good for the price.
https://www.amazon.com/gp/aw/d/B00E7UZ5OK/ref=mp_s_a_1_1?ie=UTF8&qid=1503847005&sr=8-1&pi=AC_SX236_SY340_FMwebp_QL65&keywords=mg-1+pedals&dpPl=1&dpID=41MHClFiruL&ref=plSrch
My two favorite resources to learn better technique and habits that you can study while off the bike:
There is a really good skills video by Fabien Barel that is geared towards all mountain riding but really applies to any and all riding. Not sure the best place to download a new copy, I believe it was originally on a DVD that came with a magazine
The book "Mastering Mountain Biking Skills" by Brians Lopes and Lee McCormack.
A skills clinic can be expensive esp if you don't leave too close to a good one, but that is a quick way to learn a lot and get personalized coaching. It's probably on every mountain biker's wishlist
My current favorite:
https://www.amazon.com/TEKTON-24320-4-Inch-Torque-2-26-22-6/dp/B00C5ZL2EG
For higher torque values, you'll need to go up to the 3/8" drive version.
Here are a few good tutorial vids to shape up your technique:
How to climb
Techniques for drops
A lesson on riding downhill
And the always popular book, Mastering Mountain Bike Skills. I don't have this book personally, but I really want to get it. I can attest to its greatness because there was a sample on google book previews recently that featured 15 pages or so. Great stuff.
I submit Mastering Mountain Bike Skills as a complimentary book.
One book to keep your bike in shape and another to help you get the most out of it.
Interesting, I'll try it. This 1200 lumen looks good for a main, would just have to come up with mounting hardware.
I have the Bikehand stand as well and overall I'm very happy with it and it's surprising high quality, except for the clamp itself. Mine has not broken yet but if you look on both the Bikehand and the RAD Cycle bike stands you'll see that both of them have plastic (sawtooth) teeth which allow the clamp to rotate when loosened. The clamp itself has no issues but when you're working on the bike and have to put even a slight amount of force on something - even just turning the cranks to get the rear wheel to spin - those teeth will make stress noises. Sooner or later those teeth are going to break. It's a pretty bad design, honestly. Bikehand makes a "pro" version of the stand that has metal teeth instead of plastic teeth but unless the entire clamp area was made of metal instead of plastic I feel that sooner or later something will give. I'm just really careful with my stand. The Park Tool stand must not have that same issue as I've seen videos of people working on their bike in a Park Tool stand and putting all kinds of force on it and the stand seems to take it without any issues.
I use shimano saints which are not as big as I'd like them to be, but they are fantastically grippy with these shoes. The impacts are definitely a little bit heavier than the maltese falcons but they're also built to be more durable and they're quite a bit larger. I don't really feel their weight is an issue. It's something I don't even think about while I'm riding. If you're not worried too much about hitting your ankles you can't go wrong with the lows.
This is an excellent book-lots of folks here recommended it. I'm reading it now and it's helped me a lot.
https://www.amazon.com/Mastering-Mountain-Bike-Skills-3rd/dp/1492544493
If your wheels do not require an expensive tool, and just use the regular wrench, the procedure is very easy. Turn your bike upside down and use your brakes to determine straightness, if you have rim brakes. Then use the wrench to tension the side its out and un-tension the side its in.
this video is helpful
http://www.youtube.com/watch?v=svMMaGMsIMw
The tool I use is really cheap and works fine:
http://www.amazon.com/Topeak-Alien-26-Function-Bicycle-Tool/dp/B000FIE4AE
Mountain Bikers Training Bible by Joe Friel.
I had my best racing season ever following this book.
I bought these and love them:
Wellgo MG-1 Magnesium Pedal
Buy Lee McCormack/Brian Lopes' "Mastering Mountain Bike Skills". http://www.amazon.com/Mastering-Mountain-Bike-Skills-2nd/dp/0736083715
Seriously. It's a GREAT book. Get it. Read it. Ride it.
1200 lumens, $23: http://www.amazon.com/gp/product/B006QQX3C4/ref=oh_details_o00_s00_i01?ie=UTF8&psc=1
You can buy a mount for your helmet for an additional $12.
I'd also recommend going with 2 lights, one for the bars, one for the helmet -- they're not always pointed in the same directions.
Have fun! Darkness makes old trails new again.
Oh ok, what about something like this?
I've loved this resource for many of those questions
https://www.amazon.com/Zinn-Art-Mountain-Bike-Maintenance/dp/1934030597/ref=sr_1_sc_1?ie=UTF8&qid=1524678006&sr=8-1-spell&keywords=zin+and+the+art+of+bike
I bought the same bike a few months ago - I love it! I'm also pretty new and after a few months went clipless. I went with these pedals and these cleats. The nice thing about this combo is that whenever I have an "oh shit" moment I'm able to unclip without thinking about it. I haven't been outside of my state (MN) for MTB but we have an IMBA model trail and quite a few trails in the twin city area.
With snow coming to your state maybe eye up a Pugsley or Mukluk - I'm going to head out for my first snow ride today!
I got one of these recently. So far so good. I use it with two 29" full sus bikes.
You can add a small padlock through each arm, but you'd probably be better off with a thick cable around the bikes and hitch.
https://www.amazon.com/Swagman-Cross-Country-2-Bike-2-Inch-Receiver/dp/B0001VO1YY/ref=sr_1_1?ie=UTF8&qid=1503450943&sr=8-1&keywords=swagman+xc2
Hi there!
My friend is going abroad and i want him to pick up a few things for my bike.
I wanna go 1x10 but i´m having trouble knowing what i need, i was told
http://www.amazon.com/104mm-Single-Chain-Black-Speed/dp/B00D3FG5EY/ref=sr_1_1?ie=UTF8&qid=1416311677&sr=8-1&keywords=raceface+narrow+wide&pebp=1416311548585
is going to work for me but i just want to make 100% sure
this is my bike
http://www.vitalmtb.com/product/guide/Bikes,3/Mongoose/Teocali-Expert,6360#product-specs
I also wanted to pick up rockshox reverb stealth, but my bike does not have those holes for it, but the space under my seatpost is open so i´m thinking it can come out there... thoughts? my seatpost is 31.6 x 350 but the smallest reverb i found is 31,6x380 so it´s longer, i´m a pretty short guy but from what i read the reverb can stop at any position, it does not have drop/middle/top
surprised no one has posted this yet.
http://www.amazon.com/Mastering-Mountain-Bike-Skills-Edition/dp/0736083715/ref=sr_1_1?ie=UTF8&qid=1395719768&sr=8-1&keywords=mastering+mtb
Great book, has helped me lot.
I don't ride mountain a ton, but this combo works well for me. Could go cheaper I'm sure, but at a certain point you will need to upgrade quickly and you're wasting money.
https://www.amazon.com/Pearl-Izumi-All-Road-Cycling-Shadow/dp/B01GH93266/
https://www.amazon.com/SHIMANO-149319-PD-M530-Mountain-Pedals/dp/B0052XXW32
> 15 nm
ah, bummer, that's right in the range where small cheap ones are too small and the large ones are too large.
the only decent, but relatively cheap one i could find was a tekton one, which i use now
https://www.amazon.com/TEKTON-24320-4-Inch-Torque-20-200-Inch/dp/B00C5ZL2EG
that said, if you know what 15nm feels like, you could probably get close enough and be fine- seat bolt specs are a lot tigher than most other bolts on a bike
Like everyone said, you'll fall over a bit, but stick with it. A few things to keep in mind...
Buy this book:
http://www.amazon.com/Zinn-Art-Mountain-Bike-Maintenance/dp/1934030597/ref=sr_1_2?ie=UTF8&qid=1310172528&sr=8-2
Read it and you'll never pay a bike mechanic again. I podiumed XC races back in the day on a wheelset I built by hand using what I learned from this book.
I have this $100 hitch-mount two bike carrier and I like it, especially for the price. I use a short piece of accessory cord (i.e. rope) to tie down the back tire to the tray because of the steep top tube angle on my FS bike, but if you have a flat top tube that probably isn't necessary. Only complaint is that the ball bearing in the detent pins rusts a bit if you leave it on the car long term. Now that I'm not taking my bike to work due to the time change I just leave the whole assembly in my trunk because it folds up.
https://www.amazon.com/Swagman-Cross-Country-2-Bike-2-Inch-Receiver/dp/B0001VO1YY/
Here are some links for the product in the above comment for different countries:
Amazon Smile Link: http://smile.amazon.com/Mastering-Mountain-Bike-Skills-Edition/dp/0736083715/ref=sr_1_1
|Country|Link|
|:-----------|:------------|
|UK|amazon.co.uk|
|Spain|amazon.es|
|France|amazon.fr|
|Germany|amazon.de|
|Japan|amazon.co.jp|
|Canada|amazon.ca|
|Italy|amazon.it|
|China|amazon.cn|
This bot is currently in testing so let me know what you think by voting (or commenting). The thread for feature requests can be found here.
Also, since you are new to dirt - I recommend reading this.
http://www.amazon.com/Mastering-Mountain-Bike-Skills-2nd/dp/0736083715
Hopefully it will keep you from all the stupid mistakes I made. I am still not a very good rider, but I am better than where I started at due to that book.
I am incredibly jealous that you live so close to work. I live 35 miles away from my office and I would love to ride to work every day.
Looking at Flat pedals considering a few different models and need advice on which one is the best.
SHIMANO SAINT
CRANK BROTHERS 50/50
CHESTER PLATFORM
XPEDO SPRY
Bonmixc Mountain Bike Pedals
Origin8 Ultim8 Slimline Platform Pedals
The last two are a bit less expensive but they look decent. I am aware that typically you get what you pay for. I've seen the Shimano Saint in store and the CrankBro in store. Xpedo SPRY seems to have reviews too
Here's my list:
First Aid Kit - just handy: http://www.amazon.co.uk/gp/product/B001MEY964?psc=1&redirect=true&ref_=oh_aui_detailpage_o02_s00
Some sort of sunglasses / windglasses: http://www.amazon.co.uk/gp/product/B000W4CSU4?psc=1&redirect=true&ref_=oh_aui_detailpage_o02_s00
Bike maintenance book: http://www.amazon.co.uk/gp/product/097655304X?psc=1&redirect=true&ref_=oh_aui_detailpage_o04_s00
Mastering mountain bike skills book: http://www.amazon.co.uk/gp/product/0736083715?psc=1&redirect=true&ref_=oh_aui_detailpage_o05_s00
Arse saver pants: http://www.amazon.co.uk/gp/product/B00CWVP9YC?psc=1&redirect=true&ref_=oh_aui_detailpage_o06_s00
Cheap lights: http://www.amazon.co.uk/gp/product/B00B77SGEC?psc=1&redirect=true&ref_=oh_aui_detailpage_o02_s00
Tool kit: http://www.amazon.co.uk/gp/product/B009VYB87A?psc=1&redirect=true&ref_=oh_aui_detailpage_o00_s00
Shorts: http://www.tenn-outdoors.co.uk/protean-waterproof-mtb-shorts-blackcyan-medium
Also:
Inner tubes,
Spare chain,
Chain tool,
Gloves,
Helmet,
Water bottle and cage,
Decent pedals (AND shoes)(http://www.reddit.com/r/MTB/comments/10hc9h/clipless_vs_platforms/c6dugvi),
Strava App,
Decent bag, maybe a camelback one or one with spine protection?
And lastly: A willingness to get muddy regularly. With that in mind, keep your bike clean! No pressure washing, just a hose and a brush, and some stuff. I got this kit free with my LBS membership: http://www.leisurelakesbikes.com/p/8332/vip-membership-with-free-kit
That's it. All you really need is your bike!
To make things easy here it is.
Just picked up this book: http://www.amazon.com/Zinn-Art-Mountain-Bike-Maintenance/dp/1934030597/ref=sr_1_1?ie=UTF8&qid=1419283042&sr=8-1&keywords=zinn+and+the+art+of+mountain+bike+maintenance
I don't think there's a thing on my bike I can't fix now. You really need a bike stand and a decent set of tools and you're good to go.
I heard these are good http://www.amazon.com/Wellgo-Magnesium-Sealed-Platform-Pedal/dp/B00GDF87GU
Awesome! Never would have found this gem without Reddit :).
Link for the lazy: http://www.amazon.com/Zinn-Art-Mountain-Bike-Maintenance/dp/1934030597.
So you took the existing rings off the stock crank, and just bolted a single, something like this (http://www.amazon.com/104mm-Single-Chain-Black-Speed/dp/B00D3FG5EY/ref=sr_1_1?s=sporting-goods&ie=UTF8&qid=1463960659&sr=1-1&keywords=race+face+narrow+wide) in place? Still seems like I'm close to $200 going with those parts, but I haven't tried hunting for the cheapest prices on different sites yet.
I have this bike stand,
Venzo Bikehand Pro Mechanic Bicycle/Bike Repair Rack Stand https://www.amazon.com/dp/B00D9B7OKQ/ref=cm_sw_r_cp_apa_LMfKBb6584VV5
I dig it.
I don't use a torque wrench. I know I should but everything on the bike is such low torques (speaking from the perspective of someone who works on cars and industrial equipment) that I just make sure everything feels "right" to me... Haven't broken anything or had anything fail on me out on a ride yet... But that doesn't mean you shouldn't get a torque wrench if you want to do it right. As far as torque wrench set go even the expensive ones are cheap compared to the torque wrenches I'm used to using... So cheap/expensive are relative terms. I'd probably buy something mid range with good reviews on Amazon, personally.
I highly recommend getting Mastering Mountain Bike Skills.
I highly recommend Zinn and the Art of Mountain Bike Maintenance
Another option going the same route is something like this
It's the little brother of the light KMart posted.
Get one for your head and one for your bars, that way you can turn your head to illuminate things that are not directly in front of you and level.
Also get a $5 wide angle lens for the light on your bars.
Think I'll just get something like this then since it's much cheaper than m7000 cranks. https://www.amazon.com/gp/aw/d/B00D3FG5EY/ref=ox_sc_act_image_3?smid=A2RNBXAVQ4OOHG&psc=1
https://www.etrailer.com/hitch-2016_Honda_CR-Z.htm
100 for a hitch, says it fits on the car.
https://www.amazon.com/Swagman-Cross-Country-2-Bike-2-Inch-Receiver/dp/B0001VO1YY/ref=sr_1_3?s=sporting-goods&ie=UTF8&qid=1517795853&sr=1-3&keywords=1-1%2F4+Inch+Hitch+bike+rack
132 for a bike rack. easily found used for under 100 into the 50 range.
cost a lot more to repaint the rear end when its scratched up then to do it right the first time.
I got this one and its worked well for general maintenance, repair, and bike building.
I generally use a really expensive digital one I bought for engine builds but I also use this guy for stuff I'm not super worried about tolerance on. I use it mostly to torque the bolts on my hunting rifles
TEKTON 24320 1/4-Inch Drive Click Torque Wrench (20-200 in.-lb./2.26-22.6 Nm) https://www.amazon.com/dp/B00C5ZL2EG/ref=cm_sw_r_cp_api_4YHIyb8JJV191
Had the same issue with a DB Hook. If it’s that cheap plastic piece above and below your chain ring, don’t bother with their chain guides, get a proper narrow wide chain ring and if you really want to, there’s this guide on amazon.
Origin8 Torqlite UL Chain Guide, Mini Clamp On (31.8 - 34.9mm) https://www.amazon.com/dp/B008ZTLV9W/ref=cm_sw_r_cp_api_i_U.CdBbYGY2MRT
Raceface makes a relatively cheap, well made narrow-wide chain ring.
RaceFace 104mm Single Chain Ring, Black, 32T 9/10/11 Speed https://www.amazon.com/dp/B00D3FG5EY/ref=cm_sw_r_cp_api_i_waDdBbE7C18PJ
This one: Meiser Presta-Valve Dial Gauge with Pressure Relief: 30psi https://www.amazon.com/dp/B004XISIK4/ref=cm_sw_r_cp_api_i_3H20DbVCBF11P
Got the Hellcats for $65 shipped on the Clearance/closeout section of the 5.10 website. $35 shipped for the pedals off of Amazon.
Pedals
Shimano PD-M530 Mountain Pedals https://www.amazon.com/dp/B0052XXW32/ref=cm_sw_r_cp_apa_OR-xzb0CYX0M6
Shoes (Hellcats)
http://www.fiveten.com/us/closeouts/bike
https://www.amazon.com/Wellgo-MG-1-Magnesium-Platform-16-Inch/dp/B00E7UZ5OK/ref=sr_1_1?s=outdoor-recreation&ie=UTF8&qid=1500155779&sr=1-1&keywords=wellgo%2Bpedals&th=1&psc=1
these are actually solid and because of magnesium they are the lightest cheap metal pedal you will find (aside from the nylon/plastic crap)
I would take it back and have them do some more work on it. I'd avoid using soap/water on the chain unless you plan on putting more lube on it. Also use a soft rag or towel rather than toilet paper. Look into this book, it will help you out a lot.
http://www.amazon.com/Zinn-Art-Mountain-Bike-Maintenance/dp/1934030597
I have one of these and I was able to store two bikes in my room without problems.
Having never ridden clipless I'd recommend to do yourself a favor and buy a set of the SH-56 multi-release cleats.
The normal cleats require you to twist your foot outwards. The multi-release will pop out if you twist slightly and roll the ankle over a little, but you can still pull up just fine so you get the power benefits of clipless.
With the right clip tension, they're almost exactly like riding flats in that they'll pop right out in any crash, or you can unstick your foot really quick to dab it down on a sharp turn.
After you get proficient on the pedals you can go to the regular cleats, although personally I don't have any issues popping out accidentally.
I got one off Amazon it really surpassed my expectations. Ive had two different bikes on it and it did not fall over. Works for me. It appears youre not in US but nobody replied so figured i would.
https://www.amazon.com/Bikehand-Mechanic-Bicycle-Repair-Stand/dp/B00D9B7OKQ/ref=sr_1_4?ie=UTF8&qid=1517619329&sr=8-4&keywords=bike+stand
I've been thinking about getting this one: http://amzn.com/B00D9B7OKQ . The reviews seem good, it is a reputable brand, it folds up, and it looks sturdy enough in the typical problem spots (clamp rotation, etc.)
EDIT: Also, this is /r/mtb, not /r/bicycling.
this book from the sidebar is highly recommended.
https://www.amazon.com/Mastering-Mountain-Bike-Skills-3rd/dp/1492544493
there's a lot to it, but you can read further and further as you get more advanced, there's no need to read more than the first couple of chapters right away
It's just a moto-turn. Kinda like this: https://dirtbikeplanet.com/wp-content/uploads/2017/07/how-to-corner.jpg
Basically shifting your weight forward and low, keeping weight on your front wheel so it tracks while the back does what it wants. They talk about it in Mastering Mountain Bike Skills: https://www.amazon.com/Mastering-Mountain-Bike-Skills-2nd/dp/0736083715/ref=sr_1_2?s=books&ie=UTF8&qid=1504874397&sr=1-2&keywords=mastering+mountain+bike+skills
Light hands, heavy feet. Mastering Mountain Bike Skills - 2nd Edition (not sure why the sidebar has the original 2005 edition linked..) has a great section on this.
Otherwise google attack position.
http://www.mtbtechniques.co.uk/FundamentalsAttack.html
As for the back pain, I get lower back issues a bit when i'm doing a big ride. I find focusing on my posture when I'm not riding can make a big difference. Maybe see a physio?
Anyone looking to start - imports from China have way lowered the barrier for entry. If you can find a group online that goes, do that or bring a friend, you don't want to get stuck out there without a buddy.
There's a lot of garbage out there too, I've tried several of the imports and found the batteries sorely lacking or the connectors shitty. I can vouch for this one. For bonus points, get this wide angle lens and put it on your bars, plus a normal one on your helmet so you can see where you're looking. If you can only have one, try to find a way to mount it to your helmet.
Bite the bullet and get mastering mtb skills
Start off by reading this book:
http://amzn.com/0736083715
If you think so highly about this book, you really need to link to where the authors can get paid for their work. Amazon
Is this the one?
this helps me a lot
http://www.amazon.com/Zinn-Art-Mountain-Bike-Maintenance/dp/1934030597
Oil the chain, go through all the gears, buy this book.
http://www.amazon.com/dp/B0001VO1YY
I used this one for similar purpose in a small apartment. Leans against the wall, but has rubber on the contact point to keep it from making marks.
https://www.amazon.com/dp/B000ACAM38/ref=asc_df_B000ACAM385111325/
I haven't personally used any of these products but maybe this Top Vertical Stand, Bike Nook Stand, Double Vertical, or Gravity Stand would work?
If you go with Shimano’s SPD I suggest getting the multi-release cleats. SPD pedals come with side-release cleats which I found much less intuitive and harder to get out of in clutch situations. I can get my foot down on the multis nearly as fast as flats.
I use this - https://www.amazon.com/Meiser-Presta-Valve-Gauge-Pressure-Relief/dp/B004XISIK4
Similar for me, but I went with the 30 psi range.
Here