(Part 2) Top products from r/Ring
We found 23 product mentions on r/Ring. We ranked the 126 resulting products by number of redditors who mentioned them. Here are the products ranked 21-40. You can also go back to the previous section.
21. Command Clear Replacement Strips, Small, Re-Hang Indoor Clear Hooks (17022CLR-16ES)
Sentiment score: 1
Number of reviews: 1
INCLUDES - 16 Clear Small Indoor Replacement StripsRE-HANG HOOKS: Redecorate when inspiration strikes! Command Clear Small Refill Strips make it easy to hang and rehang your Command Clear Small Indoor Hooks, damage-free!STRONG AND VERSATILE: Command Clear Adhesive holds strongly on a variety of smoo...
 Show Reddit reviews
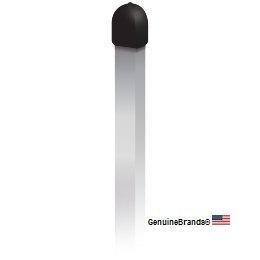
22. (1) STAKE POST 36" 100% Aluminum
Sentiment score: 1
Number of reviews: 1
Fits AlarmPolice, First Alert, SimpliSafe ADT Brinks & Most Other Yard SignsNo holes "USE ANY OUTDOOR MOUNTING TAPE"Long lasting aluminum metal material & adt'l rubber capSecurity yard sign stake / Indoor / Outdoor use for any security system alarm systemsecurity window / wall decals stickers not in...
 Show Reddit reviews
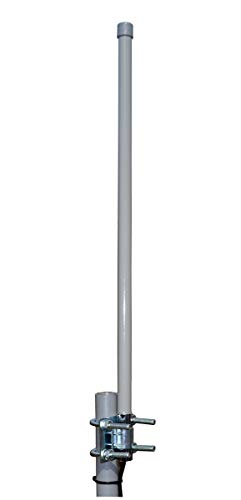
23. Proxicast 3G / 4G LTE 9 dBi Omni-Directional Permanent Mount Outdoor Fiberglass Antenna for Verizon, AT&T, Sprint, T-Mobile, USCellular and WiFi / 900 MHz
Sentiment score: 1
Number of reviews: 1
Works with 2G, 3G, 4G, LTE, xLTE, AWS, GSM & CDMA cell carriers such as Verizon, AT&T, Sprint, T-Mobile, Telus, Bell Canada, Rogers, DigiCel, TelCel and moreImproves poor signal via high 9 dBi gain for cellular (700, 850, 900, 1700, 1800, 1900 and 2100 MHz), 2.4 GHz WiFi and 900 MHz ISM wireless ban...
 Show Reddit reviews
24. TP-Link AC750 Wifi Range Extender | Up to 750Mbps | Dual Band WiFi Extender, Repeater, Wifi Signal Booster, Access Point| Easy Set-Up | Extends Wifi to Smart Home & Alexa Devices (RE200)
Sentiment score: 0
Number of reviews: 1
Ideal for extending Wi-Fi to Echo/Alexa devices, WeMo & TP-Link smart plugs, TP-Link smart bulbs, The iPhone 7, Samsung Galaxy S7, iPad 4, PlayStation 4 and moreWorks with any standard router or gateway, High speed mode allows for the most ideal HD streaming & gaming experience. Dual band speeds up ...
 Show Reddit reviews
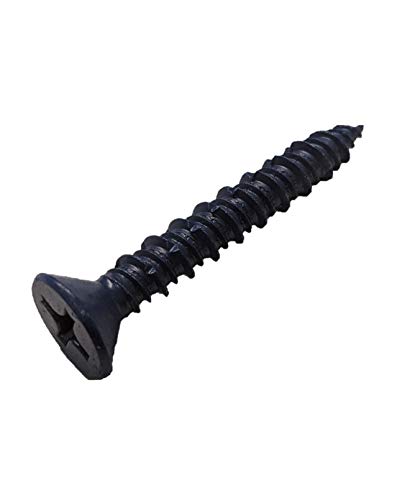
25. Hard-to-Find Fastener 014973211714 Phillips Flat Tapcon Screws, 1/4 x 1-3/4-Inch, 25-Piece
Sentiment score: 1
Number of reviews: 1
Diameter: 1/4 inchLength: 1-3/4 inchMaterial: SteelFinish: Blue ruspertHead Style: flat (Phillips)Diameter: 1/4"Length: 1-3/4 inchMaterial: SteelFinish: Blue RuspertHead Style: Flat (Phillips)
 Show Reddit reviews
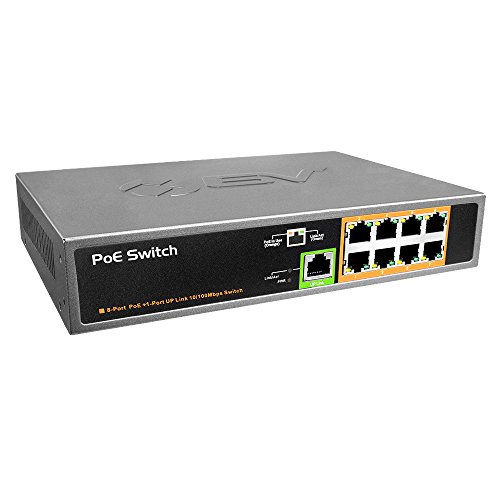
26. BV-Tech 9 Port PoE+ Switch (8 PoE+ Ports | 1 Uplink Port) – 120W – 802.3af/at
Sentiment score: 1
Number of reviews: 1
8 PoE+ Ports at 10/100Mbps1 Ethernet Uplink Port at 10/100Mbps120W Max Power - up to 30W per portAuto-MDI/MDI-X | IEEE 802.3af/atCompact Design with Internal Power Supply
 Show Reddit reviews
27. Stanley 33257 Grounded Outdoor Extension Power Cord, 25-Feet, Yellow
Sentiment score: 1
Number of reviews: 1
1 grounded outletStrain relief for a longer life16 gauge/3 wire SJTW vinyl cordRated: 125-volt AC/60 Hz/15 amps/1, 875 wattscUL listed
 Show Reddit reviews
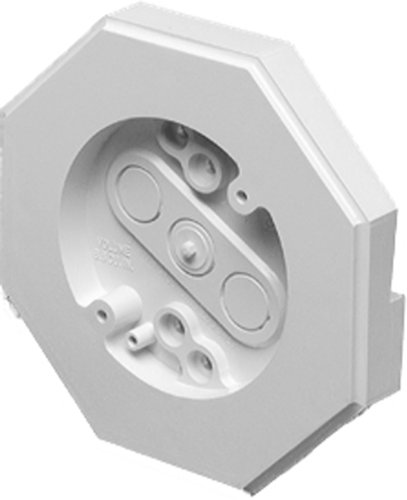
28. Leviton 1221-2IL 20-Amp, 120/277-Volt, Toggle Locking Single-Pole AC Quiet Switch, Extra Heavy Duty Spec Grade, Ivory
Sentiment score: 0
Number of reviews: 1
Top-of-the-Line Industrial QualityHeavy Gauge Copper Alloy One-Piece Arm for Top PerformanceLarge Silver Cadmium-Oxide Contacts for Long Life, Prevent Sticking, Welding and Excessive PittingFully Enclosed Switch Mechanism in Rugged Housing for Strength, Track and Arc ResistanceBrass Combination-Head...
 Show Reddit reviews
29. Arlington 8141 Vertical Siding Lamp Mounting Kit with Built-in Box for 1/2 Inch Vertical Siding LAP
Sentiment score: 1
Number of reviews: 1
Kit includes mounting block with built-in electrical box, NM cable connector, and 4 screwsFast and easy to install after siding is upTextured, paintable surfaceBuilt-in electrical box design ensures UL listed installation1/2 Inch Lap
 Show Reddit reviews
30. Arlington Industries FBA_8151-1 Arlington 8151-1 Lamp Mounting Kit with Built-in Box for 5/8 Inch Vertical Siding Lap, White
Sentiment score: 1
Number of reviews: 1
Kit includes mounting block with built-in electrical box, NM cable connector, and 4 screwsFast and easy to install after siding is upTextured, paintable surfaceBuilt-in electrical box design ensures UL listed installation5/8 Inch Lap
Show Reddit reviews31. MG ELECTRONICS MGT1640 TRANSFORMER 16V 40AH
Sentiment score: 1
Number of reviews: 1
POWER TRANSFORMERS, VOLTAGE: 16 VOLT, POWER: 40 VA, USED IN: SECURITY APPLICATIONS SUCH ASSEMBLYALARM PANELS, DOOR ACCESS CONTROLS AND S
 Show Reddit reviews
32. Leviton 80608-W 2-Gang 1-Blank 1-Decora/GFCI Device Combination Wallplate, Midway Size, Thermoset, White
Sentiment score: 1
Number of reviews: 1
Midway wallplates can be mounted onto larger volume outlet boxes and/or used to hide wall irregularitiesFull 0.375" taller and wider than standard wallplatesSmooth face and rounded edges resist dust accumulationDesigned for high dielectric strength and arc resistanceResistant to fading, discoloratio...
 Show Reddit reviews
33. Byron 776 Wired Wall Mounted Chime with Transformer
Sentiment score: 0
Number of reviews: 1
 Show Reddit reviews
34. Builders Edge 130110008001 Surface Block, White
Sentiment score: -1
Number of reviews: 1
The Builders Edge Surface Block for Dutch lap for installing fixtures after the siding has been applied to the home; for use on Dutch Lap sidingMounting blocks are durable, maintenance-free, UV stabilized and constructed with color molded-through so they won't scratch, flake, or fadeOur patented Sna...
 Show Reddit reviews
35. Heath Zenith SL-125-02 Wired Door Chime Transformer
Sentiment score: 0
Number of reviews: 1
Low Voltage Hardwired TransformersWired Door Chime TransformerTri-Volt / Clamp-On or panel mount typeInput: 120VAC - Output: 8VAC-10VA, 16VAC-10VA, 24VAC-20VA
 Show Reddit reviews
36. Builders Edge 130110006123 Surface Block, White
Sentiment score: 1
Number of reviews: 1
For installing fixtures after the siding has been applied to the homeProvides level surface for all exterior accessoriesDimensions: 6.75 In. x 6.75 In.For use on 4"-10" sidingMade in the USA
 Show Reddit reviews
37. Raco 8660, 1
Sentiment score: 0
Number of reviews: 1
RACO8660Electrical Enclosures & Boxes
 Show Reddit reviews
38. Power Supply 6/12/24VDC @ 2.5A
Sentiment score: 1
Number of reviews: 1
Green_Compliant - YesGreen_Compliance_Certificate/authority - RoHSHeight - 2"Width - 3"
 Show Reddit reviews
39. Honeywell AT72D1683 Transformer, 4" x 4", Multicolored
Sentiment score: 0
Number of reviews: 1
This is a genuine OEM replacement part.Brand name: HoneywellModel number: AT72D1683Country of Origin: United States
 Show Reddit reviews
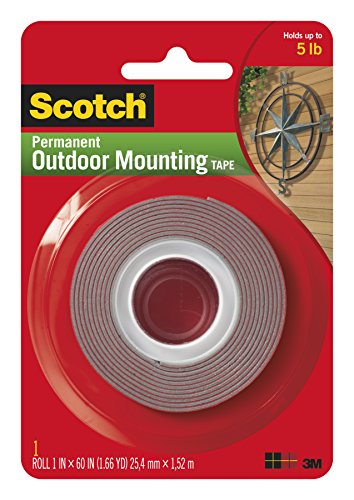
40. Heavy-Duty Exterior Mounting Tape, Holds 5 lb., 1 in x 60 in Roll
Sentiment score: 0
Number of reviews: 1
One roll of double sided tape for mounting items up to 5 poundsIdeal for mounting address plaques, signs, and moreWeather Resistant Tape That Holds Securely to Indoor or Outdoor Surfaces Such As Stucco and BrickRoll is 60 inches long by 1 inch wideMade in the U.S.A
 Show Reddit reviews
First things first, we need to know the actual product you're using. There is no "Ring Pro 2." There is either the Ring Video Doorbell 2 or the Ring Video Doorbell Pro.
They have vastly different power requirements, and one will be doable without much modification and a basic transformer and chime swap (the 2), and the other will be complicated and require modifications, possibly an electrician, and a way to cover them (the Pro).
If it's the 2, you can install a Nutone C915 16VAC@10VA transformer in the box where the AC power comes in (the Nicor box is split into two halves, high and low voltage). Be sure the breaker that powers the doorbell is off first. Then the wires just get swapped like for like to the wires on the back of the new transformer: black to black, white to white, green to green/bare. That would connect to the back of the transformer and it would screw into the high voltage side of the Nicor box.
Then, with the wires leading to the button, you would connect one of them (doesn't matter which) to one of the transformer yellow wires (again it doesn't matter which) with a wire nut and tuck it into the low voltage side of the Nicor box. Then you'll have one button wire and one transformer wire left, and those get connected to a basic mechanical chime. Connect the yellow transformer wire to the trans terminal on the chime, and the other button wire to the front terminal on the chime. Then you mount the chime over the whole Nicor box and new transformer, covering it up, being careful to ensure the yellow wires don't get pinched where they run from the front of the transformer over to the other side of the Nicor box. All the mechanical chimes (per brand) are the same inside, and generally all that's different is the cover. You may need a slightly more expensive chime with a larger cover to completely cover up the transformer and dual box of the Nicor. I recommend going with a Nutone (or Braun, it's the same company) for the chime too. Avoid Hampton Bay and Heath/Zenith, as they're low quality and fail frequently and tend to hum while the battery in the doorbell is charging.
If it's a Doorbell Pro, well, it's not going to be easy. It can't go there and meet code still. The 16VAC@30VA transformer that the Pro requires is way too big for the Nicor box and can't just be mounted in the wall. It would need to be wired somewhere else that meets code and new wires run from it to the existing Nicor location. Not fun or easy or cheap. There are two other options for powering the Pro, though with either you would have no mechanical chime, so you'd have to use a Ring Chime (or Echo devices or the Ring app alerts) to have any sort of notifications at all.
Option 1: Ring sells on their website, not on Amazon, a plug-in transformer for the Pro. It cannot be lengthened or connected to other wiring, you plug it in and run the wire to the Pro, but this will require drilling somewhere to get the wire to the Pro.
Option 2: Replace the Nicor high voltage side with an electrical outlet and buy a cover plate with one blank side (like this) and [one of these plug-in https://smile.amazon.com/MG-ELECTRONICS-MGT1640-TRANSFORMER-40AH/dp/B001DPNQ0M/). You'll also need about 12" of 18ga SOLID NOT STRANDED bell wire. It can be more than 2-stranded if you use thermostat wire, for example, which generally has a sheath on the cable but comes with 2-6 wires depending. Sheathed cable will look better, and if you can find white, even better. Your local home center should have it. You can use just bell wire too, which is generally just two wires twisted together and are different colors, but the sheathed cable will look better. Your local home center will have a variety but make sure it's solid core and 18ga.
You mount the outlet into the high voltage side of the Nicor box. Drill a hole in the blank side of the cover place where it looks nice and is big enough to pass through the wire you're using. Strip both ends of the bell wire to about a half inch. Do the same with the button wires. Attach one of the leads of the wire you're using to one of the button wires with a wire nut. Next take the Pro Power Kit v2 and peel off the tape to expose the bypass mode holes on the long edge opposite the two black wires. (You won't use those black wires. Just leave them there.) Take the other button wire and push it into one of the bypass holes on the power kit and make sure it goes in all the way and tug on it to make sure it's seated and the clamp is biting into the wire. Do the same with the other conductor of the bell wire—insert it into the other bypass hole. Now pass the bell wire through the hole you drilled in the wall plate, and drop the Pro power kit and wiring into the low voltage side of the Nicor box, and affix the cover plate over the outlet and empty space. Connect the bell wire to each of the two outer terminals on the transformer (again doesn't matter which is which, just use the outer terminals if you happen to get a 3-screw model) and tighten the screws. You'll need to remove the screw meant to hold it in place, since your outlet won't have that hole. The orange washer just pulls off and the screw comes right out. Then plug it in, turn on the breaker, wait for the Pro to charge up and indicate it's ready for setup and begin setting it up. Once you know it works, I'd recommend a strip of 3M command adhesive behind the transformer just so it can't fall out since it's heavy and you can't use the mounting screw on that style outlet.
OK, that about covers it, if any of that makes sense to you.
I’m hoping to use a Ring Retrofit Kit with my existing PIR motion sensors. Anyone know a reason why I couldn’t use a power supply like this to power the PIR’s but then run their trigger leads to the Retrofit Kit?
Perhaps a power supply like this?
I am waiting for someone smarter than me to write up a tutorial, so you know... poke poke
I guess I’ll have to abandon my sirens though. I really wish that Ring had made this board USB powered with a siren trigger output. (Even if it couldn’t power a siren.)
I used these:
DIYMAG Strong Neodymium Bar Magnets with Double-Sided Adhesive, Rare Earth Neodymium Magnet - 60 x 10 x 3 mm, Pack of 16 https://www.amazon.com/dp/B07B8PDT2Y/ref=cm_sw_r_cp_api_jX19BbBD3FM5X
And stuck them to the window with these guys:
Command Small Clear Refill Strips, 16 Sets of Strips https://www.amazon.com/dp/B00IGIT09A/ref=cm_sw_r_cp_api_MZ19Bb2QQWGN8
Works great!
https://imgur.com/a/izxye3v/
You have several options.
You can add a second router to the barn and have it join a current WiFi. A lot of routers offer this feature, asus being one of the brands.
Find a router with external antennas and multiple bands. Asus has gaming routers that create up to three wireless networks. You can mount a WiFi antenna outside your barn and outside you home.
So what I would do is purchase two routers example
And a modem example
And two external antennas example
You’ll need to find the right adapter for the antenna and router combination you go with.
And return your rental.
Mount one antenna outside you house, plug it into your new home router. Plug the new modem to this router. During the configuration you’ll be able to create 2 5ghz wireless networks and 1 2ghz. Plug the antenna into the 2ghz. The manual will tell you which antenna is which.
Now mount another outside your barn and plug it into the 2ghz antenna port of the barn router. Then configure this second router to connect to the home WiFi.
You now have a wireless bridge with Ethernet ports in the barn.
If you just want WiFi access in the barn you will probably get away with just having an external antenna mounted on your house but this depends on the materials of the barn. Having the a 2nd router inside the barn creates a stronger connection inside.
Found this one for you : https://www.amazon.com/Arlington-8151-1-Vertical-Siding-Mounting/dp/B001S2N664
see the reviews, someone used it for a ring light already, looks like it'll do the trick replacing the square one pretty easily
Thanks for the ideas. I'll have to measure the box on the house and compare it to the one you linked. Maybe your box is large enough to completely cover it and then the current position wouldn't be as much of an issue.
I think the only issue with the cover you linked is that it is for Dutch lap siding. I have hardiplank, so I'm not sure if it will work, since there are difference in how the siding is cut. I might just buy a few different types and see what works best.
One other option I'd rather not do but could be a possibility is to remove that box and install one of these in its place. I'd really rather come up with a solution that uses the existing box instead, but this is always an option.
never heard of them.
ive got 4 of these scattered around the planet. 2 at customers, and 2 at my places. oldest one is (roughly) 3-4 years old now. never had a single moment of issue. i also use it to power my ring stick up cams... works great.
https://www.amazon.com/gp/product/B005GAATOG/ref=ppx_yo_dt_b_search_asin_title?ie=UTF8&psc=1
As others have said, I tossed mine. Don't want somebody knowing what you have and potentially knowing how to disable it ahead of time. I just went on Amazon and bought some generic yard signs/stickers and some aluminum stake posts for the yard signs. Gets the point across nicely.
I used keyed toggle switches like this one https://amzn.to/2RDBrs2 for my two flood lights
Get the floodlight. Lights are not "to strong" if you worry about and when the lights go on it switches to color mode and is quite good, not like the doorbell mixed one.
Get an external round electrical box, an extension cable and a long drill. Cut the extension cable on the side you need to get through the hole. The hardest part is to drill the hole through wall but is doable.If its brick chose to drill between the brick, but make sure you use some concrete screws and anchor the electrical box with holes in the brick itself not between. Once you install the electrical box, camera attaches easys. I suppose you have some electrical outlet in the garaje just route your cable on the wall to it with some wall hooks and you are done.If you have all set can be done in 1-2 hours.
​
This is what I used (I'm in Canada, search on amazon.com if you are in US), this is just an idea.
​
https://www.amazon.ca/gp/product/B015EEL9QA/ref=oh_aui_detailpage_o07_s01?ie=UTF8&psc=1
​
https://www.amazon.ca/gp/product/B003OQVGSC/ref=oh_aui_detailpage_o07_s00?ie=UTF8&psc=1
​
https://www.amazon.ca/gp/product/B00OHXKIH6/ref=oh_aui_detailpage_o07_s01?ie=UTF8&psc=1
​
My garage wall is brick, if your is wood or plastic you need different screws.
​
One more thing, when you are done as recomended put some transparent silicon around the electrical box wher it touches tha wall,, just make sure no water can get inside. This is something which is common sense. The floodlight has a rubber seal so no silicon needed . Also use an extension cord like in the link so rated for outside and with 3 wires (grounded) not a cheap 2 wire inside one.
​
​
The chime didn’t really do much, and in fact, actually gave me worse performance than my regular network.
Now I use one of these. It’s just a regular WiFi extender, and it’s in my garage near the outside camera. I’ve had great signal this way.
No, that would be the chime. Transformer looks more like this: https://www.amazon.ca/Heath-Zenith-SL-125-02-Wired-Transformer/dp/B000BQY88I/ref=asc_df_B000BQY88I/?tag=googleshopc0c-20&linkCode=df0&hvadid=293000757354&hvpos=1o2&hvnetw=g&hvrand=1265764340987784692&hvpone=&hvptwo=&hvqmt=&hvdev=c&hvdvcmdl=&hvlocint=&hvlocphy=9000752&hvtargid=pla-386434971311&psc=1 and would likely be located either in the wall behind this chime, or somewhere closer to the panel.
Byron 776 wired door chime - White - Inbuilt transformer https://www.amazon.co.uk/dp/B000TAW9ZU/ref=cm_sw_r_cp_api_i_pWXRDbDF11FM3
I just swapped the chime and wired the doorbell.
A furnace also has a transformer see here:
Honeywell AT72D1683 Transformer, 4" x 4", Multicolored https://www.amazon.com/dp/B000692A58/ref=cm_sw_r_cp_apa_i_DOnmDb2C4AT0D
Do wires go back to furnace?
I've always done tape for alarm systems that aren't hardwired. Granted I don't use the included I use this stuff as it's way stronger https://www.amazon.com/dp/B00004Z4BV/
https://www.amazon.com/Builders-Edge-130110008001-Surface-Block/dp/B000H5RY5W/
That's a square version of what you just posted. And I was just typing this out when you replied to the other poster.
And I know the spot it is meant to butt up against the siding and fall into the overlap space probably won't line up exactly, but snipping the protrusion off would allow you to cover the box. You'd need to come up with some gasket material, like thin weatheratrip tape to line the perimeter of the box edge where it meets the back of the cover, but then with it compressed between the light and the box, it won't move. The gasket is since you won't be touching the siding, so you need your own gasket.
And I didn't suggest the square cover above but was about to post this same one you were on but square when I saw your reply. And that's the weirdest light box I've ever seen, making finding an exact cover for it difficult due to the odd screw layout (since it's basically an octagon box turned into a square, putting the screw holes in an odd place for a traditional cover).