(Part 3) Top products from r/ender3
We found 76 product mentions on r/ender3. We ranked the 702 resulting products by number of redditors who mentioned them. Here are the products ranked 41-60. You can also go back to the previous section.
41. Creality Heat Bed Platform Sticker Sheet,3D Printer Build Surface Plate for Ender-3 Ender 3X 3D Printer 235X235MM (Pack of 2)
Sentiment score: 2
Number of reviews: 3
Size:235mm x 235mm,Build sheet adheres to a print bed to help the filament stick during printing, while also enabling clean removal of the printed part afterwardCompatible with ABS, PLA, HIPS and other filamentSingle sheet design installs more quickly and with fewer bubbles than tape or filmsDurable...
 Show Reddit reviews
42. Gwisdom ENDER3 Extruder Upgraded Replacement, Aluminum MK8 Drive Feed 3D Printer Extruders for Creality Ender 3, CR-10, CR-10S, CR-10 S4, CR-10 S5
Sentiment score: 2
Number of reviews: 3
💋 STABLE and DURABLE: Full metal aluminum alloy, DIY kit and you need to assemble by yourself. Our MK8 extruder hotend include all the necessary screws & parts needed to directly replace your old original weak Creality plastic extruder.💋 UPGRADE: Original cr 10 extruder aluminum for Creality 3...
 Show Reddit reviews
43. M3 Stainless Steel Hex Socket Head Cap Screws Nuts Assortment Kit, Allen Wrench Drive, Precise Metric Bolts and Nuts Set with Beautiful Assortment Tool Box for 3D Printed Project, 310 Pcs (Silver)
Sentiment score: 3
Number of reviews: 3
🔩【Wide Application】 XOOL M3 Hex Socket Head Cap Screws Nuts are great for professionals, amateurs, landlords, handymen, repair men, women, woodworking, construction, plumbing, HVAC and so on. They also worked well for 3D printed projects. The kit is perfect to replace broken lost. Use on shee...
 Show Reddit reviews
44. Creality 3D Printer Part Limit Switch with Separate Package CNC for RAMPS 1.4 RepRap 3D Printer CR-10 10S,S4,S5,Ender 3/Ender 3 Pro (Pack of 3)
Sentiment score: 0
Number of reviews: 3
Compatible with all Creality 3D PrinterNumber of Pins: 33D Printer Accessories Limit Switch 3Pin N/O N/C control easy to use Micro Switch100% Creality OriginalPackage Included: 3 PCS * Limit Switch
 Show Reddit reviews
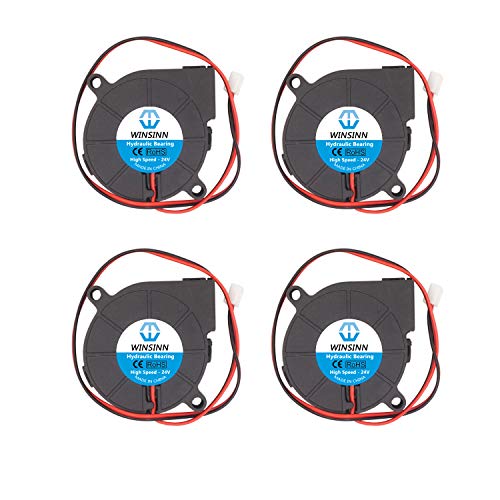
45. WINSINN 50mm Blower Fan 24V 5015 Hydraulic Bearing 50x15mm Turbine Turbo - High Speed (Pack of 4Pcs)
Sentiment score: 4
Number of reviews: 3
✔️Hydraulic Bearings 5015 Blower Fan - High Speed version✔️High quality Hydraulic bearings, Better than Oil bearings, More stable and Long life, suitable for continuous work. The life expectancy is about 45,000 hours.✔️️Rated voltage: DC 24V✔️️Size: 50x50x15mm✔️️Made by WIN...
 Show Reddit reviews
46. [Gulfcoast Robotics] M3 Stud Screw-in thermistor 100K NTC 3950 - Drop in Replacement, Works for Any China 3D Printer extruders - Anet, Wanhao, Maker Select etc.
Sentiment score: -1
Number of reviews: 3
Drop-in replacement for Wanhao Duplicator i3, Maker Select V1, V2, V2.1 3D printersDrop-in replacement thermistor for almost any China made 3D printerWorks with Anet, HIctop, Tronxy, Creality, V6 hotend and many others
![[Gulfcoast Robotics] M3 Stud Screw-in thermistor 100K NTC 3950 - Drop in Replacement, Works for Any China 3D Printer extruders - Anet, Wanhao, Maker Select etc.](https://m.media-amazon.com/images/I/41Q2Tq1vh2L.jpg) Show Reddit reviews
Show Reddit reviews47. SIQUK 16 Pieces Heated Bed Springs OD 0.31 Length 0.78 Die Springs Light Load Compression Spring for 3D Printer Creality CR-10 10S S4 Ender 3 Heatbed Springs Bottom Connect Leveling
Sentiment score: 2
Number of reviews: 3
Compatibility: compatible with most 3D Printer Bed, great for Creality CR-10 10S S4 Ender 3 Heatbed Springs Bottom Connect LevelingAdvantage: the die springs are stiffer than ordinary spring, which help your 3D printer much more stable while printingSize: hole diameter (OD): 0.31"/ 8mm; rod diameter...
 Show Reddit reviews
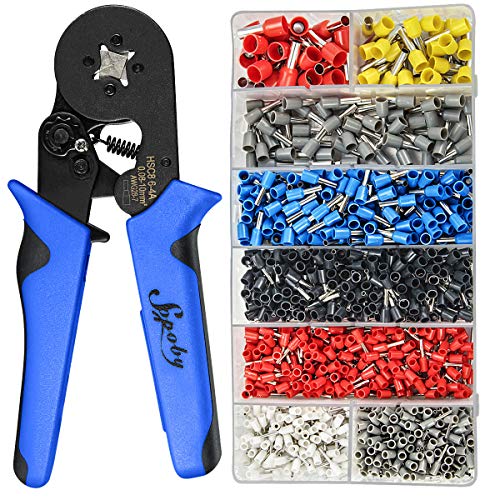
48. Ferrule Crimping Tool Kit, Sopoby AWG 28-7 Self-adjustable Ratchet Ferrule Crimper Plier Set with 1200PCS Wire Ferrules Crimp Connectors Wire Terminals
Sentiment score: 2
Number of reviews: 3
【Ferrule Crimping Range】AWG: 28 - 7 ( 0.08~10mm² ). Each Kit comes with A Handy Ferrule Crimping Plier (Quadrilateral) with 1200pcs Wire Ferrules AWG 22-8.【Self-adjustable Ratchet】- Automatically adjusting itself to the appropriate diameter for stripping terminals, the ratchet self-adjustin...
 Show Reddit reviews
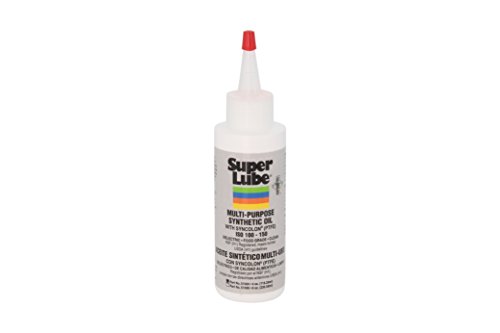
49. Super Lube 51004 Synthetic Oil with PTFE, High Viscosity, 4 oz Bottle,Translucent white
Sentiment score: 2
Number of reviews: 3
Auto & Truck MaintenanceCountry of manufacture: United StatesManufacturer: SUPER LUBESuper Lube OilComes in 4-ouncesQuality craftsmanship and materials make this product a must have for any fisherman
 Show Reddit reviews
50. Usongshine Nema 17 Stepper Motor 42BYGH 1.8 Degree 38MM 1.5A 42 Motor (17HS4401S) 42N.cm (60oz.in) 4-Lead with 1m Cable and Connector for DIY CNC 3D Printer
Sentiment score: 0
Number of reviews: 3
High Torque: Usongshine stepper motor Adopting high quality motor steel material, is provided with high torque (42Ncm(60oz.in) ), low self-inductance reactance, responsive and can avoid system error.Low loss stators have better high speed performance.Low Resistance: Usongshine stepper motor can get ...
 Show Reddit reviews
51. STEPPERONLINE Short Body Nema 17 Bipolar Stepper Motor 1A 18.4oz.in/13Ncm DIY CNC Extruder
Sentiment score: 1
Number of reviews: 3
Short Height, Motor color: Gray or Black Randomly13Ncm(18.4oz.in) holding torqueNEMA 17 bipolar 1.65"x1.65"x0.79" 4-wire1.8 deg. step angle(200 steps/rev)Rated current 1.0A & resistance 3.5ohms
 Show Reddit reviews
52. 3D Printer Burn Bootloader Kit - Firmware Snapshot and Recovery Tool - PDF Instructions Included
Sentiment score: 1
Number of reviews: 3
<b>3D Printer specific firmware pre-flashed on USBasp programmer for all read/write operations.Most other programmers on amazon will error out or refuse to create snapshots on some printers</b>.Includes highly detailed instructions on how to unbrick or burn a bootloaderSnapshot/Restore From Snapshot...
 Show Reddit reviews
53. GO-3D PRINT 235mm x 235mm Borosilicate Glass Plate for Creality Ender 3, Pro 3, Ender 5 3D Printer
Sentiment score: 0
Number of reviews: 3
Size: 235mm x 235mm x 3mmTo print with ABS or PLA, lightly spray the surface of the glass with AquaNet hairspray, then install the glass.Flat Polished Edge for safe to handleBorosilicate Glass Plate, Compatibility: Compatible with Creality 3D printer Ender-3, Ender-3 Pro, Ender-3X, Ender 5Designed b...
 Show Reddit reviews
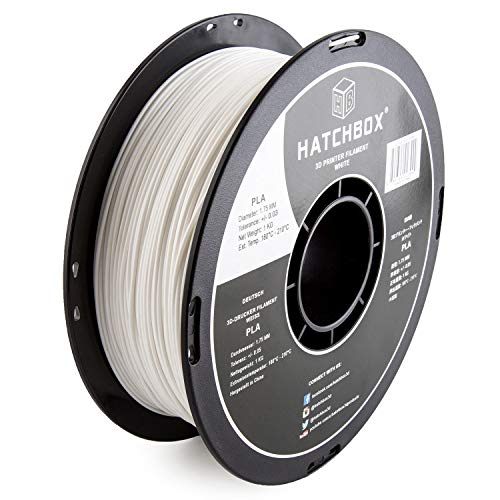
54. HATCHBOX PLA 3D Printer Filament, Dimensional Accuracy +/- 0.03 mm, 1 kg Spool, 1.75 mm, Gray
Sentiment score: 2
Number of reviews: 3
1 KG (approximately 2.20 lbs) Spool1.75mm Filament Diameter (Dimensional Accuracy +/- 0.03mm)PLA (Polylactic Acid) 3D Printer Filament Vacuumed Sealed With DesiccantRecommended Extrusion/Nozzle Temperature 180°C - 210°C (356°F - 410°F)Spool Diameter: 7.88" - Spool Width: 2.69" - Spool Hub Hole D...
 Show Reddit reviews
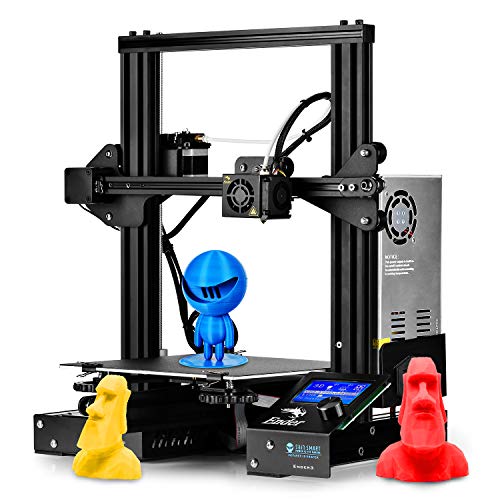
55. SainSmart x Creality Ender-3 3D Printer, Resume Printing Prusa i3, for Home and School Use
Sentiment score: 0
Number of reviews: 3
【Cost Effective】 By eliminating the high retail markup, SainSmart is able to offer a sensible package with unrivaled quality in the entry-level space. The compact design allows Ender-3 to fit in the trunk of your car or even back seat, while still providing 6x more build volume than other entry-...
 Show Reddit reviews
56. HATCHBOX PLA 3D Printer Filament, Dimensional Accuracy +/- 0.03 mm, 1 kg Spool, 1.75 mm, White
Sentiment score: 1
Number of reviews: 3
1 KG (approximately 2.20 lbs) Spool; Eco-Friendly, Odorless. Less Warping1.75mm Filament Diameter (Dimensional Accuracy +/- 0.03mm)PLA (Polylactic Acid) 3D Printer Filament Vacuumed Sealed With DesiccantRecommended Extrusion/Nozzle Temperature 180°C - 210°C (356°F - 410°F)Spool Diameter: 7.88" ...
 Show Reddit reviews
57. Creality Ender 3 Pro 3D Printer 8.6" x 8.6" x 9.8" with Meanwell Power Supply and Removable Cmagnet Build Surface Plates
Sentiment score: 1
Number of reviews: 3
SAFE POWER SUPPLY: Ender 3 Pro comes with a UL Certified power supply, protecting your printer from unexpected power surges, that can heat the hot bed to 110℃ in just 5 minutesRapid Heating: Only Takes 5 Minutes, The Heated Bed Can Reach Up The 110 Degree, Quite Meet The Requirement Of Printing Va...
 Show Reddit reviews
58. Ewigkeit PTFE Teflon Tube with PC4-M6 Pneumatic Fitting and PC4-M10 Straight Quick in Fitting for 3D Printer 1.75mm Filament(Pack of 9cs)
Sentiment score: 1
Number of reviews: 3
Bowden tube:outside diameter 4mm ,inside diameter 2mm ;it made of PTFE (Poly Tetra Fluoro Ethylene) material, safety and non-toxic,heat resistant up to 260℃PC4-M6 bowden fitting: thread M6/3mm, inner diameter(blue end) 4mm, fit for the tube whose outer diameter is 4mm,it's made of premium copper a...
 Show Reddit reviews
59. ZIRO 3D Printer Filament PLA 1.75mm Marble Color 1KG(2.2lbs) - White
Sentiment score: 0
Number of reviews: 3
We suggest setting the heat bed to 50℃ or use mask tape on the heat bed.The surface of printed objects looks like Marble.Suggest using a 4 mm or larger nozzle.Low print speed is recommended.Suitable for most 3D Printer and 3D Pen.Suggest print temperature:190-220Vacuumed Sealed and free Bone bag f...
 Show Reddit reviews
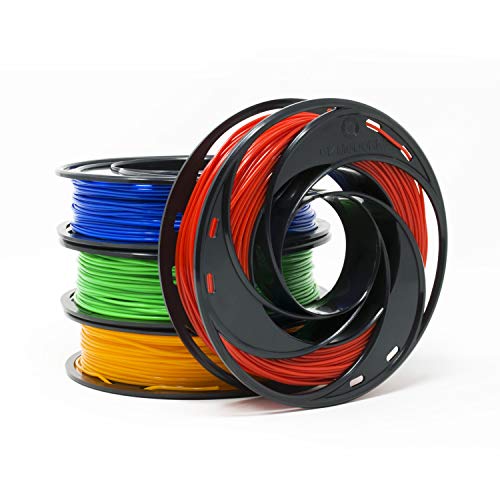
60. Gizmo Dorks PLA Filament for 3D Printers 1.75mm 200g, 4 Color Pack - Blue, Green, Orange, Red
Sentiment score: 4
Number of reviews: 3
PLA (Polylactic Acid) 3D printer filament vacuumed sealed with desiccantRecommended Nozzle Temperature: 205 - 225 C; Filament diameter - 1.75mmNet weight: 200 grams / Spool Diameter: 6" / Spool Width: 1.5" / Spool Hub Diameter: 2.25"PLA filament is compatible with various 3D printers such as the Mon...
 Show Reddit reviews
I've owned the Ender 3 for a few months now and have made a number of upgrades, both purchased and printed. Here's a list of what I have purchased and printed, sorted by importance/usefulness.
&nbsp;
Purchased Parts:
&nbsp;
Printed Parts:
&nbsp;
Future Upgrades:
Spool Roller - One issue I've found is that the stock spool holder requires excessive force from the extruder to unwind filament. A replacement spool roller with bearings should reduce the friction significantly and produce more even extrusion.
Metal Extruder - A common problem with the Ender 3 is that it fails to maintain proper tension on the extruder gear, which leads to failure to feed and poor extrusion. An all-metal extruder has been known to fix the issue.
Did you assemble using the instructions that came with the printer? Because then chances are most things need to be tweaked. I suggest looking through this build video and checking if everything is in order. I mean, maybe you instinctively put it all together right, but more likely is that some things aren't squared right, the frame is poorly produced(hence the low price of the printer), so it needs actual effort to get it all built right.
&#x200B;
The first thing you should do when you are done with all building is calibrate your extruder motor. This basically means making sure that when you tell the printer to move your filament 100mm, it also moves it 100mm. Most likely it isn't calibrated right, I don't think I ever heard of an Ender 3 that came with a proper calibrated extruder right out of the box. You also do need to do the flow calibration in that same link, and for that you will need digital calipers.
&#x200B;
As for the nozzle, no, you don't need to clean it out before every print. You only need to actively clean it out if you change to a different colour or different type of filament, and you just do that by running the new filament through until the colour is stable, then the new filament has purged the old.
The small "tool" is actually an acupuncture needle :D When that gets lost/bent/worn, don't fall into the hoax of buying "real 3D printer cleaner tools", just buy a pack of 0.35 or 0.4 acupuncture needles. The function of it is if you get a clot that clogs up your nozzle, if it isn't a bad clog, you can just puncture it with the acupuncture needle and run some filament through by hand to clear the nozzle.
Isopropyl is great for some bed surfaces, not so much for others. The Creality glass bed or a PEI sheet both benefit vastly from isopropyl, but the stock Ender 3 bed with the rough feeling surface doesn't need that much cleaning(it also doesn't last long, consider what you want your next bed to be).
Stuff like regular window or frame glass needs an adhesive like hairspray or glue stick, so wiping those with isopropyl before every print would be outright wrong as that actively removes adhesive.
&#x200B;
If you're not gonna do anything else for now, go through this checklist:
&#x200B;
Consider getting stronger bed springs as the stock ones are beyond terrible. And when your printer prints right, print an LCD back cover and fan guard - those two are essential to printer health
Get the Pro version. The magnetic print bed is nice. I finally got my Tornado working again last night and I'd forgotten that, "Is the first layer going to stick?", moments. Very reliable as long as you wait for the bed to cool before you put it back on. Plus, any time you upgrade the power supply is always a good thing.
BLTouch for automatic bed leveling. You'll also need an Arduino Zero to flash a boot loader to upgrade your software. Biggest negative to the Ender 3 is that they don't do that from the factory. I got this and I'll find out this weekend if it was worth it. Really don't want to wire up a breadboard to do this.
Get lots of filament from various brands. Stick with PLA or PLA+ to start as it's easier to get good prints. I have about 15 spools on my rack right now. Use a lot of Solutech (hit or miss on color quality) and really like the Amolen and Polyalchemy filaments, but they are pricey. You can get the Amolen in 200g spools to try them out. They print beautifully.
Go to Thingiverse and start planning what you want to print. You'll get a lot of ideas there. Keep reading here and r/3dprinting. You'll find a lot to do.
Good luck, and have fun!
Here’s a 24v 40mm x40mm x 20mm fan. Twice as thick as stock, but quieter, while moving more air. Just be sure to match polarity on the wires and ignore the signal wire (white). This will replace the heatsink fan.
https://www.amazon.com/SUNON-MB40202V2-0000-A99-Fan-Vapo-Size/dp/B0084ZNAU0
For filament cooling, it’s pretty much going to be louder no matter what, but I suggest a petsfang or hero me duct for a 24v 5015 fan. The fan is much more powerful, so you can drop it to 60% cooling in your slicer and it will still be quieter Than stock while cooling better.
I use these:
https://www.amazon.com/gp/aw/d/B079BPS9Q8
Cheap, but you get a 4 pack, so if you have trouble, swap them out.
I also suggest wiring these in to simplify swapping fans - just simple solder, heatshrink, plug and go.
It may seem daunting, but it really is simple, and it makes it vastly easier in the long run.
https://www.amazon.com/gp/aw/d/B01HHY9ZJS
Pay extra close attention to polarity on the yellow/blue wire stock fan replacement so you don’t blow anything.
> That said I'm sure there are literally hundreds of ways to safely make that connection.
With properly soldered XT-60's being one of them. The only people who need to do anything are ones that got the shitty crimped connectors.
I wish it was easier to see from the outside which ones the machine has, as right now a lot of people are skipping straight to "XT-60 == BAD".
And to /u/magiccak, while replacing the wire with a solid run would be better, your installation is perfectly fine. If you want to remove one more possible hazard, get a set of wire ferrules and the crimping tool and do all the wires going to screw terminals. Something like this, important part being that it can do 24 to 16AWG, though you can easily 'cheat' at the smaller end by doubling the wire on itself, so 22AWG might be enough.
Those couplers are trash and so is the PTFE tube they sent. They may work for a while but you'll want to swap them sooner rather than later. Here's a list of upgrades you'll probably want to do. You'll also want to look up a tutorial on how to upgrade your firmware so you can activate safety features (thermal runaway protection specifically). This also doesn't include a BLTouch or EZABL (auto bed levelers) as I have yet to make a choice personally.
Couplers and Tube:
SIQUK 3 Pieces Teflon Tube PTFE... https://www.amazon.com/dp/B07FPJHRTQ?ref=ppx_pop_mob_ap_share
Metal Extruder: ( original plastic one will wear out or break)
Ender 3 Creality 3D Upgrade... https://www.amazon.com/dp/B07KSS8FRQ?ref=ppx_pop_mob_ap_share
Bed Springs: (more than needed but oh well)
SIQUK 16 Pieces Heated Bed... https://www.amazon.com/dp/B07K9PBML5?ref=ppx_pop_mob_ap_share
Glass Bed: (goes on top of print bed which is usually warped, printing on an uneven surface not so bueno)
Creality Upgraded 3D Printer... https://www.amazon.com/dp/B07DS2LZF1?ref=ppx_pop_mob_ap_share
Raspberry Pi 3B+ for OctoPrint: (still need microsd card for it I believe)
CanaKit Raspberry Pi 3 B+ (B... https://www.amazon.com/dp/B07BC6WH7V?ref=ppx_pop_mob_ap_share
Stepper Motor Dampers: (silences the motors, no more sounding like dial up internet lol will need to print mounts from thingiverse)
Upgraded NEMA 17 Stepper Steel... https://www.amazon.com/dp/B07DNT72SF?ref=ppx_pop_mob_ap_share
Heat Sinks For Stepper Motors: (once stepper motors have dampers and aren't attached to the metal frame, they can get a little hot)
40mmx40mmx10mm Black Radiator... https://www.amazon.com/dp/B07KWVGGGK?ref=ppx_pop_mob_ap_share
Hot end silicone sleeve: (may not need, mine came with one instead of the old insulation)
Creality Original 3D Printer... https://www.amazon.com/dp/B07HNXJ39T?ref=ppx_pop_mob_ap_share
Extra Filament: (ender 3 only comes with a small sample "spool", this is just a brand I use and have had decent results with. The metallic silver hue shows off detail well)
3D Printer PLA Filament 1.75MM... https://www.amazon.com/dp/B00ME7YUIU?ref=ppx_pop_mob_ap_share
LOTS O EDITS
Way to effing many. Super frustrated with the Ender 3. I was not looking for this much frustration when I started my new hobby.
Incoming Rant:
I have a lot of good luck with Gizmodorks filament. The orange one is great. But the other various colors I got I am having issues with. (Too thin laying down??)
I also bought a thing of Hatchbox And the first roll was fine but this second roll is just not working. I wondering if the filament is too big somehow.
I also bought this from Th3dstudio's... and I still can not get it to work properly. I followed the instructions, and it is like it is not detecting the sensor at all, when I try to run the auto home it tries to go through my bed...So I will be trying to get it to work again during the x-mas holidays.
Cool thanks. I had pretty much settled on not doing the metal extruder just yet. I'll go side spool until I can get either a guide printed and feel comfortable putting the metal one on. I wish I had the damn springs but once again, slow boat from China with the glass bed.
I didn't get the Capricorn tubing. Just some cheap tubing (looks the same as the stock stuff) but came with what I assume to be nicer couplings. https://www.amazon.com/dp/B07FS2Y148/ref=cm_sw_r_cp_apa_i_m7yQCbMD4J49V
I'll go with just the couplers for now. I'm taking my time with the build. A lot of the instruction is, by nature, inexact...but hopefully taking my time will lead to a good result.
I actually meant to include that, I'm sorry. I bought the sample packs from Gizmo Dorks on Amazon.
Here's the one that includes the "orange":
https://www.amazon.com/dp/B074W1XFRX
They all seem to print pretty well, and I like the colors. They're also a pretty affordable way to get a variety of colors. I also have their packs with the black, clear, grey, and white, and another with marble, glitter, glow in the dark, and color changing. I've been meaning to see if the make one with the cool metallic silk colors...
Have a look at the bulldog extruder. It has a much higher clamping force on the filament. It does require you to have Marlin or T3HD firmware installed.
https://www.amazon.com/gp/product/B07FDSHVCN/ref=oh_aui_detailpage_o02_s00?ie=UTF8&amp;psc=1
It just works. There are a few gotchas that can be quickly resolved.
This should also allow you to easily print TPU
If you want a few rolls of different colors this is a pretty good deal, 23 bucks for 4 colors... Downside is you get 800g instead of 1000g for the money. Still good if you want multiple colors without breaking the bank 👍 I've had real good luck with this brand
Gizmo Dorks PLA Filament for 3D Printers 1.75mm 200g, 4 Color Pack - Blue, Green, Orange, Red https://www.amazon.com/dp/B074W1XFRX/ref=cm_sw_r_cp_apa_i_AbKjDbY1A0WKD
Yes of course :)
Black PLA:
• HATCHBOX PLA 3D Printer Filament, Dimensional Accuracy +/- 0.03 mm, 1 kg Spool, 1.75 mm, Black https://www.amazon.com/dp/B00J0ECR5I/ref=cm_sw_r_cp_api_i_-Nn0Db9E2TV4N
•OVERTURE PLA Filament 1.75mm with 3D Build Surface 200mm × 200mm 3D Printer Consumables, 1kg Spool (2.2lbs), Dimensional Accuracy +/- 0.05 mm, Fit Most FDM Printer, Black https://www.amazon.com/dp/B07PGY2JP1/ref=cm_sw_r_cp_api_i_yPn0DbA5MFBZS
White PLA:
•HATCHBOX PLA 3D Printer Filament, Dimensional Accuracy +/- 0.03 mm, 1 kg Spool, 1.75 mm, White https://www.amazon.com/dp/B00J0GMMP6/ref=cm_sw_r_cp_api_i_IOn0Db4BZ8QWH
•OVERTURE PLA Filament 1.75mm with 3D Build Surface 200mm × 200mm 3D Printer Consumables, 1kg Spool (2.2lbs), Dimensional Accuracy +/- 0.05 mm, Fit Most FDM Printer, White https://www.amazon.com/dp/B07PGZNM34/ref=cm_sw_r_cp_api_i_LRn0Db62EBRN2
I had the same question when looking. I decided the only different would be support. I am not one to use support so I shopped price. I tend to believe if it works out of the box it is OK if not then Amazon will take it back. I bought this https://www.amazon.com/gp/product/B07JJNX135/ref=ppx_yo_dt_b_asin_title_o03_s01?ie=UTF8&amp;psc=1
It was package like all the Creality Youtube Video, all the instruction were from Creality.
I could not be happier will this printer.
I haven't seen these mentioned in this sub before, but I ordered a couple Gizmo Dorks packs from Amazon when I first got my Ender 3 Pro:
https://www.amazon.com/dp/B074W1XFRX?ref=ppx_pop_mob_ap_share
https://www.amazon.com/dp/B074W2TNKB?ref=ppx_pop_mob_ap_share
It's a little more expensive by weight, but it's a good way to get a bunch of different colors.
I like the magnet surface that comes with the pro, I haven't had any issues with parts sticking.
I also ordered the aluminum kit you did, and I also ordered some replacement springs for the bed. I'm planning on installing them this weekend.
So I’ve found this on amazon:
https://www.amazon.com/Gwisdom-Extruder-Upgraded-Replacement-Extruders/dp/B07FKD4FZD
Is there a more official one? Want an aluminum replacement, but can anyone recommend a good brand?
This is way over expectation, and i think I've been lucky with the Ender 3 i got.
But i'm sure the assembly+bed leveling, profile setting+support, and .stl file used played a big role also.
Everything is link below.
The profile in the download dont have the support in it, you need to copy it manually from the second video.
No upgrade except the glass bed, and the self printed filament guide, chain, clip and fan cover.
https://imgur.com/a/F8okUSc
How To Print Resin-Like FDM Minis on $200+ 3D Printers (Printing The Game #3)
3D Printed Tabletop
https://youtu.be/qDW7g3JOqLA
EASIER Support Settings for 3D Printed Miniatures (Printing The Game #11)
3D Printed Tabletop
https://youtu.be/QaE7YPvh4E8?t=67
Printed Obsession
https://www.myminifactory.com/object/3d-print-85806
https://www.kickstarter.com/projects/printedobsession/hell-hath-no-fury-3d-printable-table-top-miniature/
Creality Ender 3 assembly and pro build tips
Tomb of 3D Printed Horrors
https://youtu.be/me8Qrwh907Q
HATCHBOX 3D PLA-1KG1.75-WHT
https://www.hatchbox3d.com/collections/pla/products/3d-pla-1kg1-75-wht
235mm x 235mm Borosilicate Glass Plate for Creality Ender 3 3D Printer
by GO-3D PRINT
https://www.amazon.ca/dp/B07D6J92KB/ref=pe_3034960_236394800_TE_dp_1
Filament Guard
https://www.thingiverse.com/thing:2917932
Cable Chain
https://www.thingiverse.com/thing:2920060
Board fan guard
https://www.thingiverse.com/thing:2935204
Display Ribbon Cable Clip
https://www.thingiverse.com/thing:2880021
I bought my Ender 3 Pro last week from this seller:
https://www.amazon.com/gp/product/B07JVH629F/
(make sure you clip the $35 coupon to bring it down to $224)
I also bought this extruder kit which comes with the bed springs:
https://www.amazon.com/gp/product/B07VQPSTFD/
And I got these PTFE fittings because the ones that come with the printer and that extruder are dogshit:
https://www.amazon.com/gp/product/B07FS2Y148/
Then throw in a roll of your favorite color of Hatchbox PLA for $20 and you should be good to rock-and/or-roll.
It you take your time and have good lighting and small needle nose pliers it isn't too frustrating. I bought crimp tips for the bare wires to make them more secure when tightened down and guarantee that a little wire strand wouldn't short anything.
Ferrule Crimping Tool Kit - Sopoby Ferrule Crimper Plier w/ 1200pcs Wire Ferrules Wire Ends Terminals AWG 28-7 (0.08-10mm²) https://www.amazon.com/dp/B07K17VDF2/ref=cm_sw_r_em_apap_rCPfFrGuOHN1Y
ok, i think i get you now....
I have used this thermistor
https://smile.amazon.com/gp/product/B07B3W8XQ4/
These are the style the stock one is
https://smile.amazon.com/Printer-Thermistor-Nozzle-Creality-Eewolf/dp/B07BBKWZ5K/
In octoprint you can enable the log, then watch the 1 second interval output from it to see how it is doing second to second and see the fluctuations in the temp that you wont see on the stock display....
All that said, here is the relevant comment.... I originally wondered about the accuracy of the stock thermistor...so i tried to measure the temperature with an IR thermometer.... my readings were way under what the display said it was...way == 20 degrees or so...... i also have a Fluke multimeter with a calibrated thermal couple used for doing HVAC work...so i put that on the hot end next to the built in thermistor and taped it on with kapton tape under the sock... the result was within 3 degrees of what the display read..... all the time watching the octoprint logs
Next i switched to the screw in type from above and retested.... the temperature readings bounced around more.... my theory is the screw in type is more sensitive because it is actually in firm physical contact verse just touching and held in place.....
I just got some high temp anti-sieze compound a couple of days ago and plan test this weekend and see if it will act like heatsink compound..it is nonconductive and has the right consistency...good to 2700f... if it works i think it will increase the sensitivity of the thermistor by making better thermal contact with the heater block..
screw set.
Probably could use either. The recommended ones fit right into the heat sink fan, another set might sit over the fan and need to be a little longer?
Above is a simple kit.
take that spring out, get a couple of pliers on each end and pull it to stretch it out, then put the spring back. you will have added more tension to this and allowed it to compress the filament as it moves through. quick and easy fix but getting a better spring and/or replacing the cheap extruder parts is recommended: https://www.amazon.com/Gwisdom-Extruder-Upgraded-Replacement-Extruders/dp/B07FKD4FZD
The lead screw is brand new so I'm sure it's not dirty. I managed to get it to print without major z issues by putting the z stepper into spread cycle mode which can power through the binding but I still have some weird horizontal noise in the print like several layers combining or something.
&#x200B;
I've been using Super Lube with PTFE (This stuff to be precise). My gantry will drop on its own until it gets about halfway through so I think I may be almost there.
This is what bought for the hero.
WINSINN Blower Fan 24V 50mm... https://www.amazon.com/dp/B079BPS9Q8?ref=ppx_pop_mob_ap_share
Slicer Program: Cura 3.5.1
Filament: PLA Hatchbox Grey 1.75mm
Nozzle: Stock nozzle which I think is .4mm?
Supports: I used the Cura supports for this one, I might print another one and test how the Meshmixer supports work, but these images are right after I removed the supports and no sanding/filing has been done yet.
Misc:
-Printed at a 15 degree angle facing upwards to avoid any marks on the front of it
-Profile I found from this video, where he goes over the profile.
-Here is the link to the profile downloads if anyone wanted.
Edit: switch temps around
As for any upgrades, all I’ve done so far is a fan cover so stuff doesn’t fall into it and a filament guide, otherwise everything else is factory default
I have the exact glass bed. It's great! just be careful using a metal spatula on it, I accidentally left a few scratch marks on mine.
I also bought some of these and put one on the underside in case I want to use the textured bed.
https://www.amazon.com/Creality-Original-Replacement-3D-235X235MM/dp/B07FCBCS9K/ref=sr_1_4?crid=1QMLEI33P3KGL&keywords=ender+3+replacement+bed&qid=1568821453&s=gateway&sprefix=ender+3+repl%2Caps%2C146&sr=8-4
https://www.amazon.com/dp/B00PNEQ79Q/ref=cm_sw_r_cp_apa_i_ANMFDbTMYV3KF
It will work perfectly for a 3:1 direct drive setup.
I chose the pro due to the Meanwell power supply and have applied the following mods or printed parts:
Marlin Stock 1.1.9
KIS3R33S step down converter (to power Raspberry Pi from Ender PSU) https://www.ebay.co.uk/itm/USB-KIS3R33S-7V-24V-to-5V-3A-DC-DC-Step-Down-Power-Supply-module-RED-/161780779075?txnId=1778699508006
12V 24V to 5V USB dongle housing https://www.thingiverse.com/thing:806285
XT60 parallel connector https://www.amazon.co.uk/gp/aw/d/B07BMPKGM6
Hotend Silicone Sock https://www.amazon.co.uk/gp/aw/d/B07JMMJ51W
Aluminium Extruder drive https://www.amazon.co.uk/gp/aw/d/B07BBPFFVD
Raspberry Pi case (Raspberry Pi 3B for Octoprint) https://www.thingiverse.com/thing:3075921
Heated Glass Bed https://www.amazon.co.uk/gp/aw/d/B07DSC9TJQ - I kept the magnetic base in place though so I can switch between glass and this one which seems to be better than the stock one https://www.amazon.co.uk/Comgrow-Cmagnet-Surface-Creality-Ender-3X/dp/B07H88QCY9
French Style frameless clips https://www.amazon.co.uk/gp/aw/d/B01M7408WJ
Levelling Springs Upgrade (stiffer than stock) https://www.ebay.co.uk/itm/UK-STOCK-4pcs-creality-CR-10-cr-10s-ender-3-ender-3-upgraded-flat-spring-/401627349776?txnId=738973658027
Genuine BLTouch https://www.amazon.co.uk/gp/aw/d/B0748FJ48N
Clip-on LED strip (plugged into Raspberry Pi USB) https://www.amazon.co.uk/gp/aw/d/B01M0JAYHG
Petsfang v2 with BLTouch mount left (had the bullseye previously) https://www.thingiverse.com/thing:2759439
5015 Fan (for Petsfang v2) https://www.amazon.co.uk/gp/aw/d/B079BPS9Q8
ENDER-3 BED HANDLE https://www.thingiverse.com/thing:2957507
Camera holder (used an old Mobius cam I had) https://www.thingiverse.com/thing:2886101
Ender-3 CR10 Tools holders
https://www.thingiverse.com/thing:2886395
MK8 extruder cable clip https://www.thingiverse.com/thing:3007042
Ender3 pressure fittings fix https://www.thingiverse.com/thing:2994683
Cable clips https://www.thingiverse.com/thing:2960375
Cable clip https://www.thingiverse.com/thing:2949858
Filament guide https://www.thingiverse.com/thing:2896612
Extruder knob https://www.thingiverse.com/thing:3109769
LCD/PCB cover with original screws https://www.thingiverse.com/thing:2858209
Extruder Nozzles different sizes https://www.amazon.co.uk/gp/aw/d/B076DYCSQB
I just got my ender in Feb so I haven't really hammered it with anything I just got on my second spool last week my first spool was hatchbox then I grabbed some of the amazon basics stuff (my roll was garbage) so I decided to give CHEP's Filament a try and it prints as good as the hatchbox spool I had if not better
Like this? https://www.amazon.com/Creality-Original-Replacement-3D-235X235MM/dp/B07FCBCS9K?SubscriptionId=AKIAILSHYYTFIVPWUY6Q&amp;tag=duckduckgo-d-20&amp;linkCode=xm2&amp;camp=2025&amp;creative=165953&amp;creativeASIN=B07FCBCS9K
Edit: Wait that's just a sticker.
Edit 2: here's a kit https://www.creality3donline.com/creality-3d-printer-removable-platform-hot-heated-bed-build-surface-sticker-fiber-board-for-ender-3-cr-20-235x235x3mm_p0099.html
Here's the pancake stepper I use. It works well and was only $10 on Amazon Prime:
https://www.amazon.com/dp/B00PNEQ79Q/
For the PTFE oil would this work?
Super Lube 51004 Synthetic Oil with PTFE, High Viscosity, 4 oz Bottle https://www.amazon.com/dp/B000UKUHXK/ref=cm_sw_r_cp_api_i_WRiODb91FT492
To balance I’m using a sticker consistency for resistance. I will attempt to raise the bed closer
Appreciate the detailed feedback
Yes they are. It cuts out different noises. It is significant. Much less high pitch whine during movements, essentially none.
You need the new steppers because otherwise you will need to print adapters for the old stepper motors with press fit pulleys to fit. There are some good ones to make the press-fit work for the Y axis, but the ones for X axis are not good.
I got this stepper: https://www.amazon.com/dp/B0787BQ4WH/ref=cm_sw_r_cp_apa_i_wWjQDbECAWXF1
That was my experience too. This worked well for me https://smile.amazon.com/gp/product/B07FKD4FZD/ref=ppx_yo_dt_b_search_asin_title?ie=UTF8&psc=1
Just a heads up, the Ender 3 Pro is only $10 more on amazon right now,
https://www.amazon.com/Creality-Printer-Meanwell-Removable-Cmagnet/dp/B07JJNX135/ref=sr_1_5?keywords=ender+3+pro&amp;qid=1574004237&amp;sr=8-5
This lube, OIL not grease, 4 ounces which should be enough to last a lifetime. ;)
https://www.amazon.com/Super-Lube-51004-Synthetic-Viscosity/dp/B000UKUHXK
The stepper motor, not the stepper motor driver. The Nema 17 stepper motor is probably cooked, by the sounds of your troubleshooting results.
https://www.amazon.ca/Nema17-Stepper-42BYGH-17HS4401S-Printer/dp/B0787BQ4WH
I got that one. It's a direct plug in replacement for whats on the Ender3.
https://smile.amazon.com/SainSmart-Creality-Ender-3-Printer-Printing/dp/B07DGV2L8Z/
$195 sainsmart non Amazon now,
https://smile.amazon.com/Creality-Economic-Printing-Function-220x220x250MM/dp/B07CGMN3XF/
$167 for the creality
This kit comes with the firmware already loaded specifically for 3d printers. It also has a snapshot feature so you can save your current firmware and no bootloader is even needed. BUT, with this kit you can also add a bootloader. 3 birds with one stone.
https://www.amazon.com/Printer-Burn-Bootloader-Kit-Instructions/dp/B07HHGVQXK
I could be wrong about the stock extruder specs, but I believe it's right around 42 Ncm. The BMG is a 3:1 gear ratio, so you're getting 3x torque output at the filament at the cost of the stepper running at 3x speed. 42/3=14 Ncm, so anything around that will give you about the same torque as the stock setup. That being said, I picked up a 13 Ncm pancake stepper for my direct drive setup which is working well for me, albeit running a bit too hot for my tastes. This one specifically. You could likely find something similar on eBay or Amazon.ca that would match that.
https://www.amazon.com/SainSmart-Creality-Ender-3-Printer-Printing/dp/B07DGV2L8Z/ref=sr_1_5?keywords=3d+printer+prime+day+deals&amp;qid=1563216765&amp;s=gateway&amp;smid=A1KWJVS57NX03I&amp;sr=8-5
Buy these and swap em in.
Less bed wobble, less leveling in the long term.
https://www.amazon.com/HATCHBOX-3D-Filament-Dimensional-Accuracy/dp/B00J0ECR5I/ref=sr_1_3?crid=2B2P5SB0R7B5R&keywords=hatchbox+pla+1.75&qid=1573968481&sprefix=hatchbox%2Caps%2C160&sr=8-3
https://www.amazon.com/HATCHBOX-3D-Filament-Dimensional-Accuracy/dp/B00J0GMMP6/ref=sr_1_7?crid=2B2P5SB0R7B5R&keywords=hatchbox+pla+1.75&qid=1573968517&sprefix=hatchbox%2Caps%2C160&sr=8-7
&#x200B;
Would either of these work?
This is what I got:
https://smile.amazon.com/gp/product/B015I1CYFE/ref=oh_aui_detailpage_o05_s00?ie=UTF8&amp;psc=1
I believe this one? https://www.amazon.com/Creality-3D-Printer-Separate-Package/dp/B07BF8KXW3
Try this. It removes the headache of wiring an Arduino and you can also back up firmware.
Creality 3D Printer Part Limit Switch With Separate Package CNC for RAMPS 1.4 RepRap 3D Printer CR-10 10S,S4 ,S5 (Pack of 3) https://smile.amazon.com/dp/B07BF8KXW3/
ZIRO 3d Marble Filament https://www.amazon.com/ZIRO-Printer-Filament-1-75mm-Marble/dp/B01IIAC2MW/ref=sr_1_3?keywords=marble+filament&amp;qid=1563198549&amp;s=gateway&amp;sr=8-3
borosilicate glass bed and double sided silicon thermal pads., never look back.
I still have some bed level adjustments to do, but I think the center is spot on.
SainSmart x Creality Ender-3
&#x200B;
I should probably do this regardless for my X, Z, and extruder motors but I upgraded the Y motor to one of these and am not entirely sure what the voltage should be for it. Spec sheet says 3.6, which seems insanely high if the stock X and Z motors should be at 0.94... Right now, everything seems to be working correctly but I still get the same layer shift issue as OP if I print above 50mm/s.
Also if you’re going to be doing major hotend changes I highly recommend this thermistor. It screws into heatblock where the screw now holds the fragile wires for glass thermistor that just hangs inside a hole. This one comes with a new cable and can be unplugged and is also much more rugged. It requires just one change in the firmware and instructions are listed on their website, and firmware changes will probably need to be done anyways to be able to set higher max temps. [Gulfcoast Robotics] M3 Stud Screw-In thermistor 100K NTC 3950 - drop in replacement, works for any China 3D Printer extruders - Anet, Wanhao, Maker Select etc. https://www.amazon.com/dp/B07B3W8XQ4/ref=cm_sw_r_cp_api_i_ep.2DbEYPC4VW
I used this one, a few reviews mentioned having trouble with it jamming and such. I printed it hotter than normal (220c) which is maybe why I didn't have any problems.
Not in particular but this is what I'm using right now with no issue: https://www.amazon.com/dp/B07FS2Y148/ref=cm_sw_r_sms_apa_i_PgLUDbR1BS1HN
Hmm, I guess it does not. Sorry about that. I did a little more searching and found https://www.amazon.com/dp/B07BF8KXW3/ref=cm_sw_r_cp_api_i_-1e4CbGSD477R this one had some comments that people used it on an ender 3. Doesn’t come with cables though :(
Here's the rant
The fix, use Cura's "Pause at Height" plug-in, but after changing the filament home the printer before hitting resume.
No where does it say to do this, and in none of the tutorial videos does it say to do this. So simple, but no where is this ever mentioned or shown.
STL
Printer
Filament