(Part 3) Top products from r/vandwellers
We found 80 product mentions on r/vandwellers. We ranked the 1,979 resulting products by number of redditors who mentioned them. Here are the products ranked 41-60. You can also go back to the previous section.
41. Managing 12 Volts: How to Upgrade, Operate, and Troubleshoot 12 Volt Electrical Systems
Sentiment score: 3
Number of reviews: 4
 Show Reddit reviews
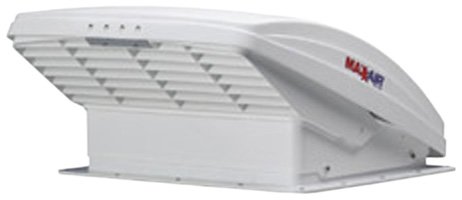
42. Maxxair 00-06200K MaxxFan Ventillation Fan with Smoke Lid and Manual Opening Keypad Control
Sentiment score: 2
Number of reviews: 4
Powerful 10-speed intake and exhaust fanThermostat to control room temperatureProvides over 900 CFM to keep you cool and comfortableFits all standard 14" x 14" roof openingsManual lid openingMaxx Fan, a new, one-of-a kind ventilator system that protects your RV interior - always - in any weather - r...
 Show Reddit reviews
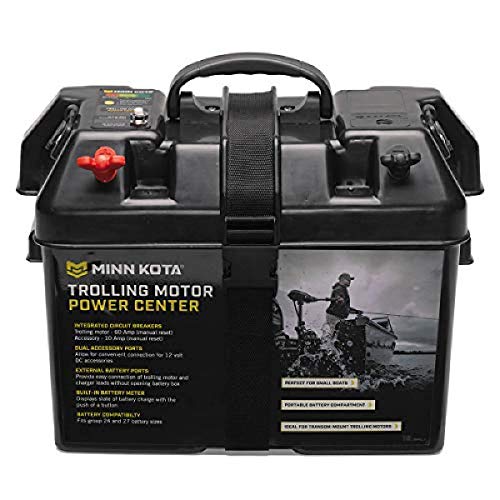
43. MinnKota Trolling Motor Power Center
Sentiment score: 2
Number of reviews: 4
Battery Holder/Case ONLY. Battery NOT INCLUDED.Motor center ideal for small-boat transom applicationsEasy-access batter terminals for connecting leadsBuilt-in battery meter displays current "state of charge"Designed to fit group 24- and 27-size batteriesOffers pair of 12-volt accessory plugs and man...
 Show Reddit reviews
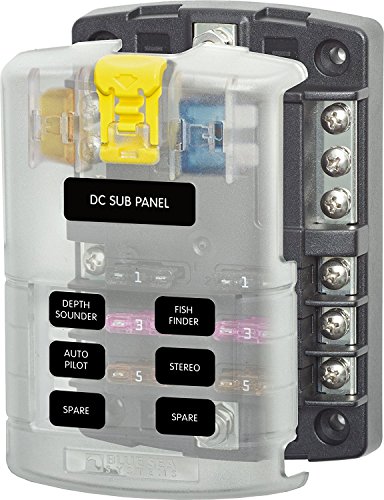
44. Blue Sea Systems 5025 ST Blade Fuse Block - 6 Circuits with Negative Bus and Cover
Sentiment score: 3
Number of reviews: 4
St blade fuse block - 6 circuits with negative bus and coverPositive distribution bus with #10-32 studCan be used for 24-hour circuitsCover satisfies ABYC/USCG Requirements for insulation, incorporates an easy to open push button latch providing easy access to fuses, storage for two spare fusesAccep...
 Show Reddit reviews
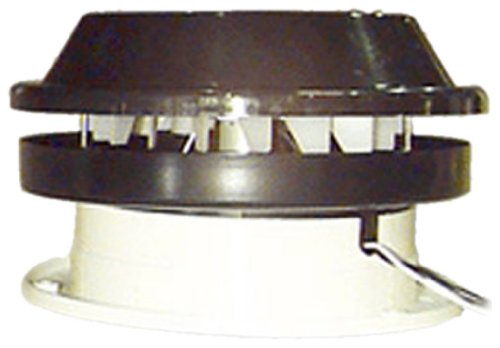
45. Ventline VP-543 12V Smoke Van Roof Air Vent
Sentiment score: 3
Number of reviews: 4
Installs in 6-1/4 inch diameter openingIncludes colonial white garnish for 1/2 inch to 2-1/2 inch roof thickness
 Show Reddit reviews
46. Reliance Products 9881-03 Luggable Loo Snap-on Toilet Seat with Lid for 5-Gallon Bucket, Black, 13.0 Inch x 1.5 Inch x 14.0 Inch
Sentiment score: 2
Number of reviews: 4
Sport Type: Camping & HikingToilet seat and cover for use with industrial pails (pail sold separately)Converts any standard size five-gallon/19-liter pail into a portable toiletSnap on feature secures seat to pailDimensions: 13 by 1.5 by 14 inches (L x W x H); Weight: 1.1 poundsFive-year warranty ag...
 Show Reddit reviews
47. Cole Hersee (24059-BP) 12V Insulated SPST Continuous Duty Solenoid
Sentiment score: 1
Number of reviews: 4
This is part of the Solenoid & Relays Product Line for Cole HerseeContacts:Normally Open (NO)Housing Materials:Plated Steel, PVC CoatedBracket:Straight; Bracket mounting:Holes 5/16 x 19/32 2-13/64 on center
 Show Reddit reviews
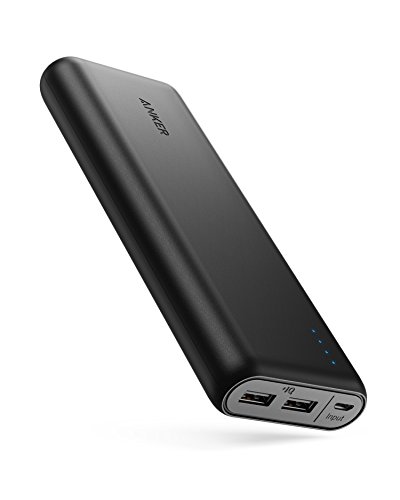
48. Portable Charger Anker PowerCore 20100mAh - Ultra High Capacity Power Bank with 4.8A Output and PowerIQ Technology, External Battery Pack for iPhone, iPad & Samsung Galaxy & More (Black)
Sentiment score: 2
Number of reviews: 4
The Anker Advantage:Join the 50 million+ powered by our leading technology.Ultra-High Capacity:Weighs as little as a can of soup (12.5 oz) yet charges the iPhone 8 almost seven times, the Galaxy S8 five times or the iPad mini 4 twice.High-Speed Charging: PowerIQ and VoltageBoost combine to deliver t...
 Show Reddit reviews
49. Mohoo 30A Charge Controller Solar Charge Regulator Intelligent USB Port Display 12V-24V
Sentiment score: 1
Number of reviews: 4
☀The product can automatically manage the working of solar panel and battery in solar system. It is easy to set up and operate.For protecting the lifespan of your battery, once the voltage of the battery drop below 8V, the solar controller will turn off automatically (LCD will be unavailable at th...
 Show Reddit reviews
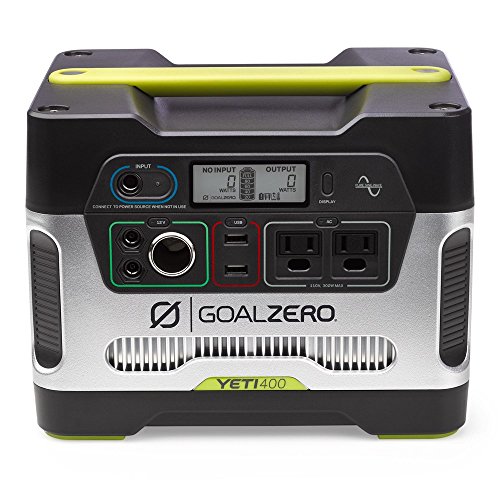
50. Goal Zero Yeti 400 Portable Power Station, 400Wh Battery Powered Generator Alternative with 12V, AC and USB Outputs
Sentiment score: 3
Number of reviews: 3
396Wh lead acid battery portable power station can power up to 7 devices at once (33Ah @ 12V)Continuous 300W, 600W surge pure-sine wave inverter, 2.1A USB ports, 120W 12V portsCharge phones, tablets, laptops, cameras, and most small devices. Backup power for small appliances, lights, and moreRecharg...
 Show Reddit reviews
51. G Ganen Unisex Portable Foldable 3 Layer PVC SPA Bathtub Freestanding Bathtub, 29.5 Inch Blue
Sentiment score: 2
Number of reviews: 3
Application: Indoor and Outdoor bathtub;Size: 75cm(diameter)*75cm(height)Very light and portable, save much place, very suitable for small room.Imported Non-phthalate PVC materials meet with EN71-3, SGS, 6P Standards,environment-friendly.Durable and easy to clean, made of 3 layers water proof and re...
 Show Reddit reviews
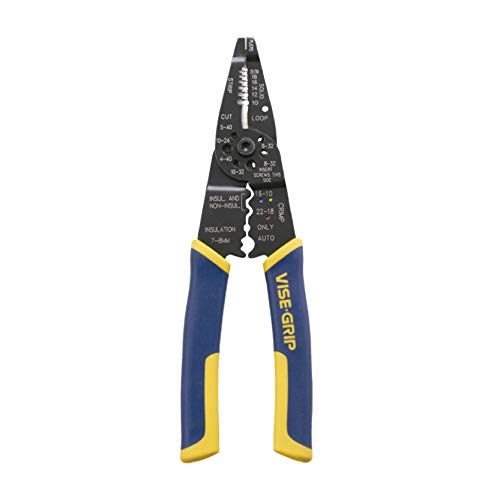
52. IRWIN VISE-GRIP Wire Stripping Tool / Wire Cutter, 8-Inch (2078309)
Sentiment score: 2
Number of reviews: 3
Wire cutter with induction hardened cutting edge stays sharp longerStrips and cuts 10-22 AWGPliers style nose allows wire stripper to pull and loop in wireBolt cutter cuts bolts to size and leaves perfect lead threadCrimps insulated and non-insulated terminals
 Show Reddit reviews
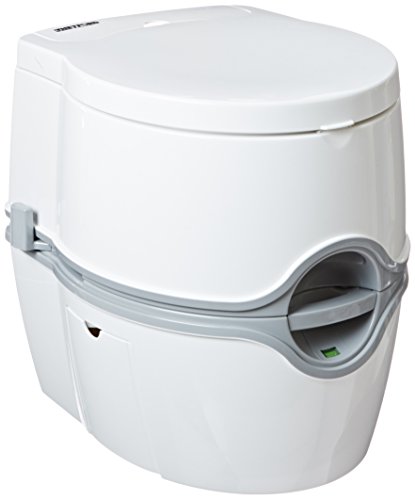
53. Porta Potti White Thetford Corp
Sentiment score: 1
Number of reviews: 3
[VERSATILITY]: Award-winning, top-of-the-line portable toilet, suited for RVs, boats, trucks, vans, healthcare, medical, camping and even off-the-grid lifestyle, with a 4 gallons fresh water tank capacity and a 5.5 gallons waste water capacity[DESIGN]: Sleek, modern, and homelike look, Porta Potti C...
 Show Reddit reviews
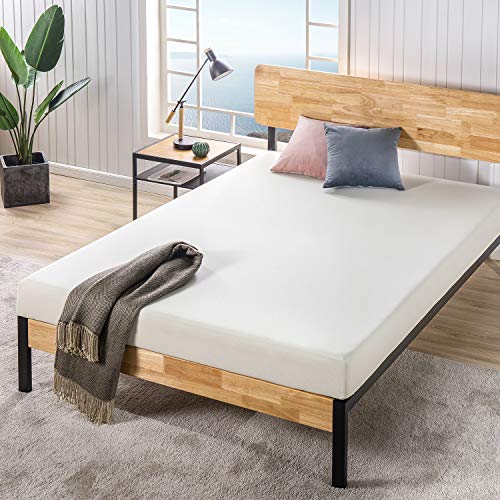
54. Zinus 6 Inch Ultima Memory Foam Mattress / Pressure Relieving / CertiPUR-US Certified / Bed-in-a-Box, Twin
Sentiment score: 1
Number of reviews: 3
INSPIRED BY NATURE - Wholesome and natural ingredients, like green tea and moisture-absorbing charcoal work wonders in a mattress! And we’ve designed this one to control odors, maintain freshness, and envelop your shape so you awake restored and refreshedPRESSURE-RELIEVING FOAMS - 1.5 inches confo...
 Show Reddit reviews
55. Suburban (2438ABK Nt-16Seq Furnace with Black Grill
Sentiment score: 1
Number of reviews: 3
Electronic ignitionVent assembly includedIdeal replacement furnaceReliable performanceDirect discharge furnace, 12 Volt DC, 16,000 BTU, Black grille
 Show Reddit reviews
56. AeroPress Coffee and Espresso Maker with Tote Bag - Quickly Makes Delicious Coffee Without Bitterness - 1 to 3 Cups Per Press
Sentiment score: 2
Number of reviews: 3
Popular with coffee enthusiasts worldwide, the patented AeroPress is a new kind of coffee press that uses a rapid, total immersion brewing process to make smooth, delicious, full flavored coffee without bitterness and with low acidity.Good-bye French Press! The rapid brewing AeroPress avoids the bit...
 Show Reddit reviews
57. LUCID 4 Inch Folding Sofa and Play Mat - Comfortable and Durable Foam - Washable Cover - Full
Sentiment score: 1
Number of reviews: 3
This folding foam sofa doubles as a play mat, providing comfortable seating and a safe play areaPerfect to use for sleepover guests, camping, cabins, dorm rooms and children's playroomsUse as a portable cushion, sofa, or a launch pad for safe indoor mischiefConvenient carry handle for easy transport...
 Show Reddit reviews
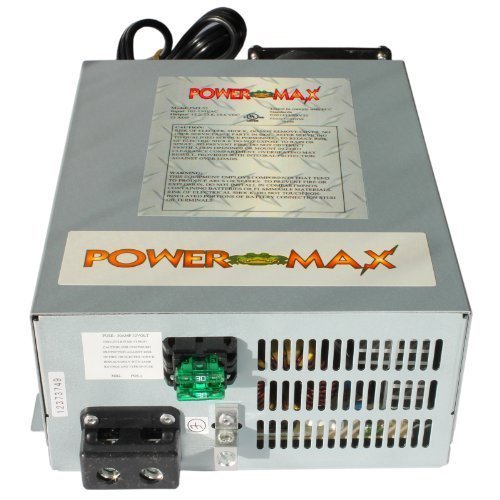
58. Powermax 110 Volt to 12 Volt DC Power Supply Converter Charger for Rv Pm3-55 (55 Amp)
Sentiment score: 1
Number of reviews: 3
13.2 Vdc range13.6 Vdc range14.4 Vdc rangeUl and cul approvedReverse battery protection
 Show Reddit reviews
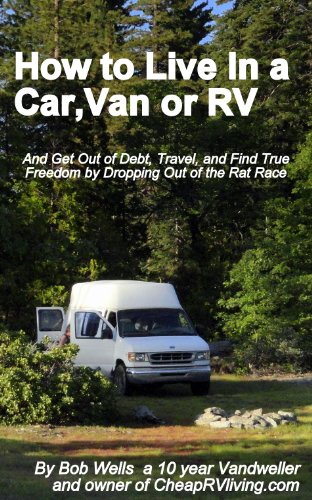
59. How to Live in a Car, Van or RV--And Get Out of Debt, Travel and Find True Freedom
Sentiment score: 3
Number of reviews: 3
 Show Reddit reviews
60. D&D Futon Furniture Gray Sleeper Chair Folding Foam Bed Sized 6 X 32 X 70, Studio Guest Foldable Sofa Beds, Couches, High Density Foam 1.8 Pounds
Sentiment score: 2
Number of reviews: 3
Condition: Brand new - this foam bed is compressed and carefully wrapped in the plastic bags. Just carefully open the carton box and plastic bags. Then, allow a few hours later, you will got what you see. No setup, no assembly requirements.Color: Gray. Filled with high density foam 1.8 pounds.Bed Di...
 Show Reddit reviews
This girl (blog is no longer active) set up a pretty smart way for either gender to pee through her plumbing. If you go this route, just be sure you won't get in trouble or ruin anything when you use it.
Do a bunch of research on vehicles. Sprinters typically cost a fortune if they need a lot of maintenance and some years are better than others. However, some come stock with standing room and are much easier to build out. Chevy's are easier to build out than Fords due to the walls and Chevy's get better gas mileage than Fords, but I've heard Fords are more reliable. You'll hear many contradictions, but do your best to weed through all of the information for a general consensus. There sure is a lot of info on this subreddit alone, and then you've got that web that is world wide too :)
Hope to see you on the road!
Edit: I suppose there is more that goes in to deciding to build your own. Time is probably the biggest. Time is money, as they say. Do you have someone who can help you and would want to? That has been the most frustrating part for me. My friends are flaky and unreliable. Fuckers they are! If you're willing to absorb all of the information at your disposal, (youtube, blogs, general webpages about building & 12v electricity/solar) the other person doesn't have to know much, but, man, it helps to have another set of hands. For some projects, two hands aren't enough.
And back to the toilet, I have an emergency toilet that I hope to never use, but it's a luggable loo on a 3 gallon bucket
The yeti is nice, i have never used one. Some say it is overpriced, but you have to admit that it is a nice simple all in one thing - battery, usb,300 watt pure sine wave inverter, and can charge from 120 vac,12vdc,or solar.
It is what it is, 33Ah battery so if that is not enough then what? If you are going to charge from 12 (like your car) you will need hours and hours. Now if you are willing to put an isolator on you van/car? you could charge faster than a cigarette lighter socket but then you are adding complexity for just using occasionally. So if you can live with the capacity then it's a neat package.
The prices for the big yeti are over $1.4K ? I think that is 100Ah of battery. I think that would get you through a weekend with enough spare energy as to not have to ration. idk And this would just be charged at home or if you find 120vac while you are away.
I will think it over more as it is late for me. But what I have done before is to use a battery box and a separate inverter. The box and battery(battery is bad now) I owned from the trolling motor set up for my canoe. It is not a clean set up but can be used in pieces as you like. So if you have separate pieces and your battery runs low you just hook up the inverter to the van, and don't run out of fun times.
here are some amazon links - non referrals so take a look and seeif you get what I mean.
https://www.amazon.com/MinnKota-Trolling-Motor-Power-Center/dp/B001PTHKMG Nice thing here is it will hold any battery up to group 24 or 27
https://www.amazon.com/VMAXMB127-Battery-Replacement-Caddy-Golf/dp/B00BDV7OO0 I just picked a 100Ah battery at random
https://www.amazon.com/Wagan-EL2601-Elite-400W-Inverter/dp/B007Y4BL1C
https://www.amazon.com/VMAXTANKS-Maintainer-Automobile-Batteries-maintain/dp/B00IZV91Q0/ref=pd_sim_263_3?_encoding=UTF8&pd_rd_i=B00IZV91Q0&pd_rd_r=2VBEJM4WJG5N3CAX8905&pd_rd_w=uLdL1&pd_rd_wg=0Vigf&psc=1&refRID=2VBEJM4WJG5N3CAX8905 Any GOOD battery charger will do.
So like $500, but you now own a nice box, battery, charger, and inverter. So play with the idea and see if it would fit your style. Just an option.
Here is what some guy did with $1000 and you could scale this to your needs.
https://www.youtube.com/watch?v=offgcMwuTGw
Sorry for the mess of a post.
Good luck and have fun. Be sure to let the sub know what you come up with.
Not a bad price on that kit. Personally I pieced together my own, using a Renology 100W panel and a cheap Mohoo PWM controller, and what you're looking at looks pretty comparable for a comparable price.
To try and actually answer your question, though, here's a fairly quick run-down of how to roughly size your battery. I'll use my own situation as an example; I have a small popup camper my wife and I use in the boonies, nowhere near power, for days at a time. This will assume you're using decent quality, sealed AGM deep cycle batteries, not the garbage RV/Marine "deep cycle" batteries, which are not true deep cycle, just slightly tougher starting batteries.
First step is actually the hard part, the rest is easy. You need to know what you want to run, how much power it draws, and how much you want to be able to run it between charges. That sizes your battery. Finding the current draw on your items if you don't already have them can be the hard part - if possible, it's often best to have what you want to run, and measure it for actual numbers.
For example, my main loads are:
My worst case overnight loads basically work out to 20Ah (fans) + 3Ah (lights) + 4Ah (phones) + 5Ah(mods). That's about 32Ah of load per day, pretty much worst case in hot weather.
Now, you can do a few different calculations to get a minimum battery size from that.
Number one, you really don't want to regularly cycle your battery below 50%, unless you want to be replacing your good batteries a lot. Hence, your absolute minimum recommended battery size would be 2x your load between charges. In my case, that's about 64Ah. A deep cycle discharged to 50% will usually last about 400 charge cycles.
Now, given the choice, you really don't even want to discharge that low. A deep cycle discharged only 30% (roughly 1/3) will usually last 1100-1200 cycles. I generally recommend you size for at least triple your daily load. This pays off big time in the long run. For 50% more battery, your batteries will usually last nearly 200% longer (3x as long). Enormous cost savings long term.
Hence, my recommended sizing would be 32Ah x 3, or 96Ah. I'm running a 100Ah battery, UPG UB121000, part number 45981. In practice I'm not regularly discharging this battery more than about 25%.
Now, you get some extra benefit from oversizing as well. By sizing to 1/3 discharge, I can run two days without charging if I have to, and not be worse than a 70% discharge. That's a good emergency backup, since if you regularly discharge anywhere near 100%, your battery usually won't last more than 100-150 cycles. That covers me in case I get a day with absolutely zero sun. In practice this isn't a big worry for me, as on days with poor sun I'm only running the fans about half as much anyway, and if I couldn't get topped off during the day, in a pinch I'd just connect jumper cables to my van and have the battery at full charge after about an hour at idle.
Next, once you know your average daily usage, you can also size your solar panel. You actually need to size more by charge time than by pure wattage, since a 100W panel will not produce 100W using a PWM controller. My 100W panel produces about 5.3A at 19V under ideal conditions (that calculates to 100W), but since the PWM controller just knocks the voltage down to an appropriate battery charge voltage, I'll never actually get 100W out of this panel. The current maxes out at 5.3A, but my battery pulls the voltage down to around 13.5V at charge, so at most I'm actually getting about 72W out of it.
To size your panel, look at the optimum operating current (usually listed as Imp), and use that to size in amp hours instead. Plus, you also need to include any loads you'll be running while you charge. In my case, my panel puts out about 5.3A, but if it's a hot day, I'm going to be running one of those fans on medium (2.25A) for our sheepdogs in the van, so I really only have about 3A to work with to charge. If I can get a solid 8h worth of good charging light, that's about 24Ah useable per day. As you could see, I'd really do well with a second panel. As it is, it's been just sufficient with one panel to mostly keep me topped up, since I haven't had a ton of hot weather where we've really had to run the fans a lot.
If I added a second panel, I'd have roughly 8A to charge with even with that fan running, and could reliably charge my bank all the way with only about 4h of good, full sun.
I know that's a bit long, but hopefully it'll be a help to get you going in the right direction!
Thank you all for the constructive comments! I apologize for having confusing information. It even took me a minute to compile it with what I thought to be an understandable manner because it even confuses me if I don't go through it in one breath. I'm going to do my best to clear things up.
u/velaazul , Here is a schematic I drew. - http://imgur.com/a/Zldos
Not the best drawing but I did it as I pieced it together, I could try to do another to clean it up a bit.
HouseBatt is the car battery. Batt1/Batt2 are deep cycle batteries. Currently this draft is a two 12v deep cycle battery operation. I still need to spend some time calculating (and understanding) what my daily/weekly power consumption would look like to see if two batteries will be sufficient for my lifestyle. I'm also trying to figure out how long I will have to run my car to charge these.
I don't necessarily plan on doing this under my current build for more than a year so there is room for improvement beyond this. With that said I know it may not be the most efficient setup possible, but I need to get my feet moving forward and make this happen.
Fuses are something I am conflicted about. I've seen instructionals that incorporate fuses, and I've seen builds that don't. I've heard people say you need them and heard people tell me I don't. If I do indeed need fuses put in place I would put a fuse between the Small Solenoid terminal to the alternator. and the 2nd fuse would be from the House Battery positive wire to the Deep Cycle Battery 2.
u/Y_BOT , am I misunderstanding the function of the solenoid? From what I understood it would function independently and control the flow of electricity from the alternator to the car battery and then to the deep cycle. When I turn the key in the car that should activate the solenoid switch to charge my car battery and deep cycle. When I draw power from the deep cycle the solenoid should act as the barrier between the deep cycle and the car battery so I never drain my cars battery when using the deep cycles. In the schematic I drew I have included the solenoid and an alternative- an isolator switch. If possible I'd prefer to wire the solenoid so I don't have to manually disconnect batteries.
u/MythicalMover , I plan on purchasing 8 guage wire, however I have not purchased any of the materials yet. I have written out a list of necessary equipment for this project with rough cost estimates. I'm trying to square away my setup before I move forward with buying what I need. I plan on going to auto parts stores and Lowe's to browse wires, lugs, batteries, ect. Also you've hit on another point that I need to flesh out. That being the load capacity for the solenoid connected to my alternator and then potentially the fuses and their load capacities.
Every time I come back to work on all this power planning it alternates between seeming simpler than I previously thought to more complicated and back and forth between the two.
Again, thank you all for the direction and the help! I will also attach links to a few products I am looking at buying for this project. I use most of these as visual representations though. I want to go to a store to actually see and hold a tool before I buy it to ensure I feel right about what I need.
Might need these: https://www.amazon.com/Plated-Battery-Terminal-Positive-Nagative/dp/B00ORH1W2W/ref=sr_1_3?s=hi&ie=UTF8&qid=1486148779&sr=1-3&keywords=car+battery+terminal
This is the solenoid that I have in mind. https://www.amazon.com/gp/product/B0064MX7US/ref=as_li_tl?ie=UTF8&camp=1789&creative=390957&creativeASIN=B0064MX7US&linkCode=as2&tag=rvlifenetwork-20&linkId=TL56E2B62BVKAEKJ
2nd considered solenoid: https://www.amazon.com/Intellitec-Battery-Disconnect-Relay-Prevents-Batteries/dp/B00KPR8QAO/ref=pd_bxgy_263_img_2?_encoding=UTF8&psc=1&refRID=4S939F2G73BZBDQ6JZA9
Inverter (though I might up it if I need more watt handling if need be): https://www.amazon.com/Cobra-400-Watt-12-Volt-120-Volt-Inverter/dp/B001RNOHBC/ref=sr_1_7?m=A2VVWG2KXGK6N2&s=merchant-items&ie=UTF8&qid=1485455953&sr=1-7
Deep cycle battery consideration: https://www.batteriesplus.com/battery/marine-and-boat/deep-cycle/bci-group-27m/sli27mdc
8 guage wire: https://www.amazon.com/Ancor-Marine-Grade-Duplex-Cables/dp/B000NV0BNM/ref=sr_1_1?s=sporting-goods&ie=UTF8&qid=1486225382&sr=1-1&keywords=8+gauge+wire
(optional) Isolator switch: https://www.amazon.com/Marine-Battery-Disconnect-Switch-Isolator/dp/B00EBQOKEQ/ref=sr_1_2?s=sporting-goods&ie=UTF8&qid=1486225429&sr=1-2&keywords=isolator+switch
I also intend to protect my wires with conduits. If necessary I will need to buy lugs and shrink insulation to "make" my own wires for this project. Crimping is something I would imagine I could find a friend to help with or get done at a store.
Hopefully I covered everything, let me know if I am still missing any information and again sorry this was all not included in my original post!
My PSA: Those links can be shortened a lot.
"I searched and didnt find any in depth threads featuring any products like these, https://www.google.com/shopping/product/10452086405530650786,
https://www.anker.com/deals/powerhouse2, https://www.amazon.com/dp/B00D5RVMAM. These seem like good options for vandwelling if you aren't trying to run a fridge/AC. Which I'm not. What do you guys think? For instance I'm trying to power this https://reverb.com/p/korg-minilogue-4-voice-analog-polyphonic-synthesizer for a few hours a day at most so I can practice. I have a few other similar keyboards as well. Thoughts?"
Most of the crap after a ? in a URL is extra stuff that's not needed, like link tracking and referrals. Trim everything after that and see if you get to the right page. It's a much friendlier link for your readers. Few people will care, but those that do will REALLY care. Thanks! :)
Here's a list and example found on amazon for all the major parts. I'll also include a wiring diagram at the end.
Solar Panel $169.99 - 100W Flexible & Thin
Solar Cable $18.99 - 20ft with male and female heads (cut in half for + & -)
[Charge Controller]
(https://smile.amazon.com/gp/product/B019QSX0CG/ref=oh_aui_detailpage_o09_s00?ie=UTF8&psc=1) $34.99 - 30A gives you room to add more panels
Battery $160 - 100Ah AGM will provide enough power depending on fridge but requires no maintenance
Fuse Panel $35 - 6 circuits with negative and cover
12V Sockets $6 - Get some of these for plugging in appliances and phones. You can buy 12V adapters for almost any electronic besides most kitchen appliances.
Pick up some 10 gauge stranded wire from your local hardware store (home depot) to wire the battery and fuse panel to the charge controller. You shouldn't need much since you want the battery as close as possible to the controller. You can buy smaller wire (16 or 18 guage) for wiring outlets/appliances to the fuse panel. 50ft of that should be fine unless you want multiple outlets on the other side of the van.
You'll also need some ATC blade fuses for your fuse panel. You can buy these at a local auto parts store pretty cheap. 15 amps should be enough than anything you'll be pulling.
To connect the wire ends to the battery and fuse panel you will need these wire terminals for the corresponding wire guages you are using. Along with these female terminals to connect to the 12V sockets. All of these can be found at your local auto parts store for cheap sometimes all together in a kit.
You'll also want a pair of wire strippers/crimper for wiring.
This is the best wiring diagram I can find. Most are so overcomplicated. This diagram does not show the fuse panel but you can see the empty slots on the far right of the charge controller where you insert the wiring for that, it's called the "load." This diagram also shows an inverter which is something I didn't go into because you will only need that if you HAVE to run a 110V appliance. I know you mentioned a kettle but maybe you could just install a gas stove in your van and use that to heat water? That's what we use :) Installing the inverter should be pretty straight forward though if you need it but remember you will waste energy going from 12v to 110v so 12v is more efficient.
Hope this can help you (and maybe others) in some way. I plan on making a more in depth version of this guide in the near future along with a video but finding the time has been difficult! Let me know any more questions you have :D
Im not sure on euro vehicles (maybe the large ford transit with bike carrier?), but there are a few good newbie guides out there. Bob Wells has a pretty good ebook that covers the basics
https://www.amazon.com/Live-RV-Debt-Travel-Freedom-ebook/dp/B008S129XY
His website cheaprvliving is a good resource too, if you dig through his articles and blogs you can basically glean all the info from the book too.
This guy: https://www.amazon.com/gp/aw/d/B00ENUILB8/ref=pd_aw_sim_sbs_196_1?ie=UTF8&psc=1&refRID=ZV6CAKKY774D0HX64Y62&dpPl=1&dpID=71erpP5cgLL
Have been pleasantly surprised by it so far! I thought it would feel totally ok, but I've really liked it! The folding dimensions work perfectly for us - big enough to spread out on during the day, then fold out to full size at night. We have a Leesa (similar to Casper) at home and it hasn't felt like we have up much in terms of comfort.
I just got a goal zero yeti 400 and will be getting two additional batteries to daisy chain to it. Whole rig will be about $500 total and give me about 1200watts. Running a processor heavy macbook pro and editing video, so hoping I'll have enough juice to last a week or so without a recharge. Obviously have other devices too, but won't be running a fridge or anything too big, mostly computer, electronics and lights. Amazon ran a deal for $300 a couple weeks ago on the yeti400, so if you're on amazon, look out for their daily deals (down from $450). http://amzn.to/2r81ieC (#adlink) They're moving towards lithium, so guessing they'll be upgrading models soon, which might be why they're running deals. Review are pretty good, although some horror stories (like all products have...). But the alternatives out there are similar. I'm heading to Shenandoah for 4-5 days to be off power and will write about how things go in detail. I'm at www.thenomadexperiment.com if you want to watch there in a couple weeks for that article. Good luck!
FUSE ALL THE THINGS!
You'll never go wrong putting more fuses in. Find what the item pulls, put in a fuse of just a touch over that amount. So if it pulls 13 amps of 12VDC, put in a 15A fuse in the positive (red) line going between the battery and that item. Do that for everything.
Get a fuse block. It makes it MUCH easier and looks prettier. :)
The Ventline VP-543(Also known as the Ventline Vanair) is under 2.5 inches tall. I know it's 6-inch popup fan, but I think that's the smallest rooftop fan you can find. Of course that's not saying much when the low-profile Maxxair's are only 3 inches...
Another option is to have a super low profile vent(also called "scupper vents" and "canopy vents". Mostly found on australian websites) and attach a separate fan to the interior portion.
Very helpful thank you.
So I'm actually looking for something like this-
PowerMax PM3-55 110 V to 12 V DC Power Supply Converter Charger for Rv Pm3-55, 55Amp https://www.amazon.com/dp/B00F8MC440/ref=cm_sw_r_cp_apa_LxZEzb6XMS06Y
It looks like something like this is designed to actually power appliances in a 12v system- but it should still be connected to the battery?
I'm also not clear on the sizing issue- and I should get clear on this before I start wiring stuff up. How do I size something like this?
Everything will need to be grounded or it will not operate. The easiest way to do this is to use a fusebox as you mentioned. The number of items you'll want to power should determine the number of terminals you'll need. Connect your Anderson Powerpole terminals to their corresponding spots on the Blue Sea Systems fuse box (12 terminals with negative because you can always not use some, but you can't add any on the 6 terminal model).
https://www.amazon.com/Goal-Zero-Terminal-Connector-Cable/dp/B00URTHQTC/ref=sr_1_1?s=lawn-garden&ie=UTF8&qid=1496442293&sr=1-1&keywords=yeti+1250+terminal+ring
https://www.amazon.com/Blue-Sea-Systems-Blade-Block/dp/B001P6FTHC/ref=sr_1_1?ie=UTF8&qid=1496442487&sr=8-1&keywords=blue+sea+fuse+box+12
Use a disconnect switch below and a ring connector cable to make sure you don't draw any power when not intended. It will go between your positive leads.
https://www.amazon.com/gp/product/B011EYWMDS/ref=oh_aui_detailpage_o02_s00?ie=UTF8&psc=1
https://www.amazon.com/Camco-47453-4-Gauge-Battery-Assembly/dp/B00JGJGCV2/ref=sr_1_9?ie=UTF8&qid=1496442659&sr=8-9&keywords=4+awg+cable
For the wiring to indidual 12v sources I use copper-clad aluminum because I'm cheap and use 12 gauge (non-awg because it's cheaper and only slightly smaller in gauge diameter) and it hasn't given me any problems because for the price I go a bit bigger than I might need.
https://www.amazon.com/PRIMARY-POWER-GROUND-100FT-ROLLS/dp/B00OU0IIFU/ref=sr_1_6?s=automotive&ie=UTF8&qid=1496442827&sr=1-6&keywords=12+gauge+wire
For the fridge though you may want to go to 10 gauge.
https://www.amazon.com/GAUGE-GROUND-PRIMARY-STRANDED-COPPER/dp/B01C7O8166/ref=sr_1_6?s=automotive&ie=UTF8&qid=1496442902&sr=1-6&keywords=10+gauge+wire.
Look at the 12v chart below and make sure you're within the range for the length of wire you want to run which I can't imagine you wont be since everything you're describing is super low amp.
https://s-media-cache-ak0.pinimg.com/originals/57/22/80/57228076ef240ed796b328a7d6387eac.jpg
Then to connect the equipment to power you can either solder the wires together or use these below to crimp them (crimping video below that). You're wire stripping pliers should have a crimping portion on them already. if not buy the ones in the 4th link.
https://www.amazon.com/Hilitchi-Insulated-Terminals-Electrical-Connectors/dp/B01D8HIQ2K/ref=sr_1_4?s=automotive&ie=UTF8&qid=1496443951&sr=1-4&keywords=12-10+gauge+wire+connectors
https://www.amazon.com/Glarks-Electrical-Insulated-Terminals-Connectors/dp/B01E7SY49I/ref=sr_1_11?s=automotive&ie=UTF8&qid=1496444024&sr=1-11&keywords=12-10+gauge+wire+connectors
https://www.youtube.com/watch?v=Svja8zEcKNQ&t=9s
https://www.amazon.com/VISE-GRIP-Multi-Tool-Stripper-Crimper-2078309/dp/B000JNNWQ2/ref=sr_1_cc_2?s=aps&ie=UTF8&qid=1496443370&sr=1-2-catcorr&keywords=wire+stripping+pliers+irwin
You'll then use the terminal rings from the link above (pretty sure that's the correct size ring) to connect the end of those wires to the fuse box on the negative and positive sides. Fuse based on the amps you'll be drawing. Since I think someone somewhere will complain that this is expensive and there are cheaper ways to do it, I set you up on the "new everything" route since I don't think you'll have any of these things and if you're getting a goal zero I don't think price is a limiting factor. Unless you already have a lot of experience with wiring this is the basic version with everything you'll need pre-made as much as possible.
Are you really set on solar? Depends on how much you drive but you maybe better off with an alternator connection. What type of fan are you using? You maybe able to go a little smaller than 100 amp hrs. That is a lot for just a laptop/phone/electronics lights.
A good example of how simple 12V can be is this box
https://www.amazon.com/MinnKota-Trolling-Motor-Power-Center/dp/B001PTHKMG/ref=sr_1_8?ie=UTF8&qid=1496277131&sr=8-8&keywords=battery+box+27
It has a few inline breakers (10 amp and 60 amp) in the box for the 12V outlets.
Bob Wells' How to Live in a Car, Van or RV. Good overview and only $3.
For boondocking I liked:
Sunny Skye's RV Boondocking Basics: Living Well on the Road Less Graveled and pretty much anything by Difley.
The only real value in that van is the GoalZero battery which goes for nearly $500. The van itself is only worth 2-4k. The conversion is weak. Looks like it's lacking real insulation and it doesn't have any of the usual conversion features (sink, fan, fridge, solar, etc...). For $10k you could do way better OP.
The ambulance you posted is a much, much better deal. I drive the same van (non-ambulance) from 1985. If you read up on those 6.9L engines, they are some of the most reliable engines ever made and that one doesn't even have 100k miles (although, the odometer rolls over at 99,999 so you might want to double check that because I've never seen an ambulance decommissioned with such few miles).
First, my needs:
Second, the components:
Panels/controller https://www.amazon.com/gp/product/B00B8L6EFA
Battery https://www.amazon.com/gp/product/B01ACKDGPS
Y connectors https://www.amazon.com/gp/product/B01N4ELRSH
Cable entry https://www.amazon.com/gp/product/B01CSEXW2S
2 Gauge wire https://www.amazon.com/gp/product/B00KD2756W
Terminal rings https://www.amazon.com/gp/product/B005V9UWB2
Crimp tool https://www.amazon.com/gp/product/B003X51S00
Terminal block https://www.amazon.com/gp/product/B000S5Q2VS
Busbars https://www.amazon.com/gp/product/B0091VHLW4
Inverter https://www.amazon.com/gp/product/B004MDXS0U
Vent vans https://www.amazon.com/gp/product/B002OW5JIU
Monitors https://www.asus.com/us/Monitors/PB278Q/
Puck lights https://www.amazon.com/gp/product/B00ODSAR12
Strip lights https://www.amazon.com/gp/product/B01IQOV13G
Fuse box https://www.amazon.com/gp/product/B001P6FTHC
Killswitch https://www.amazon.com/gp/product/B005DUUL9W
Switches https://www.amazon.com/gp/product/B06XFJW1SB
Dimmer https://www.amazon.com/gp/product/B00L8KP16E
I know my needs are fairly minimal. I see opportunity to grow with this system if I ever need to. I’m excited to lay it out with the actual parts soon and begin thinking about it in the real world.
Any suggestions, info or questions are completely welcome. I know little about electrical, only what I’ve learned from reddit and youtube. Thanks pals and again /u/StolidSentinel for the help and replies to all my messages and questions!
I have one of theseand im extremely happy with it. More comfortable than my old bed. I have arthritis in my spine too, so that says a lot.
Im actually going to get another one soon. I have a 24” one and gonna get a 36 or 48... luxury. Lol.
I would recommend Bob Wells' "How to Live in a Car, Van or RV". It has the basic, nuts-and-bolts info you need to get out there.
Remember you don't need a sweet craftsman conversion to travel, save money and have adventure. That's just the (expensive) icing on the cake. Starting simply is far better than not starting at all, and lets you add what you really need and nothing you don't.
https://www.amazon.com/Live-RV-Debt-Travel-Freedom-ebook/dp/B008S129XY
Murphy bed!!! or this!
Composting toilet! Grab a bucket of sawdust to go with it.
Deflatable tub or portable Japanese soaking tub for shower!
If you need it... HOT shower!
Hand sink!
Camping stove that can be used indoors.
Water filter system for drinking and cooking.
Water storage!
For short term! ....just figure out how to secure it all! Fun! Fun!
I purchased this book and it was an amazing resource. I had 0 knowledge/experience in anything more complex than switching a lightbulb and it helped me safely and confidently design and build out the electrical for my van
the furnace is a suburban 16k BTU RV furnace- This one
I really would love one of those propex heaters, their sized more appropriately for a van and draw less electricity for the fan but are soooo much more expensive. When i got mine it was about 320$ and I just decided it wasn't worth spending twice as much for a bit more efficiency.
This is also where the spray foam comes in, in my mind, closed cell spray foam is the best insulation option. R6 per inch and no moisture/condensation worries. However it is was probably 400$ to insulate the van which is probably 4x as much as it needs to be. That said, it feels pretty well insulated considering the doors dont have any and it does hold head fairly well as the furnace cycles.
The ford vans have such shitty wonky framing with openings and cavities that it was difficult to seal everything, which inevitably left gaps that moisture could get into those cavities which sorta defeats the purpose. However modern sprinter/transits or even the chevy cargo vans dont have that and would 'take' spray foam much better.
I'll copy paste something I wrote elsewhere just now. What do you think?
====
My plan is to use a shower pump like this:
https://www.amazon.com/Ivation-Portable-Outdoor-Battery-Powered/dp/B00IFHFJXI/ref=mp_s_a_1_3?keywords=Ivation+shower+head&qid=1567661650&s=gateway&sr=8-3#
Then boil some water on the stove, and mix it with room temp water and put enough in the floor of this to cover the pump:
https://www.amazon.com/Happy-Life-Portable-Plastic-Bathtub/dp/B008XSXQIO/ref=mp_s_a_1_6?keywords=Portable+deep+tub&qid=1567661792&s=gateway&sr=8-6
... set up underneath the roof fan, with some velcro holding up a hula hoop holding up the shower curtain tucked inside the tub. Get a thing to stand on so my feet aren't soaking, attach the shower head to the hula hoop, put a cloth bag over the pump as a rudimentary filter... Voila, recirculating, hot shower, for as long as I want, for just a few gallons of water.
Bonus, the shower water can be used to wash your clothes if you separate it from your regular gray water.
I have a 1st generation Odyssey with one of these on the roof. It works reasonably well, but people notice it. I've had a couple of LEOs ask me what it was. I think my next build will have something like this mounted in the floor. It also flows better than the one I have now.
I just bought, and installed an exhaust fan in the back of my pickup. It works great, and I'm stoked to have power in the back now. It wasn't very difficult to figure out.
I bought this, this, this, this, and this fan. It set me back about $350, but I went with a larger, more powerful solar panel. You'll need some 10 gage wire and crimp connections. Home depot has all those parts.
Here's what it looks like.
Best thing you can do is something, I spent years whining about how I need to meet a mentor, or figure out how to start out. I then pulled myself out of my pity pile, stopped wasting my time on stupid shit and got down to business. The bottom two are good places to start.
I bought a thetford curve for my van, tho i did the bucket too. The curve is the most like a regular toilet. It isn't hard to empty but it isn't exactly pleasant either but that goes for all rvs really. Thee bucket is easier to empty, you just toss in a trash can somewhere.
I shower by truckstop or in warmer weather solar shower (black bag). They make propane hot camp showers. If i need privacy, i make a tent with my tarp off my van, but normal sized people can get these cool little shower tents.
If I were doing a 5 day build, I'd skip insulation. I was in a van this summer that I had insulated with polyiso, and when it was cold outside, it was cold inside the van, and when it was hot outside, it was super hot inside the van. I never got my electrical hooked up either, so I'd skip that too. Bought a 50,000 mAh battery bank. Never really used it. I did use a long 12v extension with a splitter to charge my phone, run a fan, etc.
I'd probably put down subfloor, that's cheapish and a one day project.
For the bed, I bought this frame for $60 and this memory foam mattress, but you could probably get a cheaper twin mattress. The nice thing about the bed frame is that you can store plenty of stuff underneath it in storage totes.
Get a marine 12v distribution panel so you can have fuses. Then wire one run to some yacht lights and one run to a cigar plug and USB ports.
Quick, easy, cheap, and SAFE!
These two were recommended. I like to look at how sailors work things out. Very simple and dependable, vibration resistant, waterproof setups. Certainly can be $$$$ but it is kind of setting a standard for durability. Marine solar, Marine 12 volt TV. Or for example, ice chests with 6-8" of XPS foam are common instead of 12 volt fridge. Works /Won't break.
These two were recommended:
Weems & Plath The 12 Volt Doctor's Practical Handbook 5th Edition
https://www.amazon.com/Weems-Plath-Doctors-Practical-Handbook/dp/1878797131
Managing 12 Volts: How to Upgrade, Operate, and Troubleshoot 12 Volt Electrical Systems 2 Updated Edition
https://www.amazon.com/gp/product/0964738627?ref%5F=sr%5F1%5F1&qid=1482876085&sr=8-1&keywords=Managing%2012%20Volts%3A%20How%20to%20Upgrade%2C%20Operate%2C%20and%20Troubleshoot%2012%20Volt%20Electrical%20Systems&pldnSite=1
THIS. Except I've used it a couple of time. Cat litter is your friend, too. A couple of tuna fish cans of cat litter in the bottom of the plastic bag helps.
https://www.amazon.com/Reliance-Products-9881-03-Luggable-Toilet/dp/B0000B13MT/ref=sr_1_3?crid=1IPNUFKE8O24U&keywords=5+gallon+bucket+toilet+seat+lid&qid=1554736998&s=gateway&sprefix=5-gallon+bucket+toilet+lid%2Caps%2C189&sr=8-3
Instead of a french press, consider an Aeropress . More portable and lower maintenance than a true french press, but the coffee is every bit as good.
It's a small circular vent fan: https://www.amazon.com/Ventline-VP-543-Smoke-Roof-Vent/dp/B00407CK5W
It's over my shower area where I'll need a vent for the propane tankless hot water heater and help dry out the shower
I put a fuse between the panels/charge controller and the charge controller/battery. I used this fuse holder https://www.amazon.com/dp/B000THTBZO/ref=cm_sw_r_cp_dp_T2_cyhozb0Q7812D
Also, it may be worth while to pick up a fuse block that way there you can easily add additional 12v stuff without messing with the battery https://www.amazon.com/dp/B000THQ0CQ/ref=cm_sw_r_cp_dp_T2_vChozbH1TGQ27
feel free to PM me/reply if you have any additional questions
I just put a proper RV propane furnace in my build. I live mostly year round in a damp, cool climate. I used a catalytic heater (Mr.Buddy) in my old van and the condensation from the unvented propane was out of control. I couldn't use the Mr. Buddy here in the winter, it's just too damp and humid.
I haven't seen any builds that have installed a furnace that vents to the outside yet other than mine. I'd be interested in seeing some others.
I bought [this] (https://www.amazon.com/gp/aw/d/B00B2ATA1M/ref=mp_s_a_1_1?ie=UTF8&qid=1480098465&sr=8-1&pi=AC_SX236_SY340_QL65&keywords=rv++suburban+furnace+nt-16seq)furnace on amazon for $350. It's 16,000 BTU and it's the smallest I could find. If you use a BTU calculator you can figure out how many BTU you need to heat your space. Mine only needs about 600 BTU but this is the smallest furnace I could find. It uses 2 watts to keep the fan running. I also had a horizontal propane tank mounted under the van. We installed the furnace ourselves and had to cut a hole for the vent into the side of the van. We still haven't hooked up the gas line, so I can't tell you how it works yet.
My old van had no opening windows and only one roof vent without a fan. It wasn't enough to vent the Mr.Buddy. Maybe the Olympian is better. Also, this climate is very wet (PNW), probably depends where you plan to spend most of your time.
Ya, I got this maxxfan, and its awesome.
https://www.amazon.com/dp/B002OW5JIU/ref=wl_it_dp_o_pC_S_ttl?_encoding=UTF8&colid=2UU8RSRECPQHN&coliid=I2LUBUXBM72U8S&psc=1
I sat and watched it through a bad thunderstorm in Tennessee, and no rain came in. Love this thing.
You can look into these.. http://amzn.to/2qlqu0h Not sure how tall they are but seems like a smaller option.
Yeah but it's considerably more gross and inconvenient. I mean, yeah, you can have a shovel and go into the woods and dig a deep hole and then defecate there also, but a real toilet only costs a hundred bucks and if you need to go in the middle of the night, you can and the waste is safely in an odor proof tank you can empty into any old toilet when you have the time.
https://www.amazon.com/Thetford-92360-Porta-Portable-Toilet/dp/B006WPQNB2 is no doubt the best of the bunch. There was a thread about it the other day. If you want to really minimize space, Dometic has a great and very low model with 2.6 gallons of space that should be easy to stash. It's only 12 inches high.
https://www.amazon.com/Dometic-301097206-Portable-Toilet-Gallon/dp/B00194F0CE
This is a good book:
http://www.amazon.com/Managing-12-Volts-Troubleshoot-Electrical/dp/0964738627
Get yourself a decent crimping tool. An assortment of terminals is a good start, too.
https://www.amazon.com/VISE-GRIP-Multi-Tool-Stripper-Crimper-2078309/dp/B000JNNWQ2/ref=sr_1_4?ie=UTF8&qid=1469334380&sr=8-4&keywords=crimping+tool
When you make a crimp, test it mechanically by pulling the wire. It should not move.
Model: 2010 Mercedes-Benz Sprinter 2500
Miles: 73500
Cylinders: 6
Engine Size: 3 L
Transmission: Automatic
Features MaxxAir 00-07500K MaxxFan Deluxe with Remote: $325
https://www.amazon.com/MaxxAir-00-07500K-MaxxFan-Deluxe-Remote/dp/B002OW5JG2/ref=sr_1_3?s=automotive &ie=UTF8&qid=1523915620&sr=1-3&keywords=Max+Air+Fan+deluxe
SPRINTER SPORTSCRAFT SWIVEL SEAT BASE (passenger): $329
https://www.sprinterpartsdepot.com/collections/seat-swivels/products/sprinter-swivel-seat-base
Goal Zero Yeti 1250: $1,499
https://www.bhphotovideo.com/c/product/984437-REG/goal_zero_gz_31901_yeti_1250_solar_generator.html? ap=y&c3api=1876%2C52934714882%2C%2C&gclid=CjwKCAjwk9HWBRApEiwA6mKWadspRJqqrIvySuUDI4s GhpNsSfiWanKf6B6ivGuEPWPAVxLlpT9YOBoCr7sQAvD_BwE
Goal Zero Boulder 90 Solar Panel: $499
https://www.bhphotovideo.com/c/product/1260858-REG/goal_zero_gz_03329_boulder_90_solar_panel.html
Fiamma F65s Top Mount Awning: $1,316
https://rbcomponents.com/products/sprinter-van-awning-manual-149
LUCID 4 Inch Folding Mattress - Full Size: $129
https://www.amazon.com/dp/B00ENUILB8/ref=sspa_dk_detail_4?psc=1&pd_rd_i=B00ENUILB8&pd_rd_wg=BMuuz& pd_rd_r=PHQ9YD8QD13ZG5KS3XW5&pd_rd_w=O2mqp
CRL T-Vent Side Windows:$880
https://www.dkhardware.com/2007-oem-design-all-glass-look-sprinter-van-t-vent-passen ger-side-sliding-door-window-for-170-and-144-wheel-base-vans-FW625R-product-38789.h tml?gclid=CjwKCAjwk9HWBRApEiwA6mKWaUdFmG_G2oo6HmXKlczMri6uvpOwgOWuV 6EQSskykWgAe4keir_vlBoCN1QQAvD_BwE
Additional Features
Slat Bed Design (Outside Van Inspired)
Removable Bench/Bed with seat belts
Kenwood sound system with subwoofer
Goodyear Wrangler Duratrac
tires
Brand New glow plugs
Storage chest
Back door ladder
Custom metal shelves
Insulated walls and Ceilings
Back-Up camera
Transmission serviced at 70k miles
Nice van!
Don't be too intimidated with adding a house battery. You can do it.
Very in-depth guide for adding a house battery with solenoid: https://www.youtube.com/watch?v=1zrwHyy4qyY
This is the battery I used, it ROCKS. (smaller and cheaper options from same company available)
Other items I used...
Folding chair/bed, interesting =)
Lets do a quick run through so you can compare:
The Yeti 1250 is 12v 100ah and 1200 watts for $1250. It has 3 USB and 3 standard plugs + other ins and outs in addition to a solar charger.
A 12v 100ah deep cycle battery off amazon is $159. You would need a charger unit ($50 on amazon) in addition to some basic electrical wiring ($20-50). Then you would need an inverter (this one is $65 w/ three plug ins and two usb inputs) for 1000 watts. Last you would need to invest in a solar charger unit (often comes with solar panel kits and those can run around $30. So probably close to $350-400
So then however you want to store these (plywood box construction and a little DIY elbow grease) you can build essentially the same unit for about 1/4 the cost.
https://www.amazon.com/ERAYAK-Inverter-Alligator-Refrigerator-Cooler-8099U/dp/B019PXILXA/ref=sr_1_17?ie=UTF8&qid=1482364654&sr=8-17&keywords=12v+inverter
https://www.amazon.com/Universal-UB121000-45978-100AH-Cycle-Battery/dp/B00S1RT58C/ref=sr_1_1?ie=UTF8&qid=1482364350&sr=8-1&keywords=12v+100+ah+deep+cycle+battery
https://www.amazon.com/Controller-Regulator-Intelligent-Display-12V-24V/dp/B018ICLC3K/ref=sr_1_4?s=lawn-garden&ie=UTF8&qid=1482364823&sr=1-4&keywords=solar+charge+controller
[MaxxFan 6200k](maxxair 00-06200k maxxfan ventillation fan with smoke lid and manual opening keypad control https://www.amazon.com/dp/B002OW5JIU/ref=cm_sw_r_cp_apa_i_nHrRCbC04J1EH)
I'm not a vandweller but saw your post on /r/all. Would a hammock be possible? What about an all-foam mattress, and cut it narrower (or fold it in half)? Or something like this
or this
NICE! i plan to use an aeropress..similar to this..just easier..maybe not quite as much pressure but sufficient enough http://www.amazon.com/Aerobie-AeroPress-Coffee-Maker-Tote/dp/B0018RY8H0/ref=sr_1_1?s=kitchen&ie=UTF8&qid=1457232361&sr=1-1&keywords=aeropress
You don't even need the alternate battery, actually. A rechargeable fan or two and a power bank and a usb port in your car. This does require the vehicle to be running/driving to charge the powerbank, but if you're already driving everyday, shouldn't be a problem.
Someone on this sub recommended this, can't remember who.
Get a $19 continuous duty solenoid (http://amzn.to/2eJkQSO) a $22 50A fuse (http://amzn.to/2eAWFCL) and then don't worry about the other stuff.
First off you don't necessarily want to use any screws... With the maxair, you cut a square hole and fit in the trim piece. To cut a hole you just need tinsnips and a screwdriver/knife and a hammer/rock to make the first hole. I wouldn't let anyone take a saw to it and put metal shavings all over your house... Just go buy some tin snips, $5.99: http://www.harborfreight.com/heavy-duty-straight-cut-aviation-tin-snips-90718.html . Cuts through like butter. Power tools are not always better.
Trace your hole and cut, as long as you have your butyl tape and dicor sealant and fan you will see that spending $375 is wholly unnecesary and hazardous imo. You could end up with a bunch of leaky & unnecessary screw holes, metal shavings all over, a hole cut too big, they probably won't know how to work with the ribs correctly... You need to cut it like this: http://www.seanstoops.com/img/build/build_3_.jpg so that it will sit flush with the roof. Very simple and clever. More leakproof design. http://www.seanstoops.com/2016/01/26/roof-vent/
Unless you live in the desert I suggest a maxxair. I'm getting this one. It lets in light, works in the rain, even while all the way down.
https://www.amazon.com/gp/product/B002OW5JIU/ref=ox_sc_act_title_1?ie=UTF8&psc=1&smid=ATVPDKIKX0DER
LUCID 4 Inch Folding Mattress - Full Size https://www.amazon.com/dp/B00ENUILB8?ref=yo_pop_ma_swf
Non-mobile: http://www.amazon.com/dp/B001PTHKMG/ref=mp_s_a_1_9?qid=1425953252&sr=8-9&pi=AC_SX110_SY165_QL70&keywords=deep+cycle+battery
^That's ^why ^I'm ^here, ^I ^don't ^judge ^you. ^PM ^/u/xl0 ^if ^I'm ^causing ^any ^trouble. ^WUT?
We're installing one of these. Will let you know how it goes.
https://www.amazon.com/gp/product/B00B2ATA1M
I purchased a brand new thetford toilet with the water flush and holding tank, I think it was around $150. When I finally finished my build I ended up just using one of those $10 bucket seats, and the thetford is just sitting in my storage unit, never used. In other news.. new thetford toilet for sale :P.
https://www.amazon.com/Blue-Sea-Systems-5025-Blade/dp/B000THQ0CQ/ref=sr_1_1?ie=UTF8&qid=1498570433&sr=8-1&keywords=blue+sea+fuse+block
https://www.amazon.com/Anker-20000mAh-Portable-Charger-PowerCore/dp/B00X5RV14Y
If you already have the 5 gallon bucket, what's the advantage of the hitch?
The toilet lid itself is as low as $13
http://www.amazon.com/gp/product/B0000B13MT
something like this continuous duty solenoid would work well. takes the idea of having a relay switch and makes it more idiot proof. the last thing you want is to forget to disengage your primary battery from your house battery & wake up to a non-starting vehicle
problem solved: https://www.amazon.com/dp/B008XSXQIO/ref=cm_sw_r_cp_apa_IsA6BbZNY7MWR
Don't waste your $ on those. They are 4a and 8a chargers. If you're going to spend the $ and don't already have a built in charger, I'd get something like this otherwise you're just wasting gas running the generator for a low amp charge.
This. You can cut it to shape with a bread knife.
http://www.amazon.com/Master-Ultima%C2%AE-Comfort-Memory-Mattress/dp/B005G02ESA/ref=pd_bia_nav_t_1?ie=UTF8&refRID=05Y6N1QFA4RF766NYS5H
May or may not be useful to you, Harbor freight has these fold-able solar panels that charge via usb @ 5V. I have one of these and they work pretty well. I wouldn't use it to directly charge my phone though unless it was an emergency. Rather I use it to charge battery banks. Mostly due to paranoia and the desire to protect my phone from fluctuating voltage. I'd prefer to kill that cheap battery bank if there's an issue.
Something like this would keep your phone powered for a day or three:
https://www.amazon.com/Anker-20000mAh-Portable-Charger-PowerCore/dp/B00X5RV14Y/ref=sr_1_1?ie=UTF8&qid=1469133062&sr=8-1&keywords=battery+bank
Or they make little chargers that use 2 AA batteries. Fair warning they get hotter than hell if you use them for a long time.
https://www.amazon.com/Duracell-Instant-Charger-Universal-Cable/dp/B002FU6KF2/ref=sr_1_3?s=electronics&ie=UTF8&qid=1469133429&sr=1-3&keywords=aa+phone+charger
I am in trucking and a lot of drivers say this is the best thing out there, really odourless, http://www.amazon.com/Thetford-92360-Porta-Portable-Toilet/dp/B006WPQNB2/ , it costs more than a portapotty you might find at walmart, but its what I'd use in an self made RV Van, over a composting toilet. The base detaches and you can take it like a jug of water to a toilet or RV waste spot and dump your waste.
I drilled a hole in the roof and ran them through there. Didn't consider for very long if I could feed them through the door or not. DIidn't immediately look like it, so through the roof it was!
I haven't anchored the batteries yet. This is a little bit halfway done honestly. I did the solar and the vent at the same time, and that took all day, so the mess of wires isn't permanent it was just a quick "Let's see that everything works mess" haha. I need to build the bed frame, for that what I'm gonna do is start at the rear of the wheel well and go forward, and then put a couple of boards up vertically so that the very back will be a space for our bikes, and probably have a board going horizontally over my tools and the battery shit.
The tan box is actually silver but appeared tan in the picture for some reason. It's a 1000W inverter with 2000w peak load. It's just a china brand since I'm broke.
As for price I'll add most of the stuff up here, but I might forget some small stuff I got from home depot or such.
Column A | Column B
---------|----------
Sikaflex | $13
Inverter | $160
Charge Controller | $20
Wires | $22
VHB Tape | $30
100W Solar | $170
2 Batteries | $200 + $18ea core
total | $651
I didn't really have any tools so I spent like $200 at homedepot/lowes on shit too. Including some wire, wire cutters, jig saw, zip ties, caulk gun, etc.