 Reddit reviews Neiko 01408A Electronic Digital Caliper with Extra Large LCD Screen | 0 - 8 Inches | Inch/Fractions/Millimeter Conversion
We found 4 Reddit comments about Neiko 01408A Electronic Digital Caliper with Extra Large LCD Screen | 0 - 8 Inches | Inch/Fractions/Millimeter Conversion. Here are the top ones, ranked by their Reddit score.
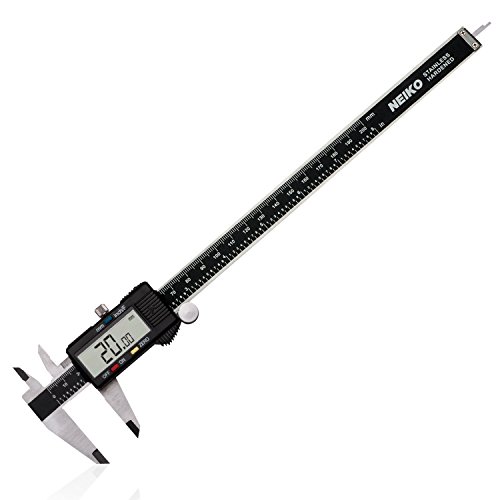
THREE MEASURING MODES: one button quick change between three measuring modes: inch, fractions, millimeterPRECISION | ACCURACY: Measurement Range: 0 - 8” and 0 - 200mm; Resolution: 0.0005” / 1/128” / 0.01mm; Accuracy: 0.001” / 0.02mmSTAINLESS STEEL: finely polished stainless steel frame with knurled thumb roller and locking screw ensure smooth sliding and accurate positioning in useVERSATILITY: measure inside, outside, depth and step with two sets of jaws and the probeEASY READ VISIBILITY: extra large LCD screen for easy and clear readingBONUS: extra replacement LR44 battery along with one battery included and custom fit storage case included for better value
So I've had my Anet A8 for about 3 weeks now. I have done everything you are seeing. First off let me say get yourself something like this https://smile.amazon.com/gp/product/B072L2YJLH/ref=oh_aui_detailpage_o00_s00?ie=UTF8&psc=1. Auto Bed leveling is amazing for being able to adjust and get that good adhesion. Also I was ripping my hair out trying to figure this out, when I took my nozzle off, and it was supposed to be a 0.4mm nozzle, but my 0.6mm drill bit went had gap on both sides, so the hole was 0.7mm which is bad when you are expecting a smaller hole. I would suggest moving changing nozzles/block. That said, also make sure that your thermistor is in the heatblock. There is the little hole by the heater that goes into the heating block. If not, you will be over heating for the filament.
Looking at what has been pused out, your nozzel is too far off the bed. If you don't have a dial calipers I would suggest getting one. something like this https://smile.amazon.com/gp/product/B000NEA0P8/ref=oh_aui_detailpage_o01_s00?ie=UTF8&psc=1
People say use a sheet of paper, but depending on the paper weight, you will have different thickness. Try to find a sheet that is either .1 or .2mm thick. This will allow you to set with the sheet of paper easier. I have .1mm thick paper that drags pretty hard, and that gives me a nice squish. If you think about it, you should be pushing a .4mm and with a .2mm layer, it should be half flat, half round. If the extruded is all round, then you are close enough to squish it. The most important part to the print is making sure the nozzle is at the size it is supposed to be.
Here's my process:
I measured the leftover openings, their width, length and depth. Then I measured the distances between the openings. Once I had my dimensions, I recreated the openings in Solidworks as a sketch and then proceeded to work on the handle. First I created the general large shape of the handle and made sure it overlayed the openings. After applying some fillets and cuts to get the outside shape to what I want, I used the Shell command to remove any excess material on the inside of the handle to create a shell of my wanted thickness. Once I had the shape of the handle done, I added the tabs to go on the inside of the door. I printed a small section of the handle with 2 tabs to make sure the fit was good, made a few small adjustments and then printed the whole handle standing up in PETG. It's rock solid.
Fusion 360 should work just as well as Solidworks. My tool for measuring are $16 Neiko micrometers from amazon, I absolutely love them and use them all the time for work and around the house.
These are the ones I bought before:
https://www.amazon.com/gp/product/B000NEA0P8/ref=ppx_yo_dt_b_search_asin_title?ie=UTF8&psc=1
These Neikos from Amazon are fine. I have two: one for reloading and one for printing. Any nicer would be overkill. Starretts and Mitutoyos are great, but the clearances 3d printing deals with just don't need that much accuracy; I've found my cheapish ones to be +/- 0.01ish mm, so being conservative and calling it 0.02mm, it's still close enough that my filament diameter measurements end up being spot on.
That is a really good project. I think you should try to find something that has already been done by a mod'ing expert or be ready to do a lot of research and CAD work.
If no mod example can be found you will have to go solo. I expect that the Intel NUC's could be made to fit if the bottom was cut to allow for its excess height. The feet need to be extended so that the laptop did not rock.
https://www.pcworld.com/article/3074962/computers/intel-nuc6i7kyk-review-this-skull-canyon-nuc-smashes-all-mini-pc-preconceptions.html
You can find all the tech details for the "Skull Canyon" NUC on Intel's website. The PDF of technical Product Specifications is where I would start.
https://www.intel.com/content/www/us/en/nuc/nuc-assets/nuc-skull-canyon.html?wapkw=skull+canyon+nuc
.
I think you will need some digital calipers and CAD software before you can be sure.
Neiko 01408A Electronic Digital Caliper with Extra Large LCD Screen