Best industrial & scientific according to redditors
We found 29,159 Reddit comments discussing the best industrial & scientific. We ranked the 11,986 resulting products by number of redditors who mentioned them. Here are the top 20.
We found 29,159 Reddit comments discussing the best industrial & scientific. We ranked the 11,986 resulting products by number of redditors who mentioned them. Here are the top 20.


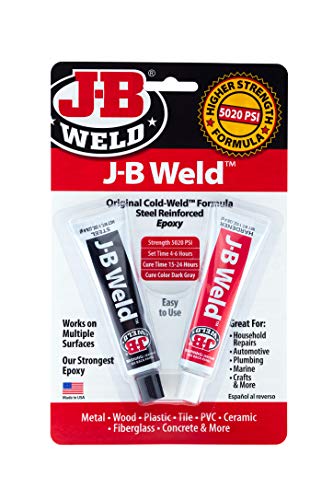


Go pro and use JB Weld. Superglue is amateur.
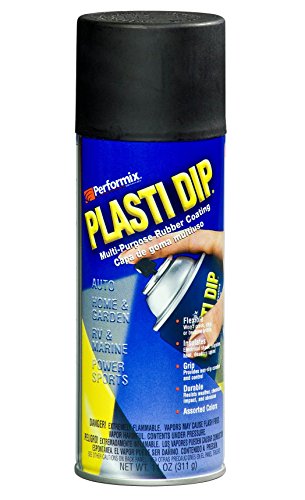
Spray the dash with Plastidip, no glare. If it's unsafe and Nissan isn't budging, fix it yourself or don't drive it. The hope of this going viral and getting fixed isn't worth the risk of killing some kid on a bike.
Amazon sells Uranium Ore. How many friends can say they have Uranium? This is the second time I've said this on Reddit, so I'm pretty sure I'll have a "pizza delivery van" across the street soon.
Damn ... it is actually offered from Amazon ... now the NSA will be tracking me for more than porn ...
http://www.amazon.com/Images-SI-Inc-Uranium-Ore/dp/B000796XXM/ref=sr_1_6?s=industrial&ie=UTF8&qid=1395501301&sr=1-6&keywords=uranium+ore
When I bought a Geiger counter Amazon suggested Uranium to me...
Uranium Ore available on Amazon: https://www.amazon.com/dp/B000796XXM/
You can also just buy some Uranium on Amazon.
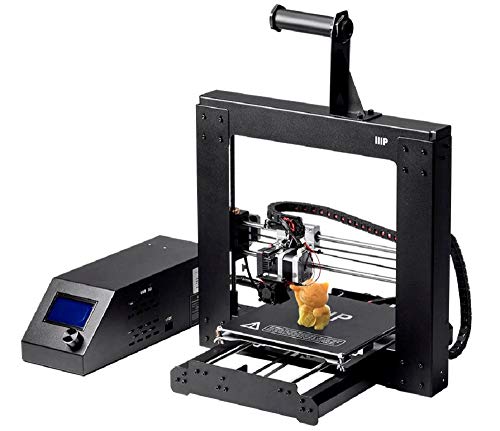
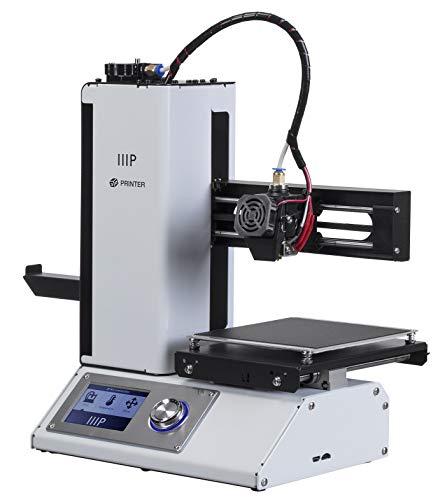
I got the Monoprice Select Mini (and lucked out, as it was freshly in stock so I didn't have to wait). Cheap, simple, and thoroughly functional.
I didn't know a damn thing about 3d printing going in, and now I have an army of minis that makes my wife gently sigh in exasperation every time she sees it.
They sell the stuff on Amazon. The reviews are pretty hilarious.
If we pool our lentils, we can get some on Amazon.
Unrefined uraninum ore is pretty safe and can be purchased on amazon. I'd suggest putting it in a vial of water to eliminate particulates though.
I'd just like to leave this here...
http://www.amazon.com/Images-SI-Inc-Uranium-Ore/dp/B000796XXM/ref=tag_stp_s2_edpp_url
If you're willing to spend about $30, you can get some Uranium Ore in a can.
http://www.amazon.com/gp/product/B000796XXM?ie=UTF8&tag=craziestgcom-20&link_code=as3&camp=211189&creative=373489&creativeASIN=B000796XXM
i've been paged for my link dump, so here it is. the first three links are detailed care sheets, then a tub tutorial, and the rest are product recommendations. read everything thoroughly, come back with any questions. let me know if any of the links don't work.
glass tanks can be very challenging for ball python husbandry due to the high amount of air flow with the screen top and the total lack of insulation with the glass walls. it's generally recommended to use tubs or pvc reptile cages instead. wood enclosures can also be suitable if they're designed well and sealed properly to protect the wood against moisture. glass tanks can work, but they require a lot of modification and maintenance, which you'll find tips for in the second link. i'll give you product recommendations to cover options for tanks, tubs, and pvc/wood enclosures.
He needs, yes. The Lee Challenger kit is around $99 on Amazon, and that has everything he'll need to get started except for: Bullets, Primers, Powder and Brass and DIES for 7.62x54r (another $30-$40)
Now, he'll want a digital scale, a case trimmer, and a tumbler to get his brass clean and pretty. That all can be added on, and most likely, be purchased in addition to the press kit for about $200.
Here's a list of things he'll want:
Lee Challenger Reloading Kit
https://www.amazon.com/gp/aw/d/B003ISVWC6/ref=yo_ii_img?ie=UTF8&psc=1
Hornady Reloading Manual (So he doesn’t blow himself up)
https://www.amazon.com/gp/aw/d/B01MAUZ71V/ref=yo_ii_img?ie=UTF8&psc=1
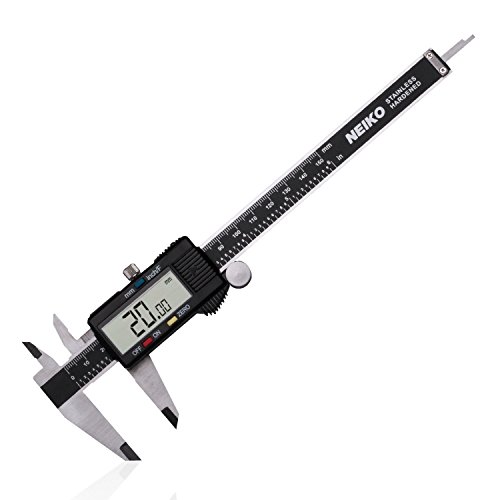
Calipers (So he doesn’t blow his gun up)
https://www.amazon.com/gp/aw/d/B000GSLKIW/ref=yo_ii_img?ie=UTF8&psc=1
7.62x54r Reloading Dies
https://www.amazon.com/Lee-Precision-7-62X54R-Pacesetter-Dies/dp/B00162UGUK/ref=sr_1_1?ie=UTF8&qid=1511562718&sr=8-1&keywords=7.62x54r+dies
Frankford Arsenal Quick-n-EZ Case Tumbler (To make clean-shiny brass)
https://www.amazon.com/gp/aw/d/B001MYGLJC/ref=yo_ii_img?ie=UTF8&psc=1
Case Tumbling Media
https://www.amazon.com/gp/aw/d/B000OQRGF2/ref=yo_ii_img?ie=UTF8&psc=1
RCBS Universal Case Loading Block
https://www.amazon.com/gp/aw/d/B0013RA5DQ/ref=yo_ii_img?ie=UTF8&psc=1
Hornady One-Shot Case Lube https://www.amazon.com/gp/aw/d/B0001NA29U/ref=yo_ii_img?ie=UTF8&psc=1
Guardians of the Galaxy Soundtrack (Because listening to good music scientifically makes better bullets)
https://www.amazon.com/gp/aw/d/B00LICGSFU/ref=yo_ii_img?ie=UTF8
Buying uranium ore on Amazon: $39.95
Seeing top result from Amazon is a testicle self exam form: priceless
(I kid, but, guys, you really should be checking for testicular cancer especially if you keep your uranium ore in your pocket.)
This one is a pretty good one with excellent reviews. May need some tinkering though
https://www.amazon.com/dp/B07BR3F9N6/ref=cm_sw_r_sms_apa_Zpf6BbJHAHYQ5
I found this
I don't know, but my gut tells me you can't do it unless it's shown to be safe with a Certificate of Measured Radiation.
I'd like to point out that you can, in fact, buy uranium ore as an individual- there's even uranium ore on Amazon.
What I think you're talking about is refined uranium-235, the kind which is used in the creation of atomic weaponry. Even supposing that you're not using it to attempt to create a bomb- and you are indeed hoping to use the product for research or development on medical or other purposes, why should individuals be allowed to obtain such a volatile material? There's the dangers of radiation poisoning, of the creation of weapons, etc... if you're truly hoping to use the uranium for research purposes, why wouldn't you go through an established university, institute, or lab? This way we make sure that qualified professionals with the equipment and know-how to make sure that it is handled safely, and for genuinely useful purposes, are the ones with access to it. And there's accountability to make sure it doesn't just end up in the hands of a bomber.
It's like if someone wanted to obtain samples of smallpox for research purposes- why would we trust just anyone and run the risk of it being mishandled, when there are established procedures and institutes to make sure it is properly contained?
Your life isn't complete without a tub of uranium ore. I would also like to mention that these rubber testicles somehow showed up in the search for "uranium", so you should buy those too.
They're getting pretty cheap -- I picked mine up brand new for $230.
Ahem.
Uranium Ore https://www.amazon.com/dp/B000796XXM/ref=cm_sw_r_cp_apa_--0Jzb7JWDQFM
Well...
https://www.amazon.com/Images-SI-Uranium-Ore/dp/B000796XXM
> 40 gal screen top tank
> No thermostat as there is a thick layer of substrate in the tank
/r/ballpython 's worse nightmare. Haha
I see you live in Southern (?) Florida, that's a huge reason why you haven't had an issue keeping the way you have. Decent on/off thermostats like this Inkbird are so cheap there's pretty much no reason not to have one. Check out /r/ballpythons sticky thread. I'm sure you can agree that even if you haven't had an issue in all this time that there's always room for improvement. Here's to 20 more!
It is an unblown plastic soda bottle preform. They're sold as water tight small containers so this could have been used for anything.
Actually, you're absurdly wrong. About 1000% wrong (with prime).
Don't forget uranium!
Long story short:Wanted to learn about the destruction of Carthage on Wikipedia, closed the browser after learning how to make an atomic bomb
bonus: amazon.com sells uranium. The reviews are glorious.
Edit:added link
But you can buy uranium on Amazon!
Get yourself a pair of these (if you don't already):
https://www.amazon.com/Neiko-01407A-Electronic-Digital-Stainless/dp/B000GSLKIW/ref=sr_1_3?keywords=calipers&qid=1565281175&s=gateway&sr=8-3
Then you just measure and model. Look at the basic shape first and model the basic shape. Then add (and subtract) as necessary.
I find using OpenSCAD a little easier for duplicating a real world part because you can use variables and fine tune with variable values rather than having to redraw something. (in OpenSCAD you write code instead of click-to-draw).
3D scanning would also be an option if you have that setup (been meaning to print a 3d scanning rig...couple of good options on thingiverse)
The adapter pack you'd need to mount to any rail is $5 on Amazon - https://www.amazon.com/dp/B0006O1ICE/
And Amazon
>Uranium that was given was most likely used to add to Russia's nuclear weapons arsenal.
You do realize that what was sold where Uranium mining rights, right? It's not weaponsgrade, it's not even torn out of the ground yet. In addition, uranium ore is not scarce, you can buy it on the open market.
Hell, you can buy it on Amazon
Russia gained nothing out of this for their weapon programs.
Just to prove how easy it is to obtain uranium, you can literally buy it on amazon. It’s commonly sold for testing instruments.
https://www.amazon.com/Images-SI-Uranium-Ore/dp/B000796XXM
That book better have some of these reviews in it:
http://www.amazon.com/Images-SI-Uranium-Ore/product-reviews/B000796XXM
I've posted this tutorial before, and I'm gonna do it again, for anyone wanting to know how to mount this bad boy. Other people have messaged me saying they've used different adapter mounts and a dremel instead of the JB Weld method. About two weeks now, and still doing great!
 
 
I used this guy's Amazon tutorial on how to put the adapter on, although I got the non-quick set version that comes in seperate tubes.
These are the items I purchased:
Here are the pics of my setup. Please note, I waited a full 24 hours before mounting them. I know people get antsy, but just wait!!! Also, when adjusting the monitors for the first time, don't use too much torque, or you might detach the adapter from the monitor. The scratch marks you see on the back of the monitor, next to the adapter are where I sanded it down. I don't care about the way it looks, since my desk is against a wall. You can probably be a bit more careful if you actually care about the looks. I also sanded off the paint from the adapters so I can get good contact between the rough plastic surface and the bare steel plate. The screws that came with the adapters, as long as I washered them out a little, were perfectly fine to use.
There are still some small adjustments I need to make to the way they are lined up, but this is pretty much 99% done. I highly recommend anyone looking for more desk space to give this a shot.
Eighth swirl attempt. Trial and error = improvement.
It's an aluminum enclosure, so paint adhesion is always a potential problem. I used self-etching primer - it chemically etches the surface of the aluminum, providing a good base coat that other paints can stick to.
After that, I put down a base coat of intense orange. I've found that swirled paint jobs tend to have a lot of see-through areas, so you want to plan the bottom layer strategically. I let this dry for about 3 days before I proceeded to the dip because enamel spray paints stay tacky for so long.
For dipping, I put a large plastic trash bag into a 3 gallon bucket before adding the water. The trash bag prevents paint from mucking up your bucket, which is important if your bucket is also used for serving chilled canned beverages at fabulous summer barbecues.
I filled the bucket with room temperature water. I added 7.5g Borax per liter of water to reduce the surface tension and allow the paint to flow over the water's surface.
For paints, I used Humbrol brand enamel paints. I was able to find them at my local hobby shop even though they weren't listed as a retailer on the Humbrol website. They should be available at most serious hobby / model airplane stores, as they're one of the classic brands of model paint that have been around almost since plastic models appeared on the market.
If doing 3-color swirls, I think think one could dip about 10 pedals from three 14mL cans of paint. The consistency should be like warm syrup: not thin like water, but able to drip or drizzle off the end of a coffee stir stick (the smaller size makes them easier to use than a popsicle stick because the cans are so little). Stir really well. If too thick, thin with mineral spirits / white spirit. I dropped it in with a plastic pipette - about 10-30 drops were required, depending on how thick the paint was. (I also tried thinning with white gas / naphtha, but it did not work as well. Despite the similarity in name - white spirit vs white gas - they are not equivalent!)
I'm going to stop posting links now; the section above is where I had the most trouble finding quality instruction in the Internet when I was figuring out how to do this, but there are plenty of YouTube videos that demonstrate the actual swirling/dipping process described below.
I drop the paints into the water by dipping a stir stick into the paint and letting it drip off the end into the water. Drop the paints into the water from as close to the surface as possible - if you drop from too high, the paint will plunge through the surface and sink to the bottom. The first few drops on the surface might thin out into a fine sheen on the surface of the water, but eventually they'll saturate the surface with a fine layer of paint and you'll be able to start getting good dots and ropes of color. I noticed that different colors seem to behave differently as they hit the surface - it's smart to try some experimental dips to master your paints before actually dipping your enclosure.
Work quickly. The paint is drying on the surface of the water even as you drop it in. It doesn't even take a minute for a thin coat of floating paint to tack up.
Swirl carefully with a stick to make your designs and move the paint where you want it. Be aware that the more you swirl, the more paint you will end up with on your stir stick instead of on your work piece.
Dip your pedal slowly and carefully (on the end of a stick or a coat hanger so your hand doesn't end up getting swirled too). The paint will be pulled onto the surface of the pedal and dragged underwater with the pedal. After it's completely submerged, use crunched up newspaper to clear an open spot on the surface of the water to pull the pedal back out so it doesn't end up with swirls on top of swirls.
Pull the pedal out. Blow or shake the water off. By the time you're finished doing that, thin areas of paint will basically be dry, medium areas will be tacky, and thick areas will be on their way. Hang it up to dry in a wind/dust free area.
If you hate it, wipe it off with mineral spirits within an hour or two and start over.
If you like it, let it dry a couple days and then top coat with something tough.
Honestly? You will screw up once or twice when you first start, but generally, it's a fairly easy process and you'll save yourself a lot of money in the long run by doing it yourself.
Just to give you an idea of how I do it, here are the items I use. If you have Amazon Student/Prime, it'll be even easier:
For me, I mix it in small tupperware (obviously, I don't use this for storing food at anymore). For 2 small packets of Shiro samples (or even a minijar (both of which fit comfortably in the aforementioned palette)), I use a mixture of no more than 3 drops of jojoba oil and use alcohol to mix it into a paste, of which I then place into the aluminum palette.
You don't want to use an excessive amount of the oil because then it will almost never dry and dilute the color. Whereas, alcohol evaporates out faster so you want to use more of the alcohol than the jojoba oil (or whatever binding solution you choose). Once it gets dried down to a certain point, you can press if you choose to, but I never feel I need to when I do it this way because it's generally pretty uniform.
I know dorm rooms are crampy, but you can do this anywhere once you get the hang of it and for cheaper than having someone else do it (especially if you take into consideration the excessive shipping costs--which will be more than the cost of what you'd be using for some of these products alone).
ETA: Added details.
25% phosphoric acid isn't particularly dangerous, and it's not horribly corrosive. Plastic or glass will be fine. I wouldn't let it sit on metal for an extended period of time, so be careful if you plan to use metal needles with your syringe. Plastic transfer pipettes work nicely, though. I like this style because it allows you to eyeball the amount you're adding without needing anything like a syringe.
Here you go.
https://www.amazon.com/Images-SI-Uranium-Ore/dp/B000796XXM
Oh come on, you can get a 3D printer for practically the same price as a normal printer.
https://www.amazon.com/Monoprice-Select-Printer-Heated-Filament/dp/B01FL49VZE
Just buy some uranium from Amazon to make it more convincing
You can buy uranium ore from Amazon.
Sorry, out of stock. Customers also bought:
I hope you enjoy shopping with us! Read our customers' reviews to be sure you won't be disappointed in your purchase.
Sounds like you were getting outdated or flat-out incorrect information and those 'experienced snake owners' are likewise misinformed. There are very few snakes that legitimately have evolved to thrive on sand-based substrate (irony being the Sand Boa is not one of them; they live in sandy soil which is very different composition than straight sand). The Ball Python is native to the svannah/jungles of Sub-Saharan Africa. Its dirt, soil, and burrows. Not a majority or even significant amount of sand.
Additionally, if I extrapolate correctly from this singular picture, your BP is also in a glass enclosure and has a log-style hide. The former makes keeping humidity in the 55~80% range a difficult exercise, and the latter, is a stressor as BPs do best with a hide that has a single-entrance or is cave-like; the more points of contact, the better, and a single entrance means they can feel safer.
I'm going to steal _ataraxia's ball python dump and toss it below:
i'm going to dump a bunch of links to get you on the right track. the first three links are detailed care sheets, the rest are product recommendations. read everything thoroughly.
glass tanks can be very challenging for ball python husbandry due to the high amount of air flow with the screen top and the total lack of insulation with the glass walls. it's generally recommended to use tubs or pvc reptile cages instead. wood enclosures can also be suitable if they're designed well and sealed properly to protect the wood against moisture. glass tanks can work, but they require a lot of modification and maintenance, which you'll find tips for in the second link. i'll give you product recommendations to cover options for tanks, tubs, and pvc/wood enclosures.
It's pretty easy, honestly it's just removing the 4 pin fan power connector and removing screws. When you have a few hours, go ahead and lookup a dissasembly guide on YouTube or Ifixit on your card and go from there.
After disasemmbly, there'll be a bunch of old thermal paste, simply going at it with q-tips and coffee filters will remove it. If it's not really coming off, use a small amount of isopropyl alcholol above 60% and get removing.
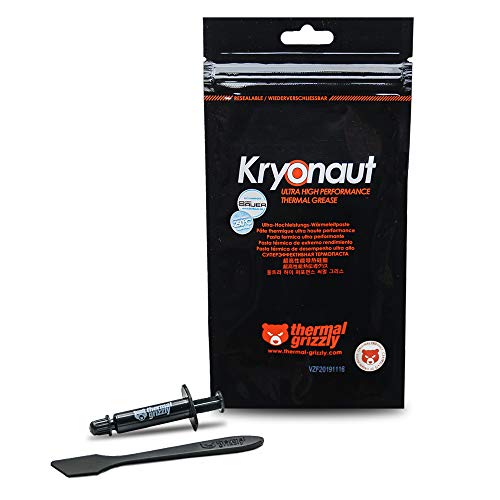
Kryonaut works really well for paste on tight GPU mounting, but any real thermal compounds works that you have lying around.
Reassembly is simply putting in new paste, attaching the 4 pins back and re screwing. A side note, you don't have to take the fans off of the heating block (aluminum fins), but rather just the cooling element off the card.
Good luck!
https://www.amazon.com/Thermal-Grizzly-Kryonaut-Grease-Paste/dp/B011F7W3LU
Red light isn't good, you'll want a heat mat (MAKE SURE you have a thermostat for it or it will get too hot) and possibly a ceramic heat emitter (also needs a thermostat) for air heat. What are the temps and humidity and how do you measure them? Glass tanks usually don't hold humidity well and often aren't good for bps. You need at least 2 good hides, one for each side. They should be snug and enclosed with only one opening, preferably identical, half logs don't work.
Someone should come by with a really good care sheet, read it, it has some great info. I know this might be a lot of information, but having a good setup is important and will save you headaches in the future.
Edit: I found the care sheet. Credit to u/_ataraxia.
Glass tanks can be very challenging for ball python husbandry due to the high amount of air flow with the screen top and the total lack of insulation with the glass walls. It's generally recommended to use tubs or pvc reptile cages instead. wood enclosures can also be suitable if they're designed well and sealed properly to protect the wood against moisture. glass tanks can work, but they require a lot of modification and maintenance, which you'll find tips for in the second link. i'll give you product recommendations to cover options for tanks, tubs, and pvc/wood enclosures.
Cheap digital caliper
https://www.amazon.com/Neiko-01407A-Electronic-Digital-Caliper/dp/B000GSLKIW/ref=sr_1_3?ie=UTF8&qid=1498403628&sr=8-3&keywords=digital+caliper
Looks like that bastard won't be buying that little tin of uranium or the JL421 Badonkadonk Land Cruiser Tank any time soon.
To answer your first question
In the same vein : https://www.amazon.com/Images-SI-Uranium-Ore/dp/B000796XXM
You're being downvoted because you, and everyone else who brings this up, all try to frame a positive as a negative in complete opposition to the facts.
Additionally, you lay blame for the "evil" deed on the wrong person because you are ideologically opposed to that person and will use any ammunition available, even if it is comprised solely of lies, to harm that person.
The uranium deal was great for the United States.
To top it all off, none of the Russian firms that purchased a 20% stake in US mine output can export any uranium from the US. They have to go through US-controlled entities and get the relevant NRC and AECA/ITAR permits and permissions.
Russia: We need uranium for our reactors and radioisotope medical devices.
US: Want to buy a stake in our mines? We have excess capacity.
Russia: Sure
US: Ok. You can buy the rights to 20% of our mining output. This means you don't have to buy uranium from China, but because of our laws you must go through and intermediary and get permission to export the output, if you want to export it.
Russia: Sounds great! All of our nukes use plutonium and we have 100s of tons stockpiled from the Cold War so dealing with some paperwork to get uranium rods for our reactors and isotope samples for our nuclear medicine industry is no big deal.
Some rando on the internet: $hillery sold us out!!!
Well. I mean. That's why I downvoted you.
And when now-President Trump brings this up in an attempt to whip some anger and rage into his ignorant base he is being a, and this is putting it mildly, shit-headed fucktard who has no clue (Donny, you're out of your element) about what he is regurgitating.
But I guess his garbage-spewing works because you, and many others, fell for it.
Get yourself your very own tin of uranium ore. 1001 uses!
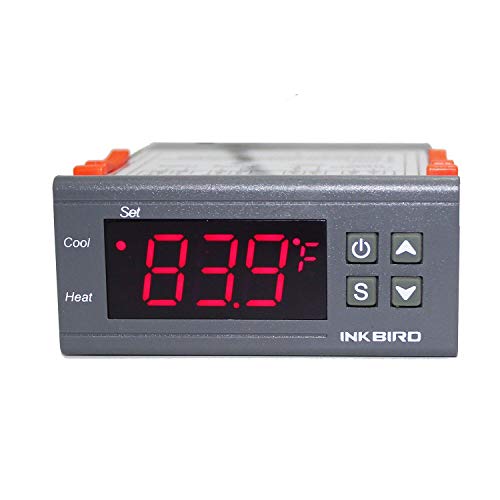
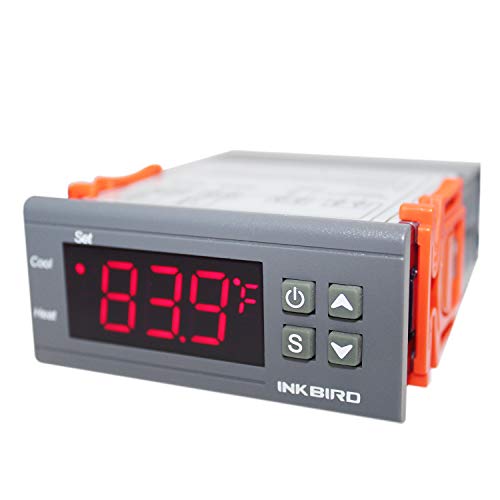
You're going to want to pick up something like this. You set a temperature and an acceptable threshold (i have mine varying by only one degree), and it will automatically turn the heat lamp off and on to keep it at a consistant temperature.
I also have a under-tank heat mat for my hot side, which is the main thing used to warm my snake. I absolutely recommend getting one to put under your tank. Corns like to burrow and will get more benefit to having one on the hot side. I just use the heat lamp to keep the ambient air in the tank at an acceptable level. You will want to get a separate controller for the heat mat.
Edit: I also have an Indoor/Outdoor Thermometer just chilling in the tank to get a more accurate reading inside. Your tank atmosphere is going to usually be a bit different than the atmosphere in your room. I have the "inside" number reading the ambient temp of the tank, the "outside" number reading the inside of the under-tank mat (controller probe goes between mat and glass on the outside, and this prob sticks to the glass on the inside under the substrate), and it also tells me the humidity in the tank.
You want to keep your numbers as consistant as possible. I like to shoot for 85 degrees on the hot side, 75 degrees on the cool side, and between 40%-60% humidty. I hope this information helps. Let me know if you have any questions.
Edit 2: GoHerping does a great care guide video on YouTube, which is where I got most of my setup and care info from. There is also a link to their discord on the YouTube page that is full of friendly people that can answer a lot of your questions.
Edit 3: You're going to be better off using a Ceramic Heat Emitter instead of a bulb. It just produces heat and no light, which will be better with the controller ( you don't want the light isn't constantly turning off and on). Corns don't need UVB either, and do fine with just natural lighting (assuming the light in the room still follows the normal day/night cycle).
your boyfriend, is incorrect im afraid to say, all heating elements need a thermostat to regulate the temperature. https://www.amazon.com/Inkbird-Max-1200W-Temperature-Controller-Greenhouse/dp/B01HXM5UAC this is a good brand and its only 30 bucks.
My condolences for your loss, it always hurts bad when a pet passes away.
Not having a hot spot would explain the lack of eating, but he shouldn't have starved in such a short time. Was your room super cold? Cold BPs can succumb to respiratory infections, which generally have obvious symptoms - wheezing, drooling, open-mouth-breathing, that sort of thing.
Did his body have any discoloration on the belly? An unregulated heat mat can reach dangerously hot temperatures, capable of burning/cooking a snake. It is possible that your heat mat shorted out after being on "full blast" for too long.
Unfortunately, cases like these are par for the course when it comes to reptiles and reptile equipment sold at chain pet shops. Their snakes are usually not very healthy to begin with - they generally sell the "less desirable" snakes produced by local breeders, and pet shops usually keep them in poor conditions (inadequate feeding, humidity, temps, overcrowding, etc), which weakens them. The quality of most big box heating products (Zoomed, etc) is garbage too.
If you want another snake someday, I would recommend buying from a good private breeder (avoid large-scale operations, like LLL Reptile, BHB, Underground, Big Apple, etc.). Most large cities have a reptile expo once every month or so, if you're up for the drive, or you can buy online and have a snake shipped (it's much safer and less weird than it might sound!). Get a radiant heat panel or a square foot of heat tape, and get a nice thermostat to control the temperature.
Don't do the open refrigerator thing, you will waste a ton of electricity and won't actually be able to temperature control even close to enough to lager with any reasonable degree of certainty. If I had to guess, leaving a fridge with an open door for a month will probably waste far more than $16.
Instead of wasting that $16 in electricity, you can get one of these, which is perfect for a fermentation chamber made from a fridge. A small amount of wiring work is required, but it's relatively easy.
If you aren't willing to invest $16 and an hour figuring out how to wire it together, I would suggest just letting it ride without temperature control (or maybe a swamp cooler or similar). Most lager yeasts will be fine in the low-mid 60s.
Edit to note: it's not too late by any means to get that temp control part now. You could start it warm and chill down in the refrigerator when you have the part, possibly even complete fermentation warmish and then stick in the refrigerator on its highest setting for a few weeks. Or you could start it in the refrigerator on its highest setting and let it warm up a bit more when you have the part. Leaving the fridge open is probably the worst choice you could make out of all the options above.
Double edit: If you don't want to mess with wires, you could get one of these, but it's more expensive. It's basically the same thing as the cheaper one, but with plugs.
Bonus fun fact edit: Refrigerators make the room warmer in general, but peaving the refrigerator door open will make it even warmer. You would be effectively making a really really ridiculously inefficient space heater.
Forty dollars on Amazon
https://www.amazon.com/Images-SI-Uranium-Ore/dp/B000796XXM
You are allowed to own as much uranium as you want, as long as it isn't enriched.
Antique store? Hell, you can buy it on Amazon.
Like this?
Yeah. You can buy uranium on amazon.
https://www.amazon.com/Images-SI-Uranium-Ore/dp/B000796XXM/ref=sr_1_1?ie=UTF8&qid=1502607828&sr=8-1
Oh, is that how it works? You just grab bag a thing that people suggested to you? :O
Sorry.
http://www.amazon.com/gp/aw/d/B000796XXM?pc_redir=1409199391&robot_redir=1
Put uranium under your archenemisises chair and give them asscancer.
You actually just graduated a level in motorcycle maintenance. You can replace your own chains with a chain breaker/pin set kit and a digital micrometer.
High quality chains like D.I.D. are a good idea, and the instructions will be clear regarding the spread/flare measurement on the pin.
If you do this, lube the threads on the extractor with a little lithium.
You will also typically want to replace both sprockets with the chain.
I got this keyboard for $50 after rebate, I really enjoy it (my first mechanical). Whenever I go to my college library, I always contemplate bringing the keyboard in to type on the computers because their rubber domed keys feel like I'm trying to type on a keyboard made of Play-Doh. Unresponsive, slow, and generally unpleasant to use.
A word of advice for someone who is thinking about getting a mechanical keyboard, even if the switches don't make much sound, the keys bottoming out / rebounding tend to be quite loud. This is why I invested in some rubber o-rings which limited the sound the keyboard makes when bottoming out. The ones from amazon are similar to the ones that WASDkeyboards sells for $18 (I assume its comparable to the 50A-R). They do influence the feel of the keyboard, but I think the noise reduction is worth it.
Overall, if you've been looking for a good keyboard to get for a new gaming computer, or if you're planning on upgrading to a mechanical keyboard, I would definitely suggest this (even though it is $10 more than what I paid for it).
Edit: If you are new to mechanical keyboards, keep in mind that they are generally taller than dome keyboards (base is roughly 3/4 inch tall). Also, this keyboard isn't fully back-lit if you were looking for a keyboard which is, I advise you look elsewhere.
next time get some pipettes so you won't spill it! https://www.amazon.com/Plastic-Transfer-Pipettes-Gradulated-Pack/dp/B005IQTSE0
What is big?
What are you planning on printing in? PLA like normal people or ABS which needs a heated bed and to be much better ventilated?
Anycubic i3 Mega is 8.3 x 8.3 x 8.1 inches
If you're literally just looking for the cheapest way into 3D printing Microcenter has PowerSpec Duplicator i3 Mini for $150.
Its build area is 5.9" x 5.9" x 4.5" and it uses 1.75mm PLA
You'll probably be printing a lot more things smaller if you're experimenting around since double the length, width, and height cubes the volume (though there's a lot more filament in the shell than infill).
Also, Cura or any other slicer that works on Linux is going to take .stl files and output gcode files to an SD Card and you can then print from the SD card in the printer without the computer attached.
Anycubic boasts 10 microns, but the layer height 100-400 is going to be your main source of "quality" in my opinion and it can match that. What you're giving up is mostly the ability to print ABS, potentially the ability to print Glow-in-the-dark PLA (you need a hardened steel rather than brass tip for this), and heated bed.
Obviously, the Creality C10 and Tevo Tornado and if it's me, and I have $350 in my hand, I'm going to grab a Tevo Tornado.
And of course: Monoprice's Budget Model is small, but gives you the heated bed and hot-end temperatures to do ABS, etc. if you wanted to.
I'm pretty sure that they can all just print GCODE from your SD Cards.
I'd be remiss if I didn't plug Octo-print
https://www.amazon.com/dp/B07BR3F9N6/ref=cm_sw_r_cp_apa_i_tLKNDbRVKMPPB
A spool of filament is about $25 but lasts quite a while. I have used it to fix my toilet, a phone bracket and water cage for my bicycle, a replacement part for my friends telescope, miniatures for a few boardgames. It's almost endless what you can do with them. Most of the files online are free, too
I have one of those mini fridges, but I haven't messed with the built in temp controller and I wouldn't want to. Instead, I plug the fridge into an Inkbird temp controller. Then I drilled a hole in one of the screw holes for the door and passed the temp probe through that and into the fermenter's thermowell. I have the inkbird set to 68 and the fridge is set to 50. When the fridge turns on again it is still at 50 for me.
First of all. It's very good you recognize that you need help in learning how to care for the snake.
Second, here is a big link dump created by another regular user u/_ataraxia all credit for this goes to her.
the first three links are detailed care sheets, then a tub tutorial, and the rest are product recommendations. read everything thoroughly, come back with any questions.
glass tanks can be very challenging for ball python husbandry due to the high amount of air flow with the screen top and the total lack of insulation with the glass walls. it's generally recommended to use tubs or pvc reptile cages instead. wood enclosures can also be suitable if they're designed well and sealed properly to protect the wood against moisture. glass tanks can work, but they require a lot of modification and maintenance, which you'll find tips for in the second link. i'll give you product recommendations to cover options for tanks, tubs, and pvc/wood enclosures.
Would it influence your decision if the Wanhao was $200 cheaper than that? http://www.amazon.com/Monoprice-113860-Select-Printer-Filament/dp/B018GZBC3Y/ref=sr_1_2?ie=UTF8&qid=1463585216&sr=8-2&keywords=wanhao+i3
It's the Monoprice variant, but basically the same printer as the Wanhao i3
This is me in the video! I got a Monoprice Maker Select v2. It's $259 on Amazon right now.
https://www.amazon.com/dp/B018GZBC3Y/ref=cm_sw_r_cp_api_i_aG7UDb66MPWYT
After you pluck the foam to the shape you want, cover it with some plasti-dip spray rubber.
https://www.amazon.com/Performix-11203-Multi-Purpose-Coating-Aerosol/dp/B0006SU3QW/
It basically glues the rest of the rest of the foam pieces together and makes the foam less absorbant.
Do not try to use the non-spray variety. I tried both and the non-spray variety was a fucking disaster, when it dried it shrunk unevenly which completely warped the foam and it was a pain in the ass to apply evenly. I ended up throwing that foam away.
I sprayed a door/window sensor and magnet with Plasti Dip and then mounted the sensor to the gate and the magnet to the wall. I would have preferred to mount the sensor to the wall and the magnet to the gate, but there wasn't enough clearance between the gate and the wall for the sensor.
I figured I would try it and see if it would fail after a few weeks or not and so far, so good. It has been on for about 10+ months and has survived the weather in Arizona (heat, thunderstorms and sandstorms).
The tape used for mounting (I don't think I used the standard tape it came with) has also held up well. I did make sure to scrub the area with an alcohol swab or two before mounting.
When it is time to replace the battery, I'll remove the coating, which can be peeled off, replace the battery, spray it again, and then remount.
The black coating makes it blend in to the black frame of the gate, so it does not stand out, which is nice, and I am getting ready to do the same for another gate real soon.
(This is my first post, so I'm not sure how to add a picture of it.)
sources: http://otbfirearms.com/nfa/transferable-machine-guns/
https://www.amazon.com/Images-SI-Uranium-Ore/dp/B000796XXM
here ya go
https://www.amazon.com/Images-SI-Uranium-Ore/dp/B000796XXM
$6431 for an e-book but only $39.95 for Uranium
Bought one. Worked great till I spilled my Tuscan Milk all over it while reading How To Avoid Huge Ships. Luckily I had bought some Uranium Ore at the same time. Sprinkled a little over the cable, and it works perfect now.
Uranium no one expects uranium.
You can however get Uranium.
Resources they have available isn't a problem at this point in the story, because of Coil. Untraceable firearms are a non-issue when one is willing to wait a few days, and (at least in post-9/11 Earth Aleph), uranium is available on Amazon.
As for mentality, I'd understand if this was Regent or Bitch's power, but Grue is pretty diligent, and Tattletale is all about information. Getting a more detailed understanding of a teammate's power seems like something they would... well, get around to eventually.
Amazon?
Here is the actual Amazon product link.
https://www.amazon.com/Images-SI-Uranium-Ore/dp/B000796XXM
I'm just going to drop this link dump from u/_ataraxia. The first three links are fantastic care sheets and will talk about feeder size vs snake size and age. The rest of it highlights products you may need.
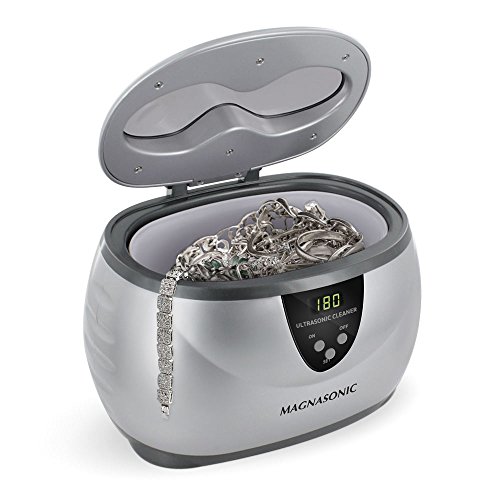
Amazon US Cleaner
Everyone has different budgets but Amazon has them for $35
It's a super easy mod to do. The parts are like $8 on Amazon and you print the mount. This is the first thing I did on my Maker Select.
Mod link: https://letsprint3d.net/2017/01/29/guide-installing-a-mosfet-board-maker-select-v2/
Part: https://www.amazon.com/dp/B01HEQVQAK/ref=cm_sw_r_cp_apa_i_cZbPCbG4PRAN7
https://www.amazon.com/Inkbird-Max-1200W-Temperature-Controller-Greenhouse/dp/B01HXM5UAC
I don't use them for this purpose, but I use them for beer brewing and other hobbies. You plug this inline with a heating/cooling source and place the probe in the desired location. Ten years ago I would make them from scratch and build in redundancy in case of failure, but I have two of these that have been working fine for over 3 years of nonstop use.
Tramontina 126-Can Beverage Center $250
7 gal | Brew Bucket Brewmaster Edition $229
Inkbird $35
Printer - $200
Plastic - $23
Some software (browse around and torrent) and trial/error and you too can be printing whatever your freedom-loving heart desires. And thats just from banging around on Amazon. You can do better (read: cheaper) on one of the Chinese sites. Alibaba or Gearbest or whogivesafuck.com you can probably put in for less than $200 all told.
Great thing is the only thing you need to re-up is the cheap ass plastic. The printer should last you longer than your imagination.
Just save $20 a paycheck and by Christmas you'll have yourself a nice gift.
u/ataraxia has amazing information for ball pythons. You should definitely read it through. Glass tanks are not ideal for Bps, so this should help. Here is her normal dump of information I took from another post.
i'm going to dump a bunch of helpful links on you. the first three links are detailed care sheets, then a tub tutorial, and the rest are product recommendations. read everything thoroughly, come back with any questions.
glass tanks can be very challenging for ball python husbandry due to the high amount of air flow with the screen top and the total lack of insulation with the glass walls. it's generally recommended to use tubs or pvc reptile cages instead. wood enclosures can also be suitable if they're designed well and sealed properly to protect the wood against moisture. glass tanks can work, but they require a lot of modification and maintenance, which you'll find tips for in the second link. i'll give you product recommendations to cover options for tanks, tubs, and pvc/wood enclosures.
If you have basic wiring skills you can do it for less than $20 (if you already have a analog/basic crockpot)
STC-1000 on Amazon.com Elitech 110V All-Purpose Temperature Controller+ Sensor 2 Relay Output Thermostat Stc-1000 https://www.amazon.com/dp/B008KVCPH2/ref=cm_sw_r_awd_jq0Wub1M7MB25
https://www.amazon.com/dp/B008KVCPH2/ref=cm_sw_r_awd_jq0Wub1M7MB25
Definitely looks like a geocache made from a soda bottle preform. would explain the 'fish eye lens' and the soda bottle style cap.
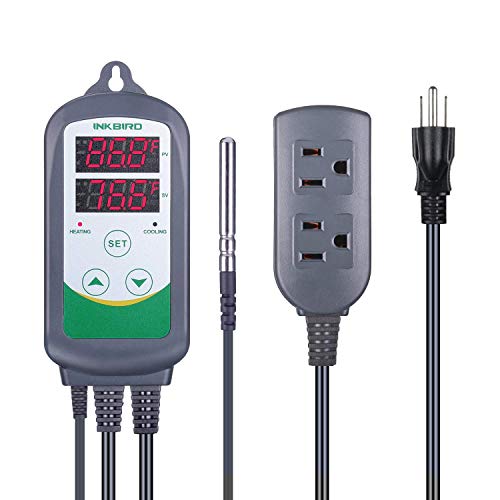
ITC-308 has heating and cooling function, and can be maintained a certain temp range by setting difference values.
US 15% coupon code: CAVDY4S6
ITC-308 With heating and cooling plug
CA 15% coupon code: ZCSTHQJM for ITC-308
An ITC-308 is probably going to be the easiest bet.
That freezer is rated at 1.4 amps at 115 volts. That is 161 Watts if it was a purely resistive load (it isn't; but it gives us a maximum to work with). The ITC-308 is rated for 1000 watts, so we are only at 16% rated capacity... That's a huge safety margin.
This controller also has compressor delay protection, so it's a wise choice in this application. Best of all, it's plug and play!
They are actually made for soda bottle production. You can usually find big packs for cheap.
https://www.amazon.com/Soda-Bottle-Preforms-Caps-30/dp/B008MB1QNY
Hey, thanks! Yes, that's the one I was thinking of. I just couldn't find it. Idk about better though. They're different for sure, but they're both made from bottle preforms, so the tube strength should be the same.
The pocket reel comes with:
The one I linked comes with:
So, with the pocket reel, you get 4 hooks instead of 6, 1 bobber instead of 2, 4 sinkers instead of 8, metal spinners instead of jigs, but almost twice as much line and a "knot guide".
Seems like about a wash to me. I should note that I don't have a horse in this race, I've never used either and am not affiliated with either shop. The kit I posted was one I found a month or so ago while looking for the one you posted.
Personally, I went with neither and just bought some bottle preforms for about a buck a piece, filled a couple with the fishing gear I already had and used the rest for other camping gear: spices/oil for cooking, match case, pill bottles, tinder case, etc.
Temp Controller
https://www.amazon.com/dp/B011296704/ref=cm_sw_r_cp_api_dYnVAb99AN5JX
Humidity Controller
https://www.amazon.com/dp/B01FQKXRXA/ref=cm_sw_r_cp_api_3YnVAbW8V1DHG
DeHumidifier
https://www.amazon.com/dp/B000H0ZDD2/ref=cm_sw_r_cp_api_SZnVAbTSHMSQT
Humidifier
https://www.amazon.com/dp/B01D0POS7W/ref=cm_sw_r_cp_api_m0nVAbD00AGKP
Small Fan (on a timer, runs for 30 minutes every 2 hours or so)
https://www.amazon.com/dp/B00WM7TRTY/ref=cm_sw_r_cp_api_V0nVAb8XD3K7Q
Heater
https://www.amazon.com/dp/B00P7U259C/ref=cm_sw_r_cp_api_E1nVAbC6R49Z3
I got an old fridge on Craigslist for $25 that I thought was a small personal fridge but turned out to be about 6 cubic feet (perfect for hanging). I’m not sure of the brand actually (maybe Kenmore). So far I’ve done a Bresaola and a Copa, both have turned out great!
Story time... I've had this Filco with blues for awhile and never done anything to it. A few months ago I picked up a CODE with clears and my poor Filco sat abandoned and unloved. Recently, Massdrop did a group buy for Ducky PBT caps and I decided it was time to breathe some new life back into my Filco. I wanted to bring it back to work so I also took the opportunity to install some o-ring dampeners (Amazon, non-referral).
I love the keycaps, they feel great -- I'm a big fan of the texture. The o-rings make a big difference for me because I always bottom out. The one's I ordered from Amazon are a hybrid of the two offered by WASD because I wanted a harder ring with less travel reduction. If you're wishing your blues were a little quieter these are great o-rings.
> - 10 mL syringes to help measure nutes
I am quite fond of these 100 pack of 3ml pipettes.
I would get a cheap precision scale instead of syringes (must have 0.01g precision!). Then a big pack of disposable pipettes.
And bottles. Many bottles. LDPE dripper bottles. Or glass.
Get yourself a Bulb Syringe for a few bucks from your local drug store or dollar store and try the soak again and then a flush with the bulb syringe. Amazon and pen shops such as Goulet also sell them.Goulet's video about pen flushing.
Next step could be an ultrasonic cleaner
Performix 11203 Plasti Dip Black Multi-Purpose Rubber Coating Aerosol - 11 oz. https://www.amazon.com/dp/B0006SU3QW/ref=cm_sw_r_cp_apa_BHrYBb1KCDE9Q
I had a similar exposed camera and used plastidip (link below) to coat the exposed PCB. It also comes in a little paint can if you don't want the aerosol can. The stuff works well for all sorts of electronics you might want to protect.
http://www.amazon.com/Performix-11203-Multi-Purpose-Coating-Aerosol/dp/B0006SU3QW
https://www.amazon.com/dp/B0006SU3QW/ref=cm_sw_r_cp_api_i_D8MSCbWDGW1WN
You can get it at Walmart, or anywhere that has paint.
> uranium
https://www.amazon.com/Images-SI-Uranium-Ore/dp/B000796XXM
Amazon.
This came up in my Amazon recommendations, might go well with your new purchase.
Wait a second, Amazon.com, a website that sells boxes of ladybugs, the three-wolf t-shirt, Groceries, actual Uranium Ore, and the "Badonkadonk Land Cruiser/Tank" is EXPECTED to sell more general merchandise?
As long as it's not highly enriched there's nothing illegal about it you can buy it on Amazon.
https://www.amazon.com/Images-SI-Uranium-Ore/dp/B000796XXM
Everything is now radioactive. Carry a small sample of Uranium (you can literally order it off of Amazon). Convert copper, aluminum, or concrete, and you'll be glowing in the dark.
This is almost exactly $50!
Thank me later.
> For the same reason that we prohibit people from purchasing any other number of dangerous goods, such as radioactive materials or hazardous chemicals.
You can literally buy radioactive materials on Amazon.
>Again, I agree that it's highly unlikely anyone will use anti-tank rounds to shoot a guy in a robbery.
Side note: .50 cal - even armor-piercing - is completely useless against a modern tank. They're anti-materiel rounds; they'd be great against something like an engine block, and they're not very well-suited to killing people (compared to cheaper, lighter alternatives).
>But people have done something similar
North Hollywood was a problem for two main reasons:
The first would obviously not be affected by this law. The only point on which this law would affect the second is where it concerns magazine capacity, and the provision would be incredibly hard to enforce. In any case, at Columbine, VT, and plenty of other mass murders, the murderers usually only fire an average of around 10 rounds per magazine anyway, and in Aurora, the large-capacity drum magazine actually caused a jam; North Hollywood is exceedingly unusual in that the robbers used larger-than-standard capacity magazines effectively.
You can literally get it on Amazon.
https://www.amazon.com/Images-SI-Uranium-Ore/dp/B000796XXM
Amazon reviews say otherwise
https://www.amazon.com/Images-SI-Uranium-Ore/product-reviews/B000796XXM
And of those, they also looked at Uranium Ore.
Didn't know people like this really existed.
You may be right. If it got cold enough, you could have frost in a line or faucet. That'll make a nucleation point and draw a lot CO2 out of solution.
You could add a little heater to the fridge and set it with a temperature controller.
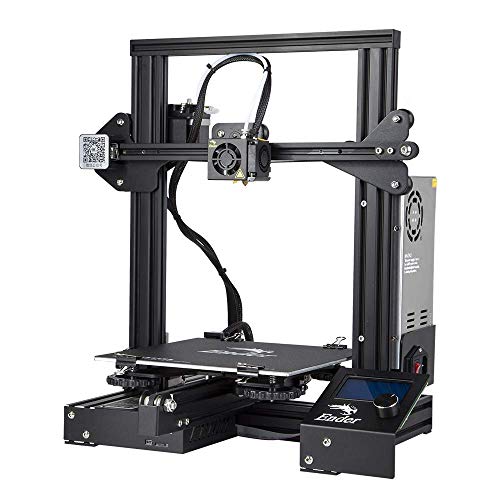
The Creality Ender 3 on Amazon.
https://www.amazon.com/gp/aw/d/B07BR3F9N6
It was recommended by at least 3 of the crafter DMs I've seen on YT.
The biggest misconception is that you pay for quality after reliability. It's the other way around: Any printer can print well, but not every printer can print reliably well.
There is no consumer printer with a guarantee of reliability. Hell, there are few commercial printers that are 99.9% reliable.
Reliability will ultimately depend on how much you learn about 3d printing, and how much (extra) you're willing to spend fixing problems that may come up. The best you can do is start with something easily modifiable at your budget.
Folgertech i3 aluminum | 270 USD (bring your own bed)
Monoprice Maker Select | 350 USD
MakerFarm Pegasus 8" | 375 USD
you need a digital temp controller ( here ), a 1000watt horse trough heater ( here ) and a submersible pump ( here ).
Depends on your money... as a fellow gamer, I got started with this relatively cheap printer available from Amazon: https://www.amazon.com/Monoprice-Maker-Select-3D-Printer/dp/B018GZBC3Y/ref=sr_1_2_sspa?s=industrial&ie=UTF8&qid=1505666716&sr=1-2-spons&keywords=monoprice+3d+printer&psc=1
It's a Monoprice Maker V2 - which is a renamed Wanhao Duplicator i3 0- which is a Chinese made version of a Prusa I3 (open source printer). With that printer there I was able to print several armies worth of WW2 tanks for Flames of War. The quality is quite nice. Feel free to PM me if you want more info.
This is a really precarious spot on the X230 and X220 lids. I've managed to repair a few that had this same issue.
I used a small spot of J-B Weld imbedded with a small finishing nail laid across the break for extra reinforcement in the area shown in the photograph here.
You just need to remove the screen bezel and temporarily push aside the antenna wires. Make sure everything is aligned and let it set up for about 24 hours and the bond will be virtually impossible to break.
https://www.amazon.com/Images-SI-Uranium-Ore/dp/B000796XXM/ref=sr_1_2?ie=UTF8&qid=1485167706&sr=8-2&keywords=uranium
The comments are great... needs better packaging - half gone on arrival...
You don't have to go to Oz either...
http://www.stuff.co.nz/the-press/news/7197865/Uranium-among-West-Coast-treasures
Uranium isn't really that substantial as an ore.
Haha you can find Uranium just walking around outside, he wouldn't be able to make anything at all with it. It's little more than a bit of rock really. You can buy Uranium on Amazon. https://www.amazon.com/Images-SI-Uranium-Ore/dp/B000796XXM
You can get it on amazon
About as well as you could.
The reason uranium still exists on this planet is it decays extremely slowly in it's natural state. As such, you can handle it without any protective gear. The stuff that is dangerous is uranium that has been brought to critical mass before, and that stuff is considerably more difficult to acquire.
My guess is they have uranium with a pretty natural rate of decay. As such, the bigger risk from a dirty bomb would be heavy metal poisoning (like you would get with lead) than the actual radioactivity of the uranium.
> You can buy "Uranium Compounds" on Amazon.
You're now on a watchlist.
How easy is it to get Uranium in the United States? Pretty damn easy considering you can buy the stuff on Amazon.
https://www.amazon.com/Images-SI-Uranium-Ore/dp/B000796XXM
Your professor seems to have fallen into the classic liberal trap of talking about how EASY it is to get Uranium, instead of how HARD it is to make it weapons grade.
Uranium starts out as yellowcake Uranium, which is .07% U-235 and 99.3% U-238. Reactors typically enrich the U-235 to about 1-5%. Nuclear bombs REQUIRE a U-235 enrichment of above 90%. Below 20% enrichment, Uranium it is PHYSICALLY IMPOSSIBLE FOR URANIUM TO EXPLODE.
Enrichment is typically done using the Gasseous Diffusion and Gas Centrifuge methods, both of which require large, obvious, expensive facilities that can be easily tracked.
Is it easy to get Uranium? You bet your fucking ass it is. But it's nigh on IMPOSSIBLE to enrich it to atomic bomb levels secretly.
Amazon of course...
I beg to differ.
Uranium isn't hard to get. You can buy it on Amazon:
https://www.amazon.com/Images-SI-Uranium-Ore/dp/B000796XXM
https://www.amazon.com/Images-SI-Uranium-Ore/dp/B000796XXM
You can buy a bunch of that and refine it as much as you want, if you really wanted to. There are other ways of getting it legally, too. eBay comes to mind. Old style smoke detectors also.
yellowcake uranium? Uranium is available online at Amazon
I had to search Uranium Ore, to check it was true. It is indeed, however, under the "What do customers ultimately buy after viewing this?" heading was this. Has Reddit got WMDs? :O
I know it's a joke, but they sell that shit on Amazon.
LPT read the reviews
Probably here. That's where I got mine.
That's probably the cause of your weird flavors. Yeast need to be kept around an ideal temperature or they start pumping out lots of not so pleasant flavors. It sounds like you already know that though, so good luck with your fermentation chamber!
Lots of us use an older chest freezer with a cheap temperature controller such as the STC-1000. Other people that don't have room or the money for that use a tote filled with water and then add bottles of ice to keep the temps down. Both will work, but the freezer is a lot more hands off.
They are soda bottle preforms (or "baby soda bottles,) which are uninflated 2 liter soda bottles. Available here and on Amazon, and other places.
I must say that posting a "these just arrived in the mail" without providing a source is a little less helpful that it might be. OP? Your source?
>Is the volt chart from Wagan Tech really correct?
Looks more or less close, I think a netbook would use more. The best way to find out is to check yourself with a killawatt.
>I think a trucker fridge or something designed for RVs would have a lower consumption.
You should look into a chest freezer conversion. It is very simple all you need is a thermostat controller, it is easily customizable. During the hot summer my outdoor chest freezer used 200 watts A DAY. Right now it uses about 10 watts a day because it's outside.
>What does 150AH a day require to support it? How fast would that drain a deep cycle battery?
Deep cycle batteries have different ratings for 20 hour periods. Example a battery with 150AH rating for 20 hours, would be able to support 150 Amp hours over 20 hours-meaning it could support 7.5 amps an hour. Which would translate to 90watts of DC an hour (7.512), OR 720watts AC an hour assuming inverter is 80% efficient(7.5120*0.8).
>24V deep cycle marine batteries are what I thought was gold-standard for van applications.
The gold standard is usually 12V battery systems, whether it's two 6v's run in a series or one 12v battery.
For more information I urge you to visit handy bob's site, which is a little harder to read but a wealth of knowledge.
As far as cheap temp control, if you are somewhat handy you can get one of these. There are instructions to add an outlet to it like this otherwise this is plug and play.
Get him a CO2 Keg system. Find a cheap garage fridge or deep freezer on craigslist for $30-$50, and buy this . Instant, easy, keg setup.
I just got this one off amazon and so far so good. Really easy to install and setup
Inkbird Itc-308 Digital Temperature Controller Outlet Thermostat, 2-stage, 1100w, w/ Sensor https://www.amazon.com/dp/B011296704/ref=cm_sw_r_cp_api_-L1MAbC4EPRYM
you can also get one on amazon for about the same price. It works very well
I will give you my background before my opinions. As everyone has different goals, opinions, and experiences.
I got my printer near the end March of this year. I have something like 2500m of filament run though it, and no idea how much print time.
When I received my printer, my test prints failed and I was pissed. But this community helped improve my Cura settings and started producing usable parts. I then went nuts and printed out a BUNCH of mods. This is by far my most favorite thing. There's always something I can print to improve the quality of the prints.
THe down side is I went too far and got to a point where I couldn't produce anything of quality. So, 2 weeks of tweeking and researching later I'm printing in PETG with beautiful quality and very minimal visible layers.
My most recent project in PETG:
http://i.imgur.com/sVf7S2D.jpg?1
So, now to answer your question...
> How do you like your Maker Select?
I love it. It allowed me to buy a cheaper printer (One of the cheapest at the time @ $350) that produced amazing results. It also has upgrades you can purchase or print to improve the quality, so investing smaller amounts over time to make it better and better. I highly recommend it to anyone who is starting because it does require tweaking which forces you to learn and understand how exactly 3d printers work. A major plus was that this community has a lot of Maker Select users for support, which was a MAJOR plus for me.
As of today, I've purchased the following upgrades:
So, in the last ~3 months I've spent an additional $264... Oh god, don't tell my wife! All are totally not necessary, mind you. The only thing I'd 100% recommend you do are print out the following to mods:
DiiiCooler along with buying the 50mm blower fan. There are cheaper options out there, I just wanted it faster so I bought it through Amazon to get free 2 day shipping.
z-Brace - This is key, and will run you maybe $15 worst case scenario to get enough M4 screws and the threaded rods.
Edit: Forgot a couple more things I bought.
That's another $59, so $323... I have a problem. again, 95% of this is NOT NECESSARY. I'm just addicted to modding.
Alternatively, you can get a pack of 125 for $8.25 on Amazon.
I have o-rings on my Poker II with blues. I'd estimate that the sound has been cut by 50%. The "thunk" noise when you bottom out is greatly decreased but the "click" sound from the switch itself is audible.
I use these from Amazon since they're half the price of what WASD charges.
If you want a real carrying case, there was a group buy over on GeekHack for a 60% soft case. The organizer of the group buy owns TechKeys.us (where I got my Poker II) and said that he should have a few spare cases after the group buy is over.
holy crap this is scary as fuck! please please please be careful. it's very obvious you don't know what you are doing. remember 2 grams is 2,000 pills. don't try to eyeball doses or keybumps or anything like that. first step: get a milligram scale!!!! you said earlier you have a gemini 20, that's would work just fine. then you are going to need a graduated cylinder, and some PG. i do 2mg per 1 ml of pg. so i weigh out 100mg of etizolam, carefully measure out 50 ml of pg then mix the two in a vial. just shake it hard core then let it rest overnight then shake it some more (takes it a while to dissolve in PG). make sure to store the vial outside of sunlight because that damages the etizolam (i wrapped electrical tape around my travel vial). then get a transfer pipette or oral syringe and make your dose (half a ml for 1 pill, 1ml for 2 pills). tastes horrible, best to put it in a drink or have a chaser handy. PLEASE BE CAREFUL!!!! it's hard to measure out under half a ml accurately so 10mg a ml means you HAVE to do at least 5 at a time. it's just a good recipe to extreme and dangerous addiction and would make it even harder to taper off.
On that starter kit you mentioned... It's fine, but it isn't the best route if you think you might stick with this.
First up, read up on mixing by weight. /u/Botboy141 has a fantastic write up on it. It ends up being cheaper and faster long term versus mixing with syringes. Take into account that you should use different syringes for each flavor and you'll have to clean them after use... The cleaning murders the time mixing and that kit doesn't have many syringes, so you'll be cleaning a lot.
A break down for you on mixing by weight... It isn't 100% I'd bet, but it should be close enough.
Scale: 16.99 http://www.amazon.com/gp/aw/d/B0012TEQMG - this is the one I have, but the auto shut off is a friggin annoyance. Pick up the one Botboy141 recommends for the extra 14 or so dollars. So let's go with 30
Pipettes: 10.00 for 500 1ml. http://www.amazon.com/gp/aw/d/B005CD2I50
10 for 200 3ml (you can probably find a better price) - http://www.amazon.com/gp/aw/d/B005IQTSE0
Dispensing bottles x2: 7.00 http://www.amazon.com/gp/aw/d/B00B5139AG
Pg: 13.00 http://www.amazon.com/gp/aw/d/B005F5OJG6
Vg: 13.00 http://www.amazon.com/gp/aw/d/B004C7MTLA
Nicotine: 100mg/120ml 19.00 http://www.nudenicotine.com/product/500ml-100mgml-100-pg-nicotine-base-for-mixing-only/ 50 30ml ldpe bottles: 11.00 http://www.amazon.com/gp/aw/d/B00F098JJA
$113, call it 130 with some shipping here and there.
Now add flavors, assuming you get 50 bucks of 8ml vials from wizard labs and you're running closer to 200. This will get you a good bunch of juice and the next time around you'll probably get 4oz bottles of your favorite flavors and maybe some more pg vg nic and possibly pipettes. It's worth the money, but syringes will be cheaper up start costs. You'd probably save about 70 bucks to start, but it'll cost you in frustration and time, which isn't worth the pain from all I remember with them.
Edit: I say wizard only because of the sample size of the vials... You can use bull city, tfa and lorann direct for 4oz and up on a bunch, or any other vendor really. But 50 in wizard with shipping will probably get you 25 or 30 vials.
Syringes will take away the scale and dispensing bottles and pipettes, so 60 bucks actually, and you'll add about 30 back in a bunch of 1ml, a few 3 or 5 and a couple of 10 for pg/vg and14ga blunt needles.
Hopefully that helps a bit. I can reformat it later on the computer if need be.
That's why you have to buy one of these suckers
It's pretty easy to make phytosomes actually. Just liquify some lecithin (equal amount to the amount of substance you're trying to prepare) by letting it sit in warm water than blending it. Add your desired substance to the mixture, then pour some of the solution (I think doing small amounts at a time works better than doing the whole thing at once) into the ultrasonic cleaner, turn it on and stir it as it is running.
Bam! You have your own phytosome complexes :)
Custom made out of plywood. Exhaust on that Sony is in that front corner, so I put two fans, buy I'm actually only using one. I left a small gap along too back for intake.
Using this to automatically turn on.
https://www.amazon.com/dp/B01HXM5UAC/ref=cm_sw_r_cp_apa_i_RAztDbWC9XWZ6
And then the noctua plugs into this.
https://www.amazon.com/dp/B000MGG6SC/ref=cm_sw_r_cp_apa_i_IHztDbJCPQ5XY
And then I found a good temp for it to turn on, and it balances out nicely and keeps temps from skyrocketing, and even runs til it cools down and shuts off.
Lined it with carpet, and overall noise is good. Never hear it. That being said, I'm weird, and I could hear it in quiet scenes, and then I'd START listening for it, ruining the movie, so I made the box. Most normal people don't have this problem. 😆
highly recommend purchasing a 3d printer if you are a hobbyist and have the room. It's another hobby within itself, but it opens so many doors! I make custom enclosures for all my electronics, I can repair broken plastic parts without having to go to the manufacturer, and you can even design your own consumable goods, like this hard drive bracket I made. I've printed a few quad bodies as well.
Printers have come down a ton in price, many people swear by the Ender 3, which is 230 dollars on amazon. I also see a lot of people mention the Creality CR10 and the Prusa for pricier alternatives
Is Grizzly Kryonaut the best thermal paste one could apply on the Thinkpads?
Yep. I blew out all the dust and replaced the thermal paste with this:
https://www.amazon.com/Thermal-Grizzly-Kryonaut-Grease-Paste/dp/B011F7W3LU/ref=mp_s_a_1_3?keywords=thermal+grizzly&qid=1557427684&s=gateway&sr=8-3
Put more on than you think you need as the cooler contact isn’t super tight and it’s none conducive so it’s just fine if it comes out on the sides.
I used compressed air to clean the heat sink and fan. Rubbing alcohol to clean the old thermal paste. Be careful cleaning around the resistors around the apu. They are somewhat delicate. You can really just leave them as they are. GamersNexus never cleans them because it’s pointless and risks damaging them.
I think it’s quieter than when it was new. I can barely hear it when gaming on a X enhanced game.
For the uninitiated...
Guess I can give a short one.
Buy a craigslist chest freezer. Make sure you can fit your fermenter in it (mine fits 2.) Think I spent $50 on an old GE. One 7.9 gallon bucket fits on the hump, the base fits either a carboy or another bucket.
Buy this - http://www.amazon.com/Elitech-All-Purpose-Temperature-Controller-Thermostat/dp/B008KVCPH2
Buy this - http://www.amazon.com/Lasko-100-Personal-Overheat-Protection/dp/B00ATY1OXY
Buy a project box and either a duplex outlet or 2 outlets, and some wire. Wire it up per the diagram on top of the STC1000 (it's very easy.) Plug stuff in, tape the probe to the side of the fermenter. I keep the heater off unless I want it to run so that it isn't fighting the compressor to keep it in range. I've checked it against my thermometer in the beer, it's within 1 degree just by taping it on the side with a dry washcloth taped over the probe. Run one neutral wire to all the places it needs to go.
You can remove the freezers thermostat and wire the STC1000 directly to it, but don't bother. You won't be getting cold enough for the stock thermostat to ever mess with anything. Just plug the freezer into the correct outlet and the heater into the other one.
P.S. Here's a diagram I found. If you do it this way break the tab so the two sides are separate. http://www.homebrewtalk.com/gallery/data/500/medium/STC-1000_outlet_wiring.jpg
My problem is its always easy to “if I have that it’s hardly any more to include this” myself into a monster pack
Mine is a 3.5 x 5.5 x 7” soft pack that weighs 30.5 oz
Contents:
Byrd Rescue 2 serrated knife
Pill case with Robax, Motrin, antihistamine.
1 roll each medical mesh tape, paper tape, electrical tape.
1 med ziplock freezer bag with a handful of bandaids.
Rite in the rain note pad.
Scissors (klien 2100-7, no idea where/why i got them but they’re a great size for this)
1 med ziplock freezer bag with 1 8x10” compress, 8 antiseptic wipes (provodine-iodine & benzalkonium chloride), 2x iodine ointment, 4x cool jel packets.
Small container with imodium, tiny tube of polysporrin, and a strip thermometer.
Small tube of Q tips.
Small tube with a dozen UCO stormproof matches.
Exotac nano striker.
Travel pack of tissues.
A pair of vinyl gloves (wrapped).
Tampon.
2x unlubed condoms (wow those expired a while ago).
Thumbprint 4 in 1 screwdriver
3x pairs of foam ear plugs (dont remember the reasoning but they weigh nothing)
Missing:
Gauze roll.
Unflavoured dental floss.
Large sewing needle.
Pen/pencil.
Tweezers.
Tick-key.
?
Bottle preforms are great small tubes for keeping things dry
https://www.amazon.com/Soda-Bottle-Preforms-Caps-30/dp/B008MB1QNY
For a while you could buy redbull shots. They were a great small container as well
edit:correcting formatting.
Edit 2: always put rolls of tape in a baggy. When theyre hot they can ooze adhesive and make your kit a mess
I use Soda Preforms and freeze by filling half the container with yeast and topping off with a 50/50 solution of starter beer and glycerin.
I then put in an insulated bag with an ice pack to protect from freeze/thaw cycles.
The only thing I’d change would be to MAYBE use 1.5 ounce glass jars. Which you could keep longer and straight up boil to sanitize.
Don't know why you got down voted
Soda Bottle Preforms and Caps (30/pk) https://www.amazon.com/dp/B008MB1QNY/ref=cm_sw_r_cp_apa_i_h1EHDbC27NHS4
Edit
They are commonly called test tubes, and used as such in an amateur setting. They are also known as this other thing though. The original intended purpose.
Ink bird 12v digital and 100amp relay found on amazon/ebay
https://www.amazon.com/Inkbird-All-Purpose-Temperature-Controller-Fahrenheit/dp/B00OXPE8U6/ref=sr_1_1?ie=UTF8&qid=1484277440&sr=8-1&keywords=inkbird+thermo
https://www.amazon.com/Support-Heavy-Split-Charge-Relay/dp/B012N09BFE/ref=sr_1_1?ie=UTF8&qid=1484277516&sr=8-1&keywords=12v+100+amp+relay
This. Is. Awesome.
I currently have a Monster cooler like this that is set up as a curing chamber with a simple temperature and humidity controller.
I would love to be able to integrate something like what you made into my setup. The data logging and interface are super nifty! Definitely let us know when/if you pull something together.
I unfortunately don't have all the photos I took of the build. Thankfully google saved a few.
The fridge was delivered and I ripped all the shelves out.
I cut a little hole in the bottom of the fridge (the bottom 6" are empty space for the compressor, so this was just thin plastic) and wired up an ITC-1000. The original freezer controls only go 10F max. I also removed the defrost timer so this fridge is on manual defrost now, though I've had no freezing problems in well over a year. The fan is now on 24/7 instead of coming on with...the defrost? I cant remember how it originally turned on. You're playing with electricity here, be smart and safe and dont start a fire or die, or have a professional do it.
The back panel in the above picture stayed on, RIGHT behind it is about 3" of space for the evap and fan. Right under the evap I drilled 3 holes. 1 for the main CO2 line, 1 for the Nitro line, 1 small one for the fridge temp sensor. Eventually another one for the 5v for the arduino. They all came up through the little slit and had grommets for the sheet metal. They shouldn't be moving around, but the last thing I want is a cut line.
I bought a 36"x5" drip tray without a drain and 3d printed 3 brackets for mounting. Since it doesnt have a drip tray I want it to be mobile. The brackets have magnets in them so it can easily be taken off the fridge door and cleaned. I really didnt want to put any holes in the door except the taps.
I cut the shelves off the door but left most of the skin. The plastic helps seal the door seal AND it's holding in the plywood I used to replace the door. I have no idea the thickness of the plywood anymore but I did have to sand down a good 1/8" where the taps are so they'd fit. Any longer shanks and I'd be poking kegs, any shorter shanks and I'd be too short and need smaller plywood.
You can see above how the CO2 is routed and the temp sensor right in the middle of the fridge.
The top distributor goes to the top shelf, middle splits to both sides, the bottom goes to the bottom shelf. I honestly could have gotten away with 2 different pressures. I really don't change off serving pressure except for quick carbing a beer. Most of the beers I brew end up around the same carbonation level. Maybe when I need something crazy high/low carbed I'll be excited.
That's also the best photo I have of the finished product before it got a bit more messy like now. I have some 3D printed brackets that hold the lines in place on the side of the fridge.
I did have an issue with the fridge leaking all of its damn r134a out. There was a small leak by the evap. A bit late in the build for a replacement. Found the leak and JB Welded it shut. It was too close to the wall to braze and JB Weld has held for over a year now. Luckily I had done a car AC before and had the manifold gauge, vacuum pump, and fittings. I learned to braze on the quick connect, pulled vacuum, hit it with nitrogen to ensure there were no leaks (though it held vacuum as well), pulled another vacuum and filled her to spec with r134a. Been working like a charm ever since.
There is a raspberry pi running RaspberryPints with some cheap ass flow meters. The only changes I made were how many pulses on the meters meant a pint. I've been fiddling with it ever since. I'm sometimes off by a handful of pints on my kegs. Enough to get me close, but I'd like to dial it in without spending $60 on each freaking meter. How much beer is left in my keg is not a $60 problem to me.
If you're going to use it fairly infrequently, they make temp controllers that attach to a crock pot and if you get a cheap fish aquarium bubbler, you have your own DIY version. We used this one for almost a year before upgrading to an Anova: https://www.amazon.com/dp/B011296704?psc=1
I keep posting this in the keezer builds for people who are about to build, here is the list of what I did with costs and where I bought things:
Here, while not basic, but a list that might help. This is a 4 keg setup. Some items are not exactly needed, for example hose clamps, MFL push to connect (you could just get barb ones), but helpful for disconnecting/cleaning. You can save a lot on faucets - my 4 costed me $280 total all in. You could also get a cheaper freezer.
I got a regulator with 2 possible pressures so I can have carbonation pressure plus serving pressure at the same time - also not a requirement.
Name|Price|Quantity|Total|URL
:--|--:|:-:|--:|:--
Inkbird Itc-308 Digital Temperature Controller Outlet Thermostat 2-stage 1100w w/ Sensor|$35 |1|35|https://www.amazon.com/gp/product/B011296704
Intertap Self Closing Faucet Spring|$1.99 |4|7.96|https://www.morebeer.com/products/intertap-closing-faucet-spring.html
Intertap Stainless Steel Faucet Shank|$32.99 |4|131.96|https://www.morebeer.com/products/intertap-stainless-steel-faucet-shank-4.html
Duda Energy HPpvc025-100ft 100' x 1/4"" ID High Pressure Braided Clear Flexible PVC Tubing|$28.50 |1|28.5|https://www.amazon.com/gp/product/B00LX6LS7E
Brewer's Edge UX-CAOO-IQIT Keg Lube 1 oz.|$5.98 |1|5.98|https://www.amazon.com/gp/product/B0064OK99S
Hilitchi 60 Piece Adjustable 8-38mm Range Stainless Steel Worm Gear Hose Clamps Assortment Kit|$12.99 |1|12.99|https://www.amazon.com/gp/product/B01IOE4RQQ
Taprite T752HP Two Product Dual Pressure Kegerator CO2 Regulator|$89 |1|89|https://www.amazon.com/gp/product/B0060NOX40
KegWorks Beer Tap Faucet Handle Black|$4.30 |4|17.2|https://www.amazon.com/gp/product/B000VI753Q
Intertap Forward Sealing Beer Faucet (Stainless Steel)|$31.54 |4|126.16|https://www.amazon.com/gp/product/B01NAGS3ST
4 Way Co2 Manifold|$42.99 |1|42.99|http://www.farmhousebrewingsupply.com/4-way-co2-manifold/
Accuflex Bev-Seal Ultra (3/16) 50'|$15.99 |1|15.99|http://www.farmhousebrewingsupply.com/accuflex-bev-seal-ultra-3-16-50/
Pin Lock Disconnect- 1/4 MFL Gas Side|$5.99 |4|23.96|http://www.farmhousebrewingsupply.com/pin-lock-disconnect-1-4-mfl-gas-side/
Pin Lock Disconnect- 1/4 MFL Liquid Side|$5.99 |4|23.96|http://www.farmhousebrewingsupply.com/pin-lock-disconnect-1-4-mfl-liquid-side/
1/4" MFL Push To Connect|$3.79 |4|15.16|http://www.farmhousebrewingsupply.com/1-4-mfl-push-to-connect/
5/16 x 5/8 BSPP (Shank Connector) Push To Connect|$5.99 |4|23.96|http://www.farmhousebrewingsupply.com/5-16-x-5-8-bspp-shank-connector-push-to-connect/
Igloo 7.1 cu ft Chest Freezer Black|$219.99 |1|219.99|https://www.walmart.com/ip/Igloo-7-1-cu-ft-Chest-Freezer-Black/31136433
Set of Four 5 Gallon Pin Lock Kegs Used|$28.90 |4|115.6|http://www.homebrewing.org/Set-of-Four-5-Gallon-Pin-Lock-Kegs-Used_p_3179.html
20 CO2 tank|$60|1|60|craigslist
2 in. x 8 in. x 10 ft. #2 and Better Prime Douglas Fir Board|$9.86|1|9.86|http://www.homedepot.com/p/2-in-x-8-in-x-10-ft-2-and-Better-Prime-Douglas-Fir-Board-604364/206182008
ZMAX 7 in. 16-Gauge Galvanized Reinforcing L-Angle|$3.27|4|13.08|http://www.homedepot.com/p/Simpson-Strong-Tie-ZMAX-7-in-16-Gauge-Galvanized-Reinforcing-L-Angle-L70Z/100375233
||||1019.36|
You would also need a wrench if you don't have one yet to unscrew the posts on the keg.
> maker select
Would you recommend this as a good first 3d printer?
Whatever comes stock on the Maker Select v2.
One-day shipping available. ;)
Equipment:
4 oz clear-top tins
3 small 6mmx1.5mm neodymium magnets per tin
Epoxy
A little JB Weld to patch the leak up a bit. I wouldn't recommend using it as a serving keg due to the higher pressure, but could use it as a fermenter. It should be able to hold a few PSI's from the fermentation process or pressurize it 1 or 2 PSI to do a transfer.
The glass doesn't get extremely hot, but it does get pretty warm when you're lighting the bowl, so I don't trust glues. I would use JB Weld, it's extremely strong, water resistant and heat resistant up to 500 degrees F. It won't last if you put the flame right to it, but it will easily handle the low heat from the bowl. Make sure to lather it on thick on the the broken edges, and around the outside to create a support. it won't be super clean, but if you lather on enough it can be sanded down to be smoother.
Here's also a list of the mods, how much, and where I got them.
Visual
Black rims $192.25x4 = $769
Window tint $180
Spoiler $100
Side Stripes $30
Tail light blackout $20
Sidemarker $15
Rear Decal: $50
345/Hemi Emblems black $34
Plasti-dip for Decals $6.00
Rock Guard $60
Engine
Air Filter+Recharge $63
Oil Catch Can $150
Other
Tazer+Bypass $300
Atturo Az850 275/40R20 $127.55x4 = $510
Mid-Muffler Delete $163
Amazon
https://www.amazon.com/Images-SI-Uranium-Ore/dp/B000796XXM/ref=sr_1_1?s=industrial&ie=UTF8&qid=1523662894&sr=1-1&keywords=uranium
The suggested items are hilarious.
Nah, Amazon!
> Where do you think that Uranium comes from?
Amazon.com?
This is SO worth reading through the reviews and questions if you have time. https://www.amazon.com/Images-SI-Uranium-Ore/dp/B000796XXM#feature-bullets-btf
I got you fam.
Uranium Ore https://www.amazon.com/dp/B000796XXM/ref=cm_sw_r_cp_apa_i_uMlPDbNKH63CH
http://www.amazon.com/Images-SI-Inc-Uranium-Ore/dp/B000796XXM
Here you go, one serving of Uranium.
Uranium-238 has a half-life of about 4.5 billion years. So it's slow to emit radiation, and most of it is alpha particles which your skin will stop. The only danger is if you eat it. Heck you can buy uranium ore on Amazon.
Once it's been through a cycle (burned is the phrase used), and a fuel assembly will be used 2 or 3 times depending on the reactor type, there is a ton of byproducts like thorium, iodine, etc. They have increasingly shorter half lives as they decay down (I think, is been a few years since my rad con training) which means they'll emit a lot more radiation and of the stronger beta and gamma types that will cut through you and fuck up your cells.
Another fun fact, younger people are more susceptible to radiation because they have more frequent cell division. So there's a higher chance a cell that was wrecked by radiation splits.
> would be possible to put a set of bullhorns on my bike
Almost certainly yes. You might need a new stem.
> and still be able to use my current shifters/brakes.
Maybe. Measure the diameter of your existing bars where the shifters are mounted. The best tool to do this is a pair of measuring calipers, something like this:
http://www.amazon.com/Neiko-01407A-Extra-Large-SAE-Metric-Conversion/dp/B000GSLKIW/ref=sr_1_1?ie=UTF8&qid=1414190268&sr=8-1&keywords=measuring+calipers
Handlebars come in only a few standard diameters, but really the best way to answer your question is to measure it empirically.
Yep. But if you build the kit yourself:
This press
https://www.amazon.com/Lee-Reloading-Press-Md-90045/dp/B002SF4X5I/ref=sr_1_1?s=sporting-goods&ie=UTF8&qid=1497553125&sr=1-1&keywords=lee+press
Dies
https://www.amazon.com/Lee-Precision-30-RGB-Die/dp/B000N8LHQK/ref=sr_1_fkmr0_4?s=sporting-goods&ie=UTF8&qid=1497553143&sr=1-4-fkmr0&keywords=lee+press+RGB
Scale
https://www.amazon.com/American-Weigh-Digital-Scale-sensitivity/dp/B0012LOQUQ/ref=sr_1_3?ie=UTF8&qid=1497553166&sr=8-3&keywords=digital+scale
Calipers
https://www.amazon.com/Neiko-01407A-Electronic-Digital-Caliper/dp/B000GSLKIW/ref=sr_1_3?ie=UTF8&qid=1497553204&sr=8-3&keywords=calipers
Priming Tool
https://www.amazon.com/LEE-LP90106-Lee-Precision-Prime/dp/B00162UGQE/ref=sr_1_7?s=sporting-goods&ie=UTF8&qid=1497553314&sr=1-7&keywords=priming+tool
... and a few other small things, you should be under $100 dies included.
I still sort and reuse Medeco pins because they're so damned expensive. Get a digital or dial micrometer. Much faster than dropping them into a plug with depth keys. You should have a micrometer anyway. It's pretty much the number one best way to diagnose fiddly little problems with depth and spacing. It's invaluable for adjusting your key machines. I can get my Borkey duplicator down to sub .001 accuracy with one.
In the old days, a decent dial micrometer was expensive. Now, those digital ones are dirt cheap and perfectly serviceable. I bought the one I linked to above as a backup to my fancy Mitutoyo dial unit, and at $17 and change, I actually use it as my main one now because it was so cheap I'm not afraid of damaging it.
Get the O-rings from Amazon http://amzn.com/B0051XWXCE
Much cheaper then WASD.
Do you think plastic pipettes would work?
This little 3D printer is pretty decent and 30% off for the next 5 hours:
https://www.amazon.ca/Monoprice-Select-Printer-Heated-Filament/dp/B01FL49VZE
Hackaday Review
(Be forewarned - you need to love tinkering if you want to be happy with a 3D printer. So far it's been fun though...)
Mine was $199 with prime shipping. The printer was cheaper than the rangefinder.
There are models that you simply plug into the wall and then plug the fridge into them. Should work universally. Just set the fridge's internal thermostat a little colder than you want it, then set the external therm where you want it.
Here is a moderately priced one.
Inkbird ITC-308 Heater Cooler Device Temperature Controller Carboy Homebrew Fermenter Greenhouse Terrarium 110V 10A 1200W https://www.amazon.com/dp/B01HXM5UAC/ref=cm_sw_r_cp_apa_i_xs1jDb09EQ53M
If you’re truly setting up your kitchen for prep, eliminate the standup refrigerator, convert another chest freezer into a chest fridge with a $35 part off amazon
This should be a significant power savings.
Yeah dude, it was the Ender 3. He's an ex GM engineer, so way smarter than me to be explaining its features but he said it was the printer some of his colleagues bought for home use. Only took him two hours and three beers to put together. I watched it print a dog for 53 minutes. Totally fucking awesome.
The C2 is a decent printer.
The MP select mini has a similar build envelope for significantly less money, and is also a decent printer. I recommend buying it instead.
It also has a heated build plate so you can use more materials.
Amazon link
Manufacturer's website link
A few general pointers: Micron layer heights from printer manufacturers are generally just hype. used for marketing. It's a technically true stat that is generally meaningless to the actual performance of the printer. Both the Robo C2 and the MP Select mini print by squeezing plastic out of a nozzle. On both the nozzle is 0.4mm.
In most cases there are (rapidly) diminishing returns to printing below 1/4 of the nozzle size. In this case that is 100 microns. Both machines are mechanically capable of printing below 100 microns. (The lowest layer height the MP Select mini is mechanically capable of is 43.75 microns.) However, every time you cut your layer height in half you double your print time, so a 25 micron model will take twice as long as a 50 micron model, which will take twice as long as a 100 micron model which will take twice as long as a 200 micron model which is what I print at most of the time because are you kidding? I don't have time for that!
Seriously, get the MP mini. Get permission to spend $800 from the wife. Tell your wife it was $400. Keep the $180 - $200, spend the other $400 on something nice for your wife. Everyone wins.
this is what im working with I like it alot so far for what i paid
Looking at the price of some of the printers recommended here you aren't far off the price of the Monoprice Maker Select V2 right now. It is on sale for $280 from Monoprice (Use code MAKER15 at checkout for the discount) or Amazon right now. Free shipping from Monoprice. (not sure what country you are in so maybe that will make a difference for you on shipping)
If you can stretch your budget about $40-50 you will get a highly recommended printer (here and other sites) that is very easy to setup, has a large community/support for tweaking/upgrading later, and takes 15-20 minutes to setup out of the box (its pre-assembled, literally 6 screws to build it). Also it prints fantastic out of the box, and with a few minor upgrades it rivals printers far above its price range.
I recently got a MP Select v1 with an upgraded hot end and PEI laid on the bed for 230 shipped on eBay. It has been working great, so far. I honestly wouldn't recommend buying a used printer for your first one though (exactly what I did) as it is a gamble and mine field right now with used printers, (I got lucky thankfully and was covered by eBay if anything was wrong).
Also, depending on your requirements of build volume, I would highly recommend looking at the MP Select Mini Amazon. It has a 4x4x4" build area, comes completely pre-assembled and leveled (most of the time leveled) out of the box. Literally unpack, and print. It is highly recommended here and other places for an entry level/low budget printer. Very high quality prints from it, the only downside is the smaller build area, but that depends on each person/use case. It is portable, so trade offs I suppose.
TL;DR: The Maker Select V2 is on sale right now for about $40 more than the prices of most printers linked here, and it is an outstanding printer out of the box, and highly recommended. If you can stretch your budget a little, I would buy that. If you need to save and don't need a large build volume I recommend the MP Select Mini. Don't get caught up on one specific sale/website, keep an eye on other options as there are sales other places.
TL;DR of TL;DR:
See also
Source: Have been in the same too expensive boat for 3 years. Finally purchased a MP Select for my first printer last week and out of the box got fantastic prints with 0 knowledge/experience.
Maker Select V2 is a good beginner printer under 350 with minimal setup, and the important parts are metal. Stick away from anything with an acrylic frame.
An alternative and cheaper unit would be the Maker Select Mini which has a smaller print bed but is around a hundred dollars less.
Both of these choices are pretty good and if you choose between the 2 I would opt for the Maker Select V2 because of the larger print bed.
Common filaments like PLA, PETG, and ABS are anywhere from 15-40$ depending on the quality you buy and more exotic filaments can be $50+ dollars. Maintenance cost for the most part is pretty minimal unless you break something like the hotend.
3d models are loaded into something called a slicer which converts the model into layers so if you can get it into the slicer and it slices you can use any model.
https://www.amazon.com/gp/product/B00D7CWSCG
Keeps it all at ~12.5V. I managed to get one screw into it to hold it where the old one used to go.
Also get the mosfet to run the bed power completely independently of the controller board for another $10:
https://www.amazon.com/dp/B01HEQVQAK/
Use some ~14ga lamp cord to tie it in. :)
https://www.amazon.com/gp/product/B01HEQVQAK/ref=oh_aui_detailpage_o00_s01?ie=UTF8&psc=1
You think 3D printers and mills are cheap? They're cheaper than they were, but a 3D printer will set you back by $240 and won't be good for anything besides prototyping, and often not even that because they aren't able to operate on a small enough scale. (The cheaper you buy, the less precise you can print)
Prices don't just continuously fall. Things can get cheaper to produce with new techniques or cheaper labour, but that can't go on forever.
I’ve been printing with an Ender 3 (Comgrow Creality Ender 3 3D Printer Aluminum DIY with Resume Print 220x220x250mm https://www.amazon.com/dp/B07BR3F9N6 ) for the better part of the year and it’s been mostly great!
The base price there is pretty cheap comparatively, and 1kg of filament (printing material) is about $20. That will last you quite a long time and print dozens and dozens of miniatures.
The largest downsides are probably the learning curve. It definitely takes some time to learn settings. But there are lots of resources out there.
The other thing is that Ender 3 is FDM which essentially means the resolution isn’t quite as high. This is just fine for printing terrain but you get a “layering effect” making it difficult to get high quality detail on some minis. That being said I’ve had great success printing minis for npcs and monsters.
The other option is resin printing which generally produces higher resolution and detail but can be messier and resin is pretty toxic so requires more safety precautions.
Ultimately I’ve been happy with my 3D printer and it’s really enhanced my gaming experience
Hey, that's my thread! It's nice to see that it inspired you. I use a Monoprice Maker Select, and they are about $60 cheaper than when I bought mine a couple months ago, so it's probably a good time to grab one if you're serious about it.
3D printers work well when you keep them working. They need plenty of maintenance and calibration to get nice prints. Be prepared to spend a bit more cash on parts and upgrades, and read through a lot of forums. If you're already DIY prone and have some patience, 3D printing is fun and pretty much the coolest thing ever.
To follow up on my printed Arrow, I didn't get to maiden it until Flite Fest, and even then I almost decided not to because there was a strong tailwind at the time. I finally got brave and gave it a try, but it failed. I don't think I had the elevons set up right. It took a hard dive and the pod got crunched and one of the stabs broke off.
However! I did meet a guy at Flite Fest using the same pod on his Arrow, and it flew great, so the concept is proven! If anyone saw an Arrow with two kiwi birds painted on it, that was him. I'm assuming he was a New Zealander, by the accent and the paint job. It would be pretty cool if he showed up here to give his input...
Aftermath: Mostly Intact
Licensing. I've got two licensed products launching in the next 6 months. In both cases the samples I sent to licensing partners were prototyped on a $300 3d printer sitting on my desk.
https://www.amazon.com/Monoprice-Printer-Filament-Preloaded-Printable/dp/B018GZBC3Y
The early R&D process is identical to what you'd do for a client, but entirely independent and under your control. Patent searching, ideation, iterating on proofs of concept, etc.
I personally have (and love) a monoprice maker select v2
that you can get here on amazon. It's pretty great for making things like minis, terrain, and so on. You can dial the resolution up pretty high and get some pretty fantastic results.
So, after using this phone for about 2 years now, it is starting to feel a little sluggish. I have been browsing this place for a while and figure I will try this out just for kick.
Keep in mind, this phone has already been repasted using https://www.amazon.com/Thermal-Grizzly-Kryonaut-Grease-Paste/dp/B011F7W3LU Thermal Grizzly Kryonaut Thermal Paste. A very generous dosage too. Just to make sure it met, but really it wasn't a huge improvement over stock. Just a little better.
After about a year of this, while it didn't really degrade in performance, it wasn't all that satisfying, to begin with. So I decided to order https://www.digikey.com/product-detail/en/panasonic-electronic-components/EYG-T3535A05A/P121364-ND/6217292
Just to try it out. Everyone else seems to be using Thermal Grizzly 0.5mm pad, but I decided to do this mostly cause it is cheaper and has 4 total applications that I can still share after a bit.
And result comparison is here, really, not too bad at all! https://imgur.com/a/MurKeke
The device is noticeably snappier and faster. Really don't notice the occasional sluggishness from before. I am very happy with this!
If you have a cheap way of getting this pad I still recommend it. I haven't compared it with thermal grizzly directly on the same phone but I can't imagine it to be much worse. Keep in mind Digi-key charge quite a bit of shipping. So unless you have shipping arrangement that is cheap. You should look for something like this elsewhere.
Treat yoself
Depending on how much a new controller costs, another option would be to use an ETC to control when the fridge turns on and off. Once configured, the fridge would turn on and off as needed. However if the controller on the fridge completely fails at some point in the future, this setup might no longer work.
Edit: Wrong acronym. ETC not ETR
https://www.amazon.com/gp/product/B007Q2M17K/ref=oh_aui_detailpage_o00_s00?ie=UTF8&psc=1
This is the one I got. Just a note: The research I found said that it works well on diamonds and other hard stones, but if your stone is softer (like an opal) it can damage the stone. Also, if you have a diamond with a lot of inclusions, it can make them bigger.
I use these. They work great and they're only 14 bucks.
Not to ruin the maker fun, but something like this is only $13.
If you don't have a vape yet, get an Arizer, you won't regret it.
As far as containers go, check out bottle preforms. I bough a 100pk of these years ago and still have half
https://www.amazon.com/Soda-Bottle-Preforms-Caps-30/dp/B008MB1QNY
is this a shitpost? or do you just really like soda blanks?
I'm all for whatever reduces WL's cost but doesn't harm me.
Personally, i bought some soda bottle preforms (https://www.amazon.com/Soda-Bottle-Preforms-Caps-30/dp/B008MB1QNY) and overbuild starters, save a vial or two, and use that to rebuild starters. Havent bought yeast in a hot minute.
The one you're linking to is a heating controller, to be used with a heating element to keep temperature up.
Here's one that does both heating and cooling. I don't have personal experience with it, but this would be more like what you'd want to convert a fridge into a curing chamber.
https://www.amazon.com/Inkbird-Itc-308-Temperature-Controller-Thermostat/dp/B011296704/ref=pd_sbs_328_1?_encoding=UTF8&pd_rd_i=B011296704&pd_rd_r=VG3NE5E8RAZBZZVKYZ2T&pd_rd_w=HwiY4&pd_rd_wg=NUioI&psc=1&refRID=VG3NE5E8RAZBZZVKYZ2T
Are you dead set on a fridge or do you have any interest in going with a chest freezer?
EDIT: With either setup you'll need a temp controller. I'd recommend an Inkbird
Not sure about shipping with Canada Post lately (maybe don't buy date sensitive products if shipping with Canada Post) but here's a short breakdown for Canada deals:
https://www.ontariobeerkegs.com/Articles.asp?ID=323 Lots of stuff on sale (free shipping over $100)
https://brewhq.ca/ 20% off equipment (free shipping over $75)
https://www.noblegrape.ca/collections/equipment/ 20% off equipment with coupon code: HAPPYMONDAY
https://www.hopdawgs.ca/ 10% off $100 or 15% off $250
https://www.everwoodavebrewshop.com/ 20% off Coupon Code: Everwood
https://torontobrewing.ca/collections/black-friday-sale Lots of stuff on sale
https://www.amazon.ca/Inkbird-Itc-308-Temperature-Controller-Thermostat/dp/B011296704 Apply $10 Coupon
https://goldsteam.com/ No specific BF sale but everyday low prices and didn't want to leave them out of the party
https://www.topps-hops.ca/collections/t90-pellets Same with Topps, always good pricing
https://www.plaato.io/plaato-airlock-bf Worth noting $99 (USD?) fun tool with free shipping worldwide
Don't forget to support your local Homebrew shop as well!
I don't see why that wouldn't work, but if you don't want to rewire things, consider the Inkbird ITC-308. Plug and play, much cheaper than other options (Homebrewfinds sometimes has shared coupon codes to get the cost below $35). I just picked one up for my keezer build.
I have this one and it's a lot less than $100 and works great. Plus no additional wiring is required, just plug it in and you're good.
I've been very happy with the ITC-308. One perk over the ITC-1000 is there's no need to wire it into the keezer, or mount it. If I ever want to convert my keezer back over to freezer use all I have to do is remove the collar.
Get these, $2.08 for a pack of 100. They work great on my wife's DS4:
http://www.amazon.com/gp/product/B000FMWLR8
Some of the less intuitive acccessories I've found helpful:
Here's the tools I use most frequently in 3d printing and assembly - I suspect you'll have most of these from modelling work:
Get a decent digital caliper and get good at measuring, model it yourself.
Here is the fun part though - printers shrink some dimensions and expand others based on temperature, extrusion, brand of filament and a hundred other variables.
I make parts that hold spring loaded Pogo pins than are about 1.6mm to 2mm in diameter.
For every design I print a test piece with the holes in various orientations to the build plate. I make each hole the correct size then some a little larger and some a little smaller. I create a profile for each part I print and save that.
When I get the test piece done, I check each hole for fit. Now I know that for part number XYZ123 on Brand-X PLA I need to make the vertical holes .05mm larger and horizontal holes .1 smaller.
It's a pain but it helps take some of the mystery out of sizing.
This one is perfectly fine. I've been using it for 4 years. https://www.amazon.com/Neiko-01407A-Stainless-Electronic-Digital/dp/B000GSLKIW/ref=sr_1_1_sspa?ie=UTF8&qid=1521558561&sr=8-1-spons&keywords=caliper&psc=1
$8.25 at Amazon.
http://www.amazon.com/008-Buna-N-O-Ring-Durometer-Round/dp/B0051XWXCE/ref=pd_ybh_20
I've done a few guerrilla-style repairs to brass and woodwind instruments in my day.
A cheap and easy fix is some "JB Weld", a steel reinforced epoxy. Just put a pea-sized drop under that joint and clamp it down overnight. Done and done. No need for solder, and it's under $10.
http://www.amazon.com/J-B-Weld-8265S-Original-Reinforced/dp/B0006O1ICE
socks + [spray on rubber] (https://www.amazon.com/Performix-11203-Multi-Purpose-Coating-Aerosol/dp/B0006SU3QW/ref=sr_1_cc_1?s=aps&ie=UTF8&qid=1474933644&sr=1-1-catcorr&keywords=spray+on+rubber)
works amazing, is crazy cheap, and if the rubber wears down you re apply, machine washable, get black spray on black socks and you're good to go. i have a few pairs
Use a plasti dip coating to paint the surface of the lock. It's the same stuff that's used to coat handles on tools.
http://www.amazon.com/Performix-11203-Multi-Purpose-Coating-Aerosol/dp/B0006SU3QW
Some people use plasti-dip. Waterproof, lasts, peels off easily if you change your mind.
Order it on amazon https://www.amazon.com/Images-SI-Uranium-Ore/dp/B000796XXM
Anyone can own uranium. It isn’t illegal. In fact, it’s one of the most common elements on earth. You can buy it on Amazon.
Uranium Ore https://www.amazon.com/dp/B000796XXM/ref=cm_sw_r_cp_api_i_LsFkDbZGJ01ZG
Yes they do.
You can get it on Amazon...
Uranium Ore https://www.amazon.com/dp/B000796XXM/ref=cm_sw_r_cp_apa_i_2wkwCb943FQQ7
For people who think I'm joking
Fuckin' inflation. I was gonna say this uranium which used to be $29.95 and free shipping, but now it's $39.99 and free shipping.
Pfth
http://www.amazon.com/Images-SI-Uranium-Ore/dp/B000796XXM/
You could consider manufacturing your own armor piercing ammunition. You need to find a good stockpile of depleted uranium for the best man portable anti armor ballistics penetration capabilities. Here is a good site to get you started on accumulating a sizable weapons grade amount.
http://depletedcranium.com/depleted-uranium-its-all-around-you/
Or if you want to bypass all of that hassle just order it direct in bulk
http://www.amazon.com/Images-SI-Inc-Uranium-Ore/dp/B000796XXM
Mind you I believe that it is illegal to manufacture depleted uranium ammunition. Then again it is illegal to jaywalk and jaywalking now a days might possibly net you a beating and or tasing/pepper spraying or all three.
I was going to say a chunk of uranium ore which is reasonably safe and entertaining, but that's slightly over your price range. Still, check it out. It's awesome.
Rub this on it
You can buy Uranium ore on Amazon those days. So, you can re-create your radioactive lab even today.
you can literally buy some on Amazon
https://amzn.com/B000796XXM
It may be difficult to sanitize all the edges if there are any on the fish tank heater. There a lot of crud floating in a fermenting beer.
If you can spare about 50$ get an inkbird temp controller and a cheap heating pad (I use this one) set it on low or medium. I secure it to the outside and forget about it.
Depending on how "presentable" you want it to be build the fermentation chamber it out of a chest freezer. You can throw a tablecloth over it w/o affecting the freezer functioning as long as you leave the motor uncovered.
This is similar to the setup I have. It’s big enough for 10 gallons of beer in two 5 gallon carboys. You could always right size the freezer for what you want.
I built my own controller, but these are cheap enough now that it probably makes sense to buy.
I highly recommend Thermal Grizzly Kryonaut. This one:
https://www.amazon.com/Thermal-Grizzly-Kryonaut-Grease-Paste/dp/B011F7W3LU/ref=sr_1_1_sspa?s=electronics&ie=UTF8&qid=1542359958&sr=1-1-spons&keywords=thermal+grizzly+kryonaut&psc=1&smid=A3EM7MU9GFCYC4
Best thermal paste I've ever used. Better than Arctic silver or mx4.
> So yeah, your argument doesn't quite hold water.
Except for the part where it does.
https://www.amazon.com/der8auer-Delid-Die-Mate-Heatsink/dp/B01N6T4LD9/ref=sr_1_1?ie=UTF8&qid=1537819549&sr=8-1&keywords=der8auer+Delid+Die+Mate+2
https://www.amazon.com/Thermal-Grizzly-Conductonaut-Performance-Grease/dp/B079HDBYY3/ref=sr_1_2?ie=UTF8&qid=1537819615&sr=8-2&keywords=Conductonaut
https://www.amazon.com/Thermal-Grizzly-Kryonaut-Grease-Paste/dp/B011F7W3LU/ref=sr_1_2?ie=UTF8&qid=1537819691&sr=8-2&keywords=Kryonaut
These are just a few I'd recommend, but definitely do your research and see which one is best for your needs.
Thermal Grizzly Kyronaut
IC Diamond 7 Carat
Coollaboratory Liquid Pro
Apex on battery.
I have all Dell and Intel software enabled and up to date except for Dell Support Assist(unistalled because it was re-installing SmartByte), SmartByte, Killer Network and Rivet services are all stopped and disabled.
CPU/GPU was re-pasted with this.
Current CPU UV, your mileage may vary.
GPU OC/UV @0.700mV, 2nd lowest performance state.
GPU OC/UV Highest Performance State @0.813mV, it says @1733mhz but in reality GPU sits @1721mhz, this will greatly reduce GPU temps and since the heatsink is shared that includes the CPU as well.
Extra Sauce when playing plugged. Helps with random shutdowns and BSODs.
At all times even on battery, my own preference.
This is all on the latest BIOS, i've always updated it.
My max CPU temps hover between low 80c to mid 70's depending on game while the CPU sits @3.9GHz and GPU barely hits 72c at a room temp of ~34c. Tropical humid weather may simulate yours since you are indian?(wild guess sorry if your not and it's offensive D:).
Bonus round:
My laptop came with the AUO panel and it's OC'ed to 108hz LCD Reduced.
I barely use the Realtek's sound drivers, mainly use a wireless headset and bluetooth for speakers, to cope with the DPC latency issues.
Download HWInfo64 and keep an eye on the m.2 ssd and the PCH temp. Those can alter performance plugged or unplugged.
m.2 ssd heatsink link if needed.
This is not necessary but i had to do this, Dell's fault. MAY VOID WARRANTY.
If i can help with anything else, lemme know.
​
Edit: some fixes and clarity.
Yeah, I believe I'm one of the earliest people who got Blade 15 lol. Here the links for what I used
https://www.amazon.com/gp/product/B011F7W3LU/ref=oh_aui_detailpage_o05_s00?ie=UTF8&psc=1
https://www.amazon.com/gp/product/B00UYTTLI4/ref=oh_aui_detailpage_o04_s00?ie=UTF8&psc=1
3d printer for $220
lathe for $130
It's not something that requires a second mortgage...
MP Select Mini is much better.
Amazon warehouse has the V1 for $180:
https://www.amazon.com/Monoprice-Select-Printer-Heated-Filament/dp/B01FL49VZE/ref=sr_1_1?m=A2L77EE7U53NWQ&s=warehouse-deals&ie=UTF8&qid=1495746568&sr=8-1&keywords=mp+select+mini
The Monoprice Select Mini is around $200, and a 1kg spool of PLA is $20-30 (that will print around 375 standard size chess pieces). It's a really great starting 3D printer, at a great price, for someone that is trying to learn what all the steps are and if they are comfortable with the effort that goes into the hobby. It's primary 'con' is that it has a smaller print area than many other printers, so the things you can print are limited to 120mm^3 (without further modifications).
Monoprice Select Mini 3D Printer with Heated Build Plate, Includes Micro SD Card and Sample PLA Filament - 115365 https://www.amazon.com/dp/B01FL49VZE/ref=cm_sw_r_cp_apip_VHFn3TI1ZXX8F
MP Select Mini v1 is on sale on Amazon.ca for $231 after 101$ off. Just bought one! Ends in 5h40m.
I didn't see any filament deals while I was browsing.
Been waffling between that or the Maker Select V2 but I was leaning toward the mini because of the price and less required additional cost mods. Saving up for an SLA but need to tide myself over.
Try the maker mini I love mine.
Amazon
Some from Amazon:
MP Mini for $189 - https://www.amazon.com/Monoprice-Select-Printer-Heated-Filament/dp/B01FL49VZE
CoLiDo kit $225 - https://www.amazon.com/CoLiDo-DIY-Printer-Build-Size/dp/B01AT4ODYA
Lulzbots stuff:
Taz 5 $550 off - https://www.amazon.com/LulzBot-TAZ-Desktop-Printer-Nozzle/dp/B01143UJK2
Taz 6 $250 off - https://www.amazon.com/LulzBot-TAZ-6-3D-Printer/dp/B01DLU3M3M
Robo3D R1 for $599 - https://www.amazon.com/ROBO-3D-10x9x8-Inch-Printer-A1-0002-000/dp/B0142PHFVU
Sindoh DP200 3DWOX for $1,001 - https://www.amazon.com/Sindohs-DP200-3DWOX-3D-Printer/dp/B017IZBFB2
XYZ: Way too much stuff to list all, but looks like everything is on sale.
Mini $269 - https://www.amazon.com/XYZprinting-Vinci-mini-3D-Printer/dp/B01IXVXV9Y
Minimaker $199 - https://www.amazon.com/XYZprinting-Vinci-miniMaker-3D-Printer/dp/B01EWGJAS0
Edit - Found some more:
Qidi printer $50 off
https://www.amazon.com/TECHNOLOGY-3DP-QDA16-01-Extruder-Structure-Filaments/dp/B01D8M32LU
AIO Robotics Zeus $375 (?) off
https://www.amazon.com/AIO-Robotics-Zeus-All-Printer/dp/B00FXBFP24
For those with Amazon Prime... $189 w/ prime shipping. Monoprice Select Mini 3D Printer https://www.amazon.com/dp/B01FL49VZE/ref=cm_sw_r_other_apa_cNioyb4GMC9MQ
Prices are without promotions. Monoprice are often on sale.
$200 Monoprice mini. Small 120mm^3, fast to out grow. Good secondary printer. Would be good if you plan to get a nicer, bigger one in the future.
https://www.amazon.com/Monoprice-Select-Printer-Heated-Filament/dp/B01FL49VZE/ref=sr_1_1?ie=UTF8&qid=1479528271&sr=8-1&keywords=monoprice+mini
$320-400 Monoprice Maker Select/Wanhao I3. Same machine, monoprice is a rebrand and has a cheaper base price. Larger then the mini at 200mm by 200mm by 180mm. Good machine to start out with. Does have some cheap parts but is easy to work on and there is a large community to help out.
https://www.amazon.com/Monoprice-13860-Maker-Select-Printer/dp/B018GZBC3Y/ref=sr_1_2?ie=UTF8&qid=1479528290&sr=8-2&keywords=monoprice+mini
$700-800 Prusa I3 MK2. Available in kit form or pre built. High quality machine with parts to match. Same size as the Maker Select. Prusa offers addition upgrades to keep the machine relivenent like the multi-material upgrade that changes the machine from having 1 extruder to 4. If you are able to, this may be the best machine to start with.
http://shop.prusa3d.com/en/3d-printers/59-original-prusa-i3-mk2-kit.html
Edit: added links
I have the Monoprice Select Mini and is around $220 here in the US. I believe this is the 2nd generation of this printer too, with a color LCD. It's a very nice little printer. Only major problem is that it has a smaller bed than most printers out there so, for instance, I can't print a case for my iPhone 7 Plus or something too big for my Nintendo Switch. However, this little printer is nice because it came pre-assembled right out of the box and was extremely easy to get printing. Whereas, my Anet A8, which is a Prusa i3 clone, has a bigger bed but was extremely difficult for me, as a newbie, to get going. I actually never got that one going and making decent prints.
Whereas you can see that I get pretty decent prints out of this little machine. Took me around 12 hours in total to print both parts of this on this printer.
You can get one yourself for a couple hundred bucks if you're interested. Mono select mini is a good cheap one. Free slicing programs too like cura and big libraries of free files on places like thingiverse and all you need is a few YouTube videos to figure out how to print. It's a lot of fun and quite useful too.
Basically, the printer currently pulls power from the PSU, runs it through the main control board, and out to the heated bed. The thing is, that's a lot of power to pull and push through such tiny connectors. The Mosfet is like a little light switch. The control board tells it to turn on, and it just lets electricity flow from the PSU to the heated bed, no issues.
Here is a good one. Just take the wires from the board, and put them where this one says "Hot Bed." Then, connect wires from the PSU (screw terminals) to the other 2 screws on the Mosfet. Finally, connect the 2 wires on the Mosfet to where you pulled out the wires from the control board.
https://www.amazon.com/dp/B01HEQVQAK
I used this one. Good for 15A.
Look, I am talking completely out of my ass here as I don't have any experience with your printer. I do have an A8 though and I don't trust it as far as I can throw it. That being said, the GT2560 looks orders of magnitude better than the board on the A8 and so is probably capable of driving the 12A or so for the heat bed.
Still, if you have one of these MOSFETs lying around it might be worth the piece of mind to take the load of the main board.
Again, I have no experience with your printer so I am probably 110% wrong.
The e3d V6 lite needed this carriage mount (and this is the direct-drive version, not the bowden setup) to be printed in ABS (and ONLY ABS, PLA will warp and eventually bust. Plus, ABS repairs with acetone really well and easily, so I've busted the one I printed a while back a couple times and just re-welded it together). This is the power supply I got, and I also got two of these MOSFETs. More info on the wiring here, I'd also recommend their advice in replacing the wiring to the bed and the mainboard with higher-gauge wires to prevent issues.
Ninja edit:
I also had to adjust my printer firmware to have the new center-point for the hotend set to actual center, for that I had to flash SkyNet3D firmware, a Marlin-based firmware made specifically for the board the A8 came with. If you're replacing the board with a RAMPS board, more than likely you'll be setting it up for all that anyways.
thank you for this post. i am not OP but just got a Maker Select, grabbed the board from amazon and the print from thingiverse and will upgrade my printer ASAP!
I'm working on this mod: https://gigdigit.com/extended-heat-bed-kits-120-x-250mm-print-area-3mm-thick-select-mini-v1-v2/
The double-sized hotbed takes more power than the stock power supply can put out (especially the newer 7 amp models, which I have)
So I decided to use one of the MOSFET drivers, through the existing power jack, to which I'll connect a beefier power supply. I chose this one: https://www.amazon.com/gp/product/B01HEQVQAK
The top two terminals tap into power as shown here: https://imgur.com/NYOGok9
The bottom two run through the braided cable (joined by the thermistor wires and run to the new platform. The small connector goes to the original board's hotbed connection.
If anyone else has done this mod, or something similar, I have a few questions.
I'll probably have more questions as I go. :-)
You can if you're willing to create a safe enviroment for it. I used a temprature sensing power outlet and connected it to two small fans inside an entertainment stand total setup is about 85$. Has been working for 4 years. 3 digit temps are very common for me.
This is the plug I used
https://www.amazon.com/Inkbird-Max-1200W-Temperature-Controller-Greenhouse/dp/B01HXM5UAC/
For me the path of least resistance was to buy an external controller like this one. You simply plug the fridge into the controller and place the probe inside the fridge. Takes a few minutes to setup and you're done.
7ft+ chest freezer (or smaller of space is a concern. 7 should give you took for two vessels most likely)
Inkbird or DIY BrewPi if you don't mind the DIY projects
Small heater with a fan
And a thermowell for whatever fermentation vessel you have. If you're looking for that too, I can't recommend Fermonster enough in terms of price/quality. Though your budget may allow a SS Brewbucket
He's controlling it with an Inkbird temperature controller, we use one connected to a chest freezer for the same purpose.
Very configurable, if you wanted to you could even add a heating element and keep it from getting too cold (if you're fermenting in winter).
This is the official one from Creality.
Comgrow Creality Ender 3 3D Printer Aluminum DIY with Resume Print 220x220x250mm https://www.amazon.com/dp/B07BR3F9N6/ref=cm_sw_r_cp_api_i_gw5wCbSC4A6DF
It's the one I bought and is legit.
Bought mine from Amazon.de, sold by Comgrow, shipped by Amazon. Ordered on Tuesday last week, arrived three days later. Price was 220€, but I got a spool of black PLA with it for free, so I guess I can round that down to 200€. I guess I did pay a premium, but the fast shipping and the added amazon safety is worth it I guess.
Got mostly lucky with quality control too. The extruder motor bracket is not bent to a perfect 90°, so I had to leave the Z guide screws on it pretty loose. But it prints well, so I'm not complaining.
It’s from creality I just saw it and thought someone would be interested
link
The MTG Arena of the Planeswalkers board games, if you can get them cheap enough, are a fantastic value for a bunch of minis. I got 2 copies of all three games (really like 2.5 games because one is much smaller) for less than $50 at one point. Mostly humanoid minis, but some interesting models. And the planeswalkers come painted. They don't seem to be on sale on Amazon right now, but if you shop around, I imagine you'll be able to find these cheap somewhere.
Similarly, the D&D Adventure board games often go on sale and are pretty fantastic deal for the quantity, variety, and quality of minis you get. I think the Elemental Evil one is the best as it gives you the 4 elementals, an ettin, and a young black dragon (in addition to all the humanoid sized minis). If you can get it cheap somewhere, it's great! The Castle Ravenloft version is probably the second best, in my option.
Finally, if you're really wanting to dive deep, you could look at 3D printing. It's not the most economical route (unless you're planning on having a huge collection), but it's an entire hobby in itself that supports your other hobby! Great for custom minis, terrain pieces, and having the exact mons you need for next week's game. The Anycubic Photon is an absolute beast of a little resin printer that often goes on sale (I wouldn't be surprised if you can get it for sub $300 on Black Friday) that will give amazing detail with little effort/trouble, and the Ender 3 is a very cheap filament printer that seems to preform really reliably for the price (I do not own this machine, so I'm only speaking based on what I've seen others say). What's cool about the 3D printing route is that just about any monster you can think of as a free model available somewhere online, because the TTRPG 3d printing community is so active!
I hope that helps! Best of luck!
EDIT: changed the link for the Anycubic Photon. Looks like it's $260 on the AC website right now. This is a fantastic price for this machine. A newer alternative is the Elegoo Mars. Hearing fantastic things about it for about the same price.
The Ender-3 and Ender-3 Pro are good budget first printers. I would advise to buy the Pro over the standard Ender 3 since it has a Mean Well UL Certified power supply, rather a generic one. If you can afford it.
Recommend to buy it from Amazon for good customer service or Banggood and Aliexpress if you want the best price.
Ender-3: https://www.amazon.com.au/Comgrow-Creality-Ender-Aluminum-220x220x250mm/dp/B07BR3F9N6/ref=sr_1_1?keywords=ender+3&qid=1573525773&sr=8-1
Ender-3 Pro: https://www.amazon.com.au/Comgrow-Creality-Printer-Upgrade-Certified/dp/B07GYRQVYV/ref=sr_1_3?keywords=ender+3+pro&qid=1573525812&sr=8-3
There are other printers in that price range such as the Anycubic i3 Mega, Anet A8 and the Monoprice Select Mini, the Ender 3 is the most popular and easily available in Australia.
> Also wanting to know other than a printer what would I need to start 3d printing. i.e. what sort of computer programs and other periferals
You will need to install a slicer on your computer, which will convert 3D models into instructions for your 3D printer. If you don't want to have your printer plugged into your computer while it is printing, your computer will need to have an sd card slot, if not purchase an adapter.
Highly recommend reading through the Getting Started guide for this subreddit.
Also here is a guide on how to build the Ender 3: https://www.youtube.com/watch?v=me8Qrwh907Q
And the Ender 3 Pro: https://www.youtube.com/watch?v=ibsOYzXduYc
Hope that helps
Probably only a used or clapped out one - from what I'm seeing, the smaller cheapies aren't very good.
You can get an Ender3 around $250 on Amazon without trying hard, and that's a great device.
https://www.amazon.com/Comgrow-Creality-Ender-Aluminum-220x220x250mm/dp/B07BR3F9N6
Not OP but 99% sure it's an Ender 3
https://www.amazon.com/Comgrow-Creality-Ender-Aluminum-220x220x250mm/dp/B07BR3F9N6
Amazon has "prime early access" lightning deal right now on ender 3 with resume print $172.68 shipped.https://www.amazon.com/gp/product/B07BR3F9N6/ref=oh_aui_detailpage_o00_s00?ie=UTF8&psc=1
And looks like that lightning deal's sold out.
Reposting the famous u/ _ataraxia info:
Glass tanks can be very challenging for ball python husbandry due to the high amount of air flow with the screen top and the total lack of insulation with the glass walls. It's generally recommended to use tubs or pvc reptile cages instead. wood enclosures can also be suitable if they're designed well and sealed properly to protect the wood against moisture. glass tanks can work, but they require a lot of modification and maintenance, which you'll find tips for in the second link. i'll give you product recommendations to cover options for tanks, tubs, and pvc/wood enclosures.
Many homebrewers just buy a conventional chest freezer, then use an external temperature controller like this Inkbird:
https://smile.amazon.com/Inkbird-Temperature-Controller-Thermostat-Fermentation/dp/B015E2UFGM
The freezer plugs into the controller, you put the temp probe inside the freezer space (make sure it's in air, not touching the sides/bottom of the freezer), and set to the desired temp. I personally use them and they work well. I have 2 freezers, one is a constant 35 f year round, and the other one I adjust to specific temperatures all the way up to the 60s and 70s for fermenting beer. Keep in mind using a 3rd party controller might void the freezer's warranty, even though most all have compressor cycle protection built in now.
I ended up going with the Monoprice Maker Select V2 for ~$330USD. It has a 200x200x180 build volume, does PLA/ABS, and is everything I personally needed.
Personally I think you would be better off getting a Monoprice Maker Select V2, also known as a Wanhao Duplicator i3. It's currently selling for $300 on Amazon, and its frame is made of metal which I think would be sturdier than the acrylic of that printer. It's the same sort of printer style style (i3), but it's not a kit so all you have to do is screw a few pieces together, calibrate, and then get printing.
Here is a link.
Depends on the build area you want, but the monoprice maker select is a good printer to start with. It will print okay from the get go, but with a couple mods (look up z brace mod) you can get it printing very nicely.
The printer itself was about $700, and the filament cost is negligible. $1 of filament, maybe?
Though I could've just printed it on a $330 Monoprice Maker Select, now that I know it's available.
Oh, well, and I used the craft store paints and paint brushes, but I only used a little of that, so maybe $0.50 of paint.
First of all, thanks for the awesome post!
But I have 3 questions about what you wrote on the Monoprice Maker Select V2 and Plus models:
Are you talking about other Amazon sites besides the .com/US site?
We use FDA Compliant PLA for the cookie cutters. It takes a little more work than running to the store, buying a cutter, and washing them. You have to trim the excess plastic off, lightly sand/buff any stray bits, hand wash in warm water, and give them a test run before you can use them. If you're really finicky, you can coat it in polyurethane (but then you have to let it cure for a couple of weeks), though some forums suggest it's unnecessary since it doesn't come in contact with food as long as something like a drinking glass.
Still worth it, though! I was spending ~$7 each for 3D printed cutters from other sites. While I'll still order from them for their adorable designs, it's really nice that his hobby had cheapen mine a bit.
He's enjoying his 3D printer. He ordered this one. Reviews said there were some issues with it that could easily be fixed, but after attempting to fix them, he found the manufacturer had already fixed them. Something or other about needing a piece installed to fix a temperature issue.
Last night he printed the parts to make my son an enderdragon toy from Minecraft. Now my son wants an enderdragon cookie cutter to go with it.
You can see the Amazon Monoprice Maker Select V2 price history here. The price does fluctuate, but hasn't a lot since November of last year.
Camel Camel Camel is a handy website.
Got into 3D Printing a few weeks ago (I blame /u/delta3dstudios) and picked up a Monoprice Select Mini v2 from Amazon. It has a few limitations but for a cheap 3D Printer it's an excellent beginner one. It prints right out of the box with just a bed adjustment and supports PLA and ABS filaments (I have a bunch from 3D Solutech in the blue boxes). I printed a new extruder and now can print TPU and other soft filaments. I think I've put about 30/35 hours of solid printing since I've picked it up. I've also setup OctoPrint, a camera for recording and some additional automation.
I don't know how many times I sat and watched the thing print chilling with my Solo II losing track of the time. I'm starting to outgrow it already, wanting to print bigger things. I'm currently building out my shed, will probably upgrade to a model that does multi-color/filament with a bigger bed afterwords. Already I've printed mounts for my telematics/dashcam system, a bunch of random parts and all kinds of neat little gadgets.
What a time to be alive. Now where's my damn flying car!?
Edit: Arizer Solo II w/Doc Brown in front of the 3D printer (if you missed them) and the Grasshopper is on the white laptop.
I would glue the heck out of that junk.
https://www.amazon.com/J-B-Weld-8265S-Original-Reinforced/dp/B0006O1ICE
Great list!
just placed an order for the Instamorph, I can think of a lot of things I can use it for.
another good thing to keep handy is JB Weld, it has saved me countless times.
http://www.amazon.com/J-B-Weld-8265S-Original-Reinforced/dp/B0006O1ICE/ref=sr_1_1?s=automotive&ie=UTF8&qid=1416784847&sr=1-1
I bet that J B Weld would hold that. That's a "cold welding" substance, you mix the stuff in the two tubes together and stick the broken sections back together with it.
That stuff does have its limitations under loads, but I've used it for things before that carried more weight and it held just fine.
I was able to repair the magnesium base of my X220 using J-B Weld.
It was a bit tricky to get the pieces to sit in the proper position while it cured, but the resulting bond has been really sturdy.
That's too funny. This stuff
http://www.amazon.com/gp/aw/d/B0006O1ICE/ref=redir_mdp_mobile
this was the epoxy we tried, this is another kind we have on-hand that is just too unwieldy/thick to do a job like this.
Is this the kind you're referring to that does work? I never really tried it, thinking it would be similar in effect to the epoxy glue. There's just so much torsion on that location, I worry about how well it would hold.
I should also mention that this is a college help desk and we provide our services 100% free of charge--the only thing the students pay is for the actual cost of parts. It's all about getting them back up and running as economically as possible, since most of the students are broke and just want it back to a functional level so they can write papers, skype, and facebook again. So while negative goodwill (badwill?) is something I'd like to avoid, it's not like we're worried about losing profit or anything as a result.
this one?
You can plasti dip them.
https://www.amazon.com/Performix-11203-Multi-Purpose-Coating-Aerosol/dp/B0006SU3QW
There's someone on here that did this a while back and it was working fine.
The platidip around here comes in a can you just spray on. Similar to a can of spray paint. You shouldn't need anything besides the can!
http://www.amazon.com/Performix-11203-Multi-Purpose-Coating-Aerosol/dp/B0006SU3QW/ref=sr_1_1?s=automotive&ie=UTF8&qid=1419791845&sr=1-1&keywords=plastidip
I took my 2015 rails off 2 weeks ago, laid them out and just put a few coats of "Plastidip" on them. They look much better.
https://www.amazon.com/Performix-11203-Multi-Purpose-Coating-Aerosol/dp/B0006SU3QW/ref=sr_1_1?ie=UTF8&qid=1502383536&sr=8-1&keywords=plastidip
There's an alternative kind of paint PC modders sometimes use. Its called Plasti Dip. Its basically rubber paint in a can. Its non-conductive and people have applied it directly to motherboards even. Though I wouldn't recommend insulating chipset heatsinks and caps but its safe none the less.
You should try it yourself! It is super easy and if you mess up it come off really well. You can get some spray stuff on amazon. It works just like spray paint http://www.amazon.com/gp/aw/d/B0006SU3QW/ref=mp_s_a_1_1?qid=1406342789&sr=8-1&pi=SY200_QL40
It's not the prettiest thing in the world but it works. My kids keep leaving the fence door open so I wanted a sensor in it. Plus I wanted it to trigger the alarm when we are in away mode to decrease reaction time of police.
Plastidip is a removable, sprayable, type of waterproofing.
Now if I can do an outdoor siren...
Any ideas on an outdoor siren?
Here is Plastidip.
Argument to absurdity. But I will play along.
So you think absolute free press includes lies and fabricating evidence, and that free speech means yelling fire in a crowed theater?
The means to fabricate a nuke is beyond an individual for the most part in this nation (note you can buy and own uranium legally), but if we take the "only a militia" can on arms, then the collective could in theory amass the means to make one and be within the realm of the "it is a collective right" argument more so than the individual argument.
So to some degree I agree, but no more than I agree that absolute free speech means screaming fire in a crowded theater is ok, or for news to use fabricated stories as fact.
That would be pretty awesome, but unfortunately David Hahn died in 2016, so it's not likely he's up to his old tricks again.
You can get Uranium on Amazon now, so I would think it's more of an interesting headline than anything illegal. Depending on what the guy was going to do with it...
Amazon
I'm sorry to say your understanding has been wrong. Unenriched (i.e. natural) uranium is present in the soil and in seawater. As the originator of this thread said, you can buy a can of it it on Amazon for $39.95 (+$10.49 for shipping). CANDU reactors run on natural uranium, but the fuel itself is safe to handle before it goes into the reactor. Here's a guy holding a CANDU bundle (here's another) with no shielding (the gloves are there to prevent damage to the zirconium sheath and to give more grip so the guy doesn't drop it). As I mentioned earlier, the only danger it poses to a human is if you swallow it in large quantities and get heavy metal poisoning.
Natural uranium is also not used for medical applications, because it's a) an alpha emitter and b) because it decays extremely slowly. Medical and research applications tend to use things like Cobalt 60, Molybdenum 99 and Strontium 90 because they are gamma and beta emitters and because they decay pretty quickly. (n.b. radium 223 is an alpha emitter and is sometimes used in tiny amounts to kill cancer cells.) And because they decay so quickly, it's not really useful for a bomb either because you'd either have to use it right away or a lot of it will have decayed away by the time you do.
We don't know the nature of the research that was being conducted in this case, but chances are it was chemical, not radiological.
https://www.amazon.com/Images-SI-Uranium-Ore/dp/B000796XXM/ref=sr_1_1?s=industrial&ie=UTF8&qid=1469264534&sr=1-1&keywords=uranium
Gonna need citation on all that. First of all only a small percentage of radioactive material is weapons grade.
Second, you can literally by uranium in amazon.
www.amazon.com/dp/B000796XXM/ref=cm_sw_r_sms_apa_93q.zbJG0EC5T
Bonus: comments for a chuckle
Ever handle Uranium?
Buying Uranium online really isn't that hard though :p. http://www.amazon.com/Images-SI-Uranium-Ore/dp/B000796XXM
> https://www.amazon.com/Images-SI-Uranium-Ore/dp/B000796XXM
No, NOW homeland security is gonna be on your ass. I hear GITMO is nice this time of year. :)
Amazon sells everything
> neither extreme or violent in a method to accelerate the projectile rapidly.
......Thats why guns never explode because smokeless gently pushes the rounds down the barrel with with light and gentle pressure. Oh I get it now./s
You are arguing semantics with someone who doesn't give a fuck. Try to change your walls mind and you might have better luck. And hey dumb ass what do hemorrhoids feel like? oh that's right they feel like butthurt. Since I was never a dick to you till after you called me one, you must have hemorrhoids, because you were pretty butt hurt over a mild joke, that was more in agreement with you while making fun of I.O., RAs,C39 owners, yet you took it personally. Most likely because you were already in butthurt due to the hemorrhoids, Hence why I recommended it for you. Why you think my pussy has a yeast infection Idk, it's not like you can see me sitting here scratching at this itchy thing, But I promise it's not from you, you are no where near sweet enough.
And now the downvotes are hurting your feefees? Don't worry I'll have a talk with them.
Guy stop downvoting him. He obviously can't handle the downvotes and needs a safepace where he can hide from all the libtard cucks who aren't even here yet he felt the need to bring that up.
Also might want to double check those numbers, Unless these are 300g containers. But surely you know what you're talking about and didn't throw up a random thing you read once.
If only we could buy it on amazon. Be sure to check Q&A.
Or buy a GM counter and go hiking in central Andhra or other uranium rich regions.
Just buy it on Amazon.
Though the author most likely meant this as an expression, you could be non-depleted ore on amazon.
http://www.amazon.com/Images-SI-Inc-Uranium-Ore/dp/B000796XXM
http://www.amazon.com/Images-SI-Uranium-Ore/dp/B000796XXM
Uranium in any easy to process form is heavily regulated. Ore, residue encased in glass and so forth isn't regulated at all.
Not bullshit.
You can even order it from Amazon.com
http://www.amazon.com/Images-SI-Uranium-Ore/dp/B000796XXM
jeez why dont the iranians just get it from amazon just like everyone else?
https://www.amazon.com/Images-SI-Uranium-Ore/dp/B000796XXM
The rest of the reviews are also pretty cool, occasionally i like people!
http://www.amazon.com/Images-SI-Inc-Uranium-Ore/dp/B000796XXM
Amazon.
You can actually buy Uranium Ore on Amazon
I vote for Uranium ore http://www.amazon.com/Uranium-Ore/dp/B000796XXM
Perhaps Uranium Ore
this yodeling pickle ?
Or, from the same company... This squirell sized coffee mug
whoops. Flintstones
Non-mobile: you can buy uranium ore on Amazon
^That's ^why ^I'm ^here, ^I ^don't ^judge ^you. ^PM ^/u/xl0 ^if ^I'm ^causing ^any ^trouble. ^WUT?
I admit I'm a little disappointed that I did not see this in the "Customers also bought" section.
http://www.amazon.com/gp/aw/d/B000796XXM/
Amusing reviews.
Or just go to Amazon
Actually you can order it from Amazon.
http://www.amazon.com/gp/aw/d/B000796XXM
I thought for sure this was bull shit. I was wrong.
I have this one: https://www.amazon.com/gp/product/B007Q2M17K/ref=oh_aui_search_detailpage?ie=UTF8&psc=1
(Not an ad, it was the cheapest one I found at the time that seemed acceptable)
I use an ultra sonic jewelry cleaner with gem and jewelry cleaner or simple green. Then just hit it with a tooth brush. Works great.
http://www.amazon.com/gp/aw/d/B007Q2M17K/ref=mp_s_a_1_1/178-5677744-3419908?qid=1458924430&sr=8-1&pi=SY200_QL40&keywords=ultrasonic+jewellery+cleaner
Watch leaving plastic in simple green too long, eventually it will eat the plastic.
Absolutely the STC-1000. They are very cheap on Amazon. (queue pricezombie)
I just did one myself. I posted it in the Monday Forum here with some pics and details.
I'm using mine already now. I didn't do any sort of airlock or anything in it. I think it will work fine. The only real place anything can escape is the small hole I drilled in the compressor hump to feed the probe into the chamber. Even if that is silicone'd though, don't worry about the seal.
The unit itself is currently $17.04 on amazon. I spent $11 on the box, $16 on a 15ft 15amp extension cord, and maybe $3 on the outlet and plate. Total cost = $47 or so.
Here's what you should do with it: Get a temperature controller unit like this, wire it up to an electrical outlet, and plug plug the smoker into it.
This will allow you to customize temps up to 212F. Then, get a cold smoke generator, put it in there, and you've got a temperature accurate cold smoker.
https://www.amazon.com/Soda-Bottle-Preforms-Caps-30/dp/B008MB1QNY
It won't be impossible, it will just mean using a different container. I've been holding onto a ton of the tubes for a while for saving yeast. Also:
http://www.amazon.com/Soda-Bottle-Preforms-Caps-30/dp/B008MB1QNY/ref=sr_1_1?ie=UTF8&qid=1406572259&sr=8-1&keywords=2+liter+preform
if you need more and want to stick with vials.
I use either mason jars (grabbing total yeast cake from fermenter) or bottle preforms (remnants of starter).
This is going to sound crazy, but hear me out.
Soda bottle performs. Soda Bottle Preforms and Caps (30/pk) https://www.amazon.com/dp/B008MB1QNY/ref=cm_sw_r_cp_api_ty66ybTH9VY8J
These things are insanely strong and I've gotten one to hold over 200psi. And if you lose a cap you can get a replacement at any gas station.
soda bottle preforms
http://www.amazon.com/Soda-Bottle-Preforms-Caps-30/dp/B008MB1QNY
http://www.preformsplus.com/Products.htm
Here is the desktop version of your link
Soda Bottle Test Tubes is what I use. Mason jars would take up way too much space in my fridge.
For any fam that wants this, Amazon's gotchu!
EDIT: They're actually a bit cheaper at Educational Innovations, its the second link when searching for where to buy unformed soda bottle.
I have two cooler setups using this one: https://www.amazon.com/Inkbird-All-Purpose-Temperature-Controller-Fahrenheit/dp/B00OXPE8U6
I have a large one for large cooks, or meat, while using the small one for veggies, or a smaller cooks. They both work great. I use a tiny aquarium pump which will need to be replaced once in a while since they are not rated for heat and will wear out eventually. Mine have lasted about a year of weekly cooks. Have fun, build your own, and you'll probably learn something too! I use water heater elements for my heating element Get a hobby box for the temp. controller/wires, mount it on the cooler. I actually have a wire diagram I made and will supply you with a full parts list if you are interested. I integrated an external relay in my setup too, and it has it's own GFCI plug end on it for those times when you are not near a regular GFCI plug in a wall. Safety first around power and water! PM me if you want to goods!
I would replace that with an off-the shelf digital controller (like this super cheap model: http://www.amazon.com/Inkbird-All-Purpose-Temperature-Controller-Fahrenheit/dp/B00OXPE8U6/ref=sr_1_9?ie=UTF8&qid=1452810523&sr=8-9&keywords=pid+controller)
I have no previous knowledge of capillary tube thermostats, but personally I find PID controllers can be tuned more easily to get the response you would like out of a system.
I'm BIAB, so that helps cut down on the space and equipment, but I'm looking at adding [240V Heating Element] (https://smile.amazon.com/gp/product/B000BPG4LI/ref=ox_sc_act_title_2?smid=ATVPDKIKX0DER&psc=1), Inkbird Controller, and [a basket to make raising the grains a bit easier to manage] (https://smile.amazon.com/gp/product/B000VXKJJI/ref=ox_sc_sfl_title_5?ie=UTF8&psc=1&smid=ATVPDKIKX0DER). Which doesn't seem like too much of an investment to make my brewday a LOT shorter, and a bit easier.
edit: [alternative inkbird controller] (https://smile.amazon.com/gp/product/B01KJZMWSI/ref=ox_sc_act_title_1?smid=A1RUFFFCQ74BCW&psc=1). This is the one i am currently considering, but i don't know the real differences.
No.
Get a cheap freezer off of ebay/craigslist, then get one of these and set your temperature:
http://www.amazon.com/Inkbird-Itc-308-Temperature-Controller-Thermostat/dp/B011296704
When it gets too cold, power to the unit gets killed...when it warms back up, you get the idea.
https://www.amazon.ca/Inkbird-ITC-308-Temperature-Controller-Thermostat/dp/B011296704 use one of these guys to save yourself the trouble of wiring an STC.
the side by sides do take a lot of room. If I would find a used (but in great condition) freezer chest. You can pick one up for between $50 to $150 depending on size etc. Build a simple wooden collar. There are lots of tutorials on here and homebrewtalk.com. Its not too hard to build the square just take your time and make sure all your measurements are right. Use this as your temp controller (https://www.amazon.com/Inkbird-Itc-308-Temperature-Controller-Thermostat/dp/B011296704) plug and play. no wiring needed. if you went this route you could probably do it for less than half the cost of what you posted.
If you really don't think you are capable of putting one together, then you need to look at that cost difference to see if its really worth it.
Also, shop around a bit. although its convenient to place one big order through one shop, it can often be more expensive.
I am no expert and still very much a newbie, so any veterans can chime in and correct me.
Maybe Inkbird is what you need: https://www.amazon.ca/Inkbird-ITC-308-Temperature-Controller-Thermostat/dp/B011296704
I just bought an Inkbird Controller
for my build, and it's been working wonderfully so far.
I just put mine together this weekend.
Around $220 for everything, but you can fit two 6 gallon carboys and two 3 gallon carboys or a few 1 gallon jugs on the hump.
What's the temp inside the unit? You could probably just keep it at a low setting or hook up a [temp controller] (http://www.amazon.com/Inkbird-Itc-308-Temperature-Controller-Thermostat/dp/B011296704/) to get to 50ish. Might cut down on the cycles.
I know many appliances are starting to integrate tools that allow them to run based on time of day pricing, but that will take forever.
In homebreweing, we use temperature controllers like this: Inkbird Itc-308 Digital Temperature Controller Outlet Thermostat, 2-stage, 1100w, w/ Sensor https://www.amazon.com/dp/B011296704/ref=cm_sw_r_cp_api_EPwtzb2P3KEM1
It allows us to bypass the fridges regular on/off mechanisms to maintain specific temperatures. By setting your fridge and freezer to the coldest settings and plugging it into one of these you would just need a mechanism that looks at your LMP to decide if you are in appropriate price parameters.
I imagine people will start developing internet/app enabled "smart" plugs that go between appliances and the wall to allow them to take advantage of price signals. Naturally, this is all dependent on a shift in retail markets toward real-time pricing. The consumer is heavily insulated from pice volatility currently.
I have one of these and taped it to the lid with some electical tape. I have it hooked up to one of these dual temp regulators and it works great.
EDIT: Sorry, actually I have the 50w version - here's the link to that length
'Best' is a relative term, but one similar to the defunct BlackBox controllers you mentioned is the OhmBrew Fermostat.
Otherwise if you're a budget brewer like me, then perhaps the Inkbird ITC-308 is an option, but keep in mind that I've heard rumors that the wiring isn't technically up to US code, if that's a concern for you.
I'm guessing the substrate is eco earth (thats what it appears to be), which is good... water bowl size is good although takes up quite a bit of the enclosure. The hide appears to be mostly enclosed so thats good... however theres only one hide so you'll need another one for a cool hide if you use that as a warm hide. Basically you want at least two hides, warm hide and a cool hide... and if you can fit a third one in then that would be your humid hide. I'd also recommend getting more foliage so the snake feels safer. I'd get the heat lamps out of there and get a large heat mat to go underneath the warm hide and then a thermostat to control the temperature. This is the thermostat I use, it seems to work very well.https://www.amazon.com/gp/product/B011296704/ref=oh_aui_detailpage_o00_s00?ie=UTF8&psc=1
And then this is the heat mat I use for two of my animals, and both seem to work so far.https://www.amazon.com/gp/product/B018VQ72RI/ref=oh_aui_detailpage_o00_s00?ie=UTF8&psc=1
You'll also want to get new temperature and humidity gauges, stick on ones don't work. This is the one I use, works great so far.https://www.amazon.com/gp/product/B06XY3X7P9/ref=oh_aui_detailpage_o04_s00?ie=UTF8&psc=1
And then if you want you can also get a temp gun, which tells you the surface temperature. I like using it a lot, and sometimes rely more on it than my temperature gauges.
As far as humidity and temperatures go, the hot spot should be about 90-95, cool side around 70-80 or so, I would make sure temps dont drop below 70. And humidity about 50%, you can boost it up to 70% during sheds but I wouldn't go over that.
If temps aren't getting where they need to be you can use a low wattage CHE, also known as a ceramic heat emitter to heat the tank as additional heat (You'll still need a heat mat).
In all honesty if you could get more substrate (bedding) you could put even more hides in. In my BP's 20 gallon she has a total of 5 hides as her substrate is filled half way so I can put hides underneath the substrate and then put cork bark to keep the substrate raised. She has probably about two humid hides, one underneath the water bowl, one on the opposite side which is a standard hide, and then underneath that in the substrate she has a warm hide which is connected to a "tunnel" system of cork bark. https://imgur.com/a/h6ERs6Y
a tube of kryonaut is only ~$12 on amazon. Its worth it for such a low cost. I did it and my delta dropped by 5-10C. Kryonaut is one of the top pastes. AC is outdated similar to how people still get the Evo 212.
https://www.amazon.com/Thermal-Grizzly-Kryonaut-Grease-Paste/dp/B011F7W3LU
That's probably the best non-electrically conductive thermal paste. Like I said though, you'll only see a couple degrees difference. Delidding would drop it 10-20C degrees though.
May want to check this out just in case.
Then this.
Try these O-rings.
Edit: The size 008 of these is a bit softer.
For $2, I used these on my browns. Probably took about 20 minutes to put them on. Definitely takes the edge off the noises from bottoming out.
Some that I ordered off Amazon.
There are many more too. No way you should ever have to pay $25 for fucking o-rings.
MX reds, blues, browns use the same spring. The reds should feel slightly lighter because of no literal tactile bump on the stems.
Oh, the o-rings I've tried are the cheap 70 durometer ones off amazon:
http://www.amazon.com/gp/product/B000FMWLR8/
I believe using softer ones would make the reds feel even mushier.
TBH I prefer browns so much that I
haven't given the o-ring'd reds a proper try. I might try them later with 55g springs from originative.
Maybe get yourself some o-rings in the mean time. I put these on not to long after I got a blue switch keyboard. You might notice the reduced key travel at first, but you forget soon. I used these cause cheap: https://www.amazon.com/gp/product/B000FMWLR8/ref=oh_aui_search_detailpage?ie=UTF8&psc=1
Measure it with calipers.
If you don't have any, buy a pair.
Your flow rate does look high. I do 95%. I think that Simplify3D might even default to 90% for PLA. The stuff expands a lot.
Not an expert, but
I'd focus on the drive train issues first, get all those tires working, might be a lost cause before going any deeper, but others will have to help with that, I take that kind of stuff to my mechanic.
Brake pedal could be that it's low on brake fluid, or one of the brake calipers is stuck.
My quad has a foot brake like that and a hand brake, but the foot brake only brakes 1 tire. That tire has two brake calipers on it's roter, one to the foot break and one to the hand brake. So the hand brake is all 4 wheels, and the foot brake is 1 wheel. There is a master cylinder on my hand brake and another on my right rear tire (foot brake). If my foot brakes master cylinder runs low or springs a leak, my pedal goes through the floor like in your pic but I'll still have brakes on the hand brake. It's like a double/emergency braking system. If my hand brake goes out I can down shift (engine brake) and lay on that foot brake to brake and not hit a tree...
___
Fuel wise, it's likely carburetor being old. The carburetor should have a primer on it that injects gas into the carb when you press/pull it. Those generally have a diaphragm in them (rubber) that tends to go bad over time and cause a fuel leak.
If you can find a diagram of the carburetor that would help emensely.
Really though, you should take the whole carburetor off, take it apart and give it a bath in carb cleaner (no plastic/rubber in there) and clean all the jets out.
Also, they make rebuild kits for most carb's that come with all new jets, and pilot screw etc. See if you can find one. I typically just replace them all, easier and then I have spares.
Also, inspect the carb's vent hose and make sure it's intact and not clogged. Check the fuel line too, for damage/rot.
You should also remove the gas tank and clean it out. Take the petcock off and inspect the filters and valve, then clean the whole gas tank out so there's no dirt/bad gas in there.
Then check/change the spark plug(s). Before running it though, I'd check the valve clearance on the valves, guides on that online.
Once all that's done, it should run good and not leak gas.
Then you can address your other issues.
Pending how old it is, there are some parts I might replace just because:
If the current ones are working, call them spares.
Starters and solenoids are cheap, voltage regulators OEM are expensive, but you can buy a few after markets pretty cheap to have spares.
Tool wise, I can recommend at least the following:
Then your typical ratchet sets, air tools, impact guns, etc.
And socket extensions (long ones) because getting to some things is a royal pita.
You don't need a micrometer, just calipers with a wheel lock and 3 points after the decimal is fine
https://www.amazon.com/Neiko-01407A-Electronic-Digital-Stainless/dp/B000GSLKIW/
Search "digital calipers" just about anywhere, here is one on Amazon, for example.
I know what sub i'm in but seriously dude:
https://www.amazon.com/Neiko-01407A-Electronic-Digital-Caliper/dp/B000GSLKIW
You have to factor in the value of your own time.
Cool fix anyway.
calipers
I suggest getting two things that helped a ton with my prusa:
http://www.amazon.com/gp/product/B000BQR7TU/ref=oh_aui_detailpage_o00_s00?ie=UTF8&psc=1
and
http://www.amazon.com/Neiko-01407A-Extra-Large-SAE-Metric-Conversion/dp/B000GSLKIW/ref=sr_1_1?s=hi&ie=UTF8&qid=1417042163&sr=1-1&keywords=caliper
Building from scratch is really great because you then have a mental framework for diagnosing when something goes wrong. Have fun.
Get a cheap digital caliper and get modeling!
For the record, those digital calipers aren't made by Frankford, but are re-branded. You can get the same set "made" by several different companies but cheaper, like this set.
Not that there's anything wrong with the Frankford ones. Just pointing it out in case you were interested in saving a few dollars.
I use these nearly everyday at a desk doing reverse engineering / 3d printing prototypes. They work fine for me
https://www.amazon.com/Neiko-01407A-Electronic-Digital-Caliper/dp/B000GSLKIW/ref=sxts_k2p_hero1?pf_rd_m=ATVPDKIKX0DER&pf_rd_p=2668834182&pd_rd_wg=cSyFv&pf_rd_r=2SJYEW38AY5AGNBK2KCF&pf_rd_s=desktop-sx-top-slot&pf_rd_t=301&pd_rd_i=B000GSLKIW&pd_rd_w=0nGkJ&pf_rd_i=digital+calipers&pd_rd_r=2VEACHX9JZMZ570M28R0&ie=UTF8&qid=1479323368&sr=1
And to add on:
Some of us bought digital calipers so we could get really technical with our widths... =/
if you live in the U.S you can get them for $8
http://www.amazon.com/dp/B0051XWXCE/
Otherwise I would guess they range around $20. ^^^^iwishiwasintheus
Without changing the feeling of the key stroke? You would probably need something with a low shore rating. Maybe somewhere in the 20A range. I suggest that you just use something with a relatively higher rating and is readily available like this one I listed below, you'll get used to it pretty quickly. You can also find some in the 40A range but they tend to be more expensive for some reason.
http://www.amazon.com/008-Buna-N-O-Ring-Durometer-Round/dp/B0051XWXCE/ref=pd_sim_pc_5?t=slickdeals&tag=slickdeals&ascsubtag=BTRsovXOEeK0Lc5lAEKLqQje75_6CQe3_0_0_0
Here is the link
I have these because I think paying $20 for orings is retarded. Typing is fine, maybe just less enjoyable, but still a lot nicer than my old keyboards. It really prevented the ping I used to get from bottoming out, but I feel they are a lot less useful now that I type properly and don't slam the keys.
I use these http://amazon.com/gp/product/B0051XWXCE though I know that you can get the nice coloured ones from WASD.
I put these on my QFR blues. Now, they don't bottom out and just do the clicky sound. Much more consistent sounding since every keypress sounds the same.
I assume you'll get similar results with the wasd ones. I also bought the sampler pack from wasd but couldn't decide on which ones I wanted, so I ended up with the amazon ones.
I got a set of 125 from Amazon for less than $9 shipped: 50A Durometer, Round, Black, 3/16" ID, 5/16" OD, 1/16" Width. Had no trouble with it on my KBT Pure.
Linky
These are from Amazon but as long as they are the correct size any o-ring will work (your preference on hardness may vary); dental bands also work.
Here's an infographic for Cherry MX caps:O-Ring Informational.
This...
https://www.amazon.com/Plastic-Transfer-Pipettes-Gradulated-Pack/dp/B005IQTSE0?SubscriptionId=AKIAJQA6PK5J5ZC4LTRQ&tag=shopperr-20&linkCode=xm2&camp=2025&creative=165953&creativeASIN=B005IQTSE0
When you split it, top it off with some [wine preservation spray](https://www.amazon.com/gp/product/B001AS4NCM/ref=pd_lpo_sbs_dp_s(s_1?pf_rd_p=1944687722&pf_rd_s=lpo-top-stripe-1&pf_rd_t=201&pf_rd_i=B0000DCS18&pf_rd_m=ATVPDKIKX0DER&tag=guphi-20&pf_rd_r=RY5M6TCXVQMG2QRQ3A37) and then close the bottles and seal the cap with a few wraps of teflon tape (grab some at Walmart or Home Depot for a dollar in the plumbing area). Make sure your bottles have the conical tops, also sometimes called vinyl liner, not paper liners. Like these. Don't use drippers to freeze, the rubber stopper area can contract in the freezer and let in moisture.
I use pipettes with my nicotine, you can get them in packs of 100+. The scale is more accurate than the syringes, and the amount you may be off per drop is insignificant.
(Edit, adding more):
It's way, way easier to mix with 100% PG nicotine solution unless you're going for max VG! Just get some pipettes, if you don't wanna have to clean shit. They're cheap and disposable. Five bucks for 100, free shipping at Amazon.
I've found using eJuiceMeUp, it's just way more simple to calculate crap out using 100% PG nic. Almost all flavours are PG and whatnot.
for moving paint around you can use a drinking straw, just dip it into the pot a little, then cover the end with your thumb, move it to the palette. if you're feeling fancy you can get some pipettes
I use about a 1:1 ratio on my palette, and I get a couple hours good use out of it just using a cheap plastic watercolor palette from Michael's. You can also make up a wet palette, I know a lot of folks like these.
for even longer lasting paint, or for wet blending, you can get some acrylic retarder
Scale 30
PG 13
VG 13+7Sh (Price is different from when I bought it, recommend difference source)
100 Pipettes 5
Lorann Sampler 15
Various bottle options, take your pick.
Does Nonsterile matter with Pipettes?
I realized it after ordering, it's still sunday for an hour, can cancel, should I though?
Yeah, I make sure to not shake my bottles, I stir them instead. This keeps paint from accumulating on the top of the bottle cap, preventing it from drying the lid shut as well as preserving the paint longer.
I also buy a ton of these pipettes as well as these medicine cups every few months. I always transfer my paint to a little cup to mix / thin it.
Another tip to extend a paints longevity is to never place thinned paint back into the jar, as it can cause some paints to gel and become useless over time.
If you want to keep your rings clean all the time, you can invest in an inexpensive ultrasonic cleaner. Most of them use a powder-based cleaner that you mix with water. They don't use much water, and the solution will last a long time unless you're cleaning 20 pieces a day. If your well water is too hard, just use bottled water.
Mine was a bit more, but you can purchase a good ultrasonic cleaner for ~$40:
www.amazon.com/Magnasonic-MGUC500-Professional-Ultrasonic-Eyeglass/dp/B007Q2M17K/
Magnasonic. There was one that was like $5 cheaper, but I think I picked this one because it has a timer? I figured $40 is nothing compared to the cost of all of the orthodontics, so I splurged. I use it with 3 minute denture cleaning tabs and it has been incredible. I’m going away this weekend and I am so sad that I will be leaving it behind (I could pack it in my carryon, but that’s a bit much for 2 nights). It works wonders - I swear my trays look as clean as the first day I put them on when I pull them out of the ultrasonic. I do 180-280 seconds usually (it has a timer).
First: Soak in cheap rubbing alcohol (remove o-rings first).
Second: http://www.amazon.com/Magnasonic-MGUC500-Professional-Ultrasonic-Eyeglass/dp/B007Q2M17K/ref=sr_1_2?ie=UTF8&qid=1404238659&sr=8-2&keywords=ultrasonic+cleaner Filled with hot water, dish soap and vinegar.
Third: Toothbrush and soapy/vinegar water from ultrasonic cleanser.
Fourth: Empty ultrasonic cleaner and fill with clean, distilled water. Put your rinsed RDA pieces back in the cleaner for max time.
Fifth: Rinse and dry thoroughly.
Edit: spelling... ugh
Here’s the one I got. I love it. I use it to clean everything: rings, necklaces, sunglasses, phone cases — basically if it’s small enough and not electronic, I put it in there lol
> I also don't have any thermal paste yet
> Oh, it also looks like I need a keyboard! Any suggestions
Edit: For some more exotic mechanical keyboards keep an eye on MassDrop.com - Often have cool ones like this: https://www.massdrop.com/buy/leopold-fc660m
here you go.
Hey yeah they slightly reduce the travel distance and they keep them from bottoming out.
I used these o-rings: http://www.amazon.com/gp/product/B000FMWLR8/
No problem!
If you want to give it a shot for relatively cheap you can try out the ones I picked up
I have a blues keyboard. I ended up getting these o-rings to place underneath the keys which ended up cutting the sound of the audio in like half. The loudest part of blues is when you bottom out and the key hits the bottom of the keyboard. O-rings pretty much dampen that, which makes it much quieter. You can also put O-rings on browns etc.
Some are reporting that these o-rings (15 x 1 x 17mm) fit the kayfun body:
http://www.fasttech.com/p/1208503
I bought the 008 Buna-N Orings for my Russian 91% chimney top, it seems to work ok...
http://www.amazon.com/gp/product/B000FMWLR8/ref=oh_details_o04_s00_i00?ie=UTF8&psc=1
Going to second giving o-rings a shot, I've got mx browns and some 70A o-rings from Amazon and they definitely quiet it down a lot. They were all of $2, so it's a pretty cheap thing to try. I actually like the stiffer o-rings compared to 50A, I find the softer o-rings leave the keys feeling a bit mushy when bottoming out while gaming.
If you want to try out some "cheap" o-rings check out this. They are a harder then the stuff that you can snag from WASD, but I actually prefer them over the ones from the Sampler Kit my brother got from them.
O-Rings
If you type forcefully then most of the noise is from the former, You can get o-rings for your blackwidow, without needing a new keyboard! If you aren't set on getting a new keyboard try it first, razer even sells a (Overpriced) o ring kit. Or you could get this If you get the secound you will also need a keycap puller, which the razer kit includes. It will still be cheaper, esp if you have amazon prime.
The only reason you would need a new keyboard is if the click it makes before it hits the bottom is too loud, or you want something nicer then a razer.
you can get o-rings for like $2 man they're just rubber.
For example, I use these on my Ducky Gold http://www.amazon.com/gp/product/B000FMWLR8/ref=oh_aui_detailpage_o00_s00?ie=UTF8&psc=1
The problem seems to be that the ones that really reduce travel distance also seem to be the mushiest. Seems like most people who are installing o-rings are doing it for sound not how far your keys depress :(
I've only found one real "review" on o-rings in general and the guy was using blues not reds so not sure how much it will tell me. At $20 a pop for a set it's kind of a sucky "guess and check" situation I feel like.
--------------------
Edit: I think I found my answer: 70A... the number is a measure of hardness not size! Now I just have to find the right thickness in them...
Edit 2: Found them! 70A O-rings on amazon. Code 008 for the 1/16" and code 106 for the 3/32". At $2 a pop I can actually guess and check with these.
I don't know why my google-foo was sucking so much last night. I must have been tired.
Most of these folks are right- blues are pretty noisy even with O-rings, but I will say that O-rings WILL quiet it down a bit. The bottoming out sound of the keycap is quite a bit louder than the actual switch actuating. A user here referred me to some cheap o-rings here that I quite like and would recommend, but it looks like they're not available at the moment. :/
Amazon link
This isn’t bad for the price we use $150 calipers and I’ve tried some of these in a pinch and they’re pretty comparable.
I'd buy something like this. It's just an example, probably better ones available, it's just the first one that came up.
http://www.amazon.com/Neiko-01407A-Extra-Large-SAE-Metric-Conversion/dp/B000GSLKIW/ref=sr_1_1?s=industrial&ie=UTF8&qid=1405012283&sr=1-1&keywords=vernier+digital
http://www.amazon.com/Neiko-01407A-Extra-Large-SAE-Metric-Conversion/dp/B000GSLKIW/ref=sr_1_1?ie=UTF8&qid=1397511458&sr=8-1&keywords=digital+micrometer
Get a set of decent calipers. You'll need them for all sorts of stuff and they aren't going to wear out. Plus they're so cheap it's almost a non-issue.
Eyy~ You'll likely want one of these~ A digital caliper / micrometer.
Digital calipers! There are other methods, and certainly better calipers than this, but these are way more than enough to get yourself started for cheap. I have two nice sets of calipers, but at one point I just bought four of these and keep one in my office at home, one at work, one in the garage, and one more just stashed in a drawer because I use them all the time: https://www.amazon.com/Neiko-01407A-Electronic-Digital-Stainless/dp/B000GSLKIW/ref=sr_1_3?keywords=Calipers&qid=1564629857&s=gateway&sr=8-3
For this print all I did was measure the diameter of the cable and the diameter of the knockout. That was enough to give me all the info I needed.
One machine screw with a spring washer and three sheet metal screws. Buy these:
http://www.amazon.com/Neiko-01407A-Extra-Large-SAE-Metric-Conversion/dp/B000GSLKIW/
http://www.amazon.com/Neiko-01407A-Extra-Large-SAE-Metric-Conversion/dp/B000GSLKIW/
You can take a pretty close guess at exactly what the screw specifications are without them, but they're cheap, very useful and will tell you exactly what the screws are.
If you're designing your own parts, definitely get a pair of calipers. Can't recommend these enough.
Zip Ties are always a good thing to have around. Spare parts for your printer (heater cartridges, thermistors, fuses if you printer has them. ) and tools to change them (usually a socket or wrench set will do). Flush cutters.
Safety glasses for removing support material. My eyelids have saved me from so many flying pieces of plastic I've lost count. You always think "I dont need those" until you do lmao.
Small flashlight (+1 for magnetic mount), fine tweezers for pulling gunk off of your hotend, PTFE grease, Allen wrench set (ball-end sets are AMAZING for getting into tight angles)
ABS and Nylon are the toughest, but can be difficult to print.
ABS will withstand higher temps.
Get a cheap digital caliper so you can take precise measurements. I model stuff in Fusion 360 and make weird parts all the time.
Using a digital caliper on the clamp area is the best way to measure it if you can't find the spec somewhere online. I recall my 2009 Pista having a 26.0 handlebar clamp diameter.
Cinelli Peppers are cool, but you can't go wrong with Nitto either.
Electric could be .011 too as I told my guy I play heavy last time I got my les paul set up. No idea what's on the Jaguar but I think they might be .008s? I like a light touch on fenders.
Either way I'd rather spend $17 on the tool and get the job done than buy a $20-$30 in electric strings and $10-15 in acoustic strings, and then throw most of them away.
https://www.amazon.com/Neiko-01407A-Electronic-Digital-Caliper/dp/B000GSLKIW/ref=sr_1_1?ie=UTF8&qid=1493316915&sr=8-1&keywords=6%22+digital+caliper
I've been using these Neiko ones (0.01mm resolution, 0.02mm accuracy) for about 8 years now with no issues
If there is a second set screw and you have a set of calipers and a thread pitch guage handy, you can remove the second set screw and measure the major diameter which is your nominal thread size, overall length of the screw and the thread pitch. It will also likely be a "cup point" set screw, not a "dog point" or anything else crazy.
Otherwise, find a local machine shop to help you determine what you need, or a gunsmith to take care of everything.
I use basically this (probably a different brand, but likely made in the same factory):
https://www.amazon.com/Neiko-01407A-Electronic-Digital-Caliper/dp/B000GSLKIW/ref=sr_1_3?ie=UTF8&qid=1482953396&sr=8-3&keywords=digital+micrometer
Disagree on the digital calipers. I bought one of these last year:
http://www.amazon.com/Neiko-01407A-Extra-Large-SAE-Metric-Conversion/dp/B000GSLKIW/
It's been perfect. Checked it against precision hole gauges. Held up great with abuse. And if it breaks someday, hey, $15.
I dont have experience with printrbot, but i used tom's guide from youtube to do my calibrating. Just watch his video.
https://www.youtube.com/watch?v=YUPfBJz3I6Y
Depends on the software for real time changes. I use octoprint. I know repetier host is really good also. If you do that, just set it as 100 in the slicer, then adjust in real time so you know what your setting should be always.
If you dont have a pair of calipers get these to measure the outside diameter of your filament, that may be why you have to adjust your extrusion. if the diameter is bigger, then it is shoving for plastic in thatn it really should.
http://www.amazon.com/Neiko-01407A-Electronic-Digital-Extra-Large/dp/B000GSLKIW/ref=sr_1_1?ie=UTF8&qid=1451996465&sr=8-1&keywords=caliper
I am a toolermaker by trade, and i actually use these everyday in the shop. I stopped using my expensive ones and just use these now.
My reloading setup was based on budget. I spent about $147 total for my Lee Single Stage Press + extras. The only complaint I have is I wish the press was a little more accurate for speedier results.
Id like if anyone commented on high speed pressing components with high accuracy results. It would be nice to have but really just curious whats out there and what works.
Edit: incase you were curious ive listed my parts below
http://www.amazon.com/gp/product/B002BDOHNA/ref=oh_details_o09_s00_i00?ie=UTF8&psc=1
http://www.amazon.com/gp/product/B000GSLKIW/ref=oh_details_o08_s00_i00?ie=UTF8&psc=1
http://www.amazon.com/gp/product/B002SF4X5I/ref=oh_details_o07_s00_i00?ie=UTF8&psc=1
http://www.amazon.com/Lee-Precision-Deluxe-3-Die-Rifle/dp/B00162TEOE
http://www.amazon.com/gp/product/B000NOQIOU/ref=oh_details_o05_s00_i00?ie=UTF8&psc=1
http://www.amazon.com/gp/product/B000NOSGOU/ref=oh_details_o05_s00_i01?ie=UTF8&psc=1
http://www.amazon.com/gp/product/B0014136PA/ref=oh_details_o05_s00_i02?ie=UTF8&psc=1
http://www.amazon.com/gp/product/B00162UGQE/ref=oh_details_o01_s00_i00?ie=UTF8&psc=1
so im looking to get into 3d Printing, and unless someone has some better option, im going with the MP Select Mini.
My question is on the other things i need. Here is the list of the things im looking to buy along with the printer:
I have a set of exacto knives and a screw bit set. Is there anything else im missing?
Some time ago, I posted a set of Caliper Extenders for the Neiko 150mm digital calipers. I just added to the Thingiverse file a storage slot to glue onto the Caliper Case. It sort of snaps in, but obviously requires some glue. I'm using E6000.
Looking at my toolbox, here was something I bought so I could measure the trunks and keep a log over the years...https://www.amazon.com/gp/product/B000GSLKIW/ref=oh_aui_detailpage_o03_s00?ie=UTF8&psc=1
I have yet to start that log but I did use it to measure a drill bit size.
Get a caliper:
https://www.amazon.com/gp/product/B000GSLKIW/ref=s9_acsd_top_hd_bw_b2hbgbL_c_x_w?pf_rd_m=ATVPDKIKX0DER&pf_rd_s=merchandised-search-3&pf_rd_r=X8J846GSRS6NS60FW29R&pf_rd_t=101&pf_rd_p=1a8eac19-c971-50dd-a67f-89fb6ce5ef10&pf_rd_i=2476630011
If you're doing any kind of modeling of real life objects, it might be worth your while to buy a digital caliper so you can make your own measurements, especially if you need more specific ones after you get the initial ones in.
https://www.amazon.com/gp/product/B000GSLKIW/ref=s9_acsd_top_hd_bw_b2hbgbL_c_x_w?pf_rd_m=ATVPDKIKX0DER&pf_rd_s
Those o-rings would work. There are different o-rings, I personally have little experience using them. /u/lpwl made a comment in a post a while ago:
>- A thicker O-ring will reduce key travel more than a thinner one.
>In other words :
>- If you want to quiet down the keyboard and soften the landing, get soft o-rings, ie in 40A or 50A durometer.
Here's a good post on his website that goes more into depth about o-rings. And here's a post on Geekhack.
If you want to skip reading all that then from what I've read the 40A-L Red O-Rings ($15) from WASD Keyboards is the most popular choice and Buna-N O-Ring 50A ($7). If you don't mind waiting a long time you can get o-rings on Ebay for $1.08, the measurements of this is very close to the red o-rings from WASD.
Also my first mech (haven't arrived yet though). I heard people like blues for typing and RTS (I plan to play SC2 on it) but perhaps not for FPS as the clicking might get annoying. The bottoming out probably produces the most noise though, so o-rings are good for that. The nice clicking will remain even with the o-rings. I just got these which are about 1/2 price of "keyboard-specific" o-rings.
WASD Keyboards the blue ones will dampen sound the most.
Max Keyboard
Amazon. Both WASD Keyboards and Max Keyboard also has O-rings on Amazon. Free shipping on Max Keyboard's O-rings and Amazon Prime on WASD Keyboards' red O-rings (blues are out of stock).
I honestly wouldn't bother with eBay unless if you want the buyer protection.
I believe these are ones most people buy. Note that o-rings will make the bottoming out a bit more like rubber domes, kind of squishy, but you will have less key travel distance, and it will be easier to actuate the switch a second time (i.e. you don't have to lift your fingers as high to get the switch to register again).
Get these. It doesn't completely silence the keyboard, but it keeps the keys from bottoming out and making the louder 'clank' noise. It also reduces travel distance of the keys, making it slightly easier to type.
If you want to save money this is the way to go
http://www.amazon.com/gp/product/B0051XWXCE/ref=oh_details_o00_s00_i03?ie=UTF8&psc=1
Looking for a full-size with MX Browns for general use plus gaming (USA), and the following are all pluses: Mac layout, white LED, detachable cord, simple aesthetics, and "floating keys" like Varmilo (definitely not all hard requirements except full size and Browns).
Current plan is WASD Code (has everything except floating keys, for 150 on Amazon or less if I can wait for MassDrop) with these O-rings (look equivalent to regular red ones), plus Vortex doubleshot PBT+POM backlit white keycaps thick OEM height ones that apparently look great on specifically the Code (plus they match my white Corsair 600T hackintosh case).
Any ideas? Decent cheaper alternatives I hadn't considered? Concerns I should be aware of with this setup? This Ducky One looks like a decent cheaper board at 120 with Browns and white LED, but the availability is listed only as preorder, which sounds to me like “unavailable for who knows how long”.
Apologies for my noobiness, and happy holidays!
Buna O - Rings
fuck yes i want pics. sounds like you almost went with dolch style color scheme.
nice price too. did you end up with brown switches?
o-rings can be really nice if you like to bottom out all the time. i do and it saves my fingers a lot of stress with my insane cave man style of key pounding.
i bought these on amazon. they seem nice enough.
http://www.amazon.com/gp/product/B0051XWXCE/ref=oh_details_o09_s00_i00?ie=UTF8&psc=1
it is a nice quick little mod. it also allows me to use my board in my cubicle at work. but i use blues. you use browns? you might be able to use browns at an office or at school without disturbing people.
You could get some plastic pipettes to transfer small amounts of the oil. I use these for depositing scented oils in my oil diffuser so that I don't accidentally use too much.
You could also consider transfering the oil to bottles with dropper tops.
Yeah, Lahmian medium is great. That will probably work better than the Vallejo TBH.
EDIT: if you're airbrushing with GW paints, get yourself some of these:
https://www.amazon.com/Plastic-Transfer-Pipettes-Graduated-Pack/dp/B005IQTSE0/ref=sr_1_1?ie=UTF8&qid=1495632710&sr=8-1&keywords=paint+pipettes
Makes it a lot easier to get the right proportions of paint/thinner when you can measure. I haaaate the idea of literally pouring paint into the airbrush cup.
This is the advice that /u/gzprime gave me:
>I like the Rit Dymore (has to be the Dyemore version) for a few different reasons. The number one reason is convenience, it is pre-mixed and there for ready to go. It has far less warnings and caustic information than the iDye Poly. I find the iDye Poly hard to blend in small batches and have been having better results as of late withe Rit Dyemore.
>I'm pretty comfortable with dyeing keycaps. You can see some of my work here: (http://imgur.com/a/A79CE) You'll want the Rit Dyemore that comes in a bottle, premixed in the black color. I would use disposable pipettes to measures 1-3ml of dye for the initial bath/shade (https://www.amazon.com/Plastic-Transfer-Pipettes-Graduated-Pack/dp/B005IQTSE0/).
>If they're PBT caps, you can bring the water to soft boil, add the caps and then just babysit them until you get the shade you're looking for. Then I'd use the pipette to add additional dye for the next shade and babyit that as well, repeating the process until you've got all the shades you're looking for.
>I'd also strongly suggest starting off with a series of test caps so you can get the timing, concentration, and process down pat. Feel free to let me know if you have any questions and good luck!
If you're looking to do a gradient type dye with one color like what I did, I would strongly recommend using both as little water as possible and as little dye as possible for your first shade. The longer the cap is in the dye bath the more even and consistent the color, but the darker it gets. Use lots of test caps to figure out the exact length of time to consistently get the shade you're looking for before proceeding. And I've found tapping the strainer up and down so that the caps jiggle around in the dye bath without being lifted out of it helps to make the color look more consistent.
these work too
yeah boofing shard is glorious!
I don't really swallow my meth because it's kind of a waste imo. I only did it once on accident my first time smoking crystal and I didn't melt it in the pipe so i inhaled everything i packed and swallowed it. That fucked with me because I had to stay up the next day because there was no chance of me getting sleep that day.
Meth has a strong burning taste i'd rather shove it up my ass than hold it in my mouth.
They're insanely cheap on amazon
http://www.amazon.com/Plastic-Transfer-Pipettes-Gradulated-Pack/dp/B005IQTSE0/ref=sr_1_1?ie=UTF8&qid=1421345085&sr=8-1&keywords=pipettes
Inventory:
This is my first shot at this, but it seems like a cool passive hobby that'll also augment my facefur. I already plan to expand by getting a couple other carrier oils to balance out the jojoba—particularly either some grape seed or avocado oil and perhaps some Vitamin E.
Questions? Comments? Concerns? Suggestions?
* I'd also be remiss if I didn't mention there's a subreddit specifically for this (of course there is) at /r/beardoil. I'm gonna start posting in the hopes of livening it up a bit—if you're interested in picking this up as a hobby, come join me!
http://www.amazon.com/Plastic-Transfer-Pipettes-Gradulated-Pack/dp/B005IQTSE0
I use about three big droppers full of Trader Joe's tea tree oil (~9 ml) in a whole bottle of Suave Naturals conditioner (I usually use coconut, but I'm going to buy one of the no-protein ones when I run out), and shake it up. I massage a huge handful into my scalp and comb it through my hair (fine, curly, not very porous) and rinse with cool water, and my hair stays fresh smelling and soft, not greasy or flat. Give it a try, but maybe only mix a few drops of tea tree oil into a half cup of conditioner to start with, just in case you don't like it. You don't want to ruin a whole bottle of conditioner if the tea tree oil doesn't work for you!
I also use a tiny bit tea tree oil in the spray gel I use for styling, to keep it fresh smelling. It's a pretty versatile essential oil!
Hey man, I would love to help you quit smoking and didn't notice the first time I commented that you didn't have any experience with vaping. So I'm going to try to put together a list here of what you need to do to start vaping for very little money.
https://www.vapordna.com/Joyetech-eGo-AIO-All-In-One-Starter-Kit-p/egoaio.htm
This is another option for you.
https://www.vapordna.com/Eleaf-iCare-All-In-One-Ultra-Portable-System-p/icaref.htm
I love my Icare, but you will need to use high (24-36) mg ejuice with it, whereas with the ego you would need 12-24 mg/ml.
https://www.amazon.com/gp/aw/d/B005UGBG20/ref=sxts1?ie=UTF8&qid=1488210602&sr=1&pi=AC_SX236_SY340_FMwebp_QL65
https://www.amazon.com/gp/aw/d/B00PSGWHIO/ref=mp_s_a_1_2_a_it?ie=UTF8&qid=1488210630&sr=8-2&keywords=vg
https://www.amazon.com/gp/aw/d/B01K8UB5VO/ref=mp_s_a_1_5?ie=UTF8&qid=1488210666&sr=8-5&pi=AC_SX236_SY340_FMwebp_QL65&keywords=pg
https://www.nudenicotine.com/product/500ml-100mgml-100-pg-nicotine-base-for-mixing-only/?attribute_size=120mL&attribute_solvent=100%25+PG
https://www.amazon.com/gp/aw/d/B0081SRRFO/ref=mp_s_a_1_1?ie=UTF8&qid=1488210749&sr=8-1&pi=AC_SX236_SY340_FMwebp_QL65&keywords=dropper+bottle
https://www.amazon.com/gp/aw/d/B005IQTSE0/ref=mp_s_a_1_1?ie=UTF8&qid=1488210793&sr=8-1&pi=AC_SX236_SY340_FMwebp_QL65&keywords=pippettes+plastic+droppers
OPTIONAL: flavoring. If you want flavoring just ask in a reply I'll let you know what to get based on your tastes, but it's not necessary and you're trying to go cheap.
This is the recipe for making flavorless, 12 mg juice.
http://e-liquid-recipes.com/recipe/1240996/For+cheapos
You can make an account at that site and adapt that recipe to be higher or lower nicotine if you want.
I know this seems a lot more expensive than the Ryo cigarettes, but trust me, this makes like a year or two worth of liquid and the mods I suggested have really cheap coils. Please believe me, this is worth every penny of the investment, you will never regret it. If you need help with mixing your first batch of eliquid, go to r/diy_ejuice and look at the new mixer thread in the sidebar. If you have any questions don't hesitate to ask me, but comment it cause I don't get message notifications on my phone app.
I went on a little shopping spree for my DIY/rebuildable stuff. Picked up the following:
5 glass beakers, 50-1000ml
4 oz amber glass boston round bottles, pack of 12
2x pack of 6 2oz amber bottles w/droppers
2x 2pack 8oz amber bottles
[labels for bottles] (http://www.amazon.com/gp/product/B00004Z5SM/ref=oh_details_o00_s00_i03?ie=UTF8&psc=1)
100count transfer pipettes
2 10 packs of 5ml blunt tip syringes
Heated ultrasonic cleaner (for quick steeping)
100ft A1 32 AWG kanthal
100ft A1 30 AWG kanthal
100ft A1 28 AWG kanthal
12ft 2mm braided hollow Ekowool
Pair of locking hemostats
butane pencil torch (for torching ekowool)
This genius little invention - everyone should buy this, it was like six bucks
other than that, a couple anyvape mini davide glass clearos because the protank 2 group buy I organized will likely not have a replacable drip tip, and I need at least 2 mini glass tanks that can take my bds60 from captivape.
i need me a fucking workshop, not sure where I'm going to put all this stuff...
Ultra sonic cleaner - https://www.amazon.com/dp/B007Q2M17K/ref=cm_sw_r_cp_tai_udByDb20V8XA4 - and a touch of dawn. Blindingly beautiful when they come out ❤️
I work with ultrasonic plastic welders and cutters. You can find welding quality ultrasonic stacks on ebay for relatively low prices (these are 700W approximately). Here. Here. Here.
You can also try to buy crystal stacks directly. These are usually designed for use in ultrasonic cleaning baths (50W approximately). Here. Here.
Alternatively you can try buying a consumer grade ultrasonic stain remover Here or an ultrasonic cleaning bath Here
Also, good luck, at least the systems I work with are irritatingly sensitive, especially when it comes to the design of the knife or tool.
I bought my fiancé a ultrasonic jewelry cleaner for her ring from amazon and I stuck my month old Merkur in there and it came out brand new after about 5 mins.
My DE is usually almost completely white with soap scum after every shave, and I even rinse it with alcohol once I'm done.
Here's the link, we used about a teaspoon of mild dish detergent to go with it.
Magnasonic MGUC500 Professional Ultrasonic Jewelry & Eyeglass Cleaner With Digital Timer https://www.amazon.com/dp/B007Q2M17K/ref=cm_sw_r_awd_Xyicub0FDWB16
Also, my GF's ring looks like new after putting it in there.
I have a Sonic jewelry cleaner from Amazon that works wonders!
Not sponsored. I love this thing - nightly 3 minute clean.
Magnasonic Professional... https://www.amazon.ca/dp/B007Q2M17K?ref=ppx_pop_mob_ap_share
I used this one, and it got the job done pretty well. Usually, ultrasonic cleaners that are sufficient enough for casual use are under $50, while more "professional grade" or "industrial" ones will cost more than that. As for the process, it's tedious, but simple. I disassembled the switches until I got something looking like this, then I organized the parts into piles. I then washed each respective part pile by putting them in the cleaner and submerging it in water, and adding a very little amount of dish soap (about a quarter of a teaspoon). I ran the parts through the cleaner twice. To rinse them off, use distilled water so there are no water impurities left on the parts after the water evaporates. Finally, I waited for the parts to dry, I click modded them, and I put them back together.
Also, I'll head to the /r/olkb question thread to inquire about the Preonic case.
Hi and thanks for answer,
Will that ultrasonic cleaner works for cleaning all tank vape parts?
https://www.amazon.com/Magnasonic-Professional-Ultrasonic-Eyeglasses-MGUC500/dp/B007Q2M17K/ref=mp_s_a_1_3?ie=UTF8&qid=1542571761&sr=8-3&pi=AC_SX236_SY340_FMwebp_QL65&keywords=ultrasonic+cleaner&dpPl=1&dpID=41QxD1i5DkL&ref=plSrch
This is the one I use and it works pretty good. Just don't put the actual watch in. Bracelet only.
https://www.amazon.com/Magnasonic-Professional-Ultrasonic-Eyeglasses-MGUC500/dp/B007Q2M17K/ref=sr_1_3?keywords=ultrasonic+cleaner&qid=1558216329&s=gateway&sr=8-3
Is this the ultrasonic cleaner you're using?
https://www.amazon.com/dp/B007Q2M17K/ref=cm_sw_em_r_mt_dp_U_7SJYCbFX43EDP
.. by Jove, I think I am. I've heard of folks using brake CLEANER to strip models, hence my knee jerk reaction.
You can get an Ultrasonic on Amazon for like $40. https://www.amazon.com/Magnasonic-Professional-Ultrasonic-Eyeglasses-MGUC500/dp/B007Q2M17K/ref=sr_1_3?ie=UTF8&qid=1500241361&sr=8-3&keywords=ultrasonic+cleaner
It's also really good at cleaning uh smoking paraphernalia, not that I would know.
I am going to buy this one http://www.amazon.com/Magnasonic-MGUC500-Professional-Ultrasonic-Eyeglass/dp/B007Q2M17K/ref=sr_1_2?ie=UTF8&qid=1418629775&sr=8-2&keywords=ultrasonic+cleaner
Been meaning to order it but keep slacking. I got a whole chart ready to check out with the machine plus a bunch of supplements. Going to order today.
Got the Magnasonic and can’t recommend it enough. I love it and you can choose the amount for the cycles (shortest is 3 min) Magnasonic Professional Ultrasonic Jewelry Cleaner with Digital Timer for Eyeglasses, Rings, Coins (MGUC500) https://www.amazon.com/dp/B007Q2M17K/ref=cm_sw_r_cp_api_i_NY7VDbVMQ9DJ6
This is an ultrasonic jewelry cleaner its under 30$ and works really well, you can use this to clean all your vape stuff and it takes very little effort. I highly suggest looking into getting one, it will save you a LOT of time and effort, and really works a lot better anyway, best of luck to you and happy vaping :)
https://www.amazon.com/Magnasonic-Professional-Ultrasonic-Eyeglasses-MGUC500/dp/B007Q2M17K
Is this v2 different than the "Monoprice Select Mini 3D Printer with Heated Build Plate, Includes Micro SD Card and Sample PLA Filament - 115365" on amazon?
Shipping is much more pleasant on Amazon, but if they aren't the same (v2?) then I'll patiently wait for the slow boat.
https://www.amazon.com/Monoprice-Select-Printer-Heated-Filament/dp/B01FL49VZE/ref=sr_1_1?ie=UTF8&qid=1495824979
I have this printer and have been very impressed with it. there is a large Reddit community for it and it is pretty cheap. Really nice quality too full metal construction.
https://www.amazon.com/Monoprice-Select-Printer-Heated-Filament/dp/B01FL49VZE/ref=sr_1_1?ie=UTF8&qid=1486656173&sr=8-1&keywords=select+mini
Don't get me wrong, it's certainly a tinkerers hobby and has a somewhat steep leaning curve, unless you want to buy a 5k ready to go printer... but all of what I listed usually comes in preset software profiles. So you're not starting from scratch by any means. The settings above are just tweaks based off the defaults that I found worked best for my printer with this particular dickbutt model. I've bought 3 printers, and all of them printed decent quality out of the box with no modifications, so it really depends on how much you want to perfect a print when it comes down to settings.
If you're at all interested in getting into the hobby, this is the one I started with, and even though I have a printer with a foot squared printing area, I still use it all the time: https://www.amazon.com/Monoprice-Select-Printer-Heated-Filament/dp/B01FL49VZE
imprimanta 3d? un magazin romanesc care se ocupa de imprimate si "consumabile" ? am gasit pe amazon ceva
Hi there! I'm looking to explore 3D printing, because it interests me. I'd be a hobbyist. Maybe make youtube videos out for fun or something like that. The biggest thing to me is that I don't have an engineering background, so friendly, obvious, accessible interface is the single most important thing to me.
Let me put it this way, affordable is a plus to me, but I'm willing to give on price if it buys me a printer that's easier for me to use as an amateur. Let me says this . . . NO MORE than a thousand.
Printing trinkets, maybe models. I don't have any intention of making parts for heavy use.
Must be assembled. Building one sounds terrible to me.
Yes.
Just to be clear, I've got one in mind. But there's no way for me to really grasp the range of options without using one.
I was looking at the:
Monoprice Select Mini 3D Printer
It's this one on Amazon. Feedback?
$220 printer with great reviews
Not OP, but something like this can be done by even a beginners 3d printer using PLA filament (the most common type of filament). A single D&D miniature costs anywhere from $0.05 to $0.15 on average in my experience. The tiles would be around the same, just depends on how much infill you use on them to make them more solid.
EDIT: Check out http://fatdragongames.proboards.com/thread/3340/started-3d-printing . These guys are great, though I recommend a http://www.prusa3d.com/ as the best printer. They estimate an average wall section costs $0.45, so a bit more than I'd originally guessed.
https://www.amazon.com/dp/B01FL49VZE/
There's a review with a red and black robot that you'll want to look at. Seems to be a great printer for only costing $200.
Here's the link https://www.amazon.com/Monoprice-Select-Printer-Heated-Filament/dp/B01FL49VZE/
I don't own it(yet) but the Monoprice Select Mini has gotten rave reviews for it's price/performance ratio. I hope to be an owner soon.
OK - the 1st one lists itself as a CR-10 S5, which has a 500x600x500 build area. What is listed is the base CR-10 with a 300x300x400 build area. It's also NOT the "S" version which has lots of upgrades: mainly a filament sensor, a second motor for the z axis and has a Atmega 2560 instead of Atmega 1280 for the controller board.
The 2nd one lists itself as a base CR-10 and by all appearances seems to be one.
Seeing how a CR-10 sells for $499 on Amazon, this seems to be a good deal. You'd have to look at the eBay vendor's feedback to see if they are delivering what they advertise. It seems like the $400 price isn't out of the range of what they cost coming straight from China, but is on the low end so be careful.
Honestly, I'd strongly recommend getting the CR-10S as they upgrades, especially the board, are well worth it. They sell on Amazon for $599 https://www.amazon.com/HICTOP-Printer-Filament-Monitor-300x300x400mm/dp/B074QLQSQV and the Hictop is a solid build as far as CR10S go. You cold probably find a better deal on one from overseas.
If that price is too steep for you, and you are OK with a smaller bed size the Monoprice Select Mini is another good starter printer. For $220 you get a heck of a lot of printer: https://www.amazon.com/Monoprice-Select-Printer-Heated-Filament/dp/B01FL49VZE
I bought a Monoprice Select Mini last week, and it's currently just under $200 (I could have saved $25 if I waited until today) and I've been pretty happy with it. The build area is a 120mm (4.7") cube, so should be fine for your small projects. It ships almost fully calibrated; all I needed to do was adjust the height of the build plate.
It can print via either USB or MicroSD (card included, but no adapter). The recommended slicer is Cura, a version of which comes on the MicroSD card or can be downloaded for free.
I've had a few problems, but I attribute most of them to my inexperience with settings and build surfaces rather than to the printer itself. My only issue with the printer is that it's controlled by a button/wheel combination that's awkward to use.
So long as the 120mm size isn't too small for your paintball projects, I'd recommend it. Though admittedly it's the only 3D printer I've used, so I don't know how it compares to others.
This is the printer I own:
https://smile.amazon.com/gp/product/B01FL49VZE/
It's very affordable and prints with really impressive detail.
The downsides would be that it's not very fast, the build size isn't huge, and it does almost require some modifications in order to prolong its life, but I've had almost no issues with it in the 8 months I've had it. It's definitely a great starter printer if you're looking to get into it!
Amazon, last week.
As far as I can tell, there isn't an X or Y move command.
I just have the stock one right now - I haven't looked into modding at all so far. Here's the amazon link for my version. Apparently it's the second release?
When it happened to me I put in XT60 connectors and I figured while I was at it I'd install a MOSFET.
Guide I based my replacements on;
https://3dprinterwiki.info/di3-mods/heat-bed-terminal-burning-fix/
https://3dprinterwiki.info/heatbed-terminal-burning-fix-with-mosfet-board/
MOSFET I installed;
BIQU Heat Bed Power Module Expansion Hot Bed MOS Tube for 3D Printer https://www.amazon.com/dp/B01HEQVQAK?ref=yo_pop_ma_swf
It's ridiculously easy to do the mod and not that expensive (<$15). Unless you plan not to ever take your eyes off the machine, I suggest you do the mod. Even the time period you take for a bathroom break can be dangerous. My connector started smoking/melting and melted a bit of my board while I was waiting for the printer to preheat as I went out of my room to grab some water to drink.
All you have to do is remove the wires going to the bed from the labelled connector and attach it to the side of the mosfet that says hot bed, attach the smaller wires to the labelled connector and using another bit of high gauge wire that you can get from Home Depot/Lowes/local hardware store to connect it to a 12v(+) terminal on the power supply and another to the (-) terminal. All this is done with a screw driver and the included allen keys.
Or just get this all in one kit to make it even easier.
Congrats and welcome to the club!
> Some of the supports looked "wonky" during the print. Like, they didn't go "straight up". Is that normal or did it not have enough cooling?
Not sure what you mean. This print doesn't use supports. Do you mean the walls? Any photos that can show us what you observed?
When printing PLA, more cooling is almost always better: hard to have too much. I'm not sure what problem you observed or whether cooling would have solved it, but better cooling will definitely improve future prints.
> As you can see, it was printed on a raft. If you look cloesly, the bottom of the of the butterfly has a slight lip around it (like the first couple layers are wider than the rest. Is there anything I can do to improve upon that so it's straight the whole way up and down?
Hm, it's not as common to see elephant's foot for something printed on a raft. Usually it happens from the nozzle really squishing the first layer into the bed, or the bed being too hot.
You'll want to learn how to print without rafts ASAP, at which point you'll want to keep an eye on that. Leveling and temperature will make a difference once you're printing directly on the bed, but the best solution is usually a model that compensates for this with a chamfer. After all, really squishing that first layer helps with adhesion and finish. A chamfer allows this without the elephant's foot.
> It has a heated bed with that "sticker/tape/thing".. Does that mean I don't need to bother with painter's tape/a glue stick/hair spray?
I just print straight to my Maker Select bed (with their version of Buildtak that you show in your photos).
Some people still add tape/glue on top of it, but I haven't found it necessary. I've printed everything straight on the bed (mostly PLA, some PETG and TPU) and haven't had a problem yet with adhesion (knock on wood).
> I plan on doing the MOFSET mod and getting a glass plate as soon as I replenish my "fun" funds next month (kinda drained it all picking this thing up).
Just my opinion - some others will disagree - but I'd put money towards the MOSFET before new filament. Maybe you don't have some of the tools and would need to buy them, but the MOSFET itself is just over $10. That's less than a roll of filament and protects the integrity of your new purchase.
There are a couple ones I've seen in tutorials: I used this, but seen some youtubers use this.
https://www.amazon.com/BIQU-Power-Module-Expansion-Printer/dp/B01HEQVQAK/ref=sr_1_fkmr0_2?ie=UTF8&amp;qid=1487892943&amp;sr=8-2-fkmr0&amp;keywords=BIQU+Mosfet
The Monoprice maker select v2(.1?) Is a little over $300 on Amazon, but other than that, it fits all of your other needs. It uses standard metric screws and such, so fixing and modding the printer is easy. It's also has a respectable build volume of 200mm^2 and a height of 180mm, which is nice to have. It comes mostly assembled: you just need to use 4 included screws to attatch the gantry to the base and 2 more to attach the filament holder. It took me no time at all to start a test print. I'm coming up on six months with my printer now, and it hasn't given out on me once. For the best prints, you'll want to do some mods, but only the absolutely necessary MOSFET mod requires non-printed hardware that isn't just screws and nuts (or the standard M8 threaded rod used in AzzA's Z-brace mod).
Tl;dr: Monoprice Maker Select v2 on Amazon, order a MOSFET to go with it, 10/10 IGN
I went with this
this standoff made to fit that mosfet may be of interest as well.
https://www.amazon.com/gp/product/B01HEQVQAK/ref=oh_aui_search_detailpage?ie=UTF8&amp;psc=1
I ordered two of them, one is operating just fine on the A8 for the past 6 months or so. The other one is the topic of this conversation.
Ha: Reading that listing again, it says 15 amps max. I guess there is my answer.
Amazon, here's one: https://www.amazon.com/gp/product/B01HEQVQAK/ref=ya_st_dp_summary?ie=UTF8&amp;psc=1
I know this may seem like a silly question but it is nearly impossible without any knowledge to search for these connectors online. I am referring to the white connector with the cable installed. It looks similar to a JST but slightly different. Look at the link. This is a heatbed mosfet and I need to replace the cable due to a printer redesign. If anyone knows the style of connector I would be very grateful. The wire is about 20 gauge. Here's a link to the product page, I couldn't find any info there.
Seconding everything people have said here and want to add the following.
A glass bed with 10mil PEI from CS Hyde will do wonders for bed leveling.
Upgrade your Y plate as soon as possible, the stock one warps over enough time making bed leveling nearly impossible.
All metal hotend such as the micro swiss is amazing, no more clogged PTFE tubing, easier to clean if it does.
Z brace is a must, also print a fan cooler like the Diicooler on thingiverse. Replace the stock part cooling fan with a nice radial fan, plenty on amazon, make sure its 12v. This helps prints come out cleaner.
Yours should come with thumbwheels, if not, print some, bed leveling is easier with it.
Print some spring cups as well, keeps the springs straight and not bending when leveling the bed.
DO THE MOSFET MOD TO MAKE IT SAFE!
Watch this vid and do his printed mods https://www.youtube.com/watch?v=Tpcm4XEbP1Q&amp;t=752s&amp;list=PLyIdpN_zILcknsQzSZSiWhQ685NxkWsvD&amp;index=2
Also, stay far far FAR away from Shaxon filament! It broke my hotend, check my post history to see the red glob of death I dealt with. I have had very good luck with eSun PLA.
Links for bought parts:
Fans: [here (https://www.amazon.com/gp/product/B00MJU6JR2/ref=oh_aui_detailpage_o02_s00?ie=UTF8&amp;psc=1)]
Glass plate: [Here (https://www.amazon.com/gp/product/B07B2YLWF9/ref=oh_aui_detailpage_o03_s00?ie=UTF8&amp;psc=1)]
Hotend: [Here(https://www.amazon.com/gp/product/B01E1HANLS/ref=oh_aui_detailpage_o05_s00?ie=UTF8&amp;psc=1)]
Y plate: [Here (https://www.amazon.com/gp/product/B07B251KBS/ref=oh_aui_detailpage_o01_s00?ie=UTF8&amp;psc=1)]
MOSFET: [here(https://www.amazon.com/gp/product/B01HEQVQAK/ref=oh_aui_detailpage_o02_s00?ie=UTF8&amp;psc=1)] and wires [here(https://www.amazon.com/gp/product/B017U6PGLO/ref=oh_aui_detailpage_o02_s00?ie=UTF8&amp;psc=1)]
At a price point not far from an Arduino, you can get an Inkbird that is built for this.
Inkbird ITC-308 https://www.amazon.com/dp/B01HXM5UAC/ref=cm_sw_r_cp_apa_i_c65pDb5V1K87G
Commonly used for homebrewing, plug the fridge into it, along with a small heating pad, lightbulb or other heat source placed inside the fridge. Set your heat and cool setpoints and walk away.
For the future, if you want to be super safe, you can get a temperature controller. That way if the heater thermometer breaks again and causes the heater to stay on, then the temperature controller will catch it and turn off the heater:
https://www.amazon.com/Inkbird-Max-1200W-Temperature-Controller-Greenhouse/dp/B01HXM5UAC
Thank you. But We would like to clarify the 34.99 is non-wifi version, and the this $35 version is adding WiFi. The original price is $50. There are 2 different versions. Thanks.
ITC-308: https://www.amazon.com/dp/B01HXM5UAC
ITC-308 WIFI: https://www.amazon.com/dp/B07PVBG8K1
One like this should be fine. You can look at similar products and find what suits your needs financially and such.
They're quite easy to make. I use mine all winter long. Just need a heater and a controller. I use the two below.
Brew Fermentation Heating Belt, 1-Count https://www.amazon.com/dp/B001D6IUB6/ref=cm_sw_r_cp_apa_Q3L1BbH29S370
Inkbird ITC-308 Max.1200W Heater, Cool Device Temperature Controller, Carboy, Fermenter, Greenhouse Terrarium Temp. Control https://www.amazon.com/dp/B01HXM5UAC/ref=cm_sw_r_cp_apa_04L1Bb1CAC4VY
If the fridge is your only option and you can't get above 45F then you can look into getting a heat wrap and a temp controller. There are several options to choose from. I personally use these (you can find both for quite a bit cheaper than those listed prices):
https://www.amazon.com/Inkbird-Max-1200W-Temperature-Controller-Greenhouse/dp/B01HXM5UAC/ref=sr_1_1?ie=UTF8&amp;qid=1501262251&amp;sr=8-1-spons&amp;keywords=inkbird&amp;psc=1
https://www.amazon.com/Weekend-Brewer-COMINHKPR125665-Fermentation-Heater/dp/B01J1WZNM2/ref=pd_bxgy_86_3?_encoding=UTF8&amp;pd_rd_i=B01J1WZNM2&amp;pd_rd_r=RFQ7WFS8YVB9XMBQQY2D&amp;pd_rd_w=gm24D&amp;pd_rd_wg=Nn18Z&amp;psc=1&amp;refRID=RFQ7WFS8YVB9XMBQQY2D
Sorry for the late response. Their are two versions, the 306 model and the 308 model. The 308 model has the ability to control a fan or chiller if it gets too hot and the 306 doesn’t - so it just turns the heater off if it gets too warm.
Inkbird ITC-306T Pre-Wired Electronic Heating Thermostat Temperature Controller and Digital Timer Controller for Aquarium, Seed Germination, Reptiles, Hatching ect, Without Cooling Controlling https://www.amazon.com/dp/B01486LZ50/ref=cm_sw_r_cp_api_i_cGVVCbSZA8C0W
Inkbird ITC-308 Max.1200W Heater, Cool Device Temperature Controller, Carboy, Homebrew, Fermenter, Greenhouse Terrarium Temp. Control https://www.amazon.com/dp/B01HXM5UAC/ref=cm_sw_r_cp_api_i_lEVVCb1KF4RSS
Temp controller : https://smile.amazon.com/Inkbird-Max-1200W-Temperature-Controller-Greenhouse/dp/B01HXM5UAC/ref=mp_s_a_1_1_sspa?crid=1CZISB4U1CU9M&amp;keywords=inkbird+temperature+controller&amp;qid=1556415981&amp;s=gateway&amp;sprefix=Inkbi&amp;sr=8-1-spons&amp;psc=1
I do a similar sous vide bath type setup, but have an Inkbird controller driving an immersion coffee heater and fountain pump in my cooler so it's 100% hands off
&#x200B;
Nicely done!
First off, check out the Wiki:
https://www.reddit.com/r/3Dprinting/wiki/index
https://www.reddit.com/r/3Dprinting/wiki/gettingstarted#wiki_what_printer_to_get
https://www.reddit.com/r/3Dprinting/comments/ckjcu6/purchase_advice_megathread_what_to_buy_who_to_buy/
The only one I have personal experience with is a Wanhao Duplicator i3. It's fine for what I paid for it three years ago, but there are better options available today.
I'm posting links from Amazon below because I'm lazy. You can probably shave off $20 or more if you do some bargain hunting. Beware of shady dealers though -- some will give you opened/used stuff, so check the reviews.
The consensus here for the best quality bottom-dollar printer seems to be the Ender 3 at around $230:
https://www.amazon.com/Comgrow-Creality-Ender-Aluminum-220x220x250mm/dp/B07BR3F9N6
The Monoprice Mini is supposed to be good too, but I would find the limited build volume annoying.
The cheapest one I would personally consider buying today is the Ender 5 at around $350. I like printers that are designed so the print bed doesn't have to shuttle the whole print back and forth with every movement in the y direction -- in general, you can get high quality prints at faster print speeds if the print bed is only moving slowly in the z direction and the hotend does all the jerky x and y movement.
https://www.amazon.com/Comgrow-Creality-Printer-Printing-Function/dp/B07KQ2MTGM
If I was going to spend a little more for some nice bonus features, I'd probably go with a Monoprice Ultimate 2 at $550:
https://www.amazon.com/dp/B07V9YBVY9/ref=sspa_dk_detail_3?psc=1&amp;pd_rd_i=B07V9YBVY9
If my budget was higher ($800-$1200), and I had a ton of free time, I'd build a Voron from parts:
http://vorondesign.com/
https://www.reddit.com/r/voroncorexy/comments/86vs8b/why_is_voron_superior_comparing_to_others_3d/
ender3 is available in amazon.com now,
https://www.amazon.com/dp/B07BR3F9N6
Will do. Please let me know if you got the updated one. I ordered this one..
Comgrow Creality Ender 3 3D Printer Aluminum DIY with Resume Print 220x220x250mm https://www.amazon.com/dp/B07BR3F9N6/ref=cm_sw_r_cp_apa_nraNBb7AZZ37G
Idk about $180, but you can definitely save a bit of money if you order it from the warehouse in China. It just takes longer to arrive, and I personally feel more comfortable dealing with Amazon, as compared to eBay or Alibaba.
OP, here are a few purchasing option links. Also, I would go with the glass bed option if I were you. The eBay link has the option to choose "Ender 3 + Glass Bed" at what looks like no extra cost. Otherwise, you can buy the glass bed separately for less than $20.
eBay Creality Warehouse store ($205): https://www.ebay.com/itm/Creality-Ender-3-Ender-3-Pro-3D-Printer-220X220X250mm-DC-24V-1-75mm-PLA/223496146513?hash=item3409688e51:m:mCXoexVEaY-yqetXfGJ-tyg
Alibaba Creality Warehouse store ($200): https://www.alibaba.com/product-detail/Official-Creality-3D-Ender-3-Ender_62047106886.html?spm=a2793.11769229.0.0.49733e5fSDdLkY
Amazon.com ($230): https://www.amazon.com/Comgrow-Creality-Ender-Aluminum-220x220x250mm/dp/B07BR3F9N6/ref=sr_1_1_sspa?keywords=ender+3&qid=1571603563&sr=8-1-spons&psc=1&spLa=ZW5jcnlwdGVkUXVhbGlmaWVyPUExVko5TVZIMU5VVzRKJmVuY3J5cHRlZElkPUEwMTk4NDkzMkxIQ1ZQRDVRSE1NJmVuY3J5cHRlZEFkSWQ9QTAxMjc0MDlFWEc2V1BKT0ZGWjkmd2lkZ2V0TmFtZT1zcF9hdGYmYWN0aW9uPWNsaWNrUmVkaXJlY3QmZG9Ob3RMb2dDbGljaz10cnVl
Ender 3 Glass Bed ($17): https://www.amazon.com/Creality-Ender-Glass-Upgraded-235x235x4mm/dp/B07RD6D2ZQ/ref=sr_1_3_sspa?keywords=ender+3+glass+bed&qid=1571603812&sr=8-3-spons&psc=1&spLa=ZW5jcnlwdGVkUXVhbGlmaWVyPUEyRjhOSlg2T0ZVRDNLJmVuY3J5cHRlZElkPUEwNDY4MzE3MkJJV1ozNk5VSENKUCZlbmNyeXB0ZWRBZElkPUEwNjY0MzIwWUhHWFJSU0U0V1NBJndpZGdldE5hbWU9c3BfYXRmJmFjdGlvbj1jbGlja1JlZGlyZWN0JmRvTm90TG9nQ2xpY2s9dHJ1ZQ==
This is the model I got It's not high-end or fast. I like it because when it breaks it's easy to work on, and parts are not too expensive. It prints u/mz4250's models really well. Not as detailed as resin but good enough for DnD figurines.
$230 on amazon for the lazy:
https://www.amazon.com/Comgrow-Creality-Ender-Aluminum-220x220x250mm/dp/B07BR3F9N6
I went with this one:
https://www.amazon.com/gp/product/B07BR3F9N6/ref=ppx_yo_dt_b_search_asin_title?ie=UTF8&psc=1
I had heard that the Comgrow and Sainsmart Ender 3's were the best ones to order when i was reading up on them.
This was the one that I ordered. I ended up getting it during a lightning deal, so it was $170 at the time. https://www.amazon.com/gp/product/B07BR3F9N6/ref=ppx_yo_dt_b_asin_title_o06__o00_s01?ie=UTF8&psc=1
Ender 3
I took the fan case off and cleaned off all the pla that was on top and the sides of the silver brick. It is clean now, and the wiring looks good.
I had to replace my fridge's dial thermostat with a digital one; it looks a bit hacked together but was able to control the temperatures much better
this is similar to the one i used:
https://www.amazon.com/Inkbird-Temperature-Controller-Fahrenheit-Thermostat/dp/B0152LYY0I
but if your fridge gets can stay below your target temp you could set the fridge to max and use something like this:
https://www.amazon.com/Inkbird-Temperature-Controller-Thermostat-Fermentation/dp/B015E2UFGM
The NVidia reference card for the 2070 Super has a good cooler and runs cool and quiet.
The Noctua LH-L12 you found is the right one. This cooler has been discontinued by Noctua and is out of stock worldwide. There was one in stock at Amazon.de a few days ago but now it's gone. If you did get one, you'd remove the top fan and mount a A12x15 fan in the case fan slot directly above it. Alternatively, you'd attach the A12x15 fan directly to the top of the cooler in place of the stock top fan. However, I'm not sure that the clips that came with the cooler would work on the slimmer fan.
It is strongly recommended to add a Noctua fan with size depending on the cooler used. It is OK to reuse the stock case fans to cool the graphics card. You could remove the case fan which comes installed over the motherboard and move it to the open case fan slot over the graphics card next to the fan already installed there.
The NVMe SSD selected uses MLC NAND and has 600 TBW endurance. MLC is superior to either QLC or TLC.
The power supply calculator shows that this build needs 414W of power, so 600W should be sufficient.
Please don't use liquid metal as thermal paste in a PC like this one you will be moving a lot. It stays liquid and conducts electricity. It could create a short and destroy electrical components if it leaks out. The Noctua cooler comes with good thermal paste. Kryonaut Thermal Grizzly is another good option. When applying thermal paste on the 3900X don't use the pea or X method. Be sure that the paste is evenly spread across the entire top of the chip. There are three chiplets in the 3900X and none of them are in the center.
The motherboard comes with a WiFi antenna. I'd use it to start and consider upgrading if needed.
With the change in currency, VAT and your discount I couldn't be sure that I got the budget right. Is it OK?
I'm glad to help. Let me know if you have any other questions.
> 750 GOLD TX750m
Not worth the money. Go with the Corsair RMx 650 or Seasonic Focus Plus Gold 650. Don't pay more than $90 for either. Your PSU honestly isn't the weak link though. Your GPU will only pull about 300 watts fully overclocked, and your CPU around 200. 50 watts for the rest of the system is a bit tight but doable, especially because very rarely will both the CPU and GPU see full load at the same time.
Delid your CPU, get a replacement copper IHS, use liquid metal under the IHS, and kryonaut on top of it.
https://rockitcool.myshopify.com/collections/all
https://www.amazon.com/Thermal-Grizzly-Kryonaut-Grease-Paste/dp/B011F7W3LU
Total cost will be about $80 for everything you need but it will drop 20 degrees or more off your load temperatures.
https://www.amazon.com/Thermal-Grizzly-Kryonaut-Grease-Paste/dp/B011F7W3LU
It is only one gram of thermal paste but I doubt you’ll need more to reapply, luckily they’re cheap
I recommend https://www.amazon.com/Thermal-Grizzly-Kryonaut-Grease-Paste/dp/B011F7W3LU/
Grab some grizzly kryonaut: https://www.amazon.com/Thermal-Grizzly-Kryonaut-Grease-Paste/dp/B011F7W3LU/ref=sr_1_1?ie=UTF8&amp;qid=1486543826&amp;sr=8-1&amp;keywords=grizzly+kryonaut
But in the meantime you should download Intel XTU and undervolt your CPU. Theres a few videos online on how to do it and it will drop your temps. a -.100 undervolt is a good place to start.
Here is a great forum on disassembly and repasting. Do what you feel most comfortable with.
http://forum.notebookreview.com/threads/alienware-17r4-15r3-disassembly-repaste-guide-results.797373/
This is the video I personally used for repasting, he uses Liquid Metal. I DID NOT
https://m.youtube.com/watch?v=Ujffb2gIsS0
This is the method I chose to go with using above video.
I used IC Graphite Thermal Pads along with copper shims in a stacked formation. !!!Side note!!! I did use the slightest of thermal paste to stop the graphite pad from sliding around on the CPU/GPU. Like a smudge of a smudge. Then I under volted CPU by 110. I personally have not had a heating issue since, but this all just a suggestion.
This is what I used
https://www.amazon.com/Innovation-Cooling-Graphite-Thermal-Pad/dp/B07CKVW18G/ref=mp_s_a_1_2?ie=UTF8&amp;qid=1541335540&amp;sr=8-2&amp;pi=AC_SX236_SY340_FMwebp_QL65&amp;keywords=ic+thermal+pad&amp;dpPl=1&amp;dpID=417eWA82WvL&amp;ref=plSrch
Copper shim
https://www.amazon.com/gp/aw/d/B00OUJQX8K?psc=1&amp;ref=yo_pop_mb_pd_title
This is what most people suggest**
https://www.amazon.com/Thermal-Grizzly-Kryonaut-Grease-Paste/dp/B011F7W3LU
Hope some of this helps
Any would work, but I recommend Kryonaut Thermal Grizzly.
I use:
https://www.amazon.com/dp/B002VKVZ1A/ref=cm_sw_r_cp_awdb_t1_5JYIBb8H9QJ08
With this thermal paste:
https://www.amazon.com/dp/B011F7W3LU/ref=cm_sw_r_cp_apa_uLYIBb6FD9PMT
The heatsink is large but it's super quiet. That whole family of heatsinks has good reviews.
You don't need arctic silver 5, your CPU cooler should include some paste and it will be just as good as AS5. If you want to buy a premium paste, people are buying this to save a couple degrees on their temps. Its up to you if its worth the extra money for a couple degrees.
An excessive amount is really really bad. You can see reductions in temps by up to 20° C or more by switching to something like Kyronaut. But I doubt Kryonaut will be as stable for 5-7 years in preventing hot spots, the way their lower performing but higher durability pastes would. Also, who would apply thermal paste to PC's in their environment lol
I can't speak for you but for me I have less throttling and better performance on the 7700! If I can I recommend this, it's $11 :D
https://www.amazon.com/Thermal-Grizzly-Kryonaut-Grease-Paste/dp/B011F7W3LU/ref=sr_1_1?ie=UTF8&amp;qid=1519969387&amp;sr=8-1&amp;keywords=thermal+grizzly
Valid concerns but trust me it’s a breeze to do. Given how hot your CPU gets you will benefit from a proper delid. Granted though you are still within safe temps. The temps are highish but they aren’t abnormal compared to most others. Higher temps do lessen the life of the CPU but we are talking a very small time span compared to the market life of the chip. I’d say you and 99% of all PC builders will have build a second or even third computer before silicone degradation even reaches minimal levels. If that makes sense. Yeah high temps kill it but it’s like saying the three cigarettes you smoked in high school took two minutes off your life when you live to be a hundred anyway. Analogy might be to the extreme but I wouldn’t worry about it.
With that said here’s some links that will help you.
Delid tool and re attachment tool:
https://rockitcool.myshopify.com
Plastic razor blades to remove stock glue (what you mentioned not knowing what to do with, yes remove it the easiest way I’ve done it was using these and a small amount of isopropyl alcohol):
https://www.amazon.com/dp/B01D6EXLR0/ref=cm_sw_r_cp_apip_nvYleOEGfw2EO
Silicone “glue” for IHS re attachment. To be honest the very first delid I did was a 3570k using wood a vice and a hammer and I didn’t reglue it. It’s still alive too. I would personally just use a very small amount on the four corners. Just enough to stick. You are correct in your concern about the stock glue causing the IHS to not make perfect contact with the die. Remove the stock crap and use minimal amount of this and it will be a non concern:
https://www.amazon.com/dp/B0002UEN1A/ref=cm_sw_r_cp_apip_2g9BJXXKzhp9F
Lastly, your liquid metal for the die to IHS and your TIM for the IHS to Kraken. You can use any but it’s probably safe to say Grizzly is currently the go to stuff:
https://www.amazon.com/dp/B011F7W3LU/ref=cm_sw_r_cp_apip_6QNoes1d24uyu
https://www.amazon.com/dp/B01A9KIGSI/ref=cm_sw_r_cp_apip_lBeHQg1WHWPGP
All in all it’s easy and it’s worth it. If you have any questions whatsoever message me or reply here. There are some good videos of walkthroughs (I think one really good one is on rockitcool’s website but I’m not sure). I can find them for you but tomorrow as I’m currently in bed and using a half open eye lid to write this.
Info about water cooling? AiO loop or custom? If AiO, any idea which one? Brand? etc. Additionally, you may want to consider a better thermal paste like Thermal Grizzly Kryonaut.
Cheap option, get this (might be a tight squeeze, requires removing the side panel fan): https://www.amazon.com/Cooler-Master-RR-212E-20PK-R2-Direct-Contact/dp/B005O65JXI
Best option, get this (also requires removing that side panel fan, but might be a tiny bit easier to fit in as it's 2mm shorter): https://www.amazon.com/Noctua-NH-U12S-Premium-Cooler-NF-F12/dp/B00C9EYVGY
unless you don't want to remove the side-panel fan at all, then get this, still great cooling: https://www.amazon.com/noctua-Premium-Cooler_Retail-Cooling-NH-C14S
It would also be helpful to know your motherboard model to check the compatibility list. But I'm fairly certain these coolers should fit regardless.
They include decent thermal paste, but the FX8350 is one of the hotter chips and it might be worthwhile to squeeze a few extra degrees out with this paste: https://www.amazon.com/Thermal-Grizzly-Kryonaut-Grease-Paste/dp/B011F7W3LU
Good evening bud,
I had the same issues last week. 3D Mark Time Spy would never finish. The computer would restart every time on test number 2. I used hwinfo64 to monitor the temperatures which were close to 100C.
Bought https://www.amazon.co.uk/Thermal-Grizzly-Kryonaut-Compound-Compounds/dp/B011F7W3LU/ref=sr_1_17?s=computers&ie=UTF8&qid=1526925000&sr=1-17&keywords=thermal+paste, repasted, and issue was fixed. Max temperature now is 86C.
Give it a try. You won't void your warranty, unless you damage a part. If you can't do it on your own, call the tech support and ask a technician to do it. Be sure to supply them with your own thermal compound and not let them apply a ton of it.
https://www.amazon.com/COOLOOdirect-20x20x1mm-Silicone-Conductive-Northbridge/dp/B074K4CKG1/ref=sr_1_1?ie=UTF8&qid=1527081227&sr=8-1&keywords=memory+chip+thermal+pad
and this thermal paste is expensive, but really good
https://www.amazon.com/Thermal-Grizzly-Kryonaut-Grease-Paste/dp/B011F7W3LU/ref=sr_1_2?s=electronics&ie=UTF8&qid=1527081312&sr=1-2&keywords=thermal+grizzly
https://www.amazon.com/gp/aw/d/B011F7W3LU/ref=mp_s_a_1_1?ie=UTF8&amp;qid=1518663086&amp;sr=8-1&amp;pi=AC_SX236_SY340_QL65&amp;keywords=grizzly+thermal+kryonaut&amp;dpPl=1&amp;dpID=41IkGIpkjtL&amp;ref=plSrch
Might want to up your PSU if you are thinking going VR.
Im not sure how much juice a VR rig pulls, put youre already around 60% PSU cap.
Also, this is the best non metallic TC ive seen on a couple studies:
https://www.amazon.com/gp/product/B011F7W3LU/ref=ox_sc_sfl_title_3?ie=UTF8&amp;psc=1&amp;smid=ANNSJU9W28Y9J
Same price.
Oh, and of the Tis, I like the Gigabyte one the best mainly because of the I/Os.
Here is detailed guide how to repaste it: http://forum.notebookreview.com/threads/alienware-17r4-15r3-disassembly-repaste-guide-results.797373/.
If you're not confident and don't want to use thermal paste with electrical conductivity, then use Grizzly Kryonaut (http://amzn.to/2tqVFgm) instead of Conductonaut.
But first I recommend to run any 3D benchmark for 30+ minutes (3Dmark FireStrike, Heaven, Valley etc.) to find out if you don't have any stuttering, before doing the repaste. Because if you do have stuttering, then you probably will need to replace your motherboard..
Inkbird Pre-Wired Dual Stage Digital Temperature Controller Outlet Thermostat 110V, 1000W Heating and Cooling for Fermentation Kegerator ect https://www.amazon.com/dp/B015E2UFGM/ref=cm_sw_r_cp_api_pVplxbKZFRS0H
I used this for a similar application. It works well and is intuitive.
Inkbird temp controller - Inkbird Pre-Wired Dual Stage Digital Temperature Controller Outlet Thermostat 110V, 1100W Heating and Cooling for Fermentation Kegerator Heating Mat ect https://www.amazon.com/dp/B015E2UFGM/ref=cm_sw_r_cp_api_60kEAbEGD0X7D
Chest freezer
Heat lamp
To Make yourself a ferm chamber
Stirplate and bar for making starters
A journal to document of/fg recipe and tasting notes
Can't speak to the hydro part.
Since you are already considering $600 for lights, going Quantum Board (or diode strips if you don't mind DIY) really is a better option. 260w @ 3000K for flower, and 120w @ 4000K for veg for veg is a better option. Cheaper and they run cooler.
One won't be near enough, though that depends on its size. As far as heat transfer, yeah, wort doesn't pump well at all, and if anything, keeping it circulation as opposed to still would probably give the little yeasties some indigestion. I can imagine a complex system of tubing, heat sinks, pumps, and heat exchange fluid, but that's probably beyond most people's motivations and abilities. I think that you can make essentially an insulated box that's cooled by the Peltiers, essentially a refrigerator, and use a glass carboy for better thermal transfer to the fluid.
For example:
https://www.mpja.com/Peltier-Cooling-Assembly-12VDC/productinfo/15312+PM
This module uses 6A at 12VDC to move just 170 Btu of heat. Fermentation is exothermic, so let's do some math. According to this:
https://byo.com/article/fermentation-temperature-control-tips-from-the-pros/
It's possible for the fermentation process to raise the temperature 20°F in 6 hours. A common batch size is 5 gallons. A BTU is the amount of heat necessarily to raise one pound of water one degree F. A gallon is 8 lbs, so to raise 5 gallons, which is 40 lbs, of wort 20°F takes 40x20=800 BTU, and to do it in 6 hours takes 800/6= 133.3 BTUh.
The main physical problem with Peltiers is that the hot and cold side heat sinks have to be close together, and that makes it difficult to use them in an insulated box because insulation requires thickness to be effective. You'll need fans, both internal and external, to move air past the heat sinks, and in the inside, to keep it circulating. Putting the modules in the lid would probably be the most effective solution as hot air rises and that brings that air to the modules via convection.
The more I think about this, the more difficult and expensive it looks, honestly. If you're lagering, I think you'd actually be better off money and power wise using a small refrigerator. Actually, maybe a small chest-style freezer with an external thermostat controller to turn it into a refrigerator might be a more practical approach. In fact, here's a decent one on Amazon:
https://www.amazon.com/Inkbird-Thermostat-Temperature-Controller-Fermentation/dp/B015E2UFGM/ref=sr_1_4?keywords=Inkbird+ITC308&amp;qid=1568383520&amp;s=industrial&amp;sr=1-4
That being said, it sounds like an interesting series of experiments to try!
So here we go,
First off a Danby 4.4 Cu Ft fridge, something like this. I got this off of some one on craigslist for a $100. I tried to talk them down but some one had informed them that the fridge was valuable to home brewers.
The tap tower was purchased on amazon.
The line connections were also purchased there, since the ones that came on the tower were incorrect for the five gallon kegs.
The temperature controller was also purchased on amazon. Really amazon was my go to.
Here is the CO2 tank I anticipate buying. I haven't really picked out a regulator yet.
Here's u/ataraxia's classic link dump I found on a other post. Although the informstion is written for bps (most common snake people have trouble with it seems- mostly due to the humedity) but the suggestions could definitely help you for the humedity aspect needed for your boa.
You should definitely read it through.
i'm going to dump a bunch of helpful links on you. the first three links are detailed care sheets, then a tub tutorial, and the rest are product recommendations. read everything thoroughly, come back with any questions.
glass tanks can be very challenging for ball python husbandry due to the high amount of air flow with the screen top and the total lack of insulation with the glass walls. it's generally recommended to use tubs or pvc reptile cages instead. wood enclosures can also be suitable if they're designed well and sealed properly to protect the wood against moisture. glass tanks can work, but they require a lot of modification and maintenance, which you'll find tips for in the second link. i'll give you product recommendations to cover options for tanks, tubs, and pvc/wood enclosures.
J'ai essaye un nettoyeur a ultrason de ce genre. C'est impressionnant toute la merde qui se detache d'on ne sait ou et que tu vois naviguer a la surface en quelques secondes.
I got this one a few weeks ago and it makes a big difference in the amount of time I spend cleaning pens. Not only am I spending less time cleaning them, but more of them are cleaned more often because it's so easy to do.
I have and really like this one.
https://www.amazon.com/gp/product/B007Q2M17K/
I use this Magnasonic US cleaner. It does a decent job but I can't recommend it. I've had to repair it once (because of this!) and it is limited to 480sec (8min) maximum cycle. I usually run it two or three times for cleaning atty's.
It says that it have just 3 minutes cycles, that's too low. I'd recommend a cleaner with at least 8 minutes cycle, like this one: http://www.amazon.com/gp/product/B007Q2M17K/ref=oh_aui_detailpage_o06_s00?ie=UTF8&amp;psc=1 , which isn't that much expensive after all.
If you want to go cheaper than the Johnson Controller, you can get yourself one of these and DIY. Since you're comfortable with some handy skills, this should fairly easy. Tons of tutorials online and will save you about $50 or more!
Homebrewers use these to control temps in fermentation chambers.
http://www.amazon.com/Elitech-All-Purpose-Temperature-Controller-Thermostat/dp/B008KVCPH2/ref=sr_1_1?ie=UTF8&amp;qid=1407875219&amp;sr=8-1&amp;keywords=stc-1000
fixed the link
It was 19 x 32 x 39 and use a stc 1000 temperature controller after 3-4 months I got a 18 cf fridge off CL and trashed the son of a fermentation chiller but keep the stc 1000.
How's this - do it for free... at least... without having to buy a temp controller.
Your next cheapest method is to wire up an STC1000.
Then the Johnson Temp controllers, Love controllers, and Ranco controllers require basically no wiring, but generally cost $70+
Here it is: http://i.imgur.com/RY7BqXD.jpg
It's basically an STC-1000 in an enclosure I got from Home Depot, hooked up to a crock pot I got for our wedding. It cost about $40 in total and has yet to shut off randomly. :-)
Yup, that'll work perfectly for you. As long as everything else runs when the thermostat is bypassed, the STC-1000 would work. All it's doing is cutting power to the fridge when cooling isn't needed, so it's basically plugging/unplugging it as needed.
Just permanently bypass the thermostat and either wire the STC-1000 in directly or put an outlet on it that the fridge can plug into. Should work just fine. The most difficult part of the job depending on your setup would be getting the STC's temperature probe into the fridge. Mine comes in the top with the beer lines and is taped to the side of the keg so it's monitoring the beer temp more than just the air in the fridge.
Here's the one I bought: https://www.amazon.com/Lerway-All-Purpose-Temperature-Controller-Thermostat/dp/B008KVCPH2. Should be the one you need assuming you live in the US.
I just did this, literally last week!
It is pretty easy just takes a little patience.
You can look at my recent post to see how mine is coming. I am doing it with a new 7.1 igloo that I got from best buy for about $200 tax included. I bought a 3 tap system from kegconnection with a dual regulator and all stainless hardware and perlicks. That came to about $370, which is a lot BUT everyone recommends it, and if you're going to fucking do it, you might as well fucking do it right.
I probably spent close to $100 on materials for the collar, BUT this is my first real project and I didnt have a lot of tools/screws/misc stuff around to put that together so about $30 of that would go there.
I got a temp controller on amazon for $16 and an extention cord at home depot for ~$10, and have some leftover electrical accessories from my previous TC build so YMMV there.
I bought these dehumidifiers on amazon for $32
I bought two converted ball lock kegs from cornykeg.com for $100 with shipping and it was a breeze to clean them even thought they said they would be cleaned already.
I then got a 10lb steel air tank from adventures in homebrewing for $60 which I thought was a steal (steel hehe).
So this puts me close to $900. Which is $300 less than a very DIY-spirited blog post like this says it will cost. Sure I havent bought the last two kegs, but I then would still be $200 short of it.
There are some suggestions by the other guys in here that will save you money, and I'd say that my attempt is a little bit of combining both.
Hope I was some help!
http://www.amazon.com/Elitech-All-Purpose-Temperature-Controller-Thermostat/dp/B008KVCPH2/
Mind the 110v vs 220v before buying.
http://www.youtube.com/watch?v=7I-iwFLykxs
http://www.homebrewtalk.com/f51/ebay-aquarium-temp-controller-build-163849/
I bought the Lerway 110V All-Purpose Temperature Controller for $15 and have had great success with it.
https://www.amazon.com/gp/product/B008KVCPH2
I have this one. I can fit two 5 gallon carboys in there or one 8 gallon. There's a small ledge on the right side which prevents me from fitting two 8 gallons carboys. There is tons of room for bottles, though, and even 2 baskets which hang you could put bottles in.
I got this: http://www.amazon.com/gp/product/B008KVCPH2/ref=oh_details_o03_s00_i00?ie=UTF8&amp;psc=1
To control the temp, which works well as well.
http://www.amazon.com/Soda-Bottle-Preforms-Caps-30/dp/B008MB1QNY
2 litre soda bottles actually are shipped as preforms that can be expanded before they are filled. I guess heating them up without pressure returns them towards their original size?
I use a small Coca Cola bottle they used to sell. 150ml I think. I also know you can buy a 2L bottle in it's pre-inflated state. Soda Bottle Preform
Its a preform https://www.amazon.com/Soda-Bottle-Preforms-Caps-30/dp/B008MB1QNY
You can order them online
I built this for about $20 (not including the erlenmeyer and the stir bar).
I got the cigar box a while back at a second hand store.
Here's the USB powered PC fan I used:
http://www.amazon.com/Thermaltake-Mobile-Fan-External-Cooling/dp/B00080G0BK/ref=sr_1_2?ie=UTF8&amp;qid=1381376532&amp;sr=8-2&amp;keywords=usb+pc+fan
I chose a usb fan so that I could power it with an android usb phone charger and not screw around with splicing wires.
Here's the magnets I used (just needed one though):
http://www.amazon.com/gp/product/B00B1M37MY/ref=oh_details_o00_s00_i02?ie=UTF8&amp;psc=1
Aside from that it just took a few odd nuts, washers, and a bit of superglue. I had to bore the hole in top of the cigar box because the box turned out to be a bit too thick (sorry Pepin Garcia!) to get enough attraction between the magnet and the stir bar. I think I might have had better luck with stronger magnets or a different stir bar but oh well.
As someone suggested I first glued a washer to the fan so that I could move the magnet around a but to find the sweet spot where it didn't shake too bad then I glued the washer in place.
I used the long bolts/nuts that came with the fan to attach it to the lid (you can see the bolts in the first picture). Between the top of the fan and the lid I had to add washers to keep the fan from rubbing on the cigar box.
That's pretty much it. The fan has a variable speed control but I get a small vortex on the lowest setting, and higher settings throws the bar off the magnet.
Now I just need to wait for my soda preforms to show up so I can start saving a bit more yeast after I use the stir plate!
http://www.amazon.com/Soda-Bottle-Preforms-Caps-30/dp/B008MB1QNY/ref=sr_1_1?s=industrial&amp;ie=UTF8&amp;qid=1381377304&amp;sr=1-1&amp;keywords=bottle+preforms
I got the idea for using the soda preforms from here:
http://www.mikebeer.net/reuseyeast.htm
Cheers
Have you considered bottle blanks? Pretty cheap option and just like what White labs used for years. Bottle Blanks
Are you looking for just the pouch or a complete kit? Bumps and bruises or blowout kit?
I don't run it on the outside of my bag, but my EDC medical setup is a CAT, Israeli bandage, trauma shears, and some everyday meds (IB, benadryl, etc) in a crush-proof tube shoved into an M16 magazine pouch.
Mag pouch - https://www.amazon.com/dp/B00AELX61A/
Pill tubes - https://www.amazon.com/Soda-Bottle-Preforms-Caps-30/dp/B008MB1QNY/
Assuming your pints are partially filled with spent wort, you can siphon that off and just fill old White Labs tubes with the yeast. If you don't have any old tubes kicking around you can just grab some of these
Oh wow, I'll have to give these a go. I've been using a few of the Nalgene Travel Bottle Kit bottles for olive oil, hot sauce, etc, and soda bottle pre-forms for batteries and some other stuff. But they're too big for most things like seasoning/spices, and not big enough for stuff like pancake mix.
I do a similar thing, but these are the tubes I use. I bought two sets of them several years ago and they still work great. I replace the caps every so often. For the rack, I just keep them in six pack holders and put them in the keezer. I fill the unused vials with StarSan solution and store them that way.
I'd also like to add that, after I have racked a new beer into the fermentor, I pour the leftover trub into a mason jar, and then let it sit in the fridge for a day. Usually the trub separates to the bottom leaving a fair bit of usable wort. I give it another quick boil just to make sure its sterile and then make a small starter of something. After pouring off much of the beer, I can usually get about 10 vials of slurry.
If you can splice a few wires yourself, here is a cheaper option for temp control. You would still need to buy a couple of extension cords, and a heating element (I use a light bulb in a paint can). Set up a search alert on Craigslist for a cheap fridge or chest freezer and you are in business. If you are looking to go super cheap, your best bet is to submerge your carboy about 3/4 of the way in water, add ice, and wrap a towel around the top of the carboy to encourage evaporation. You really have to stay on top of the ice though.
I'm looking to build my ferm chamber in the next several months. So far the only components I have are a mini fridge and this Inkbird Temp Controller. I was planning on using OSB sheathing for the walls, lined with foam board insulation, and throw in a 60 watt bulb for a heat source and perhaps a small fan to circulate the air.
I'm pretty handy. I do a lot of home/auto repairs myself so I imagine this will be a pretty simple endeavor, but what are some common pitfalls/mistakes that people make when building these things?
Buy this. plug your induction stove top into it. You'll have to do a little wiring. It comes with a little temperature probe. Put that in your water bath. It will turn the power to you device off when you reach the target temp and back on when the temp dips below the target.
To make sure this will work turn on your induction stovetop, unplug it from the wall, plug it back in. If it heats up again after you plug it back in then it will work. If it doesn't heat up again then it won't work.
Can I recommend a different thermostat? I think you would be much better off with an STC-1000, with a probe that can be immersed in the beer with a thermowell, or stuck on the side of a carboy/bucket. They are really cheap, and easy to wire. It needs 120v to power the unit, and then you can switch the input voltage for the fan with the built in relays.
If you ever wanted to add a heater it would be easy too.
The [Inkbird](https://www.amazon.com/dp/B00OXPE8U6/ref=cm_sw_r_awd_spS8ub02194G2
https://www.amazon.com/dp/B00OXPE8U6/ref=cm_sw_r_awd_spS8ub02194G2) seems to be a pretty great option that has F instead of C
Probably, but the temp probe is not waterproof.
This is what I use. It's a bit diy
http://www.amazon.com/gp/aw/d/B00OXPE8U6/ref=mp_s_a_1_1?qid=1458699099&amp;sr=8-1&amp;pi=SY200_QL40&amp;keywords=stc+1000&amp;dpPl=1&amp;dpID=41qoIapm7VL&amp;ref=plSrch
This guy is for sale on Amazon right now for less than $15 and is in Fahrenheit:
https://www.amazon.com/gp/product/B00OXPE8U6
I actually converted my mini fridge into a wineador. You'd want to invest in a ETC (temperature controller) to keep the temperature at an ideal level for your cigars. Make sure to get an airtight tupperdor so you get no condensation and a few bovedas to control the humidity. Try it out with what works best for you for a few days and then put your cigars in. Hope this helps!
I bought mine in Germany, but they have the same one on amazon.com.
http://amzn.com/B00OXPE8U6
There are quite a few with different brand names, but they are all made by the same company, mine was branded 'Tinxi'.
For the plug and connection [to crockpot] I just cut an extension cable in half and attached either end to the relevant terminals.
And I use a pump a little similar to this: http://amzn.com/B00NPJECXO.
The crock pot is only 200W so it takes a while to get to temperature, but you can use something more powerful like a rice cooker or start with hotter water.
It's great for making yoghurt in jars too.
Just need a better vacuum sealer, any suggestions?
For temp control, you want something like This to control your heating/cooling, and a Carboy Wrap to heat your FV up.
If you get a thermowell you can put the temp probe down in your fermentation vessel, rather than just taping it to the side - you'll get more accurate readings. Downside is you can't set up a proper 1" blowoff hose, and counter-intuitively the first few days of fermentation (When you really need a blowoff hose) are the most critical to temp control (Based on what I've read in other threads here)... Might work well if you get a 6.5 gallon carboy, and do 5 gallon batches in it, so you've got extra head space for all the krausen. You can also use some standard size siphon hose as a blowoff, it's just more prone to clogging than 1" hose.
If you get a minifridge make sure your fermenter fits in it otherwise you might have to build a collar.
Then just plug the fridge into a temperature controller, like the one linked below and tape the temperature probe to your fermenter. Set the temperature and you're good.
https://www.amazon.com/Inkbird-Itc-308-Temperature-Controller-Thermostat/dp/B011296704/ref=mp_s_a_1_3?ie=UTF8&amp;qid=1524708569&amp;sr=8-3&amp;pi=AC_SX236_SY340_FMwebp_QL65&amp;keywords=temperature+controller&amp;dpPl=1&amp;dpID=417y0W4HFmL&amp;ref=plSrch
This one: https://www.amazon.ca/Inkbird-ITC-308-Temperature-Controller-Thermostat/dp/B011296704
Where did you see the 15A? That'd be an incredibly high load for a mini fridge. I really doubt so. Probably closer to 5.
Screw the Johnson btw, check out these for half the cost and nicer: https://www.amazon.com/Inkbird-Itc-308-Temperature-Controller-Thermostat/dp/B011296704?ie=UTF8&amp;*Version*=1&amp;*entries*=0
Eh, what happened?
can you return it and get this one?
https://www.amazon.com/Inkbird-Itc-308-Temperature-Controller-Thermostat/dp/B011296704
$39. www.amazon.com/dp/B011296704/ref=cm_sw_r_wa_apa_8wczxbFDAWQ8W
$39 https://www.amazon.com/Inkbird-Itc-308-Temperature-Controller-Thermostat/dp/B011296704/ref=sr_1_2?ie=UTF8&amp;qid=1465921855&amp;sr=8-2&amp;keywords=temperature+controller
Great plug & play controller with heating and cooling
Wow, really interesting work you're doing. I know a little bit about the challenge of your garage grow. I live in a temperate climate that requires both heating and cooling, and my grow space started in an uninsulated 8'x12' shed. I framed off the rear third of the shed, insulated the hell out of it, and equipped it with automated temperature control. My final space is a 3x5 flower area and a 2x3 veg/seedling area. I don't have a great relationship with computers, so I took a more low-tech approach to my controls. I used an Inkbird temperature controller to control heating/cooling switching. I then ran the cooling output of the Inkbird through an old Honeywell temperature controller which monitors outside air temperature and selects between blower or AC cooling. If the ambient temperature is below 65 degrees, the blower is used for cooling. Above 65 degrees, a little AC unit does the cooling.
When I was researching and brain-storming my grow-space build, I considered using a tent. Tents are not well insulated, obviously, so it crossed my mind to put a 3x3x6 tent inside of a 4x4x6.5 tent, with a 4x4 sheet of plywood atop rigid foam to insulate the floor. I believe that the 6" air-gap created by this arrangement would be a pretty good insulator.
Edit to add: Here is my build, if you are interested.
Question One: Fridge Temperature Control
There are several different units available to adjust the temperature of your fridge. The Johnson Controls A419 will control only cold (or heat if rewired), but the Inkbird ITC-308 will control both cold and heat.
I’ve used both and the Inkbird better fit my needs and is less expensive by more than half. There are other options available as well. Google something like “temperature control unit homebrewing” and you have plenty to read. As for wiring your own, I’m sure it’s possible, but I have no expertise in doing so.
Question Two: Carbonation Pressure
There are many different ways to carbonate your beer and several different gas blends available. Oxygen is not a good choice, as it will cause your beer to oxidize quickly - this common tastes like wet cardboard smells.
I only use carbon dioxide (CO2), but I do draft line consulting for a bar that uses a “beer blend” of 80% CO2 and 20% nitrogen. I can’t taste a difference and it pours the same, but that gas blend costs a little more. There may be other reasons to choose a specific blend that I am unaware of.
As for carbonating your kegs, what you described sounds like burst carbonation. Brulosophy has a great write up on different carbonation methods. I normally use the Set It And Forget It method, but will use the Burst method if I’m in a rush.
Question Three: Infusions
Not sure if you mean infusing the beer with flavors in the keg or glass or if you mean adding fruits or other flavors during fermentation.
To infuse in the keg, I use a mess bag to keep the liquid diptube from clogging. To infuse in the glass you can use a coffee press or even a Randall The Enamel Animal.
As for adding things to fermentation, fruits, hops, oak, spices, and liquor all make good additions to the right beer. Google phrases like “beer infusion recipes, “adding fruit to fermentation,” and “keg dry hopping” for more information.
Happy home brewing and good luck. Kanpai.
You can find a chest freezer on Craigslist for almost nothing.
I use this tiny space heater for heat. It turns off automatically if it gets too hot, so I’m not worried about it burning down the garage, and it works really well. And everyone loves the Inkbird ITC-308. It’s cheap as all hell and has separate plugs for heating and cooling. That’s pretty much everything you need.
Welcome to homebrewing!
For that stout you probably want to be around 67, but your beer is fine, don't worry! Higher temperatures can impart off flavors, but at the temperatures you are at, your beer should taste just fine. I use this attached to a wine fridge or chest freezer, and it works wonders for keeping your fermentation temperature consistent (plus you can make lagers).
Cold crashing improves clarity, which is not a big concern for a stout so i wouldn't worry about it for now, it is totally not necessary.
Both of those beers would be good, and there is nothing wrong with extract brewing/kits, don't let anyone tell you different! That being said, i switched to biab (all grain) and have enjoyed it more and gotten better beers.
Lastly, as you get deeper into brewing water will become more of a concern, but for now don't worry too much about it. Grocery store water has two problems. First, you don't know whats in it, though some water companies like crystal geiser post the info online. 2. If it is distilled/reverse osmosis/filtered it will not have much of any minerals which you might want in your beer. Calcium, for example, is important for great beer, though you can add gypsum salt to your water to give it the calcium content you might want.
cheers and good luck with your new hobby, its very rewarding and a lot of fun. let me know if you have any questions and ill try to share my (limited) knowledge
I've not seen that one! I use an inkbird unit:
https://www.amazon.com/dp/B011296704/ref=cm_sw_r_cp_awdb_qF45yb97BVBV0
It works just fine with the Crock-Pot. I've done a few steaks, a couple 36hr+ bacon cooks, chicken and veggies.
I use this for my aquariums, but it also works for measuring air temp. It even has an alarm in case your heating system ever starts to lose the battle against the cold air. You could also use it to control a ventilation system in the summer to keep it from getting too warm.
EDIT: The actual temp you target will probably depend on how well you get that thing sealed up and how much firepower you put into the heating system. You could create an overpowered system that can maintain room temp and then set it to exactly what you want, but you could also go for efficiency and design it to maintain just above 50F on the coldest nights. That said, you'll have lots of warning if your system won't be able to tolerate the coldest days of the year as long as you pay careful attention.
Plug your heat Mat into this
This device will only turn the heat mat on when the temperature of your mead drops below a set temperature
Something like this.. Temperature Controller will allow you to turn your freezer into a refrigerator. I brew beer and that is a common way to store kegs in a chest freezer. might work well in your case
Going to be turning a freezer into a fermentation chamber soon (I hope). This is the temp controller I'm looking at:
https://www.amazon.ca/Inkbird-ITC-308-Temperature-Controller-Thermostat/dp/B011296704/ref=sr_1_1?ie=UTF8&amp;qid=1493653514&amp;sr=8-1&amp;keywords=inkbird
Do I need to rig up an old extension cord or anything or will this thing be ready to go right out of the box?
I feel like I'm becoming a shill for this product, but I see these questions and always feel like its worth a mention.
ITC-308
Heating and cooling, pre built, no fuss. I think there's a six stage version in the works, but I'm not sure.
Hope that helps!
I have one of these, and it works fantastic for controlling the temp in my crock pot.
http://www.amazon.com/Inkbird-Itc-308-Temperature-Controller-Thermostat/dp/B011296704/
Just use an older style crockpot with a manual knob and not electronics.
And I've noticed that too, my old crockpot I bought at goodwill would let you slow cook chili. My new one will boil it, even on the warm setting. I hate it.
> "the danger zone"
LANNAAAAA
https://www.youtube.com/watch?v=kyAn3fSs8_A
If he's an extract brewer, upgrading to an all-grain setup would be fun. Mash tuns, ported brewing kettles with temperature gauges and sight glasses, a nice gas burner or an all in one BIAB setup like the Unibrau or Wort Hog (especially if you have 240V power available, though 120v options are available). The latter two hit just around $1000 themselves but are ready to go out of the box.
If he's already an all-grain brewer in either multi-vessel or BIAB (or even if he's not), does he have a kegging setup? A good size chest freezer (consult the chart here for model numbers that fit the right number of kegs), a 4 pack of kegs with connectors, a gas manifold, a CO2 cylinder, and an Inkbird temperature controller will fall neatly within the budget range and is a significant "luxury" upgrade to buy all at once.
Already got that? He's probably already got fermentation temperature control if so, but if not, it's a nice one. This option tends to be the most awkward to just buy off the shelf and the temperature controlled conical fermenter I'm seeing runs around $1800, so its a bit out of budget. Again, a fridge or freezer with temperature controller are nice. I'd advise against a conical unless you know it will fit into his fermentation chamber. They are super sweet but they require a setup built with them in mind.
Already got all that? Ok, we're into the hilarious luxury items now. A reverse osmosis water setup? A high end pH meter? A giant stainless steel sink in his brewing area with one of those nifty shower head things for easy water filling and cleaning? A barrel of some kind for ageing? Can't help you past here, I'm too poor!
Badabing!
Inkbird Itc-308 Digital Temperature Controller Outlet Thermostat, 2-stage, 1100w, w/ Sensor https://www.amazon.com/dp/B011296704/ref=cm_sw_r_other_apa_xPpgyb5DPMEDA
[This guy] (https://www.amazon.com/gp/product/B011296704/ref=oh_aui_detailpage_o02_s01?ie=UTF8&amp;psc=1)
It's awesome for keeping everything the right temp, humidity I use a shitty little monitor inside which can give a better reading of what the plants feel.
More of an electrical engineering question, but I feel like you guys would provide me with a better answer.
After doing a lot of research the past week, I found many guides on how to assemble a Freezer-Chest-Fermenter. I am using this temperature controller, and I just want to make sure I set it up correctly.
From what I can understand (PLEASE CORRECT ME IF IM WRONG), this tool lets me set a temperature and a range, and will heat or cool if necessary to reach that destination temperature.
If that's the case, what my plan is, is to plug the Chest Freezer into the "Cooling" out, and a small space heater into the "Heating" outlet.
So my two questions... Is my idea on how this works correct? And would my plan work? Or should I get something other than a space heater?
What's the unit of measurement for your dimensions?
If you want to go super cheap, I imagine you could could get a temperature regulator (two outlets and 1 temp probe); you could run a dedicated fan next to a space heater to keep the temperature moving around the space, while the probe sits somewhere in the middle of the room. You can set a temp range where on the low it would pop on the heater, and when it hits the top temperature it shuts off (and you could attach another fan in another part of the room/wall of the incubator to the other outlet which would switch on once it hits the top of the temp spectrum you hit to promote ventiliation and more quickly cool it down).
The space heater I suppose would be overkill for a 2 foot container, but if it's 6 feet (meters) it would be a lot. You could even scrap the extra fan by getting a heater that oscillates with a fan and then use the second outlet, again, to promote ventilation.
Not sure how ideal this would be for super consistent temperatures, but temp regulators are pretty darn cheap. https://www.amazon.com/gp/product/B011296704/ref=oh_aui_search_detailpage?ie=UTF8&amp;psc=1 is what I used with a medium sized styrofoam cooler and a 60W bulb. It worked quite well.
Here's the hardware I ended up with for a simple continuous brew setup. For me, two gallons is a lot for a batch brew mostly just handling the vessel. Good luck! You're mostly limited by your imagination here.
Beverage dispenser Target is supposed to carry it also, but I never found one in the store.
Stainless spigot
Rubber bands
Heater
Temp controller outlet
Adhesive thermometer
Ahh! Thanks. Based on all of that I should be safe with something like... http://www.amazon.com/gp/product/B011296704 ?
ALRIGHT! Sorry for just getting back to you I've been trying to reply and mobile and kept accidentally deleting what i typed while trying to format my response. So had to move to the Laptop.
Anyways when I say you should repaste I'm referring to the action of removing the heatsink from the CPU and GPU clearing the provided "thermal paste/grease" (thermal paste or grease depending to who you talk to is a thermally conductive paste that is meant to be between the CPU/GPU and the heatsink to fill the airgap and conduct heat to the sink better.) from both and applying new paste. Here is also a video guide on how to apply thermal paste it doesn't pertain specifically to your laptop but gives you a good idea on how its done.
Now when it comes to your device I took the liberty of looking up the service manual and found a video guide on how to disassemble down the the motherboard here. If you've never done anything like this before it can be a little daunting, but if you have a friend with some experience it shouldn't be more than a few hours project and the outcome should be considerably better than before.
If you are going to go this route there are a few thermal pastes that everyone recommends and everyone has their own opinions but as I stated before any of these will be better than what you originally had so buy whatever fits your budget.
Artic Silver 5
IC-Diamond
Thermal Grizzly Kryonaut
Prolimatech PK-3
There are plenty of others but any of these will do you good, with a major recommendation to the Silver 5 due to bang for the buck.
After all that and you decide that maybe you don't want to do a repaste (and even if you did repaste I'm still recommending this) you are going to want to get a laptop cooling pad. The reason is due to the nature of laptops and how compact they are sometimes depending on the surface they are laid on they do not get enough air to cool properly, dropping your performance into the shitter. I have a similarly spec'd laptop to yours (Lenovo Y50 4700hq and 860m) and I use the Notepal XSlim its not the best but it does the job and for $18 I can't complain. There are others but buy what feels right to you.
Sorry for the long winded post I hope this helps you some, and I hope you can get your laptop performance back as you have a more than capable laptop. Let me know if you need anything else!
Looks like TG Kryonaut is about $10 on Amazon, but they're all beingsold by random sellers and not TG or Amazon, or some other major retailer. Not sure if legitimate? Newegg only has the 11 gram Kryonaut, and I don't need that much. Bit perplexed on what to do!
EDIT: Newegg apparently has the 1.0 gram too! But it's sold by random people, as well. Just confirmed from TG's site that "MemoryC" is an authorized seller, so I'll probably buy from them on Newegg, even though it costs a few dollars more. Should guarantee the legitimate product!
Hi
I would not adjust your Bios settings without giving the CPU better cooling.
I used Grizzly Kryonaut Thermal Grease Paste. https://www.amazon.com/gp/product/B011F7W3LU
with
Fujipoly smart Extreme X-e Thermal Pad 11.0 W/mK https://www.amazon.com/Fujipoly-mod-smart-Extreme-Thermal/dp/B00ZSJQX0E I put 2 layers of 1mm thermal pads on the heat pipe from above the CPU to halfway to the fan.
For the thermal pads I followed the general idea in this https://imgur.com/a/uAzmc#CsPVeRf
My pads are close to this pattern:
https://i.imgur.com/CsPVeRf.jpg
I used larger pads directly over the CPU. The pad over the Fan discharge is intended to stop air from leaking around the copper cooling fins but the joint already had tight tolerances in my laptop so I used those pads around the CPU instead.
I followed the instructions on this post to adjust the bios:
https://www.reddit.com/r/GPDPocket/comments/6s7zck/my_unlocked_bios_working_settings_dptf_limit/
Although I set my temp limits at 80C instead of 85C. Not that it matters with the cooling I have I can't get the CPU above 70C even running the Prime 95 stress tests for 30 minutes.
I hope this helps. You don't need the exact brand of paste or pads I used, I just included them in case anyone was curious.
I also tried 2 other kids of pads but they don't stick to a surface so I did not like using them. (Phobya Thermal Pad XT 7W/mk and Fujipoly 17.0 W/mK pad)
I should give credit; the thermal pad post was by ZiggyDeath and the BIOS settings were by neoak.
I am please with the way my system has worked out. I hope you are pleased with yours.
Have a good one.
Jon
Any prefered store?
There used to be a 1.5gr seringe, but the 4 grams one is at less than 5£, so a better deal than the 1.5gr for around 3£:
https://www.amazon.co.uk/Compound-Performance-Heatsink-Interface-Material/dp/B0045JCFLY/ref=sr_1_1?ie=UTF8&amp;qid=1509718075&amp;sr=8-1&amp;keywords=arctic+mx4
Kryonaut:
https://www.amazon.co.uk/Thermal-Grizzly-kryonaut-Compound-Compounds/dp/B011F7W3LU/ref=sr_1_1?s=computers&amp;ie=UTF8&amp;qid=1509718131&amp;sr=1-1&amp;keywords=kryonaut
Noctua:
https://www.amazon.co.uk/noctua-NT-H1-Noctua-thermal-compound/dp/B002CQU14A/ref=sr_1_1?s=computers&amp;ie=UTF8&amp;qid=1509718185&amp;sr=1-1&amp;keywords=nt+h1
Just lay a 5-6mm long bead with the thickness of a rice grain, and dont spread it with the spatula(if included) and off you go.
I use an existing fan and this temperature controller to turn the fan on when the water is above 78F. https://www.amazon.com/dp/B015E2UFGM/ref=cm_sw_r_cp_api_8ZHNAbEYSH8NX
Craigslist freezer - we chose upright for vertical space. Chest freezer might work - but you would have to figure out how to hang in it.
Temperature controller - there are lots of options. This one is the Johnson 419. You plug it into the wall then plug the freezer into the female lead. It cycles the freezer on and off at the set temperature. There are cheaper options - but I had this one laying around. I'll link some suggestions below.
The fan is a computer fan with speed switch. I wired it to an old 12v wall wort I had laying around in the parts bin.
Meat hooks are just stainless hooks - again from amazon.
Temp controllers:
Johnson - https://www.amazon.com/Johnson-Controls-Digital-Thermostat-Control/dp/B00368D6JA/ref=pd_sim_328_1?_encoding=UTF8&amp;psc=1&amp;refRID=SG7X9CB5Z0VYY8RM7EVB
If you're comfortable with electricity:
https://www.amazon.com/Lerway-All-Purpose-Temperature-Controller-Thermostat/dp/B00BMLCGF8/ref=sr_1_2?ie=UTF8&amp;qid=1481133568&amp;sr=8-2&amp;keywords=temperature+control
Best deal:
https://www.amazon.com/Inkbird-Temperature-Controller-Thermostat-Fermentation/dp/B015E2UFGM/ref=sr_1_1?ie=UTF8&amp;qid=1481133568&amp;sr=8-1&amp;keywords=temperature+control
Meat hooks:
https://www.amazon.com/Meat-Hooks-Inch-Pack-Pieces/dp/B0195CE08Q/ref=sr_1_3?ie=UTF8&amp;qid=1481133886&amp;sr=8-3&amp;keywords=meat+hooks
Fan:
https://www.amazon.com/Antec-TriCool-DBB-Cooling-3-Speed/dp/B00066ISES/ref=sr_1_5?ie=UTF8&amp;qid=1481133824&amp;sr=8-5&amp;keywords=speed+fan+computer
Do you have temperature control figured out? I did it DIY with an STC-1000, but I'd suggest going with the Inkbird for $35.
https://www.amazon.com/Inkbird-Temperature-Controller-Thermostat-Fermentation/dp/B015E2UFGM/
Design and design considerations:
Heating/Cooling:
Active Aqua Chiller, 1/4 HP - Note in the temp graph below the blunting of the green curve as the red (ambient temp) went high. I have the dual stage temp controller set to kick on the cooling plug at 68, and this starts the second water pump that pumps through the cooler. The cooler is set for 69 currently so when the temp reaches 70, cooling kicks in. I am continuing to fiddle with this setting.
Nutrients:
Plant photos:
Plants received dry bare root with no green growth from starkbros.
Temp graph:
This is with the La Crosse wifi temp probe (https://www.amazon.com/Crosse-Technology-926-25106-Wgb-Wireless-Monitor/dp/B06ZYJ5L5B/ref=cm_cr_arp_d_product_top?ie=UTF8) so I can check remotely. Red line is ambient temp, green line is water temp.
Water changes:
I use a Digital Temperature Controller with a small chest freezer. Shop around for the freezer, I just used this one 'cause I was on Amazon. Think I got mine at Sam's Club. This is inexpensive to set up and really frugal on electricity. All the cold stays in the compartment when you open it. Also - super insulated compared to a beverage cooler. It's not stainless, but you can get compact chest freezers in black. If you like DIY, you could buy a cheap chest freezer and cover it with [stainless steel laminate] (https://www.amazon.com/Stainless-Appliance-BRUSHED-Nickel-Adhesive/dp/B00BAUPS9M/).
Hey folks, back again with another question.
I just took advantage of labor day sales and got my first equipment kit, linked below.
https://www.homebrewsupply.com/advanced-homebrew-beer-kit.html
I bought some extract recipe kits from northern Brewer. Stepson root beer, beerie and off the topper to be exact.
I have a small basement freezer already and plan to buy this item to control fermentation.
https://www.amazon.com/gp/aw/d/B015E2UFGM/ref=s9_simh_gw_d0_g60_i2?pf_rd_p=1c5f02ae-183e-4906-990b-5a293310a66c&amp;pf_rd_s=blackjack-personal-1&amp;pf_rd_t=Gateway&amp;pf_rd_i=mobile&amp;pf_rd_m=ATVPDKIKX0DER&amp;pf_rd_r=Y4SZRWAJQ2ND3A86RR3W
Is there anything hardware wise that I'm missing to get my first batch ready ? Any recommendations?
Thanks in advance.
Hi. New to 3d Printing.
I mainly want to learn and make random Star Wars and Halo stuff for my kids.
I was looking at this one.
https://smile.amazon.com/Monoprice-Maker-Select-3D-Printer/dp/B018GZBC3Y/ref=sr_1_1_sspa?ie=UTF8&amp;qid=1509638586&amp;sr=8-1-spons&amp;keywords=Monoprice+Maker+Select+v2&amp;psc=1
I would like it to be no more than $400 (that is pushing it since the wife is 3/4 onboard).
Thank you for your time and advice.
I like this price with free shipping.
I found this one on amazon I think it's from the right people and It's the cheapest one I could find
http://www.amazon.com/Monoprice-113860-Select-Printer-Filament/dp/B018GZBC3Y?ie=UTF8&amp;psc=1&amp;redirect=true&amp;ref_=ox_sc_sfl_title_3&amp;smid=ATVPDKIKX0DER
At least prices have dropped. Like these. Considering even basic machines used to be at least $1,000 US only a few years ago, this is an improvement. The $350 version is cheaper on Amazon.
You can save even more by building from components.
Plastic is relatively inexpensive if you buy from Micro Center (again assuming USA)--$17 after taxes per 1kg roll.
It's certainly not the cheapest hobby, but like most technologies, prices tend to go down while quality goes up.
Essentially, the biggests sacrifices you make at the lower end are lack of a heated bed and smaller build volumes.
/r/3dprinting can help you get started.
https://www.amazon.com/Monoprice-113860-Select-Printer-Filament/dp/B018GZBC3Y
It came out a little messy in some spots, but I was honestly impressed with the quality this thing can put out - it's on par with some $1500+ printers after a little tweaking.
This was printed on a Monoprice Maker Select. It's currently at $350, but it's not uncommon to see it drop to nearly $300. It's probably the best bang for your buck as far as printers go, and it's definitely one of the cheapest out there. Monoprice also makes the Maker Select Mini for $220 that's a little simpler and has a smaller build plate.
Shameless plug: if you want to get something printed/see what this one can do, you should use my hub at 3DHubs and let me buy more filament! It's cheap, and if you tell me you're from reddit I'll give you $2 off!
edit: here's the link to the model
Yes. I have 2. In my pic the one on the left was $800 and the one on the right was $300. They both print at the same quality. This one works for a lot of people. https://www.amazon.com/Monoprice-13860-Maker-Select-Printer/dp/B018GZBC3Y/ref=sr_1_1?ie=UTF8&amp;qid=1496349955&amp;sr=8-1&amp;keywords=maker+select+monoprice
I just got a Monoprice Maker Select v2 about a week ago. It's working really well so far. Only $300 on Amazon, has a nice large print area, and a heated plate. If you're looking to get into 3D printing, this seems like a great one to get. Seems to be the best bang for your buck. And it's a popular printer so there's a large online community surrounding it for support.
Link: Monoprice Maker Select 3D Printer v2 – (113860) https://www.amazon.com/dp/B018GZBC3Y/ref=cm_sw_r_cp_apa_PUSCzbHHJ07EC
Either the monoprice maker select or the monoprice select mini
Remember you'll also need to spend money on plastic regularly so take that into account with your budget.
Monoprice MS V2 I just got mine and i love it
There's either kit or assembled printers. I bought this off amazon, it really just requires you to screw the base and Z axis together and calibrate (which you'll always have to do on a printer) and you're basically all set. I would suggest seeing if amazon, wanhao, or monoprice deliver to where you are without costing an arm and a leg, and go that route.
Amazon has the Maker Select v2 on sale for $286 with free Prime shipping today.
https://www.amazon.com/Monoprice-13860-Maker-Select-Printer/dp/B018GZBC3Y
Monoprice 13860 Maker Select 3d Printer V2 https://www.amazon.com/dp/B018GZBC3Y/ref=cm_sw_r_other_apa_oVLkybMZSNHRH
I'm Thinking About Purchasing A Monoprice Select V2 At Amazon At Black Friday/Cyber Monday But Don't Know In Wich One I Can Get The Best Deal So Want To Know What You Guys Think About That Based On Your Experiences In Previous Years. Thanks.
from the black friday thread, deal is done but you can still get it here:
For the Canadians looking for a deal, Amazon.ca has the Monoprice Maker Select for a good price at $398 CAD with free shipping. Ships from Amazon's Toronto warehouse so you won't have to worry about duty. https://www.amazon.ca/gp/product/B018GZBC3Y/ref=oh_aui_detailpage_o00_s00?ie=UTF8&amp;psc=1 - JeffDM
The Monoprice Mini does not have a heated bed, and does not have a dedicated part cooling fan. This limits you to printing PLA only, and quality will suffer a bit due to the lack of a fan.
The fan is a pretty easy upgrade, heated bed a bit more work. For only around $50 more, you can get the regular Maker Select which does not have these limitations and has a much larger build area. It has pretty good reviews.
As for the Prusa, yeah it's pretty damn awesome. Print quality will be better, but more importantly, they're just damn reliable and don't require much work to keep them running. I'm not saying $250 printers are bad, but they do generally require some extra time tinkering, so be prepared for that.
Looks like Monoprice just pulled the majority of their printers from Amazon, but if their historical pricing is any indication, ~250 is the lowest it has ever gone down to:
https://camelcamelcamel.com/Monoprice-Maker-Select-3D-Printer/product/B018GZBC3Y?context=browse
Any chance you could share the line?
I bought my maker select used from Amazon Warehouse. I got it for $280 when they were going for about $350 new. The stock fake buildtak surface had some gouges on the perimeter that didn't affect any of the printing I did in the center, and the print removal tool had a bunch of dents in it. Other than that, everything was fine.
http://camelcamelcamel.com/Monoprice-13860-Maker-Select-Printer/product/B018GZBC3Y
The new price has since skyrocketed for some reason, and they don't have any used ones.
If you can get it from a retailer with a decent return policy (will let you return it for free after being able to set it up and inspect it), do it.
But I agree with the others that caution you about buying a used printer on ebay that might not have a favorable return policy.
You didn't; Monoprice Select Mini
I got it for $180 on sale, normal is $220. Overall it's a great starter, but if you're willing to wait the Tiko is looking very promising.
https://www.amazon.com/Monoprice-Select-Printer-Heated-Filament/dp/B01FL49VZE/ref=sr_1_1?ie=UTF8&amp;qid=1483837489&amp;sr=8-1&amp;keywords=mp+select+mini
Do you know if I'd be able to use this: Monoprice Select Mini 3D Printer with Heated Build Plate, Includes Micro SD Card and Sample PLA Filament - 115365 https://www.amazon.com/dp/B01FL49VZE/ref=cm_sw_r_cp_apa_D5cBybZRTE4BT
If the cracked lid casing is the common problem shown in the photograph here there's a pretty easy fix:
Apply a small spot of J-B Weld embedded with a small finishing nail laid across the break for extra reinforcement in the area shown in the photograph here.
You just need to remove the screen bezel and temporarily push aside the antenna wires. Make sure everything is aligned and let it set up for about 24 hours and the bond will be virtually impossible to break. I've done this on a number of X220 and X230 units and it holds up really well.
some stuff you might want to think about bringing:
>lock and chain/bike chain.
you're going to be leave your campsite for ~12 hrs if no one goes back for a break. it takes about a minute to run a chain through your cooler handles, foldable chairs and other stuff. it's also easy to jb weld a metal loop onto an ez-up so they dont walk away either, i've never heard of someone ganking an entire ez up at roo, but i'd be pissed if mine was gone when i came back after the first night.
its easy for someone to walk off with one chair, its almost impossible for someone to carry your entire campsite away without anyone saying anything about it. and if you bring enough chain you can loop it around the wheel of your car, and i doubt thieves are going to go through all that hassle when no one else is locking their shit down.
>rug/carpet
grass might be super long at your campsite
>battery powered fan and string
hang the fan from the middle of your tent and itll be cool enough to get a few more hours sleep in the morning
>battery powered camp lantern
flashlights are good, but a handsfree light that illuminates everything around it is really nice if you dont go to sleep as soon as you get back to your camp.
>extra socks into centeroo
i prefer sanucks and going sockless, but if you're wearing socks bring an extra pair with you in your camelpack/backpack. wet socks suck and can mess up your whole weekend if you're stuck wearing them
The $6 fix; JB Weld epoxy.
The bond will end up being stronger than the plastic. It might look a little ugly, but for $6 it's the best option as far as price/performance.
is it aluminum body or carbon fiber if its an alloy get some jbweld, i used it to weld fittings to 2 stroke rc car mufflers that had high temps and it held grate
https://www.amazon.com/J-B-Weld-8265S-Cold-Weld-Reinforced/dp/B0006O1ICE
apparently there marine weld is good for composites
I’d take it apart a little bit, so you can easily get to the areas you need to, and use some J-B Weld to glue it back together.
This is a really precarious spot on the X220 and X230 lids. I've managed to repair a few that had this same issue.
I used a small spot of J-B Weld imbedded with a small finishing nail laid across the break for extra reinforcement in the area shown in the photograph here.
You just need to remove the screen bezel and temporarily push aside the antenna wires. Make sure everything is aligned and let it set up for about 24 hours and the bond will be virtually impossible to break.
Since your title specifies low cost you can save some money by using a wired lav mic like this Audio Technica or this Olympus lav mic. You simply plug it into the camera's mic input. A 3.5mm extension cable might be needed to reach the camera. Use the lav mic with an inexpensive voice recorder if you need the subject to move around. Smart phones have decent audio recording apps too. Syncing the audio in post can be a hassel so only do this if the shot requires being untethered. If you record audio with a separate recorder it helps to mark it by saying a scene number and making a clap sound so you can find it and sync it with the video editing software.
For lighting you might consider an inexpensive LED light and a second battery. Charge one battery while using the other.
I've used clamps like this and this for quick and simple mount of camera and small lights to a chair, windowsill, cupboard, etc. You can use JB Weld to put a 1/4-20 nut-coupler on the light if it doesn't have it already.
edit: I like Canon equipment and their line of Vixia Camcorders starts at around $300 and has a mic input. The lens and image stabilization gets you a nice picture compared to a camera phone or similar "cheap" camera.
IIRC Premiere has a basic mode that uses a simpler timeline more like Apple's iMovie. You can download 30 day trial versions of the latest Adobe products. Give Premiere Elements a try.
They would be a hell of a lot cheaper if they were;
Official Leica Cufflinks: $970 USD
DIY Leica Cufflinks
DIY Cufflinks Guide: $0 + Replacement Leica M Shutter Speed Dial $99.98 + 2 Silver Cufflink Blanks $16+ 2 Silver Contact Screws $15.80 USD to fill in the screw hole and be trimmed flush, + JB Weld to really nail it down $12.96 USD = $144.74 USD
You can make a genuine pair, with pure silver posts, and at most an hour of time for $825.26 less.
It might be a little overkill but.... JB Weld would work.
hope grad school is going well gabs
I've had the same issue before, fixed it with this stuff: http://www.amazon.com/J-B-Weld-8265S-Compound-Twin/dp/B0006O1ICE/
JB weld is an epoxy. You can buy a tube for like 6 or 7 bucks. It doesn't require welding. I've removed dozens of stripped screws with this stuff.
I think Plasti Dip is pretty cool. It's temporary but it protects the metal surface and it looks good too. One cool thing is you can put it on with an HVLP gun or a can. If you screw something up, you can peel that part off and respray it without doing the whole car. There's just no reason to be driving around in a tri-color hoopty with this stuff around.
http://www.amazon.com/Performix-11203-Multi-Purpose-Coating-Aerosol/dp/B0006SU3QW/ref=sr_1_1?ie=UTF8&amp;qid=1408415322&amp;sr=8-1&amp;keywords=plastidip
Can be bought in your local hardware store most likely
https://www.amazon.com/Performix-11203-Multi-Purpose-Coating-Aerosol/dp/B0006SU3QW/ref=mp_s_a_1_3?keywords=plasti+dip&amp;qid=1565290567&amp;s=gateway&amp;sprefix=plasti+dip&amp;sr=8-3
For the plasti dip
http://www.amazon.com/Performix-11203-Multi-Purpose-Coating-Aerosol/dp/B0006SU3QW/
But you should be able to find Plastidip at any hardware store.
You can buy spray plasti dip.
https://www.amazon.com/Performix-11203-Multi-Purpose-Coating-Aerosol/dp/B0006SU3QW/ref=sr_1_1?ie=UTF8&amp;qid=1467574791&amp;sr=8-1&amp;keywords=plastidip
I bought a set of WearEver stainless, induction-ready pans several years ago and they're still like new. The nonstick is completely unscratched, everything seems top-notch. I expect they will last me a lifetime, but you can certainly spend a lot more and get some which are nicer in some way.
The only thing I don't like about them is the lid handles get hot; I coated mine with PlastiDip but idk if that is safe for the oven; I only use these on the stovetop.
Sure, it is just your typical Plasti Dip classic black 11 oz can. Here's a link to the one I used, though I bought mine at Lowes for like 6 bucks.
https://www.amazon.com/Performix-11203-Multi-Purpose-Coating-Aerosol/dp/B0006SU3QW
Plastidip! I mean it's what I used for my car and also Xiaomi M365 and it works. Have yet to try it on my rev though :)
Performix 11203 Plasti Dip Black Multi-Purpose Rubber Coating Aerosol - 11 oz. https://www.amazon.com/dp/B0006SU3QW/ref=cm_sw_r_cp_apa_i_CvkCDb0NCY5D0
plasti dip, you can find it in most stores that sell paint products
&#x200B;
It only cost $48 and I have a whole can left over. I just wanted to see what it would look like with black rims because the sliver paint was chipping off.
Plasti Dip: https://smile.amazon.com/dp/B0006SU3QW/
Scouring Pads: https://smile.amazon.com/gp/product/B001KYQBX0
I use plasti-dip on mine. I just dipped the handle in it. I put 2 coats. I don't cut my hand anymore. They sale it in a can at Harbor Frieght if you have one close by.
&#x200B;
https://www.amazon.com/Performix-11203-Multi-Purpose-Coating-Aerosol/dp/B0006SU3QW/ref=sr_1_2?keywords=plasti+dip&qid=1557410466&s=gateway&sr=8-2
https://youtu.be/otCtkVePX_0
——————————————-
https://www.amazon.com/Performix-11203-Multi-Purpose-Coating-Aerosol/dp/B0006SU3QW/ref=pd_aw_lpo_60_bs_lp_tr_img_1?_encoding=UTF8&amp;psc=1&amp;refRID=DTKQBCFBS1BCFCF89CAH
Plasti Dip possibly. See [HERE] (https://www.amazon.com/Performix-11203-Multi-Purpose-Coating-Aerosol/dp/B0006SU3QW/ref=sr_1_cc_1?s=aps&amp;ie=UTF8&amp;qid=1537149822&amp;sr=1-1-catcorr&amp;keywords=Plasti+Dip+black)
https://www.dipyourcar.com
Watch some of their vids on YouTube, they are pretty cool.
Here it is on Amazon
https://www.amazon.com/Performix-11203-Multi-Purpose-Coating-Aerosol/dp/B0006SU3QW/ref=mp_s_a_1_1?keywords=plastidip&amp;qid=1556123766&amp;s=gateway&amp;sr=8-1
Let me know if you need tips.
Here
Here's what you're looking for
Plasti dip!
You can literally buy it off of Amazon.
https://www.amazon.com/Images-SI-Uranium-Ore/dp/B000796XXM
https://smile.amazon.com/Images-SI-Uranium-Ore/dp/B000796XXM?sa-no-redirect=1
ALL the reviews!
Dandelion and burdock
https://www.amazon.com/Images-SI-Uranium-Ore/dp/B000796XXM/ref=sr_1_1?keywords=uranium&amp;qid=1566568145&amp;s=gateway&amp;sr=8-1
What about Uranium? https://www.amazon.com/Images-SI-Uranium-Ore/dp/B000796XXM
Uranium Ore?
Need some uranium ore?
Amazon.com
> Uranium is used in nuclear weapons. That's why you don't sell it to everyone, and you don't sell it to political rivals like Russia, or Russian companies.
I can literally buy uranium on Amazon. Here's one example. Uranium is extremely common. What a nuclear bomb requires is enriched uranium, which is extremely difficult technologically to do. That's why for example Iran needed all those centrifuges; to turn easily obtainable uranium into the actually useful stuff.
> If you can't figure out why giving Russians easier access to uranium is a bad thing, you're probably dumb -- oh, I see you are a global warming cultist.
I suppose I shouldn't be that surprised that someone who doesn't understand how nuclear bombs work at all is also a global warming denier and is so far down that hole that they've decided that people accepting the evidence must be cultists. Sigh.
When I'm on my deathbed I'm going to order a shittonne of stuff on Amazon for my relatives. The good ones will get cool stuff like you got.
The bad relatives will get this.
http://www.amazon.com/Images-SI-Inc-Uranium-Ore/dp/B000796XXM
I'll give you a hint... Make sure you look at all of the customer images.
http://www.amazon.com/Images-SI-Uranium-Ore/dp/B000796XXM
The only remotely dangerous thing you could do with it is make bullets. (Because its heavier than lead.)
Still my favorite: http://www.amazon.com/Images-SI-Inc-Uranium-Ore/dp/B000796XXM
https://www.amazon.com/Images-SI-Uranium-Ore/dp/B000796XXM/
Calm down.
You can buy uranium on Amazon right now.
why was THIS!? a related item?
Amazon did:
http://www.amazon.com/Images-SI-Inc-Uranium-Ore/dp/B000796XXM
Uranium is $40 on Amazon
Your wish list item, should you choose to accept it, is this super useful for every day life uranium ore! With this item, you'll get to experience life with enhanced anatomy features, likely get to see your very own CIA spy drone, and have a legacy that will last you beyond 4.7 million years. What more can you honestly ask for?
Uranium
3 foot dong (NSFW)
Best I can do
> Problem, is you can't get uranium
You can get the ore easily enough! http://www.amazon.com/Images-SI-Uranium-Ore/dp/B000796XXM
If nothing else, some of the reviews are kinda cute.
Sob story: I missed the deadline :-(
Would have requested this.
Not at all, I have one of these sitting on a bookshelf somewhere in here.
JL421 Badonkadonk! The name is just a bonus!
Or maybe some uranium ore?
Old man wiener cleaner! Hahahaha!
I think it is important to note that the system they are trying to develop doesn't use highly enriched uranium. It would use low enriched and a smaller amount. There is a video in this thread somewhere that explains it better. I mean you can buy uranium on Amazon ,if you didn't know, but how enriched it is makes the difference between no big deal and dirty bomb. https://www.amazon.com/Images-SI-Uranium-Ore/dp/B000796XXM
Smile Link: https://smile.amazon.com/dp/B000796XXM
Partially-spent nuclear fuel is not usable as a nuclear bomb. Fuel has to be very pure in order to sustain the rapid chain reaction that happens in a nuke, and spent reactor-grade fuel isn't even close. At best, it has to be heavily refined first.
Plus you have to actually design and build the bomb itself, which is extremely difficult. The bomb's casing has to withstand the explosive force of a fucking nuke until the fuel is consumed, and only then give way, or else it'll fizzle out. Good luck.
Edit: Also, you have to somehow make the bomb not explode prematurely. Uranium is unstable, remember. If you have a chunk of 100%-pure uranium, a fission chain reaction will be started immediately by its own radioactive decay, and then you no longer have a chunk of 100%-pure uranium. (That's why highly-enriched uranium does not occur in nature.) So, you have to figure out how to make the fission chain reaction happen, but only when you want it to. Again, good luck.
Spent reactor fuel might be used to make a dirty bomb, but the effectiveness of dirty bombs as actual weapons is highly questionable.
Anyway, we already have more than enough nukes lying around—some of them unaccounted for, and probably in terrorist hands—to go full Fallout.
Fun fact, by the way: you can buy uranium on Amazon. Seriously. You can even buy it as a gift, amusingly enough.
Just like... buy some very low level radioactive shit online or something and tape it to the bottom... Just so on the little card it can read "ceramic, glaze, uranium ore"
Uranium Ore. Yep.
Uranium!
http://www.amazon.com/Images-SI-Inc-Uranium-Ore/dp/B000796XXM
http://www.amazon.com/Images-SI-Uranium-Ore/dp/B000796XXM/ref=sr_1_11?ie=UTF8&amp;qid=1453242399&amp;sr=8-11&amp;keywords=plutonium
At least it looks innocuous. There was a post about this guy finding Uranium on Amazon and it turned into a thread about all the weird shit you could find there. I clicked on a link for a 55 gallon drum of lube thinking it was a joke. Nope, 6 months of very interesting "More Items to Consider" sitting right on my front page.
If you're into this type of thing
If not, then you could always try knitting a scarf or sweater for her.
http://www.amazon.com/Uranium-Ore/dp/B000796XXM/ref=pd_sim_sbs_t_6
Where do they store the uranium ore in the warehouse?
Actually, it is legal to own up to fifteen pounds of U-238. You can buy it online. Amazon currently has uranium ore in stock, but not the pure element as far as I can tell. This is the "classic" place to buy uranium ore. They appear to currently be sold out of pure uranium-238 metal. It's totally illegal to own fissile U-235... and all this assumes you live in the US.
http://www.amazon.com/Images-SI-Inc-Uranium-Ore/dp/B000796XXM/ref=sr_1_9?ie=UTF8&amp;qid=1375382678&amp;sr=8-9&amp;keywords=uranium+238
Not the weapons grade stuff but uranium still.
I expected a gag gift. It was not.
I wouldn't want to know what it was like if the zombies ate my brains, so I would use my Uranium Ore and build a nuke. Nothing bad could happen from this plan at all.
Nope! These are cured with a few grams of uranium ore ingested orally with a Tide pod every day. You can order it on Amazon
Uranium ore. Now at the low, low price of $29.95!
Oh it's ok... I buy my uranium from Amazon
I love the fact that in the section "Customers Who Viewed This Item Also Viewed" Uranium Ore shows up.
Oh god. Okay. I feel like I've been preparing for this post my whole life (or at least since I found these awesome things on amazon):
Make sure you read the comments on these amazing, once in a lifetime products!!!
edit: Aww shoot, I just saw you meant for realz. I got nothing, sorry. But still, you'll have a good laugh!
Yellowcake from Amazon.
Essential for both terrorists and mad scientists
Flintstones!! :)
you can buy urianium! http://www.amazon.com/Images-SI-Uranium-Ore/dp/B000796XXM
You can buy uranium on amazon.
Amazon, actually.
And yes, I know that's not enriched.
Well, you can't get plutonium. But you can buy uranium here and here
You can also buy one of the plutonium cell props from the movie here
God damn I love Amazon...
I already posted This the other day, but it's still the best I've ever found :D Jetsons
You can buy Uranium Ore which seems pretty crazy.
Plus the reviews for it are absolutely hilarious.
Jetsons
This- It's Uranium Ore O_O Jetsons
The reviews on that item are hilarious...just ignore those pesky ‘verified purchase’ customers.
https://www.amazon.com/Images-SI-Uranium-Ore/product-reviews/B000796XXM
It's best if /u/thewebsiteisdown doesn't click this link
You forgot your /s http://www.amazon.com/gp/aw/cr/B000796XXM/ref=mw_dp_cr
Uranium
Great community effort :) Much like the plutonium reviews on Amazon.
Getting the Uranium is not hard. You can buy it on fucking Amazon.
Processing it is the difficult part.
[modification] Perfect $2 O-Rings for reduced travel/sound (100 pk)
http://www.amazon.com/008-Buna-N-O-Ring-Durometer-Black/dp/B000FMWLR8/ref=pd_sim_sbs_indust_2?ie=UTF8&amp;refRID=1QT0BXXR3WW3FT9HNMF9
A post from yesterday
Okay thanks. I'm leaning towards this one since it says its temp resistant up to 500F, waterproof, and is nontoxic after setting.
Just spend a couple bucks and buy yourself some JB Weld. Fix that shit right up.
Do you still have the pieces? If it didn't shatter into tiny pieces, you could definitely try to reconstruct it and glue it back together with JB Weld.
Check out JB Weld. Best damn epoxy ever. Used it to fix a similar problem on an old Dell. Just make sure you clean and sand each piece you apply it to. The sanding is to rough up the surface so you get a better bond.
So. That holder doesn't seem to be the right one for that shower head.
How nice are you wanting this to look vs. the level of function vs. cost and effort you want to put in?
If you want FUNCTIONAL only... I would recommend a big-ass carabiner and some good 2-part epoxy for metal. put the carabiner on that hangar with the epoxy and let that operate as your holder from now one.
Alternative 2: Find a new showerhead mount. Look at the measurements of the products vs. those of the handle on your showerhead. Make sure it fits. Follow the instructions to mount it. TAKE SPECIAL CARE that you either use drywall anchors (which should probably come with the device), or drill it directly into a stud.
Shower Curtain: This is a bit more difficult, because of the positioning of the window and the sink. I would recommend mounting your shower curtain from the ceiling using these. Again, use the mounting instructions that come with them. And for god's sake, when mounting into the ceiling, use drywall anchors. Past that, just get a rod and curtain.
Tools needed for this endeavor include: Small batter operated drill/screwdriver. They are all over amazon for <$50. In fact, if you are TRULY a beginner, here is a cool little set for you. You aren't going to be building any houses with it, but it has some basics you will need around the house. If any of these break, that shows you that you use it enough to warrant something more expensive.
https://www.amazon.com/dp/B0006O1ICE/ref=cm_sw_r_cp_api_7VgCxbJXY6KS5
Use this, buy a new block later when the thermistor dies.
https://www.amazon.com/J-B-Weld-8265S-Reinforced-Hardener/dp/B0006O1ICE/ref=sr_1_2?ie=UTF8&amp;qid=1492996945&amp;sr=8-2&amp;keywords=metal+epoxy
I would get an adapter like this and epoxy it into the hole using JB-Weld or something similarly temperature resistant.
you can solder the snapped cable if you can get enough exposed to make a good joint, but the frame is broken at a point that is constantly under pressure (which is probably why it broke) and if you use solder to join the ends it will just shear again.
I wonder how the broken frame will hold up with something like this. I have never used it to fix headphones but have been pleased with how well steel-reinforced epoxy works in other high-stress applications.
https://www.amazon.ca/Weld-8265S-Compound-Epoxy-Twin-Pack/dp/B0006O1ICE
First of all, are the cracks down near the bottom corners? If so, there is something you can try. I've seen a "repair," but it was on a polycarbonate container, not on the Tritan material, which your container is, assuming it is a home model from 7-10 years ago. So I'm not if it will work, but you could try it. The repair I saw used JB Weld to reinforce the outside of the corners. I don't know if the JB Weld sticks better to polycarbonate than Tritan, but it's worth a shot if you are looking for a repair.
The other thing you can do is look for a container without blade and lid, and transfer over your blade assembly. There's a wrench you can buy specifically for the task, or you can jury rig something. You have to be careful not to under or over tighten.
KennKatastrophe is right that Vitamix would just replace the container shell.
If you must use super glue, then Loctite is my favorite. However it is brittle and sometimes has problems binding to certain types of plastic.
Epoxy works much better for metal or pewter figurines. For most plastics Tenax 7r is the best.
Maybe some jb weld stuff: https://www.amazon.com/J-B-Weld-8265S-Cold-Weld-Reinforced/dp/B0006O1ICE
I would advise against welding, mainly because of the low melting point of brass. I don't know how your piece is laid out, but I imagine that it would be difficult to keep the heat away from the brass while trying to weld the steel together.
Soldering could work, I don't see why it wouldn't albeit a little frustrating. Brazing is something that came to mind. Another is J.B. Weld. I haven't used J.B. Weld for sealing jump rings, but I've used it as weld filler in a pinch.
Good luck!
I had a thin 4 inch long crack in my XC70 oil pan which leaked oil within 20 minutes. I drained the oil out of the car, let the crack drain out fully, cleaned the outside of the pan and coated almost the entire outside of the oil pan with JB weld. This was 20,000 KM ago and the JB weld is holding strong with no sign of giving up. I also fixed a snow blower engine which had a crack in the head with JB weld many years ago, that snow blower still works.
http://www.amazon.com/J-B-Weld-8265S-Original-Reinforced/dp/B0006O1ICE
Superglue is not a good choice for repairs like this.
Use an industrial epoxy like JB Weld
https://www.amazon.com/J-B-Weld-8265S-Cold-Weld-Reinforced/dp/B0006O1ICE
That's quick curing so I wouldn't use that, but I also have never used that product before either, I just know in general the faster curing stuff is more brittle. just the old school JB weld is what i was thinking.
If you go the plug route, the hot glue on the plug is bound to come loose eventually so I picked up some of this.
Only downside being that the plug will be in there forever
jb weld that shit
It won't have the same texture and will look a bit ghetto. But it will get the job done.
This is a popular method. Also, if it doesn't work, you can use something like JB Weld Epoxy (thanks /u/Boomerkuwanga) to attach another small screw to the top of it, let it set, then screw it out with whatever normal driver works for the screw you attached. I'd heard of this method using superglue, but apparently the JB weld is much better!
I bought this a few min ago. http://thistothat.com doesn't even have epoxies so I figured that epoxies are probably just as strong if not stronger than those.
Buy the Jeff Bezos model
Garden Torch
JB Weld
Airsoft Rifle
If you want an actual flame thrower then give your money to these people X15
Or fill a super soaker with gasoline and save $500.
Try using jb weld or some other type of concrete paste and paste the rod to a drum key. You'll have to throw away the drum key, but it is just an idea.
Oooh. Shiny. Black plasti-dip on the butt would probably look nice and provide some extra grip (don't forget to rough up the surface before applying several coats).
Also available at your local auto parts store.
A better idea might be to turn it inside out and spray it with some aerosol Plastidip. It is readily available at any home improvement store, or Wal-Mart or whatever.
Stock rubicon wheels. Sprayed with Plasti Dip, cheap and easy.
[Plasti Dip] (http://www.amazon.com/Performix-11203-Multi-Purpose-Coating-Aerosol/dp/B0006SU3QW) is what I've seen used most.
Plasti Dip
Its that easy
Like slapping a coat of paint on an old motorcycle!
Is it just regular black plasti dip like this?
Or is it some special stuff, like a kit, matte, glossy, etc.?
Thanks again! Def going with your plan.
FYI it is not hard to plasti-dip anything these days nor would it take tons or even need to be dipped any more as plasti-dip come sin spray can form.
http://www.homedepot.com/p/Plasti-Dip-11-oz-Copper-Metalizer-Spray-6-Pack-11236-6/204416730
https://www.amazon.com/Performix-11203-Multi-Purpose-Coating-Aerosol/dp/B0006SU3QW?ie=UTF8&amp;*Version*=1&amp;*entries*=0
Plasti-dip
http://www.amazon.com/Performix-11203-Multi-Purpose-Coating-Aerosol/dp/B0006SU3QW
No problem. You more or less do the same thing for the paddle. If you are doing just that though, why not use some plasti-dip? Comes in many colors, gives you some extra grip, and no need to prime. Just clean it, coat it, and let it sit for however long it says on the can.
Most people spray it on the bottom of their bags so they don't get soggy and wet. Amazon has it and most hardware stores do as well. Just google disc golf plasti-dip bags and I'm sure you're see some threads about it.
http://www.amazon.com/Performix-11203-Multi-Purpose-Coating-Aerosol/dp/B0006SU3QW/ref=sr_1_1?s=hi&amp;ie=UTF8&amp;qid=1406612535&amp;sr=1-1&amp;keywords=plasti+dip
You should buy some rubber spray off amazon and spray your foam so it doesn’t fall apart. That’s the move.
Performix 11203 Plasti Dip Black Multi-Purpose Rubber Coating Aerosol - 11 oz. https://www.amazon.com/dp/B0006SU3QW/ref=cm_sw_r_cp_api_i_rAb4Ab2NNV0W2
https://www.amazon.com/Performix-11203-Multi-Purpose-Coating-Aerosol/dp/B0006SU3QW/ref=sr_1_1?ie=UTF8&amp;qid=1495541546&amp;sr=8-1&amp;keywords=Plastic+dip
I did a quick search and found these.
https://www.amazon.com/Aluminium-Cigar-Tube-Travel-Screw/dp/B01JJL41FA/ref=sr_1_fkmr1_1_a_it?ie=UTF8&amp;qid=1494609104&amp;sr=8-1-fkmr1&amp;keywords=garcia+vega+cigar+tube
https://www.amazon.com/Stainless-Steel-Cigar-Tube-Travel/dp/B01JJL4AX8/ref=sr_1_fkmr1_2_a_it?ie=UTF8&amp;qid=1494609381&amp;sr=8-2-fkmr1&amp;keywords=garcia+vega+cigar+tube
They would need coated on the inside where the clicker would touch. I'm thinking spraying some plasti dip would work.
https://www.amazon.com/Performix-11203-Multi-Purpose-Coating-Aerosol/dp/B0006SU3QW/ref=sr_1_1?ie=UTF8&amp;qid=1494609272&amp;sr=8-1&amp;keywords=plasti+dip
Here'a a nice oak one for $10.
https://www.amazon.com/dp/B01HMTW00O?psc=1
Electrical tape to tape off any ports first. Then use plasti-dip : https://www.amazon.com/Performix-11203-Multi-Purpose-Coating-Aerosol/dp/B0006SU3QW
Plasti-dip. Spray it on like spray paint, but peels off like tape. http://www.amazon.com/Performix-11203-Multi-Purpose-Coating-Aerosol/dp/B0006SU3QW
I originally looked to fit the seachem bottles with pumps but couldn't find anything that'd fit. It's just a big bottle with a little opening. Here's the bottles I ended up buying. And here's the plasti-dip I used. Although I bought the plasti-dip at the local Lowes for less than Amazon sells it for.
Edit: while getting the link for those bottles, I found a pack of black bottles in the list of related items. More expensive, but it'd have probably been easier. Link
Performix 11203 Plasti Dip Black Multi-Purpose Rubber Coating Aerosol - 11 oz. by Performix http://www.amazon.com/dp/B0006SU3QW/ref=cm_sw_r_udp_awd_XLipub12RWJGR
Worth just figuring out how to do it yourself honestly.
Or just spend $5 and plasti dip.
https://www.amazon.com/Performix-11203-Multi-Purpose-Coating-Aerosol/dp/B0006SU3QW/ref=sr_1_3?s=automotive&amp;ie=UTF8&amp;qid=1541530167&amp;sr=1-3&amp;keywords=plasti+dip+black
https://www.youtube.com/watch?v=EWS9-lTfd30
https://youtu.be/Dxz2dJ6tfeI?t=640
Actually, his second guide tells you all about paint! His guides are VERY useful, and if you're interested, he also does a weekly Q&A livestream via Google Hangouts where you can ask questions about foam fabrication (among other things, usually) and he answers them right then and there! If you follow his Facebook page, he will post who his guest for the week (if any) is, and what time he's streaming.
I hope this helps you out! (To be honest, I'm not a big fan of making armor out of foam, but I've been giving it more of a shot lately. For the foam things that I HAVE made, I've used Plasti-Dip to seal, and then whatever color of spray paints I need, followed by acrylics for details/weathering.)
Edit - Formatting & a word
Plasti Dip you can buy black and white at walmart and you can peel the paint off whenever you want. youtube it
You could just buy some of this
Thanks! I'm a home user, and yes I meant 200kg force (Ebay sells them for about £40).
> Ok so to answer your question: you could wrap it in a rubber mold (which you can paint on in layers)
Any high rated product from Amazon.co.uk you can recommend? How about something like this: http://www.amazon.co.uk/Plastidip-Plastic-Rubber-Paint-400ml/dp/B0006SU3QW
Also maybe this? http://www.amazon.co.uk/250mls-Liquid-Latex-Mold-Special/dp/B004FPMN4C
I think the idea with this second one is to dip objects in multiple times (waiting minutes or hours between each layer), and each time a layer is added. You can dip multiple times, and get it as thick as you want.
> or even glue on sheets of rubber (probably your best bet)
Again, any product page you can point me to? Hopefully, UHU all purpose glue will stick it together. This approach will look less 'clean' than the previous though...
I don't mind not using rubber by the way.
> Remember, the thicker your protective layer, the bigger your air gap, and the weaker the strength will be.
If the distance is more than a few centimetres, the force will be the same AFAIK. It's only weaker in the sense that the metal can't physically touch the actual magnet if it's got a coating.
> And as always, be careful with magnets that strong!
That's why I want to get it coated :)
How do you rate the safety of a cube versus a cylinder versus a sphere? A sphere has no sharp edges or corners, but perhaps more importantly, flat metallic objects won't have so much surface area to 'touch' the spherical surface completely (unless the object was also curved like the magnet, which is unlikely).
Not sure how easy it is to detach metal objects from a 2" diameter sphere though compared to an equivalently strong cube (about 1.6" cube).
> They are cool and fun, but things go wrong very quickly in ways you will not expect.
Any stories to share? Have you ever come close to an accident?
I think this would be a good choice.
You could fashion a wall shelf for the MB with two wall shelf brackets (mounted upside-down) and a can of rubber spray for like $12. For the display, I'd go with the standard VESA wall-mounting option of your choice.
Edit: Shit, I might do this for myself now.
https://www.amazon.com/Performix-11203-Multi-Purpose-Coating-Aerosol/dp/B0006SU3QW/
It's more like spray paint. It works super well.
I do have this stuff at home which I used to coat my GoPro casing to blacken it. I used maybe 2 coats, but honestly the durability is a bit crap. I doubt very much it would stand up to the abrasion requirements of racking a barbell.
Did you know Amazon will donate a portion of every purchase if you shop by going to smile.amazon.com instead? Over $50,000,000 has been raised for charity - all you need to do is change the URL!
Here are your smile-ified links:
https://smile.amazon.com/Performix-11203-Multi-Purpose-Coating-Aerosol/dp/B0006SU3QW/ref=sr_1_1
---
^^i'm ^^a ^^friendly&nbsp;bot
for cables, check out either cablemod or mainframecustoms
for painting, I dont think there's a service that you can just ship your parts off to have them painted, but for painting pc parts, use plastidip. it's non-conductive, covers in 2 coats, comes in like 1000 colors, and is REMOVABLE just by peeling it off. for your case you may want to use something else, but for backplates and ssd's use plastidip
here's a linus video on plastidipping parts
one of my friends used clear coat to make it more shiny but I just used plastidip and then the color that I wanted and it worked pretty well
here is an amazon link to stuff we used it comes in different colors as well.
The one I'm using is Performix, not sure if that's the original. I picked it up from HomeDepot but you may even be able to find it at the local auto shop. I've used it to blacken the headlight rings on my car. Amazon link: http://www.amazon.com/Performix-11203-Multi-Purpose-Coating-Aerosol/dp/B0006SU3QW
I did 6 coats, about 15 minutes of drying between coats. Brand wise, i just brought the first one that came up on amazon: https://www.amazon.com/Performix-11203-Multi-Purpose-Coating-Aerosol/dp/B0006SU3QW/ref=sr_1_1?ie=UTF8&amp;qid=1480126309&amp;sr=8-1&amp;keywords=plasti+dip
Spray
I got mine at home depot
Yeah i read to maybe use a foam sealer of some kind before painting it, with maybe acrylic paint? This stuff??
You can always use Plasti Dip. It is basically spray paint but it is non permanent and can be removed.
I have the same chair. I traded it in for a DX Racer but I did not need to... It's a great chair. If I may offer a suggestion. Coat the parts you made with [plasti dip.] (http://www.amazon.com/Performix-11203-Multi-Purpose-Coating-Aerosol/dp/B0006SU3QW/ref=sr_1_1?ie=UTF8&amp;qid=1426521190&amp;sr=8-1&amp;keywords=plasti+dip+black) That would be the finishing touch.
7 coats of black and 5 coats of gold. :)
4 cans should be enough for four wheels and I think 3 is enough for the gold. :)
It looks mean.
http://www.amazon.com/gp/aw/d/B0006SU3QW?cache=d678df272a3c91b9686c08d4631393eb&amp;pi=SY200_QL40&amp;qid=1405885609&amp;sr=8-3#ref=mp_s_a_1_3
Was this the plast dip you used?
https://www.amazon.com/gp/product/B0006SU3QW/ref=ox_sc_act_title_1?smid=ATVPDKIKX0DER&amp;psc=1