 Reddit reviews Neoteck DTI Digital Dial Indicator 1''/25.4mm | Digital Probe Indicator Dial Test Gauge High Resolution: 0.0005''/0.01mm
We found 5 Reddit comments about Neoteck DTI Digital Dial Indicator 1''/25.4mm | Digital Probe Indicator Dial Test Gauge High Resolution: 0.0005''/0.01mm. Here are the top ones, ranked by their Reddit score.
【Aluminum Alloy Digital Dial Indicator】 Large LCD Display with 4 Digits, Be Used to Accurately Measure Small Linear Distances in Mechanical and Industrial Processes without Reading Errors, An Ideal Tool for Mechanical, Industrial Processes and Laboratory Use【0 ~ 25.4 mm Measuring Range】 Measuring Range from 0 ~ 25.4 mm (0 ~ 1 inch), High Resolution up to 0.01 mm (0.0005")【Included Rear Cover】 Hole Diameter: 6.5mm, It is Removable and Can be Used on Different Magnetic Base Holder Stand【Inch/Metric Conversion】 Switchable between mm and inch, Suitable for All Kinds of Measurement【Zero Setting, with Conveniencet Ports】RS232 Data Output Interface and LR44 Battery Compartment, East to Replace Battery
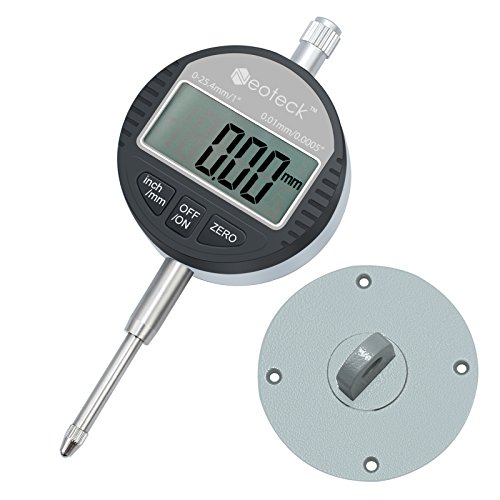
here is the mount
and here is the sensor.
You're right that automation, when done right, is generally more reliable and desirable due to precise repeatability. But the issue here is that the current ABL sensors/systems, from an engineering perspective, are not done right.
A properly engineered auto bed leveling system would actually turn the screws and physically level the bed. But the existing ABL sensors don't do that. They take readings and compute in firmware the orientation of the bed, and cause the Z axis to constantly adjust during the length of the print to compensate. This method opens the door to other issues that are unique to an ABL-enabled system:
I don't think I have any "superstar talent", as you put it. I just use a feeler gauge to set a known distance from the nozzle to the bed in one corner, and zero out a digital dial gauge that I have mounted to my extruder carriage during leveling. Then I just move the extruder head around each corner of the build plate, adjusting the bed screws until the dial gauge reads within +/- 0.01mm (the tolerance of the gauge itself) of zero on each corner. It is a perfectly repeatable process, and takes no more than 2-3 minutes to get a perfectly level bed. (Edit: This is my method using those tools because I'm a perfectionist, but good results can also be had with the tried-and-true and dirt-cheap "paper between nozzle and bed" method). On a properly rigid system with good compression on the bed leveling springs, I only have to level once a month at most...and that's usually when I've changed something in the system that invalidates my previous leveling anyways.
All this to say...I just believe your initial post was overly hyperbolic. It sounds like you had a bad experience, and if ABL worked to solve that problem for you, great! But to use your singular experience as a reason to emphatically suggest at length that someone new to the hobby should not even consider any printer that comes without ABL, especially when there are countless more people who have entered the hobby just fine without ABL? That's a bit much.
Some of the best advice I received was to simply use a piece of paper and level your bed only at the leveling screws.
After you are close print one of these.
depth dial holder doohickey
And buy one of these to go into it.
dial indicator
After that you can throw away that annoying piece of paper.
i basically did the same thing in this video: https://www.youtube.com/watch?v=Axu_Ix-nPTY
Measurement tools used: 0.001mm Resolution Dial Indicator& Indicator Mount
​
this measurement process should work with semi-floating rotors only. fully floating race rotors would have too much movement to measure properly i think.
I will also make sure to clean the caliper pistons frequently so the pistons retract correctly and prevent over heating rotors. I've actually never cleaned them in the past.
Many people have success with dial indicator. But I can't figure out a way to mount it that works well. Neoteck DTI Digital Dial Indicator 0.01/.0005'' Digital Probe Indicator Dial Test Gauge Range 0-25.4mm/1'' Dial Test Indicators Electronic Indicator Gauge https://www.amazon.com/dp/B01JYCVHLK/ref=cm_sw_r_cp_apa_.gYFyb3FZ6GB7