Best microprocessors according to redditors
We found 22 Reddit comments discussing the best microprocessors. We ranked the 6 resulting products by number of redditors who mentioned them. Here are the top 20.
We found 22 Reddit comments discussing the best microprocessors. We ranked the 6 resulting products by number of redditors who mentioned them. Here are the top 20.


There are a ton of these in Amazon's database. For example, for $110 someone will remove the CPU from your computer and replace it with an ATTINY85...
Replace the Arduino with a Teensy3.2; it runs Arduino code and is very small in comparison (with more RAM than the Arduino Uno). Solder the connections to the Teensy. Power the Teensy directly from the battery bank and use a micro USB breakout to convert the battery bank's output to wires that can be soldered into the Teensy. The LEDs should receive power in parallel, not in series. I've found the capacitor unnecessary in every wearable LED project I've done. If you only have single-core wire, helix the three strands together to make a neater cable. I usually build a holster from a coat hanger to hold the battery pack on the hat. It can also go in your pocket.
I can't remember the specifics, but you don't want BOOT0 or BOOT1 floating. If I remember right, you pull BOOT0 low and leave BOOT1 pulled high. You may also need VDDA connected.
Most off-the-shelf dev board schematics are complicated due to all the extra components on board, so if you're a beginner and you're trying to use them for reference it can be a pain. Here's a schematic for an incredibly simple STM32F4 dev board. It literally only has the supporting circuitry to make the thing run. Here's the product page for said board. Even though this is an STM32F4, the supporting circuitry is more than likely the same as the STM32F3 series. I'd double check the data sheet just in case, though. See the bottom left of the schematic for the BOOT pins.
Not OP, but do you mean the perfboard or teensy?
To start off you can buy a Teensy 2.0 and follow Hasu's guide. If you need help in the future a PM is welcome.
Thanks. the case and blue keycap are both 3d printed. total cost not including the case and cap is $60 or less. The backlight is not RBG, but I think I've seen some that are.
Big Switch
Teensy 2.0
10mm LED
Switches: any two MX switches will work. NovelKeys has a big selection.
Hey guys! While I wait for the rest of my planck parts to arrive I figured I'd build a little 3x3 macro board using my keyswitch tester. I have a teensy 2.0 I got from here. I've soldered the three rows of diodes/grounds together, but I have no clue as to what to do next, is there a guide I could follow or something? The closest thing I've found online is this but it doesn't go into very much detail about the wiring and i have no idea how it carries over to a board this small.
Hey there everyone! Sorry for the late followup. I've been unpacking from graduation and the like... Also, as a neat update to my earlier post, I was just contacted by the College Football Hall of Fame to display my cap in the Hall for a few weeks. Neat!
Unfortunately, I didn't take pictures during the build process, but here's my general construction setup.
Supplies needed:
(https://www.amazon.com/gp/product/B00SSY1AJU/ref=oh_aui_detailpage_o00_s01?ie=UTF8&psc=1)
(https://www.adafruit.com/product/1902)
Steps:
General Information
Picture of the Grad Cap During Graduation
Link to Source Video
Arduino Source Code
If you don't want to use a PS/2 to USB adapter, you have a couple of options. One somewhat difficult and one very easy. For both, you'll need to open up the keyboard with a tool like this.
The more difficult way is to use Soarer's Converter software running on a Teensy 2.0. This involves soldering the Teensy to the appropriate pins on the Model M's original controller and flashing the Soarer's Converter software to the Teensy.
I did this with an IBM Model F (AT) and it works great: https://imgur.com/a/ge80k
The easiest option is to purchase a replacement controller from Phosphor Glow. For this, you'll open up the keyboard, remove the original controller and put the new one in. No soldering involved unless you opt for the kit instead of the fully assembled and ready to go board.
I did this on one of my Model M keyboards: https://imgur.com/a/NY78q
Do you mean something like this paired with this and this and I can use that like a my Arduino Micro? (I guess the Micro has a lot more power though).
How would you connect that to your pc? I thought a programmer was only needed so you can burn your programs to the microcontroller? Could you use that microcontroller without a programmer after programming to it what you want?
The genuine Arduino UNO R3 is $22 on Amazon US, but that's for the chip plus the dev board. You can buy another 3 of the base MCU (ATmega328) in a DIP package with sockets for $14, here: https://www.amazon.com/Atmega328-PU-Sockets-Bundle-Arduino-Bootloade/dp/B018ZR3F7O. Once you have the dev board, you can use it to program the bootloader onto bare ~328 chips to use in separate projects...
You can get a bare ATmega328 in a DIP package from aliexpress for $1.28, eg here, but delivery will be longer.
If you search for ATmega328 on amazon or aliexpress, you can see many more options, as far as form factor, dev board contents, etc.
You can see the patterns in judgement on the graph in u/pieman445's comment. There's gaps where you simply can't hit the arrow. It could lead to lost steps or late judgements even though you stepped on time. I switched over to a teensy microcontroller and it completely eliminated the problem
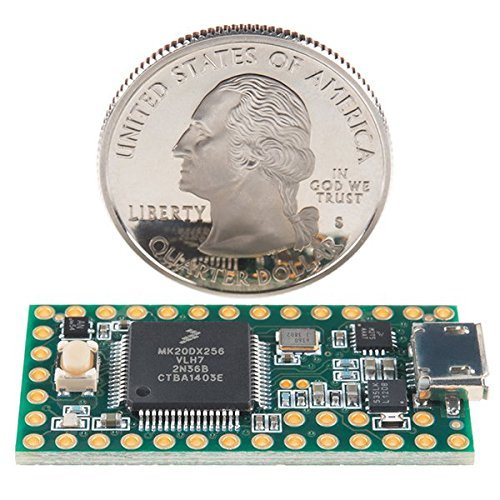
Cool, I have been messing with some stuff I have at home already, I am going to go with a Tennsy setup for this. The Teensy 3.2 is small and plenty powerful enough.
https://www.amazon.com/PJRC-6485230-Teensy-3-2/dp/B015M3K5NG/ref=sr_1_1?ie=UTF8&qid=1510164964&sr=8-1&keywords=teensy+3.2
it has an add on board that handles everything else called a "prop board" for doing projects exactly like this. 10DOF motion, 2W amp, controls LEDs also.
https://www.amazon.com/gp/product/B06ZYN7LLC/ref=oh_aui_detailpage_o02_s00?ie=UTF8&psc=1
price is still cheaper than a sound board, and way more configurable.
I live in Germany, so not sure how much use my sources would be. But in essence, it's one of those https://www.amazon.com/Aupo-Thermal-Fuse-Cutoff-BF184/dp/B0124KO99G. They're quite easy to integrate into the circuit - my silicone pad had 2 wires for AC. One I've connected directly to the line voltage in the plug, one to neutral through the SSR. I've cut the line wire quite close to the heater, soldered the thermal fuse in the break and then covered with high-temp RTV silicone (something like https://www.amazon.com/J-B-Weld-31314-Temperature-Silicone/dp/B00ID8IUJY/). And then once it hardened, added some more silicone. So it wont fall off or whatever. Maximum bed temp is set to 140 in my firmware, with the fuse breaking at 167, so I've got quite a bit of a leeway here. The downside is that if it does indeed fail - you're in for a lot of cleaning, it's not easy to rip that stuff from the silicone
Also if you do go down this route, I'd suggest looking up for to solder those fuses - I've destroyed the 1st one I've tried. Apparently, if you heat a thermal fuse with a soldering iron, they trip (who'd have guessed). What did it for me was soldering to the legs while the body of the fuse was submerged in icy water. I've also slid some heatshink on the fuse body and legs because the body is not insulated from the legs. All in all it was a bit of work but now I'm reasonably sure that my awesome 600W heated bed won't kill anything or set the house on fire.
Where are you finding ATTinys for 40c?
Mouser(2.13 USD)
Ebay(1.25 USD)
Amazon(2.99 USD)
Ali Express(1.35 USD)
and a teensy 2.0 ... just the base one .... it has a female MINI usb, right? not a micro?
http://www.amazon.com/gp/product/B00NC43256?psc=1&redirect=true&ref_=ox_sc_act_title_3&smid=AFBMYHRQ9KU5H
Karlsson Robotics is the only legitimate seller.
edit: Looks like Sports Internet Solutions is also an official distributor.
https://www.amazon.com/gp/product/B00NC43256/ref=ox_sc_act_title_1?ie=UTF8&psc=1&smid=AFBMYHRQ9KU5H
https://forum.pjrc.com/threads/23601-Official-Distributors
Likely to get a fake from any other seller.
Also, it's a dollar less buying it directly from PJRC.com. $16 + $4 postage.
https://pjrc.com/store/teensy.html
nope, just something like this
Here is mine I followed this guide. When I bought mine it was only $14 on Amazon. If you start with the Jellycomb Numpad, you don't have to buy switches or a case... Just the Teensy 2.0 and the diodes.
There may be other options, this one is very easy to get you started.
Teensy 2.0
Teensy 2.0 pinout
TMK flashing
It's called the Teensy 2.0. You can get them from ebay, amazon, directly from pjrc, but I got mine from Mouser. It is fully programable with the tmk or qmk firmwares.