(Part 3) Best paper trimmers & blades according to redditors
We found 125 Reddit comments discussing the best paper trimmers & blades. We ranked the 52 resulting products by number of redditors who mentioned them. Here are the products ranked 41-60. You can also go back to the previous section.


Hello all, in a previous post made yesterday, I had replied with a picture of a drawer of my Alex 9 unit and received a few of inquiries about how I made my drawer organizers. So, I decided to try my best to tell you how I did it. I apologize I wasn't able to make a complete step by step with a ton of photos, but this process was done over a year ago, and I wasn't really planning on doing it again since I finished!
Materials Needed:
Ruler
X-acto Knife
-I would recommend some extra blades as well-
--Foam Board (the more the merrier)--
Flathead Pins
--Contact Paper--
-The blades become dull fairly quickly, I think I used about four during the process-
--I was able to get a piece for $.99 at Michael’s on sale
---I decided to wrap each piece with contact paper because it makes it very easy to clean. In my actual vanity, I used fabric and it has gotten dirty and damaged and I 100% don't recommend it--
Template Materials:
Copy Paper or Grid Paper
Ruler
Actual makeup products
Steps:
Some other things to note:
In my palette drawer, I created L shaped panels to allow for the palette to be better seen
I also purchased from byAlegory a liquid lipstick and lipstick organizers to build around
In my lipstick drawer, I purchased little glass beads to allow for the products to stand up better
My paper towel drawer has a holder which I created using a wooden dowel and clay
Also, I grabbed plastic liquid dispensers to easily get to my various liquids
Managed to slice my finger open making little lids of acrylic to hold all my disposable paper products
*Most of my other acrylic pieces have been purchased from MUJI
I hope you enjoyed my
~teal battlestation~, if you have any other questions about it feel free to ask. And I'm sorry if it was unclear at all. And, I'm 100% aware I have a stupid amount of makeup that I've gotten over the years as a makeup artist, Sephora employee, and a true Make Up Addict.Nimm halt sowas
Swingline
With the laser cutter I was just playing with the settings myself, I could cut 5 sheets at a time with clean (though brown) edges but anything more and it would start to burn. If it were my own laser, I wouldn't mind so much and I could set up multiple stacks of paper with registration lines but I was on borrowed time.
That trimmer you linked is an idea, I have a fancy Rotatrim I could use like that, it will just be time consuming. Time isn't a big problem for this project obviously, I only need to make one book and I'm not selling anything but I like to think in terms of production. I will have to look around town for a clicker, it seems like an invaluable tool for book art, especially when you think about stamping covers.
The sidebar has some great info on tools and what to do. Get an exacto knife and plenty of blades, get a self healing cutting mat, get some cardstock to print onto for a sturdy model, get some Aleenes tacky glue. Print the model onto the cardstock and then carefully and slowly cut it out. Fold the tabs, glue with the tacky glue (only takes 30 seconds to a minute to attach firmly) and continue! Take your time and cut as accurately as possible in order to get the best result..
Some will point you towards getting the tamiya knife, and here's a similar style olfa art knife. Note the replacement blades for the olfa. I also happen to use snap off blades, in addition to xacto and the tamiya knife. I have an olfa one. I happen to not use exacto knives for gundam anymore though. The tamiya model knife and olfa snap off meet my needs just fine due to the angles of cuts I tend to make and angle of the cutting edges of the knives.
And some sand paper, since you included putty.
And lastly, some cheap ass brushes to go along with good paint brushes; decent tooth pics (if you snap it off, the thin layers of wood can be a cheap fine detail brush)... etc.
It would be if it would accept a 24" wide sheet. Until then, this is the old standby.
I like having absolute control over my grind. I find different grinders grind herb to dust or leave it quite chunky. The space case is a chunky grind, and my easyleaf mashes anything but wet bud into powder. Those plastic grinders with the pyramid teeth just mash the herb and gum up first session.
Another reason is the scissors are much easier to clean. Grinders get filled with gunk unless you keep them good and clean - just like scissors. The scissors just require a whip over with a blade. With a grinder you have to pick around the teeth, it's nowhere near as bad if you only grind properly dried bud. However, I've also had problems with properly cured resinous trees.
The only thing I don't like is how long it takes to chop with the scissors, and the dreaded knuckle ache.
I'm thinking of getting a Russell Hobbs mini chopper as a decent halfway house - quick, easy to clean, and controllable. I have one in the kitchen, but if I were caught experimenting there would be some very harsh words in my direction.
E: Vis scissors I'm a believer in a very short blade (oh that's what they're called) and a long handle, more leverage means less stress on your finger and thumb. A nice pointed blade like the ones you're using helps with gunk buildup too.
Instead of scissors you could use those tiny trimming shears, or a bigger bowl and a pair of pruning shears. You could go for hours with a pair of those.
I usually just start with basic 110lb cardstock. This is commonly available at Staples and other sources, and is easy to run through almost any printer.
​
https://www.staples.com/Staples-Card-Stock/product_SS992807
​
Once things are a little more stable you can either print onto label stock and put it onto mat board, or just print onto regular paper and use a spray adhesive like this:
​
https://www.uline.com/BL_773/3M-Light-Duty-Aerosols
​
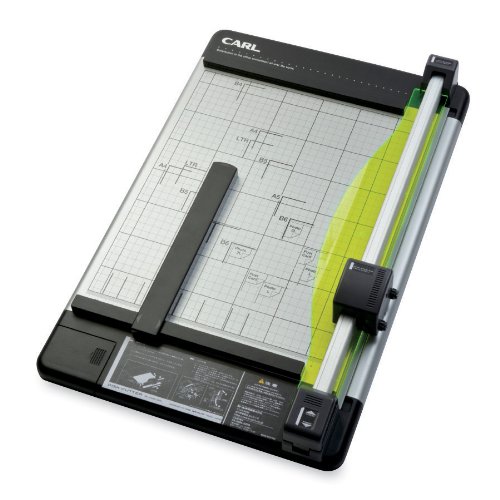
For cutting, you can use an xacto knife and a metal ruler. But if you're going to be cutting a lot, it's worth investing in a rotary cutter like this:
​
https://www.amazon.com/Heavy-Rotary-Paper-Trimmer-18inch/dp/B0006HV9O8
​
That Carl rotary trimmer is by far the most useful thing I have ever purchased to help me with game prototypes.
​
Find a method that is most convenient for you and allows you to make and alter cards as quickly as possible.
What works for me:
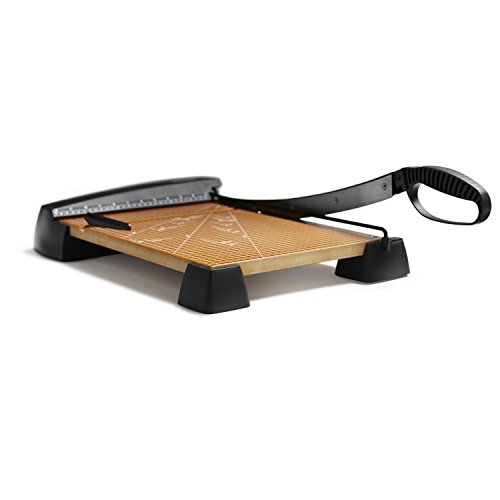
I use 3x5 index cards cut in half for my initial prototypes. Once I want a higher quality prototype I use multideck for mac. Multideck takes csv datasources for card content and then you use a wysiwyg editor for card layout. I then print the cards on regular printer paper and cut them with a guillotine paper cutter. Cutting was the biggest time sink for me, so I think a good paper cutter is essential. Once cut, I sleeve the cards with a magic card as a back to make them sturdy. One last tip: If you are going to sleeve your cards, make the layout of the cards you print slightly smaller than the sleeve you plan to put it in.
Links to resources mentioned above:
edit: lists are hard
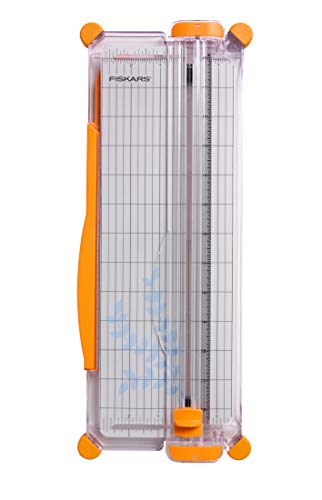
I went to staples and bought a slide cutter.
​
https://www.amazon.com/Fiskars-SureCut-Portable-Paper-Trimmer/dp/B000OMYB18/ref=pd_sbs_229_2/132-5103649-4317965?_encoding=UTF8&pd_rd_i=B000OMYB18&pd_rd_r=ea2eea45-752a-11e9-a70e-fdfd69152f1b&pd_rd_w=XauCU&pd_rd_wg=I3OCF&pf_rd_p=588939de-d3f8-42f1-a3d8-d556eae5797d&pf_rd_r=HSFEGFBQ1A4B4N10CQ5B&psc=1&refRID=HSFEGFBQ1A4B4N10CQ5B
One of these, and it was really easy to cut in straight lines with.
>accantono l'idea romantica dell'artigiana crossover
Non puoi arrenderti così, dai...
Per il forex puoi usare una taglierina da carta un po' seria. Se invece, come per me, ogni scusa è buona per comprare giocattoli nuovi, questo è un gran bel aggeggino.