(Part 2) Best sewing tools according to redditors
We found 166 Reddit comments discussing the best sewing tools. We ranked the 105 resulting products by number of redditors who mentioned them. Here are the products ranked 21-40. You can also go back to the previous section.


Most men's clothing are pretty archetypal, and honestly the stuff you'd find in Target's Goodfellow line is representative of a lot of mall brands but in a lower quality/synthetics. Banana Republic, J.Crew, and Abercrombie & Fitch carry a lot of the same things but in fuller or thicker fabrics that may be as cheap as Target on sale. All three stores often have 40-60% off and all sport a 15% off email sign-up code that you can keep getting with burner emails, for instance, in-store and online. Sub to /r/frugalmalefashion to be alerted of any sales that stand out.
If you're willing to forgo the traditional shopping experience then online second-hand is a way to go. Grailed.com, /r/malefasionmarket, and the B/S/T threads in /r/malefasionadvice, and eBay all have folks looking to move things but you'll benefit greatly to know your size and what you're looking for whether it be a brand or type of item. You can often find higher-end items for pretty reasonable prices—stuff like raw denim and premium jackets/shirts—for a fraction of or a "good for what they are" price.
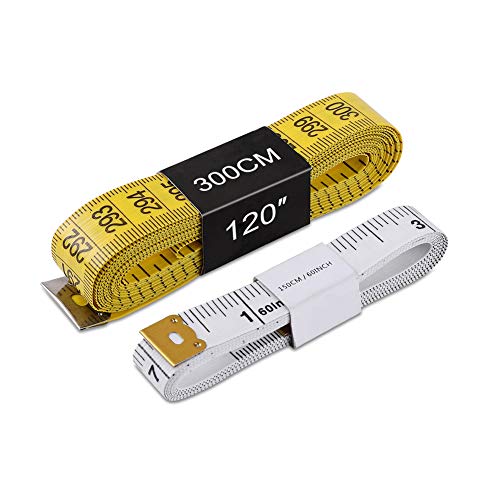
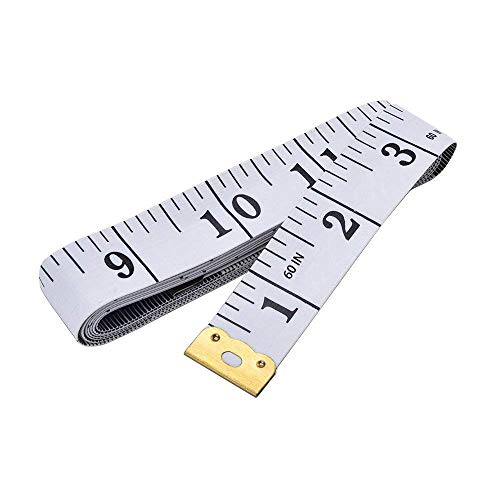
Grab a cloth measuring tape and learn to measure using your favorite-fitting clothing on a flat surface for reference as most people are willing to provide their item's dimensions for you (if they haven't posted them already).
If you happen to be a M-L-slimish person or a 34" waist check out my Grailed store for something that catches your eye. I've a bunch more to upload but I've been too lazy/depressed and measuring everything takes a good minute per item.
I can practically guarantee you need to size yourself. you can use the /r/ABraThatFits tool, and post your measurements here for ppl to help check results for you.
an easier way, that also works great, use this video. do you have a tape measure?
edit: my mom never took me bra shopping.
The fabric is cute and for the purpose they'll be fine. Good work.
You should practice your basic stitching so the seams are nice and straight, not bumpy. You can practice on lined paper without thread, but after a time there's no substitute for actual fabric. You can use the guide on the machine, mark the line in tailor's chalk or with a dressmaker's pencil, or baste right alongside the stitching line and use it as a guide.
You need to work on your corners so they are sharp. You should do samples on scraps of fabric. With thin fabric with no interfacing or very thin interfacing it's usually fine to simply sew to the intersection, put the needle down, pivot and sew the other side. But with thick fabric it's often better to sew the corner and leave room in the seam allowance for the bulkiness of the fabric. You do that by stitching across the corner on the diagonal or sewing a semicircle of three to four stitches across it.
You also should experiment with trimming the fabric on the corner before turning it. I wouldn't do it unless necessary, but sometimes it is. Start conservatively.
To pull out out the corners, you can use a bamboo corner turner, but there are other methods, such as using a needle and thread. Don't use use the point of your scissors, you could make a hole.
Sometimes it helps to stop about 1/2 inch from the corner and shorten the stitch length. When you pass the corner, after 1/2 inch you resume the ordinary stitch length.
That's the nature of sewing. There are many variables, even for a corner.
You should also manipulate the seam so when you press the top the underside doesn't show.
​
​
Does your friend’s dog have the “do not distract during job” or something like that service dog vest ?
My classmate had it and when I asked them about the effective of the vest and she said it’s worked fairly well expect for some children
patches
vest
Get a box of these. Makes it 100x easier.
TecUnite 50 Pieces Gourd Shaped Plastic Needle Threaders with Clear Box, Assorted Colors https://www.amazon.com/dp/B07CP2J4BD/ref=cm_sw_r_cp_api_i_5oCxDbC7YEXWQ
I have a threader similar to these with a tiny blade at the bottom for quick slices. I don't think I've ever used it, but I've never needed to, I've always had my scissors close by.
A typical toothpick tip diameter is about 0.6mm. Espresso grinds are about 0.2mm in diameter. You'll be able to break apart massive clumps with a toothpick, but medium to small clumps are just going to be pushed around.
The diameter of the needle threader is about 0.3mm. (according to this listing https://www.amazon.com/uxcell-Needle-Threader-Thread-Device/dp/B07R48D27Z).
A booklet of blank croquis so she can sketch ideas easily. Below is a general one, or you can google and find places that will draw a croquis for her own body.
https://www.amazon.com/Fashion-Sketchpad-Templates-Designing-Portfolio/dp/0811877884/ref=mp_s_a_1_3?keywords=design+sketch+pad&qid=1567829492&s=gateway&sr=8-3
Tailoring tools like a tailors ham, sleeve roll, clapper, and silk organza pressing cloths.
Pattern drafting materials like medical paper, a crap ton of scotch magic tape, and nice curves (the ones you can see through are best.
https://www.amazon.com/Collins-4-Styling-Design-Ruler/dp/B07FFLVMMC/ref=mp_s_a_1_21?keywords=hip+curve+ruler&qid=1567829770&s=gateway&sprefix=hip+cu&sr=8-21
I don't have any experience drawing on faux leather/vinyl but I have tried using a sharpie marker on black leather shoes to cover up a small scuff mark. It worked for a short while until it started to fade and turned green in the sunlight. If you do chose to use permanent markers, look for ones containing archival-quality ink as they are resistant to fading over time. Another option you could look into is leather dye pens. Realeather offers them in colour packs and Tandy makes refillable pens that you load with leather dye. I haven't tried any of these personally though. Good luck!
They make stick on thread cutters and handheld needle threaders are pretty easy to use
This is modification: https://scanlime.org/2010/01/diy-sewing-machine-retrofit/
First, get a leather edge beveler, like this. it will make your leather appear much more polished and clean.
Next, get a stitching awl and some waxed nylon thread. i cant quite see your stitches because it looks like you filled the stitch line with leather conditioner, but they seem like they are too far apart. when punching the holes, it is useful to use a stitching pony to help hold everything together while you stitch.
Your edges are unfinished, but it isnt too late.... you can still burnish them. get them slightly damp by wiping with a wet sponge (you only need one or two passes!) and then rub the edge vigorously with a very smooth object. even a sharpie or a very smooth countertop will work. I know some folks that use denim or canvas as well... like they say, there are many ways to skin a cat! just keep rubbing until the edge appears shiny and smooth. it shouldnt take more than a few minutes.
also, the watch distracts from the presentation of your craftsmanship. remove it from all future photos
You can probably stitch it back up yourself. Go on Amazon and order a stitching Awl. They are invaluable to any goalie or player. I keep one in each of my bags. There are many youtube videos out there on how to use them. Here's the one I have: https://www.amazon.com/Speedy-Stitcher-Sewing-Awl/dp/B07BMN71QF
after making some for my last kit, i bought these on amazon and they're great so far!
https://www.amazon.com/dp/B07GFDYB17/ref=cm_sw_r_cp_apa_i_5W-BDbKQDS9JS
You've already been given good advice about yardage estimates, but I'm here to say dear god do NOT try to gather all those ruffles. You absolutely need a pleating presser foot. They come in various high shank and low shank varieties, can vary in price from $12 to $100 and can be troublesome at times. Some work better than others (I can't recommend a specific, mine is quite old), cheaper ones do wear out and "grip" less well.. some work well on tulle and some like to snag. It will take a bit of testing, but one its done you can measure your sample and go "on these settings, I do a 1:3.2 gather" and do all your math.... and then glaze over while running all the pleats.
You may also want to look into the rolls of precut tulle widths that they sell for wedding decorating -- could save you a lot of time on cutting
Beginning patternmaking materials I used:
The first thing I made when patternmaking is the easiest to draft and most daunting to cut out in fabric and later hem: the FULL circle skirt.
I created 2 strips of 1.5" wide pattern paper at 7.5" and 31.5" with awl-poked holes at .5" in on either end. These will create your skirt! The smaller is your waistline and the larger is your hemline. You remember circle geometry with pi and radii and diameters from math class? We're going all the way back there! Measure your waistline (where you can bend side to side) and divide that number by 2 times pi (that's approx 6.28). That will be your waist radius, then calculate to the closest 1/16th of an inch to the literal number. Poke another hole 5/8" away from either original hole. This is your waist seam allowance. The hem strip is your waist radius+your skirt length. I chose a modest 24", which meant my hem radius was 6.5+24=30.5. Add the 1" for space to put the awl-poked holes for this one, too. Add an additional hole on one side .5" from the original hole. This will be your hem fold.
Because this is a FULL circle skirt, the easiest thing to do is cut the circle into quarters: 2 back skirt pieces and 1 front skirt piece. Cut 2 back skirt and cut 1 front skirt on fold. The fold for the front skirt was on the long straight edge of the pattern paper, where i placed the awl+small strip (this is the center of your circle) with a pencil tip at the hole on the other end (this will be your circumference aka waistline). Holding onto your awl in 1 hand and moving your pencil with the other, draw 3/4 of a semi circle. Now draw a straight 33" line at the center of the circle mark perpendicular to the straight long edge of the pattern paper. This will be your side seam. Where the circle meets the straight line, draw a 1.5" line perpendicular to that line (it will be parallel to the edge of the fold). Repeat the same steps for drawing 2 3/4 semi circles with the larger strip with the pencil in the furthest of the double holes (hem hole), then the closer one (hem fold hole?). Draw 3" lines perpendicular to the side seam where it meets the two big circles. Finally, draw a parallel straight line to your side seam line 5/8" away (seam allowance). Draw a notch at the hem fold line at the side seam and another notch anywhere in the middle range of your side seam. Cut out at outermost lines. This is your front skirt pattern piece! The back skirt piece is basically the same except you start 5/8" away from the edge of the straight edge (front skirt's fold edge) and the circle center will be on THAT line rather than the edge. Otherwise steps are the same for drawing. For notches, match your side seams and make sure the notches line up there, then double notch at the center back 3.5 " away from the WAISTLINE (NOT waist seam allowance line). Two single notches at either side where the hem fold will be to match the front skirt hem fold notch. Now you have your skirt pattern!
OK I have to do wedding related stuff right now I'll come back and continue later.
So this is a tape measure lol.
Sounds weird, I know.
But it's actually for me to be able to measure my chest so I can get the right size binder
https://www.amazon.com/dp/B07QN6645Y/?coliid=I95K8F5UL712F&colid=1MX1SFQ9PRRQN&psc=1&ref_=lv_ov_lig_dp_it
> Is this similar to a loop turner, or is it more like a crease maker in shape?
Crease maker. Here's one.
>Any iron recommendations, or should your typical department store one do just fine while I'm a student? Or should I splurge sooner rather than later on one of those Reliable stainless steel pro irons which look rather frightening?
I hate the big Rowena iron I bought a few years ago. It was expensive, but it is no gravity-feed industrial model with a vacuum bar. It was very well reviewed on Amazon by hundreds of people, but it sputters and there's no water indicator. I would wait on the iron. The school's workrooms must have irons. It only becomes a problem if there's a deadline and there's a line for the irons, or if someone screws up and irons the glue side of the interfacing.
White silk organza is often recommended as a press cloth because you can see through it.
>Helio, I have you tagged as "sewing alumna" (you're female, yes?). You've been so approachable and helpful. I look forward to seeing more of your advice in this subreddit as I proceed through school.
Yes, I am a woman. I'm just someone who takes one or two evening or weekend construction classes a year at FIT. I want to sew for myself, so I take it seriously, plus, it's fascinating. I don't sew consistently in between the classes in part because I don't have a sewing space and I always need fitting help. But things are sloooooowly coming together: This summer I bought a 2010 barely used Wolf dress form for $300. Now I'm saving up to get someone to help me customize it, which will cost more than the form.
If you have any questions, just post them, or direct message me. A lot of people have given me help over the years. They still are.
Cutter and Tailor is an excellent bespoke tailoring website. Your school may have a subscription to the University of Fashion website. They offer a library of videos on fashion-related topics, and have very clear construction and pattern making videos. It's still fairly new, so they are frequently adding material. There may be times when you want to review something. It's good to go to a reliable source.
Good luck. :-)
Does anyone have any experience with removing stitching from denim? I've been wearing in some nudies since July. While I liked the signature back pocket stitching at first, I'm not in love with it anymore. I personally think it's kinda gaudy, but I also understand it's part of the nudie "look" and that many people probably love it.
I bought this to try to remove it, but I'm curious if anyone has experience doing this and how it turned out.
Not sure how you use that thing exactly, but you might consider a leather stitching wheel. Like this thing:
https://www.amazon.com/Honbay-Leather-Paper-Sewing-Overstitch/dp/B07FT7PLHD
They have wheels that are more or less pokey.
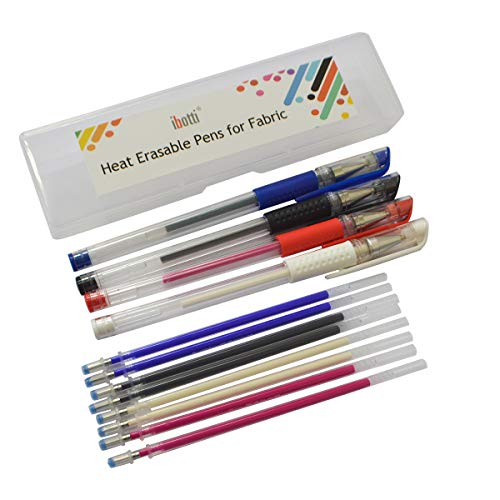
I got these pens from amazon and put them to the test recently. The marks went away after a round in the dryer with the blue pen, though I can't speak certainly on the rest because I haven't texted them out yet :3
I bought this one https://www.amazon.com/Sewing-KIT-Emergency-Clothing-Accessories/dp/B07BLQFB8N/ref=sr_1_19?keywords=sewing+kit&qid=1573664467&sr=8-19 works really well, i use it quite a bit.