Best crafts & sewing arts according to redditors
We found 14,171 Reddit comments discussing the best crafts & sewing arts. We ranked the 7,592 resulting products by number of redditors who mentioned them. Here are the top 20.
We found 14,171 Reddit comments discussing the best crafts & sewing arts. We ranked the 7,592 resulting products by number of redditors who mentioned them. Here are the top 20.


You wanna be the best fiance ever u/vickicamfield?
Get him one of these.
His neck will thank you, his hands will thank you, his precision will thank you. Probably the best purchase I've ever made for minis. You can snag em at most hobby shops.
​
Bonus, if he wants to do detail work I recommend a cheap set of reading glasses. He won't have to strain his eyes as much and they are a nice magnifying glass....es... you get the point lol.
​
PS: I recommend bright white light for better color recognition and more akin to natural light.
Edit: Also if he is thinning with water, get this. I find it works better than water and mixes with metallics!
Edit 2: For brush care, dont forget to get some brush cleaner and conditioner. Maybe a wet palette for longer paint sessions. For brushes, winsor and newton are always a solid choice.
Edit 3: Folks are asking for essentials. Here is a short list:Vallejo thinner
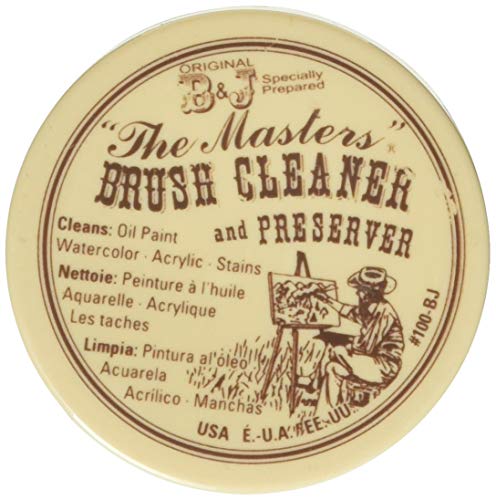
Masters brush conditioner
Wet palette
Kolinsky brushes
Mini holder
Liquid cement for plastics
Vallejo paints
Citadel paints
Warhammer TV
Cheap airbrush for prime/basecoat
We are getting married Nov 7, 2020 and I have lost about 40 lbs since we got engaged!!!! My ring was getting super loose, but I didn’t want to get it resized quite yet, as I still have a bit of weight to lose to get to my goal. I got this from Amazon for $5.99 with low expectations. But it works PERFECTLY and is so comfortable, I hardly even notice it’s there. Just wanted to recommend to anyone in a similar situation!
I highly recommend something like this for your wedding ring. My husband and I both have them. I'm cico and he has unintentionally lost weight as a result of my healthier dinners.
Excellent choices but you forgot two necessities that no one ever seems to cover when they recommend upgrading to quality brushes. Especially ones as expensive as Newtons, which can run in the $40 dollar range for the larger sizes.
[Brush Shaper] (https://www.amazon.com/Speedball-2-Ounce-Brush-Shaper-Restoration/dp/B000UXHBP4/ref=sr_1_3?ie=UTF8&qid=1520405791&sr=8-3&keywords=brush+shaper)
This will save you a lot of money and headache in the future and keep your brush tips nice and sharp. I often see people complain about bristle quality and return their brushes because they weren't educated on proper brush care technique or the existence of this product. To give you an idea I have some old Davinci brushes I bought when I first started the hobby 15 years ago and they hold their points like new. Hell even cheapo brushes become actual workman's tools when you use this stuff.
Brush Soap
-Masters: if you prefer solid bar type soap. One of these will last you for a decade if you keep the lid tight and the soap moist.
or
-[Pink Soap] (https://www.amazon.com/Pink-Soap-12-Ounce-Cleaner-Conditioner/dp/B0027A79I2/ref=pd_sbs_201_1?_encoding=UTF8&pd_rd_i=B0027A79I2&pd_rd_r=5FGK26S58JK2D46M7DK3&pd_rd_w=7U2UF&pd_rd_wg=jjUmB&psc=1&refRID=5FGK26S58JK2D46M7DK3&dpID=31GCq6nHuxL&preST=_SY300_QL70_&dpSrc=detail): If you prefer liquid.
Remember these are art brushes designed to be handled by an experienced artist with a light touch. Their intended use isn't mini painting which can be quite brutal on brush fibers. Miniature hobbyists and modelers aren't, in general, what I would call trained painters (no shade thrown) so using them as a resource in handling artists tools can be a bit limiting or downright pricey. As such I recommend it to anyone to watch this brush care vid by someone who uses the products I linked to maintain his gear. Proper brush care will save you a ton of money over time allowing you to spend that saved cash on new minis rather than on replacing your tools.
Make it Noodler's bulletproof.
Once this touches fabric it is never. Ever. Coming out. Not even with bleach. If you want something ruined forever, this will more than do the trick.
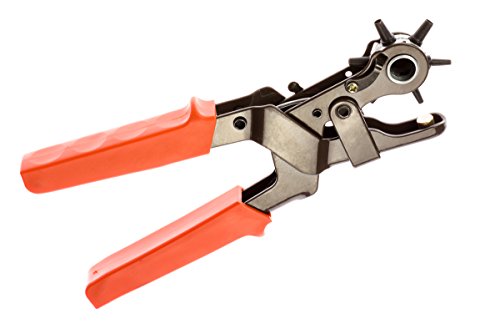
Clever died when you used a Hermes belt to try your first punch! Next time spend a few bucks on this
https://www.amazon.com/dp/B000NK5VY2/ref=cm_sw_r_awd_bBrcvb0R6XYTE
Looks like it’s time for some of these . Congrats!
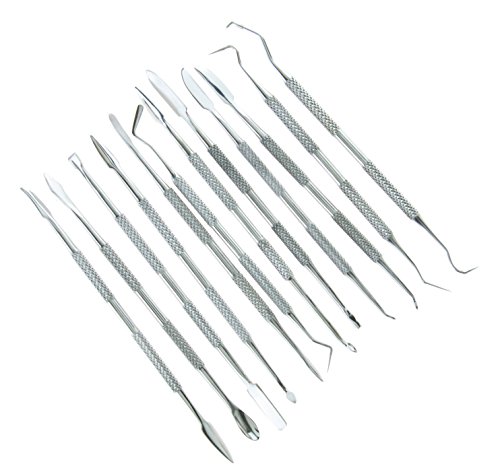
They're actually just wax carving tools and, IMO, this is a much better set.
2,500 googly eyes.
I built it so long ago that I don't remember the exact parts, but it was pretty simple.
They key thing I did was use hard boiled egg holders to hold the touch controllers. Basically you drop the bottom of your touch controller into this holder, then wrap your hand around the egg holder itself. Holding both the controller in the holder, and the holder itself.
The PVC parts are just 1' PVC pipe with a pair of PVC 90 degree elbows. You'll need something to cut the PVC pipe, a hacksaw works well, I used a dremel, or you can pickup a pipe cutter while you're on amazon
I also used one small piece of 3/4 inch PVC pipe wrapped in duct tape to hold the AR-15 stock onto the end. This is a luxury, but as someone who shoots real guns a lot, having a real gun stock on the end of it really makes a difference to your cheek weld.. So if you want dat real AR feel, you can pickup an AR stock right here.. All you need is the plastic stock, the tube and all the other stuff isn't required. I just warpped the 3/4 inch PVC pip in tape until it fit VERY snuggly into one of the 1" PVC elbows. I left it about 6" long, so that the rreal AR-15 stock would slide over it. I used a bunch fo tape around the 3/4" PVC pipe until the AR-15 stock very snuggly.
You will also need some 5 minute epoxy, and I used some instamorph. I used the epoxy to glue the egg holders onto the PVC pipe, and then wrapped the bases in electrical tape. Make sure you scuff up the PVC pipe before putting the epoxy on. I used a knife to scratch it up, and then some snad paper to really rough it up. This helps the epoxy hold.
I wrapped the base of my touch controllers in plastic wrap, then I heated up the instamorph and placed a bunch of it in the egg holder. Then I pushed the touch controller into the egg holder, so that the instamorph took the shape of the touch controller. DO NOT use epoxy for this.
After that, all you need to do is cut your PVC pipe to length and put the 90 degree elbows on there. The AR 15 stock is optional, not required.
I also recommend a sling, so that you can pop your hands in and out of your stock as need be. When your done with the stock, it'll just hold on the sling. And old cheapy rifle sling will work.
https://www.amazon.com/General-Pencil-Company-Masters-Preserver/dp/B001TNR7VM
This is the brush soap that everybody recommends.
Make sure you don't get paint in the ferrule (the metal bit where the bristles meet the brush). Paint will dry there and cause the splaying. Frequently rinse off the brush in a cup of water while you're painting.
You sure do, I posted a product below. You can get it in most hobby stores and all art supply stores. Little bit of water and move the brush around in the soap work out all the crap. If you take care of your "nice new sable brushes" they will take care of you :)
https://www.amazon.ca/The-Masters-Brush-Cleaner-Preserver-1oz/dp/B001TNR7VM
Congratulations! You've earned one of these!
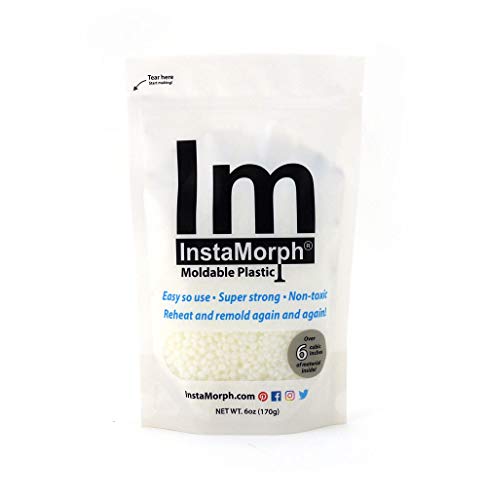
this stuff is the same thing in pellet form http://www.amazon.com/InstaMorph-Moldable-Plastic-6-oz/dp/B004MFLU4Y/ref=sr_1_2?ie=UTF8&qid=1463054497&sr=8-2&keywords=mold+plastic
Also not the original commenter, but I just bought an airbrush a few months ago and did a (read way too much) research into it. u/darcybono has pretty excellent advice on the Badger Patriot 105, it's a great brush.
This is a copy/paste from a conversation I had awhile back where someone asked about them like a month after I had started using mine. The sotar refers to the Sotar 20/20 the brush I wound up getting. I find the cone is a little smaller than I'd like, but haven't gotten a medium tip yet so I know it can go bigger.
​
>Amazon was fine for the sotar and this was the compressor I got.
>
>I also grabbed this cleaning kit but I don't use the upper brush holder because it doesn't fit the sotar. I actually 3d printed a stand for mine.
>
>You'll also want Vallejo airbrush thinner, iwata airbrush cleaner, and I recommend distilled water.
>
>If you haven't swapped your paints to dropper bottles I heavily recommend doing so. The GW pots really suck for it, though you can mitigate that some by using pipettes. Just make sure to get an agitator that isn't reactive like, I use hematite beads.
>
>Let me know if you have any other questions!
It's super fab, the compressor is quiet enough that I can use it when the house is asleep (I'm in a basement office of a two story home) I've used it a bunch for priming and have a couple projects I'm working toward where I'll be using it for base coating. I got one of the Munitorum Cargo Crate boxes and after testing basecoating on them I'll be moving to using the brush to basecoat my marines and such.
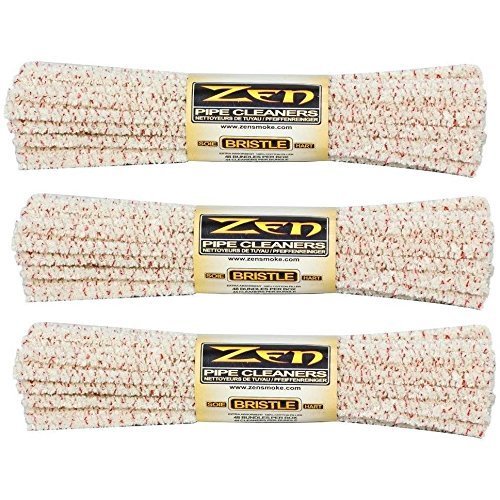
This stuff might save it. Also good to have regardless, keeps the bristles perfectly clean.
These are awesome for getting in there and getting things clean. highly recommend them.
http://www.amazon.com/Bundles-Pipe-Cleaners-Hard-Bristle/dp/B000W5R6UA
These changed my life
Look up Zen pipe cleaners on Amazon
https://www.amazon.com/Zen-Bundles-Cleaners-Bristle-Count/dp/B000W5R6UA
There are 'wood burners' like this: https://www.amazon.com/Walnut-Hollow-Versa-Temp-Temperature-Woodburning/dp/B005P1TRAS
That you use like a marker to burn wood. They're basically a soldering iron with a fat tip.
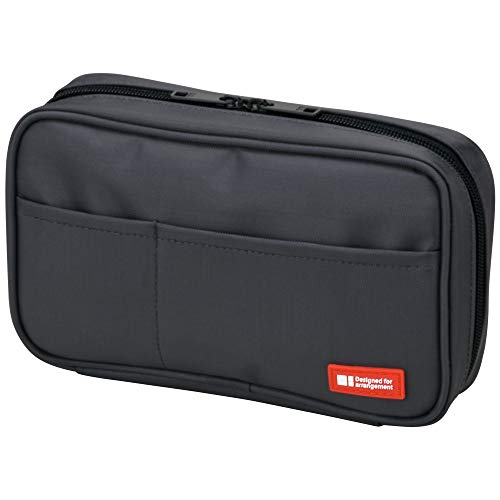
I love my Lihit Lab Pen Case. I it holds lots of pens and more.
For pen storage I got this tool chest and put pen liner. Though the wood or construction is not the best quality, it can store all of my pens and holding up for several years so far. If you want you can store ink bottles (except tall bottles such as Noodlers or Isroshizuku) on the top compartment. Also the top two small drawers come with removable wooden deviders. I store converters, cartridges and spare nibs there.
Kolinsky round brushes #1-3, maybe #0 and #4; these are the mini painter's tool of choice and he will always need them because they wear out. Series 7, Raphael, da Vinci, Roubloff are all world-class brands. Look to pay around $8-18 per brush (not sure what country you are in). If he doesn't have any already get him a puck of Master's brush soap to go along, because proper care will preserve his tools for months and years depending on frequency of use. You will look savvy as fuck too.
Definitely the Masters Brush Cleaner/Preserver. Most commonly recommended stuff out there. I've been using this for a good amount of painting the last 4 months and have hardly made a dent in the amount I have. 100% worth it.
https://www.amazon.com/General-Pencil-Company-Masters-Preserver/dp/B0009RRT9Y/ref=sr_1_1?s=arts-crafts&ie=UTF8&qid=1479362298&sr=1-1&keywords=the+masters+brush+cleaner
Edit: It also smells like lemons and happiness.
They are clay/wax sculpting tools
http://www.amazon.com/SE-DD312-12-Piece-Stainless-Carvers/dp/B000SVRSRY/ref=sr_1_6?ie=UTF8&qid=1418578480&sr=8-6&keywords=clay+sculpting+tools&pebp=1418578503800
My recommended buying list for a new painter is:
Tools
Sprays
○ Grey is standard, white if you're painting a majority of light colors, and black if the majority is dark.
Brushes
○ Round 0
○ Round 1
○ Round 2
All in all it should be around $60 USD for the tools and about $40 USD for the brushes. However, this list gives you every tool you will need to get started and to continue with the hobby.
This is just what I like to have on hand, this does not reflect the "perfect list". I hope it helps :)
Paint has gotten into the ferrule, or base of the bristles. Try to avoid getting paint that high up. Leaving the brush submerged in the water pot can cause this too. Also, cleaning your brushes once done is paramount. Most folks here swear by General Pencil's Master Brush Cleaner. This will clean and condition your brushes, to keep their fine point.
You can buy a cheap rotary punch and do it. It's really easy to use.
Woodburner - I got it for Christmas but here it is on sale now for $28 and it comes with assorted attachments. The carbon paper is less than $10 for 10 sheets, too.
First comment:
Please upvote this by default so it stays towards the top. I'm still learning how2reddit
So I am NOT an artistic person so this is especially anxious for me. But, I needed something to keep my hands busy that wasn't masturbating, so here we are.
I have probably over studied techniques and materials, and I want this post to be a "documentary" if you will. Where someone who has no business painting is going to be doing just that.
So, I'll be documenting my pitfalls and approaches to everything here. With all of you lovely people, it'll also hopefully be a central location for someone like me or just wants to get into 40k can refer to.
Disclaimer: I'll be at work until 5pm EST. But my job is pretty cushy so I'll be adding planning details throughout the day
Tools and Such
Well, I probably overspent here. Only because I'm lazy and didn't want to make the drive to harbor freights. But then again, paying the premium to help support my local game shop is going to give me some karma in the long run. Here's the list of things that I ended up picking up:
Theory is Great and All (11.13.19)
So here are my updates from actually painting.
Life Sucks and I haven't gotten much done (11/15/19)
So I was only able to apply a second coat of to what I've already done. But honestly, not too shabby! Apparently I didn't water down the paint too much.
https://imgur.com/gallery/lA9LV1N
Also, I recently switched to a different cell phone carrier, and got a $200 prepaid card.... So I'm getting these.
https://www.amazon.com/gp/product/B004INERK4/ref=ox_sc_act_title_1?smid=A3TMLEXVMVIW94&psc=1
https://www.amazon.com/gp/product/B002JLVM5U/ref=ox_sc_act_title_3?smid=A1Y3PCPH3CY53X&psc=1
There's a blog that I found (will have to find it again later) that recommended these.
Better tool than the one shown in his video, comes with variable temperature knob and flat end and other tips.
http://www.amazon.com/Walnut-Hollow-Versa-Temp-Temperature-Woodburning/dp/B005P1TRAS
Would suggest adding this bits kit to give more hot end shape versatility.
http://www.amazon.com/gp/aw/d/B0024JMIPA/ref=pd_aw_fbt_21_img_3?ie=UTF8&refRID=139FHWPPGW5KYRDHVAQA#immersive-view_1456844011167
FIRST, Read this guide (It should answer most questions)
https://miniarmyhugetimesink.wordpress.com/2014/05/15/so-you-want-to-airbush-a-beginners-guide-part-1/
Then, My intro recommendations: (I've included Amazon links, but you can likely find better prices elsewhere)
Badger Krome (a solid intro airbrush) https://www.amazon.com/Badger-Air-Brush-RK-1-Additional-Regulator/dp/B0078MEXX8/ref=sr_1_1?ie=UTF8&qid=1494523163&sr=8-1&keywords=badger+krome
Compressor (make sure it has a moisture trap and hose or purchase these seperately)
https://www.amazon.com/AIRBRUSH-COMPRESSOR-Airbrush-Published-Exclusively/dp/B001738DXU/ref=sr_1_5?s=arts-crafts&ie=UTF8&qid=1494523192&sr=1-5&keywords=airbrush+compressor
Respirator (a must have for safety):
https://www.amazon.com/3M-07193-Cartridge-Respirator-Assembly/dp/B00079FOK0/ref=sr_1_3?ie=UTF8&qid=1494523296&sr=8-3&keywords=respirator+mask
Cleaning pot (pipe cleaners optional)
https://www.amazon.com/Naturebelle-Airbrush-Cleaning-Holder-Nozzle/dp/B01D41W04U/ref=sr_1_6?ie=UTF8&qid=1494523444&sr=8-6&keywords=airbrush+cleaning
Other things you will probably want
Some quick questions, do you write really small now?
Most of the engineers I know do write small, which is why I ask. /u/the_illest does this joke you see here every time this question is asked, but it is a good recommendation to start. I personally recommend the Pilot Metropolitan over the Lamy Safari, I think it is a nicer pen to use, and the I believe the nib is better. If you write fine, you might be better off going to Goulet and getting the new model in fine, than buying the medium nib on Amazon. If you write really small, I really like the Metropolitan with the nib from the Pilot penmanship swapped onto it. The link here is more than I spent on the penmanship, if you search you can find them cheaper (I think on Amazon sometimes, I got two for that price). The Japanese EF nib is closer to a western UEF nib (the medium on the Metro is very close to an EF on the Safari). The line is very thin, and comfortable if you are used to writing small with a mechanical pencil.
With this, pick up a bottle of Noodler's black , and you will be set.
Now, to deviate a little from the standard answers. If you want something a little different, the Nemosine Singularity is an good intro pen that has gotten a lot of good feedback.
For a cheaper alternative, but usually only in a medium nib, the Jinhao x750 or x450 are big pens that make a statement (Amazon has sellers that ship these from China, Goulet pens carries them for $10 in stock).
There are a few others on Amazon that people like in the starting range, Parker, Scheaffer, etc that some like, but generally, the popular ones are the Metropolitan and Safari.
A) I have an awl in my craft kit that I usually use. B) If you have a hammer and nail, you can also use that; put something underneath that won't get damaged. C) They do sell actual leather hole punches for pretty cheap.
My suggestion is to buy a Pilot Metropolitan, which comes with both a cartridge and a converter so you can try both out. I would also suggest getting a bottle of a basic, workhorse ink. Something like Noodler's Black would be a good option, a nice saturated black that is waterproof and behaves pretty well on cheap paper.
Uncaging
Marking the holes
Making the holes
Apoxie Sculpt 1 Lb. White https://www.amazon.com/dp/B0013UDWXI/ref=cm_sw_r_cp_apip_6KnEdOHgdEvSU
Lihit lab pencil case.
https://www.amazon.co.uk/LIHIT-Case-inches-Black-A7551-24-x/dp/B004WMWCYE/ref=sr_1_1?ie=UTF8&qid=1540373774&sr=8-1&keywords=lihit+lab+pen+case
Looks like a wood burner tool with some sort of letter attachments (like these maybe). I've never used the letter attachments myself but wood burners are cheap to pick up, pretty easy to get the hang of, and loads of fun. You could burn the letters with the regular attachment too but I guess if you don't have the best handwriting or if the wood you're using is tough to burn evenly then the letters make things simple.
Edit: Really cool project OP. Nicely done and a great idea.
As a fellow rookie Tau collector/painter I have to say these look pretty cool but I noticed some of the finer panel lines are a little uneven so I wanted to make a suggestion that saved me alot of time and headaches.
You can buy black pigment liners with a 0.05mm tip that will fit right into those panel lines to let you quickly black them out, giving a nice and crisp edge to the armor panels and other fine details.
The one linked is just one I had from my other hobbies but you can get pigment liners from most craft shop with various colors and tip sizes. The .05 or .03 mm ones are the best, anything larger and you're not gonna fit it in the gaps.
edit: grammar, also sorry I can't post a pic of the results, I'm at work on a slow Sunday :)
I have tiny fingers and I use these to size down my too-big rings. I'm usually a 4.5-5 US and I bought several packs of size 6 rings (they were the smallest size...) and the larger piece works pretty well for most of them!
I got these for my engagement ring after it fell off, and it’s working for now.
GWHOLE Ring Size Adjuster with Silver Polishing Cloth,Set of 4 (2mm/3mm) https://www.amazon.com/dp/B01M0OX3EW/ref=cm_sw_r_cp_tai_mZQZAbQZQ020S
> Is there any reason to take Hormagaunts over Genestealers?
When having more bodies on the table and tying up enemy units in melee is a greater consideration than just killing units outright.
This is a rare situation lol. Killing is good. But there are some fringe cases... for example, you're playing Hive Fleet Behemoth rules and you want to use their unique stratagem (Brute Force, which basically has a 16% chance to deal a mortal wound for each friendly model that makes it into close combat) and you need to bring down something with a strong invul save (so like... Mortarian, or Guilliman, or somebody) and your only option is to drown it in low quality bodies.
In those cases it might be more useful to just have a fucking gargantuan amount of Hormagaunts.
But in 99% of situations, Genestealer spam is superior, for the points.
> I'd like to use florescent dye on my 'nids, so they glow-in-the-dark. Is this viable; If so, how would I go about it (mix the dye with the paint? Apply it as a gloss?); & what should I use to do so, specifically?
I haven't messed with this myself but I would assume if it is of a compatible material it should be mixable. Is the dye acrylic? Most miniature paints are acrylic.
> * Any painting/modelling tips you could give me would be greatly appreciated.
Make a wet palette, learn the difference between priming/basing/layering/washing/highlighting/drybrushing, get a drybrush, get a base coating brush, get a fine detail brush.... then once you figure out what you're doing and you're ready to REALLY detail some fine detail, graduate to a Windsor & Newton Series 7 sable hair detail brush... sable hair is so much better at holding a fine point and stays moist longer.
Also, invest in a tub of brush cleaner: https://www.amazon.com/General-Pencil-Company-Masters-Preserver/dp/B001TNR7VM
It's cheap and lasts forever, just get your brush wet, brush it back and forth on the top of the block o' soap, get the soap all massaged into the bristles, and rinse with room temp water. Repeat until the bristles are nice and silky smooth.
Never get paint in the ferrule (the part where the bristles join with the rest of the brush). Never get any sort of chemicals in there either, like isopropyl alcohol or even soap if you can manage. Cheaper brushes use weak glues and soap could dissolve them - probably not an issue on a Windsor & Newton brush, but you don't want to take the risk. Just be in the habit of only immersing brushes in things-other-than-water up to the ferrule, never past it.
Water in the ferrule is fine and should not be a problem. Always rinse your brushes when you're finished painting for the day, dried paint will fuck your brushes up over time.
Decide on a paint scheme and then paint your SMALL models first! Do all your learning on the little dudes that nobody is looking at on the table lol. Then once you've built your skill up, do the big impressive looking monsters. When you have 30 Hormagaunts all climbing over each other to get to the enemy, they can look like absolute shit individually but as a horde they look awesome as long as you have them all painted identically. The uniformity is what makes them pop. But when you have one single monster by itself, people look very closely at that and technique is more important.
Paint your swarms in batches. Prime all 30 Hormagaunts. Wait till the next day. Base coat all 30 Hormagaunts. Wait a day. Layer the Hormagaunts' carapace. Etc. Do one step for 30 models, not 30 steps for one model. This prevents a lot of logistical bullshit like running out of space on your wet palette.
Most importantly, make "om nom nom nom" noises when finishing off enemy units.
That is a pretty shitty airbrush.
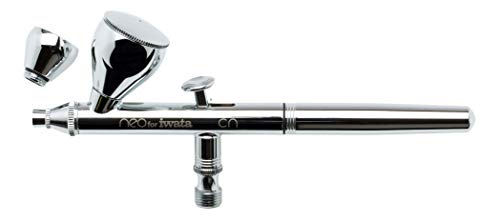
For €10-15 more you can get yourself a much better airbrush such as the Harder & Steenbeck Ultra or the Iwata Neo.
tl;dr: Buy quality, cry once.
Yos should use this: https://www.amazon.co.uk/General-Pencil-Masters-Cleaner-Preserver-1oz/dp/B001TNR7VM
It works like magic.
I approve of this message and I have nothing to add.
Except that I use a size 6 brush for almost everything.
[EDIT] Wait, I do have something ESSENTIAL to add: Get this brush cleaner. I've been working on the same tub of it for the last year and it works miracles with any brush. Even if the brush has paint dried on it this stuff will still make you very happy.
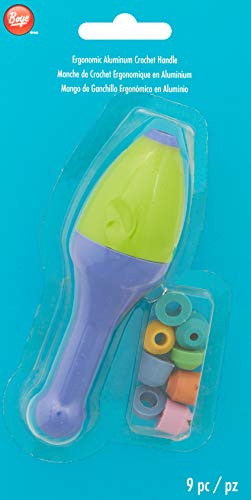
Any hook should be the same for a man or woman. The only thing that I would change is to get a bigger handle. This is the one that I use: https://smile.amazon.com/Boye-Crochet-Ergonomic-Aluminum-Handle/dp/B004ALF72G/ref=cm_wl_huc_item
My husband uses it too because of his bigger hands. I use it because I have carpal tunnel (from all the crocheting) and it helps my hand relax because it's in a more open position.
take frequent breaks, and stretch your fingers and palm and wrist and forearm muscles during each break. Stretch your neck, shoulders and chest muscles, stand and get your blood flowing and be mindful of your posture as you crochet.
http://www.crochetspot.com/hand-and-wrist-stretches-for-crocheters/
http://www.crochetspot.com/easy-exercises-for-crocheters/
http://www.freshstitches.com/wrist-exercises-knitters-crocheters-easy/
http://klncrochet.tripod.com/id2.html
There are awesome ergonomic crochet hooks out there which reduce strain.http://www.amazon.com/Boye-Ergonomic-Aluminum-Crochet-Handle/dp/B004ALF72G
http://www.michaels.com/Soft-Touch-Crochet-Hook/nw0554,default,pd.html
http://www.amazon.ca/s/?ie=UTF8&keywords=tulip+crochet+hooks&tag=googcana-20&index=aps&hvadid=15609380982&hvpos=1o1&hvexid=&hvnetw=g&hvrand=3527627891210032897&hvpone=&hvptwo=&hvqmt=b&hvdev=c&ref=pd_sl_97pyezf27i_b
There are multiple ways to hold hook and yarn to cause the least amount of stress.http://www.wikihow.com/Hold-a-Crochet-Hook
Adding to all this:
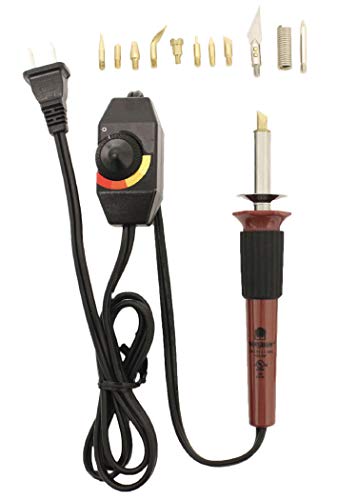
Get a soldering iron that allows you to control the temperature. That made all the difference in the world to my own soldering abilities.
This is the one I've been using lately. Only costs approximately $20USD shipped, and does have a temp dial. Now the placement of the temperature dial is a problem for some people, because it's on the cord close to the iron itself. I have never had an issue of the dial pulling the iron off the table, but am really careful to avoid that scenario in the first place.
Practice safety with regards to any hot tools like soldering irons: turn em off when done, don't leave em unattended until they cool down, and ALWAYS unplug em when not in use. Never depend on an "on/OFF switch on anything in your shop/work space. Always unplug, making sure the cord (and everything else) is safely away from both the hot part of the iron and keep all things from the edge of the table itself.
The helping hands clamping devices on the market today have much smaller bases. I have 2 and the one with the magnifying lens is made useless because of the small footprint of the base. A regular helping hands would probably suffice. I bought a cheap lamp that has a built in magnifying lens which does the job for me.
Hi there. If you're looking for a craft, woodburning can be a lot of fun!
I'd recommend picking up a basic woodburning tool at your local craft store or online and give it a try. Most come with some instructions/ideas and a variety of different tips to use. A popular one (which I enjoyed using) is the Versa Tool by Walnut Hollow, since it's inexpensive and you can adjust the temperature. They make an even cheaper one-temp model but if you want to practice shading and such the temperature control is really nice for a few extra bucks.
Other than that, you really just need some wood and you're ready to get started! The craft store will likely have wooden plaques and shapes as well, usually pine or basswood which are easy to burn. But if you just want to practice, any wood will do. I get scraps from local carpenters or lumber yards; driftwood can be fun too. Just be careful you aren't burning wood that's been coated or chemically treated, as you'll breathe in some unhealthy fumes. Just regular smoke from burning can be a nuisance but usually more so when burning larger pieces/burning for long periods of time. So although it may not be necessary for a beginner, down the road I would recommend getting a fan if this becomes an issue.
As for stenciling, I personally use graphite paper to trace designs onto the wood (you'll also find this at the craft store). Carbon paper is a similar option but I find it a bit messier/hard to remove if I've made a mistake. All you do is draw or print off the image that you want to burn. Then you lay the graphite paper (black side down) onto the wood, lay your image on top (I recommend taping to keep it in place), and lightly trace over it. Once you are finished and pull up the papers, the graphite will have transferred onto the wood where you traced and now you have your outline to burn over.
I hope that made sense! I find seeing a visual can often help, so some Youtube tutorials may be a good place to start to learn the basics. There are tons of resources online, and quite a few books on how to do different techniques/use different tips if that's more your style. Or just find some old scrap wood and experiment.
Have fun!
> When moving a unit along their movement value'd distance, do you usually measure out the lead model, move it, and then move each other model in the unit in approximately the same (but not measured) distance to maintain coherency, or do you measure out each individual model in a unit to ensure not a single one possibly goes further than its value? Or is this something agreed upon by the players pre-match?
> If each model is measured, I could see some units (ie, conscript squads) being extremely time-consuming or difficult to deal with depending on terrain and model count.
Officially, each model. However almost everyone I've ever played with does it the "time saving way" when dealing with large groups of models. This usually isn't a problem when you are clearly moving them less than max movement range. This is especially the case with horde units that have greater than 10 models to a unit. 20x Poxwalkers for instance. Once you get used to playing, it isn't too time consuming for a single 5 model Marine squad.
> On the second question, is there a generally agreed upon "kit" or set of paint brushes to get before starting to paint models? In addition to the First Strike box I got last night, I also got the small Painting Essentials box which includes a brush (along with cutter, glue, and some small pots), but wasn't sure what other brushes I might need/want before starting to paint.
The "goto" kit for brushes tends to be a Winsor and Newton Series 7 Round Size #2 and #0. Keep them clean with Master's Brush soap and they'll last you a long time. You can find them on Amazon. At $10-$15 a brush they aren't cheap when starting out. And that's arguably more then you need for a first model. You can get by with a cheap bag of small "gold taklon" brushes from walmart or similar at first.
Here's something I wrote recently on brushes for someone else looking for some nicer brushes....
https://www.reddit.com/r/deathguard40k/comments/8ac9ui/what_warhammer_brushes_should_i_get_what_vallejo/
As for Army Painter brushes specifically. It's what I started with before moving to Kolinsky Hair brushes. Still use a number of their small dry brushes for small detail dry brushing. If you are set on Army Painter... The Wargamer series, specifically the Regiment, Character, and Detail brushes are pretty solid. As well as the Wargamer Small Drybrush. Certainly better than Walmart synthetics. Have held up well cleaning with Masters Brush Soap linked below. They just have never had the same type of fine tip you get on a Kolinsky. The super small Army Painter brushes aren't really worth it though in the long run.
-----------------
I have a large collection of brushes with my better half. Bought her a large collection from different brands from around the world so she could try different styles to find the perfect brush for her.
Essentially, you'll want a Natural Kolinsky fiber brush in round shape for miniature base coating, shading, layering, edging and detail work. They will last you quite a while if you take care of them. Most people find they can do everything with a #2 and #0. A workhorse and a detail brush. Good natural Kolinsky hair helps thinned paint flow properly out of the brush, and holds an excellent point. There are a number of options to get a good Kolinsky brush:
As for brands, you have options:
Then you'll want to keep it all clean with "The Masters" Brush Soap and Conditioner. Cleaning regularly will make a big difference brush life. https://www.amazon.com/dp/B0009RRT9Y/ ... Keeping brushes freshly rinsed in a basin can help prevent the bad buildup of dried paint to begin with. This kind of thing... https://www.amazon.com/Loew-Cornell-Brush-Tub-II/dp/B0019IKYU8/ or really any sturdy cup you have around that won't tip over easily.
NOTE - You'll want to use cheaper brushes for Drybrushing, it can just murder brushes. Either walmart/craft store brushes you can toss, or just cheaper quality brushes made for it, like Army Painter or Citadels drybrush lines.
As for paint... I use Army Painter and Citadel. Citadel primarily for anything warhammer to get color matches. Army painter for some washes, and anything else I paint (boardgame and DnD minis). Rither now I are only using Vallejo for Airbrush paints and a few premium metallics.
-----------------
There's a great guide that got me and my other half started over on the /r/minipainting subreddit. https://www.reddit.com/r/minipainting/comments/50hd3a/rminipainting_buying_guide_hd_remastered/
They sell clear ring sizers to help make them smaller. I wouldn't apply anything in case you do damage it
https://www.amazon.com/GWHOLE-Adjuster-Silver-Polishing-Cloth/dp/B01M0OX3EW/ref=mp_s_a_1_3?crid=1XH0PWFUEOQ8G&keywords=ring+size+adjuster&qid=1551069587&s=gateway&sprefix=ring+size&sr=8-3
These work great. I used them til I got mine resized.
https://www.amazon.com/dp/B01M0OX3EW/ref=cm_sw_r_cp_apa_ZYcZzbFMGJ69B
> Is it likely that inhaling the VOCs in the paint caused any damage?
Yes. There is a really damn good reason why every bottle of paint says to only use in well ventilated areas, and that's because both because inhaling VOC's, and inhaling literally anything other than air is pretty bad for your lungs.
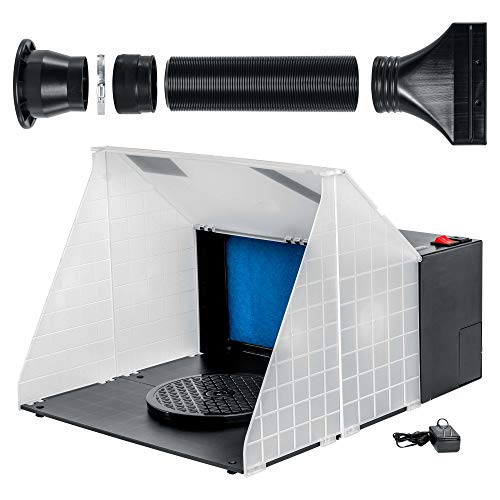
Stop working in poorly ventilated spaces. If you can't find a better space, get a spray booth for about $100. If you absolutely, positively cannot work in a better space or get a spray booth, get a respirator with VOC cartridges. Should only cost like $20. The respirator is a last ditch effort to keep your brain and lungs intact, and is far from the ideal solution.
But it's better than inhaling VOC's all day.
Like any hobby the initial cost to start will always be high. You may be tempted to buy cheaper tools but whats the point if you plan on building Gunpla for a while and will end up replacing them. If you only want to build 1-2 kits then you can get away with 2 dollar clippers and a box cutter but it won't give you good results.
Despite the cost these are still the tools I recommend that EVERY Gunpla owner who doesn't plan on painting their kits purchase
A) Tamiya 74035 Sharp pointed side cutters, worth every penny
B) Xuron 410 Side Cutters, very durable at an affordable cost
C) X-Acto X3000, Comfort rubber grip, comes with 2 blades
D) 3 Fine tipped Gundam Markers, Black, Grey and Brown
E) Krylon Acrylic Flat Coat, large can for only $5-6
And that's it.
2)Use the Tamiya cutters to cut the remaining nub, with practice you can get it practically flush to the part.
3)Clean up the nub with a hobby knife. You don't need sandpaper or a file if you did the steps above correctly and the flat coat will mask any scratches.
4)Use the Gundam markers for lining
6)Finally finish with a top coat
Total cost with amazon prime is $65. Yes the Initial cost is high but the tools above will last you for 20+ kits (you will need to buy more blades and flat coat). If you really can't afford that you can save up for the Tamiya sharp pointed side cutters and use the Xurons in the mean time (you will have more work to do).
So $38-65 initial investment to me is really not that expensive
Buy this for all your Pops that don't stand. We have over 900 Pops, and this is the best thing to use that we've tried.
r/https://www.amazon.com/InstaMorph-Moldable-Plastic-6-oz/dp/B004MFLU4Y/ref=sr_1_2?ie=UTF8&qid=1536279608&sr=8-2&keywords=instamold
https://www.amazon.com/Watch-them-wiggle-Black-PIECES/dp/B0074MHV7W
I think we should all pitch in and send these, gift-wrapped, to the OP's command who took away precious morale.
Acrylic through an airbrush has very little smell, but that doesn't mean you should spray without a mask or good ventilation.
 
Several people have recommended this (or similar): https://www.amazon.com/dp/B00B2TESUQ
I just use a cheap one from amazon, but it hasn't failed me yet: https://www.amazon.com/AIRBRUSH-COMPRESSOR--Airbrush-Published-Exclusively/dp/B001738DXU/
The ones with tanks are nice because they don't have to run constantly. That one is pretty quiet as well. On the more expensive side, people seem to like Iwata and Badger, but I don't have experience with them.
For a compressor get one with a tank, it assures a good even flow of air.
The one I have is:
https://www.amazon.com/gp/product/B001738DXU/ref=oh_aui_detailpage_o01_s00?ie=UTF8&psc=1
The compressor I linked is pretty quiet as well.
For airbrushes I have:
https://www.amazon.com/gp/product/B0013NBQLA/ref=oh_aui_detailpage_o03_s00?ie=UTF8&psc=1
The airbrush has worked great for me and looks very nice, it provides a good flow of paint and is very easy to clean.
For paint I use Vallejo model air, is needs to be thinned down a decent amount. I have also tried Citadel air paint and while it needs a small amount of thinning it worked well. There are lots of other good airbrushes as well, I have been very impressed with Badger's airbrushes, they are a little expensive around $100 but they are very good quality. Make sure you get paint reducer and airbrush cleaner as well, the reducer helps thin down the paint to prevent clogs in the airbrush.
Here's a few quick tips.
Never leave your brushes standing in a water pot. The bristles will bend and fray very quickly (like less than a minute).
Never let the paint get on or around the metal ferrule part of the brush. That's the bit where the bristles join the handle. Paint is hard to get out of there, and when it dries, it can push out, bend or cut the bristles.
Try to keep the paint to only half of the bristle length.
Wash often and thoroughly. Don't let paint dry in the bristles. Keep it wet, or wash out and get more paint. As above, keep the paint volume minimal. You can load the brush up a bit more if it's a more watery paint like a wash or glaze.
Further to above, you can use brush cleaner or conditioner. It helps get the paint off a bit better than water and can help hold the shape for longer. Can also help remove dried up paint.
I've recently started using Masters Brush Cleaner (https://www.amazon.com/General-Pencil-Company-Masters-Preserver/dp/B001TNR7VM). Comes in heaps of sizes, will last for AGES and it's amazing how much extra paint it gets out of the brush.
Try not use detail and high quality brushes for "rough" painting or drybrushing. That sort of motion can damage and bend the thin bristles. Use a specific drybrush or a cheap $2 one for that.
Generally more expensive brushes are better, but there is a limit to that. I jumped over to Winsor & Newton Series 7 brushes and it made a big difference to my painting, however, they still get damaged and they won't last forever either. Obviously, good care will make them last longer but I've been pretty bad at that lately.
For a new painter some of the Army Painter or GW range is a pretty good start. Once you get better and learn to care for the brushes properly, then grab yourself some more expensive stuff.
Give this stuff a go it’s saved me many pounds on brushes
https://www.amazon.co.uk/General-Pencil-Masters-Cleaner-Preserver-1oz/dp/B001TNR7VM
The Master's Brush Cleaner & Preserver-1 Ounce https://www.amazon.co.uk/dp/B001TNR7VM/ref=cm_sw_r_awd_btrEwb6B57JRV
That's the standard size. £4.16 + free uk delivery.
Do you use a brush soap to clean your brushes? I use this:http://www.amazon.com/General-Pencil-Company-Masters-Preserver/dp/B001TNR7VM
The key is to leave some soap on the brush when you are not using it and shape the brush to a point (or however it is naturally suppose to be shaped) so that when it dries it will keep that shape. Just be sure to thoroughly rime the brush in your water cup before dipping in the paint.
I use some brush cleaning soap like this one after painting: https://www.amazon.fr/dp/B001TNR7VM/ref=cm_sw_r_cp_apa_i_p7b6AbGXXKP4R
Keyboard: WASD 61 Keys with custom cap colors (built on their site)
Headphones: Sennheiser HD 598 SR with open backs.
Pen: Baoer 388 with a medium nib
I want to buy a nicer pen but for right now this one (with Noodler's black ink) works perfectly. I use numbers a lot at work, so I plan on making a separate number pad soon, and I also am probably going to purchase a trackball to place between the keyboard and number pad. The headphones I bought on Prime Day for half their normal price (at the time).
Pilot Metropolitan <F> nib and Noodler's Black. Use a CON-40 or CON-50 converter for the ink as the included converter is more for cleaning than anything
Let it cure a bit for hard edge sculpting. Use an old razor to slice off little equal chunks. It's pretty sticky and will ruin a nice blade. Cut off very small amounts at once until you get a handle on your skills, think a few grains of rice. When you pas the sculpt time, just smash the blobs onto bases and make mud or sandstone. When it's to far gone, it will just fall off, so rocks can easily be glued back done. Balancing stickyness and hardness is really key.
Go out and grab a huge pile of dental tools for cheap. The little paddle and shovle kind, not the wire picks. I own several real deal sculpting knifes but I go back to that one dental tool I like the best. Amazon has lots, but they are really common.
A good first project is layered sandstone for bases and other base elements to get a feel for moving it around. Then try out gap filling then furtrim and chain mail.
It's a little blurry, but it looks like you need to mesh the greenstuff onto the cloak a little better. It looks like there is a gap between the two?
Having the gap on the shoulders is fine, since it is sitting on top of them, but you want it to blend into the cloak itself, since it is supposed to be part of it.
Do you have a sculpting tool? They help a lot when dealing with greenstuff, especially for keeping your fingerprints off of it.
This is what I use;
https://www.amazon.com/gp/product/B000SVRSRY/ref=oh_aui_detailpage_o05_s00?ie=UTF8&amp;psc=1
I run this instead of a Dremel brand tool. I have had a couple Dremels die on me over the years, so I tried this one and it has lasted 4 years so far! I also got a lot of my bits from harbor freight. I use the cuttoff wheels (ALWAYS WEAR FACE PROTECTION WITH THESE), Sanding Drums, and grinding stones the most. Use the cutoff for cutting out large swaths of material, sanding drums for tighter areas, and grinding stones to debur and smooth it all out. Most work that needs a dremel can be done with hand tools for better control. Coping saw, files, and flush cutters can go a long way. A lot of the "pros" don't use Dremels because they can jump out of control and hit a part of the blaster you planned on leaving stock and leaving a huge gash.
As for soldering Irons, I've heard wonderful things about this model, but cheaper models will work fine. TBH, I'd grab something in the $10 range and see if he sticks with the hobby. Maybe for christmas you can get him a nicer one if he's still going at it. I use a super duper old school Weller soldering station, so really anything will work. The issue you'll get with the cheaper soldering irons is the tips will tend to not last long and the heating element might crap out after a few months. Don't go cheaper than $10 here as some of them are meant for wood engraving, not soldering and wont get hot enough to melt solder. Any size solder is fine. I personally use lead/tin solder and just avoid breathing fumes as well as wash my hands when I'm done modding. Lead solder is MUCH easier to work with and requires less heat. Look for "Rosin Core solder" as it's easier to work with as it has flux in the center of the solder.
Good flush cutters, hobby knife, wire strippers, heatshrink, wire, loctite, etc are all valuable modding supplies. We sell some on our shop (shameless plug). I would recommend for plastic to plastic bonds he use Devcon Plastic Welder (make sure it contains Methyl Methacrylate as this acts as a solvent weld to bond the plastics together chemically instead of a weak adhesive grip like putty). Putty should be used as a filler material. I use two different putties. Free form Air for large amounts of gap fill, it is 6 times less dense than normal putty so it wont make the blaster weight 8 pounds when done. It is VERY easy to sand, but sometimes requires a thin layer of bondo over top of it to leave a perfect finish. I also use Apoxie Sculpt which is a direct replacement for normal putty for gap filling purposes. It's MUCH easier to sand than JB Weld putty, and leaves a nice smooth finish when sanded down.
Speaking of sandpaper, get various grades of sandpaper from 100 down to 600 grit (I go as far as 1000 if I want a gloss sheen on something).
Other than all of that, the tools I have on my bench that I would hate to mod without now are: Helping hands (for soldering), various different sizes of needle nose pliers, numerous sizes of small to medium screwdrivers, silicone lubricant, hot glue (for securing wires inside the shell), Electric Screwdriver, and various tweezers.
As you should, get some of this wax. Rinse, run brush across paper towel until it's mostly clean, dip in water, swirl brush gently in this stuff, rinse, run across towel, do until the brush is back to normal color, do one more time but this time focus on reshaping the tip
https://www.amazon.com/gp/aw/d/B0009RRT9Y/ref=mp_s_a_1_2?ie=UTF8&amp;qid=1522148457&amp;sr=8-2&amp;pi=AC_SX236_SY340_QL65&amp;keywords=brush+cleaner+and+preserver
Get Noodlers ink. The stuff is awesome and doesn't bleed through moleskine paper.
If you're using a fountain pen, go with Noodler's Bulletproof Black. Amazon UK has it for under 20 quid, and it's both free-flowing and permanent.
If you're using a dip pen, basic black ink is less expensive. IIRC, I've used Senshi (their top item) and it worked OK. I grew up using Speedball Super Black India Ink, which is listed on that page for under £9. Most of those are for dip pens only, and not suitable for fountain pens.
I wanted to give a heads up for those looking to save money with DIY foams. I went through 3 orders of Comply tips over a 3-4 month span. They would literally tear up due to the excess earwax after 2-3 weeks of use(even with the earwax proof version). I got fed up and ordered these
I've been using these DIY tips for a long time and its been amazing.
Puncher
http://www.amazon.com/gp/product/B000NK5VY2/
Tips
http://www.amazon.com/gp/product/B0013A0C0Y
http://www.instructables.com/id/DIY-Noise-Isolating-Earbud-Tips/
I've gone through about 8 pairs of DIY foam tips with my Triplefi v10 and still have tons of spare foam tips left.
https://www.amazon.com/dp/B000SVRSRY/ref=cm_sw_r_cp_apa_wbCYAbCYNG33G
Thanks for all the replies! So let make sure I'm getting this info correct, it's fine to dab with Stainless Steel? I would not be endangering my health by dabbing with these? http://www.amazon.com/SE-DD312-12-Piece-Stainless-Carvers/dp/B000SVRSRY/ref=acc_glance_sg_ai_ps_t_2
Couple of helpful accessories that people always mention on this subreddit include:
I think you are likely right. I've never seen this happen before myself though. Try different pipe cleaners maybe? I use these: https://www.amazon.com/Zen-Bundles-Cleaners-Bristle-Count/dp/B000W5R6UA/
Bro, I had a 99 Maxima with those exact same keys... both copies of the key broke the same way. I just got some moldable plastic like Instamorph and bridged the gap on the key. Sucks though... you drop those keys once and boom.
Honestly, the biggest thing is having the right tools. My friend is a circuit board engineer and he let me use his workshop which saved me days. From a technical perspective, nothing here is too difficult -- the tricky parts are in the details, like wiring up the original power switch and reset switch to work with the Raspi global input/output and somehow wiring up the LED light, but these things aren't really necessary for it to function, just added flair. Apart from that, you literally just throw the img file onto a micro sd card, put that on a raspi, mount the board to something and you're pretty much done.
That said, I did discover that this stuff is effing awesome.
My pens are either in a case like a Nock or Lihit inside my bag or in my shirt pocket. I'd never carry a fountain pen in a pants pocket unless it was something like a Kaweco Brass Sport, they're just not meant to be treated like that.
https://www.amazon.com/LIHIT-LAB-Case-Black-A7551-24/dp/B004WMWCYE/ref=sr_1_3?s=office-products&amp;ie=UTF8&amp;qid=1482569939&amp;sr=1-3&amp;keywords=pen+case
This is the one I use. It doesn't have individual pen slots, but it'll hold about 12 or so pens. And has space for other things.
my best advice, as a semi-novice myself in wood burning:
i'd start with a cheaper wood burning tool. can find one at wal mart, home depot, craft store... it'll look like a soldering iron. get one with a few interchangeable tips, maybe one with a heat regulator if you're so inclined to spend the extra money. they can get complex and expensive, so depending on your involvement in the hobby it can get expensive, but you'll definitely see a difference in the heat consistency in the more expensive tools. but for a beginner, something like this is perfect to figure it out: http://www.amazon.com/Walnut-Hollow-Creative-Versa-Temp-Temperature/dp/B005P1TRAS
I got this set as a gift, but after doing three projects and burning my fingers on the handle I'd recommend buying a tool like this where you can actually adjust the temperature. For more information and inspiration I'd recommend checking out /r/pyrography and good luck getting started.
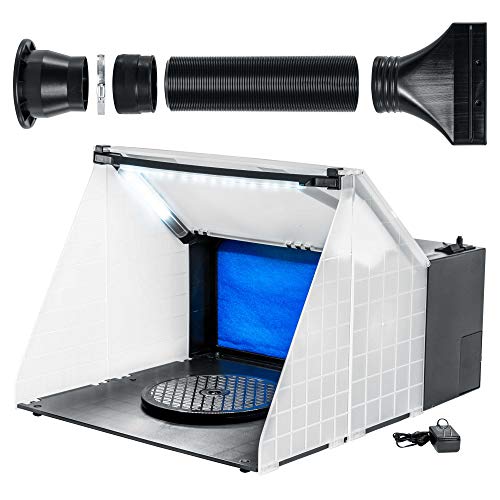
This spray booth folds up into a stupidly small rectangular box that's really easy to store. Even with an open window in front of you, I'd probably still recommend getting a booth just to keep overspray from going all over your desk/work area/room.
Welcome to the hobby, friend! Here's a few useful tidbits of info for you.
None of the Gundam kits from the last 20 or so years need glue. That's a standard feature across pretty much every Gundam model kit. So in that regard, feel free to pick any design you like. Not all kits are created equally, but a quick search across this subreddit will help you figure out if the kit you're looking at happens to be hot garbage (and there are a few that are).
To more directly answer your question, the starter set uses an older model of the classic RX-78-02 Gundam. The Revive version is a much, much better model. You can find it here on Amazon.
A panel lining pen (or pens) are not required, but certainly make for a better final product. They're pretty cheap on their own, and generally you'll want at least grey and black, and possibly also brown. Alternatively, you can get a pack of all 3. You'll also want so basic q-tips/cotton swabs to clean up your panel looking.
You're also going to need some nippers. Nippers come in a range of types, qualities, and styles. The best nippers are single sided (that is, one side is a blade and the other is flat). These, the infamous Godhands are hands down the best nippers on the market. They're expensive as shit, but worth every penny. If you're on a medium budget, Tamiya's nippers are the next best option. There are cheaper nippers out there, but they're gonna come with significantly inferior results. That said, a lot of that can be addressed with...
A good hobby knife. You'll be just fine with a simple, cheap X-Acto knife, but there is (in my opinion) a better option. My personal favorite, the Tamiya Design Knife. It's got a slightly smaller blade, which will let you get into tighter spaces with it. It also comes with a metric crapton of replacement blades. You'll want to replace the blade every couple kits, but there's a bunch of them in there. There same container that holds the replacement blades even has a second chamber to dispose of your old blades into.
Finally, you may want some fine pointed (possibly angled) tweezers for decal application. Finger oils can screw up the adhesive on the stickers. You can pass on this starting off most likely, but you'll want to get some eventually.
TL;DR, the starter pack isn't the best option. If you're after the granddaddy Gundam, get the Revive. Otherwise, pick your favorite design. The newer the kit, the better, generally speaking. Look at the copyright date on the box cover to see. Bottom left corner.
You're going to need nippers, which can get pricey, but the cost is worth it. Start with a mediocre pair, and upgrade to the Godhands once you're committed to the hobby. You'll need a knife, too. You can cheap out on this one, but there are better options IMO.
Optionally, get tweezers, panel lining pens, and cotton swabs.
Edit: other good starter kits
HG Barbatos is a great kit. The build process for IBO models is a bit different than other gunpla, though, as they have a quasi-inner frame.
HG 00 Gundam is another great starter. It's also the first kit I ever panel lined, and it was a great starter for that.
If you're wanting a Zaku, the HG The Origin Zaku II Type C is probably the best Zaku kit released to date in 1/144 scale.
Finally, I'd feel bad for not suggesting my all time favorite HG build. It was just a fun, fun kit to make and to pose. The HG 1.5 Gundam. It's got some really cool gimmicks and, unique colors, and an awesome design.
I use this one from Amazon:
https://www.amazon.com/dp/B01M0OX3EW?ref=yo_pop_ma_swf
It serves its purpose and is comfortable, but if you forget to take your ring off when you wash your hands, it gets kinda gross and full of soap.
Silicone Spiral Ring Guard
Amazon
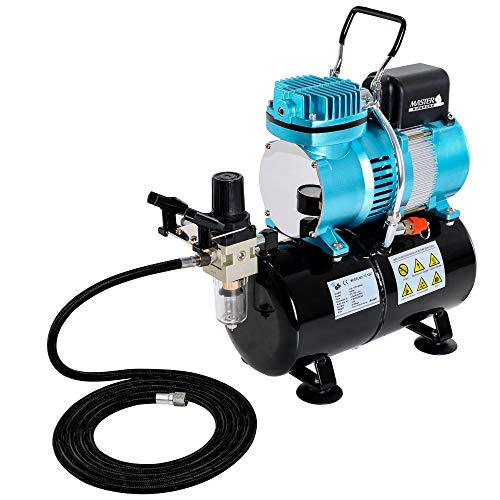
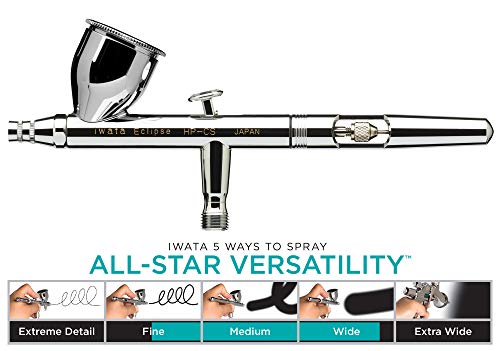
I've got the version with the tank. IIRC it cost only $20 more. I like it a lot! I have it paired with an Iwata HP-CS and it does its job marvelously. It's not particularly loud either. You could probably run it in another room without waking somebody up.
If I were you, I'd just save up the extra little bit of money and get the tank version so that the motor isn't constantly running and you can avoid risk of "pulsing" air.
edit: I didn't realize an airbrush comes with it as well. I can't comment on the quality of that, as I only bought a compressor. If you do get, make sure you leave it on the floor! This thing subtly vibrates while it's going and I didn't realize it was slowly creeping off the side of my bench. Scared the shit out of me when it crashed to the floor!
I third this. With a small reservation, I would suggest getting a kit with a small tank like this as it will allow you to play with the airbrush for longer periods of time without having the engine overheat.
That's a loaded question. I'm going to assume you want the cheapest price for a mid grade set up. I wouldn't recommend going cheaper than this set up personally. tl;dr roughly $170-$200 for a mid grade setup. Can you go cheaper? Yes, would I recommend it? No.
Air brush compressor with tank $100 (ideally you want one with a tank, the master one is actually pretty great but fairly loud, if you want a quieter one you will need to spend more $)
Air brush itself, start off with a quality midgrade brush. DON'T CHEAP OUT AND GET A LOW GRADE MASTER BRUSH TRUST ME. I started with a badger 105 which runs around $55-$70 and really like the thing, but will have to upgrade down the road if I want to do more than just base coating. It's spray pattern is very wide so for finer details it's really hard (for me) to use.
Airbrush flow improver. $10-$15 per 200ml. You will mix this 25(flow improver)/25(distilled water)/50(paint) for thinning purposes. Obviously some paints will need to be thinned more and others less. Generally you want the consistency of milk for your end product. Proper paint thinning and what psi to shoot it at will be one of the biggest things to learn when starting off airbrushing, but it's something you will learn fast through trail and error. I highly recommend getting some models you don't care about to get through this process. I was lucky enough to have my store manager let me practice painting some terrain for the store to get over my learning curve.
Airbrush cleaner + roll of paper towels. Once you are done with the paint and need to clean out the airbrush fill the cup with water, shoot out the water (into the airbrush pot) clean out the bowl with a paper towel, put cleaner in and shoot that out, then keep shooting water through till soap bubbles stop forming and water is clear.
Airbrush pot/holder this is really a great investment for $13 holds the airbrush and it gives you a place to spray your left overs/clean out your brush
More important than two cylinders, see if you can find one with a holding tank, like this. It will give you much more consistent airflow, and the compressor won't run nearly as much.
https://www.amazon.com/General-Pencil-Company-Masters-Preserver/dp/B001TNR7VM/ref=sr_1_2?ie=UTF8&amp;qid=1539364989&amp;sr=8-2&amp;keywords=hobby+brush+cleaner
That's the brand
The Masters brush cleaner & preserver is awesome for cleaning and maintaining your brushes. It also lasts forever because you only need a teensy tiny bit to give your brushes a lil spa day! https://www.amazon.com/General-Pencil-Company-Masters-Preserver/dp/B001TNR7VM
Winsor and Newton Series 7, I do 99% of my work with size 0 and 1 brushes, and just use my 000 for faces and extremely small highlights.
Also, if you're destroying your brushes that quickly you need to take better care of them. Make sure you're not using them to mix paint, don't let paint get in the ferrule (the metal part), and clean them regularly with this magic stuff
I bought an interchangeable grip for hooks that are 2.25-6.5mm. It is made to be used with Boye hooks, but I have used it on some of my off-brand ones as well. It accommodates all of those sizes with little colour coded plastic washers that you slip onto the hook before attaching the handle over it. I had already purchased a lot of Boye hooks before I realized that ergonomic ones were necessary, so it made the most sense for me to buy that grip, rather than a whole new set of hooks.
I hold my hooks like I hold a knife, and this grip works well for me. I can crochet for hours without any cramps or soreness. The grip looks huge and clumsy, but it sits very nicely in my (small) hand and allows me to relax all of my fingers over it. It isn't heavy, either. It does take some getting used to, but that would be the same for any hook that is different than the ones you currently use. It's available at Michaels, I used a coupon to get it. I would highly recommend it, especially if you already have a lot of the Boye hooks.
If you want something that will be compatible with more hook sizes and don't mind spending a little bit of money, I got one of these and absolutely love it: https://www.amazon.com/gp/aw/d/B004ALF72G?psc=1&amp;ref=ppx_pop_mob_b_asin_title
If you ever need brush cleaner, this works really well. I have used alcohol before though, and it definitely works well for dried on paint with a bit of soap.
This stuff work wonders for cleaning & maintaining your brushes.
Amazon Link
I have seen a lot of people recommend Masters Brush Cleaner and Preserver, as linked below.
https://www.amazon.co.uk/The-Masters-Brush-Cleaner-Preserver-1oz/dp/B001TNR7VM
I've got myself a pot and it is really good, the first time i used it I was amazed how much paint came out of what I thought was a 'clean' brush.
Quite cheap as well, and it will last forever.
You're probably going to get lots of recommendations for the Clover Armour hooks. It sounds like you've tried hooks like them, though.
I have this grip - it's an ergonomic grip but it might be just the thing you're looking for. It should allow you to relax your hands. I bought mine at Michaels. It's compatible with most metal hooks, though it was designed for the Boye brand books. You just slip a rubber washer over the hook and assemble the handle over it. It works for hooks up to 6.5mm.
The reviews are a bit special, I doubt it'll last you long, even if it manages to spray once for you. I've never come across such a compressor, in honesty, save your money, buy once and buy right.
If you're that tight on funds then one of these will get you going, but the compressor leaves a lot to be desired. If you can stretch further, a kit like this has a decent compressor, the airbrush is still a cheap chinese kit. If you want to spend money more wisely then a compressor like this and an airbrush like this will serve many years for a beginner before upgrading the airbrush to something with higher detail. The compressor will serve any model airbrush very well. You can get that compressor or similar in a kit too.
The reason why /u/triviper said it's about $200+ to start airbrushing is because you need not just the airbrush, but the compressor, moisture trap, hose, and adaptors if you're buying everything separately and want a setup that will last you a long time.
My setup isn't the best, but I got
*ie=UTF8&qid=1469082512&sr=8-1&keywords=moisture+trap)
Total = ~$145
Hope this helps. Brings me back to when I was researching all this for myself.
My setup isn't the best, but it's the bare minimum that I was comfortable with. Two years later and I'm still using the same stuff except I got a spray booth and respirator since I'm using lacquers now
/u/MacdougalLi /u/xhui /u/arkanoid2520
Edit: my bad, this doesn't factor into the paint, alligator clips, and various topcoats. Note that I had all of the former because I started out with spray cans. The cost will probably go up to $170 - $200 depending on what you also get
I used that airbrush for three years. Be mindful that that airbrush is going to be less precise and less well machined than a more expensive brush. It also needs to be cleaned more frequently than other brushes, or it will jam. I cleaned it often enough that I just removed the back handle entirely because it served no useful purpose (not even as a counterweight). That brush is serviceable. It won't run circles around your expensive airbrushes of the world, but it works. If you don't clean it, though, that thing is going to drive you crazy.
In case this is helpful: https://www.reddit.com/r/modelmakers/comments/2yzw9o/master_g23type_airbrush_takedown_and_cleaning/
I still use that compressor when I build models. My airbrush now though is this:
https://sites.google.com/site/donsairbrushtips/badger-sotar
The brush a lot of people consider a nicer starter brush (i.e. in a way, the next level up) is this one:
https://www.amazon.com/Gravity-Feed-Dual-Action-Airbrush/dp/B004INERK4
Airbrushing is above and beyond nicer than brush painting. You just can't do things with a brush that you can with an airbrush. Don't break the bank with an airbrush now. Get something simple and get your feet wet with it. I've been recommending the Neo for Iwata a lot lately. It's half the price of most mid-range airbrushes but definitely gives you a much better airbrush than something like a Master. Master's are very frustrating to work with.
Okay, that's a broad question you are asking.
First you need a brush. Get a double action. I recommend either the badger patriot 105, or the iwata neo for your first brush.
You need a compressor. I used a cheap one off amazon pretty well until I upgraded to a larger California air tools silent compressor.
You want a moisture trap as well, plus an air hose.
As far as paints go I really like the Vallejo model air and game air paints. The game air paints have very vibrant colors, whereas the model air line is more like real camo colors from WW2
https://www.amazon.com/gp/aw/d/B004INERK4/ref=mp_s_a_1_2?ie=UTF8&amp;qid=1511452252&amp;sr=8-2&amp;pi=AC_SX236_SY340_QL65&amp;keywords=iwata+neo&amp;dpPl=1&amp;dpID=31GV4HFiqIL&amp;ref=plSrch
https://www.amazon.com/gp/aw/d/B01LYHYHEA/ref=mp_s_a_1_fkmr0_1?ie=UTF8&amp;qid=1511452308&amp;sr=8-1-fkmr0&amp;pi=AC_SX236_SY340_QL65&amp;keywords=california+silent+compressor
https://www.amazon.com/gp/aw/d/B000BQO8W4/ref=mp_s_a_1_1?ie=UTF8&amp;qid=1511452347&amp;sr=8-1&amp;pi=AC_SX236_SY340_QL65&amp;keywords=iwata+hose&amp;dpPl=1&amp;dpID=41K8ruY-CAL&amp;ref=plSrch
https://www.amazon.com/gp/aw/d/B002SAO7QI/ref=mp_s_a_1_11?ie=UTF8&amp;qid=1511452388&amp;sr=8-11&amp;pi=AC_SX236_SY340_QL65&amp;keywords=1%2F4+to+1%2F8+npt
I've been thinking of making one for myself...
Tin
Moldable Plastic
https://youtu.be/v7Np50hwSBg?t=1m28s
Mirror
i had a patient that made his own denture that ive wrote about before. it was a nightmare. he had nonrestorable dentition and needed full mouth edentulation and denure fabrication. he couldnt afford it and disappeared for months. then on a friday at 430 he showed up as an emergency on my schedule. he used these beads that he bought off amazon that they make hollywood masks out of and stuff. i guess you heat it up to make it moldable? so he heated it in his oven and then shoved it in his mouth. it bonded to all of his tissue and remaining teeth. he had it in his mouth for 3 days before he had the courage to admit he needed help. i had to try t oget him numb under it (which was crazy difficult) and section it surgically. when it finally became removable, it brought teeth and tissue with it. he needed bone and tissue grafts, residual root tip exts, and a denture made afterward. all and all it ended up being way more expensive than if he would have just had regular ext and dentures made. this was maybe 5 years ago. i had taken a ton of pictures for liablity reasons at the time. but since then ive moved across the country and opened my own practices, so im pretty positive i dont have the pics anymore
edit: im pretty sure he used a material similar to this https://www.amazon.com/InstaMorph-Moldable-Plastic-6-oz/dp/B004MFLU4Y/ref=cm_cr_arp_d_product_top?ie=UTF8 ... it was definitely all white and looked more like a mouthguard than a denture
InstaMorph is pretty much the same thing except it doesn't expire and is less expensive. (I haven't actually used either one, so I could be wrong...)
I haven't actually received it yet, but I've just bought the Lihit Lab Book pen case. Should store all my essentials and give me an easy overview :)
I wanted this one and it looks to hold a shitload of pens!
https://www.amazon.com/Homecube-Capacity-Durable-Students-Stationery/dp/B01KLW6EWY/ref=sr_1_1?ie=UTF8&amp;qid=1488044870&amp;sr=8-1&amp;keywords=Homecube+pen+case
I bought this one because it has better organization, but may not hold 25 pens and markers. Although some reviewers say they have 20-25 pens in theirs.
https://www.amazon.com/LIHIT-LAB-Case-Black-A7551-24/dp/B004WMWCYE/ref=sr_1_fkmr0_1?ie=UTF8&amp;qid=1488044984&amp;sr=8-1-fkmr0&amp;keywords=limit+lab+book+style+pen+case
Lihit Lab $8.45.
iDream365 Hard Case $7.96.
I use and like both of the cases above, but you could also consider using a hard eyeglass case and you might already have one or more of these around the house. The downside is these might not fit larger pens and they don't protect against scratches if you put two or more pens in them.
As mentioned already, some vape cases could work, or you could look at cigar cases.
There's lots of possibilities.
Well, considering another user just posted that Walnut Hollow Versa Tools are frickin dirt cheap on Amazon right now, I'd get one of those asap. Here's the link. I've used mine for the last 3 1/2 years and it's the only tool you'll ever need if you learn how to use it. This entire piece was done with my Versa Tool
Lightly sketch out the outline of the design you want to burn. Then turn the burner on and just trace the pencil lines. You'll need to just get in there and practice, nothing I tell you will make much sense until you get some hands on experience. Don't wet anything, you use the burner to draw the same way you'd use a pencil.
This is the one to get, Walnut Hollow Creative Versa Tool with Versa-Temp Variable Temperature Control & 11 Woodburning Points (Tips) https://www.amazon.com/dp/B005P1TRAS/ref=cm_sw_r_cp_apa_i_kIZSDbJ6TJ852
this is the exact one
Yeah please don't do this, it's awful enough to work retail as it is. Want to have some fun, then buy some of these and place them on things to give them ridiculous faces. It doesn't torture underpaid people working on thanksgiving and it's actually quite a bit funnier:
http://www.amazon.com/Watch-them-wiggle-Black-PIECES/dp/B0074MHV7W/ref=sr_1_1?ie=UTF8&amp;qid=1416598670&amp;sr=8-1&amp;keywords=googly+eyes
Thoughts and prayers for your cancelled eyeball Swunty.
But don't sweatstain it and look on the bright side... for the low cost of $5 you can now give your face a much needed upgrade!
Here's a link to the one I got on Amazon:
Master Airbrush Brand Portable Hobby Airbrush Spray Booth (without Optional LED Lighting) for Painting All Art, Cake, Craft, Hobby, Nails, T-shirts & https://www.amazon.com/dp/B00B2TESUQ?ref=yo_pop_ma_swf
It's seems pretty good. I haven't been able to test mine with paint but I did plug it in real quick when I got it and it seems like it's pretty strong. Hopefully this week I'll be able to start.
Yay! Painting! I hope you enjoy it. :)
For tools:
After rinsing out your brushes in your jar or water or whatever, be sure to wipe it down with towel/rag, then lay it flat. DON'T LEAVE THEM SITTING IN THE JAR. They get messed up that way. I also swear by The Master's Brush Cleaner. I generally use it after a painting session. It has saved a few mistreated brushes from the garbage can.
Another tool that I use frequently is matte medium and different kinds of flow releasers. You probably won't need this just yet, but I found that they helped me immensely. When you're using acrylics, chances are that you're using water to dilute pigment and thin out your paint as you go along. This is fine, for the most part, but it sometimes takes a lot of mixing to get an even consistency. Using an acrylic-based medium will allow you to thin out your paint without having the weird quality that you get with water. Again, this might not be something you'll even think about or notice until you've been painting for a while.
Pure, transparent matte medium is also good to paint on tape edges before you go in with your color to ensure a clean, hard edge.
If you're using acrylics, a hairdryer can be your friend. The thing about acrylics is that they air-dry quickly, and even moreso with a dryer. This means that once you've made a mistake, or finished an area to a certain degree, you can dry it off with the hairdryer, then almost immediately cover it up with another coat.
As for actual technique, you learn more as you go along. You'll develop experience, personal style, preference, influences, etc.. But here are some general things I keep in mind:
Paint from the background to the foreground. This means that you paint, say, your blue sky before the mountain. This ensures that:
(edit: As with drawing, you should be aware of the whole canvas at once, and block big parts in first, then work to details. Don't let my above process get in the way of taking care of the "big picture" stuff. It just happens that for me at least, the background is often the largest part of the composition!)
Also, remember to mix for black whenever possible. Using black straight out of the tube can feel flat and cheap. Unless that's something you're going for, at least mix it with another color to give it some depth.
Then there's even more about color. What do you know about mixing colors, pigment, etc.? Do you work in, say, colored pencils or even color digital media at all? I can talk for ages about more of this kind of stuff. But I've said enough already.
There's so much to know! One of the best things you can do to teach yourself is to also look at your favorite artists and see if you can research their techniques. Read interviews with them, some might post videos, etc. etc. But most of all-- have fun and experiment.
Also, you might want to invest in a belt hole punch. They're about $8-10 on amazon, and its way easier than trying to use a drill to make an emergency hole in a belt at 6 am. Ask me how I know.
Using something like this is a lot cheaper than buying new belts. Works great.
Wax Carving Tools are one of the best investments I've made.
As well as one of these or these, depending on the vape you use.
Seconding the Kemper recommendation.
These are cheap and cheerful too, depending on the scale you're working at. https://www.amazon.com/SE-DD312-12-Piece-Stainless-Carvers/dp/B000SVRSRY/
Grab some Zen Pipe Cleaners
&
Grab a bottle of Propylene Glycol (lube for the mouthpiece)
Ring spacer although I'm not sure if it would fill in 2 sizes difference
If you wish to use markers for panel lining, you will want a fine tip pen such as:
https://www.amazon.com/GSI-Creos-Black-Gundam-Marker/dp/B00HY8JI7C
I bought these! They came with a bunch of sizes https://www.amazon.com/gp/product/B01M0OX3EW/ref=oh_aui_detailpage_o01_s00?ie=UTF8&psc=1
This happened to me too! Someone on Reddit recommended these and they saved my life! Not going to resize until I order my wedding band 😊 https://www.amazon.com/gp/aw/d/B01M0OX3EW?psc=1&amp;ref=yo_pop_mb_pd_title
I bought a [Tamiya tool set] (https://www.amazon.com/Tamiya-Basic-Tool-Horizon-Hobby/dp/B000BMYWXI) like a decade a ago and I still use the side cutter and blade. I am not use to hobby knives, so I cut the nub far from the piece and then use the slide knife in that set to remove the remaining nub. I'm just more comfortable with that than I am with hobby knives. And then if there are still white stress marks, run over it with your fingernail. It works, don't know the chemistry or physics behind it. Get a [gundam marker lining pen thing] (https://www.amazon.com/GSI-Creos-Black-Gundam-Marker/dp/B00HY8JI7C/ref=pd_lpo_21_lp_t_4?_encoding=UTF8&amp;psc=1&amp;refRID=P3JJW08V8MEW95H7MR8M). You can use other fine tipped marker, different colors, etc, but your mileage may vary.
(October '18 bride here!) Firstly, congrats on your upcoming marriage!
Someone on r/weddingplanning suggested not trying on dresses too early. She went pretty early on in her weight loss and bought a dress that, while she still loves, isn't the style she would have bought for the body she has now. If you've always been fat, you might not be able to guess what will look good after you've lost weight. My FMIL is very excited to go dress shopping and I have to keep reminding myself that at this point it'll do more harm than good.
Another thing to remember about dresses is that dresses with beading are going to be much harder and more expensive to alter than other dresses. Corset backs can usually be added pretty easily, which will also help with sizing. Switch to maintenance after your last fitting to make sure your dress isn't too big on the big day!
If you're losing slowly, you have a better chance of avoiding loose skin. There's also anecdotal evidence that intermittent fasting will help tighten your skin, too. r/intermittentfasting might be of better help with that!
Last bit of advice is to not let anyone make you feel bad about losing weight "for your wedding." At least for me, losing weight is something I've needed to do for a long time- the wedding is just a motivator for making changes.
Edit: last-last piece of advice is to get a ring adjuster! As you lose more weight, this will allow you to keep wearing your ring without actually resizing it.
I bought these for my wedding rings. Huge lifesaver.
I use my airbrush for applying anything that I can, be that paint/stain/finish etc. Aside from saving money on paint you get much better results with a bit of practice. Smoother transitions etc etc. This is especially true with laser cut projects as I will often mask whatever it is that I am making, which allows me to spray the engraved/cut parts with an airbrush, and then remove the masking for perfect results.here is an example Basically an airbrush is GREAT in combination with a laser cutter, that said, there is a cost. I'll provide you some links to my setup.
airbrush
compressor
fume hood
masking material
Also there will be a smattering of paints/cleaners/paint thinners and airbrush cleaning supplies you'll need. So you are probably looking at $300-500 investment to get a good set up. Now clearly you can spend less on the airbrush, and if you plan on working outside, you can skip the fume hood etc etc, but just know that you won't be saving money on this right off the bat. All that said I heartily recommend getting one
That is the one, without the lighting. I wound up getting [this one] (http://www.amazon.com/Master-Airbrush%C2%AE-Portable-Airbrush-Extension/dp/B00NLQ019A/ref=sr_1_1?ie=UTF8&amp;qid=1464496077&amp;sr=8-1&amp;keywords=airbrush+spray+booth) because it was roughly the same total cost as the one you linked to since I have prime for free shipping and it came with the lights. If I had to do it over, I would probably get the one you linked to and get some of the LED's pointed out by /u/Bastidgeson.
Here is a video I found of someone actually using the booth. Skip to around 3:20. My only other comment is to make sure that there is enough room for the unit plus the hose coming out of the back wherever you are putting it. I have mine set up on a counter top (standard 24" deep) and, even angling the hoses at 90's to snake it to the window, the booth still sticks out over the edge of the counter by around 8 inches. I measured from the wall to the front edge and it's about 32 1/2" in total, from the front edge to the back curve of the hose. I wound up getting 3 pieces of scrap wood to put under it as support, just in case.
I decided to try to take a photo to show you what the built-in lighting looks like. I manually set up the photo so it looks very close to what I was seeing. I put that orange paint in there to really show the blue lighting effect on color. The 'white' stuff has been base coated with Vallejo Ivory. The AT-ST's in the back are the gray Krylon primer, prepped for painting. As a contrast photo, here are some y-wings with the same Vallejo Ivory (and one with just white Krylon primer), but under natural LED lighting. Also, you can see two of my tricks for prepping to airbrush large groups of things. For flat-ish objects, I can use double-sided tape on those jumbo craft sticks. For everything else, I use the blue poster tack stuff. I also keep empty medicine bottles in case there is just one thing that I am painting. Really, that turntable hasn't helped me much.
It is size 6 but its a tiny bit loose (not easy to come off but shifts on my finger most days), currently waiting on an order of ring size adjusters from Amazon:
https://www.amazon.com/GWHOLE-Adjuster-Silver-Polishing-Cloth/dp/B01M0OX3EW
Here you go!
I would highly recommend you get a basic airbrush station. Masters makes a very simple airbrush station that while not perfect does help considerably, https://www.amazon.com/Master-Airbrush-Portable-Lighting-Extension/dp/B00NLQ019A (there's are a few versions, one without tubing and another without light.) Alternatively you could put it near a window and have a fan blowing it out. Either way you really don't want to breath that aerosolized paint/primer/varnish and it lingers for quite a while, even after you've stopped smelling it.
As for flock storage I use some plastic Really Useful Boxes that I've glued some foam sheet to the top inside of the lid of to stop it from spilling out when closed.
GSI Creos Black Fine Point Gundam Marker https://www.amazon.com/dp/B00HY8JI7C/ref=cm_sw_r_cp_api_i_w8YVDbZW4ESJD
I don't know if I'm missing something here, but this doesn't look odd to me at all. I actually like the gap. If the ring moves around so that the little stones don't align with the big stone maybe you could bind the two rings together. You can try using ring size adjusters first if you want to save money instead of going to the jeweler and having them permanently connect them: https://www.amazon.com/gp/product/B01M0OX3EW/ref=oh_aui_search_detailpage?ie=UTF8&amp;psc=1
I recommend taking a trip down to a local hobby store that sells gunpla- I've found that (at least for mine) it's usually cheaper and can have kits that aren't available online. You can also improve your build with some panel lining- using one of these (or a marker of your choice) along lines in the design to make it look as though 2 panels are separated.
My ring is a bit too big for me right now as well and, I think based on recommendations here, I found this product on Amazon. It's been great for me as I weight to lose the last bit of weight before resizing and as you can see was like $8. Highly recommended.
IWATA NEO CN airbrush and AS-186 compressor.
For a total of 140$ as the time of writing this (on 5.8.2019.) it is the best cheap airbrush and compressor combo.
Why? You get the whole package - Airbrush, a compressor with a tank, air filter and a hose which is all you need to start airbrushing
Iwata Neo is considered the best cheap(est) branded airbrush on the market by many so I used it here, also the AS-186 compressor (Check later in the page about it more) is p good. You also get a hose which far too many people forget to buy when choosing a compressor.
mostly everything
-----
Note for other users - I am currently rewriting the airbrush page a bit (this will be on the top of the page), so if you have any wishes to add to it please comment.
I'm not a veteran by any means in terms of Airbrushing (I've airbrushed 2 kits... a MG Strike Freedom & a MG Nu)
For both of them I went with a very cheap set-up...
For the Airbrush I used a Iwata Neo Gravity which I bought at Hobby Lobby for about $45 w/ their 40% off Coupon :P and it was a great starter airbrush, to me it was straight to the point and definitely something I'd recommend.
As far as my compressor goes, I went with Master Compressor. Reason being is it had a Hose, Water Trap & the Compressor. It works great and I still use it and I like it.
I didn't have a Spray Booth and went with spraying in a damn tub I bought at Walmart for $3 lol and didn't even have a mask...
I highly recommend getting one as it definitely helps out.
I recently bought one and I now use the MSA Safety Works Mask. I started painting my 3rd Airbrushed Kit (about 3 pieces primered lol) and this mask is a god send. I was killing myself before and don't suggest you do the same.
With a Airbrush & the Compressor Set that I linked you should be good to go all you really need is paint which I bought all of mine at the time from Hobby Town USA since they carry Tamiya Paints which are very user friendly and I thinned it 1:1 with 91% Isoprophyl Alcohol from Walmart.
I was in the very same position as you lol, I built about 9 kits before starting a Airbrushed model.
I recently purchased another Airbrush, I got the Master G23 and I've only used Primer on it but it's pretty good, the action isn't as great as my Neo but it's nice enough since I'm no pro and I feel it matches my skill level.
If you have any other questions I can help you as much as I can.
COPYING MY RESPONSE FROM A OLD POST!
I have used the Master Airbrush to paint my Hi-Nu Bust(Scroll down for it) and my MG Unicorn.
Both came out pretty well and to be honest I don't suggest you start with a Airbrush that is expensive... I've done some decent work on my stuff using the Iwata Neo & the Master which both we're under $50... Decent enough to place in contests.
Sure, nothing special really, this is my brush.
https://www.amazon.com/Gravity-Feed-Dual-Action-Airbrush/dp/B004INERK4
Here's my compressor
https://www.amazon.com/Iwata-Medea-Studio-Silver-Single-Compressor/dp/B000BQPNVY
I've only been painting for about 6 months now but if there's one thing I have learned it's to be patient and not rush, also make sure your paint is the right consistency.
I bought some moldable plastic & was surpised to discover most people are using it for false teeth. It is pretty cool stuff.
https://www.amazon.com/InstaMorph-Moldable-Plastic-6-oz/dp/B004MFLU4Y/ref=pd_sbs_328_1?_encoding=UTF8&pd_rd_i=B004MFLU4Y&pd_rd_r=db76cbd5-e0b8-11e8-a192-c9cc3f1dfa1a&pd_rd_w=2KTcR&pd_rd_wg=vAiBe&pf_rd_i=desktop-dp-sims&pf_rd_m=ATVPDKIKX0DER&pf_rd_p=7d5d9c3c-5e01-44ac-97fd-261afd40b865&pf_rd_r=B7Q79AJPSNNCZ33GAMR2&pf_rd_s=desktop-dp-sims&pf_rd_t=40701&psc=1&refRID=B7Q79AJPSNNCZ33GAMR2
Sugru or moldable plastic. Save what you don't use for another fix.
Seems like loads of people use this one- you can check out the pocket configuration in the photos. Main thing is, it's not too bulky & still has good storage and protection. I like it https://www.amazon.com/LIHIT-LAB-Case-Black-A7551-24/dp/B004WMWCYE
I just got this Lihit Lab case and like it. It holds a good amount of stuff, looks nice enough, and was really cheap... the cost was the driving factor for me. I am not totally sure what I want/need in a pen case yet, so I didn't want to commit to anything too expensive. This was $10 and does the job pretty darn well!
For a student I'd recommend the Nock Brasstown 100%. https://www.gouletpens.com/nock-co-pen-case-brasstown-raven-aqua/p/NC-NZ60BAq
If that's too steep then this one is pretty nice and it fits a graphing calculator or a pocket notebook too: https://www.amazon.com/dp/B004WMWCYE/ref=twister_B01FVTMSDG?_encoding=UTF8&amp;psc=1
It’s the Lihit Lab Pen Case. It’s on Amazon for $8-10. Been loving it so far. Here’s the link to it: https://www.amazon.com/LIHIT-Case-inches-Black-A7551-24/dp/B004WMWCYE/ref=mp_s_a_1_2?ie=UTF8&amp;qid=1538077661&amp;sr=8-2&amp;pi=AC_SX236_SY340_QL65&amp;keywords=lihit+lab&amp;dpPl=1&amp;dpID=41iFZrvOA8L&amp;ref=plSrch
I have these
This one which has my BuJo stuff....ruler, eraser, Rotring 600 0.5 and 600 Ballpoint and two Micron PN markers. I keep this one in my laptop bag
This one I use for keeping my Zebra F-xMD stash, fountain pen ink bottles, spare leads etc
This one I use to keep my Fountain Pens, Parker Pens and other misc pens in
One of these might suit your needs
this is what i use. it's an ok case just that one of the pockets on the inside was tearing from the seem when i stuck one of my block erasers in there. other than that no complaints.
Check out this review from jetpens, as it helped me choose my own pen case: https://youtu.be/ls8rklb7kEs.
Personally, I use the LIHIT pen case (that's under $10 right now): https://www.amazon.com/LIHIT-Case-inches-Black-A7551-24/dp/B004WMWCYE. For the few months I've used it, it's has been durable, compact, nice to look at, multifunctioned and quite cheap! Good luck with any purchase you make 😀 {DISCLAIMER: N0T A PA1D BO7}
The other friend just stopped talking to me a couple weeks later for reasons unknown. It was a big bummer.
A couple months later, ex-gf contacted me out of the blue to get lunch. I was super excited at the prospect, so I went. She told me she was sorry for not keeping in touch as promised. Her previous breakups were always terrible, but she realized I actually meant it when I said I wanted to remain friends. We kept in touch for a few years and saw each other on occasion. It was nice.
Moral: If someone needs space, do your best to give it to them. It could turn around.
4. [Surprised Crono](http://www.videogamesprites.net/ChronoTrigger/Party/Crono/Crono%20-%20Shocked%20(Front%29.gif), [Lucca casting a spell](http://www.videogamesprites.net/ChronoTrigger/Party/Lucca/Lucca%20-%20Right%20Arm%20(Front%29.gif), emo Setzer - for perlers, of course!
Thanks for the contest!
---
The fact that you are even thinking of doing something like this for people you've never met, especially when it will cost you money that you don't have, is amazing. Never let anyone tell you that you're anything less than great. You've got a good head on your shoulders, and you should be proud of that.
https://www.amazon.com/Walnut-Hollow-Versa-Temp-Temperature-Woodburning/dp/B005P1TRAS
Here this is a good one to start with it has temperature control which is great (its currently on sale so bonus). The kit i started with didn't and its been a hassle.
I have a process down that I love (since I'm not artistically gifted at drawing or writing pretty). I neither free hand, nor draw it.
I use an inkjet printer and print the image, phrase, etc. onto wax paper (but it has to be mirrored horizontally). The inkjet printing on wax paper will not allow the ink to dry. You can then press the paper onto the wood (do some careful measuring and marking to ensure that you get it where you want it). Make sure you do it once and do it right without moving it (otherwise the ink will smear). Then you basically have a printed version of whatever you want to burn on the wood piece all drawn out for you. You can then trace over the ink with a wood burner (see link below for cheapo kit I have used for this method which works great). This saves me from having to be skilled/artistic, and I also find that the ink burns into the wood and helps enhance the blackness of the burn marks.
&#x200B;
I spent about $150 a couple years ago for a cheap cheap inkjet printer, a ream or two of wax paper, and the wood burning kit and I have gotten a ton of mileage out of it.
&#x200B;
Link for transferring printed item to wood
https://www.theartofdoingstuff.com/print-on-wood/
&#x200B;
Cheapo wood burning kit I use
https://www.amazon.com/Walnut-Hollow-Versa-Temp-Temperature-Woodburning/dp/B005P1TRAS/ref=sr_1_7?keywords=wood+burning+kit&qid=1569870300&s=gateway&sr=8-7
I used these to burn the lettering:
Definitely want to sand the finish off the handle first - makes the burning easier. Also need to go slow with it since the curve won't allow you to get the entire letter burned in at once. Kinda have to roll it up and down.
Did the whole thing (including hammer) for about $50
This is the burner I'm currently using, but it's pricy. I started Woodburn initially using this,to see if I'd like it, but the thread for the tips melted with extended use. I invested in the fancy professional one when I felt certain I was going to keep this hobby going, but the first one I bought really worked well for practice and testing out the hobby!
Yes!
https://www.amazon.com/dp/B01GPVFZHK/ref=cm_sw_r_cp_api_DL1BybCTR66N6
https://www.amazon.com/dp/B0074MHV7W/ref=cm_sw_r_cp_api_zM1BybYBHDSWT
They should sell googly eyes in their shop to stick to the front of the Rift.
https://www.amazon.com/dp/B0074MHV7W/ref=cm_sw_r_cp_awd_yuTKwbW664SEN
Not to mention that you are providing entertainment to your whole family! Start charging admission! Don't forget the Googly Eyes! :D
Edit: added link
If you're talking about this model
https://www.amazon.com/Master-Airbrush-Portable-Optional-Extension/dp/B00B2TESUQ
I just got the updated version, it does the job well for airbrushing at around 15-25 psi, I haven't tried it with anything else though. The LED lights it comes with are bright and the fans are strong. I've read reviews that some people have problems with it after a couple of months and others say it works very well after a year plus of regular use.
But they're easy to fold and relatively light so very easy to transport from one location to another
I was looking at getting something like this
http://www.amazon.com/Master-Airbrush%C2%AE-Portable-Airbrush-Extension/dp/B00B2TESUQ/
Does anyone have any experience with that?
Hi there, well, for 300$ here is what you can get:
First of, the compressor, it's quiet, it's reliable, I've had one for 2 years, still kicking and it's a good deal, 1/5 hp MASTER AIRBRUSH TANK COMPRESSOR , that is the best for the money. Now, if you want an Iwata airbrush, start off with a Neo, this is gonna be your workhorse airbrush, the one you apply basecoats and major workloads with, when you do fnd it, don't pay more than 60$ for it, Iwata Neo, and finally, for detailing jobs like highights or if you wanna get more detailed on your work, you will need a finer needle airbrush, .03 to be exact, following the Iwata series, here is the Iwata Anest, Eclipse with a .03 needle, if you buy all 3 of these, you will have less than 300$ which you cna also spend on quick release adapters for both airbrushes: Quick release x 3, the compressor does come with a hose. Hope this helps, also, might wanna think about using Vallejo and Tamiya, since they are acrylic, they are a lot more forgiving than enamels, but that is my personal opinion.
Don't bother with the tankless models!
I own this guy: http://www.amazon.com/dp/B001738DXU/ref=pe_385040_30332200_TE_item
It's quiet as a cat's purr. Less expensive, has a tank (thus no pulsing of air pressure), and because it has a tank it's not on all the time. It's very small and fits inside a gunpla box! Don't bother with tankless models unless space is a big issue!
PS: Plus, it's on -55% off sale right now...
Master Compressor
I have this one and it has been good so far. I prefer tank as the motor is not continuously running. This is also beneficial as the motor doesn't heat up as quickly which is better for painting and increases the longevity.
You can get a decent, but pretty basic kit for $80 (http://www.amazon.com/Master-Airbrush-Multi-purpose-Dual-action-Compressor/dp/B001TO578Q/ref=sr_1_sc_2?ie=UTF8&amp;qid=1451448207&amp;sr=8-2-spell&amp;keywords=airrbrush+kit)
I have no experience with that airbrush, so I cannot speak of its quality. My recommendation is to buy the Iwata Neo from Hobby Lobby or Michaels. 50% off coupons are pretty easy to come by, so you could get it for $50-$60.
If you do that, you will need a compressor. The TC-20T (http://www.amazon.com/AIRBRUSH-COMPRESSOR--Airbrush-Published-Exclusively/dp/B001738DXU/ref=sr_1_2?ie=UTF8&amp;qid=1451448428&amp;sr=8-2&amp;keywords=tc20t) is a good compressor that is pretty quiet and has a tank.
Personally, I have a Badge 105 Patriot and I just use a noisy Campbell-Hausfield compressor. I just got these for Christmas and am still experimenting with it before I paint a model.
I wish the best of luck to you!
http://www.amazon.com/gp/product/B001738DXU
http://www.amazon.com/gp/product/B002KJDXHQ
http://www.amazon.com/gp/product/B000VADIVC
That's what I have. A compressor with a tank makes all the difference and a decent but cheap airbrush to mess with. Plus that stand/cleaning station thing is a life saver. It's so handy.
I have that same brush and it also looks like that when it is dry. It is one of my favorite brushes. I read somewhere that as long as the brush comes to a fine point when wet, then all is still good :)
My brush care from my experience - When I'm done painting I rinse or swish the brush with warm water until there is no color if I dab it on a paper towel. Squeeze out excess water, and let them dry on their side (upside down would be better so that water doesn't leak into the ferrule). This is the lazy approach but works best, I'm finding :)
If I used a staining color like phthalo blue, or if I feel like the brush is still dirty, I might use a little of the master's conditioning soap to clean it, rinse, apply a little more to "condition" and then squeeze out excess water and shape to a point. I used to use this every time after I painted, but I heard it can be a little harsh on natural bristles so now I just do it every once in awhile.
Another tip is just to be gentle with brushes while painting - if you scrub with them they wear out quicker - I often use a cheap brush when mixing colors or doing scrubby things.
I'm not 100% sure this is the best care for brushes, as every guide or person seems to have their own way, but this is how I've been taking care of my natural and synthetic brushes for a few years and almost all of them are still holding up well. Some of my synthetic brushes are losing their sharp tip a little over time.
Brushes whatever you need, I use a lot the 0, 3/0 and 10/0 all round tipped but this depends on how you paint. A lot of people here (in other posts) mentioned Winston and Newton series 7 if I remember well, I use davinci and vallejo ones. The best bristle is from kolinsky sable.
About having the same brush repeated for each type of paint is kinda retarded but if you feel like doing it go ahead.
What you really need if you want them to last is this
. Just google it and there're a ton of vids on how to use it (not hard but just in case)
This
It's a lifesaver, have used it for a long time as a painter, works just as well for modeling. clean your brushes with it after every session. you can also find, at art stores, brush reshaping conditioners made to fix frayed bristles.
if you are buyng high quality brushes, they need to be very well taken care of to be worth the money.
are you painting detail work, or whole kits?
The only reason to stay away from GW brushes is the price. You can buy comparable brushes for slightly less that's all.
At the end of the day, whatever brush you buy: TAKE CARE OF THEM.
I'd say for anything that's smaller than a vehicle, a well maintained 1 is a fine brush. If the tip is good, you can go as high as a 3 but will need some good control. I do edge highlighting with a 000 to 0, I have an 18/0 for eyes. I'll base with a 1 or larger depending on how quickly I want it done.
Here's a Brush Cleaner I, and a lot of people I know, use
Army Painter are probably the best reasonably priced equivalent however if you want to up your game definitely splash out on some Windsor and Newton Series 7 like /u/Route66_LANparty mentioned.
Whatever you go with make sure you get some of this, proper use will keep your brushes alive for months on end ;)
https://www.amazon.co.uk/The-Masters-Brush-Cleaner-Preserver-1oz/dp/B001TNR7VM/ref=sr_1_1?ie=UTF8&amp;qid=1520353247&amp;sr=8-1&amp;keywords=masters+brush+cleaner
Masters brush cleaner is awesome. It's basically a soap you work into the brush and it can revitalize even far gone brushes.
Amazon
Here's Les from the Awesomepaintjob using it
It's good stuff.
(DEATH TO THE FALSE EMPEROR!)
I'd say with almost absolute certainty, DO NOT BUY the citadel brushes. Buy 1 or 2 Winsor Newton series 7 brushes. Probably a #1 and a #0. Buy some of this masters brush cleaner as well. And you're set. My personal advice is to clean your brush every 5-10 minutes no matter what. The citadel brushes are sooooo damned expensive for what you get vs what you need that it feels criminal.
I'd also add brush cleaner for when you upgrade to the nice brushes.
linky
In terms of starter compressors, this is the one usually recommended.
https://www.amazon.com/dp/B0038D38AA/ref=cm_sw_r_cp_ep_dp_xmHjzb3JYF8CN
This has both a pressure gauge and moisture trap along with a tank. Only issue is you may need to buy a different size hose and/or adaptor as airbrushes vary in connector size and not sure if it would fit the one you have. The reason for a tank is that it allows for a more constant air pressure as air is coming from the tank reserve and not directly from the compressor which can give some variance on your pressure as you spray which can affect your paint job. It also takes load off the compressor as they will generally sleep once the tank is full and pressure is met therefore extending the life of the compressor as it won't be constantly on as you spray.
Try this handle from boye I got mine from Joann's or Michaels, with a coupon, it totally saved me when I made a baby blanket!!
When I first started my hands would hurt like crazy if I crocheted for more than an hour or two. I figured out that my problem was that I was keeping an iron grip on the hook. I added these with these on top of them and that's helped a lot. There's also a big ball-type grippy thing that you could get. I hope you find something that helps.
Let me also suggest this handle. It saved my hands from cramping
Boye Ergonomic Aluminum Crochet Hook Handle https://www.amazon.com/dp/B004ALF72G/ref=cm_sw_r_awd_JBfcvb01SDGVD
Also, for the love of anything remotely holy, clean your drybrush as soon as you're done using it!
Generally, you don't thin the paint you use when drybrushing so the paint dries faster and thicker and will ruin your bristles if you're not careful.
I like to use this to clean my brushes. Drybrush will still wear away your brush, but cleaning it with more than just water will keep it going for much longer.
Also, all the greebling on the the Y-wing will be a great way to practice washing and drybrushing!
All you need is water to clean off the bristles, and some brush soap at the end of the session.
Thinners are generally reserved for enamels and oils.
Hey OP, you specifically need brush soap. Also for some really gunky brushes you can get some brush restorer. The first is a soap made specifically for paint brushes and the restorer is a clear liquid that can help get paint that is caught in the ferrule. The restorer is great. I bought a set of helping hands and I've revived some really old brushes by just letting them sit in there for a few hours. Winsdor and Newton make the restorer.
Anyways, brush soap is ideal for holding the bristles firm and to help remove paint from between the fibers. You definitely need to get some. Even if you still go through brushes like mad this is just proper brush-hygiene. My cleaning process is to at least clean every brush I used at the end of every painting session. I also clean them when I move to a totally different color (e.g. blues to reds). "The Masters" is a good and very popular brush soap and I also oddly like the scent Amazon Link.
Cheers, PS: Make sure you get the soap wet before you start swiping the brush all up on it. ;)
Edit: PSS: Do not stick your brush in restorer fluid past the ferrule. It will eat away the glue binding everything together and you will have ruined a brush.
I wonder how the BB one compares to the General Pencil Company cleaner I've heard so much about.
I currently just swirl my brushes around in soapy water and it can be quite time consuming for foundation brushes. I need to try one of these products. I also want to get a spray to use on eyeshadow blending brushes between thorough washes.
I use this brush cleaner. When I'm done using my brushes for the day I clean them with it (just water and the cleaner) and then wash them. I then lather the brushes in the cleaner again before hanging them up on the rack. The cleaner dries semi-hard and helps keep the points straight and firm.
I use this stuff and it is incredible at getting paint out and keeping brushes happy.
Brush Soap
What a lovely idea! For me, it's been fun testing out materials and finding what I like to use. Depending on her media interests, here's what I'd recommend thinking about:
A Brush Pen (especially for cartooning on the go!):
http://www.amazon.com/Pentel-Pocket-Brush-Refills-GFKP3BPA/dp/B002LJRKN8/ref=sr_1_1?ie=UTF8&amp;qid=1448983878&amp;sr=8-1&amp;keywords=cartooning+brush
A Nice Brush:
http://www.amazon.com/Winsor-Newton-Kolinsky-Pointed-Brushes/dp/B0013E68TO/ref=sr_1_1?ie=UTF8&amp;qid=1448984196&amp;sr=8-1&amp;keywords=Windsor-Newton+Series+7+sable+%232
Some Ink:
http://www.amazon.com/Speedball-2-Ounce-India-Super-Black/dp/B0007ZJ8TM/ref=sr_1_3?ie=UTF8&amp;qid=1448983937&amp;sr=8-3&amp;keywords=ink+cartooning
A Brush Cleaner:
http://www.amazon.com/General-Pencil-Company-Masters-Preserver/dp/B0009RRT9Y/ref=pd_sim_201_12?ie=UTF8&amp;dpID=512oIauSQjL&amp;dpSrc=sims&amp;preST=_AC_UL160_SR149%2C160_&amp;refRID=1J5XTFQ5TBWPSS5E39AV
An Ames Lettering Guide:
http://www.amazon.com/Alvin-Ames-Lettering-Guide-AL666/dp/B001DNAHRO/ref=sr_1_1?ie=UTF8&amp;qid=1448984324&amp;sr=8-1&amp;keywords=AMES+LETTERING+GUIDE
A copy of Making Comics by Scott McCloud (SO useful!):
http://www.amazon.com/Making-Comics-Storytelling-Secrets-Graphic/dp/0060780940/ref=sr_1_13?ie=UTF8&amp;qid=1448984007&amp;sr=8-13&amp;keywords=cartooning
I just bought this at the recommendation of someone here. That will save my hands!
I believe the aero spray is modeled after the famous Iwata Airbrush in real life: https://www.amazon.com/Iwata-Medea-Eclipse-Action-Airbrush-Gravity/dp/B000BQKFAI
My Lamy Safari is getting quite worn out. I've had it for years and it's been riding around in my pocket the entire time. Switching back to writing in cursive with that pen made it so that I can actually somewhat keep up with notes without developing horrifying writer's cramp.
A large portion of the black coating is gone off of the wire clip, it no longer retains in the cap like it should, and I've had to replace the nib where it got loose in my pocket and got crushed. Still love the thing, though. In the end, it's wound up saving me money, because the $40 I spent on the pen, a bottle of ink, plunger insert, and replacement nib is all I've spent on writing implements in the last 3 years or so, whereas before, I was going through multiple G2 gel pens a month.
I have no idea why that caused me to go off onto such a tangent. I guess I'm just attached to that pen. I use Noodler's Bulletproof Black Ink in mine, by the way.
EDIT: Why not get that USP in .45 ACP, by the way? I think I would have gone with .45 instead. I already have half a dozen handguns in 9mm, though, so maybe it's just saturation on my part.
Okay, sweet. So, one of the cool things about fountain pens is their customization to how you want to write. Do you like writing small and precise? Get an EF or F nib. Do you like cursive-looking writing? Get an italic nub. Do you like sexy line variation? Get a flex nib.
My point is that I would get one of the two most recommended starter fountain pens so that you won't be stuck with an experience you don't like having spent $50 on a design or nib size that doesn't suit you: the Lamy Safari or the Pilot Metropolitan. After the first few pens, you'll have an idea of what you really like in a fountain pen. These pens are both inexpensive, relatively high build quality, and nice writers. I started with a Lamy Safari EF as my first pen and I still use is regularly because it is a nice pen, despite it being inexpensive. But I think you can look around Youtube or Google some reviews on the two and see which one looks more appealing to you. I personally recommend the Lamy Safari because it has a "tripod" grip that helps beginners position the pen so that the nib is in the right orientation. See the Safari here. The Metropolitan is also a nice pen. So again, whatever you think looks cooler.
Fountain pens can be refilled through disposable cartridges or through filling mechanisms that take up ink from a bottle.
My first bottle of ink was Noodler's Black.
And to refill the Safari, I had to buy a converter.
I started using fountain pens around 5 or so months ago, and my bottle of the same ink is still going strong. (Although I have bought tons more other colors. :D).
I wrote a slightly more extensive "beginner fountain pen guide and why you should use fountain pens" comment on another post, and I'll link that here if you want to read it.
Online, the ink I use is on Amazon so I just get it there in recent years.
Any of the inks that are considered "bulletproof" from Noodler's (Noodler's black, 54th Mass. etc.) will not smear (unless they haven't dried). Once a bulletproof black is on some cellulose material (e.g. paper, fibers) it is there for good.
http://www.amazon.com/Noodlers-Black-Waterproof-Fountain-Pen/dp/B000MVZ2E6/ref=sr_1_1?ie=UTF8&amp;qid=1427578163&amp;sr=8-1&amp;keywords=noodler%27s+black
Noodler's Black is fairly well known for being bleed resistant:
https://www.amazon.com/Noodlers-Black-Waterproof-Fountain-Pen/dp/B000MVZ2E6
For bleed through I've found that higher quality paper helps more than different inks. I like these A5 Clairefontaines:
https://www.gouletpens.com/clairefontaine-1951-clothbound-notebook-black-lined/p/C195246
Tried my best to measure with a ruler at work, here's what I found:
[EDIT]
Cheap leather hole punch tool if anyone ends up needing to use it, it works well: https://www.amazon.com/dp/B000NK5VY2/ref=cm_sw_r_awd_Hfhiub0RM4ZS5
Or get a leather punch that costs 9$
https://www.amazon.com/SE-7924LP-Heavy-Duty-Leather-Punch/dp/B000NK5VY2
I'm using some metal sculpting tools, Here's the set I'm using, a lot of sculpting comes down to experience and practice, life-drawing lessons always helped but besides that I've picked up some tips and tricks here and there. note some of these tips only relate to Sculpting with Super sculpy.
For the love of god make a sturdy armature
Thin pieces of sculpy can be cooked in boiling water anything below 8mm for about 15 minutes
when sculpting the eyes/eyelids It's much easier to use solid eyes. I usually roll 2 balls, throw them in some boiling water and then once they've hardened jam them into the eye sockets. It's much more forgiving when the you're trying to tuck in the eyelids around the eyeball and it doesn't give way to your tool
You can use lighter fluid to smooth out Sculpy, get a small sturdy paint brush and dipping it into lighter fluid you can use it to manipulate the Sculpy to get some nice flowing lines and soft edges.
thats the most I can think of off the top of my head.
SE DD312 12-Piece Stainless Steel Wax Carvers Set https://www.amazon.com/dp/B000SVRSRY/ref=cm_sw_r_cp_apa_i_GAPFDbPW0RSP7
Apoxie Sculpt 1 lb. White, 2 Part Modeling Compound (A & B) https://www.amazon.com/dp/B0013UDWXI/ref=cm_sw_r_cp_apa_i_9APFDb4BZREHF
Sand Detailer Finishing Kit, Finer Grits, 24 piece https://www.amazon.com/dp/B0039ZCQAK/ref=cm_sw_r_cp_apa_i_BCPFDbBV5SSGW
SERONLINE 24pcs Ball Stylus Dotting Tools, Polymer Modeling Clay Sculpting Tools Set Rock Painting Kit for Sculpture Pottery https://www.amazon.com/dp/B0776SN7Y5/ref=cm_sw_r_cp_apa_i_JDPFDbTH56VM0
Monster Clay Premium Grade Modeling Clay (5lb) https://www.amazon.com/dp/B0722NKKYF/ref=cm_sw_r_cp_apa_i_dEPFDb1WPY7K2
Special thanks to u/Morgan-3D and u/Lps2 for the STLS! I modified the Poseidon/Mod holder to fit my Joytech infinite....had an error when printing and it ended up being a perfect fit for the reverse banger and grommet. Coil holder and second Poseidon stand are awesome, thanks again to everyone here for providing so many tips. Happy Sunday y'all!
Details:
Joytech Espion Infinite & Sai TAF (Awesome Mod, but no Arctic Fox compatibility. The TCR mode is great so I don't feel like I'm missing out too much; I have a backup VooPoo I'll get around to flashing soon).
Usually running Triple Black Ceramic, TCR 366 / 27 Watts / 360 - 430 / Locked @ 0.29 with the Reverse Banger on a halfway decent rig. I get very solid clouds and throaty strong rips all day. I have some ti & quartz buckets to try but I'm so happy with the Triple Black I haven't got around to it yet.
Favorite items are obviously the 3D Prints and Reverse Banger. Loving this wax Carver kit (you can't beat this price anywhere) : SE DD312 12-Piece Stainless Steel Wax Carvers Set https://www.amazon.com/dp/B000SVRSRY/ref=cm_sw_r_cp_apa_i_CMOQCb61J6RYC
Also, this ultrasonic cleaner and portable case with ice packs is a must for me (all recommendations from waxpen & r/saionara):
Ultrasonic: Yesker Professional Ultrasonic Jewelry Cleaner with Digital Timer for Eyeglasses, Rings, Coins https://www.amazon.com/dp/B001DKDAVW/ref=cm_sw_r_cp_apa_i_zNOQCbYCNV3EB
goldwheat Portable Insulin Cooler Bag Diabetic Organizer Medical Travel Cooler Pack + 2 Ice Pack https://www.amazon.com/dp/B01E3MS782/ref=cm_sw_r_cp_apa_i_7NOQCb3RB56GX
Never would have got this dialed in without these subs & HVT! I am barely even using flower anymore.
Personally I would go with a decent quartz banger. Those glass nails, like the one that comes with your piece, are prone to break - but it is still very usable.
With the piece you linked, you'll need a 14mm female. Here is a very basic article on glass joint sizes and male/female genders - edit: looking for a better reference.
The general rule of thumb for male and female joints is if it inserts INTO a glass joint it is a male - Think penis. If it slides OVER a glass joint it is a female - Think vagina.
For example, the glass dome (and the bowl) on the piece you linked is a female joint because it slides over the male joint (not pictured) on the downstem.
While Ti nails are perfectly fine, I prefer quartz. I think the flavor is better, but this is just my opinion. There are a lot of options out there for nails, try them out and find what suits your tastes.
You can get along just fine with a banger by itself but, to get the most out of it you should learn how to use a carb cap. There is a learning curve with everything but through trial and error you'll eventually get to MLG360no-dome globfather status in no time.
As far as domed vs domeless, the piece you linked comes with a glass dome, which you would need if you used just a regular nail insert such as the glass one that comes with your piece. Here is an example of a domeless Ti nail, and here is one similar to yours with a dome and Ti nail insert.
Notice how the domeless nail has a an opening, or channel, in the middle for the vapor to flow through as you inhale. You don't need a dome to capture the vapor with a domeless nail. This is really the difference between the two types as the standard nail insert is basically a solid dish with no airways on the surface.
There are many styles of domeless nails but hopefully this will give you a general idea about the differences between the two.
I should add that with a domeless nail, you won't need a dome, but you will want to learn how to use a carb cap. Also, as /u/snobord mentioned, the carb caps are going to be different depending on what type of nail you decide to use. If they don't match up or properly restrict airflow, the caps will not work as intended. So be sure to do your research before deciding to pull the trigger.
You'll also need a dabber or dab tool to apply your concentrates to your nail. Personally, I use a Ti dabber with a ball point tip because it makes it easier for me to collect my rosin after I press it. There are a lot of options for dabbers as well and really I think it comes down to personal preference.
edit:
>/u/snobord
>The type of your concentrate is going to affect the kind of dabber you want to use. The ball point wouldn't be ideal for crumble, for example. I personally bought a stainless steel wax carver set from Amazon so I'd have all the bases covered.
Finally, you're going to need some sort of storage container for your concentrates like a wax wallet or something similar. A quick google search should point you in the right direction.
edit:
>/u/snobord
>As for the silicone containers, bought 10ish (don't remember exactly) of them last year, used them one or twice and basically haven't touched them since. The main reason is I pick up from dispensaries and it comes prepackaged in half/one gram packs and the process of transferring it over isn't even worth the effort. This is definitely a matter of opinion though so my point is just that op should try it out before buying a bunch.
Several edits later: If I missed the mark on anything let me know. Op, hopefully if I wasn't able to answer your questions someone more experienced can chime in and get you on the right path.
Good luck, and happy dabbing!
Zen Bundles Zen Pipe Cleaners Hard Bristle, 132 Count https://www.amazon.com/dp/B000W5R6UA/ref=cm_sw_r_cp_api_qNObAbWP8147Y
Get these. This pack has lasted me almost a year. I hardly ever use the brush that came with my Pax.
I block the mouth end with an old cut-up q-tip after removing the mouthpiece. Sometimes I'll scrape a bit of goo right away on the top with a dry q-tip but I do the finishing steps near the end by spraying a tiny amount of 99% iso on a qtip and rub away.
I dab the inside of the oven with 70% iso and I start scraping with a knife.
I finish off the oven with a green scouring pad that I cut to 1 cm/2 and dip it in iso and I use a precision screwdriver and I rub it in the oven.
Then I remove the old q tip and use those plastic lined pipe cleaners and dip it in iso and go to town on the vapor chamber.
I also wipe off the flat mouthpiece first with a towel to remove most of the goo and then I use cold water, an old toothbrush and dawn dish soap to clean it since you should avoid using iso on rubber if possible.
To clean the screen I just burn off the stuff with my torch lighter and it's like new.
Sometime I'll scrape some crap off my half pack oven lid with a knife if it gets too bad, then I clean it with iso and a qtip.
At the end I make sure to thoroughly wipe everything with 99% iso as to not inhale small scouring pad particulates that might have been left behind.
I have a tip to help with maintenance, if you're using the original screens, use a pair of pliers and bend the sides a little bit so it's easier to remove. On that note I remove the screen after each use and wipe the pax oven/screen with a dry q-tip, I use a bamboo skewer to help pry it off (by pushing on the side of the screen) and I can use it as a tool to scrape some abv that's stuck in the oven.
I have a Pax 3, a Mighty and a Dynavap M 2017 and yet my go-to is the pax3. If you treat it right, it's amazing.
Apologies for the text wall!
Often times the white acrylic pearled stems are very difficult to get back to perfect when the airway has been poorly maintained (not sure on your color). Best approach I have found with these is to completely submerge it and soak the stem in a mixture of white distilled vinegar and baking soda. You want the solution to bubble and fizz during the majority of the soak (so use a good amount of baking soda in the bottom of your container and a lot of patience filling it). I will usually place the stem tennon side down. Make sure you have cleared the airway as much as you can. You will want to see bubbles coming out through the lip as it soaks. You can soak for 1hr to overnight (this soak won't hurt anything)
Follow up the soak with passes of a bristle nylon brush (https://www.amazon.com/dp/B0115SLLLM/ref=cm_sw_r_cp_apa_aVXdzb72RVG6S) and hard bristle pipe cleaners if still being stubborn (https://www.amazon.com/dp/B000W5R6UA/ref=cm_sw_r_cp_apa_DWXdzbXF8T8WV) Pass multiple soft pipe cleaners dipped in the flat sodium bicarbonate solution, followed by dry ones. Aaaand REPEAT as many time as needed haha. It usually works pretty well for me.
You can also use the flat sodium bicarbonate mixture to clean the outside of the bowl and inside the shank to remove some smell! Vinegar and water is often recommended for cleaning hard wood floors that have been freshly stained as it won't remove stain and sanitizes. The extra dissolved baking soda can help with smell as well :)
These are only 5 bucks and they work great.
Is the screen or the pipe itself getting clogged. For the pipe I recommend the pipe cleaners that have metal bristles mixed in with the soft ones as well. As far as the screen I've found that if you make sure to hit the bowl and empty the ash and scrape the screen the second you are done, before the resin and ash can harden it helps keep it clean. Don't leave half smoked bowls. If it is attached and won't clean well it may be worth cutting out and leaving just enough around the edge to hold another screen in place, and just replace that one when it gets clogged.
Edit these are the pipe cleaners i'm talking about
these are really great for cleaning any smoking device, I have a bunch https://www.amazon.com/Bundles-Zen-Pipe-Cleaners-Bristle/dp/B000W5R6UA/ref=sr_1_1?ie=UTF8&amp;qid=1478012971&amp;sr=8-1&amp;keywords=zen+pipe+cleaners
Not for this price, they don't :)
And my local shop doesn't, actually. At least, they never do when I've shopped there, but they're much more porn oriented, the smoking accessories are relegated to a corner and most of it is way overpriced glass pieces. I wish there was a proper smoke shop like some of the ones I've seen online around here.
This is what I use for my customs.
Example
It's really sturdy & you can even get long/thin/sharp details without worrying about them breaking off.
Look up some tutorials & be sure to play around with it.
Haven't used it but a lot of people say "Green Stuff" is good too.
Just whatever you do, stay away from any air/bake dry clays I've yet to see any custom using those turn out decent.
Ok good because I’d recommend this stuff. It’s very easy to work with and fill holes. A little tip is to wet your fingers down after it’s pretty much in place and smooth it out. It takes awhile to set up but after that a little sanding and paint away.
Along with the already great suggestions by OrangeKrate76, check out Apoxie Sculpt.
It dries/cures slower so it gives you more working time to work with molding, so less sanding to do in the long run. But I'm not sure the structural and weight difference versus 2 part epoxy.
It often depends on what your end goal is. Some sculpting putty is going to be a bit softer and rubbery as it cures, while others will be very hard.
I like Aves Apoxie Sculpt for most projects. It's very hard when it cures, but you can work a decent amount of detail into it if you sculpt it after it's been out a while, but before it totally cures.
You might try Master's Brush Cleaner (some of the liquid brush repair fluids might work as well, try looking for the one from Winsor & Newton) and see if that works; however I wouldn't count on it.
It's quite personal (some very good painters I know use cheap nylon or Citadel brushes exclusively and replace as needed), but I would say that buying a W&N S7 brush was a revelation for me.
https://www.amazon.com/General-Pencil-Company-Masters-Preserver/dp/B0009RRT9Y/ref=sr_1_1?ie=UTF8&amp;qid=1518662342&amp;sr=8-1&amp;keywords=masters+brush+cleaner
THIS!
It may be cheaper if you go to an actual art supply store. I bought mine at Blick Art Supply store for around $5-6. It is amazing! I originally bought it for paint brushes and then read online how it was also used by many for makeup brushes. Cleans + Conditions (so your bristles are kept in good condition).
I'm sure Dawn soap will clean them, but I don't know if other chemicals in there will hurt them long run. I would recommend Masters Brush Cleaner. I found some in a local art supply store.
do it. Easily the best money you'll ever spend and it's only like $9 for the masters kind, which will last you a year at least.
Linky: https://www.amazon.com/General-Pencil-Company-Masters-Preserver/dp/B0009RRT9Y/ref=sr_1_5?ie=UTF8&amp;qid=1523038510&amp;sr=8-5&amp;keywords=brush+soap
EDIT: bought mine in July 2016 and it's still only about a quarter used up...so yeah. lol
You can look into some more tailored brush soap as opposed to just dish soap. This is what I use and it works pretty well. Similar process to what you're currently using and you can also leave some of the soap on to dry to "sculpt" and condition the brushes back into shape.
https://www.amazon.com/General-Pencil-Company-Masters-Preserver/dp/B0009RRT9Y/ref=pd_sim_201_1?_encoding=UTF8&amp;pd_rd_i=B0009RRT9Y&amp;pd_rd_r=QQF6259AR9VGHKBWVB05&amp;pd_rd_w=KwWqo&amp;pd_rd_wg=HjxeS&amp;psc=1&amp;refRID=QQF6259AR9VGHKBWVB05
I've used the stuff you find at a Hobby store, cheap brushes you find in a package of 20 for $2 and have started using the Da Vinci series of brushes. All brushes work and work with varying results. However, the issue is longevity. I've had to toss all the Hobby store brushes after 3 or 4 months because they start to fray and split. The Da Vinci brushes on the other hand I've been using for quite awhile and they still work as if I just took them out of the package.
I picked up this stuff which has made cleaning the brushes much easier, more thoroughly and increased the longevity, but the Hobby store brushes just don't last very long.
if you want to buy the cheap $5 brushes and replace them frequently then they'll work fine. But you tend to get "Attached" to a brush and how it works so longevity is a key factor for me.
Yeah that thing is called "helping hands" I believe, it serves the same purpose more or less.
Vallejo paint is arguably some of the longest lasting paint on the market, I would avoid GamesWorkshop paints as they have a reputation of drying out fast. However my Vallejo bottles from 2009 are still kicking.
Yeah, get him a canister of this stuff, and a couple either Raphael 8404 or Winsor & Newton S7's and he won't really need any other brush for years.
You can buy cheap airbrush kits from the "master" brand that include an airbrush and air compressor for I think about 80$, I don't personally have any experience with them so I can't say much about them. I've heard that the compressors will last a decent amount of time, comparable if not better than more expensive air compressors like Grex. And you can upgrade the airbrush at a later date for an entry level Iwata Revolution for like 70$.
A wet palette is a palette with a sponge or paper towel soaked in water covered by a piece of parchment paper. Basically it keeps paint moist so that they don't dry out within a few minutes of laying them on the palette. You can make one for nothing, you literally just need a stack of paper towels, a flat Tupperware container and a roll of parchment paper. But there are companies that make wet palettes and sell pre-cut inserts and such.
Here's a big fat messy shopping list I made for someone a while ago. You might find it useful too.
http://www.amazon.com/Quickshade-Ink-Warpaints-Army-Painter/dp/B00HC8D80W
Amazon.com: Quickshade Ink Set Warpaints Army Painter
http://www.amazon.com/Pacer-Technology-Zap-Zap-Adhesives/dp/B00SXJJ2QI
Amazon.com: Pacer Technology (Zap) Pacer Technology (Zap) Zap-A-Gap Adhesives, 1 oz
http://www.amazon.com/General-Pencil-Company-Masters-Preserver/dp/B0009RRT9Y
Amazon.com : General Pencil Company The Masters Brush Cleaner & Preserver 2.5 0z. : Brush Soap
http://www.amazon.com/Army-Painter-Wargame-Starter-Paint/dp/B01BJ55UDQ
Buy Army Painter Wargame Starter Paint Set - PLUS Promo Undead figure
http://www.amazon.com/280715-American-Accents-Primer-12-Ounce/dp/B00KZ6LLZW?
Buy Rust Oleum 280715 American Accents Ultra Cover 2X Spray Paint, White Primer, 12-Ounce
http://www.amazon.com/TEKTON-6655-Needle-File-10-Piece/dp/B000NPUKYS?
TEKTON 6655 Needle File Set, 10-Piece
http://www.amazon.com/Xacto-X3311-Precision-Knife-Blades/dp/B0000DD1N4?
Buy Xacto X3311 N0. 1 Precision Knife With 5 No. 11 Blades
http://www.amazon.com/Most-Wanted-Wargamer-Set/dp/B007H4YR8S
Amazon.com: 1 X Most Wanted Wargamer Brush Set
http://www.amazon.com/Xuron-170-II-Micro-Shear-Flush-Cutter/dp/B000IBSFAI
Xuron 170-II Micro-Shear Flush Cutter: Wire Cutters
http://www.amazon.com/Milliput-Standard-2-Part-Hardening-Yellow/dp/B011BO9R5W
Amazon.com: 2 X Milliput Standard 2-Part Self Hardening Putty, Yellow/Grey
Edit: Of, and I used this guide for making my Thinner. http://www.reapermini.com/Thecraft/15 But I'm going to experiment more, because this is not perfect.
There are definitely better alternatives, but you can't go wrong using GW's brushes. All of GW's tutorials and videos use their own brand, and I find it easier to "follow along" by using them too. I imagine if I got some more experience and skill under my belt that I'd want to shift to using some higher quality brushes, but for a casual or beginner, I think they're just fine. You don't need to go hogwild and buy the entire range, just get some of the standard sizes and you'll be set (the essential set is a good selection).
Winsor & Newton brushes seem to be popular alternatives, but are kind of pricey. The Army Painter has a line comparable to GW at around the same price. Amazon has tons of inexpensive hobby brushes for acrylic paints; be sure to check the reviews to see how they hold up if you go that route.
Regardless of what brushes you get, do yourself a favor and get the Masters Brush Cleaner. It's like a magic panacea for brush care.
> "Your paint should be transparent enough to where you can actually see through it."
He then goes on to say that your paint should be thinned such that you can paint over a newspaper and still read the words after the paint has dried.
Paint thinning is just one of those skills you need to develop. And the only way to do that is to paint.
Be careful when highlighting red. To me, orange-ish highlights look correct, but pinkish highlights typically look wrong. It probably depends on the particular piece, but I've almost always seen people highlight red with orange. Other colors should highlight fine by mixing white.
You want to get above a certain threshold of brush quality, but after that you'll encounter diminishing returns. Avoid cheapo, "kid-quality", dollar store brushes. Those will just let you down. You want a brush that will hold a point and will hold onto its bristles - it's really frustrating when a brush sheds bristles into wet paint on your mini. I suspect that any "student quality" or above brush will be fine. I would avoid hog's hair brushes for mini painting - hog's hair is pretty stiff. A decent synthetic brush is probably what you want. I splurged when I got started (at the suggestion of some Youtuber) and picked up a set of Windsor and Newton Series 7, Kolinsky Sable brushes. I like them a lot. They're expensive (Amazon shows them about $10 - $15 each). But they should last a long time if you take care of them.
Speaking of which, get some brush soap. That should keep your brushes alive longer.
One final piece of advice - paint! When I got started, I watched tons of YouTube videos, I tried to copy other people's techniques. I turned it into a science. Doing those things isn't bad (YouTube especially is FULL of great tips), but at the end of the day, the best way to learn is to fail. Get painting and you will see your skills improve before your very eyes.
Paints: Vallejo Basic Colors, plus a few Reaper MSP paints like Truesilver, Gem Purple, and Adamantium black (which I used on the bases). I spent a lot of time mixing up new shades.
Primer: I'm a fan of spray primers since they tend to be a bit more even-coated and don't ruin details, I just used some Rustoleum Grey spray primer since I don't have an airbrush setup. Example.
Brushes: I use the Virtuoso 15-piece set, but most of those are too big for fine detail work, so it might be worth investing in even smaller brushes. Getting eyes right is fiendishly difficult.
Misc: I sometimes use a magnifying glass with clamps on it, but you need to be careful not to splash paint on it. I also use this after rinsing out my brushes.
You should absolutely check out r/minipainting for more resources, there's a lot to work with in their FAQs.
I really like this for cleaning my brushes, and diluted baby shampoo works very well too. I mix 1/2 water and 1/2 shampoo, which also makes the brushes easier to rinse.
A silicone scrub pad like this gives a deeper clean than rubbing against your palm, and speeds up the process quite a bit. I used it for the first time yesterday, and it took me about half the time than it used to.
I clean all my brushes and my BB knock off daily. Otherwise I break out something awful. I use this stuff and it's magic. I had a lip brush that had been stained from a magenta lippie for years. It came clean the first time I washed it with that.
I haven't had a problem with mold, but I haven't had mine for very long. I think sanitizing it occasionally with alcohol like /u/SecretCitizen40 says is a good idea.
Im a big fan of Iwata airbrushes. the Eclipse HP-CS is a good mid range AB. More expensive than what you paid for your chinese one I'm sure. But its not super expensive, and you'll notice the quality difference right away.
I didn't mean that you're going to sand most of the gloss coat off. I just mean that you sand it enough that you don't see glossiness anywhere on the piece. The gloss coat will usually have a little bit of an uneven surface after its sprayed on. some times this uneven surface will be very pronounced, which is called orange peel, because it looks like the skin of an orange. Even if you did a really good job spraying, there will be some slight unevenness. Make a couple quick passes of sand paper and you'll see the high spots will no longer be glossy and the low spots will remain glossy. But if you keep sanding, all those high spots will be leveled off and you'll create a flat smooth surface. At that point, all the glossiness will be gone. It sounds counter-intuitive, I know. But Now that the surface is flat and smooth the polishing compound will bring the gloss back.
found this vid real quick, illustrating wet sanding and orange peel on a larger scale (a car). it wont be this pronounced on a model but it will be there. They don't show how to buff, but you do see them wet sanding. It's the same basic concept, just on small pieces.
I should also mention that if you are only wanting to do a gloss coat for proposes of applying decals and panel washes, and are just going to spray a flat clear over that, don't bother with all this. just spray it and leave it. it'll be glossy enough to do that stuff. But if you want you end finish to be super glossy, wet sanding and polishing is the way to go.
I picked up something very similar to this a little while ago:
https://www.amazon.co.uk/gp/aw/d/B01984G4SU/ref=sspa_mw_detail_5?ie=UTF8&amp;psc=1
and one of these.
https://www.amazon.co.uk/Eclipse-0-35mm-Action-Gravity-Airbrush/dp/B000BQKFAI?SubscriptionId=AKIAIG7C236P5SNXU2FA&amp;&amp;linkCode=xm2&amp;camp=2025&amp;creative=165953&amp;creativeASIN=B000BQKFAI&amp;tag=stucuk-21&amp;ascsubtag=5c90045cdccc2801f0688ca9
I set up my desk with cardboard sheets and news paper, and ware a respirator. with the window open. this setup works fine. it's just a bit of a pain to set up and pack up. I love using it and the results I get.
the iwata is pretty damn awesome, but the cheap brush that came with the compressor can do 95% of the job, so the iwata is kinda overkill when ur a beginner
This one is not cheap, but it’s really great:
https://www.amazon.co.uk/Iwata-Medea-Eclipse-Action-Airbrush-Gravity/dp/B000BQKFAI/ref=mp_s_a_1_1?keywords=iwata+eclipse+hp-cs&amp;qid=1567627674&amp;s=gateway&amp;sprefix=iwata+&amp;sr=8-1
But if you want to invest, I'll save up and buy from the big brands such as Iwata, check their 'eclipse' range. About £120 for mid-range. Then buy a compressor for about £60 to £80.
Check out reviews on YouTube
Iwata eclipse
Iwata-Medea Eclipse HP CS Dual Action Airbrush Gun / Gravity Feed https://www.amazon.co.uk/dp/B000BQKFAI/ref=cm_sw_r_cp_apa_i_HPuCDbNJMQDQN
Compressor
ABEST Complete Professional Airbrush Compressor Kit with Air Tank for Nails Tattoo Nail Art With Dual Action AirBrush Spray Gun for craftwork, cosmetics, tanning, hobbies, models, airbrushing, painting, cake decorating, customised clothing https://www.amazon.co.uk/dp/B00JAJTKWQ/ref=cm_sw_r_cp_apa_i_NRuCDbH2KC6K1
Buying an airbrush is kind of like buying a guitar. If you buy a super cheap one it's difficult to get any good results out of it and it can put you off for life. So invest a little bit would be my advice.
I can personally recommend the following.
Airbrush: iwata hp-cs - https://www.amazon.co.uk/Eclipse-0-35mm-Action-Gravity-Airbrush/dp/B000BQKFAI
Compressor: - https://www.amazon.co.uk/ABEST-Professional-Compressor-Multi-Purpose-Airbrushing/dp/B01I2ZUKYU/ref=sr_1_1?s=kitchen&ie=UTF8&qid=1538751820&sr=1-1&keywords=airbrush+compressor
The Compressor comes with a cheap airbrush so if you want to try with a cheap one go ahead, but you will want to upgrade sooner or later and that Iwata HP-CS will last a life time if you look after it.
This is also a must - https://www.amazon.co.uk/dp/B00RVZG4X4/ref=sspa_dk_detail_2?psc=1&pd_rd_i=B00RVZG4X4&pf_rd_m=A3P5ROKL5A1OLE&pf_rd_p=8e5be0e3-b258-4b06-8b6e-695b24f935a4&pf_rd_r=4PP45CTWFKT5WD7KR20K&pd_rd_wg=pFBRH&pf_rd_s=desktop-dp-sims&pf_rd_t=40701&pd_rd_w=j5dUp&pf_rd_i=desktop-dp-sims&pd_rd_r=d08662fa-c8af-11e8-a4e7-5f4df7c134b5
&#x200B;
I recently got back into the scene and invested in an airbrush... I love it. It makes priming and base coating much quicker and I have now started using it to apply the layers.
I live in the Uk and went for this compressor
http://www.amazon.co.uk/Badger-BA1100-Airbrush-Compressor/dp/B00I68KJPO
I would think that you could probably get a cheaper one but it was on offer when I got it and only cost about £55
For the brush I went with http://www.amazon.com/Iwata-Medea-Eclipse-Action-Airbrush-Gravity/dp/B000BQKFAI/ref=sr_1_1?ie=UTF8&amp;qid=1417043599&amp;sr=8-1&amp;keywords=IWATA+HP-CS+Eclipse
Ordered it from Amazon.com and it came from Japan, total cost about £80 a lot cheaper than I could find it in Uk
You will also need to buy a hose
Go for it mate! I went with this one:
https://www.amazon.co.uk/Eclipse-0-35mm-Action-Gravity-Airbrush/dp/B000BQKFAI
Seems to be a fairly solid all rounder, really struggled to find a bad word said about it.
Vallejo Model Air and Game air are both good lines for airbrushing your models. If you're new to airbrushing then buying airbrush paints are probably the best way to get started, but you can also just thin down your regular paints too. I don't recommend starting by doing this as it's better to learn to control the airbrush with paint that you know should be working properly before you throw in the new variable of paint thinning.
As for airbrushes, I always recommend the Iwata Eclipse. It's both a good starter brush as well as a brush that you will continue to use as you become a more skilled airbrush artist.
Honestly would recommend the Iwata Eclipse HP-CS. Yeah it's a more expensive airbrush but it's a fantastic piece of equipment.
Pretty much would recommend these to start you off:
https://www.amazon.com/gp/product/B000BQKFAI/ref=oh_aui_detailpage_o02_s00?ie=UTF8&amp;psc=1
https://www.amazon.com/gp/product/B001738DXU/ref=oh_aui_detailpage_o02_s00?ie=UTF8&amp;psc=1
EDIT: I know the topic says cheap but with airbrushes, you pay for what you get.
I think it's cool you want to pick up a hobby your father had. It will be a nice reminder every time you pick up the gun.
I use this 100% for miniatures, and it works great!!
&#x200B;
Alright, here is the list I bought. It's a bit more than you want to spend, but this will ensure you can get going right away, and not be frustrated. I did a fair amount of research on different forums, sites, and youtube videos. If you want to know why I chose something, feel free to ask. I was going to bold the ones that you absolutely need, but I would say everything in the first set are a must.
&#x200B;
&#x200B;
&#x200B;
&#x200B;
For the compressor, I keep mine at about 18-20 while doing miniatures and it's perfect.
I do 1 drop Improver, 5 drops thinner, and 6 drops primer and have perfect flow.
&#x200B;
Feel free to ask any questions! Good luck!
Hvstle
I did a lot of research/reading reviews/watching videos when i was getting my airbrush. I think I waited almost 3 months before making a purchase. The two that everyone always suggested to start with is an Iwata Eclipse or a Badger Patriot 105. I decided on the Badger. Then it sat on a shelf for a year because i was trying to decide on a compressor. Never really wanted to invest the money for a nice silent one. Instead, I bought a 10 gallon tank and some fittings and plummed it up. I fill it up with our compressor in the garage. It lasts me about 2 hours til I have to fill it back up.
If you are not worried about the noise, you can just buy a cheap pancake compressor from a local hardware store. I do suggest getting one with a few gallon tank though so that it doesn't kick on as much since they are loud as fuck. You will need a filter whatever route you go since non-airbrush ones usually don't have one.
List of the things you will need to buy:
I also suggest you invest in:
I am by no means an expert on this subject. I am a hobbyist and enthusiast at best. I always suggest you do your own research. Let me know if there is anything else I can answer for you.
My experience with inks is pretty limited, I hope others will help me out with suggestions. I use Private Reserve DC Supershow Blue, which is a full, darkish blue. My uncle recommended it to me because it is easy to clean and it is easy to restart pens that have dried up using a drop of water. HOWEVER, it has no water resistance whatsoever, so if you expect your notes to come in contact with water (aka rain), they will smear badly. Inks like a Noodler's Bulletproof Black are great if you want your notes to last a long time. However, I haven't used a bulletproof ink before, but I know they smell.
The paper makes the experience and for the time being this will treat you nicely. You can get a 5 pack for three dollars at most Target.
If you can justify the price Rhodia and Clairefontaine makes excellent paper.
Ink:This is a well behaved ink that will work great on any paper.
Waterman is a nice ink sold on Amazon, I have inspired blue and it's excellent and a lot of fun.
The folks here will suggest all different kinds of ink, enjoy your new pen and try not to get addicted like me!
Noodlers Bulletproof black has a pretty big following. I use it myself and it perfectly fits my ink needs. They also sell other inks that people seem to enjoy, but I personally have no experience with them.
How about a nice pen? Have you ever used a fountain pen?
This pen is great. I have one with a silver trim. I've had many a fountain pen, and this is still my favorite, even more so than pens that cost me twice as much. Feels good, looks good, made very well, writes well. Just don't drop it. It will break. That's the only downside for me. However, I've broken mine 3 times, and epoxied it back together and polished it up each time.
When you start using a FP, paper becomes important too. Cheap paper and some fancy notebook brands (i.e moleskine) are horrible for fountain pens. Ink will bleed and spider on the page. I'd suggest looking at this brand of paper. They're cheap(er than moleskine), look good, and take fountain pen ink super well.
You'll need some ink too. I'd suggest starting with something from Noodler's ink lke this. Some FP inks are waterproof, some are not. Bulletproof, iron gall, or pigmented inks are usually water proof.
I know that probably puts you closer to $100, but imo, it's worth it if that's something that interests you.
Noodler's Ink black. Item number 19001. I use the pen at work so I have to keep things simple and professional. I'd prefer a nice dark blue, but, eh. It's for my paperwork.
I like your handwriting. Mine is still sloppy but I'm working on it.
If cleaning doesn't work then I'll try the soap trick. Thanks.
i got these two with a metro
hope i got the right stuff lol
PM me you address and I'll send you one of these.
Hey bud... get one of these for the next time you want to punch a hole in your leather. Not expensive and makes a much cleaner cut for the leather!
Kind of looks like a leather punch to me.
The one I am linking to rotates, however.
http://www.amazon.com/SE-7924LP-Heavy-Duty-Leather-Punch/dp/B000NK5VY2
All you need is a hole punch and an eyelet setter. I use 3/16" eyelets which are a little on the smaller side but still fit most leather laces.
For belts, have you considered ordering custom-made ones such as from this site? Alternatively there are guides for making your own that can be found in /r/malefashionadvice and it seems to be pretty easy and cost-effective. I also love my leather hole punch, which I got for less than $10 on Amazon. Hope you find that helpful!
So, $8.82 for a wax carving set:
http://www.amazon.com/SE-DD312-12-Piece-Stainless-Carvers/dp/B000SVRSRY/ref=sr_1_1?ie=UTF8&amp;qid=1370102302&amp;sr=8-1&amp;keywords=wax+carving+kit
I don't know what to tell you with specifics for Spain, but I can give you some general info that may or may not be helpful to you.
First off, there's this link in the sidebar. It'll give you a bunch of options.
Your hobby knife and mouldline remover will be the same thing. The handles all function the same way. However, I'd recommend picking up some kind of hobby knife set so you get a variety of blade shapes to try and multiple handles to use. #11 blades are the standard, and I prefer X-acto brand, but your mileage may vary. Some larger blade sizes won't fit into smaller handles. Buy in bulk to save money. You can remove mouldlines with the back of a blade, rather than a separate tool.
Any kind of cheap and well-reviewed wax tool / clay tool / dental tool set will work for scupting. Same deal with needle file sets. And with your pin vise. The drill bits will break (for any set), though, and bits can be problematic to replace if you're not sure of exact sizing.
I use Aves Apoxie Sculpt; the regular is a grey color. Tutorial hereSame two-part compound idea, but it will thin (and clean) with water before hardening and is a finer grain than green stuff (so it files/sands nicer (smoother). Very easy to manipulate & shape with wax shaping tools
4th tool from the left http://www.amazon.com/SE-DD312-12-Piece-Stainless-Carvers/dp/B000SVRSRY/ref=sr_1_16?ie=UTF8&amp;qid=1415246554&amp;sr=8-16&amp;keywords=pottery+tools is my favorite for keeping seams down and keeping my fingers out of harms way!
These are the only craft related thing on my Amazon list. I'm a jeweler by trade and would use these in wax carving for models.
Lunar Supplies
Like these?
After trying just about every method of using concentrates, I find that my prefered method is a nectar collector, This one is a great starter kit. This guy makes awesome stands with a 3D printer and sells them super cheap. An enail is outrageously expensive and more for the party session style. Pens just don't get hot enough and it's not an on-the-go kind of set up. Get a professional grade butane torch like this one, and borocite dish like a mini-ramekin. Oh, I almost forgot, I would upgrade to a quartz tip as opposed to the titanium one it comes with. Sorry, I'm at work and keep remembering things to add- essentially, of all the methods, I prefer the nectar collector or honey straw method simply because it give the most control when hitting. Another handy thing to pick up is a set of wax sculpting tools
.
As far as my "recipe", I usually get diamonds or crystals and then top them off with some distillate sauce. This is mostly because I draw really hard and can't help it, so sauce prevents the crystals from shooting straight through the straw.
Overall, I hate to say it, but when learning how to use concentrates, just be flat out prepared for losses and accept the trial and error process. Eventually, you'll find your groove with it. I promise.
https://www.amazon.com/gp/product/B000SVRSRY/ref=oh_aui_detailpage_o00_s00?ie=UTF8&amp;psc=1
Was actually $6.99 when I bought it, my bad. I guess the price went up on it :( but still, $8.95 for 12 of these aint that bad.
Welcome welcome
I would recommend a few things depending on what you're looking to do.
For helping smooth out the print I regularly use XTC-3D by smoothon- You basically coat your print with the epoxy and it dries smooth. You really need to put it on really thin or else you will lose the details of your print. Once its dried you can sand it further or paint.
https://www.youtube.com/watch?v=ZopV6He4cqE
I also regularly use a dremel to remove excess pieces or grind away parts I cant tear off.
I also picked up these needle files that are awsome for sanding down detailed areas.
http://www.harborfreight.com/needle-file-set-10-pc-69876.html
I also use sculpting tools to help remove stubborn support materials.
http://www.amazon.com/gp/product/B000SVRSRY?keywords=sculpting%20tools&amp;qid=1451425886&amp;ref_=sr_1_2&amp;sr=8-2
Specifically the forth tool from the left
Other than that I just use sanding paper when needed.
Hope that helps and hope you are enjoying the witbox
Wax carvers like these.
http://amzn.com/B000SVRSRY
I would suggest going to a cigar shop and picking up some. I have found a pack of 30 for $1. I have heard some people use a paperclip, but you might scratch the oven or vapor path.
https://www.amazon.com/Bundles-Zen-Pipe-Cleaners-Bristle/dp/B000W5R6UA
I use these and haven't had to buy any in months.
Usually wherever you buy your glass should have some. I use Zen Bristle Pipe Cleaners, my local shop has them for $1.50 for the 44 pack, which lasts a while (you can reuse them a couple times).
Instead of foam you could use bits of old sweater. Easier to felt into, and they have a nice weight to them. As for wire, I really like using actual pipe cleaners, not the craft kind. They have really hard bristles that catch the wool and make a great base. They’re not perfect for tiny details, cause they can be spiky, but they are quite strong.
Well, you could just mouth hit it with a lighter and not inhale it. You know, until you stop tasting burnt cotton. Then just blow out all the burnt stuff.
Also, if you REALLY wanna clean it out...
Your best bet for wood is probably going to be pipe cleaners. They were originally created for cleaning wooden and clay pipes. This with a light alcohol/water mix (probably 30alcohol/70water) and a nice drying overnight should have you in ship shape.
Hope this helps.
Your vapor path is probably clogged. Your unit is getting hot because it's either clogged and you can't remove the vapor and heat that's being produced, or, it's getting hot because you didnt pack it tight enough and the heater is being over worked.
https://www.amazon.com/Zen-Bundles-Cleaners-Bristle-Count/dp/B000W5R6UA
I use those to clean all my vapes. Remove the mouthpiece. Dip one in 90% iso and stick it through the vapor path holding the unit upside down. Any excess alcohol will drip down the pipe cleaner and get absorbed or drip to the floor. You dont want to risk alcohol getting underneath the silicone and getting into your electricals. The pipe cleaner will pop out the screen and you can scrub that down. Then run the pipe cleaner back and forth while twisting to get a good scrub in the vapor path. I usually have to use two pipe cleaners to get the vapor path clean. A clean pax is a happy pax.
I found these work great for this.
http://www.amazon.com/gp/product/B000W5R6UA/ref=oh_aui_detailpage_o00_s00?ie=UTF8&amp;psc=1
http://www.amazon.com/gp/aw/d/B000W5R6UA/ref=mp_s_a_1_1?qid=1452984269&amp;sr=8-1&amp;pi=SY200_QL40&amp;keywords=zen+bristle+pipe+cleaners&amp;dpPl=1&amp;dpID=41I0P5fM0nL&amp;ref=plSrch
I found these for $4 with free shipping.
This.
I use this stuff called apoxie sculpt, it is great for that stuff. it mixes in two parts (like an epoxy) stays workable for about 2 hours, adheres to almost anything, is pretty cheap and hardens like the original plastic substance.
*oh, and it can be tooled once cured.
You could try polymer clay or a product called Apoxy Sculpt that I found on amazon. I've used this with great success.
Apoxy Sculpt
I've purposely bought a few damaged figures, but I'm very into customizing, so I tend to buy what I think I can fix.
If your absolutely going to buy the statue one way or the other and the damage isn't too severe I'd consider picking it up and saving the money.
I've never fixed a statue, but I'd assume it's a little easier than a fig since there's no moving parts.
If you got a picture of the damage I, or someone else more knowledgeable than me could give you some pointers on how to fix it.
Since it's Batman's cape, I'm assuming one of the end spikes broke off. If that's the case all you would need to do is buy some Apoxie Sculpt or similar epoxy, re-sculpt the damaged part, then try to match the paint with some black/blue acylics.
You say the damage isn't noticeable in certain poses so even if the fix isn't that pretty, from a distance it'll probably look fine.
Apoxie sculpt seems to be the standard for custom POP Vinyl figures.
http://www.amazon.com/Apoxie-Sculpt-1-Lb-White/dp/B0013UDWXI
Sounds good! I got mine on Amazon.
Apoxie Sculpt 1 Lb. White https://www.amazon.com/dp/B0013UDWXI/ref=cm_sw_r_cp_api_i_sm7-AbS384KVZ
This stuff.
This product has a pretty long working life, so you'll have time to mold it exactly as you want it while it hardens, without sanding it later. Maybe rub a little piece of smooth wood over it, or use a putty knife, after you apply it, for a good edge. Apoxie Sculpt 1 Lb. White. Good luck.
Eventually when I cave and get an airbrush I'll be getting the NEO CN Gravity Feed Dual Action Airbrush $58 and the Master Airbrush High Performance Airbrush Air Compressor $66.
You're going to find that you can either get some decent gear upfront for a realistic price, or you can go cheap and have to replace poorly performing gear almost immediately, which is the expensive way to go. These items below come in within your listed budget and will give you good service for years.
Get a compressor with a tank. Those cheap air compressors may save you thirty dollars upfront, but you're really going to regret having that on-demand-only air pressure bobbing up and down and screwing up your air flow. This Master TC-20T is a good buy. Get the TC-40T for twenty dollars more if you're going to want to do other types of spray paint art in the future. This one has more endurance before heating up. I own one of these and they are quality gear at a good price.
Get a decent starter air brush. This Iwata Neo Dual Action is good for a starter and yet isn't too expensive so if you screw it up you won't break the bank. At the same time, the machining of the parts is much, much better than those cheap Master sets which really aren't good at all. Granted, you may get lucky and get a good-yet-cheap Master air brush, but more likely than not, you'll spend most of your time trying to get the thing to give you a spray without splatter.
Get a quick release coupling set for the airbrush. Having to use a wrench to attach the air brush gets old really, really fast -- like immediately -- and the ten or so bucks makes it a great deal. Iwata-Medea Quick Disconnect Set
Depends on your budget, I'd recommend getting quality tools from the get go, if you can afford them.
Decent starting setup would be TC-20T compressor (or equivalent, there's a bunch of similar compressors coming from the same chinese factory) and either Neo for Iwata, Badger Patriot 105 or H&S Ultra. All of them offer good performance and will last you quite a while. Personally, I'd go for Ultra simply for the ease of maintenance.
If you're on a really tight budget, you can look for some cheap chinese kit. Not the highest quality, but it'll do well enough as a learning tool.
You can hookup any airbrush to a compressed air can. It is never recommended for extensive modeling due to pulsation. You may be prone to pressure-loss while you paint and whatnot. The cheapest you can go is a $70-$100 compressor and a $40-$60 airbrush (Iwata Neo). 8 Dollar colors seems pretty expensive when mr.color bottles go for $2-$3 a bottle that when thinned goes a long way.
Do you have any in mind? I haven't used it myself but I'm planning on getting my partner an Iwata Neo CN for christmas as her first starter airbrush- .35mm nozzle, two different gravity cup sizes, dual action and a price point of ~60USD make it seem like a phenomenal choice for a first go!
The badger is great for the detail work you said you want to do and I would recommend it, since it is a detail oriented brush, the nozzle and color cup size make base coating, priming, and varnishing more difficult, you would be better off getting the eclipse or this to start out and then the badger for the detail work
It all depends. Expect to drop somewhere between 150-300 dollars on all the equipment for airbrushing. Think hard about whether or not you want to drop that cash on that instead of a bunch of new kits.
If you do want to get into airbrushing, these are usually recommended as starting things.
The NEO Iwata http://www.amazon.com/NEO-Gravity-Feed-Action-Airbrush/dp/B004INERK4/ref=sr_1_1?ie=UTF8&amp;qid=1426961305&amp;sr=8-1&amp;keywords=neo+iwata
This is the airbrush I use. I like it, but have never used a different one.
Air Compressor http://www.amazon.com/AIRBRUSH-COMPRESSOR--Airbrush-Published-Exclusively/dp/B001738DXU/ref=sr_1_18?ie=UTF8&amp;qid=1426961238&amp;sr=8-18&amp;keywords=air+compressor+tank
If you want your compressor to be quiet, you will want a tank. They hold air in a tank so it wont constantly be running and makin noise.
Instamorph is also great stuff. You soften it in boiling water and it is workable like silly putty until it cools. Repeat as often as necessary to get it right.
I was working on something like this, but I kind of gave it up in favor of cooler projects... my ideas were:
OR
Another great material for repair is Instamorph:
InstaMorph - Moldable Plastic - 6 oz
http://www.amazon.com/dp/B004MFLU4Y/ref=cm_sw_r_an_am_ap_am_us?ie=UTF8
One Idea I have had for this was the usage of products like Gorilla plastic or InstaMorph to create an ergonamical Grip espacially designed for my Hand, like Tournament Guns are having it.
My go to would be modable plastic
&#x200B;
https://www.amazon.com/InstaMorph-Moldable-Plastic-6-oz/dp/B004MFLU4Y/ref=pd_lpo_sbs_201_t_0?_encoding=UTF8&psc=1&refRID=FVJT0JSSW1NJFE23J74N
Thrift store or craigslist would probably be your best bets.
Depending on your school, you might be able to get some pieces on loan from a theater department?
For adding details on your costumes and accessories, maybe ask around and see if a school/library/local hackerspace can get you access to a 3d printer. If all else fails, a ten dollar bag of thermoplastic and some spare time can go a long way for making/modifying props and adding details at a super low budget.
As a side note, thermoplastic is also a lifesaver for building/repairing weird ass mounts, accessories, and holders for shit at the last minute.
One of my guys make tips out of a moldable plastic.
https://www.amazon.com/dp/B004MFLU4Y/ref=cm_sw_r_cp_awdb_2CqrybK72VEP9
Have you ever played around with this? https://www.amazon.com/gp/aw/d/B004MFLU4Y/ref=mp_s_a_1_1?ie=UTF8&amp;qid=1495313333&amp;sr=8-1-spons&amp;pi=AC_SX236_SY340_FMwebp_QL65&amp;keywords=instamorph+moldable+plastic&amp;psc=1
It's a plastic that turns clear, sticks to itself and gets a texture similar to silly putty when you put it in 55 degree Celsius water. Once it cools, the plastic hardens and is actually pretty durable. I made a cone shape like a party hat and smashed it with a hammer a few times and it flexed but sprung back into shape immediately. The plastic is remoldable if you just heat it back up. You could mold it into any shape or thickness you want, and it is actually pretty strong.
Yea, I broke some off its fingers taking the supports off my prints of this model as well. And really your print looks as good as mine does. Maybe you could slow print speed down a little more, to like 1500 mm / min, and get the remaining fingers to look a little more round.
I use a product off Amazon called InstaMorph to mold replacement parts for stuff that I can't just glue back together.
I use a pencil case similar to this one found on Amazon: https://www.amazon.com/dp/B004WMWCYE/ref=cm_sw_r_cp_api_dlhyxbBY7AHS2
Jealous!
I have a lihit labs case : https://www.amazon.com/LIHIT-LAB-Case-Black-A7551-24/dp/B004WMWCYE/ref=sr_1_1?ie=UTF8&amp;qid=1492808329&amp;sr=8-1&amp;keywords=lihit+labs
I love this, and carry everything I've ever needed for class/work.
Currently: 9 Fountain pens, 9 Mechanical pencils, 3 Tubes of replacement erasers, 3 sizes of leads, a Boxy and Eknock, replacement eknocks, 5 inch clear graph ruler, eraser shield, usb drive, back up apple earbuds, 3 highlighters, sharpie.
Looooveeee it. I need to downsize heavily lol. I just hate that ink isn't portable and have to keep some at office and some at home.
I carry my pens and pencils to work everyday. I have a nice zipped pouch that holds them and it fits in my bag. I do have a locked drawer at work too but I prefer keeping the writing utensils with me.
I really like this one - Lihit Lab Pen Case. Tombow brush pens will fit in the back pocket. If you want something bigger, there's the Kipling 100 Pens Case, but I don't really like that one because the slots in the front only hold really thin pens (like Gelly Roll sized).
Honestly... no. This handgun is as basic as it gets- you'll be able to strip it in 30 seconds. Just buy a bunch of ammo and get rolling. If you're into DIY projects, go ahead and get an [extra grip module] (http://www.selwayarmory.com/shop-by-category/firearms-parts/sig-sauer-parts-and-tools/sig-sauer-p250p320-grip-modules.html) and a wood burning kit. That way you can work on stippling. Practice on a PMAG or something first! You can look into the Apex flat trigger (link in my big comment) as well.
My husband uses rolls of this: http://www.dickblick.com/products/grafix-wrap-dura-lar-rolls/
I forgot to mention that he uses a burning tool with a fine tip to 'cut' the stencil. Like this one
I used this one:
http://www.amazon.com/Walnut-Hollow-Versa-Temp-Temperature-Woodburning/dp/B005P1TRAS?ie=UTF8&amp;psc=1&amp;redirect=true&amp;ref_=oh_aui_detailpage_o02_s00
It worked well for my first project but I will likely be investing in a better tool for future projects.
I use this, and like it quite a bit. Walnut Hollow Creative Versa Tool with Versa-Temp Variable Temperature Control & 11 Woodburning Points (Tips) https://www.amazon.com/dp/B005P1TRAS/ref=cm_sw_r_cp_tai_vm11BbXHK4WMT
Thanks! I got this one off Amazon.
https://www.amazon.com/dp/B005P1TRAS/ref=cm_sw_r_cp_apap_pIoTAxt7fU2iu
What about some cool paint by numbers? Like a cool cow or maybe a neat tree.
I've recently attempted to take up wood burning and fried a couple of wooden spoons, may take some time to actually get the hang of it..or that could just be me....
wood burning
You use a special tool that's basically a soldering iron with special tips. I currently use one of these. The red comes from stain applied after the burning. And thanks :)
This is the exact burner that I use: https://www.amazon.com/Walnut-Hollow-Versa-Temp-Temperature-Woodburning/dp/B005P1TRAS
I just bought mine at a crafts store in the city I live in. However, pretty much all burners are the same, so you can definitely buy a cheaper one and it will probably work just fine. I used to have one that I got for $15, but I upgraded to this one for the temperature control abilities.
This is what I'll be getting. Similar to my old one.
Walnut Hollow Creative Versa Tool with Versa-Temp Temperature Control https://www.amazon.com/dp/B005P1TRAS/ref=cm_sw_r_awd_P5Ufvb1271FZZ
https://www.amazon.com/dp/B005P1TRAS/ref=cm_sw_r_awd_P5Ufvb1271FZZ
I used one of these.
This is the foam I used. 1 sheet is enough to do both those drawers fully without having to mess with piecing offcuts together. I know, it's pretty expensive for what it is, but once you get used to it there's no going back. It's like power windows or having the ice dispenser in the fridge door.
Optional but highly recommended is cutting the foam with a hot knife. I bought this one and it's decent.
The foam I used has a weird silicone- or wax-impregnated backing so no marker or pencil or pen I tried would write on it usefully, so I had to make all my marks on the backing with shallow exacto cuts, then cut through with the hot knife. It's important to remember that since you lay out the marks on the backing that everything will be mirrored left-to-right from the finished product. I took pictures so I'd be sure everything would be where I wanted it when I flipped back over.
You can get them pretty cheap. This is a pretty decent starter one with temperature control.
https://www.amazon.com/gp/product/B005P1TRAS/
Well, I guess that's my Amazon impulse purchase for the day ...
How about this video?
Or this one?
or a picture
Laugh You!
around $5 THINK OF THE POSSIBILITIES
Under 10 - I basically make all day to day decisions with this
http://www.amazon.com/Mattel-30188-Magic-8-Ball/dp/B00001ZWV7/ref=sr_1_1?ie=UTF8&amp;qid=1409136677&amp;sr=8-1&amp;keywords=magic+8+ball
Under 5
http://www.amazon.com/Watch-them-wiggle-Black-PIECES/dp/B0074MHV7W/ref=sr_1_1?ie=UTF8&amp;qid=1409136773&amp;sr=8-1&amp;keywords=craft+eyes
You will be amased at how many people you can make laugh by just sticking these everywhere and anywhere!
>She continued: ‘Some parents won’t leave the doll with their children at night because you are not allowed to have any eyes in the room.’
Guess I know what I am doing with these now!!!!
you can buy 2000 googley eyes.
https://www.amazon.com/Watch-them-wiggle-Black-PIECES/dp/B0074MHV7W
Scavenger hunts are too much fun! I should be working! RAWR! Thanks for the fun break =]
1.) Something that is grey. My name is makeup and I am grey! WL
2.) Something reminiscent of rain. This color is called "Naughty Nautical". Nautical = water, water = rain. =D?? WL
3.) Something food related that is unusual. Pretty sure most people don't have teeney shaped veggie cutters. WL
4.) Something on your list that is for someone other than yourself. Tell me who it's for and why. (Yes, pets count!) This is for my two parrots! My quaker especially loves dried papaya. I'm teaching her how to fly right now and have been using food as a reward, but we ran out of papaya a couple of weeks ago, and our local bird store has been out of stock for a long time. Turns out that Whole Foods doesn't carry dried papaya either. Rawr! WL
5.) A book I should read! I am an avid reader, so take your best shot and tell me why I need to read it! The Girl with the Dragon Tattoo. I had heard about this when the movie came out in English. I liked the movie and then moved on with my life. Come this spring, I found myself facing a LOT LOT LOT of driving by myself, so I started borrowing audiobooks from the library. I borrowed all three of these books and REALLY enjoyed them. It wasn't at all what I expected. They're murder mysteries with a lot of themes about violence against women. When I learned about the author, it became that much more interesting. The author wrote these books with the intention of making 10, but died after the third one. They found them after he died. The themes about sexual violence stem from a gang rape he witnessed as a teenager. He never forgave himself for not being able to help her, so he channeled all those emotions into his writing later in life. Anyway.....interesting stuff. Good books. I recommend them :)
6.) An item that is less than a dollar, including shipping... that is not jewelry, nail polish, and or hair related! Pfft.
7.) Something related to cats. I love cats! (keep this SFW, you know who you are...) If I was a cat, this would be my JAM!
8.) Something that is not useful, but so beautiful you must have it. Dresses are admittedly useful for avoiding public indecency charges, but not really useful beyond that. BUT LOOK AT THE RAINBOWS!!!!!!!!!!!!!!!!!!!!!!!!!!!!!! WL
9.) A movie everyone should watch at least once in their life. Why? Not on my wishlist (it's on American Netflix though!), but everyone should be aware of the impact of plastic on the environment and our bodies. Education is everything. Plus, there's a newborn baby at the end.
10.) Something that would be useful when the zombies attack. Explain. 1. Stab zombie in the skull. 2. ??? 3. Profit. The reviews rave that it's super sharp and doesn't stick so it probably wouldn't get stuck in their skull like other knives. WL
11.) Something that would have a profound impact on your life and help you to achieve your current goals. I don't know if I'd use the word profound, but it would sure help me out. A big passion of mine is learning to ID birds. I'm pretty good at most birds, but finding information on juveniles is VERY difficult sometimes. I've used this book before to help identify birds in hand, but I think the information regarding juvenile plumage would help me identify young birds from afar. It's even part of my job to identify birds! WL
12.) One of those pesky Add-On items. This is an Add-On item, but it's also a hair addon =P Not on my WL, but I'm losing my hair like crazy so I might have to look into these >.>
13.) The most expensive thing on your list. Your dream item. Why? This isn't the most expensive item on my list (that was #8), but it's the one that would help me the most! When I do field work, I tend to have a lot of gear on me at once, and the extra strain of binoculars around my neck tends to give me some really freaking sore muscles. A harness would be MUCH easier on my shoulders/neck/back. I start field work again in October, so I plan on buying it for myself by then anyway =] WL
14.) Something bigger than a bread box. EDIT A bread box is typically similar in size to a microwave. This is larger than the average bread box.
15.) Something smaller than a golf ball. I am smaller than a golf ball! WL
16.) Something that smells wonderful. This smells amazing!!! I'm infatuated with cinnamon, but had to stop using cinnamon Crest YEARS ago because I developed a bad reaction to it. This stuff is expensive, but the company is very environmentally responsible and I feel good giving my business to them. WL
17.) A (SFW) toy. This seems pretty SFW unless you're playing Cards Against Humanity. evil grin WL
18.) Something that would be helpful for going back to school. I used sticky notes all the time in school! WL
19.) Something related to your current obsession, whatever that may be. I've obsessed with birds since I was 11. I've been obsessed with rainbows forever. I'm currently obsessed with sushi. THIS IS ALL THREE! WL
20.) Something that is just so amazing and awe-inspiring that I simply must see it. Explain why it is so grand. Hear me out! This baby can keep ice for DAYS. Sitting out in the sun for hours on end? NO PROBLEM! YOU'LL HAVE ICE AT THE END OF THE DAY!! Seriously, Thermos needs to pay me for how much I rave about their stuff. My water bottle has still had ice in it after three days AND being refilled twice. No joke.
BONUS
This beauty was made in OR.
fear cuts deeper than swords. She is my favorite character by far :)
Boom and its prime so no shipping cost!
I airbrushed in a tiny apartment for a year before I moved somewhere larger. I used this booth (https://www.amazon.ca/Master-Airbrush-Extension-Revolving-Turntable/dp/B00B2TESUQ/ref=sr_1_1?ie=UTF8&amp;qid=1484057824&amp;sr=8-1&amp;keywords=hobby+spray+booth) which you can fold up when not in use. Just pop that hose out a window and you're golden.
The thing that actually took up more space than the airbrushing gear itself was my parts on alligator clips while I was building a kit.
One of these:
https://www.amazon.com/Master-Airbrush-Portable-Optional-Extension/dp/B00B2TESUQ/ref=sr_1_2_sspa?keywords=spray+booth+airbrush&qid=1565177400&s=gateway&sr=8-2-spons&psc=1
Basically an open box with an exhaust fan that draws any overspray through an air filter and exhausts it somewhere else, usually a window. I don't bother with the exhaust on mine, though I do watch where the exhaust hits the wall to see how much, if any, paint gets through.
Thank you very much for your reply, I appreciate it.
If I may just confirm, is the spray booth that you have and you feel it does well at grabbing all the particulate/dust?
http://www.amazon.com/Master-Airbrush%C2%AE-Portable-Airbrush-Extension/dp/B00B2TESUQ
Thank you again, have a great day.
There's a similar one on Amazon. Price varies between about $65-$90 before shipping. Just search for "portable spray booth," but watch out because some of them don't have the vent hose, just booth and fan.
edit: You could build one yourself for less, but a decent number of redditors use a similar model (they're probably all made in the same factory, just rebranded for the different airbrush supply companies). If you do build your own, consider this guide. 100 cfm is recommended (typical flow in a lab chemical hood).
Master Airbrush Portable Hobby Airbrush Craft Spray Booth (without Optional LED Lighting) for Painting All Art, Cake, Craft, Hobby, Nails, T-shirts & https://www.amazon.com/dp/B00B2TESUQ/ref=cm_sw_r_cp_apip_PYfsELXRniQzM
one of these is what i use
Here you go
https://www.amazon.com/Master-Airbrush-Portable-Optional-Extension/dp/B00B2TESUQ/ref=sr_1_5?s=arts-crafts&amp;ie=UTF8&amp;qid=1520097672&amp;sr=1-5&amp;keywords=spray+booth
edit: I know you probably wanted a cheap cardboard box solution. But paint fumes in doors aren't something to play around with.
https://www.amazon.com/Master-Airbrush-Portable-Optional-Extension/dp/B00B2TESUQ/ref=sr_1_cc_3?s=aps&amp;ie=UTF8&amp;qid=1501695316&amp;sr=1-3-catcorr&amp;keywords=Spray+Booth
My compressor recently died and I was looking for a cheaper one as well. The guy at my local hobby shop talked me into a Paasche D500SR which was a bit more than I wanted to spend but I am extremely happy with it. Very quiet and solid flow. You can probably find one on Amazon for about $120
You can also get portable spray booths with exhaust hoses as well, very handy and quick to set up
Looks great! I recommend getting a panel line marker, they are so cheap but make such a massive difference to a kit. Welcome to the hobby :)
Gives more of a natural look on light colored armor plates, black gives more of a classic cartoon look. Brown is used for warm colors and sometimes zeon/zaft/etc suits. You are looking for something called a "fine tip gundam marker", You can get them online. There is also something called "panel line accent" which is applied with a brush and some people feel gives a more natural look, I would reccomend starting with the marker, as its easier to learn with. Keep a qtip around when using it incase your hand slips. any residue clears up with a bit of rubbing alchohol, dont use nail polish remover, it can melt plastic.
https://www.amazon.com/GSI-Creos-Black-Gundam-Marker/dp/B00HY8JI7C/ref=sr_1_8?keywords=gundam+marker&amp;qid=1566105777&amp;s=toys-and-games&amp;sr=1-8
If you are going for 30 dollar tamiyas just drop the extra 5 dollars and get these, they come with free shipping on your whole order and tax free. https://www.gundamplanet.com/gundam-planet-premium-side-cutter.html
They also carry sanding sticks
https://www.gundamplanet.com/supplies.html?cat=30%2C31%2C29
I use these: http://www.amazon.com/GSI-Creos-Black-Gundam-Marker/dp/B00HY8JI7C/ref=sr_1_1?ie=UTF8&amp;qid=1411874898&amp;sr=8-1&amp;keywords=gundam+fine+tip
I use a black for parts that are molded in a dark color, and a grey for things that are much lighter. They're really easy to use, and you don't have to be precise with them. Keep some q-tips and a bit of rubbing alcohol handy, though. Just set the ink into the panel line in as many passes as you fee is needed. Let it dry for just a little bit, then gently flick over the line using the q-tip. Don't even push down that hard, just gently stroke over the area. This will help spread ink away from the line, if not pick it up entirely. Any excess can be rubbed off using another q-tip with a very modest amount of rubbing alcohol on it. It'll come right up and leave your lines filled.
There's a lot of tutorials on youtube, and various methods (I've heard a lot that panel washing works best, but haven't tried it), but that's how I do mine and I'm pleased with the results.
I would suggest buying a really cheap HG kit that you can screw around on, test a bunch of different techniques and see what works best for you. That way if you totally screw up you won't be out of a lot of money.
edit: Also, there's alternatives to these pens. I used some sakura microns I had laying around on my first HG and it looked good, but buying a set of those is going to be more expensive in the long run than getting gundam pens. I've seen some individual very fine point pens at Michaels for about a buck or two, but I've not yet tried them. They seem like they can get the job done, though.
Miniac is pretty good with these sorts of things, and I used his videos to figure out my first Airbrush.
[Video talking about various good quality airbrushes.] (https://www.youtube.com/watch?v=_-WxKl_AVTE)
Video on how to start with an Airbrush.
Honestly, that compressor is good, but the Master's airbrushes aren't great. A really good airbrush for starters is the Badger Patriot 105. It's got very few moving parts, lots of tutorials on how to use and clean it, and does the job for a decent price.
Badger Patriot 105
Master's Compressor with good reviews
For both, it's about 200$.
I'd also look into the Master's Painting Hood (Link).
I'm willing to answer any questions on what shit to buy, so feel free to ask.
I have one of these, mostly for airbrushing but I have used it with spray cans a couple of times.
If you have a window you can vent out of then [this works well](Master Airbrush Brand Lighted Portable Hobby Airbrush Spray Booth with LED Lighting for Painting All Art, Cake, Craft, Hobby, Nails, T-shirts & More. Includes 6 Foot Exhaust Extension Hose https://www.amazon.com/dp/B00NLQ019A/ref=cm_sw_r_cp_api_aveVzbFTMZR9P)
I have this set up and it vents fine.
My wedding ring started getting unsettlingly loose, so I ordered some of these. They work great if you're not ready to get your ring(s) resized.
I have the same issue, I bought this on amazon: https://www.amazon.com/gp/product/B01M0OX3EW
It comes with several wrap styles and fits my wide band and helps a lot.
It's this one on amazon I like it a lot for the price.
I use gundam panel lining pens, like these: https://www.amazon.com/dp/B00HY8JI7C/ref=twister_B01N8TDZIM?_encoding=UTF8&amp;psc=1 - black
https://www.amazon.com/GSI-Creos-Point-Gundam-Marker/dp/B006B3YYZM/ref=pd_bxgy_21_img_2?_encoding=UTF8&amp;pd_rd_i=B006B3YYZM&amp;pd_rd_r=WF27RX3KPCKMWVEPFH2E&amp;pd_rd_w=5XjyC&amp;pd_rd_wg=XTRl0&amp;psc=1&amp;refRID=WF27RX3KPCKMWVEPFH2E - grey
Hey team, Does anyone have experience with This paint booth? Was considering going diy but I’ve found this for $150 nzd and would end up costing more to build my own I think.
Panel lining. Use a very fine-tip paint marker, like this; brush on inks; or even really, really, really thinned down paints. Use it to pick out the separations between the toy vehicle's molded in body panels, hatches, and doors. Really helps make them "pop."
https://preview.redd.it/8n8h1p3x9ef11.jpg?width=640&crop=smart&auto=webp&s=0800dd71f8a56bed87de388256da7f86e8f9e574
I got a ring adjuster that is basically a plastic spiral that wraps around the ring--like this one. I've had it for about a year now and it's been great. actually haven't replaced the first that I put on, even though I probably need to at this point.
You have three options for panel line;
-----------
Some people use pencil, but I don't find that method to be efficient. You can also mix your own paint but why bother when there is already a pre-mixed solutions.
I use this with a respirator in my second bedroom. https://www.amazon.com/dp/B00NLQ019A/ref=cm_sw_r_other_apa_1huBxb3VNT73T
You can buy a little ring guard (not sure if that is the real name) that will reduce the size until you are at your goal weight and have them resized.
Edit: it is a ring guard. https://www.amazon.com/GWHOLE-Adjuster-Silver-Polishing-Cloth/dp/B01M0OX3EW/ref=sr_1_3?ie=UTF8&amp;qid=1535852337&amp;sr=8-3&amp;keywords=ring+guard
You might want to get a black thin tip gundam marker to fill in the lines. Other tools that are helpful are a pair of side cutters for cutting parts off the runners, and some x-acto knifes and sandpaper to get rid of the nubs left from cutting the pieces out. I usually use 800+ grit. A flat top coat can be sprayed on to remove the shine from the kit, and give it a more model like look than something that looks like a toy. Hope this is helpful!
GWHOLE Ring Size Adjuster with Silver Polishing Cloth,Set of 4 (2mm/3mm)
https://www.amazon.com/dp/B01M0OX3EW/ref=cm_sw_r_cp_api_i_dzqMDb6HFKESV
Booth
Respirator
First things first, how big is the armor? Is this something you'll be wearing? If so, a smaller one like this will make your life hard. They get hot really fast and they'll shut off on you. The thing about them is that they run constantly. Push the trigger, it fires up to keep up with the air demand. It can be done, but it'll take awhile. I painted a helmet with one of these and it was very frustrating.
I do suggest investing in something else. Something like this California Air Tools compressor will do you a lot more justice. The storage tank really helps. Your compressor won't turn on as much, thus leading to a much longer lifespan. I have the 6310A version and it has been going strong for about 2 years now. I have been using it for my airbrushes and my smaller spray guns. It easily powers my LPH80 mini gun when I'm painting motorcycle parts. You can usually spray for about 10-15 minutes before the motor kicks in. This is when I spray at lower psi. If you're spraying at a higher psi it'll turn on faster, but it's still not as loud as many conventional compressors. You won't need ear plugs. When it does it isn't very loud. I can turn mine on at 2am when my family is asleep and they can't hear it upstairs. Invest your money wisely as a hobbyist.
I do suggest investing in a mini gun eventually. You'll get faster coverage and more even coverage. If you have any questions feel free to message me. I had to teach myself because no one was willing to help me. I don't mind helping people out whether they have questions about materials or equipment.
It's irritating that the price is higher for essentially the same thing but this guy is equivalent IMO ... that said - I'm only linking to it because you asked, I am a novice like yourself but have been looking long and hard at these units and chimed in to hopefully save you some of the time I've wasted ;)
I am not actually endorsing it or telling you to buy it, caveat emptor, read the reviews etc.
https://www.amazon.com/Airbrush-COMPRESSOR-Training-Published-Exclusively/dp/B001738DXU
If you really wanna get it good looking I'd recommend getting an airbrush to paint it. Cans are fine but you'll never get the right colors going that way. It's possible to just use a regular brush but it'll also come out extremely thick and unsatisfactory compared to an airbrush. Its a small investment (about $150 for a nice airbrush and another $100 for a small compressor if you don't already have one. Get one with a tank if you can) but if you do even a couple of models with it you'll never want to use a regular brush to paint an entire model again.
First off the model as it comes is way too blue, I'd recommend painting it based off the newer bandai model's box art as it looks fantastic which you can see here: TIE Advanced.
For the paint itself my personal favorite is the Tamiya line of acrylics. They are the best looking and most professional out of all the acrylics I've seen. They come in nice bottles that are great too. This is of course the best for airbrushing as thats what I would do but if you do end up going the brush route a better paint would probably be Vallejo as they are more suited towards that.
I'd honestly forgo the primer and simply do a full flat black base coat to get that blue off of the solar pannels then mask those up and do the main body. According to the supplied sheet for the bandai model the main body is 70% neutral grey and 30% white with a pinch of blue grey. For the darker parts around the ship its a 100% neutral grey. You'd use that in areas like the recesses on the wing roots, the window's frame and a few other places.
After that its really up to you how much extra detail you wanna add. You can do some dark washes to get those nice shadows, maybe add some metallic scratches and what not. Theres no limit with these sort of things.
Also as a last note if you wanna get into some more of these model's I would highly HIGHLY recommend the entire line of 1/72 ships by bandai. They are all snap together and have more detail then you would believe for their price as well as coming slightly colored so you can fit it all together and still admire it even before painting. I have the TIE Fighter and plan on getting the TIE Interceptor and TIE Advanced. They are the perfect size for putting on display (or playing with haha) and even scale correctly with other real world planes in 1/72 scale.
I have this and it works great. https://www.amazon.com/AIRBRUSH-COMPRESSOR-Airbrush-Published-Exclusively/dp/B001738DXU
Stuff that you need:
I've been using a second hand Paasche airbrush since August, and it's been working really nicely for me. I really like how easy it is to disassemble and clean. I just ordered a new Paasche H to replace the one I've got because I like the design so much, and I'd like to finally have all the parts so I can try some of the fancier techniques I see folks pulling off (like shading and fine details).
I started out hand painting (and still do it when I just want to add some minor details), and having the airbrush is really convenient. I can spray all my parts in an hour or two (depending on how many parts and how many colors) and then work on other things for the rest of the evening, instead of having to devote an entire evening (or more) just to prep and painting.
If you don't have one, you'll want a compressor too. I love this one, it's nice and quiet when it runs. I've got it under my desk sitting on top of a towel and you can barely hear it. It does need an adapter for the Paasche hose tho since of course the Master fitting is different.
If a bit of noise isn't an issue, there's also this Paasche setup with everything all in one pack . Down side is no tank, but the compressor isn't very loud.
Here is the hobby compressor that I bought and am happy with. I recommend compressor with a tank because the airflow is much more constant.
I bought a cheap Iwata Neo and used a generic airbrush that came with my first compressor before I picked up a Badger Patriot 105. From my experience cheap airbrushes are simply more prone to clogging. If the airbrush can spray water without trouble, it'll probably just be a matter of finding the right ratio in order to get paint to flow. I do recommend just throwing down for a better airbrush, specifically the 105. As far as paints for testing, I recommend just getting a small bottle of Model Air paint. They're specifically thinned for airbrushing and have finer pigment so you should be able to test with them without having to mess with thinning.
here is my set up. nothing to complain about. and the badger 105 is a great starter. its use of good machining means it only has one o-ring and its dead simple to clean.
https://www.amazon.com/Badger-Air-Brush-Patriot-Gravity-Airbrush/dp/B002W84GTO
https://www.amazon.com/Master-Airbrush-Fitting-Conversion-Adapter/dp/B0038NJYHG/ref=pd_lpo_vtph_201_lp_t_3?_encoding=UTF8&amp;psc=1&amp;refRID=9CTBV4FN6C10RQSFJXPG
https://www.amazon.com/AIRBRUSH-COMPRESSOR-Airbrush-Published-Exclusively/dp/B001738DXU/ref=sr_1_4?s=arts-crafts&amp;ie=UTF8&amp;qid=1505354405&amp;sr=1-4&amp;keywords=master+airbrush+1%2F6
then you will need cleaning supplies such as
https://www.amazon.com/Naturebelle-Airbrush-Cleaning-Holder-Nozzle/dp/B01D41W04U/ref=pd_sim_201_12?_encoding=UTF8&amp;psc=1&amp;refRID=3SG1JR28SAK6TVWHEZ03
https://www.amazon.com/Iwata-Medea-Airbrush-Cleaner-16-Oz/dp/B003TJA0SQ/ref=sr_1_1?s=arts-crafts&amp;ie=UTF8&amp;qid=1505354507&amp;sr=1-1&amp;keywords=iwata%2Bairbrush%2Bcleaner&amp;th=1
I'm pretty happy with the quality of everything and it makes painting a base coat of pure white or yellow super simple. also makes painting a color shift or pattern very easy. if you have the cash i would highly recommend it
here are some of my projects i have completed with it
https://imgur.com/a/N4mhr
I got this the other week, I currently live in a ~400 square foot apartment and it isn't much louder than my windows AC, takes about 30-60 seconds to fill up, and from then on is perfectly silent until it starts running low and it will turn back on, fill up in a few secs, shut off again.
I bought this a couple weeks ago and it has been working really nicely so far. It also comes with a hose.
https://www.amazon.com/gp/product/B001738DXU/ref=oh_aui_detailpage_o09_s00?ie=UTF8&amp;psc=1
The equivalent compressor in the US is this one:
https://www.amazon.com/gp/product/B001738DXU/ref=oh_aui_search_asin_title?ie=UTF8&amp;psc=1
Read through all the comments - the screws and seals on the compressor piston have to re checked and tightened for best results, but it works well and it's very quiet. Harbor Freight probably has an equivalent.
Doesn't have a tank, which is a deal breaker for me. A compressor with a tank provides a constant airflow, eliminating the air pulsing which can distort your paint job.
https://www.amazon.com/gp/aw/d/B001738DXU/ref=mp_s_a_1_1?qid=1453313936&amp;sr=8-1&amp;pi=SY200_QL40&amp;keywords=airbrush+compressor&amp;dpPl=1&amp;dpID=51PiLjO7hlL&amp;ref=plSrch
This one is exactly like mine and I have zero issues with it.
I was in the same boat as you. This is all the stuff I bought: https://www.amazon.com/gp/product/B0067BAYNO/ref=oh_aui_detailpage_o04_s00?ie=UTF8&amp;psc=1, https://www.amazon.com/gp/product/B001738DXU/ref=oh_aui_detailpage_o04_s00?ie=UTF8&amp;psc=1, https://www.amazon.com/gp/product/B00KS1II96/ref=oh_aui_detailpage_o04_s00?ie=UTF8&amp;psc=1, https://www.amazon.com/gp/product/B003TJA0SQ/ref=oh_aui_detailpage_o04_s00?ie=UTF8&amp;psc=1,https://www.amazon.com/gp/product/B004BN5RUU/ref=oh_aui_detailpage_o03_s00?ie=UTF8&amp;psc=1 .
I also bought an assortment of paints I thought I'd need. I went with the Vallejo Game Air line. If you look around, you'll see the stuff I bought recommended by many people for novice airbrushers.
Also, when I bought all that stuff, I signed up for the Amazon Prime credit card as well, so I ended up getting like $120 off that order. It worked out pretty well.
This particular model might be done already. From what I can see you do not use a wet palette, washes or do highlights. Time to grab another model and once you get more comfortable with your skills you can return to this guy and fix him up.
As a basic rule for painting minis, you should paint in multiple, thin layers always starting with a darker color than the final one you wish to achieve, building up to the highlights. Painting this way gives you more control over the final result but is of course time consuming. Of course there are always exceptions to the rule. Part of the hobby!
Good luck fellow Heretic!
I'm excited for you!
I swipe it around in brush cleaner. http://www.amazon.com/General-Pencil-Company-Masters-Preserver/dp/B001TNR7VM?ie=UTF8&amp;keywords=brush%20soap&amp;qid=1463077999&amp;ref_=sr_1_2&amp;sr=8-2.
It usually seems to get off some color that didn't get rinsed in the water.
Thanks :) The smallest brush I used on these is a 2/0, it's important to have a really good point though. I use Winsor and Newton series 7. I usually start with a GW standard size brush for basecoating the larger areas and then use a size 0 for the bulk of the work, finish some minor details and the eyes with the 2/0.
The higher quality brushes just last a bit longer by keeping a point a little better. It's important to take good care of them though so that they can last. Rinse them really well, be careful not to let paint get into the ferrule, and I use this stuff every once in a while:
https://www.amazon.com/General-Pencil-Company-Masters-Preserver/dp/B001TNR7VM/ref=sr_1_2?ie=UTF8&amp;qid=1467427051&amp;sr=8-2&amp;keywords=brush+soap
I think the process of doing eyes is the key, and it really takes patience. It took me a long time to figure out a good way for me to get it to look good. Elizabeth's Sarya tutorial (https://www.kickstarter.com/projects/coolminiornot/arcadia-quest-inferno/posts/1616987) is pretty much the way I do it, although I do the black pupil before i do the highlighting of the iris, don't think that matters much.
Haha yeah no tricks for the bases. I use the standard size brush to put on the gray, then put on some spots of red/ purple/ yellow for the other color stones, then use the 2/0 brush to draw in some lines.
The big ones at least look good. The small ones can be ruined quickly, but this is true with all cheap brushes, basically. So if they are not expensive, I'd say go for it. Especially if you are just starting to learn how to paint miniatures, it's much better to get lots of cheap brushes and only once you have a good grasp of the basics you should start checking the more expensive ones (Winsor & Newton, Raphael etc.).
The most important thing with brush care is, as it was already said in another comment, never let paint dry on your brushes. So when painting, stop every now and then and clean your brush. This can be surprisingly difficult as you could be in the zone while painting and don't want to stop, but you should. Properly clean the brush and then dry it by dragging it against a paper towel while turning the brush, so that you will end up with nice sharp shape. Diluting your paints helps with this, too.
Never "load" your brush with paint so that it reaches all the way to the metal thingy (can't remember the actual name). If you load your brush too full and the paint dries, the bristles in your brush will be pointing every direction and this will ruin the brush as it is very difficult to clean it afterwards.
Store the brushes in a mug or similar holder and make sure the brush end points upwards. This will help to keep the brush sharp.
At some point I would advice you to buy some brush cleaning agent specifically designed for the job. I and many others use the Master's Brush Cleaner and Preserver, but any soap designed for brush cleaning will do.
That's all I can think of now, but it should get you started. You can also try Youtube for brush care tips by non-miniature painters. Just make sure they use acrylic paints. Good luck!
I personally use Raphael Sable Kolinsky Brushes, sizes from about 0 to 2 depending on what I'm working on. They're fairly priced for their quality and you can definitely feel the difference between this and a cheap brush when painting.
If you make an investment in some nice brushes that you get something to clean them with and keep them in top form. Personally I use the Master's Brush Cleaner.
Would it be a terrible idea to use a paintbrush cleaning soap like this one? It’s supposed to be “mild” but I think that refers more to the brush than to whatever is left in the brush after you wash it. I just like these because they’re a really convenient shape for cleaning brushes. (Also I obviously wouldn’t use the same one I use for paints.)
Is this the item / brand you're referring to?
If so it's on amazonUK :)
https://www.amazon.co.uk/The-Masters-Brush-Cleaner-Preserver-1oz/dp/B001TNR7VM/ref=sr_1_2?ie=UTF8&amp;qid=1498143113&amp;sr=8-2&amp;keywords=masters+brush+cleaner
I don't where you are but Amazon has it. https://www.amazon.com/General-Pencil-Company-Masters-Preserver/dp/B001TNR7VM
Dang that looks way better than my first models haha.
&#x200B;
Though, I do have advice. I would recommend trying out dry brushing in small layers (bunch of youtube vids on how to do that). What I typically do is dry brush abbadon black as a base coat of sorts, 2-4 coats will do, and then adding mephiston red in thin layers (2-5 will do). It may be overkill but I personally like it that way.
This way, you won't have clumps of paint over your models, nor will there be many brush marks.
&#x200B;
Note: this technique works well if you get a specific dry brushing brush thing. GW sells one as well and it works pretty well :D
Link: https://www.games-workshop.com/en-US/M-Drybrush
&#x200B;
Also, get a brush soap. An absalute neccessity if you want your brushes to work for the years to come.
Link: https://www.amazon.com/General-Pencil-Company-Masters-Preserver/dp/B001TNR7VM
&#x200B;
Hope this helps and Emperor bless! FOR SANGUINIUS!!
&#x200B;
Edit: had to add stuff and remove [REDACTED]
&#x200B;
&#x200B;
Yeah, I would recommend some decent synthetics while you're still learning the ropes. When you're a beginner, you can be unintentionally rough on your brushes and synthetics are cheap + fairly reliable, depending on what you get. Privateer Press makes some good ones: http://privateerpress.com/content/work-hobby-brush . Also, get some of this stuff, it will greatly extend the lifespan of your brushes: http://www.amazon.com/General-Company-Masters-Cleaner-Preserver/dp/B001TNR7VM . Trust me, you'll want to learn good brush care early on, it'll be a lifesaver.
Once you've been at it a while, I would actually recommend the Winsor and Newton Series 7 line of brushes instead of those miniature brushes. If you're going to buy a Kolinsky sable brush, I would recommend a full sized one like the Series 7, which is the industry standard. The problem with those miniature brushes is like you said: they have a smaller tip and don't hold as much paint, which means more trips to the pot.
Ahh I see that stands for Convergance now. Hold on let me pull that up. Jesus all of those are metallics aren't they. I am very sorry for you. Especially if this is your first time painting. What is your idea of how you want to paint them. At some point you will need a few other non metalic base colors I think. But that it up to you.
Now there are two things you need to know for metalic paints.
So again I hope this helps, and if you have any questions feel free to PM me or just comment back.
https://www.amazon.co.uk/The-Masters-Brush-Cleaner-Preserver-1oz/dp/B001TNR7VM
If you have an art store near you (I went to Blick), go and get The Masters Brush Cleaner and Preserver! It was made to gently clean art brushes (even oil paint) and it works amazingly well. It's like $6 for a 1 oz solid - they also come in larger tubs but I wanted to make sure I liked it before committing- and it's AMAZING. The makeup just melts off the brushes, they get so nice and soft after washing and it has a nice lemony scent!!
Link for the lazy :)
General Pencil Company The Masters Brush Cleaner & Preserver 1 Oz. https://www.amazon.com/dp/B001TNR7VM/ref=cm_sw_r_cp_awd_zzGRwb944R38A
https://www.amazon.co.uk/General-Pencil-Masters-Cleaner-Preserver-1oz/dp/B001TNR7VM/ref=mp_s_a_1_5?keywords=artists+brush+cleaner&amp;qid=1571675137&amp;sprefix=artists+brush+cleaner&amp;sr=8-5
Personally, I find this as a great "thank you" for fellow mini painters, as it's relatively cheap and has been something that the two people (massive numbers here...) Who I know, that paint, have never heard of.
Paints- as above- down to your choice. I do like gw paints but the pots are shite and I find there's a lot of wastage, which isn't any fault of mine. That said, it's probably been designed that way so that gw can milk more revenue out of us. I have a lot of love for the Vallejo range, I find their textured stuff to be far better, and far more varied than the gw range. To be honest I'm not a big fan of the army painter range, but do use a few of their rattle cans.
Brushes- again, you'll pay through the arse for gw products.. (notice a theme?). I understand a number of pro painters (Sam Lenz springs to mind) who use pretty "standard" cheap brushes to get phenomenal results.
If you have a look on YouTube there's a huge amount of channels dedicated to the hobby and offering detailed analysis of paint brands, brushes etc. Miniac is a great start.
Hope this helps, just my two pence :)
Top tier brush cleaner.
https://www.amazon.com/General-Pencil-Company-Masters-Preserver/dp/B001TNR7VM
This stuff? Is that okay to use on something you're going to put on your face? It's so cheap but I'm afraid of it because it says it's for paint brushes. :s
At the end of an evening of painting I will dampen the brush I've been using in clean water (not the cup of water I have been using while painting, thus full of paint and potentially metallic flakes) and brush back and forth in my little cup of brush soap. Looks like this. Then rinse in clean water. Wipe off moisture on paper towel. Restore the tip of the brush by dragging it along towel or crease in the palm of your hand while rotating the brush. Replace the brush cap and store the brush vertically if possible, bristles down. Once a month, take a very tiny amount of hair conditioner (not shampoo/conditioner combo), brush the bristles in it for a bit to work it in, leave it sit for a minute or two. Rinse and store. If you do that, the brush will last a huge amount of time. Also don't use your best brush for dry brushing, washes, or applying the GW technical paints. Dry brushing is punishing to the tip of the brush, washes will get into the ferule (where the bristles are attached) and when it dries it forces the bristles apart, and technical paint typically has things in it that, like dry brushing, are just hard on the bristles. I would recommend cheap nylons for these uses.
When you dip a brush in a water pot, and I know this sounds excessive, you should avoid having it touch the bottom of the container or banging it into the sides. The bottom can do a lot of damage, the sides less so. I try to swish the brush around when it's a brush I care about. Crap brushes I'll bang them into the side, scrape the bottom.
Brush brands I use are Raphael, but I'm buying some Windsor & Newton Series 7 Miniatures today. There are a bunch of quality brands though. Windsor & Newton are very well respected.
Best of luck in your endeavors! Should you have more questions, need advice, really anything... let me know. I really enjoy passing on what I've learned. I've made mistakes so you don't have to!
I haven't tried it yet myself (I've still got quite a ways to go on my BB solid cleanser) but someone posted this a couple of weeks ago as an alternative -- maybe you can give it a shot if baby shampoo doesn't end up working as well as you'd like!
https://www.amazon.com/gp/aw/d/B001TNR7VM/ref=mp_s_a_1_3?ie=UTF8&amp;qid=1523285574&amp;sr=8-3&amp;pi=AC_SX236_SY340_QL65&amp;keywords=paint+brush+cleaner this is the brush cleaner I use. I get my brush wet and then "paint" the cleaner, getting it mushy, and then massage my brushes and rinse a couple times. Helps me a lot. For brushes, Michael's is a good resource or some place local to you. Don't be afraid to spend 5-10 dollars on a single brush. Like OP said a no 1 and no 00 are good, I also like to get a filbert style, no 4 I think, maybe 6, for base coating and wider models like vehicles.
Search ebay for "TC-20T" - currently there's a Zeny listed that comes with the hose, regulator, water trap, and the tank (that's the one I got). You can catch them on sale for as low as $30 every now and then, but even at $60 it's a steal. It's one of the same models re-badged by several other companies like Masters/Sparmax/PointZero/etc for a lot more (ie: https://www.amazon.com/Airbrush-TC-20T-AIRBRUSH-COMPRESSOR-REGULATOR/dp/B0038D38AA/).
I can't remember if this is the compressor I have or not, but there's a ton of clones just like it at varying price ranges. Whichever clone I've got has served me pretty well
If you don't want to invest a huge sum up front then as /u/TheRealMacLeod said you can pick up a normal $100 compressor & airbrush kit on amazon. I myself have been using a $100ish compressor with an air tank and $20 Chinese import gravity fed dual action air brush for my whole air brush career and if you look through my post history a cheap airbrush is not a deal breaker. One thing I learned is you have to take care of the airbrush so an end of session cleaning routine is a must for any airbrush to give good results.
This is what I use
Compressor
Airbrush
The airbrush will be complete, and the compressor will be complete, and with any luck the airbrush will include an air hose. Those are pretty much the only things you need to get going. My airbrush (a Paasche) did not include the hose, but I didn't get a "complete package" deal either.
You can use any compressed air source - pancake compressor or industrial strength Ingersoll-Rand diesel-powered air compressor. However, I suggest getting a dedicated airbrushing compressor. I've got a cheap Harbor Freight pancake compressor for inflating tires and it is loud as sin. My TC-20T clone, on the other hand, I can use in the house without annoying people even at night. This compressor is well worth the modest amount of money. A tankless version is also available, but the tanked version was recommended to me and I've enjoyed it.
For what it's worth, I live in a 2-bedroom duplex. My hobby space is against the shared wall with the other unit. The neighbors have said they have never heard it. If I close the hobby room door, you can't hear the compressor in the hallway.
Spend a little more and get the Master Airbrush TC-20T. It'll be worth it in the long run.
He Iwata NEO is a good Airbrush to start with, not only that many craft and hobby stores have replacement parts readily available for them which is pretty convenient.
First of all, whatever you choose, make sure it's double action and gravity fed.
A couple of months ago I bought my first airbrush kit.
After A LOT of research, I decided to go for an Iwata Neo CN airbrush. It's great quality and reliable, as all Iwata products are, but still more economic, which makes it great for beginners. It comes with two interchangeable cups in two sizes, which I find very practical.
With proper cleaning and maintenance, it should last a long, long time. So far, mine has been a delight to use.
It's around 55 USD on Amazon.
In my case, I preferred buying from a known, quality brand. I'm not saying the more inexpensive chinese airbrushes can't get the job done, but I'm very meticulous with my works and I'd rather minimize the chance of an unexpected failure.
Paasche is another well-known airbrush brand. I found this kit which might also fit your criteria.
One strong suggestion: do not go cheap on the compressor. It's the motor that will power whichever airbrush/es you decide to get, so it's important that it's good. I'm not telling you to buy the most expensive ones, of course, but to avoid the cheaper, smaller ones.
I recommend a compressor with a tank. The tank helps store air at the desired pressure, avoiding pulsations in the air flow. This also allows the piston to only start when the pressure drops below a certain point, saving energy and piston life, while avoiding overheating and constant noise. Additionally, the tank helps condense the humidity of the air in it (it sinks to the bottom and can be emptied), thus decreasing the risk of water droplets suddenly coming out of the airbrush (getting an additional water/humidity trap also helps).
Here is an example of one such compressor (it looks bigger than it is haha).
There might be cheaper ones; just make sure to check the reviews thoroughly to check for possible common issues, and to make sure the company provides customer support.
No matter what you buy, maintenance is key. Learn how to clean your airbrush. Make sure you're using the correct cleaning product (for instance, it's not recommended to clean certain varnishes with alcohol, as they get sticky and it makes it harder to remove from the airbrush). Clean it as soon as possible; some materials dry way faster than others, so look into that. If you're not going to use the airbrush for a long time, applying some airbrush lube on the needle is a good idea.
Cleaning it is fast and easy once you get used to it.
Sorry for the long comment, and I hope it helped in any way! :)
There's lots of articles and videos online, too; just Google things like "Good airbrush for beginners" and "How to choose an airbrush".
*Edited because typos, and a formatting fail 🤦🏻♀️
Yeah, I do live in the US, here is the compressor
https://www.amazon.com/dp/B0038D38AA/ref=cm_sw_r_other_apa_PM6Hzb5W1F4CK
I use a similar model to this one from the buying guide. This is definitely a bigger option, but I feel like it won't clutter up even a small room. It's about the size of 2 shoeboxes stacked on top of each other and smaller than a PC tower.
Of course; you can generally break compressors into 2 broad categories, tank and tank-less. Because you're probably going to be working on precise projects for long periods you'll ideally want a compressor with a tank. Tank-less compressors can have fluctuations in air pressure that can mess with your painting. This is a good compressor, it's the one I own. You can also get it bundled with an Iwata HP-CS. It does run a bit hot, so be careful handling it after working for a long period, or take regular breaks (something you should probably do either way)
If that's a bit too expensive, wait for a local hobby story to have one of those "1/2 off one item" coupons, or shop around. You just want a tanked compressor and a braided hose. Just make sure that the hose is compatible withe the compressor and the brush. The connector for the HP-CS is 1/8". Tanks will vary, the one linked above has a 1/4" connector. So you'd either need a symmetrical hose, and an adapter, or an asymmetrical hose.
Get an airbrush. Nothing fancy is really needed, just something that works. I used a cheaper airbrush for a long time before I felt I needed an upgrade. I started with this brush: https://www.amazon.com/gp/product/B002KJK130/ref=oh_aui_search_detailpage?ie=UTF8&amp;psc=1 and this compressor: https://www.amazon.com/gp/product/B0038D38AA/ref=oh_aui_search_detailpage?ie=UTF8&amp;psc=1. I still use that compressor, and now use this brush: https://www.amazon.com/gp/product/B01EB569ZY/ref=oh_aui_search_detailpage?ie=UTF8&amp;psc=1
edit: I would also point out that this was my first model that I had even attempted this sort of shading on. It turned out well, but I got a lot of my inspiration and technique from this guy: https://youtu.be/ynW6ZOj3wuA
I've seen really giant hooks at craft stores made out of bamboo. Lightweight, but maybe less prone to snapping than plastic.
I've never owned a plastic hook. All of mine are metal, and the largest one I have is a 9mm Susan Bates hook that came in a set. I'm very satisfied with it!
What is it exactly about the cheap hooks that hurt your fingers? Is it because they're too thin? If that's the case, there are some DIY fixes you can do to attach an ergonomic handle to it. Some people put those soft pen/pencil grips around their hooks. Or they'll wrap their hooks in those soft squishy shelf liner mats. There are also ergonomic handles you can buy that will multiple hooks, like this one. You can also use polymer clay to design your own handle. I think I've also seen people wrap masking tape around the handle area of thin hooks to make it wider and easier to grip.
Lastly, aside from Amazon and eBay, I know some small businesses sell handmade hooks from wood. They may be carry large sizes, and this might be an alternative to buying plastic ones.
I've found the ergonomic ball thing you put your hook into helps me.
https://www.amazon.com/Boye-Crochet-Ergonomic-Aluminum-3421001/dp/B004ALF72G/ref=mp_s_a_1_2?adgrpid=56342934432&amp;gclid=Cj0KCQjwyLDpBRCxARIsAEENsrIexWzRqPdCSWCp1kpWpCSXk4b3UzIqRNrT-unqWhbfLSHox2QxqoMaAoDoEALw_wcB&amp;hvadid=274739395819&amp;hvdev=m&amp;hvlocphy=9033835&amp;hvnetw=g&amp;hvpos=1t1&amp;hvqmt=e&amp;hvrand=1023097494132732709&amp;hvtargid=kwd-313687697012&amp;hydadcr=13641_9716132&amp;keywords=ergonomic+crochet+handle&amp;qid=1563219980&amp;s=gateway&amp;sr=8-2
Otherwise, it's good to take a break and rest your wrist. Brace can help, brace overnight is good. Vitamin B6 and glucosamine chondroitin can help reduce inflammation.
I had to buy a handle for my hook to be able to muscle thru it. Now with that I love it. Instead of a pencil hold that i normally use , I do a "fist hold?"
Boye Ergonomic Aluminum Crochet Hook Handle https://www.amazon.com/dp/B004ALF72G/ref=cm_sw_r_udp_awd_9FN5tb13ARMJR
Well, I find most of them that are just swirled mashes of colors simply ugly. But I tried it anyway.
I thought the point of adding the clay was to make them easier to hold, but I have smallish hands and there just isn't enough there to make the grip feel better --just clunky and heavy. I went back to using my [Boyde Ergo hook cover.] (http://www.amazon.com/Boye-Ergonomic-Aluminum-Crochet-Handle/dp/B004ALF72G) Some of the hooks wobble (non boyde hooks) a bit but a rubber-band can fix that.
I need this crochet handle so my hands don't hurt so much when I try to learn. It's on arts and crafts list.
I need this egg slicer Because 1 it's adorable and 2 I eat a lot of egg sandwiches and this would make my life so much easier and delicious.
I recommend Boye ergonomic hook, you can put your metal hooks in it and I've found it far better than the clover hooks at preventing cramp. https://www.amazon.co.uk/dp/B004ALF72G?ref=yo_pop_ma_swf
Have you considered maybe, even though your hooks have ergonomic handles, maybe they arent BIG enough? I have nerve damage that makes my fingers numb and found that bigger handles were what I needed. My thumb and hand would ache because since I cant feel anything, I was essentially death-gripping my hooks for fear of dropping them.
This is a kind of universal handle you can put hooks into:
Boye Crochet Dude Ergonomic Aluminum Crochet Handle (3421001) https://www.amazon.com/dp/B004ALF72G/ref=cm_sw_r_other_apa_i_6Ri6Cb8A1NJXB
Here's a listing on etsy that shows a couple different shaped hooks you can get. I personally own on of the red, heart candy box ones and use it all the time:
https://www.etsy.com/listing/669262404/rts-ergonomic-crochet-hook
Crochet Hook Ergonomic Adapter check other websites for better prices, but that is the idea.
I would maybe try one of these for her,
Boye 3421001001 Ergonomic Aluminium Crochet Handle - Multicolour https://www.amazon.co.uk/dp/B004ALF72G/ref=cm_sw_r_cp_apa_i_Df8WDbBJM53T2
You use it with regular metal hooks but this makes a really wide soft (rubber) handle for you to hold onto and it's not expensive so if it doesn't work out for her you've not wasted a lot
This helped me: https://www.amazon.com/dp/B004ALF72G/ref=cm_sw_r_other_awd_N1PKwbZ174T63
I'm thinking about trying this giant handle thing. I haven't tried the silicone ergonomic ones yet though. Good luck!
http://www.amazon.com/Boye-Crochet-Ergonomic-Aluminum-Handle/dp/B004ALF72G
Also, this Boye Ergonomic Crochet Handle is a must have! I'm in my 30s and get hand cramps if I don't use a hook with some cushion. This handle fits all my hooks.
http://www.amazon.com/gp/aw/d/B004ALF72G/ref=redir_mdp_mobile/187-9992762-5509763
I've been using this ergonomic hook holder, which will fit the boye hooks you already have. It takes some getting used to but I find I don't end up putting pressure on my hands as much when I use it, if that makes sense. It might be something relatively inexpensive to try if you would rather avoid buying new hooks. I bought mine at my local Michael's and was able to use a 40 percent off coupon.
Something like this for a budget beginner. https://www.harborfreight.com/deluxe-airbrush-kit-95810.html
I prefer the Iwata Neo. Its dual action gravity feed https://www.amazon.com/NEO-Gravity-Feed-Action-Airbrush/dp/B004INERK4
Then you need a compressor with an air regulator.
One idea I had for this is to use epoxie sculpt. It's a two part solid that you combine into a clay you can sculpt. It becomes hard as a rock after about a 30 minute working time or something like that. Using water can help smooth the surface.
I was thinking about trying this on a pick just to see if it would hold up to use since it'd be a really fast, easy way to get a completely comfortable grip molded to your hand and how YOU hold a pick.
https://www.amazon.com/gp/product/B0013UDWXI/ref=oh_aui_search_asin_title?ie=UTF8&psc=1
In 2011 I did a scary pumpkin head mask... I got a foam pumpkin at Michael's, carved a face in it, and made an opening at the bottom so I could wear it. I fastened a brimless baseball cap inside so it would fit securely. Then I put a piece of clear plastic inside the eyes at an angle, and mounted LED eyes inside the top of the mask, pointing down. Because of the plastic reflector, from the front the LED eyes looked like they were deep inside the mask. (same technique as the Terminator mask in this video)
This year I plan to revisit the concept, but with better carving. I will use some Apoxie to give the pumpkin some thickness near where it's carved. I'll put a closet push-light inside the forehead and run a wire out of the head so I can switch it on when I want, and I'll wear this mask directly on my face.
I'm planning to cut the mask into a face part and a jaw part, and fasten both parts to a morphsuit face stocking so the mask mouth moves with mine. It should be pretty unsettling.
Ah, thanks again! Here's the apoxie I bought: https://www.amazon.com/gp/aw/d/B0013UDWXI?psc=1&amp;ref=yo_pop_mb_pd_title
I use this Compressor and this airbrush you need a adapter for the hose it comes with but its a good place to start.
Ah gotcha. Yeah I'm looking at this one and similar. Reports and videos are that it's about the noise level of a small fan, sort of. Which to me is acceptable. Has the auto on-off and moisture trap too. Can totally see the appeal of CO2 only though -- zero noise is better than a little noise, right? :)
Just to add my 2 cents - I also have the Iwata HP-CS and absolutely love it. My close friend has the Badger Sotar that Miniac uses and loves his airbrush as well. You really can't go wrong with either of them. My only additional recommendation is to invest in an air-compressor that has a dedicated tank. I use this one and it has been awesome for the last two years. The tank helps eliminate any pulsating pressure and allows for a more consistent experience. Its not super important, but what kind of miniatures does your husband paint and what does he plan on painting with the airbrush? One thing to keep in mind while you look at airbrushes is the needle sizes of the unit - they can be changed, but the one that comes with it does play a role in how the airbrush behaves. The Iwata comes with a .35 mm needle while the Sotar can be found with needles ranging from .19 mm to .31 mm. The .19 mm needle is much finer and is better for precision work. I think the .35 is a great "all around" size, but if he plans on doing a lot of small details, he may find it a bit too large.
An airbrush is a great gift! I know I use mine all the time!
Yeah, that compressor wasn't looking too good to me either. Replaced it with this.
https://www.amazon.com/dp/B001738DXU/ref=cm_sw_r_cp_apa_i_eDTrDbH39V8J3
I'm also going with the Paasche because of how many extras it comes with, like the three different needle sizes.
Iwata Revolution CR, compressor is some no-brand thing very similar to this: https://www.amazon.com/AIRBRUSH-COMPRESSOR--Airbrush-Published-Exclusively/dp/B001738DXU/ref=sr_1_5?s=arts-crafts&amp;ie=UTF8&amp;qid=1467094971&amp;sr=1-5&amp;keywords=airbrush+compressor
I used Tamiya masking tape for doing small things but got lazy and used some regular DIY store masking tape to cover the big areas, it was this tape that took some of the primer with it.
I was able to get my airbrush set up for around 90 dollars.
I bought a used old $40 testors AC2000 from ebay, and a Iwata Neo CS for 45 dollars using Hobby lobby's 40% off. If you keep your eyes peeled for deals you can get a fairly cheap set up as well. If you're buying new, I'd recommend this compressor as it's cheap, comes with a tank, and produces adequate pressure. This will leave you with around $100 to get your airbrush and other supplies. Since it comes with a 1/8th hose it can fit the iwata airbrush without an adapter, but you'll need a specific adapter for either of the badger brushes.
Compressed aircans are sort of a step back, but if that's what you need to do then go for it. Getting a good compressor first is nice though, as they will last you a long long time.
If your budget is like that, get this for your compressor: https://www.amazon.com/AIRBRUSH-COMPRESSOR--Airbrush-Published-Exclusively/dp/B001738DXU/ref=sr_1_3?ie=UTF8&amp;qid=1473190155&amp;sr=8-3&amp;keywords=airbrush+tank+compressor
Then get this airbrush: https://www.amazon.com/Paasche-TG-SET-Double-Gravity-Airbrush/dp/B0017IJL9K/ref=sr_1_2?ie=UTF8&amp;qid=1473190197&amp;sr=8-2&amp;keywords=paasche+talon
The Talon has all the features of the Iwata HP-CS at a fraction of the price. I've been using one for some time. My only complaint is that I'm looking at a wider nozzle, but that might just be me needing to nut up and thin my paint even more than I normally do, and just be more patient.
I'll be honest and say I got a similar kit from Amazon. Compressor works great the airbrush... not so much. I ended up just buying a Iwata Revolution. If you can afford it I'd recommend this compressor as it has a storage tank and then get a better airbrush. Just my opinion though.
Totally worth it. There is a learning curve for sure, so if you keep it simple in the beginning with zenithal light technique, it will do wonders for your models and keep your sanity at the same time.
When you do get one, make sure you get a compressor that has a tank. I had one that did not and it was not usable. Also, a mosture trap is a must. posted a couple links for some reasonably priced brush and compressor that has the above mentioned features
http://www.amazon.com/Master-Airbrush-Multi-Purpose-Dual-Action-Professional/dp/B002KJDXHQ/ref=sr_1_1?ie=UTF8&amp;qid=1458420341&amp;sr=8-1&amp;keywords=airbrush
http://www.amazon.com/AIRBRUSH-COMPRESSOR--Airbrush-Published-Exclusively/dp/B001738DXU/ref=sr_1_2?ie=UTF8&amp;qid=1458420440&amp;sr=8-2&amp;keywords=airbrush+air+compressor
I have this compressor, which I got as part of this kit. I'm only a beginner with the airbrush, but I highly recommend both. The compressor delivers a steady stream of air and doesn't heat up or make serious noise. I can easily use it at night without disturbing anybody even across the hall in my house.
Like OneWhoGeneralises said, GW's paints need to be thinned a lot. They're very thick for an airbrush to begin with, and tend to clot up even more as they dry out over time. I had a lot of trouble at first using mine without clogging up the airbrush. i can do it now, but mostly use Vallejo Air. I also found that Jay Adan video really helpful.
https://www.amazon.com/Airbrush-COMPRESSOR-Training-Published-Exclusively/dp/B001738DXU/ref=sr_1_4?ie=UTF8&amp;qid=1550871367&amp;sr=8-4
Is the one i use.
NEW Quiet 1/6 hp MASTER AIRBRUSH TANK COMPRESSOR-(FREE) AIR HOSE and Now a (FREE) How to Airbrush Training Book to Get You Started, Published Exclusively By TCP Global. https://www.amazon.com/dp/B001738DXU/ref=cm_sw_r_cp_api_STDFzbGK3DMFA
Hey! I was in a similar situation a few months ago with around a $200 budget as well. Here's what I got:
Airbrush: Iwata Revolution - It's a great airbrush and is almost always on sale on Amazon for under $100. It's easy to use, easy to clean, and is solvent safe, meaning you can spray more than just acrylics.
Compressor: Master Airbrush - I wanted something with a tank on it because I didn't want it to run the entire time, and this one fit the bill. It's super quiet (I can even run it at night), and it comes with a moisture trap, which is super important. It also comes with a hose!
That brings everything to about $200, so there's not much wiggle room to fit other stuff in if you draw a hard line on your budget, but definitely consider:
Spray Booth: Master Airbrush- This thing is amazing. I love it. It's compact and super easy to use. It folds up super tidy and even has a button to retract the cord.
Cleaner: Iwata-Medea Airbrush Cleaner - comes in different sizes, but it's been wonderful when cleaning out my brush between paints or when I need to do my monthly field-strip.
Thinner, Retarder, and Flow Improver: Vallejo products!- I love the Vallejo Auxillaries. They're easy to use, pretty cheap, and widely available depending where you live.
if you got some room to spare for compressor you can hit up ebay or amazon for this cheap compressor combo.
http://www.amazon.com/AIRBRUSH-COMPRESSOR--Airbrush-Published-Exclusively/dp/B001738DXU/ref=sr_1_1?ie=UTF8&amp;qid=1420041270&amp;sr=8-1&amp;keywords=tcp+global+compressor
just remember to allow some cool down time and don't run your compressor for extended time or it will heat up and slow down the pump unit.
http://www.amazon.com/NEO-Gravity-Feed-Action-Airbrush/dp/B004INERK4/ref=sr_1_1?s=arts-crafts&amp;ie=UTF8&amp;qid=1417404244&amp;sr=1-1&amp;keywords=iwata+cn+neo
http://www.amazon.com/AIRBRUSH-COMPRESSOR--Airbrush-Published-Exclusively/dp/B001738DXU/ref=sr_1_1?ie=UTF8&amp;qid=1417404271&amp;sr=8-1&amp;keywords=tc-20t
This is what I personally used since September. The only I complaint I have has to do with the airbrush cup o-ring. Just toss it and put teflon tape in it's place. I don't have any complaints otherwise.
I have This Compressor and it has worked great so far. I also have a badger 150 that I use with it. I have done 1/350 ships with it however not for a while. I mainly focus on 1/35 tanks and sometimes 1/48 aircraft.
Yeah, sounds like you've eliminated things down to a problem inside the compressor itself.
TBH those types of compressors are practically just repackaged aquarium pumps, and IMO aren't what anyone should use. Even when they work, they top out at such a rock-bottom low PSI and CFM that they're basically unusable outside of one or two VERY narrow use cases. For model airbrushing, you want something a little bit stronger.
The Iwata Ninja Jet is WAY overpriced for how inherently limited it is. Return it, and get something like this or this instead (I use the latter, and can vouch for it).
Honestly, don't bother with either of those compressors. You REALLY want one with a tank. For precision painting, the tank ensures an even air flow, while the kind that don't have a reserve tank sometimes can't keep up with consistent spray.
I have this one: http://www.amazon.com/AIRBRUSH-COMPRESSOR--Airbrush-Published-Exclusively/dp/B001738DXU/ref=sr_1_1?s=arts-crafts&amp;ie=UTF8&amp;qid=1449878332&amp;sr=1-1&amp;keywords=airbrush+compressor+with+tank
YES, it's more expensive, but honestly if you want to do it, I highly suggest you do it right. Had several friends buy those starter kits and they always wound up replacing both the compressor and brush it comes with, thus spending more.
Speaking of brush, those brushes are pretty bad. They aren't precision machined, so they use O-Rings all over the place. Those are hard to clean and a point of failure.
I have two airbrushes that I adore: an Iwata Revolution and a Grex (I forget the model)
You have a few different kinds of grips: a pistol grip and a pen grip. I have one of each and use them for different applications, but have found that I mostly prefer the Grex.
I think this is what I have: http://www.amazon.com/Grex-Tritium-TG3-Trigger-Gravity-Airbrush/dp/B002XQ2K5W/ref=sr_1_2?ie=UTF8&amp;qid=1449878477&amp;sr=8-2&amp;keywords=Grex+Airbrush
Someone can probably recommend a cheaper alternative-
I recommend a gravity feed. Side feed and vacuum feed are both more of a pain to clean, and don't work so well with small amounts of paint for miniature work.
Anyways, just my opinions and observations. YMMV!
https://www.amazon.com/dp/B001738DXU/ref=cm_sw_r_sms_apa_GtWOAbED52XPJ
If you're getting something other than I believe 1/8" BSP hose you will need an adapter. I have an Iwata but I think Badger uses a different fitting.
I had the same goal as you, but eventually I broke down and went up a few bucks, knowing that I needed a compressor with a tank. So I went on Amazon and picked up this Master. Is it flawless, no, but I can paint for a long time without much worry. https://www.amazon.com/dp/B001738DXU/ref=cm_sw_r_cp_apa_aztyyb5ZBDTG4
While searching for the actual airbrush itself though, I jumped online and got a Hobby Lobby 40% off coupon and picked up this Iwata for a reasonable price. It's a decent airbrush although I'm plotting to use another coupon and pickup it's much more expensive siblings for detail work. http://www.hobbylobby.com/Crafts-Hobbies/Model-Kits/Airbrushes/Neo-CN-Gravity-Feed-Dual-Action-Airbrush/p/868
You can refine any airbrush though with some Regdab from Badger, it is some great lube, which you'll need anyways to keep a brush going and keep from wearing out the internal oring which would cause blowback failure.
You'll be at around $150 before paints if you have Amazon prime, but this setup has been great for a starter kit. Go too cheap and you'll have a bad experience and regret it. I'm loving it though, being able to blast through basecoating rapidly, and finally getting to paint vehicles without unwanted brush strucks on flat points. I intend to do almost all of my layers on a plastic contemptor with it and some liquid masking.
Jeeze, It feels like i'm biting off more than i can chew with this lol.
Would this get me most of what I need?
http://www.amazon.com/AIRBRUSH-COMPRESSOR--Airbrush-Published-Exclusively/dp/B001738DXU/ref=sr_1_2?ie=UTF8&amp;qid=1449424905&amp;sr=8-2&amp;keywords=tcp+airbrush+compressor
and I think I'm going to go with this for the actual brush:
http://www.amazon.com/Iwata-Medea-Performance-Action-Large-Gravity/dp/B0018A7QJE/ref=sr_1_2?ie=UTF8&amp;qid=1449370777&amp;sr=8-2&amp;keywords=iwata+airbrush
I use this:
http://www.amazon.com/Master-Airbrush-Performance-Compressor-Dual-brush/dp/B005H3CBXO/ref=sr_1_11?ie=UTF8&amp;qid=1449424905&amp;sr=8-11&amp;keywords=tcp+airbrush+compressor
Although, if I had a chance to buy a new one, I would buy the same one with the included air tank so the compressor is nice and silent.
http://www.amazon.com/AIRBRUSH-COMPRESSOR--Airbrush-Published-Exclusively/dp/B001738DXU/ref=sr_1_2?ie=UTF8&amp;qid=1449424905&amp;sr=8-2&amp;keywords=tcp+airbrush+compressor
Save your money you are like $100 bucks off getting a decent set up.
Edit: Let me elaborate on my reasons a little bit.
You want an air compressor with a tank and an automatic on/off switch.
This will keep your airbrush from getting pulsating air and the on/off switch will extend the life of your compressor (so will the tank as it isn't running all the time). Some added bonuses is being able to work without a lot of noise.
There are some cheap ones you can buy on amazon. ( TheTC-40T and the Master Tank Compressor)
Airbrushes are tricky. but you still can get soem good ones under $100. Like the Badger Krome RK-1, Badger 105 Patriot, Iwata Neo (Not made by Iwata but supported by them), and Iwata Revolution
Don't go the cheap route in buying an airbrush. I HIGHLY recommend you buy an airbrush from iwata, their quality and prices are great. I myself use an Iwata HP C Plus for 2 years and it still is my go-to brush. It can do anything, from fine detail jobs to wide sprays for blending. For an air compressor, you should get one with a tank. Here is a good set to buy Iwata w/ compressor combo. Save up and go for quality on airbrushes, trust me.
Or if you want to save up on money, you can buy another Iwata airbrush, the HP CR Revolution gravity feed which is a great airbrush at a fraction of the price.
For airtanks, I've used a couple, but they really don't differ much with brands in my opinion. Go for an air compressor with a tank like this one from amazon.
Now if you're looking for a high quality airbrush and price doesn't matter, I recommend you buy this badboy from hobbywave. Its my second airbrush, and it handles like a dream.
Hope this helps.
I would say that you would only really see benefits with a higher quality air compressor if you've already got your skill using an airbrush really dialed in until then a cheaper airbrush would really suffice. I'll entirely honest I've only been airbrushing my miniatures for a couple of months now but I've had the honor of using my friends high quality compressor but I've also been using my cheap Master Compressor. If i'm being entirely honest with you at my skill level I can't even tell the slightest difference between the two. My much more skilled friend can notice a huge difference between the two compressors but again, he's been airbrushing for almost five years. Now for a beginner I am using a slightly nicer airbrush, I'm using the Iwata HP-CS. I was recommended by him that I get the nicer airbrush and the cheaper air-compressor because the fine detail work that you're almost constantly doing with miniatures, he argued that the airbrush would have much higher returns per dollar than the more expensive air-compressor. I hope that helped a little. Take that all with a grain of salt because Like I said before I'm new and these are just my personal observations.
Stupid question. My airbrush was delivered today and everything looks perfect! There is one tiny little nick? that I think will do nothing to affect the air brush, though the 1/8th connector I have for the Badger 105 Patriot leaves some of the thread left. Anyways that is not my question.
&#x200B;
Am I able to test this airbrush with water? I have airbrush cleaner coming, hopefully in a few days and not July 16-30th like the package says... I would like to test it to see if any air leaks out through anywhere and I would also like to test if paint leaks so I was hoping water would do that job.
&#x200B;
Also I bought this compressor and I have no idea how to regulate? the PSI on it... Does anyone know how to do that? I am very new to airbrushing as one can see...
Master Airbrush Compressor
I don't have enough experience to definitively say whether I'd recommend it or not. My thought process was to get a good quality airbrush and pick a decently cheap compressor to learn on.
It seemed to work well enough this time around.
I have this one and it never turns off. I bought it used elsewhere and can’t return. Ive read how to fix the problem of never turning off, but I haven’t figured it out yet. I don’t have anything to compare to, but it works really well besides never turning off.
https://www.amazon.com/gp/aw/d/B001738DXU/ref=cm_cr_srp_mb_bdcrb_top?ie=UTF8&amp;th=1&amp;psc=1
Thanks for the input! I ended up increasing my budget and picked up this brush, and this compressor.
Iwata Revolution CR, and as for a compressor: Try looking at this one
Rancor gives some good advice. I've only started modeling for only over a year but I don't know how I would paint a kit without an airbrush. Iwata Neo and this Compressor is what I've been using and it has been working really well.
Don't use GW brand brushes or tools as they are over-priced. Middle of the road quality for near premium prices. Just get yourself a xacto for trimming and some generic hobby clippers.
For paints you should at least look at vallejo and reaper (way better bottle design). Opinions differ but I think Reaper beats them all aside from metallics where GW are head and shoulders over everyone else. Also THIN YOUR PAINTS AND USE A WET PALLET.
Jokes aside a wet pallet, whether DIY parchment paper or store bought, make blending so much easier for a new painter and is my number one suggestion for those just starting out.
For brushes there is a huge range in price (with GW near the top) and quality (GW near the bottome here). Army painter is my go to for synthetic brushes with Kolinsky being the generally held gold standard sable brushes (sable hair forms a finer point). Pick up a set of army painter's (they also have helpful descriptive names rather than numbers) look after them with this magic stuff (you can probaly get it cheaper elsewhere but it last forever anyway) and then see if you want to upgrade later.
Have fun!
As you improve in the hobby you will find yourself using bigger brushes. A size 2 or even a 3 with a good point will serve you better than anything 0 or smaller. Even for most detail.
It's not the size of the brush you use, but the size and shape of the point. I found this myself through experience as I started off painting with the smallest brush I could but the problems you run into using a small brush are threefold :
Paint dries before you can get it on the model, leading to clumps of pigment instead of smooth coats.
Small brushes tend to more easily leave brush strokes showing on your model, especially on flat areas.
Models just take longer to paint, less finished models = slower improvement :)
Sounds like you are heading in the right direction though, next up treat yourself to some brush soap for example: General Pencil The Master's Brush Cleaner & Preserver-1oz https://www.amazon.co.uk/dp/B001TNR7VM/ref=cm_sw_r_cp_apa_i_UoJoDbK5NEARY
Your brushes will thank you :)
Finally and most importantly, feel free to disregard any advice you may get and just dive in and go your own way. The most important thing about the hobby is to have fun and enjoy it!
Get some Master's Brush Cleaner and Preserver. Use it to wash the brush, then use some to form a tip before storage. Works really well.
I use Cinema Secrets for my brushes, and this paintbrush soap for sponges and deep cleanings https://www.amazon.com/General-Pencil-Company-Masters-Preserver/dp/B001TNR7VM/ref=sr_1_2?ie=UTF8&amp;qid=1474259623&amp;sr=8-2&amp;keywords=brush+soap
They sell that soap at Michael's, too, and there's always coupons available. There's a nice lemony smell, as well
If you can get this stuff your brushes will last a long time and you'll probably never run out of cleaner - link
Eh, I'm kinda lazy and don't wash all my brushes every time but I try to wash the high-use ones semi regularly. I usually wash two or three at a time when I'm doing my skincare and waiting for actives (acids, enzymes) to work. Depending on the type of product, that could be 8 to 20 mins.
Based on a recommendation on MuA a long time ago, I use a [solid brush soap] (https://smile.amazon.com/General-Pencil-Company-Masters-Preserver/dp/B001TNR7VM/ref=sr_1_2?ie=UTF8&amp;qid=1539062737&amp;sr=8-2&amp;keywords=masters+brush+soap) and a [silicone half-egg] (http://musicalhouses.blogspot.com/2015/04/brush-egg-dupe-for-2-daiso-egg-laundry.html) thing I got from Daiso. I fill the soap's cap with water, press my brush in the water to wet it, swirl it around in the soap, and then swirl it around on the egg. Rinse and repeat until there is no more colour in the soap lather and the brush is clean. I find that bushes used with liquid / cream products take a few times to get properly clean while brushes used with powder products are clean after 2 passes, at the most. It's just the nature of the beast, especially if it's a lot of long-wearing, heavy coverage stuff.
After that, I gently press the excess water out, shape the brush head, and leave the brush on a shelf (with the bristles sticking out over the edge) to dry.
Congratulations on making the BIG MONEY!!! Seriously, is everyone in the office bowing down and singing your praises?
If I were to win your raffle, I would like this for cleaning brushes and this for cleaning mah fayce! Thank you so much for hosting!
Yes, yours is a better deal, the exact one I got was this listing. The packaging on the one you found reads more or less identical minus a website so I imagine it might be from older supply explaining the lower prices for volume.
Brush soap will help keep your brushes going longer. Working a wet brush across the cake then swirling the lathered bristles against the palm of your hand breaks up any paint in the belly of the brush or that has dried on the bristles. Rinse, add a little more soap, then shape the clean brush to a point and let it dry. Used at the end of your painting session, it'll extend the life of your brushes by months or even years. I swear by The Master's Brush Cleaner.
Varnish protects the paint job, reducing chipping and wear. PVC figures actually hold up pretty well without it, but I recommend using it anyway to get the most mileage possible out of your figures. It comes in gloss, satin, and matte. Matte is my preference because it doesn't interfere with the shadows and highlights as much as a shinier option.
I dont mean this to sound bad but are you mixing the paints with your series 7? I personally use junk brushes to mix colors, than use the series 7 to paint.
Other than that I dont usually have a problem and once a week I hand wash my brushes in Brush cleaner
http://www.amazon.com/General-Pencil-Company-Masters-Preserver/dp/B001TNR7VM
One last thing, and its a bit gross =P But I am practicing 2 brush blending while I learn how to paint and the tip they all say to use is to suck on your brush tips and use your saliva to help move the paint. I also wonder if this doesnt help keep the paint out of the ferrule. Again, it sounds awful and gross but I think it works (and its not that bad). Just brush your teeth before you do it =D
So Windsor Newton series 7 are beautiful and super long lasting if well treated.
Even just one size 1 is better than a bunch of varied cheaper brushes as they keep their point.
Also Masters brush cleaners is miraculous. De gunks gunk you didn't even know was gunking :)
https://www.amazon.co.uk/General-Pencil-Masters-Cleaner-Preserver-1oz/dp/B001TNR7VM/
I'm also not dressing up this halloween, but I am going to be doing my sister's zombie makeup for her choir concert! I'm going to be taking major tips from that one zombie look in /r/makeupaddiction from /u/sssamanthaa. Here's to hoping that it'll be spooky scary!
Would really like to get this. It's cheaper, and shipping is free from -Supermart.
Definitely not a cheap alternative, but for a long lasting and high quality alternative I would always recommend Winsor & Newton Series 7 brushes. The size 1 is a good all rounder, and the brush I use the most. It strikes a good balance of being thin enough to do details, but large enough so the paint doesn't dry out on the tip straight away.
&nbsp;
You could likely do everything you want to do with just a size 1 W&N brush, and one other cheaper, bigger brush for basing (for example the citadel large base brush).
&nbsp;
Raphael also make good brushes, but I find the belly of the bristles to be a bit too fat for my liking.
&nbsp;
If you are going to buy a more expensive brush, I also recommend picking up some brush cleaner. It really helps to extend the life of your brushes.
No problem I'm always happy to help people with their hobby.
I'd actually recommend getting some miniatures and paints first. The hobby really is about the models and the spectacle, if you don't enjoy them as objects you probably won't enjoy the rest. Pick the models you like the most and go from there. Also literally a table cloth with some boxes on is enough to have a go at most game systems, so I wouldn't worry too much about terrain for the time being.
In terms of game system it sounds like http://www.boltaction.com/ might be the ideal game for you, it's pretty easy to pick up, well supported by warlord games (they do global campaigns for it which is very cool), you don't need a ton of models and it's very fun and popular. I'd pick up maybe a box of infantry (or a starter army if you're willing to make the investment) and the rule book (warlord books are beautiful). I'd also recommend r/boltaction, it might be worth posting a question there. Warlord games also has their own forum http://www.warlordgames.com/forum/viewforum.php?f=48&amp;sid=88c53ccceabba7211bf08b6ef18c67a6 where you can ask questions, a good place for beginners. Also use youtube, it's become an excellent resource for wargamers, you'll be able to find introductory videos, battle reports and all sorts.
I wouldn't buy that paint set, paint's are expensive and they rack up pretty fast, I'd buy the paints you need for the models you have. Get vallejo paints, they tend to be the best for historicals. After you've decided what models you want to buy I'd post a question there asking exactly which paints to get to paint them 'correctly'. Some historical gamers are very finnicky about uniforms being perfect, I'm not one of them, but it is nice to be broadly accurate. If you want to be perfect check out https://ospreypublishing.com/store/military-history/series-books/men-at-arms these books are like the painting guides for historical models. Many are even designed based on their art.
Brushes; this is an area that I believe it is worth spending a bit more money, good brushes will last (provided you maintain them) and will improve your painting experience enormously. Although I occasionally paint commissions so my perspective is a little different. I'd recommend Windsor Newton Series 7 brushes (better for detail) or Raphael Kolinsky brushes (better for blending, harder to get though). To start with just get one for normal painting (windsor newton size 0), and one for fine detail (windsor newton size 0 or 00) should do. I'd strongly recommend getting http://www.amazon.com/General-Pencil-Company-Masters-Preserver/dp/B001TNR7VM/ref=sr_1_2?ie=UTF8&amp;qid=1450981902&amp;sr=8-2&amp;keywords=masters+brush+soap to keep your brushes clean and to help maintain their point. These are natural fibre brushes so after cleaning it's a good idea just to dip them in some hair conditioner so prevent them drying out too much, then rinse them clean. I use this stuff http://www.dickblick.com/products/weber-turpenoid-natural/ The beginner synthetic brushes most people use are frankly a waste of money. The best tip I can give you regarding painting though is to always thin your paints, either with water or Vallejo Glaze Medium. Also don't forget to spray prime your models, citadel or army painter sprays are good for this, most people use black. Look up zenithal priming if you want to get fancy.
Terrain's broadly split into 2 categories, static terrain, and moveable terrain. Static terrain is usually what you'll see in magazines, dioramas in museums etc. An entirely modelled board. When done well it looks incredible, the pinnacle of the hobby. http://miniscaping.com/miniscape/preview/248#active-gallery one of my favourites, the British siege of Badajoz in 1812 during the Peninsular Campaign. http://www.matakishi.com/TH%20table%202%20600.jpg a medieval conflict.
The only problem is when it's your table and you play most of your games on it, playing in the identical village/farmstead can get a bit dull. Also storing static terrain tends to be really hard. So we move onto moveable or modular terrain, which what most people use and I'd definitely recommend. This consists of having buildings, forest etc on bases that you can move around to mix up your games. It's also very cheap generally, e.g. take a beard trimmer to a doormat, and voila, you now have a ploughed field, spray/dye some towelling material green and you have great looking grass. An example http://imgur.com/a/EGvpK
I still use pasting tables as my table, they are 6ft x 2ft, fold away and are very cheap, I'm not sure what they're called in the us but this is what I mean: http://www.homebase.co.uk/en/homebaseuk/hardboard-top-folding-pasting-table---1780-x-560-x-740mm-027611
Get 2 of those. Then place 3 4x2 plywood sheets on them, cloth on top of that, and there you have a cheap, good 6x4 starter table that is fast to set up and put away. Then populate it with terrain, model railway terrain is great for things like trees and much cheaper than specialist wargame terrain. You can always upgrade to more complex modular boards later using the plywood you bought.
Anyway sorry if that was a bit in depth, hope it was useful.
To recap:
P.S. beer and wargaming are a good combination.
P.P.S. look for wargaming clubs in your area, there are a lot more than you may think, and are great places to meet other gamers, try different systems and get advice.
Highly recommend getting this to get started: Reaper Bones Learn to Paint Kit
Also, if you want to make your life a little easier, consider making or buying a wet palette, a nice Sable brush, and definitely some Master's Brush Cleaner.
---
If you're just painting the one mini, you can get Reaper paints and use their online tool to decide which colors to get.
'The Masters' Brush Cleaner. It's sold on amazon for $5.19 the smallest size.
This stuff gets it clean like BRAND NEW.
As a starting point you should probably look into natural Sable Brushes, size 2 for basecoating and 0 or 0/2 for finer detailing. Make sure it has a good point. I am currently using these, the regiment brush is quite good.
Some mini painters will quickly mention Newton and Winsor 7 series brushes or Raphael Kolinsky sable brushes, which are more expensive, but I cannot confirm that, I have not tried Kolinsky sable brushes. Be sure to buy a nice brush cleaner to preserve your natural hair brushes.
Here is a nice unbiased information (mini painters tend to be fanboys on certain brands of paints and brushes) about brushes or this one by one of the best mini painters around, one of the comments mentions Toray brushes which are often used by minipainters
EDIT: Added the APJ link
Its been mentioned before, but I also second the suggestion of the Windsor & Newton series 7 brushes. Get him a 1 point or a 3 point.
Also there is this cheap but extremely effective brush cleaner that can help repair old brushes and maintain new ones
https://www.amazon.com/gp/product/B001TNR7VM/ref=oh_aui_detailpage_o00_s01?ie=UTF8&amp;psc=1
If this was the kit you're looking at then I should warn you that it is missing the compressor. If you already have an air compressor capable of producing a steady 20PSI then you'll be good to go, but if you still need a compressor them, fair warning: the compressor can be just as expensive as the airbrush itself - which is probably why they didnt include one in that kit. Asside from a missing compressor, it does look like a solid kit
Thank you for the response. How much time do you usually airbrush for? Do you do a lot of detail work with it? I was thinking I would just be doing base coats and the initial highlights, then finishing with a brush.
These Master or Paasche tanks seem good. I am concerned about the 1 star reviews though, seems like they can break.
For now I think I am going to try my Hitachi and see how it goes. I can always get an airbrush compressor later.
I really want get into airbrushing my pieces, I wanted to know how consistent this compressor is...https://www.amazon.com/dp/B0038D38AA/ref=cm_sw_r_cp_ep_dp_xmHjzb3JYF8CN
I'm not looking to break the bank, but I keep seeing mixed reviews with Master compressors.
Thanks
Airbrush: https://www.amazon.com/Iwata-Medea-Eclipse-Action-Airbrush-Gravity/dp/B000BQKFAI/ref=sr_1_3?ie=UTF8&amp;qid=1520896361&amp;sr=8-3&amp;keywords=iwata+eclipse+hp-cs
Compressor: https://www.amazon.com/gp/product/B0038D38AA/ref=oh_aui_detailpage_o02_s00?ie=UTF8&amp;psc=1
Hose: https://www.amazon.com/gp/product/B002FDX36I/ref=oh_aui_detailpage_o02_s02?ie=UTF8&amp;psc=1
These are all that I use and have been nothing but happy with them. I'm one of those with the mindset that if I'm going to invest, I'm going to invest - and the Iwata Eclipse is praised far and wide as one of, if not the, best airbrush out there.
I'd recommend stepping up to the model with a tank if you can spare the extra $40.
https://www.amazon.com/Airbrush-TC-20T-AIRBRUSH-COMPRESSOR-REGULATOR/dp/B0038D38AA/ref=sr_1_13?s=arts-crafts&amp;ie=UTF8&amp;qid=1482854361&amp;sr=1-13&amp;keywords=Master+Airbrush+High+Performance+Airbrush+Air+Compressor+with+tank
For airbrushes, I'm personally a fan of the Neo by Iwata, especially their gravity feed (cup) model. The brush is well built, fairly easy to take apart and clean, and has very few issues with most paints and other products you may put through it.
I picked mine up on sale for around $50, and if you have a Michael's or Hobby Lobby nearby, you may be able to pick it for less with one of their one-item coupons they release occasionally. It's also nice if you have a hobby store near by as you can drop in a pick up replacement needles or nibs if you accidentally drop it >.>; . Needles and nibs typically cost in the 10-15 dollar range for replacements, so not too terrible.
For compressors, a simple compressor with a tank will work wonderfully, so long as it has a proper pressure regulator and water trap. I have this compressor and it works well, after I got the correct airbrush hose to attach to the NEO.
There are a couple extra tools that can help with airbrushing as well, but most can be picked up at a later point. Something I would recommend that you get with the initial purchase is a spray booth. This allows you a place to spray into and capture many of the errant particles of paint from your airbrush. Combined with a proper respirator mask, it will ensure that you don't breath in any of the particulate from airbrushing, and hopefully don't have airbrush paints drying on items they weren't directly sprayed on. I would say of the two, the mask is the most important to have.
A quick-disconnect is useful for cleaning and swapping airbrushes, but isn't really necessary at first. A cleaning pot is also useful as it gives you a dedicated space to spray out leftover paint and cleaing fluid, and should stay fairly contained.
I would also look at purchasing a ultrasonic cleaner further on, as it is amazingly helpful for cleaning the airbrush when paint has leaked into the body, or spilled into places it shouldn't be.
Other's can probably offer advice as well, but that's what I currently use. Hope this helps!
For that money you could probably pick up a relatively good airbrush/compressor set. If he's never used one before it would be a fairly big change in his painting process, but I've yet to meet a modeller that doesn't lust after that smooth airbrush finish!
Paasche make excellent airbrushes, this looks like quite a good one. This would be a sufficient compressor to pair it with although you may need an adapter if the lone user review is to be trusted. This would leave you some budget left to pick up extra supplies like paint thinning solution (for making normal acrylics airbrush friendly).
Got one of these: https://www.amazon.com/gp/product/B0038D38AA/ref=oh_aui_search_detailpage?ie=UTF8&psc=1
It kinda sucks. It has to run constantly even for light painting on Gundams. Also I had to add a fan cause I could smell plastic on it melting after long sessions. Tho it has been running solid for years. I've even forgotten it on many times and its still kicking. Might be overkill, I think it goes to like 60psi, I normally use 20-25.
Happy painting
What do you like to do? Do you like sport, music, exploring, cooking, fashion, art? What are your interests and level of physical limitations? What is your budget? There are honestly so many hobbies you can do out there with only a little thought on how to adapt them.
You mentioned craft. Honestly I've found with most crafts, you pick the one you like and there will be some way to adapt it. Lots of old ladies like crafts, and lots of old ladies have arthritis in their hands, so there are adaptations made for them which you can use with other disabilities. Would you be interested in knitting, or crochet? There are some great grippy gloves, widened hooks/needles, hand supports that can help with reduced motor skills. I used to crochet and used this which was an amazing help. If you use a larger hook and wool (not gigantic) that makes it easier too.
I swear by this grip. It has eliminated my sore hand issues completely.
https://www.amazon.com/dp/B004ALF72G/ref=cm_sw_r_other_apa_HiDMxbSCYCXW4
I found this ergonomic handle that I love!! Added bonus, I lose less hooks this way.
https://www.amazon.com/dp/B004ALF72G/ref=cm_sw_r_cp_tai_Ej.vDb52C6M9T
there is a Boye ergo handle which can fit over a K hook that you may use. Boye also has standalone ergo hooks by The Crochet Dude. I use these and find them very comfortable.
There are these type of ergonomic hooks that help too.
https://www.amazon.com/Boye-Crochet-Ergonomic-Aluminum-3421001/dp/B004ALF72G/ref=asc_df_B004ALF72G/?tag=hyprod-20&amp;linkCode=df0&amp;hvadid=198109655242&amp;hvpos=1o1&amp;hvnetw=g&amp;hvrand=2794263440927296619&amp;hvpone=&amp;hvptwo=&amp;hvqmt=&amp;hvdev=m&amp;hvdvcmdl=&amp;hvlocint=&amp;hvlocphy=9030891&amp;hvtargid=pla-361849738478&amp;psc=1
http://www.amazon.com/Boye-Ergonomic-Aluminum-Crochet-Handle/dp/B004ALF72G/ref=sr_1_5?ie=UTF8&amp;qid=1416709040&amp;sr=8-5
It's not a hook persay... but I bought one of these for my girlfriend recently and she says it is really comfortable. It is intended to be used with the metal Boye hooks and is basically a universal handle. I didn't pay anywhere near that much though. I think it was around 9$ at the local Michael's. Her only complaint is the light green part is a bit tacky/grippy. Even so though she still likes it.
Has she tried any ergonomic hooks or handles? I have the clover Armour and love them. There are also make handles you can put on regular hooks like this: https://www.amazon.com/dp/B004ALF72G/ref=cm_sw_r_cp_apa_i_oAE1CbEMYYPMJ
I don't have experience with that handle, but I've heard from other crocheters with arthritis and wrist pain that it helps quite a bit. Maybe you could give her the yarn, a hook, and one of these handles, if you think it would work for her.
I don't have carpal tunnel but I couldn't crochet without this: Boye Crochet Dude Ergonomic Aluminum Crochet Handle (3421001) https://www.amazon.com/dp/B004ALF72G/ref=cm_sw_r_cp_apa_6-VPBbTPT8DJB
They're sold at Michael's and Walmart too.
I use the Clover Soft Touch hooks which are certainly better on my fingers than ones without grips, especially since they are so light. The difference isn't that big though for my wrists. If you also hold your hook with a death grip like me, they make really big grips like this that help a lot. You can also make your own by wrapping something around the handle (I used an Ace bandage lol). Another thing that helped me was learning to use my nondominant hand to do more of the work. I use my nondominant hand to yarn over and only use my hook hand to push or pull the hook. Saves my wrist from having to move too much.
This might not help support your wrist and the damage already there, but it may offload the stress.
This is a ergonomic crochet handle
https://www.amazon.com/Boye-Crochet-Ergonomic-Aluminum-3421001/dp/B004ALF72G/ref=asc_df_B004ALF72G/?linkCode=df0&hvadid=198109655242&hvpos=1o2&hvnetw=g&hvrand=17948814812143420833&hvpone=&hvptwo=&hvqmt=&hvdev=m&hvdvcmdl=&hvlocint=&hvlocphy=9031240&hvtargid=pla-361849738478&psc=1
I just got one yesterday to try. I just picked up crocheting again. Then can you believe after a few small projects, I pinched a nerve! It was a zinger, along the fleshy part between them and forefinger. I haven't crocheted in over a month to let it heal (it is better but still numb along the skin) and I decided to try this instead of pinching a thin hook.
I should, I really should but for now I just take breaks and only work on small projects. I also use an ergonomic hook handle amazon link and that helps a lot.
I have the handle that holds my aluminum hooks. http://www.amazon.com/Boye-Ergonomic-Aluminum-Crochet-Handle/dp/B004ALF72G
Have you looked into getting an ergonomic hook? I have this one and it works great!
If she already has plain aluminum Boye hooks, I use this thing to make them more ergonomic. It looks silly but it completely stopped the hand and wrist cramps I used to get if I crocheted for too long.
Iwata have a 'Neo for Iwata' which is cheap and general purpose.
https://www.amazon.com/Gravity-Feed-Dual-Action-Airbrush/dp/B004INERK4/ref=sr_1_1?s=toys-and-games&amp;ie=UTF8&amp;qid=1483579990&amp;sr=1-1&amp;keywords=neo+for+iwata
For a little extra you could get a Badger sotor20/20 its a finicky airbrush but once you get the hang of it its great.
https://www.amazon.com/Badger-Air-Brush-2020-2F-Gravity-Airbrush/dp/B000BROVIO/ref=sr_1_fkmr1_1?ie=UTF8&amp;qid=1483579968&amp;sr=8-1-fkmr1&amp;keywords=badger+sotar+20%2F29
thanks.
so if i get this: https://www.amazon.com/NEO-Gravity-Feed-Action-Airbrush/dp/B004INERK4/ref=sr_1_5?crid=1GJX2LR3C2LW3&amp;keywords=iwata+airbrush&amp;qid=1563204953&amp;s=gateway&amp;sprefix=Iwata%2Caps%2C165&amp;sr=8-5
What else would need besides the paint? Would be all that i needed or would i need some kind motor or whatever? All I want to use the air brush for is painting skin. I have a spray can for primer that's worked well for me so far.
the iwata neo is a good cheap airbrush. I used to use one untill I upgraded to a Sotar, and they're pretty decent.
Brush Cleaner to keep my paint brushes in good shape! I like to paint miniatures! Here's the first mini I painted, an orc, and my latest WIP: a Union Soldier!
I clean my BB after each use with a solid paintbrush cleaner. It comes in two sizes, (small and large), and you can generally find it at any arts and crafts store. It's MUCH cheaper than the BB brand cleanser. I believe other folks will use solid soaps like Dr. Bronner's.
I use the The Masters Brush Cleaner. It’s an art supply used to clean oil and acrylic off of paint brushes so I know it’s really good for taking dried makeup residue off. It isn’t advertised to clean makeup brushes but its safety data sheet indicates no hazardous material or health hazards. I haven’t tried the brush cleaning balms advertised for makeup brushes but I assume it’s very similar but The Masters Brush Cleaner is much cheaper. You can find it at Hobby Lobby or amazon.
But I just wet my brush and swirl it around gently in there to get the product until it lathers and use a makeup cleaning mat to scrape the residue off. Rinse and repeat until the water is clear.
Then I put one of these net guards around the hairs to keep its shape until it’s dry.
In addition to this, when I clean my brushes, I use this:
http://www.amazon.com/General-Pencil-Company-Masters-Preserver/dp/B0009RRT9Y/ref=sr_1_1?ie=UTF8&amp;qid=1398113082&amp;sr=8-1&amp;keywords=brush+preserver
It helps them to stay clean and keep their shape for far longer than prior to using it.
https://www.amazon.com/General-Pencil-Company-Masters-Preserver/dp/B0009RRT9Y/ref=sr_1_8?ie=UTF8&amp;qid=1474523589&amp;sr=8-8&amp;keywords=paint+cleaner
THISTHISTHIS
This is what I use. It's really easy--just wet your brushes in warm water and swish it around. Takes about a minute to work all the stuff out, though expect to spend a few minutes on sponges. Doesn't harm bristles and smells amazing!
So I'll give you a link to a list that you may find useful for checking all the boxes on what you may need. I'll post my opinions below on some of the stuff I have found is most important. (I went through this process about 2-3 months ago)
http://www.reapermini.com/Thecraft/32
I LOVE this hobby knife Very important for removing mold lines, cutting off flash, etc. Very important to get one that starts and stays sharp
Primer is incredibly important. You want to make a suitable surface for your paint to adhere to. I would also look up some articles about how to prime. Contrary to popular belief you don't want the entire model to be the color of your prime when you are done! You want it to look almost speckled and have about 80% coverage.
Paint Here is a decent starter box of citadel paint, with a box and some 1/2 decent brushes. Obviously this is a bit pricey, but you get 45 paints plus some helpful extras
Brush Cleaner VITALLY important. Keeps paint out of the ferrule and helps your brushes stay conditioned and pointed
Brushes I just got a Winsor and Newton Series 7 #00, #1 and #2....WOW the difference between these and synthetic brushes is night and day. Painting tasks that seemed to take forever or require too much of a steady hand are MUCH easier now
Dull Cote Matte Spray Essential for providing a matte finish and protection to be able to actually use your minis. This product is excellent for that
Obviously there are many more items that are important to have that are described in more detail in that link I provided. But the ones above are the ones I would consider most essential
Assuming you understand how to use your drybrushes, the rest of it is just finding brushes you like, whether those be a $2 bruch from a hobby store or a $25 Windsor & Newton.
Best learning advice I can give you is to head over to /r/minipainting and start reading and asking questions.
Best actual advice I'll give you is to start using a wet palette, and clean your brushes regularly: http://amazon.com/General-Pencil-Company-Masters-Preserver/dp/B0009RRT9Y
I also just started out in acrylics. I'm not sure of a good set that has everything in one, but I can share what I got to get started. For Christmas I got the basics, i.e. Red, Yellow, Blue, White, and Blank paint (Premiere acrylics), some canvases (8x10 and 12x16), a set of 12 different Royal and Langnickel brushes, and a wooden table-top easel.
Additional items I went back to AC Moore and bought:
--Silver, Gold, Brown, Green, Orange, and Purple paints
--A sta-wet palette which keeps your paints from drying up while you are working.
--Palette knife
--Canvas panels
-- Liquitex Gloss medium & Varnish
-- Brush Cleaner (same as this one on Amazon)
Basically I was having trouble finding an All-in one kit, so I got everything separately. One thing I would have done differently is buy a multipack of the paints with more colors to save time mixing. If you want to go pick stuff out in person then AC Moore or Michaels, as JT suggested, are great. Otherwise, everything seems to be on Amazon and the reviews tend to be pretty helpful! I actually made my shopping list by looking up things on Amazon and then went to the store because I was too impatient to want to wait for shipping.
I use this brush cleaner, it's relatively cheap and it cleans my brushes the best. You can also Dawn soap, I let them dry for a day. Good luck!
http://www.amazon.com/General-Pencil-Company-Masters-Preserver/dp/B0009RRT9Y/ref=sr_1_2?ie=UTF8&amp;qid=1382233993&amp;sr=8-2&amp;keywords=the+masters+brush+cleaner
Synthetic brushes will deteriorate no matter what you do. Natural hair brushes are the way to go. I've only had to replace one of my good brushes in the 2 years I've been painting. I use This at the end of every painting session.
Worth every penny you'll ever spend on it.
http://www.amazon.com/General-Pencil-Company-Masters-Preserver/dp/B0009RRT9Y/ref=sr_1_10?ie=UTF8&amp;qid=1453489548&amp;sr=8-10&amp;keywords=brush+cleaner
Ok so just to confirm: If I use The Masters, I'd put some of that on there after each painting session, and that'd act as both cleaner and conditioner? Also, this is the right product, right? http://www.amazon.com/General-Pencil-Company-Masters-Preserver/dp/B0009RRT9Y/ref=sr_1_1?ie=UTF8&amp;qid=1451426176&amp;sr=8-1&amp;keywords=the+masters+brush+cleaner
User this. Stuff is amazing.
General Pencil Company The Masters Brush Cleaner & Preserver 2.5 0z. https://www.amazon.com/dp/B0009RRT9Y/ref=cm_sw_r_cp_apa_i_F.i4DbDMMRHGY
https://www.amazon.com/General-Pencil-Company-Masters-Preserver/dp/B0009RRT9Y/ref=sr_1_1?s=arts-crafts&amp;ie=UTF8&amp;qid=1479362298&amp;sr=1-1&amp;keywords=the+masters+brush+cleaner
I just use this cleaner for all my brushes. I use those that I linked a few of the Army Painter ones and I really like the citadel shade brushes.
I have an Iwata eclipse airbrush that I've had for probably 8 years now. It's a great airbrush.
http://www.amazon.com/Iwata-Medea-Eclipse-Action-Airbrush-Gravity/dp/B000BQKFAI/ref=sr_1_8?s=toys-and-games&amp;ie=UTF8&amp;qid=1406324569&amp;sr=1-8
It's the same brand and probably model that Mache is using in this video.
https://www.youtube.com/watch?v=wuWz2a1HAhQ
Thank you very much for the thorough reply! I do need to work on highlighting. This is the first time I started actually painting the highlights on instead of dry-brushing everything. Also, I am waiting on a hose for my new Iwata-Medea airbrush and I think that will help me make the future vehicles look even better.
I see two different Iwata Eclipse listed on Amazon with a price difference of $5? Whats the difference and which one should I get?
&#x200B;
https://www.amazon.com/Iwata-Eclipse-Hp-Cs-W-Airhose/dp/B00695CY54/ref=sr_1_2?ie=UTF8&qid=1540928163&sr=8-2&keywords=iwata+eclipse&dpID=51odG-D4KWL&preST=_SY300_QL70_&dpSrc=srch
&#x200B;
and
&#x200B;
https://www.amazon.com/d/Airbrush-Materials/Iwata-Medea-Eclipse-Action-Airbrush-Gravity/B000BQKFAI/ref=sr_1_3?ie=UTF8&qid=1540928163&sr=8-3&keywords=iwata+eclipse
Make sure you buy a hose if you buy a compressor without one (eg. if you buy used).
You will want to buy a respirator.
You can also jump-start his accessories list by including some cleaning supplies (spray-out pot, airbrush cleaner), as well as some paints/primer/topcoat (tamiya, mr color, vallejo, alclad ii, etc.).
I believe this can all be done with a budget of 300$ (assuming US). At this point, he could start spraying that day if he wanted.
EDIT: I use this Master Airbrush Compressor and the Iwata HP-CS airbrush. I've been happy with them so far, but I do wish I spent a little more on a compressor with a tank (as /u/7x13 recommends).
Anyone have any opinions on the Iwata Eclipse Airbrush and Iwata Silver Jet compressor?
Thinking about getting those to start airbrushing
Linked below:
https://www.amazon.com/gp/product/B000BQKFAI/ref=ox_sc_act_title_1?smid=A2WHQECH5ANNLK&amp;psc=1
https://www.amazon.com/gp/product/B000BQPNVY/ref=ox_sc_act_title_2?smid=A2TF0EOVMPEXJK&amp;psc=1
I must had posted in the wrong section.
I did some research on gunpla before I got ready to invest into it.
So I was wondering what airbrush should I pick up as a beginner.
I'm looking to use these airbrush for everything and finer detailing on models.
http://www.amazon.com/gp/aw/d/B000BROVIO/ref=mp_s_a_1_1?qid=1451755063&amp;amp;sr=8-1&amp;amp;pi=SX200_QL40&amp;amp;keywords=badger+20+20&amp;amp;dpPl=1&amp;amp;dpID=31BZaLebDGL&amp;amp;ref=plSrch
The iwata eclipse is a recurring brand I've seen on bunch of blogs and seems to be the most popular
http://www.amazon.com/gp/aw/d/B000BQKFAI/ref=mp_s_a_1_1?qid=1451755023&amp;amp;sr=8-1&amp;amp;pi=SY200_QL40&amp;amp;keywords=iwata+eclipse&amp;amp;dpPl=1&amp;amp;dpID=41EIKj727OL&amp;amp;ref=plSrch
So which one should I buy? Can anyone recommend any of these?
Last at least the air compressor and other parts.
I've also seen this recommended on one blog:
http://www.amazon.com/gp/product/B0000AQK78/ref=oh_details_o05_s00_i00?ie=UTF8&amp;amp;psc=1
Apparently it's better then a hobby's air compressor cause of the constant air flow you will get?
I was wondering what kind of hose and connectors I would need for either the badger or iwata if I picked up the air compressor.
Sorry for any spelling or grammar mistakes in advance as I'm typing on my phone.
[Lamy 2000] (http://www.amazon.com/Lamy-2000-Fountain-Black-L01F/dp/B001D3PYT0/ref=sr_1_1?ie=UTF8&amp;qid=1397277169&amp;sr=8-1&amp;keywords=lamy+2000) as a modern pen, [Sheaffer Snorkel] (http://www.peytonstreetpens.com/sheaffer/1950s-sheaffers/sheaffer-valiant-snorkel-1950s-black-medium-superior-restored.html) as a vintage { [here] (http://www.peytonstreetpens.com/sheaffer/1950s-sheaffers/sheaffer-triumph-tm-touchdown-fountain-pen-gold-filled-fine-very-nice-restored.html) is another snorkel that matches your EDC}. however if you want something to try it out first go with a [pilot metropolitan] (http://www.amazon.com/Pilot-Metropolitan-Writing-Fountain-91107/dp/B009X9Z2FW/ref=sr_1_1?ie=UTF8&amp;qid=1397277744&amp;sr=8-1&amp;keywords=pilot+metropolitan+fountain+pen). Finally [here] (http://www.amazon.com/Noodlers-Black-Waterproof-Fountain-Pen/dp/B000MVZ2E6/ref=sr_1_1?ie=UTF8&amp;qid=1397277859&amp;sr=8-1&amp;keywords=noodlers+black) is a good black ink to start with. If you want me to recommend another color ink or want a specific trait in the pen just ask!
I just got a JinHao pen and it looks amazing. The reason I say looks is because I don't have ink for it. I've checked the sidebar and the sub wiki and such, but I had a question for y'all. What's your favorite non-blue and non-black ink? If I was going to go black I'd get this and blue would be this. But I want something.. different.
I'd like to stay around or under $20.
I haven't tried many inks, but the one I'm using now is Noodler's Bulletproof Black, and it's just excellent. In a Lamy Safari EF, it's my go-to pen for everyday use.
I just bought Noodler's black and it's exactly what you want. The only small thing is that it's not a pure, darkness of space black.
http://www.amazon.com/gp/product/B000MVZ2E6/ref=nav_timeline_asin?ie=UTF8&amp;psc=1
Oil based inks? No, it wouldn't flow as nicely and it wouldn't flow as nicely in the pen. However, there are some safe pigment inks that are "waterproof." I want to put a disclaimer here though, you should not use any ink not intended for fountain pens, ever. Specifically India ink. It's too heavily pigmented and will destroy the pen's feed (that's the piece that rests behind the nib and connects to the ink reserve).
There are a few notable waterproof inks out there, most of them are labeled as "taper proof" or "safety ink" intended for office use. After all, there still are a fair share of professionals who use fountain pens but need to have taper proof signatures (same goes for personal use and signing documents). Noodle's bullet proof ink is quite good, and inexpensive for a waterproof and tamper proof ink. Platinum also makes one as well. There are others out there, but they escape my mind. Only downside to the waterproof inks is they are not quite as "wet" as other inks., and they lack the verity of colours
Sorry, I should've been more specific. When I wrote Noodler's, I meant Noodlers Black, this one.
> if you find an ink too wet, you can add a tiny bit of water to make it drier. This works by diluting the amount of surfectants/other things that help the ink flow.
Well that's new for me. Thanks, that's awesome to know this! I'd think quite the opposite because all this wetness/dryness logic (such as add water = wetter).
Get this tool:
http://www.amazon.com/Leather-Hole-Punch-Tool-Heavy/dp/B000NK5VY2/ref=sr_1_1?ie=UTF8&amp;qid=1321287194&amp;sr=8-1
$6.68 + FS w/ Prime.
http://www.amazon.com/SE-7924LP-Heavy-Duty-Leather-Punch/dp/B000NK5VY2
You can buy a leather puncher at Hobby Lobby for $20 ($10 if you use a coupon). Here is one for $7 off Amazon. One of the best purchases I've ever made!
Congrats! Soon you'll need a punch
I got one of these and have used it to make 6 new holes in my belt!
https://www.amazon.com/SE-7924LP-Heavy-Duty-Revolving-Leather/dp/B000NK5VY2
Nice work, really well done.
Here is an inexpensive punch I have used for years that works well: SE 7924LP Heavy-Duty Leather Hole Punch Tool, 2.0 - 4.5 mm https://www.amazon.com/dp/B000NK5VY2/ref=cm_sw_r_cp_apa_exDxybKCYTQBP
I would suggest this kind of device http://www.amazon.com/SE-7924LP-Heavy-Duty-Leather-Punch/dp/B000NK5VY2 better them knife cause it doesn't tear material as much so holes might stay (read not completely tear) longer.
You can then reinforce holes with this http://m.instructables.com/id/Reinforced-fabric-hole-Old-style-button-hole-or-ey/
Ideally you should use something like this.
http://www.amazon.com/SE-7924LP-Heavy-Duty-Leather-Punch/dp/B000NK5VY2
might have to make 2 holes side by side. if you Cut the rubber, it will continue to rip along that cut and tear. If you use a hole punch you are creating a round hole and it has no place to tear.
If you have a farm store or hardware store close by where you live they might have one on the shelf.
Even better solution
Get a leather hole punch for best results, they are cheap. I've cut down a couple belts. Then I just used a pair of good scissors to trim off the excess leather.
This is how you're supposed to do it -
http://www.amazon.com/Leather-Hole-Punch-Heavy-2-0mm/dp/B000NK5VY2/
With one of these
try this one
leather punch
I bought it about a month ago, did the job well on 4 different belt so far, super easy.
For the life of me I cannot locate that exact tool.
Here's some great ones though: SE DD312 12-Piece Stainless Steel Wax Carvers by SE http://www.amazon.com/dp/B000SVRSRY/ref=cm_sw_r_udp_awd_vAj1tb03SC6N4
I got it at a local Flea Market / Swap Meet
I use these: https://www.amazon.com/Hakko-CHP-170-Stand-off-Construction-21-Degree/dp/B017ODDPNO/ref=sr_1_3?ie=UTF8&amp;qid=1499887364&amp;sr=8-3&amp;keywords=flush+cut+pliers
And these: https://www.amazon.com/SE-DD312-12-Piece-Stainless-Double-Sided/dp/B000SVRSRY/ref=sr_1_2?ie=UTF8&amp;qid=1499887406&amp;sr=8-2&amp;keywords=wax+carving
Anything I missed?
I'm a noob but no one else has said anything:
Material:
For larger figures you'll probably want some sort of clay as opposed to epoxies like green stuff/ graystuff/ milliput. ( https://www.sculpey.com/super-sculpey/9-super-sculpey-firm ) super sculpy firm is the only polymer clay I've used (oven hardening). Unless anyone with more experience pops by I'd say just get some super sculpy and play around with it. Learn what you like about it or dont like, and branch out from there.
Tools:
https://www.amazon.com/SE-DD312-12-Piece-Stainless-Carvers/dp/B000SVRSRY/ref=mp_s_a_1_3?keywords=wax+carving+tools&amp;qid=1573851649&amp;sprefix=wax+car&amp;sr=8-3
I think this is what I have, plenty of shapes and sizes for all your detailing needs. You may also want some files for after you bake the clay:
https://www.amazon.com/10-Piece-Diamond-Needle-Total-Length/dp/B07R3R9461/ref=mp_s_a_1_9?keywords=diamond+file&amp;qid=1573851744&amp;sr=8-9
These work well in my experience. As far as your armature question goes I'd definitely recommend arnatures, I'd just go on amazon and search "copper wire", obviously dont get anything insulated. I think I have 24 gauge wire and it's perfect for what I do on the ~25mm scale, so a thicker gauge may be beneficial to you.
Paints:
Make a thread at /r/minipainting it's a more active sub and has some really good painters.
Again, I'm no expert. The tools/ files I can vouch for, and the clay will be a good starting point if no one else pipes up. Good luck!
Also, I like the drawings!
Edit: I should say that if you're on a budget the files and tools are not required, you can get by with whatever you have around the house. Toothpicks, silverware, hobby knives, paperclips, safety pins, etc.
This is a good cheap set you can get from Amazon.
https://www.amazon.com/SE-DD312-12-Piece-Stainless-Double-Sided/dp/B000SVRSRY/ref=sr_1_6?ie=UTF8&amp;qid=1483070428&amp;sr=8-6&amp;keywords=sculpting+tools
Also, the small sphere in this set helps.
https://www.amazon.com/COMI-Pottery-Ceramics-Sculpting-Modeling/dp/B01JED95XG/ref=sr_1_1?ie=UTF8&amp;qid=1483070440&amp;sr=8-1&amp;keywords=sculpting+tools+round
I need doll-modding supplies!
Like clay or tools or acetone pens or embellishments or brushes.
With practice, I hope to be able to work with some very talented doll artists in my community, as well as crafting custom dolls for people over the Internet.
The ideal kit for resin scraping, in my opinion, can be found on Amazon.
http://www.amazon.com/gp/product/B000SVRSRY/ref=pd_lpo_k2_dp_sr_3?pf_rd_p=486539851&amp;pf_rd_s=lpo-top-stripe-1&amp;pf_rd_t=201&amp;pf_rd_i=B003KE3ZFK&amp;pf_rd_m=ATVPDKIKX0DER&amp;pf_rd_r=0NYKVM69MZ4ANCM4RX26
Oh yeah, I bought this set of wax carving picks about a year ago and get tons of use out of all the tools: https://www.amazon.com/gp/product/B000SVRSRY/ref=oh_aui_search_detailpage?ie=UTF8&amp;psc=1
&nbsp;
Not many better deals for less than 10 bucks if you ask me. Not to mention buying the one's labelled for uses other than vaping/smoking are always a hell of a lot cheaper than the one's you get in a smoke shop.
Milliput and green stuff both work well for gap filling and smoothing over rough areas. Liquid green stuff is garbage. I find that milliput is more fragile than green stuff, so if you're putting it in areas that are likely to be touched a lot (or you're fabricating detail) I'd use green stuff. But I like it a little more for seam filling just because of how easy it is to sand and carve.
Get yourself a cheap set of tools and remember to smooth it over with watered tools/fingers.
If you are molding by hand I would suggest a set of carving tools.
https://www.amazon.com/gp/product/B000SVRSRY/ref=oh_aui_detailpage_o06_s01?ie=UTF8&amp;psc=1
I follow this cap maker on Twitter and they did a killer BMO a while ago, you should definitely go for it: https://twitter.com/tinymakesthings/status/983197768431710210
What are you using for tools? I got this for 9 bucks: https://www.amazon.com/gp/product/B000SVRSRY/ref=oh_aui_search_asin_title?ie=UTF8&psc=1
No problem. You'll probably be cleaning lint etc mostly from it if you plan to carry it around. I tend to go a little overboard when I clean my guns, but I typically don't clean my rifles/shotguns all that frequently and will go between multiple thousands of rounds before I do.
When I clean my guns I use a mat like this to absorb oils etc and this to get all of the black carbon out of it. I use these to clean the bore/inside of the barrel. I use these and these for the hard to reach places that still have something building up on them.
When you're done cleaning everything, you'll want to make sure you put oil/grease on all the components that come in contact with other parts. Basically if it rolls oil it, if it slides grease it. I use this on the slide/rails where they contact each other and use this in most other places. Then I'll wipe down the exterior with this.
Really all you have to make sure you do is get most of the debris out of the gun, and make sure you have oil on surfaces that create friction or need some kind of rust preventative coating.
http://www.amazon.com/Bundles-Pipe-Cleaners-Hard-Bristle/dp/B000W5R6UA i use these a lot for my warez too
Pipe cleaners
I hope you feel better!
Smoke shops, craft stores, gun shops, Walmart, Amazon and such. Colorful and/or sparkly pipe cleaners are more for crafts and might cost more. Look for cheap fuzzy white pipe cleaners.
I'm still working through a huge pack of 12" pipe cleaners I bought years ago. Handy to have around. I cut them in half so I have twice as many.
Edit to add this link of some on Amazon and another link. These have stiff bristles and are made more for cleaning instead of crafts.
I always put everything away as soon as I've finished, that way I know I'm not going to bump into it, knock it to the floor, etc.
Cleaning on a weekly basis is a good habit to get into, the alcohol and salt is pretty cheap compared to the chemical solutions that are sold that do exactly the same thing and get it no cleaner in the end. Don't forget to clean the bowl and stem. Purchase bottle brushes for the purpose and clean those off after use every week. It will keep your bong looking like new and make sure every different strain smoked tastes as it should.
Also stop by the tobacconist to purchase pipe cleaners, the ones with metal filaments in them, they do an excellent job of keeping those stems clean.
This is what the pipe cleaners I'm talking about look like. I usually cut them in half 'cause they're too long as is.
http://www.amazon.com/Bundles-Zen-Pipe-Cleaners-Bristle/dp/B000W5R6UA/ref=sr_1_2?ie=UTF8&amp;qid=1415465541&amp;sr=8-2&amp;keywords=pipe+cleaners
I cannot open the link, either, but I'be been a pipe smoker for most of my life and I'd call these pipe cleaners.
Anyhow, you don't need those to clean a razor. A toothbrush and dish soap are all you'll ever need for that. I usually just give my razors a gentle scrub with my nail brush when changing blades. No biggie.
I use these, local shop stocks them
http://www.amazon.com/Bundles-Zen-Pipe-Cleaners-Bristle/dp/B000W5R6UA
+1 to just ISO (99% OR 91% Isopropyl alcohol) and salt. Though I learned the hard way that if you're cleaning a grinder just use ISO. The salt makes it more difficult to reclaim the goods.
This process will take a couple/few hours but just let it sit in a bag, shake it around every so often, and of course one bag per item if it's glass. You don't want to lose a piece in the cleaning. Overnight is great too if you want. I strongly recommend pipe cleaners with hard bristles too.
I highly recommend zen pipe cleaners They're really cheap and work great.
yeah, I ended up using it twice. It still functions fine and temp is good, it's just it feels like the fuzziness is killing the drag and not allowing smoke to come out well
just for opinion, do you think this product is good for Pax?
http://www.amazon.com/Bundles-Zen-Pipe-Cleaners-Bristle/dp/B000W5R6UA
I use these
http://www.amazon.com/gp/aw/d/B000W5R6UA?vs=1
Sorry for shit formatting, I'm on mobile.
While I have no experience making prop guns, I have made prop swords using PVC fake-wood, which is very easy to cut and sand. I usually cut the general shape of the sword, then use a dremel to sand to a better shape. Once I am happy with the shape, I do detailing with Apoxie Sculpt, which becomes rock hard, but can make some very nice details.
However, I usually do a single piece construction, so more complex shapes like guns may need to be made separately and assembled. If you aren't happy with the detail on pepakura files, I would recommend trying to use Apoxie Sculpt to add the details once the model has been hardened.
Not sure if you want something entirely empty like OP's base, but I just finished a set of 12 Bones skeletons (there's probably a joke there). Anyway, I used some plain 1" round bases and Apoxie Sculpt to blend the hunk of plastic down smooth with the base. Some of them are propped up on rocks I sculpted if their existing base was too wide for the new base. They all came out looking pretty nice and it didn't take too much effort. I can grab some photos later if you like.
I'm also very new to this so do take this advice with a grain of salt, there are probably better solutions out there, but this worked for me.
I've had very good results with this stuff. Has a much longer sculpt time. Water soluble. Dries hard but with a stoney, chalky texture that makes it great for carving details if you need. Because it's water soluble, you can work it into the seams, then wipe off the excess with a cloth and get a perfect fill which doesn't need sanding.
Also, remember that you can always try stuff on scrap pieces. No need to guess how it will come out.
Stupid good for modeling and so strong that 24hrs after I mixed it I sometimes carve it with a dremel, amazing modeling clay.
Damn that sucks, is it a handle or does air actually have to travel thru it?
If it's just a handle I bet something like this would work
http://www.amazon.com/Apoxie-Sculpt-1-Lb-White/dp/B0013UDWXI/ref=pd_sim_201_12?ie=UTF8&amp;dpID=41gn20MrtUL&amp;dpSrc=sims&amp;preST=_AC_UL160_SR160%2C160_&amp;refRID=1EXNH8K3Z8F6KFXHQF54
No problem at all!
That top section is just spare insulated electrical wire I had floating about, with those grey blobs formed out of Apoxie Sculpt. If you're not familiar with it, it's two-part epoxy clay that will harden to a rock a short time after you combine the two parts, so you can mold it to whatever shape you like and set it fairly quickly. I just slapped it around the wire and hoped for the best, but another option that might look neater is if you find rubber tubing just large enough to slide over the wire in those sections.
For the anchoring, I'm going to MacGuyver this, mostly because I'm having a brain fart and can't think of a search term for what I actually want, so let's start from the bottom of the construction. Get your bucket lid that you'll be using for the base. Epoxy (or screw, if you're feeling adventurous) a light bulb socket to the center -- this will provide that wide, stable base that I failed at when I was building mine. Scoop out a hollow in your styrofoam round large enough to make it sit around that socket, and cut a hole over the socket part. Glue the styrofoam to the bucket lid once you're sure everything lines up properly. We'll be adding the dowel next, but we need to see how long that dowel needs to be.
Take your mannequin head, and flip it upside down. You should see the hole in the bottom of the neck for conventional use. That will not be nearly deep enough. I speak from experience. If you're using a plastic one, you might need to drill to get past the stoppage at the end, if you're using styrofoam a long knife or screwdriver and some patience should work. Get all the way up into the head if you can, but at the very least get a few more inches to work with. Now take your dowel, and push it in as far as it will go. Mark that point on it, that's one end of the depth. Do the same into the socket under the foam. Measure to those marks and add them together, that is the total length of your dowel, cut it to that size.
The most important part here is getting a solid connection from the dowel into the socket. Epoxy should be strong enough, but whatever you use, make sure that the dowel is not moving, it will only end in tears. Once that's solid, cut a hole in the bottom of your (already colored) bucket and slide it down the dowel, attach to the foam round with epoxy. Volia. You have a solid anchor that's long enough to actually hold the head up. That should be able to handle bobbling around, if rotation becomes an issue and you don't expect to take the head back out, you can glue the head to the bottom of the bucket, but if removal might be needed, velcro should do the trick.
I hope that was clear enough!
Edit: Oh I'm a dumbass, you were probably asking about the part behind the wire at the top. That's actually part of the bucket I used and just painted to match, I went digging and found my old order for it. Not sure if that one in particular is still available, but as long as you have that little lip area where the lid connects, you should be fine.
Sweet. Keep us up to date on the ammo counter! Get this, stuff works great =)
It was originally the little plastic monster that came with the Alisa Ilyinichna Omela Nendoroid
I used an exacto knife to shave all the plastic parts off to make the right body shape, then took apoxy sculpt clay to make the body texture and spikes, then I sprayed Tamiya Grey Primer on top, then painted it black/white/red with Tamiya acrylic paints.
I hope this helps.
there's two types of putty, basic putty for filling in tiny holes, gaps or panel lines. and the other is epoxy sculpting putty. this is the stuff for bigger jobs like adding custom details or redefining "parts". tamiya sells some and so do other brands, i personally use this
Aves is a "apoxy" clay. It air drys so you don't have to bake anything. It's not an epoxy it's an apoxy. Not sure if apoxy is a real word though.
I too would appreciate this.
Not Black Friday but I was recommended this compressor and this air brush on the Discord channel yesterday.
I have this one. It is great and it has never let me down. As far as an airbrush, I suggest the Neo. If you are from the US they will be cheaper yet.
I have one cheap 0.2mm Sparmax SP20 and one Iwata Revolution Br (0.3mm). The cheaper one is a lot more work to clean and maintain, though I am unsure if it is a quality issue or just the smaller nozzle diameter that's causing it.
I don't have this one, but I have heard very good things about it:
http://www.amazon.com/NEO-Gravity-Feed-Action-Airbrush/dp/B004INERK4
If you plan on buying one, look at the "frequently bought together" area a bit under the main image. You do want a quick-disconnect and the cleaning pot, it makes it a lot easier. You should also consider a soft, braided hose (the plastic ones are often a bit springy and can resist your movements).
Do you have a suitable compressor?
I don't mind investing in an airbrush set. I do want to know if this one Airbrush is pretty good. I looked it up on Amazon and saw it was half off so I decided to get it. My local stores don't have anything like that. I'll have to go look for a compressor and pressure regulator later on. Just don't know what kind of paints I need and how to start prep work properly. I don't want to break my kits or make them brittle or something.
If you're looking to spend a little less, I have the Neo, and I'm very happy with it.
Then again, I don't do anything crazy with it whatsoever, mainly for basecoats of light colours or large models.
Out of my 3 airbrushes I seriously still find myself using this bad boy. It's easy to clean (paint well screws off) and it's not very expensive at all. https://www.amazon.com/Gravity-Feed-Dual-Action-Airbrush/dp/B004INERK4
I'm seeing it for $54.50 on amazon : https://www.amazon.com/NEO-Gravity-Feed-Action-Airbrush/dp/B004INERK4.
Idk if there's anything wrong with that one, because that is cheaper than most places, but the reviews are good.
The compressor is branded different in Australia but this is it. https://www.amazon.com.au/Yescom-Compressor-Pressure-Regulator-Spray/dp/B075LGDC2W/ref=sr_1_fkmr0_1?ie=UTF8&amp;qid=1539471741&amp;sr=8-1-fkmr0&amp;keywords=Tc-20t+compressor
And it seams the brush is a little more on amazon in australia but it is worth every penny and the cheapest quality airbrush around.
https://www.amazon.com.au/gp/product/B004INERK4/ref=ox_sc_act_title_1?smid=A2N62VVHJVF9PO&amp;psc=1
You can't go wrong with an Iwata NEO. I'm not sure how much detail is involved in what you are painting, but this airbrush is very versatile.
https://www.amazon.ca/NEO-Gravity-Feed-Action-Airbrush/dp/B004INERK4
If you look at the bottom "Customers who bought this also bought" you will see compressors.
http://www.amazon.com/NEO-Gravity-Feed-Action-Airbrush/dp/B004INERK4
That? how much are the rest of the hose and hopper run, do you know?
Is it worth getting an airbrush and air compressor? Would this air compressor and air brush be good? I've been interested in painting and building more complex kits and was wondering if I should make the investment.
This is my setup, I'm happy with it.
https://www.amazon.com/Iwata-Medea-Revolution-Action-Large-Gravity/dp/B000BQS3UWhttps://www.amazon.com/Paasche-D500SR-Compressor-Regulator-Moisture/dp/B000BR2HOO
Additionally, a decent airbrush that is a little cheaper.https://www.amazon.com/NEO-Gravity-Feed-Action-Airbrush/dp/B004INERK4Something to keep in mind, is that the NEO is NOT made by Iwata. It's a Chinese airbrush with their name on it. But I've heard it's quite decent. Here's a video on it, and it's got a great video for learning to clean your airbrush in the description. https://www.youtube.com/watch?v=q8YKUA2SGzU
I use this one.
Some are dual action (like the one linked), some are single action, some have wider spray areas -- this is a pretty good airbrush tutorial (part 1 of 3).
I did it with brush but my brother and I just split on this affordable one . I used these paints for color. As for the weathering, I dipped a small but wide damaged brush into grey paint (silver works better) and lightly lined the edges that I thought would chip away first. I tried to be careful because it’s easy to over do it.
u/didgeboy and u/Monti21 make valid points. I picked up an inexpensive air compressor and cheap airbursh from Amazon. While the compressor is has turned out to be very nice - quiet, easily adjustable - I upgraded to an Iwata Neo and haven't touched the cheap airbrush since. I've picked up a second Neo, and am now looking to buy something for more detailed work. Paint flow through the better airbrushes is much more consistent. I've really enjoyed the learning curve!
Something like this is okay to start with. If you want a better brush the Iwata Neo CN and the Badger Patriot 105 are highly recommended and are beginner friendly.
You can make it effectively solid, which will make it a lot more comfortable on your skin, especially if you want to wear for a while. Look for a product called instamorph. It's basically just little plastic beads that melt when put in hot water.
Melt a bunch of it and roll it into a cylinder about the diameter of a pencil. This way you can easily remelt it if necessary. Also put your ring in hot water so that it warms up a bit. Once both are good and hot, work the instamorph liberally into the groove; you want to have it spilling a little out of the groove. Be sure to push plastic into any air gaps.
Do one side, then melt more plastic and do the other side. Then put the whole thing in cold water for a while to cool.
All that's left now is to sand away the excess plastic and then polish it smooth. Start with a coarse grit, like 60 or 80, and get it pretty close to the shape you want. Then just use finer and finer grits to do your successive shaping and smoothing. A pack of different fine grits like this should be pretty good for what you need.
A few other thoughts:
I did this modification to my ring and it was like a whole different product. I couldn't go more than a day or so before my skin got pressed into the groove and became really tender. Now with a little lotion I don't have any problems down there from the ring.
Use InstaMorph. It's a moldable plastic that I've used as fake fangs. You soak it in hot water, let the plastic become a little clear then scoop it out, and begin to mold it. Once cooled off, it will turn a solid white. If you don't like the shape, you can easily drop it back into the hot water and repeat the process. I used my coffee maker (without the coffee) to make a pot of hot water and it worked fine w/ that temperature.
You could modify your mouse with something like ShapeLock or Instamorph. It's a plastic called polycaprolactone which you can soften in near-boiling water and hand-mold into anything you want. When it cools, it turns into a hard, sturdy, paintable plastic.
I had considered doing a plaster mold of my feet, then filling it with something like this thermoplastic so I'd have 3D models of my feet. Then just sending that off to manufacturers and asking if they'd see what size would fit those feet the best.
Never got around to it, though. Plus, I'm pretty sure everybody would think I'm really, really weird (not that they don't already).
This item may not seem very fun but it's used to make something super fun and awesome! My family and I go all out on halloween and decorate our house so it looks awesome! The final touches of course are our costumes. This year I'm planning on making a full mouth piece of pointy teeth. I already have the material to make the teeth itself but I need this to make the mouth piece so they stay in my mouth. It basically makes dentures haha they will look sort of like these. Oh and it's $9.99 :) Sunday Funday
This stuff is awesome for this exact use InstaMorph - Moldable Plastic - 6 oz https://www.amazon.com/dp/B004MFLU4Y/ref=cm_sw_r_sms_apa_i_MknVDb38RJJWA
Molding plastic is your friend.
I had similar problems with my cage. I got a jar of InstaMorph and made a little cover for the back of the bar. Works perfectly. I also used the slightly bigger ring and threaded it through a piece of Food Grade Vinyl Tubing which both reduces the diameter, but more importantly, makes it non-skin, without being to grippy. If that makes sense.
As this is just the chamber portion, I recommend getting a good chunk of a thermoplastic like (InstaMorph https://www.amazon.com/dp/B004MFLU4Y/ref=cm_sw_r_cp_apa_96RKzbBT7Z845)
Or you could maybe use a modelling clay. I would go with a cook gold colour or something, and then wrap a design around it, partially for strength, and partially for looks.
I bought 3 different ones this one actually shoots darts, so its mechanism is pretty sturdy. The one I used was [This] (https://smile.amazon.com/gp/product/B005SICR6O/ref=oh_aui_detailpage_o09_s00?ie=UTF8&amp;psc=1) cheapie. It has a working mechanism, but I didn't need it to function, so I only used the hammer, frizzen, backplate, and trigger guard, then modified them with thin, homemade Worbla. (To make metal-smooth Worbla, mix [Instamorph] (https://smile.amazon.com/InstaMorph-Moldable-Plastic-6-oz/dp/B004MFLU4Y/ref=sr_1_2?ie=UTF8&amp;qid=1504898165&amp;sr=8-2&amp;keywords=instamorph+pellets) with a small amount of ordinary flour. Put it in a glass pan and heat it in an oven until the plastic gets soft, then carefully mix them together and knead until evenly combined. It's smoother than real Worbla, which uses wood fibers as a filler, and a LOT cheaper!)
You could make a custom extension using a moldable thermoplastic like instamorph. You soften the plastic with a hair dryer or by submerging it in boiling water and then you can form it into whatever shape you like.
Just be sure it's up to code, as other people in this thread have mentioned.
Get some water-moldable plastic like this stuff:
https://www.amazon.com/InstaMorph-Moldable-Plastic-6-oz/dp/B004MFLU4Y/ref=mp_s_a_1_6?keywords=Hot+water+plastic+mold&qid=1554581119&s=gateway&sr=8-6
Mold some face bases, and pour a resin of your choice in. You can cut up the bases to form larger shapes or sections to glue onto big bases. The results look pretty good with a little green stuff and paint
Nice! I did the whole thing at 250%, and yes, the ribs were terrible. I ended up using a spray lacquer in several coats on them, and they were still fragile... I also used some of this with the black color pellets to match my Black PLA, to reinforce some areas like the knees and the neck joint where it connects to the head.
Amazon link for OP.
I was actual going to make a post about this. I love my Lihit Labs case. Specifically this one. It has a lot of storage capacity and is made with quality materials and is a book design with one 2 sides to put pens and 2 sides to put miscellaneous stationary.
This does the trick for me if you're planning on carrying around more than one pen or pencil. I try to carry them nib side up and sometimes horizontal. I find that unless you're slamming the bag down or dropping it you shouldn't have any ink seeping out into the cap. Condensation is normal.
Here's another option you can consider.
Well I have a book-style bag for my pens and mech pencils from Lihit Lab that I really love.
Never seen that one before, but if you are unable to find it, this one is my personal recommendation
https://www.amazon.com/LIHIT-LAB-Case-Black-A7551-24/dp/B004WMWCYE
https://www.amazon.ca/LIHIT-LAB-Case-Black-A7551-24/dp/B004WMWCYE/ref=sr_1_1?ie=UTF8&amp;qid=1523858453&amp;sr=8-1&amp;keywords=lihit+lab+pen+case&amp;dpID=41iFZrvOA8L&amp;preST=_SY300_QL70_&amp;dpSrc=srch
I currently use this one, it can fit at least 12 pens! Also, it has pouches on the other side that can fit spare cartridges/converters and other stationary items.
LIHIT LAB Pen Case, 7.9 x 2 x 4.7 inches, Black (A7551-24)
https://www.amazon.com/dp/B004WMWCYE/ref=cm_sw_r_cp_apa_yC7ZAbDDJ9XCS
I've been eyeing one of these but haven't bought one yet.
http://www.amazon.com/dp/B004WMWCYE/ref=wl_it_dp_o_pd_nS_ttl?_encoding=UTF8&amp;colid=151JIIZLYZVP4&amp;coliid=IXD90QGY3AXLF
I'm looking at this one for myself: LIHIT LAB Pen Case, Black, 4.7 x 7.9" (A7551-24) https://www.amazon.com/dp/B004WMWCYE/ref=cm_sw_r_cp_api_MFrEzb8TJJVMB
Anything from Lihit Lab. It’s inexpensive and solid. I have the “Teffa” model and it holds a lot. I also use Nock cases. They are made in the U.S. and are amazing.
https://www.amazon.com/dp/B004WMWCYE/ref=cm_sw_r_cp_api_i_6ee3CbSDTN62H
https://nockco.com/cases
I use several cases for my tools.. I work from home, so I don't especially need one for when I'm away from home, but in case I do, I purchased this one, and I absolutely love it:
Homecube Large Capacity
A few others I have include:
LIHIT
(I used this one before I upgraded to the large capacity one)
4 Layer HITOP for my fineliners and muji pens.
72 Slot Pencil Wrap for my watercolor pencil crayons.
I also have two regular pencil bags I got from Indigo (in Canada) to hold my pencil crayons and watercolor markers.
Overall, I really really recommend the large capacity Homecube case!
LIHIT LAB Pen Case, Black, 4.7 x 7.9" (A7551-24) https://www.amazon.com/dp/B004WMWCYE/ref=cm_sw_r_cp_api_goJ-ybWVXQRSW
Great experience so far! Lots of space to hold pens!
Neat, haven't seen that one before. I have this one and it can hold a ton of stuff. Definitely would recommend if you want something a little larger.
If you're serious about your pen game, I recommend you get a really good pencil case with organization. Here's the one I have. I've lost 1 pen since October, and that's only because it was stolen.
I just had this come in today from Amazon and its great. Might be a little bigger than what you want but overall its not that large. In the front left I have 4 Pilot G-2s and 4 Pilot V5s and in the front right I have 6 different Fountain Pens. I cant say much for durability since it just came in today but it feels like a quality product.
http://www.amazon.com/gp/product/B004WMWCYE/ref=oh_aui_detailpage_o01_s02?ie=UTF8&amp;psc=1
Oh, I also forgot. If you want something bulkier that can carry more than the rolls I linked you below, I have a friend or two that use this case:
https://www.amazon.com/gp/product/B004WMWCYE/ref=ox_sc_act_title_1?ie=UTF8&amp;psc=1&amp;smid=ATVPDKIKX0DER
I like it a lot. It can hold a pretty good amount of stuff (enough for field drafting for me and other Geologists' - i.e. 5 drafting pens, 24 pack colored pencils, erasers, drafting pencils, small ruler / protractor, etc.). I do have this one that I use when I need to pack heavy for field notes, but 90% of the time I don't have to. Hence, the smaller less-bulky rolls I linked you below that I am trying to pick up.
Hope one of my suggestions work for you, let me know what you think!
I've got this one
Great job! I do this as well but I only trace stuff I find online or create on my own. What tools do you use?
I own this:
https://www.amazon.com/Walnut-Hollow-Versa-Temp-Temperature-Woodburning/dp/B005P1TRAS/ref=sr_1_2?ie=UTF8&amp;qid=1469129344&amp;sr=8-2&amp;keywords=wood+burning+kit
In my experience, I find basswood the easiest to work on. I am still very new to this so any advice/links would be greatly appreciated. I have done approximately 6-7 pieces.
I'm assuming you're using one of the cheaper green pens with the three tips. There's another, more robust hobby pen from the same company that comes with a circle-shaped tip to it, that's about the size you're asking. The burns won't be crazy fast, but if you do it right they'll come out as nice black polka dots.
This is the pen I'm talking about
If that doesn't work for you, you should look into getting a more expensive setup or a blowtorch that you can heat that circular tip with more quickly.
I'm a big fan of Pyrography or Wood Burning Art and the amazing art it makes. You should look some up if you have the time. If not just comment and I'll post some links of some cool stuff. You need this puppy to put the art onto the wood. I find the entire process very relaxing. Hope you may considering venturing into this awesome art form.
Oh and...... Stillneverwrong is so groovy
Thank you! I definitely think you should give it a shot. From what I see so far on this subreddit, I use a different tool than most. https://www.amazon.com/Walnut-Hollow-Versa-Temp-Temperature-Woodburning/dp/B005P1TRAS/ref=sr_1_3?ie=UTF8&amp;qid=1466045184&amp;sr=8-3&amp;keywords=wood+burning , but I really like it.
I'd say that I'm somewhat artistically inclined, but in that I like to be creative. I wouldn't say I can freehand well, aside from stick figures. I use carbon paper to help me transfer images.
The tricky part is more in your steady hand and eye for shading than in your artistic ability, I think! I mainly use three tips: one that looks like a pencil, one that's a tinier pencil tip, and one that looks like a leaf (I use that one for the shading and the others for outlining). That's it!
I've been doing this for maybe a year now, and still learning techniques. Give it a shot!
Glad you figured something out, there are these as well:
https://www.amazon.com/dp/B005P1TRAS/ref=cm_sw_r_sms_awd_rnXfxb9BQNTF9
https://www.amazon.com/dp/B00MJW08JK/ref=cm_sw_r_sms_awd_4nXfxbPS230AX
Walnut Hollow Creative Versa Tool... https://www.amazon.com/dp/B005P1TRAS?ref=ppx_pop_mob_ap_share
Actually this one looks like the kit I have -- http://www.amazon.com/Walnut-Hollow-Creative-Versa-Temp-Temperature/dp/B005P1TRAS/ref=sr_1_1?ie=UTF8&amp;qid=1413925846&amp;sr=8-1&amp;keywords=leather+burning+kit
...and it's a bit cheaper, anyway. And I completely know what you mean about tooling and neighbors! That was a problem until I finally got out of an apartment....
No problem!!!
Capital letters:
Walnut Hollow Hotstamps Uppercase Alphabet Branding and Personalization Set for Wood and other Surfaces https://www.amazon.com/dp/B0019N4VSO/ref=cm_sw_r_cp_apip_qZ3nYNo4V4dhs
Lower case letters:
Walnut Hollow Mini Hot Stamps Lowercase Alphabet Branding & Personalization Set for Wood, Leather & Other Surfaces https://www.amazon.com/dp/B01KTBQU3A/ref=cm_sw_r_cp_apip_kDRK8wBD2b4RL
Wood burner:
Walnut Hollow Creative Versa Tool with Versa-Temp Variable Temperature Control and 11 Woodburning Points https://www.amazon.com/dp/B005P1TRAS/ref=cm_sw_r_cp_apip_l5txnwxGFubDB
A pretty ok wood burner is about $28 on Amazon
Here’s the one we have
I've been using a woodburning tool which is an adjustable temp soldering iron type of deal with multiple nozzle attachments when I want to heat smooth any PLA, works great if a little awkward to hold due to the heat shield. I mostly use it for the exacto blade attachment since it slices PLA like the proverbial hot knife through butter and couldn't be happier with that aspect of it and would be kind of lost without it.
&#x200B;
I picked mine up at a Michael's in the wood crafting section, if you're in the US go there or amazon something like this https://www.amazon.com/Walnut-Hollow-Versa-Temp-Temperature-Woodburning/dp/B005P1TRAS/ref=sr_1_2_sspa?keywords=wood+burning+tool&qid=1559074816&s=gateway&sr=8-2-spell-spons&psc=1 as I think that's my exact model.
&#x200B;
I also do heat welding/smoothing with a 3Doodler 3dpen with the nozzle removed and a pin vise drill bit embedded in the hot end to conduct heat to a fine pointy tip for super fine detail. About the only use I have for that 3d pen since it's incompatible with my typical filament diameter and I won't buy their proprietary overpriced filament on principle lol. But the little attachement modification I made to it is too useful to return the device so I keep it.
&#x200B;
This isn't a perfect solution, neither of these are and are going going to be useful in certain circumstances but you can royally mess up your prints with heat smoothing, especially when you're not mindful and the heat shield melts off a giant chunk of your piece. Not to mention toasting the hell out of your fingers from time to time. Anyway it's useful but not a magic bullet. Best way I've got to smooth prints is using filler primer, filling compound and sanding and I stick to the heat tools for cutting and welding these days, but I did try for awhile to perfect this, just not ideal for my needs. Useful tool to have though for this hobby, like I said couldn't do without the exacto attachment it's worth it just for that!
alright just getting an idea of what you used, I was using soldering iron first then got
https://www.amazon.com/Walnut-Hollow-Versa-Temp-Temperature-Woodburning/dp/B005P1TRAS/ref=pd_lpo_21_bs_t_2?_encoding=UTF8&amp;psc=1&amp;refRID=GRGCG1F455C6GW8D7XXJ
and my stippling went from what you got there to PRO looking overnight the variable temp is the way to go. I also did alot of prep maybe too much but i used just sandpaper (120>300>600) grits to get it super smooth, then stipped with a fine or med point. Not telling you that it looks like crap I just want you to know that the wood burner can take it alot farther than the iron ever will without any more practice involved.
Link to Heat Gun: https://www.amazon.com/dp/B005P1TRAS/ref=cm_sw_r_cp_tai_BAHLybZMSVPMZ
Build list:
Zev Dragonfly Slide
Trijicon RMR 06 Type 2
Zev Glock 19 Dimpled Bronze Match Barrel
AmeriGlo GL-429 Suppressor Sights
TTI Spring Kit
SSVi Tyr Trigger
Glock OEM Minus Connector
&#x200B;
Tools used:
Wood Burner
Dremel Micro Max 8050
Dremel Bit 108 Engraving Cutter
Dremel Polishing Kit
Sand Paper Assortment
Flitz Polish
You could always make shadowed socket holders out of Kaizen foam and place the sockets exactly where you want them. You can use a hot knife, long thin razor knife and/or a hole saw kit to make cut-outs for your sockets.
A wood burning kit like THIS works great on the foam for making finger grip holes and for cleaning up the bottoms of shadowed spots that are less than the thickness of the foam.
FastCap's long nose permanent markers are great for marking out the patterns of your sockets or other tools for you to cut on.
&#x200B;
Just my two cents.
This is the pen that I used to make this. I taught myself by just messing around on a blank piece of wood and it wasn't too difficult, but I'm sure you could find some good videos on YouTube if you just search "Pyrography".
I use this dial controlled “pyro pen” or wood burning tool for various cleanup tasks, especially removing supports from small bits on figures. The included “x-acto” blade works great. This specific model will dial down pretty low though I’ve never actually measured the temperature.
Walnut Hollow Creative Versa Tool with Versa-Temp Variable Temperature Control & 11 Woodburning Points (Tips) https://www.amazon.com/dp/B005P1TRAS/ref=cm_sw_r_cp_tai_7SkWCbW11FD6E
I bought a 25 dollar wood burning kit off Amazon. Here is the one I used. I really liked it because it had its own temperature control, and a whole lot of different tips you could use to make patterns or thin lines.
I have been using this model https://www.amazon.com/Walnut-Hollow-Versa-Temp-Temperature-Woodburning/dp/B005P1TRAS
> My grandfather was an amazing woodworker, and my skills are limited, but years ago before he died, we worked on a few pieces and I really took to the woodburning. For my birthday that year he bought me a little woodburning kit (cost about $20). About 9 months ago my wife told me to clean out the shed and I found it and thought, "why not." I've been hooked ever since.
It only takes about $20 to get started (http://www.amazon.com/Walnut-Hollow-Creative-Versa-Temp-Temperature/dp/B005P1TRAS/ref=sr_1_1?ie=UTF8&amp;qid=1451521659&amp;sr=8-1&amp;keywords=woodburner)
I picked up the Creative Versa-Tool kit for $29.99 at a local store. It's currently $26.31 at amazon.
Thanks! One thing that I realized while doing this project is that it will require you to a) learn how to draw, or b) find some creative way to sketch a pattern onto the wood for you to trace. I ended up free hand sketching the design on a piece of paper (while looking at a wiki image), overlaying it onto the wood, taking a pocket-knife and poking holes through the paper/onto the wood at the corners of the shapes, playing connect the dots with the resulting holes, and then traced over with the wood burner. However, I'm pretty sure there are easier methods, this is just what was in hands reach.
If you ever get the urge to refinish it, the beeswax can be removed fairly easily, and a good wood burner can be bought pretty cheap.
If it were me, I'd spend $20 or so on a small U-Gouge and use it to cut out the lines you scored originally. Because that gouge is 1.5mm, you should also be able to straighten up any slightly-crooked lines by choosing a good starting point for your cut. Since it's a log, I would use a small paintbrush to brush hot water onto each line a minute or so before you start your cut to soften it a bit. With the gouge I mentioned you shouldn't have to re-sharpen, but you'd need to strop it frequently during the process.
After cutting the lines, use the chisel tip (or a round tip 1mm or smaller) of the wood burner to re-trace the lines to get that nice, dark look to them. The kit also comes with a big, blunt, round tip that is perfect for re-making the dots once you've finished with the lines.
That would hold up better and wouldn't fade in the sun. Of course, that all assumes the wood itself is still in good condition, which it might not be.
Anyway, it's a pretty easy and cheap weekend project you could do to restore that awesome board to have a nice look and playable quality. Wish I had some stumps around here....
Thank you, just a regular wood burning kit. My wife free-handed it with a pencil first and then traced her lines.
https://www.amazon.com/Watch-them-wiggle-Black-PIECES/dp/B0074MHV7W
https://www.amazon.com/Watch-them-wiggle-Black-PIECES/dp/B0074MHV7W/ref=sr_1_3?ie=UTF8&amp;qid=1484153008&amp;sr=8-3&amp;keywords=googly+eyes
I want to be the guy who makes one of these videos whilst carrying a spare pair of "googly eyes" to stick on the can.
"There you go little fella!"
She's gonna smack you
I would have said she won't hit you but you put that in there for some reason and obviously you know your girlfriend!
I kinda need these googly eyes for my family, too much fun
This item would be totally rad, man. My daughter would have tons of fun putting googley eyes on all the things!
This would be my ultimate $5 and under item. Googly eye all the things!
The dog ate my homework!!
This is what I got, less than $6 for 500 eyes, with Amazon Prime: http://www.amazon.com/Watch-them-wiggle-Black-PIECES/dp/B0074MHV7W/ref=sr_1_1?ie=UTF8&amp;qid=1376416990&amp;sr=8-1&amp;keywords=googly+eyes
Only downside is that they're not sticky-backed, so you'll need to buy some super glue. I got a bottle of super glue with a brush applicator, and it works great.
http://www.amazon.com/Watch-them-wiggle-Black-PIECES/dp/B0074MHV7W/ref=sr_1_1?ie=UTF8&amp;qid=1427659148&amp;sr=8-1&amp;keywords=googly+eyes
DO IT
Any combo of this , this or this !
Who doesnt love googly eyes, feathers and pompoms?! Art and crafts stuffs!
Weight hmmm ... 7.9 lbs
>Would you have a guess at consistency? Does a base coat like 50 paint / 50 water? Just an idea of an amount?
Depends on how thick the paint is, really. It can change from color to color, and even pot to pot. Varies with age of the paint too.
There is no magic ratio that I have found. It has to be mixed where it's thin enough to flow but still be able to stick. Too thick and it sputters, too thin and it goes on like a wash.
It's not that hard, just make adjustments as you're spraying.
>Damn! haha. Do the metal flakes give the brush issue?
Yes sir! Hit that one on the head.
>What is better? Do you use them both?
I use about 50/50 bottled water/vallejo flow improver.
Flow improver isn't cheap, but makes the paint stick a bit better.
Water is cheap, but turns the paint to a wash. 50/50 seems to work for me.
Kenny Boucher is the one that turned me on to the flow improver/water mix. He calls it "Gangsta Gumbo"
>When you say badger specific parts, do you mean replacement parts? How often do you have to replace pieces on them?
Mainly the oddball thread size where you connect your air supply from the compressor. The air hose was hard to find locally. Still ended up having to get some stuff from home depot to make it fit the compressor.
I think Iwata uses standard threads.
Replacement parts too, though that is true of any airbrush.
>What primer would you recommend using in your brush? I generally prefer a matte black.
Vallejo Surface Primer all day, baby! They have it in quite a few colors. I usually go with black.
http://www.thewarstore.com/product67987.html
>Are these small enough to place on my desk? I don't have much extra room in my office. Link to a decent one?
I find mine to be invaluable, I would not airbrush any other way. It is about 30" wide x 16" tall x 24" deep + hose that runs to the window out of the back of it. You will need a light for it.
edit After looking at the measurements on Amazon, it appears my memory for scale is borked. Is smaller than I said above.
http://www.amazon.com/Master-Airbrush%C2%AE-Portable-Airbrush-Extension/dp/B00B2TESUQ/ref=sr_1_3?ie=UTF8&amp;qid=1463499481&amp;sr=8-3&amp;keywords=airbrush+station
>Thanks so much for taking the time to spread the knowledge!
No problem bud! The airbrush has saved me a ridiculous amount of time and made my models look far better.
This airbrush booth is what I use as I also exclusively airbrush indoors. The fact that it folds into a neat little suitcase is a huge deal for me since I have very limited space.
I've been using one of these for airbrushing (as well as using a mask) and it seems to work well. It should help glue fumes too if you vent it to outside.
https://www.amazon.com/Master-Airbrush-Portable-Optional-Extension/dp/B00B2TESUQ/ref=sr_1_4_acs_ac_3?s=home-garden&ie=UTF8&qid=1541446955&sr=1-4-acs&keywords=Master+Airbrush
Selling - prices do not include shipping shipping will be via USPS flat rate, either small or medium (airbrush stuff probably large). Let me know if you want me to include box art and/or manual as well.
* RG Strike Freedom Wing of Skies Bandai - $20 I already tried it on for my RG SF* RG Strike Freedom - $10 panel lined, decal'd. Parts of gold frame painted with gold* Master Airbrush® Brand Airbrush 3 in 1 Cleaning Pot-air Brush Holder-paint/car - $5+shipping; used once with the airbrush set link* Master Airbrush® Brand Portable Hobby Airbrush Spray Booth - $60+shipping; used once with the airbrush set; link* Master Airbrush Brand High Performance Multi-purpose Gravity Feed Dual-action Airbrush Kit with 6 Foot Hose and a Powerful 1/5hp Single Piston Quiet Air Compressor - $60+shipping; used once to put primer on a few parts for a car kit. linkSome Compressor + Airbrush sets are good (like those from Pasche or Iwata) but it's all relative to your needs (as a good brush might not be good for Gunpla due to the scale) and what is offered.
There's actually a very good deal going on right now, as you can get a Paasche TG-3F with Compressor and all your needed accessories + Prime shipping (or free Super Saver shipping.)
http://www.amazon.com/dp/B00AI5ZJBW/
With this set you have all you need to functionally airbrush but you'll also want to pick up some needed "accessories" for you.
You will also want to pick up some glass jars (for storing & mixing paints) as well as some plastic pipes for more accurate paint measurements (makes the jars less messy as well.)
I highly suggest getting an easy to clean brand of paint like Vallejo Air to start with, so you can learn with less trouble as Vallejo can be cleaned up in an instant with Windex or water.
Man you guys have it good in the US. Those kits are way more expensive in Canada :P That spray booth looks great! Too bad it's twice the price on amazon.ca D: \
Edit: How often do you worry about that thing blowing up?
There is but it is challenging... and can get expensive. Here are some options.
Either way the largest challenge will be dealing with overspray that will be in the exhaust from the booth.
I have one of these hobby spray booths setup in my garage for winter painting. I didn't spend that much on it though, they can be had cheaper on ebay. The switch went bad on mine, so I had it open. It's just a large computer box fan, a duct, a filter, and some shielding, so if you're handy you could probably build one.
Looking to set up a spray area in my apartment in the near future, but first a couple of questions:
Get something like this:
http://www.amazon.com/Master-Airbrush%C2%AE-Portable-Airbrush-Extension/dp/B00B2TESUQ/ref=sr_1_1?ie=UTF8&amp;qid=1369299692&amp;sr=8-1&amp;keywords=spray+booth
Real great with the vent tubing, just get it out a window or something.
https://www.amazon.com/dp/B00B2TESUQ/ref=cm_sw_r_awd_RfR8ub02VY7MA
So still a work in progress. But I figured I would post up what I have so far. Had a catastrophic failure on the hands, broke the outer pieces that the fingers snap in to. Have some touch ups to do and stripping and repainting on the skirts in the works also. Still need to decal, top coat and panel line. But pretty happy with how things are turning out. This is the airbrush kit I am using, along with this hood and if you don't have one of these lamps, do yourself a favor and pick on up. They are awesome.
I got an airbrush for Christmas and picked this up:
http://www.amazon.com/gp/aw/d/B00B2TESUQ/ref=mp_s_a_1_1?qid=1420162830&amp;sr=8-1&amp;pi=AC_SY200_QL40&amp;dpPl=1&amp;dpID=51UZcN0YCdL&amp;ref=plSrch
It is a fold- up airbrush station that blows the paint fumes out the window. Maybe that would work? I havent tried it yet, because my airbrush is in the mail.
I recommend either the thin panel lining markers in grey, black, and brown or a set of real touch markers that has those three colors
I panel lined with a set of panel lining markers for quite a while and only recently tried using real touch markers for panel lines and while the panel lining markers work pretty good I think I prefer real touch markers
The real touch markers are initially messier to apply but I think they clean up nicer just using like a qtip and make for some nice sharp looking lines
Probably not as good as a panel wash but I like them so far
Edit: here is a black panel lining marker https://www.amazon.com/GSI-Creos-Black-Gundam-Marker/dp/B00HY8JI7C/ref=sr_1_1?ie=UTF8&amp;qid=1473087011&amp;sr=8-1&amp;keywords=Panel+lining+markers+gundam
I bought this on Amazon :
GWHOLE Ring Size Adjuster with Silver Polishing Cloth,Set of 4 (2mm/3mm) https://www.amazon.com/dp/B01M0OX3EW/ref=cm_sw_r_cp_apap_uEB4avXEitfWl
Just for a temporary fix. Once I get down a bit more, I'm going to get my ring resized.
I bought these ring size adjusters and they are quite cheap and useful! Lots of women in the reviews section said they bought the item because hey have larger knuckles than the rest of their finger https://www.amazon.com/GWHOLE-Adjuster-Silver-Polishing-Cloth/dp/B01M0OX3EW
I have RA so my hands are different sizes depending on how well I’m feeling, so I use a plastic ring adjuster pretty much permanently. https://www.amazon.com/dp/B01M0OX3EW?ref=ppx_pop_mob_ap_share is the one I use and it’s worked really well, comes with different sizes adjusters.
I would recommend waiting to re size until your weight has stabilized. Getting the ring re sized multiple times can weaken the ring.
GWHOLE Ring Size Adjuster with Silver Polishing Cloth,Set of 4 (2mm/3mm) https://www.amazon.com/dp/B01M0OX3EW/ref=cm_sw_r_cp_api_i_65ZLDbGTH42XC
I'd also recommend these plastic adjusters! I was worried about my fingers swelling during pregnancy so I didn't want to do anything permanent, and these stay on really well.
Good for you!
One of my goals is to fit back into my wedding ring. I haven't been able to fit since my 8th month of pregnancy, and I'm almost 10 months postpartum. I didn't want to get it resized when I KNOW I need to make a change to my health.
You could always get it resized, or try one of these ring size adjusters
Try this ring sizer:
https://www.amazon.com/GWHOLE-Adjuster-Silver-Polishing-Cloth/dp/B01M0OX3EW
Creepy name, but it works much better on my ring than the traditional sizers. I've got a tacori too btw!
This is the wrong sub. This is for the Ring Doorbell/Alarm/Camera company. But I recommend this.
Get yourself one of these! I haven't wanted to get my wedding set sized either, so this works in the interim!
You really want a spray booth not so much to avoid spraying other objects, but to avoid inhaling paint particles that can fly back into your face.
Here is what my buddy bought it's very compact and works well, I've used it myself as well.
Otherwise a black fine tip gundam maker would also work, such as this!
Granted the link I sent you is the US Amazon site, but I've used it on my own Petitgguys with nothing more than a bit of over drawing that is easily cleaned up with a cotton swab.
If you don't already have a proper tool kit like This you'll want to get one, when i first started i just used household tools like scissors and my kit's came out horrible with nub marks all over the place. The file or some sandpaper will work wonders to remove those. You'll also want a panel line marker like This they come in different colors so look around to get the one that matches the model your working on, adding panel lines alone greatly improves the look of the model. After you have the nub mark removal and panel lining down the sky is the limit you can dabble in custom painting or try your hand at kitbashing custom models. Research each thoroughly before trying them and expect a lot of errors at first if you try those.
I'm using the Black Gundam Marker. I did a lot of cleaning on the kit when I messed up but I just couldn't get it right. My main issue was that I made sure to do it lightly but it went on so thick, and I always have shaky hands so that never helped the situation.
EDIT: This is the marker I use http://www.amazon.co.uk/GSI-Creos-GM01-Black-Fine/dp/B00HY8JI7C
If you just want to draw on them to add detail I recommend
http://www.amazon.com/GSI-Creos-Black-Gundam-Marker/dp/B00HY8JI7C/ref=sr_1_1?s=office-products&amp;ie=UTF8&amp;qid=1422131965&amp;sr=1-1&amp;keywords=gundam+marker&amp;pebp=1422131945212&amp;peasin=B00HY8JI7C
they're designed for use on Gundam models and work great and have a very fine tip. I've used them on other figures before too and had no problems. If you get them just be sure not to touch the marker right away so it doesn't smudge.
They have a silver and a gold as well which work beautifully, I use them for everything with customs. There's other colors available but those have thicker tips so I wouldn't recommend them for fine details.
GM01 Black Fine Line https://www.amazon.co.uk/dp/B00HY8JI7C/ref=cm_sw_r_cp_api_eExyybGVJ187W
Gundam Marker GM02 Gray Fine Tip GUNPLA https://www.amazon.co.uk/dp/B006B3YYZM/ref=cm_sw_r_cp_api_RHxyybAA0VTDA
Grey on white and light colours black on darker colours
Nice! Can't wait to see it decaled.
You can either mask it off with Tamiya masking tape (they do curved tape too), paint very carefully with a thin brush, or use a Gundam lining marker pen to do it.
https://www.amazon.co.uk/GSI-Creos-GM01-Black-Fine/dp/B00HY8JI7C/ref=sr_1_1?s=kids&amp;ie=UTF8&amp;qid=1483116413&amp;sr=1-1&amp;keywords=gundam+pen
Hi. 2 questions.
1). Are these kits all legit/genuine gunpla, or are there any knock offs/bootlegs?
2). If i panel line with this do I need a top coat? Ive heard it dries and ive heard it doesnt and needs top coat.
Thanks
I use this:
https://www.amazon.com/Master-Airbrush%C2%AE-Portable-Airbrush-Extension/dp/B00NLQ019A/ref=sr_1_1?ie=UTF8&amp;qid=1469039471&amp;sr=8-1&amp;keywords=paint+booth
Loved it so much I bought another one to increase the size! One is enough for all cars and most planes. If you like to built huge 1/48 planes you'll need two pushed together.
Can I use an aluminum or pvc viynl hose to replace my plastic hose in my airbrush station?
I have this airbrush station and due to long time being stored on my window, the sun has made the plastic hose dry out and crack. I am looking for a replacement and can't find any with just the 4inch diameter plastic hose. However I do see some 4 inch diameter exhaust hoses made with different material (aluminum / pvc viynl). Can I use one of those instead of having to a replacement for the whole plastic hose unit? Which one would be best?
This is the booth I have, I really like it, it lights up really well, the fan suction is no where near strong enough to effect sprays or move light pieces but enough to keep the particles and such going out of it:
https://www.amazon.com/gp/product/B00NLQ019A/ref=oh_aui_detailpage_o03_s00?ie=UTF8&psc=1
>is there any advice you guys could give me so that I end up ruining the finish on my kits?
Why certainly, just spray with tar thinned with engine oil, i garuantee you will end up ruining the finish on your kits =D
On topic though since i'm not much of a DIY-er and looking for a spray booth myself, i've found they don't have to be very expensive.
Example 1
Example 2
Those have a hose that you can hang out the window making ventilation no longer a problem.
Disclaimer though: i'm still looking and haven't actually used any of these nor done much research into them yet so they might be utter crap, but hopefully some fellow modelers will have experience?
You are right that acrylics are relatively safe. You still don't want to breathe in the particles though. Just get one of them spray booths https://www.amazon.com/Master-Airbrush-Portable-Lighting-Extension/dp/B00NLQ019A/ref=sr_1_1?ie=UTF8&amp;qid=1503908992&amp;sr=8-1-spons&amp;keywords=spray+booth&amp;psc=1 and extend the hose with something similar from Home Depot.
Yet another question about paints! I'm grabbing some Mr Color paints (because the stuff I want to do does not have an applicable Tamiya paint mixture laid out anywhere and I don't want to try 'eyeballing' shades just yet) but I have one small worry about them.
How bad ARE the fumes? I live in an apartment that's a pretty decent size and my current gunpla workroom is large but has no windows. So how much trouble am I signing up for here? I've been eying this thing here : https://www.amazon.com/Master-Airbrush-Portable-Lighting-Extension/dp/B00NLQ019A/ but again, no nearby windows to run the piping to. Would it be okay to just run it out the door of the small(er) room into my larger room, which does have a patio door I can open for natural ventilation, or is that also too little?
I just really don't want to end up making myself sick for my hobby.
Ive used it twice. Imo, for its cost and size, it gets the job done. I have a pretty cramped space, so being able to collapse it and store it has been pretty helpful. I opted the one that came with attachable LED lights. The lights help, but make it a little hard to see sometimes due to the color of the LEDs.
Though, I may have a different brand than OP.
Spray booth
I just set up a teeny airbrush/gunpla work desk in a carpeted spare bedroom. My wife will lose her shit if I get paint ANYwhere on the carpet or guest bed. For now, I plan to only spray Future clear and some flat coats before gradually moving on to Tamiya acrylics (and perhaps Gaia lacquers). Other than what I have below - can anyone suggest some tips for maintaining a CLEAN and efficient small work area?
This was the set that I initially purchased. The air brushes that came with the kit are a little on the cheap side but they were good for me to learn with.
This is the spray booth that I purchased a little while ago. So far the booth has been great. I'm able to spray indoors, both rattle cans and my airbrush. You just have to change the filter every once in a while, and I think the filters are ~$10.
I recently purchased this airbrush. I havent been able to use it yet though because I need an adapter to use it with the hose for my compressor.
You really need a decent airbrush, cheap no name knock-off copies will probably put you off airbrushing for life.
Compressor
Airbrush
The NEO is made for Iwata who make some of the best airbrushes around. Review is here he does raise some issues, but this was written 7 years ago.
There are numerous pencil cases on Amazon that would fit the bill; here's a soft-sided one I bought back in August or September. I don't use it ATM, but it easily holds 6 assembled darts and as long as you don't sit on it the flights wont get smashed.
I'm still using an hold semi-hard sided hard drive case from 30~ years ago: what I use.
Thanks dude! And, yeah that's an awesome design, I think it'd make a cool deck too.
I'll let you in on a secret that took me forever to figure out: the best way to make masking / stencils is to get yourself some transparency sheets, like the kind used for overhead projectors in school, and then take a marker and draw what you want to spray through (best way to make stencils). Then take a 'wood burning kit' (which is just a low-heat soldering gun pretty much) and use it to "trace" your lines on the transparancy sheet, do it light and quick and it'll cut the parts out that you want - afterwards you'll be left with a mask or stencil that's much stronger than paper, easy to clean, and the wood engraver allows you to make more detailed and smoother cuts than if you were masking with tape, or cutting out of cardboard or card stock.
When you finish your painting, you'll want to give it a light coat of clear spray finish, and when that dries hit it with a coact of actual clear coat - I use minwax - that''s 'satin' (which is their way of saying 'matte') listed there but I prefer mine to be gloss. It's important that you hit it with the spray finish first, because it'll seal the paint, and the minwax may cause it to run if you don't. I use a lot of markers in my paintings and minwax will absolutely make them bleed and run if I don't seal them first.
You also want to seal it because the acrylic will easily chip off the deck
Like I said, also be aware that painting on a deck is A LOT different than painting on canvas, the deck will cause the acrylic to paint much faster than canvas so you lose that 'wet period' you normally have to blend paint.
Good luck, post a picture when you finish it! And feel free to drop me a line if you have any other questions.
Note: This is all from experience with painting things other than Gunpla using acrylic paint. Gunpla may be different, but I really don't see how.
Something I learned when I started painting RPG minis is that it's a good thing to splurge a bit on brushes if you're planning on doing a lot of painting. A high quality 0 brush can give better precision and thinner lines than a cheap 10/0. By buying good brushes I reduced my number of brushes used to 3 - a 00 for detail work, a 1 for coverage, and a cheap brush for drybrushing. And that's for painting little 28mm tall minis.
I recommend the Winsor and Newton Series 7 brushes, if you're wanting to give them a try. You can find them online pretty easily, and if you catch them at certain stores you might be able to grab them for about $10 a brush instead of the retail $20+. Just be aware that they're natural fiber brushes, so they'll both hold paint differently(meaning more) and require a bit more care when cleaning to keep them in good shape. You'll want something like The Masters brush cleaner to keep them clean without damaging the fibers, and it can be left in to act as a conditioner as well.
Nice. My smoke shop tends to pull 7-10 dollar bullshit.
Yup, I'm a fan of my dentist pick. Another good deal, though not currently in stock:
http://www.amazon.com/SE-DD312-12-Piece-Stainless-Carvers/dp/B000SVRSRY/ref=sr_1_1?ie=UTF8&amp;qid=1382473690&amp;sr=8-1&amp;keywords=dabbers
Amazonn
Amazon again! ( cheaper i think)