(Part 3) Top products from r/DIY
We found 94 product mentions on r/DIY. We ranked the 7,518 resulting products by number of redditors who mentioned them. Here are the products ranked 41-60. You can also go back to the previous section.
41. Build Your Own Earth Oven: A Low-Cost Wood-Fired Mud Oven, Simple Sourdough Bread, Perfect Loaves, 3rd Edition
Sentiment score: 2
Number of reviews: 5
Detailed instructions including photos and diagrams make this a complete how-to book on building and baking with a traditional earth ovenTips on baking real sourdough bread, tooDenzer10" x 7"114 pages
 Show Reddit reviews
42. LE 12V LED Strip Light, Flexible, SMD 2835, 16.4ft Tape Light for Home, Kitchen, Party, Christmas and More, Non-Waterproof, Warm White(Not Include Power Adapter)
Sentiment score: 3
Number of reviews: 5
Power adapter not includes. If you need one, please search 'LE B019Q3U72M/B00DKSI0S8' on Amazon.Safe to use. The working voltage is 12V, extremely low heat. Please do not use power adapter that is higher than 12V to supply. The wattage is 18W, Please be kindly informed that the total wattage of LED ...
 Show Reddit reviews
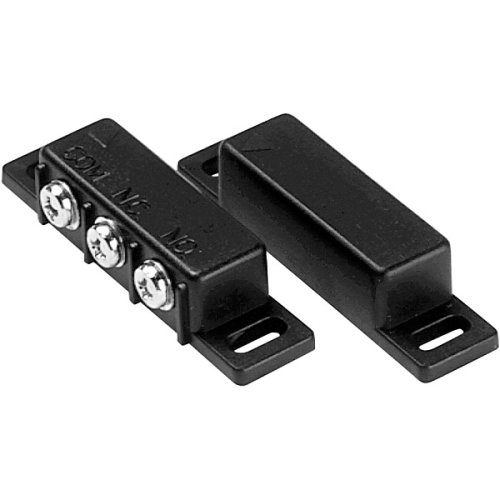
43. Magnetic Switch, Standard Packaging
Sentiment score: 1
Number of reviews: 5
Normally OpenNormally ClosedEffective for Theft DeterrenceOne of the only switches with both normally closed contactsGreat for pick-ups with sliding rear window
 Show Reddit reviews
44. Crystal Clear Bar Table Top Epoxy Resin Coating for Wood Tabletop - 1 Gallon Kit
Sentiment score: 3
Number of reviews: 5
Designed for Table Tops, Bars, Wood finishes, See-Through Encapsulations, Art work, and other applicationsSelf Leveling and High Gloss U.V. Resistant FormulaProduces a Tough, High Gloss, Water Resistant CoatingEliminates Craters, Crawling and Fish EyesBlush Resistant. A total of 1 gallon combined
 Show Reddit reviews
45. E-Z Lok 400-4 Threaded Insert, Brass, Knife Thread, 1/4"-20 Internal Threads, 0.500" Length (Pack of 25)
Sentiment score: 1
Number of reviews: 5
Provides a Strong Machine Thread In Hard WoodsIdeal For Use in Woods Like Oak, Cherry, and MapleDesigned For Use In Furniture, Cabinetry, Storm Windows and Tap HandlesSimply Drill the Appropriately Sized Hole and Install with Bolt/Jam Nut or Optional Drive ToolThreaded Insert, Brass, Kni...
 Show Reddit reviews
46. Zitrades 10PCS LED 5050 RGB Strip Light Connector 4 Conductor 10 mm Wide Strip to Strip Jumper
Sentiment score: 1
Number of reviews: 5
10Pcs LED Strip Light 5050 RGB strip Connector for Conductor 10mm Strip to Strip Jumper led strip connectorFits 5050 LED chips with 10mm 4pin wide stripThis jumper and bend the wires 90 degrees10 pcs LED Strip Connector Cablecut the strip on the cut line, splice the ribbon electrically with this jum...
 Show Reddit reviews
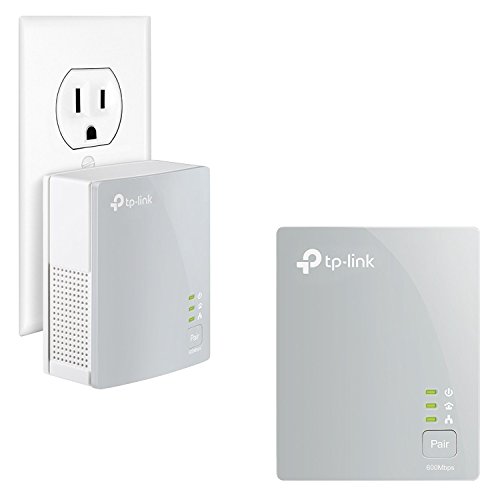
47. TP-Link AV600 Powerline Ethernet Adapter - Plug&Play, Power Saving, Nano Powerline Adapter, Expand Home Network with Stable Connections (TL-PA4010 KIT)
Sentiment score: 3
Number of reviews: 5
Faster speed: wired connection with high speed data transfer rate, ideal for HD video or 3D video streaming and online gamingNetwork expansion: Home Plug AV Standard compliant IEEE802.3, IEEE802.3U, with Easy pair feature to add additional TP Link PowerPoint adapters to the network; connect Multip...
 Show Reddit reviews
48. Tyke Supply Dual LCD Monitor Stand Desk clamp Holds up to 24" LCD Monitors
Sentiment score: 3
Number of reviews: 5
Tyke Supply is the only seller of Tyke Supply ProductsFully adjustableEasy to install Desk clampVesa compatibleHolds up to 24 inch lcd wide screen monitors
 Show Reddit reviews
49. Pour-On Epoxy Finish Is Equal To 60 Coats Of Varnish And Provides A Gorgeous High Gloss Appearance
Sentiment score: 4
Number of reviews: 5
For Embedding, Preserving, CoatingJust one coat of "Glaze Coat" equals 60 coats of varnishWaterproof & heat resistant to 120 degreesHi gloss epoxy finish needs no polishingCan be used on almost any surface
 Show Reddit reviews
50. Armour Etch Cream, 10-Ounce
Sentiment score: 2
Number of reviews: 5
Package length :2.47"Package width :2.47"Package height :4.82"Made in United States
 Show Reddit reviews
51. ThinkMax RC Forklift with Lifting Arm Radio Remote Controlled Mini Engineering Truck Industry Fork Car .
Sentiment score: 1
Number of reviews: 4
6 Function Radio Controlled (forward/backward, left/right, lifting arm up/down)Professional Architect Industry Fork CarGlossy Exterior Paint, Detailed InteriorOperating range up to 6 feet awayColor may vary
 Show Reddit reviews
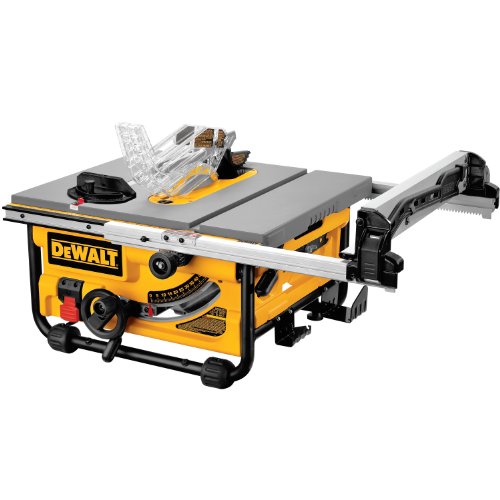
52. DEWALT DW745 10-Inch Table Saw, 20-Inch Rip Capacity
Sentiment score: 2
Number of reviews: 4
22 kilograms unit weight and optimized footprint make this the most portable saw in its class. Shoe bevels 0 to 45 for beveled cutsSteel roll cage protects saw against jobsite drops and impacts, Rack and pinion fence system, front and rear fence lock and large, clear scales combine to give an extrem...
 Show Reddit reviews
53. DEWALT DC970K-2 18-Volt Compact Drill/Driver Kit
Sentiment score: 0
Number of reviews: 4
Constructed to minimize user fatigue. Dual speed range, 0-450/0-1,500 rpm, delivers optimal performanceIncludes DC970 Drill/Driver Charger, two 18V batteries ,Contractor BagCompact size fits into the tightest conditions.1/2-inch single sleeve key-less ratcheting chuck for tighter bit gripLightweight...
 Show Reddit reviews
54. PWM Dimming Controller For LED Lights or Ribbon, 12 Volt 8 Amp, 3301
Sentiment score: 2
Number of reviews: 4
Knob monotoner is a controller which can realize stepless dimming.Using the knob control mode, it is a kind of dimmer which can realize 0-100% pole-free dimming. The user can adjust the light to the appropriate brightness according to the actual needs.Used to control all kinds of LED lights, such as...
 Show Reddit reviews
55. Westinghouse Lighting 70269-00 Angelo Brothers Make A Lamp Kit
Sentiment score: 1
Number of reviews: 4
This are easy to useThis are highly durableThis is manufactured in ChinaModel number: 70269-00
 Show Reddit reviews
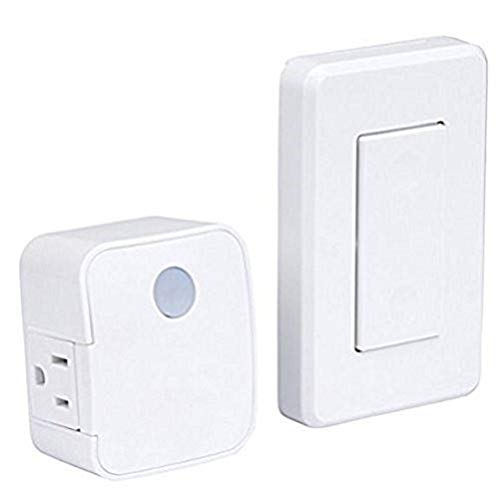
56. WESTEK Indoor Wireless Wall Outlet Switch with Remote Operation - Ideal for Lamps and Household Appliances - the Easy Way to Add a Switched Outlet - Signal Works Through Walls, Up To 100 Feet Away
Sentiment score: 3
Number of reviews: 4
CONVENIENTLY CONTROL ANY DEVICE - this wireless outlet switch allows you to remotely operate and control indoor devices at the touch of a buttonAT-HOME CONVENIENCE - RF signal works up to 100 feet away, around corners and through walls to make your life easier; saves energy consumption and moneySUPE...
 Show Reddit reviews
57. Wagner Spraytech 0518080 Control Spray Max HVLP Paint or Stain Sprayer, Complete Adjustability for Decks, Cabinets, Furniture and Woodworking, Extra Container included
Sentiment score: 2
Number of reviews: 4
HVLP PAINT SPRAYER: The Control Spray Max paint sprayer uses high volume, low pressure technology to atomize materials into fine particles and provide a smooth finishGREAT FOR ANY PROJECT: Perfect for priming, painting or staining cabinets, door trim, decks, furniture, woodworking projects and moreU...
 Show Reddit reviews
58. Command Replacement Strips, Re-Hang Indoor Hooks, White, 6-Strips (17023P-ES)
Sentiment score: 1
Number of reviews: 4
INCLUDES - 6 Indoor Large Replacement StripsRE-HANG HOOKS – Reorganize when inspiration strikes! Command Large Refill Strips make it easy to hang and rehang your Command indoor hooks, damage-freeORGANIZE DAMAGE-FREE - Say goodbye to holes, marks, or sticky residue on your walls, doors, cabinets, o...
 Show Reddit reviews
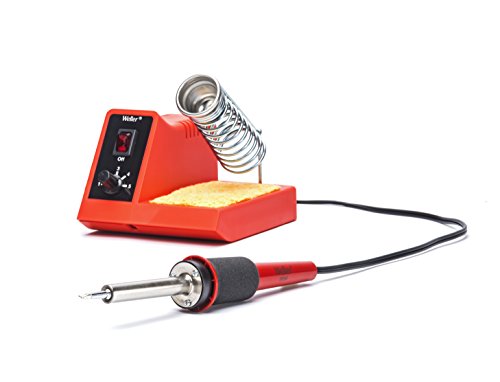
59. Weller WLC100 40-Watt Soldering Station
Sentiment score: 3
Number of reviews: 4
High performance analog soldering station produces up to 900° F to handle many soldering projectsVariable power control dial adjusts power from 5 watts to 40 watts for accuracyQuality, lightweight pencil iron with cushioned foam grip provides extended comfort during long term soldering projectsIncl...
 Show Reddit reviews
I'll just leave this here:
In means of accuracy and size you probably can't beat the Dewalt DW745. I've had mine for 3 years and am still super happy with it. The guided fence is super easy to adjust and is always parallel to the fence.
The two downsides are the 20" rip capacity (24" would be perfect) and that the arbor is to short to use a dado stack.
There are enough work arounds for me to still be happy with the saw (router and circular saw) for dados i also often use a flat tooth saw blade and make more passes.
I bought a ryobi tableware initially and returned it after making 4 cuts... piece of shit!! Although I love my ryobi 18v one+ tools.
I bought the dewalt for 229 on sale at HD and love it!
EDIT: f****ed up formatting
The prices for batteries are high because they can be. I have sold power tools for a few years and their are actually pretty good margins in them. Especially the bare tools. That is why, if a user needs a new battery, their best bet is to buy a kit to keep the batteries and part them out. For example, a Makita BL1830 Battery is 100.00 at Home Depot but you can get an LXT211 for 251-279 when on sale. It comes with 2 batteries, a charger, drill, and impact. All of which are sold for over 100.00 by themselves. This is why you see so many bare tools on Ebay for good prices. People buy the kits and break them down. There is so much profit in tools that you could purchase either of the kits below, break the parts down, and make pretty good money selling them on Ebay:
lxt211
dc970k2
Amazon will sometimes sell the 2nd kit for $89.00. DW9116 Charger -$15 DC9098 Batteries - $20 DC970 Drill - $34. If you search these on Ebay, you will see a couple sellers doing this. Hell, you could even break the items down and sell them on Amazon.
I had been wanting to build one of these for about a year and finally got around to it this month. I roughly followed the steps in the book "Build Your Own Earth Oven" by Kiko Denzer, like the other pizza oven fella on here. I'm happy with how it turned out. I haven't cooked in it yet but it holds heat very well (the first small fire I lit went out before I went to bed and the oven was still nice and warm in the morning) and it hasn't shown more than hairline cracks (although it's not a big deal if it does crack). I'll do my best to answer any questions anyone has!
It cost about $150 (US) in total which went on bricks, gravel and lots and lots of sand. The clay, of course, was free.
Resources for doing it yourself:
Build Your Own Earth Oven by Kiko Denzer
Build Your Own $20 Outdoor Cob Oven for Great Bread and Pizza
How to Build a Simple Wood-Fired Cob Oven
Building an Earthen (Cob) Oven
Wood Fired Clay Pizza Oven on Imgur
Way cool project!
I was thinking that if you still have money to spend of this project, some sort of monitor mounting system might help the overall aesthetic, then you wouldn't have to worry about the screw heads messing up the levelness of the monitors slightly either, and you could remove the bases.
Something like this x2 might work and look very nice. I found a pair of something similar called a space arm on ebay for under 80$ for a pair.
The make ones like this too, but i dont think those look quite as nifty, and wouldnt work as well for 27"ers.
PS: i love that you decided to tie some wood in with the legs and speakers, makes it look more inviting and less monolithic.
I've been working on this table project for a little while now, and now just need to fasten the legs to the table tops. One issue that that these raw oak slabs were never planed more than the rough cut from the tree, so their fairly uneven, and even bow a little (don't think it shows in the pictures, though). For that reason, I need a way to level the legs so that the tables don't rock once their finished. Shimming the plates with washers should be easy enough to get the table level, but I'll need machined threads to run the fasteners into and out of (and then into and out of again) so that they'll still hold once it's all said and done. I've looked at a few different options for this problem, but aren't convinced any of them are ideal. T-nuts would work, but I think they might pull out since they won't be held in from the top of the table surface (not interested in that industrial look). These threaded inserts and these similar ones would seem to do the trick, but the reviews raise questions about the strength of the material in dealing with hardwood, as well as problems with the material stripping while trying to place them. Anyone have any suggestions/advice?
TLDR: Looking for fastener solutions to affix table legs to the underside of an oak slab that will allow adjusting to level the table.
Nice job, looks great!
I made one too, but I used one of these to modulate the speed.
the pulse width modulation dimmer is a lot easier on the fan motor and uses less power (and it's dirt cheap). You can rip the insides out of the box, it's a pretty small board inside.
Also, old hard drive magnets are great for stir plates.
Easy and cheap hack to do this. Step one (while light/fan is off), open fan grate and pull fan cord from plug. Step two, figure out how much space you have in there. Step three, get a remote control "light switch" to plug in between the fan and the fan plug. Note: These are about $10 and plentiful for operating Xmas lights right now. Upside is this hack is cheap, slight downside is you can only use the fan while the light is on, but you can keep the fan off and still have the light on. Also, while you are messing with the light/fan with the grate off, maybe buy a nice LED bulb to replace whatever incandescent/CFL is in there, it will be a whole lot cooler/brighter and better for your new "light switch".
Example:
http://www.amazon.com/Westek-RFK100LC-RFK101LC-Mounted-Receiver/dp/B000HJBE68/ref=sr_1_1?s=hi&ie=UTF8&qid=1416814907&sr=1-1&keywords=wireless+light+switch
Yeah I patched the big voids with mortar. You can see a slight difference in color but it's not bad at all. My sink is ground/polished down to the point that there is a lot of exposed aggregate (and the surface had a shine before the epoxy, I guess from the polished silicon in the sand?), so there's a lot going on anyway.
If you are leaving any voids (which is fine, just make sure they can drain so that water doesn't sit in them), make sure to thoroughly vacuum them so there's no cement dust that could come loose.
I (think I) used this one: http://www.amazon.com/Finish-Varnish-Provides-Gorgeous-Appearance/dp/B000PEGLBS
Here's a pic of the sink; it looks better in person :) http://imgur.com/a/k1lwZ#9
As others have said running standard 5e or 6 will work just fine.
I'd like to throw out a couple other options that I haven't seen covered yet.
I've used something like these PowerLine Ethernet adapters at my parent's house and even with older wiring it still worked out very well: https://www.amazon.com/TP-Link-Powerline-Adapter-Starter-TL-PA4010KIT/dp/B00AWRUICG/ref=sr_1_2?ie=UTF8&qid=1499982359&sr=8-2&keywords=powerline+ethernet
And another option would be to get a wireless system that is built to handle a bit more. Ubiquiti has a great range of wireless access points that are built to handle the load. You would install multiple access points and then turn down the transmission power of the radios. Doing this will help the devices split up and connect to the access point they are closest to. At the same time those devices are rated to handle something like 30 clients.
I install a lot of SMD LED strips. I have had good luck with these. http://www.amazon.com/gp/aw/d/B00HSF64JG?cache=27cdb7082ac1067e2e4766bf86b4860d&pi=SY200_QL40&qid=1412750393&sr=8-3#productDescription_secondary_view_pageState_1412750433171
They use .5 Amps per Meter. You will need 4 rolls so you will also need a12Volt power supply rated at 10 Amps and 120 Watts. Something like this would work. http://www.amazon.com/gp/aw/d/B00LWQ2GS0?cache=27cdb7082ac1067e2e4766bf86b4860d&pi=SY200_QL40&qid=1412750809&sr=8-2#ref=mp_s_a_1_2
To control them you will need a dimmer or simple on-off switch. I would suggest a remote dimmer. Like this one. http://www.amazon.com/gp/aw/d/B009C34ZV6?cache=27cdb7082ac1067e2e4766bf86b4860d&pi=AC_SX110_SY165_QL70&qid=1412751212&sr=8-12#ref=mp_s_a_1_12
I personally prefer warm white for indirect lighting in a kitchen area. Cool white can be a bit harsh bouncing off the ceiling.
I hope this helps.
Looks like a good walkthrough! Good cheap suggestions.
If you're doing plexiglass, you're going to have to use letter stickers to stay cheap. However, if you use glass, you can use glass etching cream and an overhead transparency stencil to etch letters.
Of course, you'd be certain it'd never break if you used plexiglass, but the etched glass would look way better. . .
I would also suggest using 'glazing tips' (just google 'em) instead of hot glue if you end up using real glass, but TheMadHatter made a good list of suggestions!
http://www.amazon.com/Complete-Do-It-Yourself-Manual-Completely-Revised/dp/0762105798/ref=pd_sim_b_1
A book like this is a great starting point. it will give you a good idea of what you would be getting into before you start a project. I would suggest a book like this then if you decided you wanted tile a bathroom get book specific for laying tile, then look at videos on you tube and try and learn as much as you can. this next part is important, just go for it. decide what you want to do and do it. best way to learn things is to actually do them.
Hope this helps! Its all pretty basic stuff, Good luck!
http://www.amazon.com/Westinghouse-Lighting-70269-Make-A-Lamp-Kit/dp/B00002NADS
I guess you could call it DIY, but it was pretty easy. I bought the components from Amazon:
The transformer plugs into the wall and then into the dimmer (I extended the wires using 12v wire I had on hand and butt contectors) then 2 wires out of the dimmer into the strip of lights. The light strip comes with a standard looking DC connector, which I removed and just hard wired it. I also used the entire strip, but it can be cut every two inches at certain points. If you choose to cut the strip, you will need to solder the wires onto the strip. Since I used the entire strip I just used the included wire (after removing the DC connector thing)
To give an example of what I would personally use.
LEDs (I would purchase 2 reels (10m total)
http://www.amazon.com/gp/product/B005ST2I9O/ref=oh_details_o04_s00_i03?ie=UTF8&psc=1#productDetails
Dimmer (2 of these, 1 per reel)
http://www.amazon.com/LEDwholesalers-LED-Strip-Lights-Controller/dp/B003L4KKF2/ref=pd_sim_hi_bsb_12?ie=UTF8&refRID=024VHCH0KYFFJDQAM9QV
powered by this (only need the 1 but you can buy 2 if you'd prefer)
http://www.amazon.com/MEANWELL-HitLights-Listed-Adapter-Warranty/dp/B008K4UKLW/ref=sr_1_51?s=hi&ie=UTF8&qid=1397563708&sr=1-51
Mount as much of the strip(s) as possible on U-channel or similar to minimize heat issues (the U channel will act as heat sink with a bit of "work") sideways outside of the square/rectangle lightbox. This will minimize the 0 0 0 0 0 0 lighting effect.
If you can build the desk enough to test you can see if 1 row around the perimeter will work, or 2 or 4... You can use the dimmer(s) to adjust the brightness as needed.
If you still need/want MORE lighting or want to have a separate smaller section that is always on at 100%, you can put some strips in rows across the "bottom" of the lightbox facing directly up.
I pretty much did this on my magnifier lamp. I have about ~.3 meter of the above linked LEDs running constantly at 100% for basic task lighting and a "night light" and ~2-3meter inside periphery of the reflector. I also used some to replace a picture lamp (it needs to be dropped by 50% though, it is too bright) and I am working on figuring out 2 more "ideas" now.
Rough math is rough but I figure it is approximately a 10% and 100% split. I am not using a dimmer on my setup though so I just try to not stare at the light for too long.
Came here to say cob oven. Sand, clay and straw instead of firebrick and mortar, and the cost in materials including the firebricks for the floor (if you want them - you can use cob for that too), and a tarp for mixing is usually under $50 or so. The biggest downside is having to cover it because there is no concrete in the mix, but I've built a few of them and they get just as hot and make great pizza. You can even let them weather and just build a new one every 5-10 years or so as they break down. I mean, $50.
Some great plans here though probably more than $50. And the authoritative text here.
Have you looked into power line communicators? Like the one linked (note that I've not used this model and only link this one because it was the first one to show up on my lazy search, you should look around if you decide to go this route)
https://www.amazon.com/dp/B00AWRUICG/ref=cm_sw_r_cp_apa_TuYHzb5NC86F6
What these do is encrypt the signal from Ethernet and send it over the neutral wire. If you're using it in the same room, there's a good chance it's on the same circuit and that's like best case scenario with these things so you don't need an expensive high end model.
TL;DR - I didn’t mean to write an essay, so I’ll start with this: Get a multimeter and a decent soldering iron. If you have time, want free components, and wish to practice desoldering, find some scrap electronics and start collecting (please recycle the remnants). Check SparkFun, eBay, or Google for bulk supplies of components as it might be cheaper that way, and you get only what you need. Otherwise, buy a kit. A decent kid’s one should do fine (recycle the book if it comes with one and it’s too basic for you).
It seems like your book is from the early 2000s and is biased towards analog circuits. I hate to break it to you that those days are over now that almost everything has moved towards surface-mounting on printed circuit boards (PCBs), and you'll find it's cheaper (time- and money-wise) to replace entire units than actually troubleshooting individual almost-microscopic components.
With that being said, I still found it useful to learn how to troubleshoot analog circuits to solidify my understanding of electronic circuitry in general and for my DIY projects, such as: fixing faulty wires/cables, making my own phone chargers, powering a bathroom scale with an old cell phone to make it rechargeable, replacing faulty components on / adding computer fans to power inverters, and most recently, re-soldering a problematic switch on the circuit board for a stove hood (would've been $50 for replacement board).
I only use a free multimeter (from Harbor Freights with any purchase) and would at the very minimal recommend that, but you should note that measuring a circuit does in fact change the circuit and if input impedance of the meter is not high enough (cheap meters like this one) compared to the impedance of the circuit being measured, you can get useless readings.
I would also recommend getting a decent soldering iron. I've had bad experiences with melting tips on the cheap ones, but have been going strong with my current station (an older version of this) with an off switch and varying levels of temperature (on my model, it heats to a certain point and waits until it drops to a certain point before re-heating it back to the level set like a conventional oven, but none of my projects require anything fancier than that).
I don't own an oscilloscope since my projects do not deal much with wavelengths, signals or latching. I would go to the nearby community college where I have taken classes before and ask to use one of their high-quality ones if I really needed it. I have never personally tested the handheld ones for under $100, but I have worked with someone who designs custom electronics for clients and swears by one. On the other hand, I've heard some negative reviews that the bandwidth/resolution of the the cheap scopes are impractical for many of today's circuits. You can make a "poor man's scope" by using a sound card and a modified 3.5mm audio cable if you really needed a basic one!
I haven't touched a function generator since I had to troubleshoot an old AM/FM transceiver in an electronics troubleshooting course.
latex paint works best with an airless sprayer, but those will run you $300+.
I picked up a wagner https://www.amazon.com/Wagner-0518080-Control-Spray-Sprayer/dp/B003PGQI48/ref=sr_1_3?ie=UTF8&qid=1469559938&sr=8-3&keywords=paint+sprayer
works ok for such things. it cant quite vaporize the paint, even after thinning with some floetrol and water. But it works better than a brush.
Its certainly faster, but it does waste a fair amount of paint.
Still, I hate painting, Ive gotten my money's worth IMO. Though with the amount Ive used it, I wish i had gotten an airless sprayer.
A PowerLine device, like the other guy suggested is perfect for avoiding running Ethernet. I use them around the house for running network to my TV, Xbox, and media player. You can even connect a network switch on the receiving end to connect multiple devices.
It basically uses the power lines in your home/apartment as an Ethernet connection. Generally much faster than Wi-Fi, and the greatest advantage is signal stability. You get a solid and consistently low ping, which you can't always get from wireless. Also, all data that is sent between adapters is encrypted, and it takes about 30 seconds to set up.
The previous recommendation is a much older device that is really slow and overpriced.
Get this and you'll be set!
TP-LINK TL-PA4010KIT AV500 Nano Powerline Adapter Starter Kit, up to 500Mbps by TP-LINK:
http://www.amazon.com/dp/B00AWRUICG/
Edit: added second paragraph for more details.
I am not aware of a way to wire a switch in a headboard that is up to code. You would probably need to attach the bed to the wall/floor so it is considered part of the structure, and any exposed wire would need to be in conduit. Can you put the switch in the wall?
Let me give you a simpler option if you want the switch on the headboard.
I have used these LEDs on a few projects. They are cheap and you can buy additional strips to extend them, or you can cut them shorter. Just make sure your power adapter has the current for the length you attach. They come with a remote which can turn them on and off and set the color and brightness. However, they remember the state they were in. So you could set them to a cool blue or pink or whatever she likes and forget about the remote. Then, with the wireless switch I linked, she can easily just turn them on and off. (you could always turn them on and off with the remote, but it's nice to have a switch because it is always in one place.)
Thanks! They were pretty easy. Just a 12V wall wart and these:
http://www.amazon.com/gp/product/B00HSF64JG?psc=1&redirect=true&ref_=oh_aui_detailpage_o01_s00
I don't know much about butane soldering irons or what he plans on soldering.
But i do a lot of electronics soldering, and the most important thing for me when buying a soldering iron/station, was that it was adjustable, meaning i could better control the temperature and not fry the components i was soldering. I ended up buying this solder station and it has worked great for me
This is what I use on my projects and it works very well for table tops, bar tops, etc. This would not be appropriate for your garage floor, as it's a very different type of resin than the garage floor kits.
http://www.amazon.com/gp/product/B003PGQI48/ref=oh_details_o07_s00_i01?ie=UTF8&psc=1
here is my HLVP...the reviews are probably better than I can do. I like it.
whether or not its worth it???? YES.....spraying the corners and fronts was sooooo much easier than using a brush....in fact, I cant imagine using brushes for this
Pour some epoxy over the top. It looks great and will totally protect the surface.
http://www.amazon.com/Pour-On-Varnish-Provides-Gorgeous-Appearance/dp/B000PEGLBS
They sell etching cream at most craft stores like Michaels or online. You can use it with decals/stickers the same as you did here. You brush it on, then after set time, wipe off. The acid in the cream permanently "etches" the glass. Much safer for items that need to be food safe.
I was thinking the same thing, LED strip lights and a power supply can be had for cheap i.e.
http://www.amazon.com/gp/product/B00HSF64JG/ref=oh_aui_detailpage_o00_?ie=UTF8&psc=1
The linked LED strip even came with a barrel connector already connected and ready to plug in, as well as a secondary connector, just cut to get the desired amount of light, then peel and stick.
I just redid my mother's under cabinet kitchen(note: I used the waterproof version of those) lighting for like $30, previously she spent like $300 on expensive proprietary LED pucks(that she can't even buy any more) and electrician to hard wire it(I piggy backed my power supply off the touch power switch for the LED pucks and installed an inline rocker switch on the power cord that went to the power supply I used)
It looks really good and professional if you do it correctly.
I use armour etch, and it works great:
http://www.amazon.com/Armour-Etch-15-0200-Cream-10-Ounce/dp/B001BE3UM4/ref=pd_sim_ac_bsb_1?ie=UTF8&refRID=0BY6RFNW7CK3FJY4M772
Awesome product, thanks for letting me know it exists.
If you scroll along the "Customers who bought this product also bought" bar on that page you'll find These connectors and they lead on to loads of different options.
I absolutely LOVE the Reader's Diegest Complete Do-It-Yourself Manual. It's old, but there are a lot of good things in there
These look like "dumb" led strips (no onboard electronics). You either need to solder the ends or use one of the solderless connectors. These are for making nice corners: https://www.amazon.com/Connector-JACKYLED-Non-waterproof-Splitter-conductor/dp/B011BD2B5Q/ref=pd_sim_86_24?_encoding=UTF8&pd_rd_i=B011BD2B5Q&pd_rd_r=YBEV9BRYYGQ25YR29T5C&pd_rd_w=NsgMN&pd_rd_wg=gO6Fc&psc=1&refRID=YBEV9BRYYGQ25YR29T5C and these can be used to join strips https://www.amazon.com/Zitrades-10PCS-Connector-Conductor-Jumper/dp/B00977FHG4/ref=pd_sim_86_28?_encoding=UTF8&pd_rd_i=B00977FHG4&pd_rd_r=YBEV9BRYYGQ25YR29T5C&pd_rd_w=NsgMN&pd_rd_wg=gO6Fc&psc=1&refRID=YBEV9BRYYGQ25YR29T5C
The one's you linked should work. I'd highly suggest connecting each monitor's strip in parallel as well to reduce issues with how much current the strips draw and avoid having some of the LEDs dimmer (the ones at the far end of the strip)
http://www.amazon.com/Weller-WLC100-Soldering-Hobbyist-Yourselfer/dp/B000AS28UC
I have one of these it's a good iron. used it until my company was throwing out some old HAKKO's and got one for free! ^_^
Sounds like you want to use the kind of finish that is used on bar tops and bar tables. There are many different brands, such as this one:
http://www.homedepot.com/p/Rust-Oleum-Parks-1-qt-Gloss-Super-Glaze-Finish-and-Preservative-241352/202056337
Or this:
http://www.amazon.com/Pour-On-Varnish-Provides-Gorgeous-Appearance/dp/B000PEGLBS
So I had several closets that were very dark and hard to see in. None had outlets and I didn't feel like getting anything wired in. So I made these lights using AA batteries. You can find everything on Amazon. Perfect for apartments too! One closet comes in at around $30, less if you don't get nice rechargeable batteries like I did.
Switch
Lights
Case
I know you said you wanted to build, but this is only 40 bucks and is fantastic. I have a 24" and a 19" attached to this, it's then clamped to an Ikea build your own desk, can't recall model though.
http://www.amazon.com/Dual-Monitor-Stand-clamp-monitors/dp/B002R9HQLI/ref=sr_1_1?ie=UTF8&qid=1341326765&sr=8-1&keywords=dual+lcd+monitor+stand
I'm using this westinghouse lamp kit from amazon. I am very new to diy and would love some guidance.
I got the DeWalt DW745 from cragslist, new in box for $250 and I probably would've paid the $400 for it now that I've owned and used it for a while. Everything was nice and square right out of the box too, which saved some time!
I found it on amazon for about 50 dollars. So far I like it quite a bit, the height you have to set, but the arms move freely and the monitors tilt, rotate and swivel.
Now I need a cheap and easy mini forklift
Edit: For $25 this project just became badass.
https://www.amazon.com/Forklift-Lifting-Controlled-Engineering-Industry/dp/B002PNWCBA
We actually ended up using a couple brands because we really underestimated how much we would need. So we started with this stuff from home depot and then ended with this stuff from Amazon. They both worked great. I think the part that made it look really good was using a heat gun to get rid of all the air bubbles.
I have this mount. I have had no issues with it. I am not sure if it will work for your monitor but if you want new ones you can check here one of my friends has this and has nothing but goos things to say about it.
Yeah, especially to protect the (I'm assuming) non-oil-based, less-durable coats of paint underneath. http://www.amazon.com/Finish-Varnish-Provides-Gorgeous-Appearance/dp/B000PEGLBS/ref=sr_1_2?ie=UTF8&s=arts-crafts&qid=1301373510&sr=1-2
> but they plug in as oppose to being controlled by a switch. We still may install them.
If you want to use them, but don't want to wire (at least for now) you can get some fairly nice looking remote control switches for outlets. (Similar to this although there are many different styles: http://www.amazon.com/Westek-RFK100LC-RFK101LC-Mounted-Receiver/dp/B000HJBE68/ref=sr_1_17?ie=UTF8&qid=1395671730&sr=8-17&keywords=remote+control+outlet )
A magnetic switch, like the kind security systems use to see if a window is open.
https://www.amazon.com/dp/B0009SUF08/ref=sxts_kp_bs_lp_1
One side mounts on the door, the other side mounts on the door frame and has wires running to it. When a magnet gets close to the wired one it opens/closes a contact (depends on how you wire it). So wire it to be open when there's a magnet and the circuit will close (thus the light turns on) when the door is opened and the other part moves away. The circuit opens again when the door is closed and the other part gets close. Works for both sliding and regular doors.
(sorry - thought this got eaten in a spam filter and was sad)
This is 3M magic adhesive that I have used before and doesn't cause damage when removed a year after application.
My flatmate speculates the wall is made of plaster, if that helps.
I was planning on using either:
large 3m strips
which are rated by 3M at 5 lbs/strip, and put 9 strips/board, and maybe fill in the gaps with something that comes 9 strips/pack like these medium strips (3lbs/strip)
I did a penny top desk a few years ago and used some from Home Depot. It was in the paint section. It was like $30 a box, and I needed 3 for my desk.
If I did it again I would get the stuff from Amazon sold by the gallon. Something like this: https://www.amazon.com/dp/B01LYK2NAG/
There was nothing wrong with the stuff from the big box stores, but from a pure cost perspective I could have bought that for less, and had a ton left over for something else.
Epoxy Resin would be your best bet. I don't trust water based polyurethane on anything that may get wet.
I would put a layer of epoxy coating on top of the whole thing. Something like this should be available at a local big box store.
http://www.amazon.com/Pour-On-Varnish-Provides-Gorgeous-Appearance/dp/B000PEGLBS
Ah, you'd think the switch would be waterproof given it's designed location, but unless it specifies it I wouldn't put it in a wet location. You could bypass using the one supplied and put in a mag like this one https://www.amazon.com/Directed-Electronics-8601-Magnetic-Switch/dp/B0009SUF08/ref=sr_1_7?ie=UTF8&qid=1484926127&sr=8-7&keywords=pin+switch
I like the idea but not the cost. I applaud the execution and I am totally a fan of DIY, however I just ordered this
http://www.amazon.com/Dual-Monitor-Stand-clamp-monitors/dp/B002R9HQLI/ref=sr_1_1?ie=UTF8&qid=1293564463&sr=8-1
Readers Digest has always made a pretty decent all-in-one DIY book. I have a copy from when I first started doing projects.. helped alot. Now everything is on the internet.
Hmm..
You could get lucky, and the room in question could have a light switch that controls an outlet. Plug lights into the outlet, and you're done.
Or, since they come with an infrared remote, so you could control them that way. Just use the remote to control the lights.
Then, there are all kinds of solutions to control infrared devices, usually home theatre equipment.
Now that i think about it, this might have the advantage of preserving the settings, because some of these devices don't save the last light color/mode setting when power is cut, but don't lose it when you cut power with the remote.
Last, you could do a wireless light switch solution. They make light switches that have two parts, a battery powered switch that you attach to the wall (looks almost normal too), and a controlled outlet you plug into the wall outlet, then plug in the lights. example
then all it takes is some creative drilling to be able to run a cable through, and then a light kit, such as this: http://www.amazon.com/Westinghouse-Lighting-70269-Make-A-Lamp-Kit/dp/B00002NADS
This is not on point, but I would suggest that any new homeowner buy The Reader's Digest Complete Do-It Yourself Manual and The Reader's Digest New Complete Fix It Yourself Manual. I've owned these books through multiple editions. They've saved me many thousands of dollars, hundreds of hours, and incalculable frustration. When you have a problem like this, they'll identify the possible causes, suggest some fixes, and help you figure out whether it's time to call a plumber.
You might like this book; Build You Own Earth Oven
I think this is very similar to the insert used on the original build.
Are these really worth that much? You can get a brand new dewalt that has a rack and pinion fence and a guard for $300.
http://www.amazon.com/DEWALT-DW745-10-Inch-Job-Site-Capacity/dp/B000HXT2N6/ref=cm_cr_pr_product_top
That is a full brick oven. and a very nice one. Mine is clay. There are tons more to see @ http://ukwoodfiredovenforum.proboards.com/ or http://www.fornobravo.com/forum/
but I followed the technique in this book "Kiko Denzer - Build Your Own Earth Oven" http://www.amazon.co.uk/dp/096798467X/?tag=googhydr-21&hvadid=6229408160&hvpos=1t1&hvexid=523520&hvnetw=g&hvrand=643651100990024808&hvpone=&hvptwo=&hvqmt=b&hvdev=c&ref=pd_sl_rq5ew2bfc_b
If you're routinely opening the panel, I'd suggest getting threaded inserts like this that allow you to use machine screws rather than wood screws. If you take wood screws in and out enough times, you'll make the hole useless. The ones I listed are sized for inch threads, but you can find metric equivalents.
Also, as someone else mentioned, I'd seal the case with something to protect the wood.
This Weller is what you want. Don't mess around with a junky one. Get the real deal first time around.
After much nail biting trying to choose the right epoxy, I went with this ProMarine from Amazon:
For anybody that want's to do this but are scared to solder,or just want things easier. They sell connectors for these light strips that get rid of having to solder completely.
http://www.amazon.com/dp/B00977FHG4/ref=wl_it_dp_o_pC_nS_ttl?_encoding=UTF8&colid=3A3W1Z0CUSK9T&coliid=I26ROOAIL77ZA4
2 rolls for the battery operated one ($14 CAD each, local Toronto electronics store) and 6 rolls of this from Amazon: http://www.amazon.ca/gp/product/B00HSF64JG?psc=1&redirect=true&ref_=oh_aui_detailpage_o02_s00
Two rolls for the small window, 4 rolls for the large one. You have to wire each roll to the power supply in parallel or it gets dim at the end.
Light are here
I bought the power supply from a local Goodwill for $3 from their electronics section.
An earth oven seems more approachable than a brick one to me. Then again, I've been saying for nine years or so that I'm going to build one and still haven't made it happen...Kiko Denzer's earth oven book
If wifi isn't your thing, why not just use these: https://www.amazon.com/gp/aw/d/B00AWRUICG/ref=psdcmw_1194444_t2_B001AGM2VI
you can also try an Ethernet bridge.
http://www.amazon.com/TP-LINK-TL-PA4010KIT-Powerline-Adapter-Starter/dp/B00AWRUICG/ref=sr_1_1?ie=UTF8&qid=1465196583&sr=8-1&keywords=ethernet+bridge
Another idea. Need to have the lights far from the power source? Use this cable with these connectors. A slight bit of soldering (use heat shrink tubing around the solder joints) and you're in the game!
I'm doing this! RC Forklift
I was looking at this one. any thoughts?
https://www.amazon.com/Forklift-Lifting-Controlled-Engineering-Industry/dp/B002PNWCBA
I might buy one of these...
The etching cream I used was this (it comes in other sizes, and it can also be used on glassware/that is its primary purpose), and here is the link to the slate tiles (only $3 home shipping in the U.S. if it's not available at your local store!)
http://www.amazon.com/gp/product/B000HXT2N6/
These
aren'tare thedroidsdrills you're looking forhttp://www.amazon.com/gp/product/B002RLR0EY/ref=s9_hps_bw_g469_i1?pf_rd_m=ATVPDKIKX0DER&pf_rd_s=center-5&pf_rd_r=0Y8FEK8Y5MC72QRAC8WJ&pf_rd_t=101&pf_rd_p=1275635522&pf_rd_i=228292
3M Command Strips:
http://www.amazon.com/gp/aw/d/B000FCGS5Y/ref=mp_s_a_1_2?qid=1463467896&sr=8-2&pi=SY200_QL40&keywords=3m+command+strips&dpPl=1&dpID=41H17DQObaL&ref=plSrch
One large strip will hold up to 5 pounds
The Targets by me sell refill packs. They are usually at the bottom of the shelf. Either that or Amazon.com
Should use some Command mounting strips
I screwed these into the top:
E-Z Lok Threaded Insert, Brass, Knife Thread, 1/4"-20 Internal Threads, 0.500" Length (Pack of 25) https://www.amazon.com/dp/B00207NF6W?ref=yo_pop_ma_swf
Then I put 1/4 inch hex bolts through the holes in the legs into those inserts in the top. If the wood expands - which it would do widthwise, not lengthwise - the bolt has room to move within the hole in the leg so that it doesn't crack.
I actually did something similar for a Christmas gift. Except I used glassware and this stuff etching cream. Didn't come out too terribly, just took a little patience.
Hi guys,
I want to do some painting. Lots of painting.
In my house:
Outside:
I want to use a paint sprayer and hopefully use Behr Ultra Premium Plus (undiluted) where at all possible. My choices are the following sprayers:
Paint for ceiling(s):
Which should I get, given the scope of the work? I may choose to roll the ceilings (I hate rolling and I suck at it), but I want to spray everything else.
LEDs: http://www.amazon.com/gp/product/B00KCHRKD6/ref=oh_aui_detailpage_o03_s00?ie=UTF8&psc=1
the power supply is really bad for most reviews. I'd suggest getting a laptop charger with multiple connectors, unless someone else knows a better way.
links: http://www.amazon.com/gp/product/B00977FHG4/ref=oh_aui_detailpage_o03_s00?ie=UTF8&psc=1
Overall I spent about $126 because I used a lot of material that I already had (baseboard, paint, romex).
Materials Used:
Leftover 7/16" OSB sheathing cut to size
(2) Closetmaid Cubeicals
Existing baseboard
1" x 12" pine board
Shelf hardware
Paint
Painter's Putty
Caulk
Primed Quarter Round
LED light strip
12v Power Supply
(2) LED PCB connectors
Magnetic Door Switch
(2) Old Work Boxes
Romex Cable
Outlet
Outlet Cover
So would something like this work? https://www.amazon.com/Directed-Electronics-8601-Magnetic-Switch/dp/B0009SUF08/ref=sr_1_6?keywords=nc+door+switch&qid=1573847969&sr=8-6
I'm just confused because the circuit is complete when it isn't pressed in because the power contact is grounded, but when the switch is pressed in, the ground is lost and then open circuit, right?
Use this stuff.
You can cut it every 4 inches and use wires to reconnect them again.
So you drill 1/4" in. holes to feed wire through, and run it to wherever you hide the power box. I stuck mine in the cabinet above the microwave.
I made a little switch enclosure box that sits flush with the bottom lip of the cabinet.
I used one of their fader units so that I could dim the lights.
DeWalt makes a solid power drill that fits your budget. This is the one I have. Lots of power and durably built. DeWalt has many other tools that accept the same battery.
Here are a bunch more with various battery sizes. Not sure of the advantages of the various battery sizes, but I have no complaints with my 18v.
An electrician? You think you need an electrician to make a lamp? 6-year-olds in sweatshops in china put lamps together all the time! You can buy lamp kits in about any hardware store! (Stuff like this: https://www.amazon.com/Angelo-Brothers-Make-Lamp-Kit/dp/B00002NADS). Making a lamp is high-school shop levels of complicated and dangerous.
WTF its not like the OP is trying to make a deck.