(Part 3) Top products from r/DnDIY
We found 21 product mentions on r/DnDIY. We ranked the 92 resulting products by number of redditors who mentioned them. Here are the products ranked 41-60. You can also go back to the previous section.
41. Grafix Medium Weight Chipboard Sheets, 12-Inch by 12-Inch, Natural, 25-Pack
Sentiment score: 1
Number of reviews: 1
Medium Weight Chipboard SheetsMeasures 12 by 12 inchesPackage contains 25 sheets of natural colored chipboardAcid-free designImported item
 Show Reddit reviews
42. Plastic Canvas 12x18-Clear
Sentiment score: 1
Number of reviews: 1
1 Piece Per Package12 By 18 Millimeter In Size#7 Mesh CanvasCountry Of Origin : China
 Show Reddit reviews
43. Soft Touch 4728695N Heavy Duty 1 Inch Felt Furniture Pads to Protect Hardwood Floors from Scratches, Brown, 48 Piece
Sentiment score: 1
Number of reviews: 1
PROTECT YOUR HARD SURFACES - Everyday use and movement of furniture can be damaging your hard floor surfaces. These SoftTouch Felt Pads to protect your beautiful floors from scratchesREDUCE SCRATCHING AND NOISE - Use these round felt pads to reduce friction and noise while moving furniture and prote...
 Show Reddit reviews
44. Slipstick CB071 Self Stick Furniture Felt Pads (37 Piece Variety Pack) Heavy Duty Adhesive Surface Protectors
Sentiment score: 1
Number of reviews: 1
Protective, Heavy Duty felt protects floors from scratches, dents and dingsFor use with almost any floor or counter surface: finished wood, Vinyl, metal, laminate, etc.Ideal for moving into a new home or after remodelingPremium 37-piece pack includes: (16) 3/4 inch round protectors, (8) 1 inch round...
 Show Reddit reviews
45. Grafix, Clear, KSF50-C 8-1/2-Inch by 11-Inch Shrink Film, 50-Pack, 50 Count
Sentiment score: 0
Number of reviews: 1
When heated grafix shrink film will shrink to about 50-percent of its original sizeWhen cooled to room temperature it becomes thicker and hardDecorate grafix shrink film with permanent markers, rubber stamps or paint pensEasy to cut with scissors, die cut machines and punchesSheets are clear 8-1/2-i...
 Show Reddit reviews
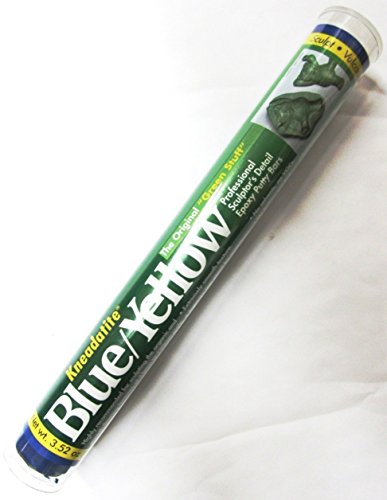
46. "Green Stuff" Blue/Yellow Epoxy Putty
Sentiment score: 1
Number of reviews: 1
Green Stuff Bars (Kneadatite Blue / Yellow Epoxy Putty) ArmsKeeperFunctional cure occurs in 4 to 5 hours when Blue/Yellow can be drilled, sawed, carved, sanded, stained, and painted.Ultimate hardness is reached in 20 to 24 hours.Cured color is green.Bars: Cut or twist off 1 part blue curing agent to...
 Show Reddit reviews
47. Faux Animal Skin Hide Rug 4'3 x 6'3 (Pink)
Sentiment score: 1
Number of reviews: 1
Expertly constructed of durable hypoallergenic synthetic fibersUltra plush and wonderfully soft; feels great under your feetFibers do not easily shed; non-skid backing; stain and moisture resistantPopular alternative to decorating with real animal skin or furDiscounted prices of decorative home acce...
 Show Reddit reviews
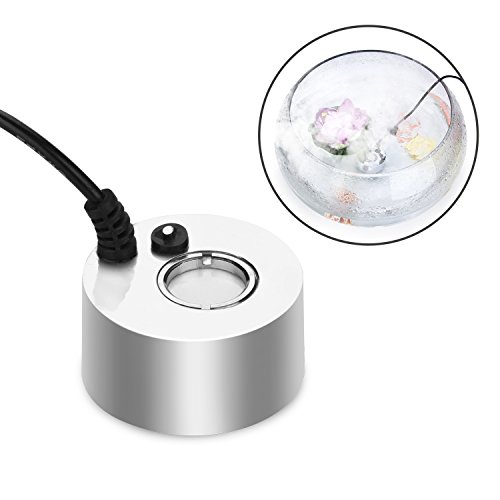
48. AGPTEK Aluminum Mist Maker Fog Maker for Water Fountain Pond Rockery Fishtank Vase Birdbath
Sentiment score: 1
Number of reviews: 1
♦ WIDELY USE - AGPtEK fogger machine indoor HS0056 can add a great amount of mist to your pond or water tank to filter the bad smell with ultrasonic technology. You can put the fountain atomizer in your pond, rockery, fish tank, vase, tank, etc. It will create a magical atmosphere. Especially perf...
 Show Reddit reviews
49. BCW Protective Pages Crystal Clear for Photographs or Postcards | 2-Pocket Page | Pocket Size 5 ½" x 7 ⅛" | (50 Page Total)
Sentiment score: 1
Number of reviews: 1
50 Pages Total. 2-Pocket per page. Pocket Size 5 ½" x 7 ⅛"Archival Safe. Acid-Free. Crystal Clear Polypropylene. Improved Weld Strength.Perfect for storing 5-Inches x 7-Inches photographs or postcards.BCW Pro 2-Pocket protective pages fit all standard 3-ring binders and albumsUse the 2 pocket pag...
 Show Reddit reviews
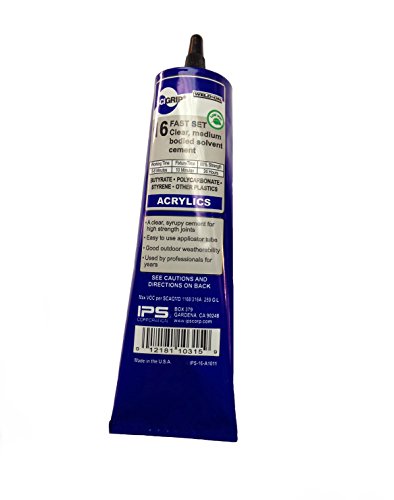
50. SCIGRIP 10315 16 Acrylic Plastic Cement, Low-VOC, Medium Bodied and Fast-Setting, Clear, 5 fl oz Tube
Sentiment score: 1
Number of reviews: 1
High-strength solvent cement for bonding acrylicFast setting with a working time of 5 - 6 minutesLow VOC contentBonds rigid PVC, ABS, styrene, butyrate, polycarbonate to themselves and each other, as well as other plastics and porous surfacesAvailable in a variety of sizes to suit your needs
 Show Reddit reviews
51. Shrinky Dinks Shrinkable Plastic - 8 x 10 inches - Set of 10 - Frosted
Sentiment score: 0
Number of reviews: 1
Sold as a Pack of 10 sheetsGenuine Shrinky Dinks- sheets shrink to one-third of original size and become nine times thicker when heatedMachine roughened on one side for easy drawing with a colored pencilBlank sheets allow for creative, imaginative expressionShrinking process preserves artwork and ma...
 Show Reddit reviews
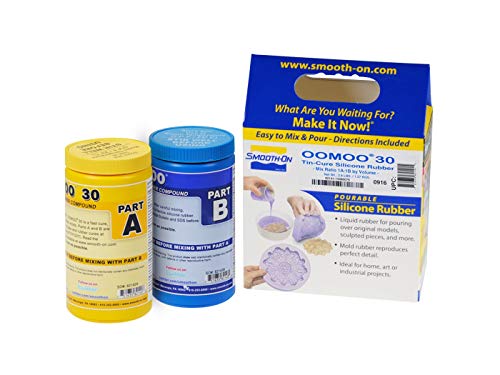
52. Smooth-On Silicone Mold Making, Liquid Rubber , Easy to Use - Trial Size 2.8 lb
Sentiment score: 1
Number of reviews: 1
MIX RATIO: 1A:1B BY VOLUME - Easy to use silicone rubber compound features a convenient one-to-one by volume mix ratio, no scale is necessary *Packaging may vary*SHORE A HARDNESS: 30 - This scale measures the hardness of flexible rubber molds. A 30A hardness is in the soft to medium soft range, betw...
 Show Reddit reviews
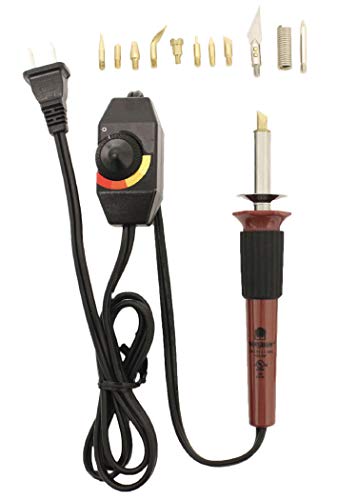
53. Walnut Hollow Creative Versa with Versa Variable Temperture Control & 11 Points (Tips)
Sentiment score: 1
Number of reviews: 1
Hot Woodburning Tool with variable temperature control gives you control of the heat for any projectThe Versa Tool has a comfort grip for long time use, a heat shield for protection and an easy to use standThe points (tips) can be changed using pliers for your safety. Do not bend when removingThe po...
 Show Reddit reviews
54. EK Tools Circle Punch, 2-Inch
Sentiment score: 1
Number of reviews: 1
Psn L 2 inch Circle
 Show Reddit reviews
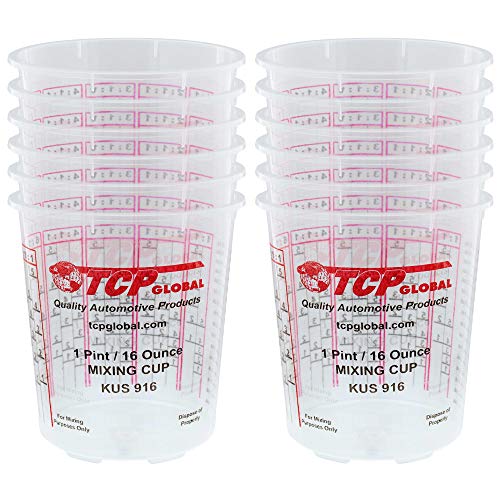
55. Custom Shop Pack of 12 Each - 16 Ounce Paint Mixing Cups = 1 Pint Cups Have calibrated Mixing ratios on Side of Cup Pack of 12 Paint and Epoxy Mixing Cups
Sentiment score: 0
Number of reviews: 1
Mix Cups are Solvent ResistantUse with all the popular brands such as PPG, DuPont, SW, Sikkens, Glasurit, House of Kolor and moreThe Graduated Measurements make mixing easy and accurateAll the popular Mix Ratios Graduated on the side of the CupBox of 12 Cups, 16 oz. (1 Pint)
 Show Reddit reviews
56. Chessex Dice Boot
Sentiment score: 1
Number of reviews: 1
This portable dice-rolling tower designed to assemble into a convenient freestanding boot shapeConvenient, portable, lightweight, and very useful for all kinds of gamersChessex Dice Boot
 Show Reddit reviews
57. Beadaholique 100-Piece Epoxy Stickers for Bottle Cap Pendants, 1-Inch, Clear
Sentiment score: 1
Number of reviews: 1
Color: ClearQuantity: 100 PiecesStyle/Shape: Epoxy Stickers
 Show Reddit reviews
58. Q-Workshop Metal Dwarven 7 Polyhedral RPG Ornamented Dice Set
Sentiment score: 1
Number of reviews: 1
PREMIUM SET with seven polyhedral dice (d4, d6, d8, d10, d12, d20, d100). Dice are made from supreme metal.MADE from the best material, casted with ornamented digits, are top-notch sets for any roleplaying and tabletop game.UNIVERSAL and usable in all roleplaying and tabletop games (like Pathfinder,...
 Show Reddit reviews
59. FlashForge 3D Printer Creator Pro, Metal Frame Structure, Acrylic Covers, Optimized Build Platform, Dual Extruder W/2 Spools, Works with ABS and PLA
Sentiment score: 1
Number of reviews: 1
Full manufacturer's warranty fulfilled by Flashforge, and free email support provided by expert FlashForge techniciansA sturdy metal frame that is substantially more stable than the Creator's original wood frame.Build volume 8.9 X 5.8 X 5.9 inchesAviation level aluminum plate with a thickness of 6.3...
 Show Reddit reviews
60. Star Wars Science Force Lightning Energy Ball - Uncle Milton
Sentiment score: 0
Number of reviews: 1
Harness the power of Force Lightning like a Jedi master! Touch the plasma ball and use your hand to control the energy!Real plasma energy streams directly to your fingertipsScience learning poster connects the Force Lightning of the Star Wars galaxy to plasma, the fourth state of matter in our own u...
 Show Reddit reviews
I had this posted in r/DnD for a bit and someone suggested I post it over here. Im not sure how crossposting works, so I just did a copy/paste. I know some DIY subreddits aren't fans of 3D printers and such so if this is against the subreddit please let me know and I'll take it down.
So we recently upgraded our Monoprice 3D printer to a swanky new Prusa i3 Mk3 and after setting it up and printing some things we had a moment of "What else can we do?" Now my FIL is a carpenter who, after seeing the Wyrmwood Arsenal Kickstarter, we challenged to also build one. It came out beautiful, but was very large and very heavy. We decided to also try our hand at it, but we are not carpenters. We are gamers and have a host of technology skills.....sooooo we bought a shit ton of wood filament and learned some CAD.
After a couple iterations of magnet location changes, size changes, and the like we managed to get the vault and box into a size that will fit (most) plastic and metal dice sizes while also being light and compact. We remixed the logo on the box from another thingiverse model. The wood filament stained up super nice and we are really excited about it. Bought some cork sheets and some premium felt from the craft store that will line the box so you can use it for rolls and acoustic foam that will go in the vault for the minis and dice.
It may seem simple but it took us quite a bit of time to get everything sized in mm just right, learn the software, and print off each iteration (the final wood print took just under 23 hours for just one side of the vault at optimal settings)
All the photos: https://imgur.com/gallery/5KpwCl3
The Thingiverse File for Everyone to love: https://www.thingiverse.com/thing:2892142
Update! (5/6): Image of everything put together with stain, foam, and padding.
Magnets:
Neodymuim Magnets: These are the ones we usesd but obv you can adjust for whatever you have or can find.
[Edit by Popular Request] The Dice:
Blue/Black Metal
Blue plastic
Dwarven Metal
Filament:
Colorfabb Woodfil Fine Filament
I don't have any "methods," since I've never tried to sculpt individual feathers (just a feature "texture" on wings). But I'd suggest using green stuff or a similar two-part epoxy putty, if you weren't already. It holds detail amazingly well and dries almost as hard as plastic, while being much less brittle than modeling clay. Something that protrudes off the edge of a model (like, I'm guessing, your feathers) could still get snapped off, but during normal play, or even if you drop the model from a reasonable height like a game table, it should be totally fine. I'm not a sculptor by any means, but that's the best material I know to recommend.
But as for a "way to sculpt or apply feathers" once you have the green stuff, I'm not sure, and it would depend on how big you want the feathers to be. I can attach some pictures of a project I'm working on to give you ideas, if you want, but I haven't yet added any free-standing feathers. They're molded directly onto the wings of the model, so I don't have to worry about them breaking off.
for large creatures!
The hole punches are pretty cheap on amazon ($11 for 1", and $12.50 for 2"), so even if you only deal with a few dozen large creatures over your DM life, it could still save you a decent chunk of time. But I'd totally understand if it's not a regular thing for you/your campaign(s).
For me, because I play on a whiteboard on the wall instead of on a mat on the tabletop, I instead use 2" per 5ft so that my players can more easily see everything.
I also print a lot of doubles for each token in different colours. This means that each mini has a unique colour (or different hair, weapons, etc). Which gives me flexibility to represent different setups for a fight, and it helps me keep track of each creature's hp without having numbers on every single mini.
To store and organise all of them, I bought some 3-ring binders, and clear photo sleeves. I also "borrowed" a sheet of sticky labels from work.
Originally I just used one envelope per monster type, and rubber-banded them together. But I found that got really annoying to deal with once I got to like 15 different monsters - an alphabetised folder is much faster and easier to flip through.
That’s a good idea too.
The original version of these was beer bottle caps with a 1” furniture-to-floor felt stickers stuck inside then hammered flat.
Things got out of hand though, and I’d find myself trawling all the exotic (and expensive) beers for cool bottle tops.
I really enjoy using this dice tower a lot. Pretty darn cheap and works well. Additionally, it folds down pretty small.
https://www.reddit.com/r/DnDIY/comments/6x7nig/oc_acrylic_flying_miniature_stands/?st=j70mgv4s&sh=0c9743e9
I went and made a post about it, but I'll leave the reply below...
I have, I can post pictures when I get home tonight. I made 2x2 and 4x4 stands, at 2 different heights. They're supported in the corners.
The platforms are acrlyic, and I scored in a grid on the bottom side (so if need be, I could use dry-erase on the unscored side, this has never come up though... lol). The corner post is also acrylic. I purchased everything from McMaster-Carr, but you can get the same materials on Ebay for a bit cheaper, I just had a few other things I was ordering from them at the time.
https://www.mcmaster.com/#plastics/=196icwz
https://www.amazon.com/SCIGRIP-10315-Acrylic-Cement-Low-VOC/dp/B003HNFLMY/ref=sr_1_4?ie=UTF8&qid=1504192570&sr=8-4&keywords=acrylic+glue
I sketched up a 3D model to illustrate how they're assembled. I used an acrlyic adhesive that actually melts/bonds the acrylic pieces together, so it's quite a strong connection. If I were to redo it... I'd maybe go with a 3x3 grid, with a center post, but I've had a handful of metal minis on the edges of the 4x4's and there's hardly any deflection.
Finally, here's a photo of a pirate ship where I used 2 of the 4x4's to elevate the deck, and then the 2x2's to create a lookout's nest. Everything was quite sturdy (the floors of the ship are cardstock).
And if you want to support Wyloch here’s a link, at no extra charge to you he gets a small kickback and funds go to support his channel.
Cheap easy way to support an artist.
(I crafted this from a Wyloch video)
https://www.amazon.com/dp/B0013JRFUA/?ref=exp_wylochscraftingvids_lv_dp_vv_mw
I simply download pictures of whatever mobs I want to make and minimize them to an appropriate size and print out a sheet of them. Here's an example of a group of kenkus that I made a while back.
Then I use self-stick furniture pads & a round paper punch to make custom tokens. I've found that with my particular punch it's better to use a thicker paper, like a cardstock or construction paper.
Then for storage I simply put them into a fishing tackle box. I've made several hundred that way.
Flash Forge Creator Pro. I had a lot of problems with it out of the box with clogging in the nozzles and things sticking to the build plate. After adding a metal hotend and magnetic build plate it has worked amazingly with no issues. I see the magnetic build plate is out of stock, so not sure where you can get those now, but being able to just flex the plate and have pieces pop right off is great.
here is the resin
here is the silicon
here is the dye
i'm a poor art student so i've gone kinda the cheaper route, other stuff you might need are popsicle sticks, styrofoam cups to make your molds, and glitter and whatsuch if you'd like to go that route. over all i put about $60ish into the stuff i've linked above. good luck dude!
(edit: formatting bc mobile :p)
Plastic embroidery canvas makes great for material for mesh windows.
Thanks! I got this one off Amazon.
https://www.amazon.com/dp/B005P1TRAS/ref=cm_sw_r_cp_apap_pIoTAxt7fU2iu
If you want stone, take a look at your local hardware store for tile options. A lot of these are thin, as you say you don't want, but talk to whomever is there about using slate on walls (and floors if you want).
For extra tavern flair, I recommend using animal skins as rugs (or fake animal skins if you prefer; you can even get crazy colors and make up in-game animals that they're from). Thin animal (or fake animal) skins can also work as chair-throws, table cloths, and bar-coverings.
Google around for "medieval wall sconce" for ideas or for DIY. Check out your local Ren Faire or blacksmith for other tips. They'll be a good source for you for a olde timey hinges and a sword rack, too.
They most certainly do.
However, you may find the off-brand stuff more economical.
I'm using a small transducer that I grabbed off amazon for about 10 bucks.
(Link: https://www.amazon.com/dp/B00PAK245E/ref=cm_sw_r_tw_dp_U_x_9kNBDb744V3MM )
It works by atomizing water, so the fog effect is just a very fine mist. It's fine enough that for short runs there's hardly any residue, but running it for a while leaves the tiles slightly damp.
Actually I'd recommend actual mixing cups.
Here:
https://www.amazon.com/Custom-Shop-Pack-each-calibrated/dp/B00A2F5W8S/ref=sr_1_fkmr1_1?keywords=silicone+metered+cups&qid=1557240559&s=gateway&sr=8-1-fkmr1
I used these when making dice myself to mix both the resin and silicon, and both pop right out with minimal effort. Your resign is an exothermic reaction, and will react the the styrofoam, risking both a spill and introducing imperfections. Plus, with the effort you will need to stir properly you will break styrofoam off.
For $9, it will 1000% save your project to buy proper mixing cups.
This is the plasma ball I used but I found it at a thrift store for $2.
https://www.amazon.com/Uncle-Milton-Science-Lightning-Energy/dp/B00K5OLQFE