 Reddit reviews "Green Stuff" Blue/Yellow Epoxy Putty
We found 35 Reddit comments about "Green Stuff" Blue/Yellow Epoxy Putty. Here are the top ones, ranked by their Reddit score.
Green Stuff Bars (Kneadatite Blue / Yellow Epoxy Putty) ArmsKeeperFunctional cure occurs in 4 to 5 hours when Blue/Yellow can be drilled, sawed, carved, sanded, stained, and painted.Ultimate hardness is reached in 20 to 24 hours.Cured color is green.Bars: Cut or twist off 1 part blue curing agent to 1.5 parts yellow base.
I'm a full-throated advocate of never buying anything that GW rebrands (clippers, greenstuff, brushes, primer, etc.)
For the cost of a small GW ribbon of greenstuff, you can buy more kneadatite (the manufacturer!) than you'll ever use. Unless, of course, you're a sculptor.
I love supporting my FLGS, but Amazon has a log of it for $13:
Green Stuff Sculpting Putty
Here's a Psylock I did recently. I used the Ms. Marvel body, which I think it's the same as Capt. Marvel. The open hand and head I got from a Mariah Hill from the TRU Shield 3-Pack.
I used Green Stuff for the hair, it hardens to a plastic like toughness but still retains a little flex, so I like using it for hair.
Sword I just got from Casting Cave I think, and painted purple. ClayorNotCustoms also sells a clear purple sword.
Sand down all the joints as best you can, anywhere where plastic rubs plastic. You can prime the figure, then work all the joints and see where problem areas are.
For energy effects I'd try hot glue before melting plastic. Wrap your figure's fist in aluminum foil, then cover it in hot glue in whatever shape you want (like a psychic knife), let it cool. Then take it, and the foil off and your hardened glue shape should pop back over the fist. Water down some purple paint real good and paint it and it should keep it's transparency.
If you have any more questions go ahead and ask.
Things I've learned starting out:
Wash the miniatures. I found the easiest way was those little ziploc plastic containers. Warm dishsoapy water in them, throw a few minis in, scrub them with an old toothbrush, rinse them off and toss them into a second ziploc container filled with plain water. Then drain and refill that a few times to get all the soap out. Be careful you don't dump them down a drain.
Take them out of the warm fresh water and put em onto a plate with a paper towel or something to dry. I like to organize them into which model belongs to what at this point.
I invested on a sprue cutter and it has been WONDERFUL for me to remove pesky mold lines and the bigger tags sticking out of models. Also an xacto knife helps.
I got some cheap needle files from Harbor Freight and they've helped get the flash lines flush without any weirdness.
After your stuffs all pretty and moldline free I tend to toss it into a sonic cleaner because I work at a lab. It might be placebo but the industrial strength badass one at work seems to get clean and I mean... why not? But you can do the water and rinse again. Or even just do it once, after the mold line removal. (Side note: sonic cleaners are PRETTY RADICAL for removing paint from miniatures with some simple green. I love it. Saves me a lot of scrubbing.)
Anyway once its dry I personally use this glue and some stuff called green stuff to fill in gaps. Heres a tut showing the basic idea
Once they're assembled I use some good ol elmer's white glue on the bases and dip em in sand and shake them off. Tutorial that shows that
Then prime your stuff. Tons of tutorials about it and tons of everyone saying which is their favorite primer, spray or brush on, different types of primer, different brands. Some stand by Army Painter or Citadel. I've had good results with Rustoleum Ultra Cover 2x White primer. I've recently picked up some TAMIYA WHITE which I hear good things about. Trying them on some Morats tomorrow.
Lots of other good info has been posted too! I also just started probably, shit, 6 months ago, so this is stuff I've had to pick up and learn as I go.
As far as I know, Reaper Miniatures.
Also, he uses "Green Stuff" Epoxy Putty to sculpt additions to miniatures.
Probably Green Stuff.
https://www.amazon.com/Green-Stuff-Yellow-Epoxy-Putty/dp/B002MB61RQ
It's literally called Green Stuff!
Try green stuff:
http://www.amazon.com/Green-Stuff-Yellow-Epoxy-Putty/dp/B002MB61RQ
Just shorten the link next time - just use [ ] ( )
First of all anything I say here are not absolutes and do have substitutes. Each painter has their own way of doing things. This is just my take.
Prepare Your Mini for Painting
Before you do any paint first you need to sand/trim, assemble, fill gaps, and prime your miniature. When you sand/trim your mini you are removing mold lines and areas that don't mesh well with the minis surface, your trying to get everything even. You can use an exacto-knife and files for this. Once you have all the pieces so that they fit together well next you need to assemble your mini. Take the time to dry fit everything before gluing to make sure it all fits together. The type of glue you use depends on what the mini is made of and preference. For plastic, I tend to use super glue 90% of the time since plasti-weld (a chemical that melts the plastic together) doesnt seem to make the joint any stronger, though I could be using the wrong type. You can also pin the mini joints together for added strength. After your mini is assemble now we need to fill those gaps that can ruin a great paint job, I see it all the time and it makes me sad. There are many different types of putty that you can use but I go for green stuff. I mix 1:1, yellow to blue, and using a damp toothpick I wet my hands and smoosh it into gaps until it seems filled. This can be hard to tell sometimes since you cant get a sense of depth. If you want to make sure I will usually brush on some Gesso and check to see if it even. Finally we can prime our miniature. This is required or acrylic paint wont stick to the plastic. Application can be done via airbrush, rattle can, or brush. Since I haven't done much with a brush, but FYI you can use the Gesso above also for priming, and I cant assume everybody has an airbrush I will talk about the cheaper option, rattle can or spray paint. There are many available like those made for miniatures (though I don't think they have a real difference), and brands like Rustoleum and Krylon. Make sure you get a can that is for just priming and not the "prime and paint" type and is for indoor/outdoor use, sometimes the outdoor only stuff can be a bit thick. The brand doesn't matter as much as when and how you apply it. Humidity and temperature are Very important when priming a miniature, if it is to hot and dry the paint will crack and to humid you can get dripping and that terrible fuzzy look. Make sure you read and FOLLOW the directions on the can. When applying the paint do wide sweeps across the miniature with a constant spray. Keep the sprays short and the motion consistent.
Painting
Now you are at the fun part. Again, there are different mediums to paint in, oil, acrylic, pigment. Acrylic is a good place to start. The brand of paint you use is really up to you. You can go to a hobby or art store to get these paints. Don't get the paints that are to cheap the results are not good. Blick is a good store to visit because mini painting is an art that uses artistic mediums. That is what Blick is all about and you will get a wide range of brands there, you don't have to use the mini makers brands. Brushes are very important and if you get the cheapest kind you'll find that they tend to fray and leave little bits of bristles on your mini. For starters stick with the mid range synthetic ones and take care of them, theyll last awhile if you do. Make sure you wash them in your water pot (just a jar of water) often so that the paint doesn't dry on them and clean them every so often. So when you sit done with your brush and begin make sure you thin your paints or they will end up thick and goopy. You can thin with distilled water or you can use an acrylic medium. There are many special mediums but the most useful ones are matte and glaze medium and are used for different painting techniques. Always give your paint time to dry before applying more or youll mess up the prior coat and things will look rough.
Sealing
After you are done painting and have let your mini dry for a few days its now time to seal and protect it by giving it a few coats of finish. This will keep scratches away from your wonderful paint job. Application and selecting is similar to picking a primer but there are 2 options, gloss and matte. Think about what type of finish you want. Most go for matte and some use a mix but few do only a gloss finish.
Stripping
So you messed up. What now? Well you can strip the paint off and try again but you got to be careful here because this process can make the mini brittle. A common used item is Simple Green. Though it does a good job on the acrylic paint it will not remove the primer very easily. To do that I have found Super Clean to work best. But do note, only soak a mini 10 minutes at a time sink Super Clean works by sucking the moisture out of the paint, and the mini. So do a 10 minutes soak, then take a toothbrush and try to brush off the paint, then return to the solution and repeat.
This is what I use for my customs.
Example
It's really sturdy & you can even get long/thin/sharp details without worrying about them breaking off.
Look up some tutorials & be sure to play around with it.
Haven't used it but a lot of people say "Green Stuff" is good too.
Just whatever you do, stay away from any air/bake dry clays I've yet to see any custom using those turn out decent.
Thanks! It's my first completed scratchbuild.
The white parts are made from Apoxie Sculpt, which is an epoxy that's very similar to Miliput. I love the stuff. It's cheap (for sculpting grade epoxy putty) and has a lot of properties that make it great to work with on its own and mixed with Green Stuff (buy Kneadatite putty, which is the same product, but without the GW logo, and thus, much less expensive). Almost all of my sculpting is done with a roughly 50/50 mix of GS and AS.
Oil/grease the male connector(s). Buy some green stuff: two part epoxy, yellow and blue, mix em to make green, mold them around the male connector. Remove gently and let dry. Will become as strong as PVC.
For very large pieces it can get pricey, but it is amazing for detail. http://www.amazon.com/Green-Stuff-Yellow-Epoxy-Putty/dp/B002MB61RQ/ref=sr_1_1?ie=UTF8&qid=1425485701&sr=8-1&keywords=green+stuff
With a 4x4 base you're probably looking for something that's 12"+ tall. I think you'll have more luck modeling that yourself than purchasing anything available. I think you'll have better luck buying this and this and testing your artistic ability.
Edit: These might make a nice touch: Melissa & Doug Rainbow Crystals Bead Set
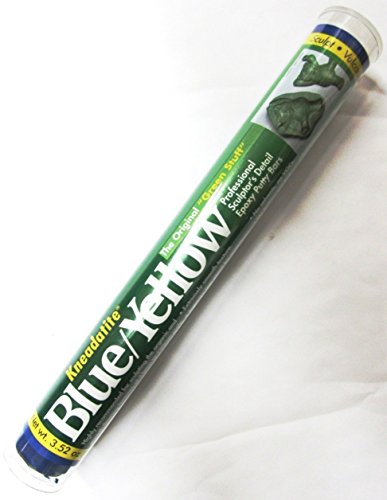
Yep that stuff exactly but that's the packaging you'd want to stay away from. The middle where it touches has to be cut away. Look for tubes like this:
https://www.amazon.com/Green-Stuff-Yellow-Epoxy-Putty/dp/B002MB61RQ/ref=pd_sim_21_4?_encoding=UTF8&psc=1&refRID=3VXACGJZ4E2YY0XY4JVB
Or two separate tubes.
Green Stuff
Exactly this. They sell in a different package where the two epoxies are connected and it doesn't last as long. With these, keep each color in it's own Ziploc bag and it will last forever.
I'm using normal framing wire. It cost $3 for a million feet of it.
Sorry, I could have given you a link.
Here are a couple of examples of green stuff:
https://www.games-workshop.com/en-FI/Green-Stuff
https://www.amazon.com/Green-Stuff-Yellow-Epoxy-Putty/dp/B002MB61RQ
​
At least with the first type, you mix two different clays together and they harden over time. That means you can form them just as you'd like in the meantime, while it's soft. Hope that answers your question :)
Welcome! Glad to hear you are interested in Malifaux and welcome to the hobby! As another user mentioned check out the "Pullmyfiger" wiki on tactics and how to play. Also take a look at r/minipainting on tips and tricks for painting and inspiration! So since you are brand spanking new and have a lot of questions I'll try to cover all I can. As for my background Malifaux is the only mini game I have ever played and when I first started I was new to the hobby as well.
Lets start with minis and gameplay. Glance over pullmyfinger to check out tactics and looks of models. See who you enjoy. When I first started I picked Resurrectionists because I really enjoyed the thought of having undead minions doing my bidding. Think about what type of tactics you want to play with. Do you want to shoot people from behind cover? Do you want to summon monsters? Do you want to be in an enemies face with melee? Do you enjoy trickery and movement based shenanigans? Each faction is balanced faction to faction and each one harbors a wide variety of gameplay. Some have their specialties, but each faction can do just about anything. For example say you like to summon. Ressurs are king of summons yet other masters can summon as well, like Ramos in the Arcanists (electrical creations and spiders), Leviticus in the Outcasts (undead techno horrors), and Somer Teeth Jones in the Gremlins. There are others but you get the idea. Pick a faction you think is cool or looks cool. Depending on what faction you go with depends on which master is good for beginners. Some of the beginner friendly masters for each faction are
{Faction}:{Masters};{Role in order of masters}
Guild: Lady Justice, Perdita, Sonnia; Melee, Ranged, Magic
Ressurs :Seamus, McMourning, Nicodem; Movement/range, Melee/poison, Summoning (expensive start up cost though)
Arcanists: Rasputina, Kaeris, Ramos; Ice Magic, Fire magic, Electric/summons
Neverborn (slightly more advanced): Lillith, Jacob Lynch; Melee, Card Manipulation
Outcasts: Victoria's, Von Schill; Melee, Ranged
Ten Thunders: Misaki, Jacob Lynch; Hit and run tactics, Card Manip.
Gremlins: not enough knowledge to comment :/ Sorry
To let you know I used to have two masters in each crew other than gremlins, until I sold off many of them to focus on three factions instead of all of them.
These masters listed themselves are pretty straightforward but may have advanced interactions with their crew that you will learn in time and with reading and lots of play and practice. This also just lists what the master does. Like Lady Justice herself is melee but the rest of the crew is versatile with melee or ranged attacks and interactions. The box sets always compliment the master well especially for the beginner crews. In all honesty though pick a faction and master you think is cool. The rest will come with time.
Next lets talk about construction and supplies
Each set of Minis comes in a padded cardboard box on a sprue like this.
This is a link to the instructions Wyrd has wonderfully provided. You can look up individual box sets instruction sheets to decide for yourself how complicated a project may be. Its hard to put a difficulty on construction of the minis because they all use small parts.
Each box set comes with the models on a sprue, simple round bases and character/upgrade cards for each model in the box.
The basic tools you will need are
Hobby Knife/Exacto Knife
Needle nose pliers
Miniature Plastic glue/welder
Gorilla Glue
Green Stuff
Table or work surface
These supplies are for construction only. The cement plastic glue stuff is very sensitive. Literally a drop is all you need to permanently fuse two parts together. It actually melts the plastic ever so slightly into each other. Do not get excess on fingers and use carefully. Do not smash the parts together. This is why I like the kind with a fine point applicator like the one I linked. Always do a dry test fit first when constructing even with instructions it can be difficult to see how they parts go together. The Gorilla glue and green stuff is what I use for basing. Needle nose pliers and knife to cut things out and help hold them. Basing can be as simple or as complicated as needed. Sometime I use a very thin layer of green stuff and paint to simulate earth. Sometime I go get tiny tiny pebble off the side of the road to make rock formations. I once bought clock parts off ebay and got scrap from a plumber friend and I glued them into some green stuff to make a techno junkyard. Get creative.
Next once your model is constructed and based now it is time to paint! You will need
Brushes of varying size and type
Primer either spray primer or paint on primer
Paint and washes
Water containers
Pallet, Wet or dry. I prefer a wet pallet
Light
Start off by priming your minis by either spraying with a spray primer or a paint on primer. I like spray primer because it is fast BUT it is more finicky. It can ruin a mini if you are not careful. Don't spray too close, don't spray in high humidity. Use nice even coats. Two to three thin coats is much better than one very thick coat. Wait for each coat to dry before doing the next. It doesn't take long if you use thin even coats. Then go ahead and paint!
I am always trying to do miniatures and save money. I cannot break the bank right now BUT one thing I do not skimp on is quality brushes. As long as you keep them clean a great brush will last you ages. Invest in some decent ones and they will treat you well. Miniature paint is not always required and can get very expensive. I actually got most of my acrylic paint from Wal-Mart. The paint from there though is very thick! You want to water it down to be like skim milk. Again many thin layers are better than 1 thick one. If the paint slicks right off the model it is too thin. The other kind of specific paint to pick up is called a wash. It can be put on in large amounts and will dry dark in crevices but not on raised parts of the model. It gets great shadows and detail. Anyways I know it is a lot of information for just starting out but shoot me a reply or a Pm and I would be glad to answer more questions or concerns!
https://www.amazon.com/Green-Stuff-Yellow-Epoxy-Putty/dp/B002MB61RQ
Ah yes, I buy the sticks. On my fifth one now since joining the hobby several years ago.
I looking for a light weight headset that is the price range from 20-60 dollars. I also wear glasses so it has to be able to work with that.
​
Right now my current painting equipement:
​
Is there anything else I should buy?
a very thick and very tacky idea is green stuff
http://www.amazon.com/Green-Stuff-Yellow-Epoxy-Putty/dp/B002MB61RQ
mix the blue and yellow and make green clay that sticks to plastic
I don't have any "methods," since I've never tried to sculpt individual feathers (just a feature "texture" on wings). But I'd suggest using green stuff or a similar two-part epoxy putty, if you weren't already. It holds detail amazingly well and dries almost as hard as plastic, while being much less brittle than modeling clay. Something that protrudes off the edge of a model (like, I'm guessing, your feathers) could still get snapped off, but during normal play, or even if you drop the model from a reasonable height like a game table, it should be totally fine. I'm not a sculptor by any means, but that's the best material I know to recommend.
But as for a "way to sculpt or apply feathers" once you have the green stuff, I'm not sure, and it would depend on how big you want the feathers to be. I can attach some pictures of a project I'm working on to give you ideas, if you want, but I haven't yet added any free-standing feathers. They're molded directly onto the wings of the model, so I don't have to worry about them breaking off.
use a scalpel and side-cutting pliers to carefully cut the base out of the mini leaving just a small piece around the feet.
Get some blank bases and use green stuff to create your 3d cobblestone texture. The exceeding plastic under the feet will help to keep the mini steady and will be completely covered by the green stuff.
Personally, and this is just conjecture because I haven't started painting my miibos yet, but I'd just do what I do for miniatures. Get some acrylics, thin them to the consistency of skim milk, put on a ton of coats. With regard to sculpting hit up a hobby shop and ask for "Green Stuff."
http://www.amazon.com/Green-Stuff-Yellow-Epoxy-Putty/dp/B002MB61RQ
http://www.bananaking.net/cento/workshop/conv_green.htm
Don't use polymer clay. It melts plastics and I wouldn't want to test it on these. I believe they're vinyls but I don't know how it interacts.
If you're shy on painting head on over to /r/minipainting and soak up some knowledge. The features on the amiibos are larger but the techniques should carry over.
http://www.amazon.com/Green-Stuff-Yellow-Epoxy-Putty/dp/B002MB61RQ
Its a 2 part moldable "plastic"
You mix equal parts, mold it into shape, and when it dries it can be painted and to a lesser extent, sanded.
I have been using 1" plastic squares that I got on Amazon. I'd seen a few Kickstarters for stampers to put a pattern onto bases. I figured I could make my own.
I used the Clay to make my positive. I made one of a cobblestone and another of bricks. They are much larger than the size of the base so that I can use any portion to create the impression.
I then used this low melting point plastic. Soften it up and then press it into the clay pattern. Now I have a negative that I can use over and over.
I then got some Green Stuff. Put it on my 1" square base and then gently press into my negative image. Now I have a positive and I can let that setup and glue/pin my mini to the base.
https://www.amazon.com/Green-Stuff-Yellow-Epoxy-Putty/dp/B002MB61RQ this or something similar. I usually buy at local shops because some of them have it cheaper than online does though.
green stuff https://www.amazon.com/Green-Stuff-Yellow-Epoxy-Putty/dp/B002MB61RQ
I buy Kneadatite green stuff recommended from r/minipainting.
It's $13 for a tube that's at least 3x larger than GW green stuff. Added benefit is that the Blue and Yellow are in separate packages, so it never goes bad.
Amazon Link
This link leads to a gap filler made specifically for this issue! You mix the yellow and blue to make the green ckay-like substance that fills in any gap!
https://www.amazon.com/Green-Stuff-Yellow-Epoxy-Putty/dp/B002MB61RQ/ref=mp_s_a_1_1_sspa?adgrpid=58824589151&hvadid=274732491114&hvdev=m&hvlocphy=9015551&hvnetw=g&hvpos=1t1&hvqmt=e&hvrand=10939296767922561980&hvtargid=kwd-299414241990&hydadcr=28696_10176914&keywords=green+stuff&qid=1567476058&s=gateway&sr=8-1-spons&psc=1&smid=A3D3WXKRRQPHZM&spLa=ZW5jcnlwdGVkUXVhbGlmaWVyPUFSTU0wMURGVVA4RkomZW5jcnlwdGVkSWQ9QTAxNTg5NjkyMFRVM0dIVjlRVEZRJmVuY3J5cHRlZEFkSWQ9QTAyNzk2NzEyMzRQUEhBN0UyUkNKJndpZGdldE5hbWU9c3BfcGhvbmVfc2VhcmNoX2F0ZiZhY3Rpb249Y2xpY2tSZWRpcmVjdCZkb05vdExvZ0NsaWNrPXRydWU=
I'd make them out of two-part epoxy putty. Greenstuff, is the most popular variety for this kind of work. There are tons of articles and videos on how to use the stuff too.
You can order it off of amazon or ebay, like at this link here:
http://www.amazon.com/Green-Stuff-Yellow-Epoxy-Putty/dp/B002MB61RQ/ref=sr_1_1?ie=UTF8&qid=1465180253&sr=8-1&keywords=green+stuff
It's also often called "Two part epoxy putty"
green stuff
You can get much cheaper stuff from other companies. That is at a jacked up price on that website.
http://www.amazon.com/Green-Stuff-Yellow-Epoxy-Putty/dp/B002MB61RQ
I don't know if I'm going to paint Amiibo like figures. I've painted stuff like that before. It has a different surface than normal wargaming figures, so you need to basecoat well(especially if you only want certain parts of the figure done, and not just spray the whole thing).
Once you get a good base you can probably be ok, but you'd need a good varnish or seal coat too.