(Part 2) Top products from r/InfinityTheGame
We found 20 product mentions on r/InfinityTheGame. We ranked the 36 resulting products by number of redditors who mentioned them. Here are the products ranked 21-40. You can also go back to the previous section.
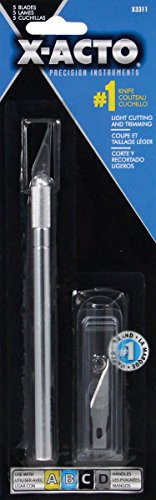
21. Xacto X3311 N0. 1 Precision Knife With 5 No. 11 Blades, #1 Knife
Sentiment score: 2
Number of reviews: 1
Great for delicate, precision cutting, trimming, and strippingCuts paper, plastic, balsa, thin metal, cloth, film and acetateComes with a lightweight handleIncludes No 11 Classic Fine Point BladeThis is an aftermarket of generic partGreat for delicate, precision cutting, trimming, and strippingCuts ...
 Show Reddit reviews
22. Bob Smith Industries Maxi-Cure Extra Thick, 2 oz.
Sentiment score: 0
Number of reviews: 1
Maxi-cure extra thick 2oz ca adhesive glueMaxi-cure extra thick ca is the best ca for most plasticsWorks best on: Soft wood, hard wood, glass & metal, fiberglass, ceramics, hard plastics, rubber
 Show Reddit reviews
23. Tamiya America, Inc Masking Tape, 6mm, TAM87030
Sentiment score: 1
Number of reviews: 1
Made from high quality materials and designed for long lasting performance.Use Tamiya stock and hop-up replacement parts, accessories, and more to get the most out of your modelsThis is for use on RC and model products, consult your user's manual for exact parts listings.
 Show Reddit reviews
24. Tamiya America, Inc Primer White 180ml, TAM87044
Sentiment score: 1
Number of reviews: 1
Tamiya Surface Primer White 180ml … 87044
 Show Reddit reviews
25. Excel Sprue Cutter, Blue
Sentiment score: 1
Number of reviews: 1
Spring loaded soft grip plierAvailable in BlueMade of carbon steelProduct Dimension: 4.75"L x 2.5"W x 0.43"H
 Show Reddit reviews
26. General Pencil Company The Masters Brush Cleaner & Preserver 2.5 0z.
Sentiment score: 2
Number of reviews: 1
Formulated for use with oilsacrylics and watercolorsWill even remove dried on paints and paint stains
 Show Reddit reviews
27. 3M Double Coated Urethane Foam Tape 4008 Off-White, 1 Inch x 4 Yards 1/8-inch
Sentiment score: 1
Number of reviews: 1
1/8 inThick Open Cell Urethane Foam Flexible Carrier with High Shear, High Temperature Resistant Acrylic AdhesiveUse to Fill Gaps and Bond Irregular SurfacesDistributes Stress Uniformly Over Bonded AreaApply by Hand or with DispenserThick Open Cell Urethane Foam Flexible Carrier with High Shear, Hig...
 Show Reddit reviews
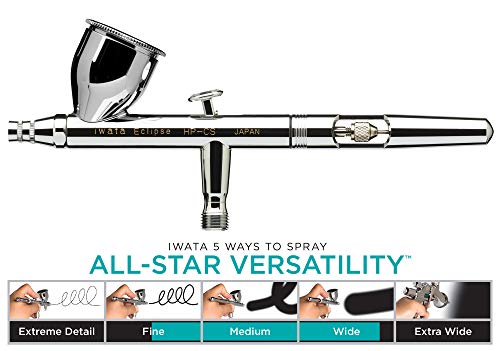
28. Iwata-Medea Eclipse HP CS Dual Action Airbrush Gun / Gravity Feed
Sentiment score: 1
Number of reviews: 1
Features a 0.35mm needle and drop-in self-centering nozzle combination comes with a large 1/3 oz gravity-feed cupGenerous 1/3 oz sized cup is designed with a new funnel shape, which makes for easy clean up and more efficient paint flowThe Eclipse CS sprays heavier acrylics and Medea Textile Colors, ...
 Show Reddit reviews
29. Vallejo Painting Miniatures from A to Z Vol 2 Paint
Sentiment score: 1
Number of reviews: 1
Explains new techniquesTips through hundreds of pictures of the painting processTutorial guides about how to paint all the different Infinity armies
 Show Reddit reviews
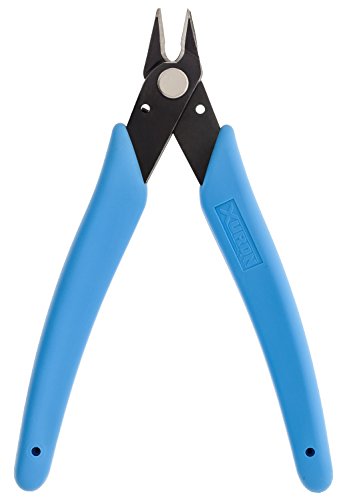
30. Xuron - Xuron - 170-II Micro-Shear Flush Cutter - 170-II
Sentiment score: 2
Number of reviews: 1
Type: Micro-ShearStyle: FlushCapacity: 18 AWGOverall Length (Inch): 5-7/64Blister Pack With Generic Card
 Show Reddit reviews
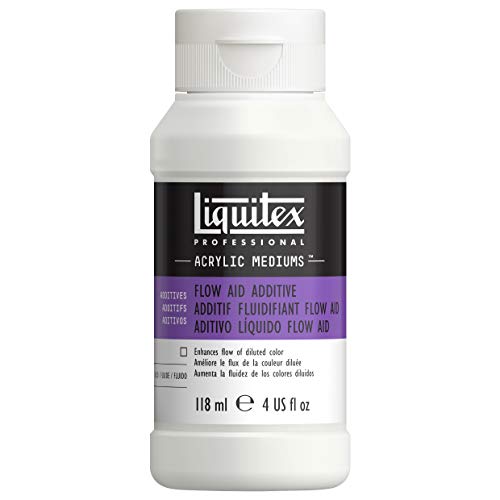
31. Liquitex Professional Flow Aid Effects Medium, 4-oz
Sentiment score: 2
Number of reviews: 1
A binder-free aqueous solution with surfactants.Use in conjunction with any acrylic medium or acrylic color when increased flow and absorption and decreased film tension and friction are required.Great for staining effects on raw canvas.
 Show Reddit reviews
32. Fiskars 174360-1001 Medium Circle Squeeze Punch, 1 Inch, White
Sentiment score: 0
Number of reviews: 1
Use cleanly punched-out designs as embellishments on homemade cards, scrapbook pages, collages and much moreUnique design makes it up to 2X easier to punch shapes than other shape punches on the marketSize: 1 inchFor best results, use on 65-lb. cardstock and lowerLifetime warranty
 Show Reddit reviews
33. Universal Work Holder PEG CLAMP VISE+ 8 pins
Sentiment score: 0
Number of reviews: 1
This is a new universal holderUsed for repairing and engraving jewelryThe eight removable pins accommodate large and small items during engraving or repairJaws open to 3/4" (19 mm) and close to securely hold items in placePins measure approximately 1/8" (3 mm) diameter x 1/2" (13 mm) tall
 Show Reddit reviews
34. M-D Building Products 56032 1-Feet by 1-Feet Galvanized Steel Sheet
Sentiment score: 1
Number of reviews: 1
28-gauge steelSolid galvanized steel sheetCan be cut with tin snipsUse sheet metal screws or rivets to attach to other materialsUse indoors or outdoors
 Show Reddit reviews
35. Mod Podge CS11302 Waterbase Sealer, Glue and Finish, 16 oz, Matte
Sentiment score: 0
Number of reviews: 1
Multipurpose, all-in-one sealant, glue, and finish. Matte finishQuick-drying for multiple coat build up. Dries clearApply with brush or sponge applicatorDries in approximately 15-20 minutes and can be sanded to a smooth finishWater-based, non-toxic, made in the USAQuick-drying for multiple coat buil...
 Show Reddit reviews
Things I've learned starting out:
Wash the miniatures. I found the easiest way was those little ziploc plastic containers. Warm dishsoapy water in them, throw a few minis in, scrub them with an old toothbrush, rinse them off and toss them into a second ziploc container filled with plain water. Then drain and refill that a few times to get all the soap out. Be careful you don't dump them down a drain.
Take them out of the warm fresh water and put em onto a plate with a paper towel or something to dry. I like to organize them into which model belongs to what at this point.
I invested on a sprue cutter and it has been WONDERFUL for me to remove pesky mold lines and the bigger tags sticking out of models. Also an xacto knife helps.
I got some cheap needle files from Harbor Freight and they've helped get the flash lines flush without any weirdness.
After your stuffs all pretty and moldline free I tend to toss it into a sonic cleaner because I work at a lab. It might be placebo but the industrial strength badass one at work seems to get clean and I mean... why not? But you can do the water and rinse again. Or even just do it once, after the mold line removal. (Side note: sonic cleaners are PRETTY RADICAL for removing paint from miniatures with some simple green. I love it. Saves me a lot of scrubbing.)
Anyway once its dry I personally use this glue and some stuff called green stuff to fill in gaps. Heres a tut showing the basic idea
Once they're assembled I use some good ol elmer's white glue on the bases and dip em in sand and shake them off. Tutorial that shows that
Then prime your stuff. Tons of tutorials about it and tons of everyone saying which is their favorite primer, spray or brush on, different types of primer, different brands. Some stand by Army Painter or Citadel. I've had good results with Rustoleum Ultra Cover 2x White primer. I've recently picked up some TAMIYA WHITE which I hear good things about. Trying them on some Morats tomorrow.
Lots of other good info has been posted too! I also just started probably, shit, 6 months ago, so this is stuff I've had to pick up and learn as I go.
The guy who painted those models released a book all about his process. It reads like this guide (same guy) and it mentions the paints used.
The book is good but definitely pricey if you're just looking for a paint list. You might be best off finding a user on here or the main forum who doesn't mind transcribing the lists for you, or you might have luck asking the guy directly.
It would probably help if you had a faction/group of minis in mind that you're looking for the colors of.
Oooooor don't worry too much about about matching the marketing images. I've played against several armies that were way off the faction color scheme, their owners just had fun and did what they wanted.
Tools needed to assemble minis to a very basic finish:
Dikes (side cutters, wire cutters, snips, whatever )
Cyanoacrylate glue. Super glue, Krazy glue, Hobby glue.
Hobby sand paper. Super light to medium grit stuff. Scuffing up the surface of a part can help it stick pretty decently. YOu don't necessarily need to score it with a hobby knife.
Jeweler files
These few items can get your minis looking pretty decent pre-paint. Corvus Belli delivers excellent minis, so flash and off-center molds aren't really a problem. Cleanup the sprue parts with a file and sand paper and glue it all together!
Use mild soapy warm water before gluing because the oils on your hand and such can be problematic for the glue.
Cyanoacrylate is a water-catalyzed glue. Breath on it, or dip the part in watter to flash-cure the outside portion of the glue. Breathing on it is slower. Water almost isntantly makes the glue cure when exposed.
A simple art store and a hardware store can get you serviceable tools, I think. :)
I made a list of the tools that I like to keep at my work station.
My recommended buying list for a new painter is:
Tools
Sprays
○ Grey is standard, white if you're painting a majority of light colors, and black if the majority is dark.
Brushes
○ Round 0
○ Round 1
○ Round 2
All in all it should be around $60 USD for the tools and about $40 USD for the brushes. However, this list gives you every tool you will need to get started and to continue with the hobby.
This is just what I like to have on hand, this does not reflect the "perfect list". I hope it helps :)
Vallejo Model Air and Game air are both good lines for airbrushing your models. If you're new to airbrushing then buying airbrush paints are probably the best way to get started, but you can also just thin down your regular paints too. I don't recommend starting by doing this as it's better to learn to control the airbrush with paint that you know should be working properly before you throw in the new variable of paint thinning.
As for airbrushes, I always recommend the Iwata Eclipse. It's both a good starter brush as well as a brush that you will continue to use as you become a more skilled airbrush artist.
For metal minis there are typically two generally types of solutions.
For instance, I'm magnetizing my Star Wars Legion models this way.
I'm using this 13x13 container with has 4" tall "levels":
https://www.amazon.com/Snapware-Seasonal-Ornament-Storage-Container/dp/B00FXLTSI6/ref=sr_1_1?ie=UTF8&qid=1522936303&sr=8-1&keywords=ornament+storage+13x13
I'm using this 12x12 sheet:
https://www.amazon.com/gp/product/B000W6ZMQY/ref=ox_sc_act_title_1?smid=ATVPDKIKX0DER&psc=1
The sheet drops right in, I've secured it with some double-sided tape or you can use glue or whatever. Then I put 6x2mm magnets on the bottom of each figure. You'd want to check the Infinity bases to make sure how thick a magnet will fit the recess but basically that's the process. Metal minis are heavier so you might want a slightly bigger magnet or perhaps two smaller ones. There are probably recommendations online somewhere.
It's fairly cheap, very expandable, and should be able to hold nearly any game.
https://www.amazon.com/Tamiya-300087030-Masking-Tape-6mm/dp/B0000WRZZQ/ref=sr_1_7?ie=UTF8&qid=1479390004&sr=8-7&keywords=tamiya+masking+tape
Use this / they also have a tape for curves. It helps a ton and has low adherence so you don't have to worry about pulling paint up. I really enjoy the profile and the model itself looks cool to me but it's all preference. I do have to say it was the easiest tag to put together that I've done.
I use Double Sided Foam Tape. It's designed to hold stuff like mirrors on tiles so it's super strong and it's easy enough to remove from minis since all you need to do is slip a knife into the foam bit then roll off the remaining tape from the mini contact point. I usually attach it to whatever I'm going to hold on to when I paint the mini..normally a cork bung.
For smaller bits or for things that have 2 sides like a cape I use Blu-Tak (mounting putty in the USA). Forms a decent hold but lets you remove it and remount in seconds.
Maxi-Cure and then Insta-set. Dab glue with the end of a toothpick, place ear to ear-hole with tweezers/pliers/etc, ask friend to spray glue on or somehow do it yourself (I've done it myself by just laying the model on its side).
Maxi-Cure: https://www.amazon.com/Maxi-cure-extra-thick-Bob-Smith/dp/B0000DD1QH
Insta-Set: https://www.amazon.com/Bob-Smith-151-Insta-Set-Accelerator/dp/B0000DD1QR/ref=pd_sim_21_1?_encoding=UTF8&psc=1&refRID=BWSCD72426BCYAMM6H0X
Go here: http://www.caseyswood.com/shoppingcart/zen-cart/index.php?main_page=product_info&cPath=54&products_id=702
And buy ~200+ of those. It'll run you about $20.
Go to Michael's (or similar store) and buy:
http://www.amazon.com/Podge-CS11302-Original-16-Ounce-Finish/dp/B001IKES5O (note the matte finish)
and
http://www.michaels.com/darice-17-compartment-bead-organizer/10091119.html?cm_mmc=Sq1_Search-_-GooglePLA-_-Darice-_-Darice%2017%20Compartment%20Bead%20Organizer&utm_source=GooglePLA&utm_medium=cpc&utm_campaign=Darice&utm_term=Darice%2017%20Compartment%20Bead%20Organizer&utm_content=10091119&srccode=cii_17588969&cpncode=42-25094047-2
Also grab a cheap brush (you'll need it for the mod podge).
After you've printed and punched the tokens, paint a thinish layer of glue on a disc, apply the token, set aside and let it dry. Do... 50+ at a time. Do it while you watch your favorite TV show re-runs or something. Keep the tokens in vaguely first to last order. Once you've attached the last token to a disc, apply a thin layer of mod podge as a seal coat, starting with the first token you did. Apply a total of two sealing coats. Make sure they're thin and applied smoothly. Mod podge can add a texture if you brush it on that way.
Dirt cheap per token (somewhere in the neighborhood of $0.19/token) and they're nigh indestructible.
EDIT: The box is to store your tokens, by the way... I seemed to have forgotten to mention that.
I got one off Amazon after seeing it in his last painting post. I like the weight of it, mitigates some of my shakiness.
https://www.amazon.com/gp/aw/d/B000RB547G/ref=ya_st_dp_summary
For tokens:
Print out THESE.
Cut out tokens with THIS.
Apply THESE.