(Part 3) Top products from r/MechanicAdvice
We found 57 product mentions on r/MechanicAdvice. We ranked the 1,821 resulting products by number of redditors who mentioned them. Here are the products ranked 41-60. You can also go back to the previous section.
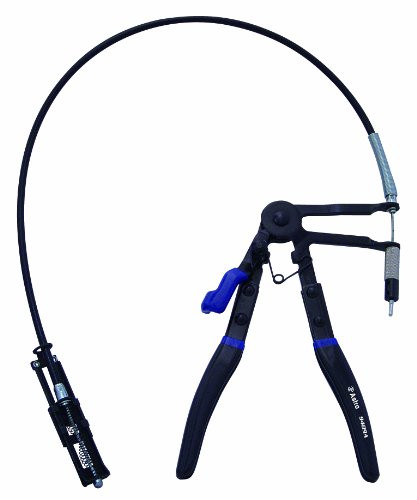
41. Astro Pneumatic Tool 9409A Hose Clamp Pliers
Sentiment score: 1
Number of reviews: 3
Allows for removal of plastic and/or metal self-tightening hose clamps with diameters of 11/16-inch - 2-1/2-inch (18mm - 54mm)Precision clamp on end of flexible cable allows for extended reach where other models cannot reachPliers can be locked, freeing up your hands and making your job easier and f...
 Show Reddit reviews
42. OTC 4590 Brake Spring Plier and Claw
Sentiment score: 2
Number of reviews: 3
Effectively removes and replaces shoe return springs of drum brakes on domestic cars and trucksThin narrow point provides straight in-line pull on springRobust handle provides powerful leverageDouble-ended designPlated steel resists corrosion
 Show Reddit reviews
43. Veepeak Mini Bluetooth OBD2 Scanner OBD II Car Diagnostic Scan Tool for Android & Windows, Check Engine Light Code Reader, Supports Torque Pro, OBD Fusion, DashCommand, Car Scanner App
Sentiment score: 1
Number of reviews: 3
NOT COMPATIBLE WITH IOS (iPhone or iPad)! Works with Android devices and Windows PC only. Very useful gadget for car owners to diagnose check engine light and monitor car sensors.Save time and money by finding out why the check engine light is on and fixing simple car problems by yourself! Read engi...
 Show Reddit reviews
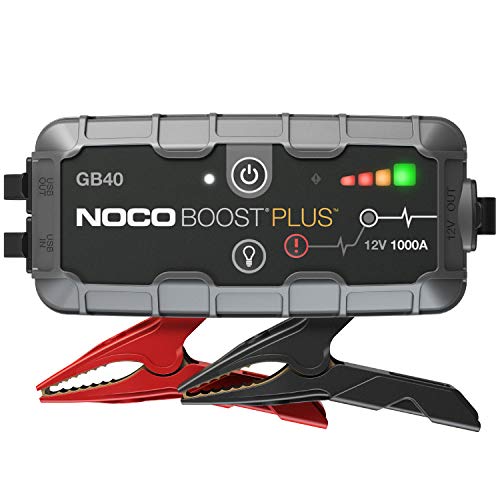
44. NOCO Boost Plus GB40 1000 Amp 12-Volt Ultra Safe Portable Lithium Car Battery Jump Starter Pack For Up To 6-Liter Gasoline And 3-Liter Diesel Engines
Sentiment score: 1
Number of reviews: 3
Start Dead Batteries - Safely jump start a dead battery in seconds with this compact, yet powerful, 1000-amp portable lithium car battery jump starter pack - up to 20 jump starts on a single charge - and rated for gasoline engines up to 6 liters and diesel engines up to 3 liters.UltraSafe - Safe and...
 Show Reddit reviews
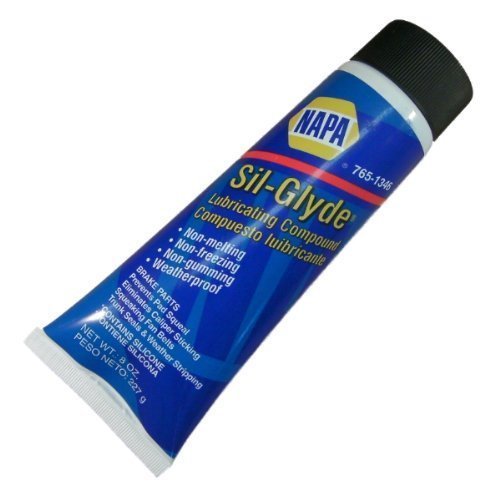
45. Napa 7651346 SIL Glyde Silicone Lubricating Compound Tube, 8 oz.
Sentiment score: 1
Number of reviews: 3
high film strength, stays put and water repellentApplications: brake pads, calipers, rubber boots, fan belts, v-belts, weather stripping, trunk seals and bumpersThis is a Napa private branding of american grease stick company (ags) sil-glyde sg-8Chemical Working Temperatures: -20 To 500 Deg. F.
 Show Reddit reviews
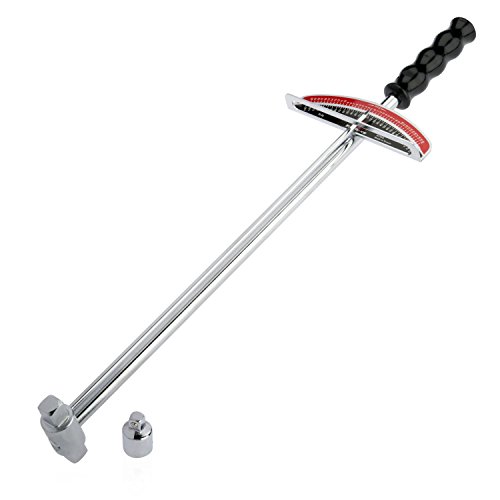
46. Tooluxe 03703L 3/8" and ½" Dual Drive Beam Style Torque Wrench, Hardened Steel | 0-150 Ft. Lbs.
Sentiment score: 2
Number of reviews: 3
Beam style torque wrench uses a calibrated scale fitted to the handle to precisely measure torque, graduated tip prevents parallax errorConstructed with a powerful steel alloy and a durable corrosion-resistant mirror-chrome finishIntuitive scale is calibrated in both directions from 0 to 150 foot-po...
 Show Reddit reviews
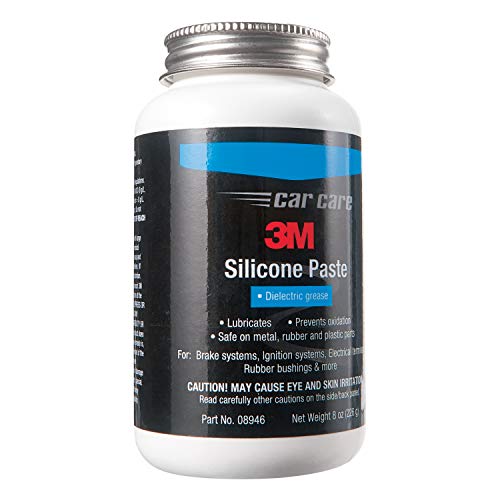
47. 3M Silicone Paste, 08946, 8 oz, Clear
Sentiment score: 2
Number of reviews: 3
Excellent dielectric lubricant.Thick paste.Conditions rubber.
 Show Reddit reviews
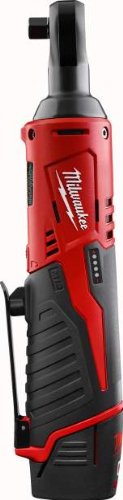
48. Milwaukee 2457-21 3/8-in Cordless M12 Lithium-Ion Ratchet Kit
Sentiment score: 0
Number of reviews: 3
Powerful 12-volt motor: Delivers up to 35 ft-lbs of torque.The kit includes one M12 battery, a 30-minute charger, and carrying case.On-board fuel gauge: Helps you monitor the charge precisely for less downtime on the job.Built-in LED light: Illuminates work surfaces in dark locations.Superior fasten...
 Show Reddit reviews
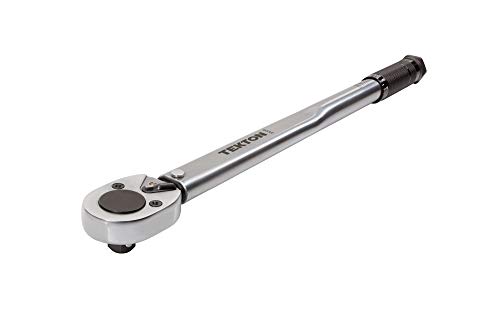
49. TEKTON 1/2 Inch Drive Click Torque Wrench (10-150 ft.-lb.) | 24335
Sentiment score: 2
Number of reviews: 3
Includes storage case and product manual with torque conversion chartWrench emits a click that can be heard and felt when the preset value is reachedHigh-contrast dual-range scale is easy to read, even in low lightReversible ratchet head drives in both directions and measures torque in clockwise dir...
 Show Reddit reviews
50. Zerostart 3100057 Engine Block Heater for Buick, Cadillac, Chevrolet, Ford, Mercury, Lincoln, Jeep, Pontiac, Continental, Oldsmobile, 1-5/8-Inch Diameter | CSA Approved | 120 Volts | 600 Watts
Sentiment score: -1
Number of reviews: 3
Ensure quick winter starts and reduce engine wearFor Buick, Cadillac, Chevrolet, Ford, Mercury, Lincoln, Jeep, Pontiac, Continental, Oldsmobile. See Zero start catalog for specific applications.1-5/8-Inch diameter5. 8' (1. 8m) cord includedVolts: 120 | Watts: 600 | Plug Type: 120 Volt, 15 Amp (Type ...
 Show Reddit reviews
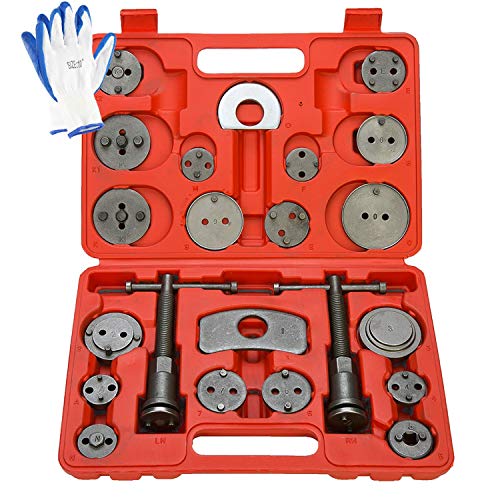
51. 8MILELAKE Brake Caliper Wind Back Tool 24pc Professional Disc Brake Caliper Tool Set
Sentiment score: 1
Number of reviews: 3
Ideal for 4 wheel drive cars/trucksIncludes left and right handed thrust bolt assembliesThe kit includes 18 adapters which fit a variety of modern car brands24Pc kits rotates piston back into caliper for fitting of new brake shoes and padsStorage case and a pair of gloves included.
 Show Reddit reviews
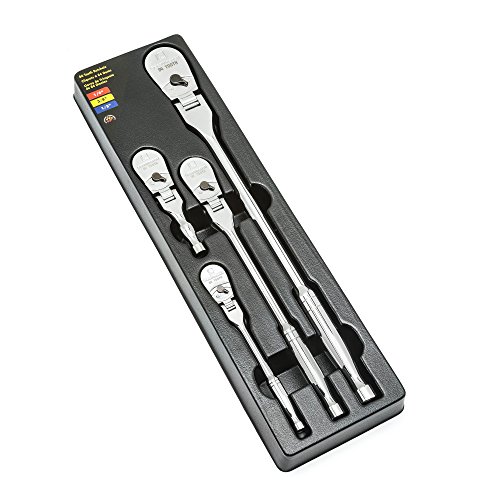
52. GEARWRENCH 1/4", 3/8" & 1/2" Drive 84 Tooth Flex Head Teardrop Ratchet Set, 4 Pc. - 81230F
Sentiment score: 3
Number of reviews: 3
Designed to provide added leverage with patented low profile and performance headFeatures 6 flexible head positions for extreme access and 84 tooth gear system for improved strengthComprises tear shaped head for better accessLow profile, teardrop headFlex Head
 Show Reddit reviews
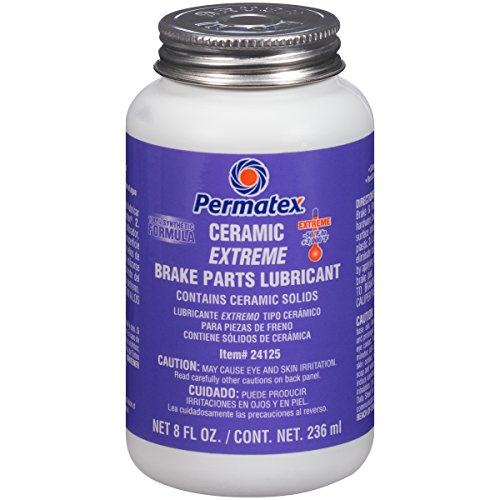
53. Permatex 24125 Ceramic Extreme Brake Parts Lubricant, 8 oz., Pack of 1
Sentiment score: 1
Number of reviews: 3
100% synthetic formula with ceramic solids forming a premium quality brake lubricantResistant to moisture, corrosion and contaminants - will not wash outSilences brake noise across a much wider temperature range and maintains lubricant integrityLasts longer and easily outperforms ordinary caliper gr...
 Show Reddit reviews
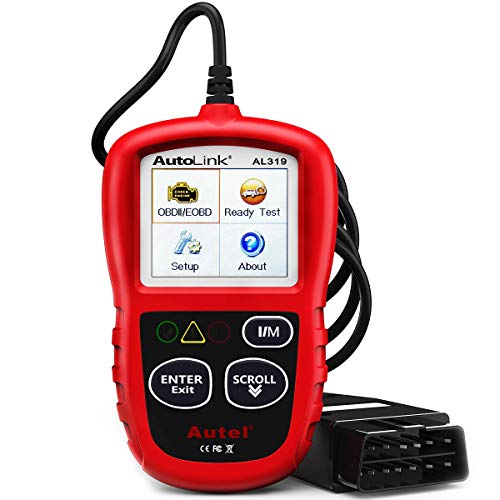
54. Autel AutoLink AL319 OBD2 Scanner Automotive Engine Fault Code Reader CAN Scan Tool
Sentiment score: 0
Number of reviews: 3
FOR END USER & DIYERS: This error code reader is “plug and play” and comes with an easy interface. Even if you’re not familiar with vehicle repair, you can quickly take control of this code reader, and get the information you want.TURN OFF CEL: This car diagnostic tool supports reading DTCs, d...
 Show Reddit reviews
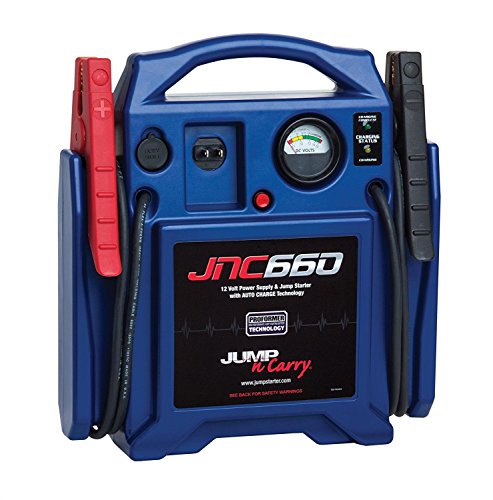
55. Clore Automotive Jump-N-Carry JNC660 1700 Peak Amp 12 Volt Jump Starter
Sentiment score: 1
Number of reviews: 2
1,700 Peak Amps; 425 Cranking Amps22Ah Clore PROFORMER Battery46" Heavy-Duty #2 AWG CablesVoltmeter provides charge status of onboard battery.The ideal storage environment is room temperature, or 68ºFDC outlet to power 12 volt accessories; DC input to recharge internal batteryBuilt-in Automatic Cha...
 Show Reddit reviews
56. CRC Sta-Lube API/GL-4 Multi-Purpose Gear Oil 85W90, 1 Gal
Sentiment score: 1
Number of reviews: 2
Highest Quality StandardsHighly ReliableProfessional ProductsAuto, truck and bus standard transmissions and differentials requiring API/GL-3 and GL-4 oilsMade in the USA
 Show Reddit reviews
57. Mastercool 85510 R134a Can Tap Valve-Screw-On Model
Sentiment score: 1
Number of reviews: 2
Screw-on design for R-134a can tapsGasket assures leak proof operationM14-F x M10-FL-M. Gasket assures leak proof operation. Built-in safety check. Exclusive “full grip” valve knob.Screw-on design for R-134a can tapsGasket assures leak proof operationBuilt in safety check valve
 Show Reddit reviews
58. How to Keep Your Volkswagen Alive: A Manual of Step-by-Step Procedures for the Compleat Idiot
Sentiment score: 2
Number of reviews: 2
Avalon Travel Publishing
 Show Reddit reviews
59. Tracer Products TP34000601 UV Fluorescent Leak Detection Dye - Set of 6
Sentiment score: 0
Number of reviews: 2
Multi-purpose UV fluorescent dye for oil based fluid systemsWorks with all UV and UV/blue light lampsGasoline engine oil, Diesel engine oil, Gasoline, and Diesel fuelAutomatic transmission fluid, Power steering fluid and Hydraulic and lubrication fluids
 Show Reddit reviews
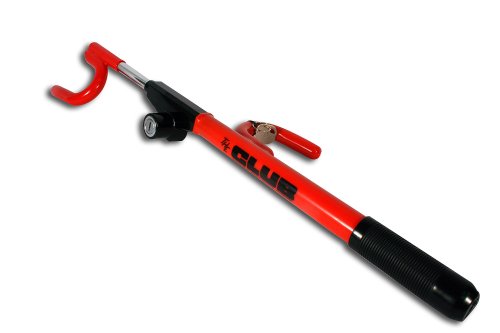
60. The Club 1000 Original Club Steering Wheel Lock, Red
Sentiment score: -1
Number of reviews: 2
The Club's patented self-locking feature locks with one pullSolid steel hooks for greater securityCro-moly steel construction resist sawing, prying,hammering, and freon attacksHighly visual theft deterrent. Fits steering wheels with inner dimension from 8.75 to 14 inchesUniversal fit for cars, light...
 Show Reddit reviews
As I stated elsewhere I don't think a torque wrench should be on the top of the 'recommended tools' list, esp if you just plan on doing routine maintenance. They are definitely good to have once you start tackling larger projects but a good torque wrench can be quite expensive and I think that money is better spent elsewhere when first putting together a tool set for routine maintenance.
I'd recommend:
Edit to add:
https://smile.amazon.com/Permatex-24125-Ceramic-Extreme-Lubricant/dp/B0018PSASU?sa-no-redirect=1
---------------
The front caliper piston on most vehicles do move in and out, but the back piston generally needs to threaded back in, and would need a tool.
A generic clamp of any kind is fine for retracting a push-in piston, you just need to be slow and patient with it. Don't crank the clamp all at once, turn it about 1/8th of a turn and wait 20 seconds, and again. Make sure to use something which won't harm the piston face; Wood works well. Make sure the clamp is straight and the piston is going back in straight.
If rust is an issue in your area get some penetrant like PB Blaster or something and try to get the bolts soaking before it's time for the repair, if possible.
Make sure you have the proper lubricants, and the proper grease for the slider pins. Lube the piston mating surface(s) and the ears of the pads with a film of quality ceramic/synthetic brake grease. Not a GLOB, a film.
Make sure to clean up the shims and replace them if they are at all damaged or deformed. A film of grease where the shims mate to the caliper bracket is a good idea as well.
Be sure to avoid getting the grease/lube on any braking/friction surfaces such as the rotor or pad faces. Rotors can be cleaned with a rag and brake clean.
Make sure the tattle-tale, if present, is going in the correct direction. Make sure the pads are mounted properly. Try to reference the pads your removing first.
If you're replacing Rotors and/or replacing pads with a different compound, you should follow a "bed in procedure." A general bed-in is a few very light brakes from low speed like stop and go traffic, a few stops from 10-20 mph sort of riding the brakes holding them till you roll to a stop, and then one or two good "emergency stops" with a firm foot planted from 20-30mph. This will help ensure that friction material is transferred into the rotor surface which helps ensure proper stopping power.
I hope this helps.
> I absolutely understand torque wrenches and their importance, but, not sure I want to make the investment for the infrequency I would use one at this point in my life.
Really???
Just two examples: https://amzn.com/B0019VMI0Y and https://www.hfqpdb.com/coupons/3364_ITEM_CLICK-TYPE_TORQUE_WRENCHES_1562189647.3117.png
Those are much cheaper than brake rotors. The beam type will last forever. It's a good idea to have the calibration checked on the click types because the springs stretch on them. I have a couple of the Harbor Freight cheap ones, and some "tool truck" ones I paid $100+ for, and if anything, the HF ones stay closer to proper calibration longer than the expensive ones.
If storage space is a problem, I also like this solution: https://amzn.com/B009GLISI0 which also doesn't require periodic calibration (and can actually be used to check calibration on other torque wrenches).
For pads, I agree Akebono are the best. Those go on my wife's Mercedes S class, and on her VW Beetle daily driver. My pickup truck, a 1997 Chevy S10 2WD with the 4.3L V6 (which is also my autocross "sports car") is running Wagner ThermoQuiet Cermic pads now. They are inexpensive but very effective. Most modern ceramics (even the parts store "house brands") are more than adequate for today's cars and today's tires.
yes that works, but I figured free for a tool you'll use once is better than buying it :)
You'll also need to buy one of these to hook up the can of refrigerant to the gauges if you go the buying route https://www.amazon.com/Mastercool-85510-R134a-Valve-Screw-Model/dp/B000LQODJC/ref=pd_bxgy_263_img_3?ie=UTF8&psc=1&refRID=TMMEHPXN9MG3SEA09X5B
Here's some helpful videos on reading the gauges and using them.
https://www.youtube.com/watch?v=UW1GDiOa0kE
https://www.youtube.com/watch?v=lglPJuBXVeE
Definitely do the shocks and brakes yourself! You'll save yourself nearly a thousand dollars and they really aren't even that hard to do with common hand tools.
How to replace brake pads and rotors
How to replace shock absorbers
How to replace struts (if this is what your car has rather than separate shocks and springs)
You really shouldn't need a full brake system flush for a car that's this new, but if you really want to...
The alignment will need to be done by a professional though, but all the other stuff can be done yourself for probably $150-200. You'll learn a ton about how your car works and how to fix it, and you'll probably get a lot of supplies that you didn't know you needed, like silicone paste lubricant for the brake guide pins, copper anti-sieze, and thread locker, all supplies that can be used for many, many different things, not just this one brake job!
I hope this all is helpful. I've been doing this stuff at home for many years so feel free to reach out if you need any help at all.
If they are the same as the MK4 Golf/Jetta, they are solid and Lemforder is the OEM brand. I actually have a set of Lemforders down in the basement I bought when I was doing a suspension refresh but didn't install them. The originals are still good at 190k miles.
As far as greasing the contact surfaces and easing installation, I would recommend silicone grease. That is safest for rubber. That is also what is used on brakes typically.
Edit: Something like this, or this.
I would just start it up and feel the air around the exhaust looking for the pressure escaping, (don't burn yourself) but there may be better and safer ways of checking. If you have heater boxes on the J pipes the leak could be inside one of those and a lot harder to find. And do make sure you have the engine timed correctly, I remember seeing a chart showing that throughout the model years the timing changes between 10 BTDC, 7.5 BTDC, 0 TDC, and 5 ATDC. This Book was very helpful to me and I would absolutely recommend it.
I would also recommend a generic bluetooth adapter like the elm327 if all you want to do is be able to read/erase codes and you don't plan to use it very often. For something a little better, I'd recommend this one: https://www.amazon.com/Autel-AutoLink-AL319-Scanner-Automotive/dp/B007XE8C74/ref=sr_1_4?ie=UTF8&qid=1539451895&sr=8-4&keywords=autel+obd2+scanner
It can read/erase codes as well as view the emissions ready monitors.
And the best book for learning about repairing Beetles:
"How to Keep Your Volkswagen Alive"
http://www.amazon.com/Keep-Volkswagen-Alive-Step-Step/dp/1566913101
The same publisher put out similar style books for a few other cars, unfortunately not many and none newer than 1985-1990. They may be the best books for absolute beginners to learn about car repair in general.
Like others said, lights (rechargeable), creeper, good jack and/or jack stands, magnet bowl, magnet's pen(see link), torque wrench, breaker bar, Car ramps. Or maybe if you have a harbor freight in your area a gift card there. I use to always buy craftsman tools but with them(sears) hurting so bad lately i have started buy HF stuff because they make warranty exchange so damn easy and stuff is cheap in price.
Link 1
Link 2
Link 3
Dont go off the brands i linked just the type of tool itself. Also a vice, or C-clamps, or portable speaker to use while working on said car. :)
I hope this helps you some...
http://www.amazon.com/gp/aw/d/B000JFJLP6/ref=s9_simh_gw_d0_g263_i1?pf_rd_m=ATVPDKIKX0DER&pf_rd_s=mobile-1&pf_rd_r=1B2X3DQKS1CBDT41CV37&pf_rd_t=36701&pf_rd_p=1824974342&pf_rd_i=mobile
This is a good one. Definitely worth the price. I've rarely had issues with these. They're currently on sale on Amazon as well.
For oil start with a 15w40 oil. I use 4quarts of that and 1 quart of high mileage oil in my 73 Chevy.
For the manual trans is it a 3 speed manual or 4 speed? I believe it called for gear oil, like a 90weight or so. If its not been rebuilt start with a GL4 gear oil. Pennzoil, Valvoline, etc... I think still make a GL4 manual trans gear oil. Don't use synthetic or GL5. Here is a cheap one for example that some have used in older manual trans.
https://www.amazon.com/Sta-Lube-SL24239-GL-4-Multi-Purpose-Hypoid/dp/B000M8RYMC/
But yea the rest looks good. Clean it up and add new fluids. Be careful when driving as many brake seals/lines will rot with age. So inspect/replace them as needed.
good call given the spec for my rims is 120 Nm +/- 10. Given that i think I may order the 1/2 one and get a 1/2 to 3/8 reducer and deal with the bulk when I'm under the car doing an oil change. By that time i may invest in a 3/8 or 1/4. Had to add in I'm so excited to order my Rhino Ramps instead of jacking up my car I'm like a kid in a candy store lol
An updated if anyone is looking at this in the future.
KOE5960 was sold out but it is comprised of KOE5959 and KOE5961 which is what I bought and turned out to be cheaper for the single piston rear, dual piston front. I also bought a piston pushing toolkit which worked really well for the threaded rear and push front.
https://www.amazon.ca/dp/B0122Q83T4/ref=pe_3034960_233709270_TE_item_image
The rotors were stuck pretty good but a bfh did the trick to loosen it. Just came back from bedding in the brakes and no more squeaking. The inner edge of the front rotors was rusting and causing the pad to wear unevenly on the bottom and squeak for the first few minutes of driving.
I use a small 12v impact driver (brushless is better since it doesn't get weaker over time as contacts get dirty).
Or I use my 12v ratchet
This is my favorite set of wrenches They are long, have swivel heads and the way the ratcheting part protrudes on one side makes all the difference in a ton of situations.
good idea for "to change flat tire". in the shop today, I want to use my hand tool to loose that lug nuts to make sure it's smooth, that piss off the boss, he asked me to get lost. I should come up with a reasoning of "just in case I need to change flat tire".
>remove them often enough
do you remove them every 3 months or 6 months? I usually didn't touch it if there is need to, such as to change a flat tire.
> Torque it down, dry
you dry the lug nuts before put it on? May I know what's the purpose?
Thank you for your recommendation of the 3 tools, do you think these 3 looks Ok:
https://www.amazon.com/gp/product/B00C5ZL0RU/ref=s9_acsd_top_hd_bw_b2Lfk_c_x_1_w?pf_rd_m=ATVPDKIKX0DER&pf_rd_s=merchandised-search-3&pf_rd_r=CWTA8X0BR49HVQ186Y8Y&pf_rd_t=101&pf_rd_p=365b646d-0ab5-53c3-9063-fe500e13a356&pf_rd_i=559968
http://www.sears.com/craftsman-1-2-in-drive-quick-release-teardrop-ratchet/p-00944809000P
https://www.amazon.com/TEKTON-15356-2-Inch-24-Inch-Breaker/dp/B00MWVAUT6
Thank you!
You can buy a beam style torque wrench for less than $20 so that in the future you can torque away confident that you're not grossly exceeding or undershooting the correct torque value: https://www.amazon.com/Tooluxe-03703L-Torque-Wrench-Hardened/dp/B0019VMI0Y/ref=pd_lpo_sbs_469_t_1?_encoding=UTF8&psc=1&refRID=8SE6HAEEYYSXHDKN6EJS
I like sil glyde https://www.amazon.com/Napa-7651346-Silicone-Lubricating-Compound/dp/B0054DWS1W
It wont damage the rubber boots like someothers such as permatex purple w/ceramic in it.
There's another style that is cable operated which quickly became my favourite. I'll edit if I find a link to one.
Edit: I'm pretty sure these are the exact pair I have: https://www.amazon.ca/Astro-Pneumatic-9409A-Clamp-Pliers/dp/B003D3N7YW/ref=mp_s_a_1_11?keywords=flexible+hose+clamp+pliers&qid=1573349910&sr=8-11
Leverage.
I have the matco (3x as expensive) version of all of these:
https://www.amazon.com/GearWrench-81230F-Polish-Handle-Ratchet/dp/B000V5G7LU/ref=pd_sbs_469_2?_encoding=UTF8&pd_rd_i=B000V5G7LU&pd_rd_r=WFB0XHAVEFRVD1DD6CZS&pd_rd_w=itHwF&pd_rd_wg=A03cy&psc=1&refRID=WFB0XHAVEFRVD1DD6CZS
I have this set and the larger set and I use the shit out of them:
https://www.amazon.com/GearWrench-85988-Ratcheting-Wrench-GearBox/dp/B000T8WFBU/ref=sr_1_4?s=hi&ie=UTF8&qid=1509582952&sr=1-4&keywords=long+gear+wrench
Most shops have a little blurb on the work order telling you to stop back by in 100 miles to have the torque checked. No one ever does but this is the reason it exists. In my personal experience the basic ugly steel wheels are usually fine but the fancy bling rims need to be retorqued quite often.
Stop back by next week and ask them to check the torque on all of them. Better yet go get yourself a torque wrench so you can do this yourself for the rest of your life. This one is cheap and will work fine. The beam type are pretty much good forever. (fixed link to one that will actually work)
I linked these from amazon, just to show you. Both of these will make the job easier.
Pliers from amazon Use the round part on the end of the handle, put it on the top part of the spring and twist. Use the other end of the handle as a prybar to put the spring on.
[Hold down spring thingy] (http://www.amazon.com/Tools-2774-Shoe-Rtng-Sprg/dp/B0002SQU7W/) Removes the round hold down on the shoes.
They should've done it, yes. You'd either see that, P0016, P0017, or P1345. DO NOT let them clear the code at AutoZone.
Also, order one of these and download Torque Pro for your phone. Given that you've got a high-mileage Cavalier, it's probably a good thing to have.
This should help it has an end that will engage the stud and you just lever the spring on.
My $100ish must have use everyday options include: cordless 3/8 ratchet https://www.amazon.com/dp/B07CZWBYBK/ref=cm_sw_r_cp_api_i_Tw.2DbXFTMF30, lighting! a good rechargeable headlamp https://www.amazon.com/dp/B07CV3VTYB/ref=cm_sw_r_cp_api_i_aI.2DbYZ76FY7, flashlight or decent under hood light https://www.amazon.com/dp/B01MTXC016/ref=cm_sw_r_cp_api_i_sK.2Db40MCX8D, a portable jump box https://www.amazon.com/dp/B015TKUPIC/ref=cm_sw_r_cp_api_i_mL.2DbX8E94SN or 24 cans of brake cleaner https://www.amazon.com/dp/B00JRPDW7M/ref=cm_sw_r_cp_api_i_Du.2DbZ2WMZDE
Now if you want to get it fixed professionally, by all means do so. But I wouldn't let lack of a torque wrench hold you back. This 1/2" drive one is only $40. I'm sure it's not the world's greatest torque wrench, but Tekton has a decent reputation. Harbor freight sells a 1/4" drive for $10 (after coupon, ~$20 otherwise).
You can rent a lot of specialty tools for bearings, etc from part stores like Autozone or Orielly's. I haven't seen anything saying they rent torque wrenches, but I'd give them a call at least.
I've seen a lot of jump packs over the years. I've disassembled many for repair and recycling. Most have never really stood out in quality to me. They're all about the same. You can spend a varying degree of money on them.
There are 3 basic sizes. A lot of brands will through 'power' numbers at you like 900 peak amps or 1500 etc etc. They are all basically made the same, and usually pretty cheaply.
It's important to know that jump packs basically assist a weak battery. The chances of it starting a stone dead car battery are limited. Many factors play a roll. Size of engine/car. Temperature (cold = car needs more power, batteries produce less power). How dead the car battery is. Jumper cables and an assisting car is the best option, but jump packs can be convenient.
Jump packs are just another battery. So they have a life too. 3-5 years on average. Older they get the less power they put out. They need maintenance too. They need to be charged after every use and need periodic charging (every couple months).
Personally, I like Quick Cable's designs. Good quality. You plug an extension cord into it to charge it. Many other brands have their own charger wall pack and these get lost (trust me).
Every company uses the same quality of internal battery in these. Cheap. There are thousands of battery manufacturers for Sealed Lead Acid batteries in China. There are thousands of brands you'll find in these jump packs (even Quick Cable). Do not expect brand A's internal battery to be a lot better than brand B. When buying a jump pack, the build quality of the casing, lights, cables is what to look at.
Once your jump pack battery dies, you can replace the internal battery. It's usually most of the cost of the jump pack.
Ones with inverters or air pumps can be handy. But these are typically cheap components. I've run into my own issues with the Quick Cable ones that had these built in.
The smallest ones like this:
http://www.amazon.com/Clore-JNC300XL-Jump-N-Carry-Ultraportable-12-Volt/dp/B000XQ9MGE/ref=sr_1_1?ie=UTF8&qid=1416949837&sr=8-1&keywords=car+jump+pack
Internally, these have a 12v 7 or 8 Amp Hour Sealed Lead Acid battery. Basically a bigger moped battery. If your Honda Civic cranks but can't start and it's 50°F outside, this would help you get it started. If your Honda had it's lights on for 2 days and is stone dead, forget about it. I'd avoid these. Priced from $30-70 typically. These have short cables that can be annoying to work with.
Most common size:
http://www.amazon.com/Clore-JNC660-Jump-N-Carry-12-Volt-Starter/dp/B000JFJLP6/ref=sr_1_3?ie=UTF8&qid=1416949837&sr=8-3&keywords=car+jump+pack&pebp=1416950179642
Internally have a 12v 17-20 Amp Hour battery. Basically a motorcycle battery. Will start most vehicles, even trucks. $50-$150 typically.
Third type, heavy duty:
http://www.quickcable.com/products.php?pageId=177
I bought this for my father-in-law because I knew it was good build quality and could start about everything. With my discount it was around $130 with a battery. The battery I used was the same size as a lawn tractor. Retail probably $200-$300.
EDIT
I live in Wisconsin, so my experience may vary depending on your climate. Typically, cold related battery failures are the leading cause. So a small $50 jump pack may work great in Florida for someone that left their lights in October. But January in Wisconsin is going to tell you a different tale.
EDIT 2
Please avoid these at all costs.
http://www.amazon.com/Weego-JS6-Standard-Batteries--Packaging/dp/B00N9XVPBS/ref=sr_1_17?ie=UTF8&qid=1416951350&sr=8-17&keywords=car+jump+pack&pebp=1416951352732
Basically you're using a laptop battery to start your car.
He's using this electric ratchet. It's entirely unnecessary for the job. The stud has a flange that's sandwiched between the housing & the sheet metal. Loosening the nut will not loosen the stud.
More important than a fancy electric tool is the proper size socket & direction of force. I.e. Not at an angle that makes it easier to slip off & round the nut. It is easier to destroy the fastener with an electric tool if you aren't properly aligned.
My buddy at work today mentioned using some of [this stuff] (https://www.amazon.com/Tracer-Products-TP34000601-Fluorescent-Detection/dp/B000JFHNTM). They make other brands and cheaper versions etc. It's UV dye that will show up under a black light, it's made for finding these kinds of leaks. He said that it will work much better than soapy water (the soapy water might not work with the fuel system) Pour the dye in the gas tank run the car for a bit and use a blacklight to check out the lines the tank etc.
This is what I use. I can't think of anything better. Permatex 24125 Ceramic Extreme Brake Parts Lubricant, 8 oz. https://www.amazon.com/dp/B0018PSASU/ref=cm_sw_r_cp_apa_AOgOyb0Y4T5SS
False... Proper brake spring pliers. You'll thank ME later.
https://www.amazon.com/OTC-4590-Brake-Spring-Plier/dp/B00063V40G/
You can buy it on amazon.
Redline gl4, the "I give a fuck about this transmission enough to spend $60 on it."
or stalube cheapo for the "whatever, it's GOOD ENOUGH"
I've used both and the transmissions keep on truckin'
I like your ingenuity to solve the problem in the moment. In the future I would suggest THESE to save you some trouble.
Basically those 2 knobs on the end slot into holes, then using the handle you turn the object, in this case the calipers piston.
Using that for brake calipers usually won’t work as you also need to apply pressure against the piston at the same time.
The proper tool for calipers looks like this:
https://www.amazon.com/dp/B0122Q83T4/ref=cm_sw_r_cp_api_i_7N1PCbZVG39WR
Although maybe your car would work fine with a spanner wrench
On your smartphone, you can download an app called Torque Pro. It's $5 (at least it was when I bought it) then buy one of these that "talks" with your ECU. There should be a sensor it can read the transmission temps.
Thats a squeezy boi, can use a set of slip joint pliers, or buy these and change your life forever.
https://www.amazon.com/dp/B003D3N7YW/ref=cm_sw_r_cp_apa_TV8bAbMKW72PF
Start here:https://www.amazon.com/Autel-AutoLink-AL319-Scanner-Automotive/dp/B007XE8C74
Most decent pads come with little packets of grease you can use, or you can buy a big bottle of the same stuff. Example:
https://smile.amazon.com/Permatex-24125-Ceramic-Extreme-Lubricant/dp/B0018PSASU/
www.amazon.com/dp/B0122Q83T4
$20 version
http://www.napaonline.com/Catalog/CatalogItemDetail.aspx/Lubricant-Multi-Purpose-Sil-Glyde-Lubricates-Prevents-Sticking-On-Rubber-Metal-Wood-Plastic/_/R-BK_7651351_0361142439
http://www.amazon.com/Napa-7651346-Sil-Glyde-Silicone-Lubricating/dp/B0054DWS1W/ref=sr_1_1?ie=UTF8&qid=1453322685&sr=8-1&keywords=sil+glyde
Napa Sil-glyde
If it's just for one vehicle, occasionally, go to the parts store.
If you are having regular issues, then I would get one of these:
https://www.amazon.com/gp/product/B011NSX27A
I use it with the Torque app on my phone.
Best. Lube. Ever.
It's a block heater, something like this. Used to get some heat in your oil when you live where it gets really freakin' cold. Plug it into an outlet after parking, and the next morning you don't have to wait for your vehicle to warm up.
I have one on my Jeep ZJ. Comes in handy during Montana winters (and Fall, and sometimes Spring).
Yeah, then this is no problems. Just a ton of steps.
Before you go out and do all this, let's make sure your compressor is trying to start. Turn your car off. Plug in your bottle of AC pro. It should be in the red "overcharged" range. Have someone start the car, and then watch the value on the gauge, you should see the value drop into the green when the compressor turns on. That means you just need a proper recharge to fix your AC. Follow the directions below. If it doesn't do that, then you have something else wrong, and we need to fix that first.
Call a bunch of Autozones in your area. A couple of them rent out vacuum pumps + manifold gauges. Call enough of them and you'll find one that will rent you both. Look in the side of the vac pump, it should be full of oil to the fill line. If not, buy a bottle of vac pump oil, and fill it to the "Full" line.
Here's general information:
You need to buy a can tap, even if the gauges come with one. You'll want to save your bottles for later. https://www.amazon.com/Mastercool-85510-R134a-Valve-Screw-Model/dp/B000LQODJC They'll have them at autozone as well. To use a vampire tap, open the silver handle (CCW) all the way. Buy bottles of 134a, screw this onto the top of the bottle, get it handtight. Then close the silver handle all the way. The last few turns it will pierce the top of the top of the can. That'll let you pull the 134 out of the bottle.
Always operate the can with the valve at the top, right way up. Never turn it on it's side, bad things can happen.
When using a vac pump, do not turn the pump on or off while the yellow line is attached. Always turn the pump on, attach the yellow line, let the pump run, then detach the line, turn the pump off.
PPE! Wear leather gloves & safety glasses. Freon burns are not good. Eyes don't grow back.
Find the label on your car that says how much 134a your vehicle takes. It'll be listed by weight. You'll also need a small kitchen scale.
There's 3 different weights of AC oil. Find the correct weight for your car.
Buy a bottle of green or yellow dye, and a blacklight. Hunting for leaks at night/in the evening works much better then during the day. The darker you can get it, the more the dye stands out.
You need a dye/oil injector. https://www.amazon.com/DIY-UV-DYE-INJECTOR-CLAMSHELL/dp/B001DKP0ZG How to use: Unscrew the two parts from each other. Clean out any old oil. Fill up the small part with oil or dye. You must inject a full thing of oil/dye, no half-full, because you'll also be injecting a half-amount of air as well. Hold it level while you screw the other side back on. Tighten it to just past snug. Make sure both both knobs are closed. Take off the lowside (blue) connection. Connect the injector onto your car. Then connect the lineset to the injector. You now need to do something to force dye into the car. Either open the red valve if there's pressure on the red side & nothing is attached to the yellow cable or you can open the valve on can if there's no freon in the system. Then very slowly open the blue valve. You'll see the blue needle spike up, close it down a bit and figure out how to get some small amount of freon going through the lineset. You've now got freon flowing through your injector. Turn it so the black part is straight up and down, you're trying to force all the dye out of the injector and let it flow into your car.
Disconnecting your lineset: If your car is running, you want to try to get as much freon out of the lineset as possible. Make sure your gloves are on. Disconnect the yellow line if connected. Hold down the port on your car and pull up on the red connector's ring. It'll pack a bit of a punch. Put the dust cap back on immediately. Now we'll SLOWLY pull all the freon out of the lineset. Too much at once might damage your compressor. Open the blue knob slowly, watch the blue gauge, open the valve slowly, don't let it go above 60 or so range. Then slowly open the red VERY slowly, same thing, don't let the blue gauge over 60 or so. Once you've got as much freon out of the lineset as possible, disconnect the blue port, and put the dust cap back on. Keep your connectors out of the dust. Dust is your enemy.
Always make sure both knobs are closed before attaching or detaching anything from the lineset.
NEVER EVER EVER EVER open the red valve with anything attached to the yellow line & the car running. This could cause the freon can to explode. You will have a bad day. Check every step you do in here, and make sure you're not breaking this rule.
Steps:
Start by vaccing out the lineset. You need to get any crap out of it that was left by the previous guy. Turn on the pump, attach the lineset. Open both knobs all the way. Let the pump run for ~30 minutes. Disconnect the yellow line, shut off the pump.
Close both knobs. Take off both the dust caps. Pull the collars on the connector back, with your other hand, hold the fitting stable, you don't want to put stress on it. Press the connector in with a smooth motion. It's easier to do with the car off. AC OFF. Start up the car. Watch the values on the two gauges. They have different scales. Both values should be pretty close. Turn on the AC, while watching the gauges. If the needles move, that's the compressor trying to come on. If the pressure gets too high, or too low, the compressor will turn off to protect itself. You may see it cycling on and off as it tries to run. If it's cycling on and off, inject dye into into your system. Follow the directions above for disconnecting your lineset. Find your leak, and fix it.
When you're ready to properly refill your car: CAR OFF! Hook the lineset back up, turn on the vac pump, connect the yellow line to the vac pump. Open both knobs. Listen for the sound of the vac pump as it pulls air out of the system. Listen to the sound, and what the pump is telling you it's doing. At first it's pulling out a lot of air. Then it'll start pulling less and less. Then you'll hear it pulling little bubbles every few seconds, and those seconds will get more and more spread out. Wait for the sound to stabilize, then wait 30 more minutes. This chases all the moisture out of the AC. After 30 minutes, you shouldn't hear any of the sounds of air bubbles. Close both knobs. Wait ~10 minutes. Open the knobs. The sound shouldn't change if you open or close the knobs. If it does, you either didn't vac long enough, or you have a leak. Once you're sure you don't have a leak, disconnect the yellow line from the vac pump. Your system is now at a hard vac! You're in the home stretch.
As you start filling the AC (next paragraph), Inject an injector full of compressor oil. Being at a hard vac tends to boil some of the oil off... the pros have a gauge that measure how much oil that was pulled out, we have to guess. I normally inject 1/4 oz (one injection) or 1/2 (2 injections) of oil. On that large of a car, you might choose 3. Especially if you vacced for a long time. This is more guessing. If your compressor is making a terrible racket, add oil. We unfortunately have to guess on this part. Too little oil, and the compressor won't be lubricated, and will tear itself up. Too much oil, and the compressor will have problems with slugging, and tear itself up.
Connect the injector, and your lineset (Valves closed!), and get out your scale. Car still off. Most ACs will require 2-3 small bottles of freon. Figure out how many full bottles you need to put in, and how much out of the last bottle you'll need. Connect the first bottle. Open the valve on the first bottle. Open the blue knob a little bit for a few seconds to inject the oil into the low side.
This step will injure you if you do not follow directions CAR OFF Really, make sure the car is off, valves closed. Invert the can, valve side down (remember I said not to do this. This one time is an exception. Car off. seriously) Car off. Close the BLUE valve. Open the RED valve. This will dump liquid freon into the high side of the car, which is designed to take high pressure freon, the low side isn't. Let it take as much as quickly as it can. This will quickly dump most of the first can into your AC system, and have it part-way charged. When you stop hearing it flowing around, RED SIDE CLOSED.
Engine block heater then? Or a garage?
Yes, that is 100% normal. It is the risk we all take as car owners. Do look up book value for your car though; generally the insurance company gives you book value, which tends to be more than the car is actually worth. If you show them that the market value is higher than book value then you can even argue for more money.
One insurance company advertises "better car replacement" which should help. You might go with that company.
If you're truly paranoid, some options to help prevent theft of the entire car are:
To be honest, a 2009 Fiesta really isn't worth all that effort, time, and money. Just park it somewhere visible or secure and lock it. Save the money that would be wasted on all those irritating accessories to help buy a replacement if an insurance is insufficient, if it gets stolen at all.
Get the club instead. Possibly the cheapest option out side of a homemade kill switch.
The Club 1000 Original Club Steering Wheel Lock, Red https://www.amazon.com/dp/B0000CBILL/ref=cm_sw_r_cp_api_i_tnxZDb9DGW30H
I suggest this as it can scan ABS and SRS codes and live data monitoring. I have this in my work truck at all times, just in case.
Autel MaxiLink ML619 CAN OBD2 Scanner Code Reader +ABS/SRS Diagnostic Scan Tool, Turns off Engine Light (MIL) and ABS/SRS Warning Lights https://www.amazon.com/dp/B072XH9GLW/ref=cm_sw_r_cp_api_i_TLgoDbWN50SAF
I’m not a fan of the phone adapter ones myself, but I’ve heard some people like this with similar options
BlueDriver LSB2 Bluetooth Pro OBDII Scan Tool for iPhone & Android https://www.amazon.com/dp/B00652G4TS/ref=cm_sw_r_cp_api_i_5OgoDb6XGEKRR
You can get the lower tier options that can only read/erase codes but have no SRS/ABS ability for under $50.
Autel AutoLink AL319 OBD2 Scanner Automotive Engine Fault Code Reader CAN Scan Tool https://www.amazon.com/dp/B007XE8C74/ref=cm_sw_r_cp_api_i_K2goDb06ZB4RZ
Have you tested the antifreeze? Antifreeze that has been left in an engine for a long time without being changed, or had water added to bring it out of the 50-50 mix can degrade its properties. There are cheap coolant testers you can get at autoparts stores or similar area will sell them. They let you take a sample of the coolant and the float will tell you its rating. -15 is cold, if the antifreeze isn't doing it's job and freezes it can crack the block/heads and cause all kinds of trouble. Hopefully it won't be this but worth checking.
I would see if you can get a engine block warmer:
https://www.amazon.com/Zerostart-310-0057-Engine-Block-Heater/dp/B000NM2KNA
or something similar to heat the block to see if it helps.
Alternative things could be IAT sensor or any similar temperature sensor, the engine relies on this when starting to properly gauge the fuel mixture in the engine and if a temp sensor is sending out funky information it can also cause this.
That is a fair leak and you should have it repaired, not just for your vehicle's sake, but because you are dumping all that oil onto the ground and letting it seep into the surrounding environment.
If you can't identify where the leak is by eye, get a bottle of UV-reactive tracer dye (like this or equivalent: https://www.amazon.com/dp/B000JFHNTM/ ) and add it to your oil. After letting it circulate, you should be able to use a UV flashlight at nighttime to identify where the oil is leaking out.
Another reason I'm probably stressed over nothing - this was the battery jumper I used, and it states that there's no worry for incorrect connections.
Milwaukee 2457-21 3/8-in Cordless M12 Lithium-Ion Ratchet Kit https://www.amazon.com/dp/B006GKFWSS/ref=cm_sw_r_sms_c_api_YjMbAb78BGHDT
I️ was looking to get an air ratchet but this is the jam. No hose to deal with no need for air and it comes with two batteries.
Seriously, get this!