(Part 3) Top products from r/diyaudio
We found 25 product mentions on r/diyaudio. We ranked the 492 resulting products by number of redditors who mentioned them. Here are the products ranked 41-60. You can also go back to the previous section.
41. Jasper 400J Model 400 Router Circle Cutting Jig
Sentiment score: 1
Number of reviews: 2
Router circle cutting jig ideal for the speaker maker120 different size cutouts in 1/16-inch incrementsMade from 3/8-inch thick cast acrylicDesigned for smaller speaker cut-outs, tweeters and midrangesfrom 1 inch to 7 1/2 inches in 1/16 inch increment
 Show Reddit reviews
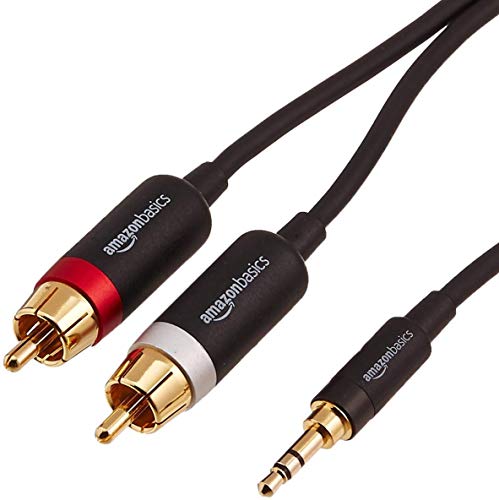
42. AmazonBasics 3.5mm to 2-Male RCA Adapter Audio Stereo Cable - 4 Feet
Sentiment score: 2
Number of reviews: 2
Adapter cable connects a smartphone, tablet, or MP3 player to a speaker, stereo receiver, or other RCA-enabled device3.5mm Male connector on one end and two Male RCA connectors on the other endWorks with left and right audio input and devices with a standard 3.5mm auxiliary jack (typically used for ...
 Show Reddit reviews
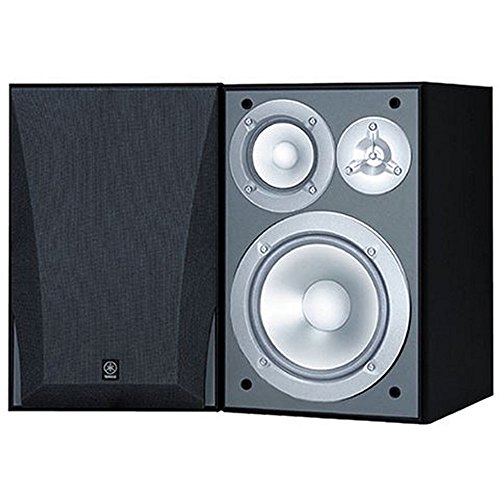
43. Yamaha NS-6490 3-Way Bookshelf Speakers Finish (Pair) Black
Sentiment score: 2
Number of reviews: 2
These 3 way speakers can be added anywhere in your home component sound system front or rear speakers, even as auxiliary speakers for another roomEach speaker enclosure has 3 drivers: An 8 woofer/ a 4 midrange/ a 0.75 dome tweeter that work together to provide an 45Hz to 23Khz frequency response ran...
 Show Reddit reviews
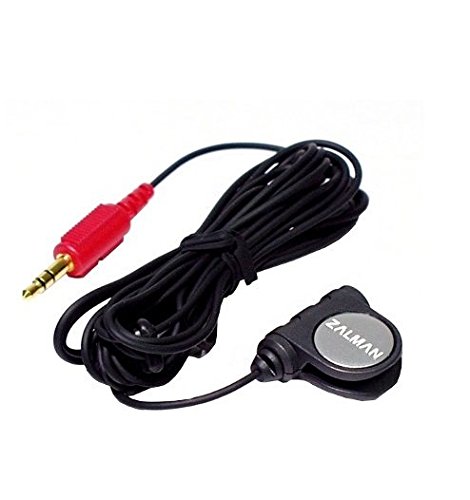
44. Zalman Zm-Mic1 High Sensitivity Headphone Microphone
Sentiment score: 1
Number of reviews: 1
It has attractive & compact designLocalization - EnglishHigh Sensitivity Headphone Mic3 Mini Clips for Tidy ArrangementProduct Type - Headphone MicrophoneLocalization - EnglishSystem Components - N/ASystem Components - N/ASystem Components - N/A
 Show Reddit reviews
45. Sound Reproduction: The Acoustics and Psychoacoustics of Loudspeakers and Rooms (Audio Engineering Society Presents)
Sentiment score: 1
Number of reviews: 1
Focal Press
 Show Reddit reviews
46. Anytime Tools 30 pc MICRO PRECISION SCREWDRIVER SET w/ T4 T5 T6 Mini Torx, Hex, Flat, Pozi
Sentiment score: -1
Number of reviews: 1
9 pc Torx T4, T5, T6, T7, T8, T9, T10, T15, T207 pc Flat 1.0, 1.5, 2.0, 2.5, 3.0, 4.0 mm4 pc Phillips 000, 00, 0, 12 pc POZI #0, #18 pc HEX 1.27, 1/16", 5/64", 3/32", 7/64", 1/8", 9/64", 5/32"
 Show Reddit reviews
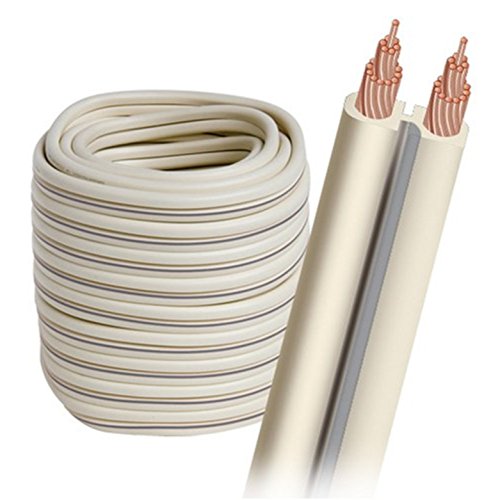
47. AudioQuest G-2 bulk speaker cable - 16 AWG 30' (9.14m) spool - white jacket
Sentiment score: 1
Number of reviews: 1
Long-Grain Copper (LGC)Semi-Solid Concentric-Packed Conductors
 Show Reddit reviews
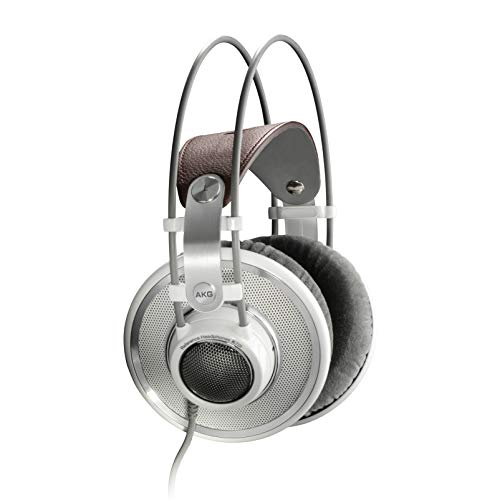
48. AKG K 701 Ultra Reference Class Stereo Headphone Level 1
Sentiment score: 0
Number of reviews: 1
Revolutionary flat-wire voice
 Show Reddit reviews
49. HELLA H61928001 Switch Rocker SPST INC Red
Sentiment score: 1
Number of reviews: 1
High Quality HELLA Electrical PartsHELLA quality and performanceOver 100 years of excellence in automotive lightingConveniently packaged
 Show Reddit reviews
50. PanaVise Model 201 "Junior" Miniature Vise
Sentiment score: 1
Number of reviews: 1
Easy-to-use single knob controls head movement through 3-planes: 210 degree Tilt, 360 Turn & 360 RotationFine/coarse adjusting knob controls jaw pressure for delicate workGrooved jaws are excellent for holding small objects and are made of reinforced thermal composite plasticContinuous heat toleranc...
 Show Reddit reviews
51. AudioSource AMP-100 Stereo Power Amplifier
Sentiment score: 1
Number of reviews: 1
Perfect for Computer and Video Games60 watts per channel into 4 ohmsRear Channel Amplifier for Dolby 6.1 and 7.1 systems2 Independent channels ratedDual Auto-Switching inputs
 Show Reddit reviews
52. UPG UB1280I Sealed Lead Acid Batteries
Sentiment score: 1
Number of reviews: 1
Used In Ups Backup Systems, Spotlights, Flashlights, Exit Lighting & Other Equipment12V 8 AH .187 tab terminals, UB1280IThis item is not for sale in Catalina Islandub1280i
 Show Reddit reviews
53. Handmade Electronic Music: The Art of Hardware Hacking
Sentiment score: 1
Number of reviews: 1
Routledge
 Show Reddit reviews
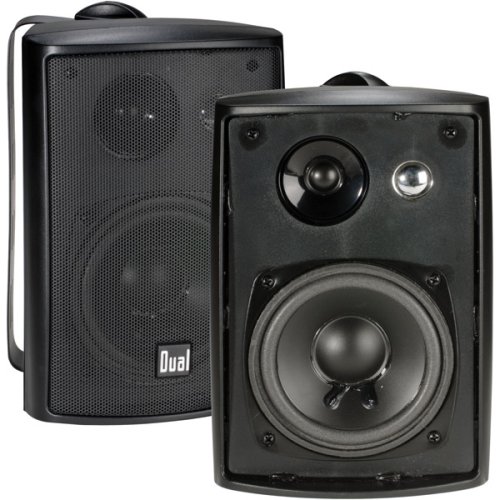
54. Dual Electronics LU43PB 3-Way High Performance Outdoor Indoor Speakers with Powerful Bass | Effortless Mounting Swivel Brackets | All Weather Resistance | Expansive Stereo Sound Coverage | Sold in Pairs
Sentiment score: 1
Number of reviews: 1
 Show Reddit reviews
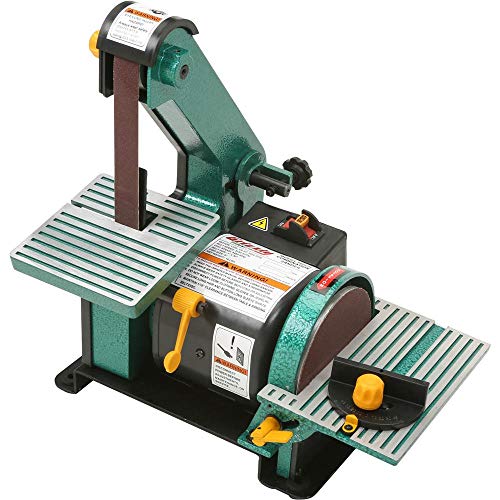
55. Grizzly Industrial H6070 - 1" x 30" Belt/5" Disc Combo Sander
Sentiment score: 1
Number of reviews: 1
1/3 HP, 110V, single-phase, 3450 RPM motorBoth belt and disc sanding tables tilt 45 degreesBelt sander table size, 5-1/8" x 5-1/8"Disc sander table size, 4" x 7-5/16"Removable belt platen and idler roller guard
 Show Reddit reviews
56. Logitech 5.1 Game Console Adapter Convert Rca Plugs To A Single 1/8 (Discontinued by Manufacturer)
Sentiment score: 0
Number of reviews: 1
Adapter converts standard stereo RCA plugs to three 1/8 stereo mini plug jack inputsCompatible with all Logitech 5.1 multimedia speaker systems
 Show Reddit reviews
57. Stereo Headset Adapter, Audio Mic Headphone Converter for Xbox One Controller (Black.)
Sentiment score: 0
Number of reviews: 1
NOTE:The stereo headset audio is not made by microsoft and it's a third party manufactured product.But it is as easy to use as the original.100% BRAND NEW and HIGH QUALITY: Specially designed for Xbox One controller , to connect your headset with a 3.5mm audio jack. Most stereo gaming headsets with ...
 Show Reddit reviews
58. SE Helping Hand with Magnifying Glass - MZ101
Sentiment score: 1
Number of reviews: 1
Holds item securely (leaving hands free) with 2 alligator clips on 4-way swivelsBuilt-in magnifying glass (4x) aids in minute detail workHeavy-duty base for stabilityFor electricians, everyday users, hobbyists, and jewelersGreat for repairing watches, soldering, working on details, and working with ...
 Show Reddit reviews
59. PanaVise 350 Multi-Purpose Work Center
Sentiment score: 1
Number of reviews: 1
Self-centering, extra-wide opening jaws open a full 9-Inch (228.6mm) and hold heavier objects by centering weight over baseParts Tray Base Mount adds stability [8.5 (215.9mm) diameter] and has six individual trays to neatly hold small parts and toolsRibbed, neoprene jaw pads are 1.875 (47.6mm) high ...
 Show Reddit reviews
You really need a set of helping hands or a vise or something. Trying to hold everything in place, control an iron and control the solder is a challenge without it. In a pinch I have used my feet as a quick clamp, but I wouldn't recommend it.
Secondly, properly prepare your wire. You only need to expose about 1/8" or so of bare wire. make sure you have a nice twist on each bare cable, and if necessary, go ahead and apply solder to it so it stays together. I do t usually like to do this personally, because it makes the end too rigid and difficult to maneuver at times, but sometimes it is necessary to keep the wire and connection clean.
Also, with TRS jacks, you want to trim the shield back a little bit so that everything lines up. (If there is a ton of shield, feel free to trim a little off to make the wire a bit more manageable- you don't have to connect the whole rap to have a good connection.) Use a pair of small pliers to open the strain relief on the jack (the part you were trying to thread through) and bend the shield pin down a bit if necessary.
As far a flux, hopefully you have rosin core 65/35 or 60/40 lead solder (I still don't trust the lead-free stuff); if you do then the flux isn't really necessary. The rosin core contains flux, which has a lower melting point than solder, so flux is applied by the iron heating solder on the surface. There are occasions when the solder type or the board you're trying to solder to needs a flux coat to prep the surface, but this isn't one of them.
Thirdly, make sure you have a decent iron that gets hot enough, and is properly tined. You should have a little solder on the tip (that is shiny) so that heat is properly transferred to the surface. Make sure you apply the iron to both the cable and the surface so both get equally hot. Once you flow solder on them, keep the cable still until the joint cools- it should also look shiny when done, (if it looks really dull, you have a cold joint, and need to reheat it.
Clamp the strain relief down on the cable and seal it up (I hope you remembered to put the sleeve and any shrink or cover over the wire before you started soldering..)
I've had to do hundreds of jacks for patchbays and audio cable tielines. You'll get better at it with practice.
For the price, I think the Pyle 8 channel amp that somebody posted is a great choice. Here's and Amazon link, a little cheaper than B&H. Seems to have good reviews, although I really doubt it's 1000w/ch. Probably something like ~150RMS. Pyle's okay, and GREAT when you consider the price. I've got a few stupid-cheap Pyle amps and speakers here and there and they're fine. Cool thing about that amp is that you could break the zones into different audio sources if you want.
I'd pair it with these - you might not even need a woofer.
When you set the system up listen carefully for clipping/distortion and label your nominal operating level and your 'ABSOLUTELY DO NOT GO LOUDER THAN THIS' level in big bright labels.
If you do end up getting a sub I second /r/CashKeyboard's recommendation to go with an active (aka Powered) sub, and remember placement is important for getting the most out of it.
[Glen Ballou's book] (http://www.amazon.com/Handbook-Sound-Engineers-4th-Edition/dp/0240809696/ref=pd_sim_sbs_b_1?ie=UTF8&refRID=17XRBA75YDQ47T230Q36) has a lot of really good information in it. Also , this [one] (http://www.amazon.com/Timer-Amp-Optoelectronic-Circuits-Projects/dp/0945053290/ref=sr_1_1?s=books&ie=UTF8&qid=1406325087&sr=1-1&keywords=timers+and+op+amps) from Forrest Mims is cheap effective. Learning some BEE (basic electronics and electricity) is a great place to start. The one /u/tvdf mentioned has a ton of useful information as well. Good luck, it's a lot of fun once you get started!
I'm surprised no one has mentioned Floyd Toole's Sound Reproduction, or Geddes' Audio Transducers. Toole's is more related to psycoacousics and implies guidelines for speaker building more than specific speaker building tips. From there, I'd probably go with AES and SMPTE Papers and obviously the great info on DIYAudio and AVSForum.
I/We can happily try to point you toward some good AES papers if you find a topic you're interested in. I have saved a ton of papers on waveguide theory and can send you some links if you find that interesting.
The patents can become interesting once you've really got a hand on things - I've been slowly working through the Danley paraline patents for hours and have barely scratched the surface.
Sound waves have length based on their frequency, called wavelength. Higher pitched sounds have shorter wavelengths. Any sounds which reach a full wavelength within the distance from the driver to the edge of the baffle are reflected back to the listener and sound louder, and any which leave the baffle before hitting a full wavelength are not, and are quieter as a result. This is called "baffle step loss".
One way to minimize this effect is to spread it out - if the tweeter is the same distance from two sides (or even three sides, if it's close to the top), the baffle reinforces the same frequency range in every direction. If you offset the tweeter so it's a different distance from each edge, it reinforces a slightly different frequency range in each direction, giving it a smoother response across the frequency range. This sounds better on its own, and may also make it easier for the designer to incorporate a "baffle step compensation" into the crossover, toning down the reinforced frequencies.
Another reason it's done, in "MTM" or bigger speakers with multiple low-frequency woofers and a single tweeter, is to get the big drivers a bit closer together.
Now, tweeters aren't always offset on homemade speakers. There are plenty of designs with centered tweeters, and some sound very good. And sometimes they're offset on commercial speakers. It just happens that a few very common DIY designs, like the Overnight Sensations here, use offset tweeters. If I had to guess, I'd say that commercial speakers are either more concerned about symmetry for aesthetics, or are designed using more custom components that make the baffle step easy to deal with, while DIY speakers are more likely to worry about getting the best performance possible without tricks.
Those are passive speakers. On the wall are terminals for the speakers. Each pair is for one speaker. To use these with your TV you will need some kind of amplifier/receiver. You can also use a stereo amplifier if you use only the left and right speakers. If your TV has a headphone jack, you can get good results with a very simple, inexpensive amplifier like this and a cable like this. Using the headphone jack will let the TV remote control the volume.
You can test the speakers by just tapping a regular old 9-volt battery to the terminals. When you tap it the speaker will make a loud pop. Don't CONNECT the battery, just tap it momentarily on the terminals.
Have fun!
This is a great company, I have a pair of their older speakers and they sound great.
Speakers: $344.50
http://www.amazon.com/SpeakerCraft-OE5-One-Outdoor-Speaker/dp/B0017LADVW/ref=sr_1_6?s=aht&ie=UTF8&qid=1394418175&sr=1-6&keywords=speakercraft+outdoor
Amplifier: $100
http://www.amazon.com/AudioSource-AMP-100-Stereo-Power-Amplifier/dp/B00026BQJ6/ref=sr_1_sc_1?ie=UTF8&qid=1394418458&sr=8-1-spell&keywords=ausiosource+amp-100
RCA Cable: $10
http://www.amazon.com/Mediabridge-3-5mm-Male-2-Male-Adapter/dp/B004YEBK66/ref=sr_1_13?ie=UTF8&qid=1394418952&sr=8-13&keywords=rca+cable
Speaker Cable: $10
http://www.amazon.com/AmazonBasics-16-gauge-Speaker-Wire-Feet/dp/B006LW0W5Y/ref=sr_1_1?ie=UTF8&qid=1394419011&sr=8-1&keywords=speaker+cable
For Wireless music, Bluetooth receiver, $32
http://www.amazon.com/HomeSpot-NFC-enabled-Bluetooth-Receiver-System/dp/B009OBCAW2/ref=sr_1_1?ie=UTF8&qid=1394419052&sr=8-1&keywords=bluetooth+music+receiver
Total Cost: $496.50
I built one of these a few years ago and its still working great. Here is the link to my post
Here are some of the parts I used copied form that post:
AMP: Lapai Tripath
Speakers: 4 inch full range speakers I would go larger if you have the room in your project.
Battery power: 10 NiMh rechargeable AA
input: Dash Mount Stereo Jack
Bus bars to try to keep the wiring organized
Nice little flush mount switches i will use on the next version to control the lights power etc:
For fun I also added a 12v charging port, and a USB charging port for my phone.
Well yes and no. (I understand that does not answer any of your questions)
The two leads (wires) coming off the mic are (+) and (-). If you want to make the mic work on its own you will need to get a jack that has T/S (Tip and Sleeve) and solder the (+) to the tip and the (-) to the sleeve. Then you will have to attach the mic to the Sennheisers, which may or may not last. This is a lot of work and the cost of the jack alone is probably more than a new mic that already has means to clip on to the cable of your headphones.
I personally would recommend the Zalman ZM-1 as a replacement. It will look and probably sound better.
(http://www.amazon.com/Zalman-Zm-Mic1-Sensitivity-Headphone-Microphone/dp/B00029MTMQ)
If you want an upgrade to the mic I'd recommend the V-MODA BoomPro Gaming.
(http://www.amazon.com/gp/product/B00BJ17WKK/)
And if you really want to drop some cash on Microphones and interfaces check out /r/audioengineering and depending on your needs /r/livesound. ~$200 can get you pro-sumer levels of audio (SM58/AT2020 + Interface)
The amp you listed would work fine from a 12v battery. You then need some suitable speakers, bearing in mind you don't want anything to heavy or bulky. You'll also need to ensure that the output of your audio source (phone, MP3 player?) has sufficient output to drive that amp effectively. You've might also need to think about how you charge said battery. Sealed Lead Acid batteries are reasonably cheap and are available in more portable sizes than a full car battery.
If you want to go full DIY have a look at this Instructable
Flush cutters. This pair and this pair are the industry standard workhorse. Absolutely essential tools.
PanaVise clamps are a must have. This one and this one are my favorites.
A manually operated solder sucker will be an important buy as well.
Easiest would probably be a tabletop beltsander and some practice. Something like this would be perfect although you can get that type of machine cheaper - this one is just and example, the first one that popped up when I searched Amazon.
Here's the fancy updated version of that text, with better figures and a DVD and stuff. Kinda spendy, but I highly recommend it.
Cool project! You mentioned that you are starting to work on flush mounting speakers. I am not sure what tools you are using for the cutting the holes, but if you do not have a Jasper Jig, I would highly recommend one. I built my last set using it, and it made the project so much easier.
Jasper Jig
Ok so here's my list of stuff. Please tell me if I'm off on anything.
Speaker wire
https://www.amazon.com/AudioQuest-G-2-bulk-speaker-cable/dp/B000F1X6GE
Subwoofer cable
https://www.amazon.com/gp/aw/d/B003P63SP0/ref=mp_s_a_1_14?ie=UTF8&qid=1504795218&sr=8-14&pi=AC_SX236_SY340_QL65&keywords=subwoofer+cable
Fishing tool
https://www.amazon.com/gp/aw/d/B0026TBOU8/ref=mp_s_a_1_3?ie=UTF8&qid=1504795375&sr=8-3&pi=AC_SX236_SY340_QL65&keywords=fish+tape&dpPl=1&dpID=415cJ-VZ12L&ref=plSrch
I've already got the rear speakers, subwoofer and mounts.
These will really help if you start to get into the hobby more:
http://www.amazon.com/gp/aw/d/B00009K77A/ref=mp_s_a_1_1?qid=1383050908&sr=8-1&pi=AC_SX110_SY165_QL70
http://www.amazon.com/gp/aw/d/B00009K77D/ref=mp_s_a_1_2?qid=1383050908&sr=8-2&pi=AC_SX110_SY165_QL70
There's also the separate version: https://www.amazon.com/dp/B07XD1F8G8/ref=mp_s_a_1_1_sspa?keywords=xbox+adapter&qid=1572323345&sprefix=Xbox+a&sr=8-1-spons&psc=1&spLa=ZW5jcnlwdGVkUXVhbGlmaWVyPUEzTTRZOUExSkZKRjdEJmVuY3J5cHRlZElkPUEwNjgxOTg3MkM4WVlVVFJMWDEwTiZlbmNyeXB0ZWRBZElkPUEwODY2NTgzMlhESDZZMk1ZQVVXQyZ3aWRnZXROYW1lPXNwX3Bob25lX3NlYXJjaF9hdGYmYWN0aW9uPWNsaWNrUmVkaXJlY3QmZG9Ob3RMb2dDbGljaz10cnVl
They make an adapter for this.
https://www.amazon.com/Logitech-Console-Adapter-Discontinued-Manufacturer/dp/B0006U3ACY
As a former Sennheiser die hard who owned both 580's and 650's I was able to cure my cable problem pretty easily with this gadget:
http://www.amazon.com/AKG-K-701-Headphones-White/dp/B000EBBJ6Y/ref=sr_1_2?ie=UTF8&qid=1396647158&sr=8-2&keywords=akg+k701
On my Lepai the 8 small front and back panel screws are just really small Phillips screws, but I've got the older silver version, and it looks like you've got the black one. You might be able to superglue a screw that fits a screwdriver you have to the bolts and try to get them off that way if you can't find Torx small enough. It's a pretty crude solution, though.
I believe, however, if you undo the 3 larger screws in the back, the board should just come loose through the front. Although I don't have it with me at the moment to double-check.
E: thinking about it, you'll probably still have to take off at least the front four small screws to get that approach to work. Are the screws too small for even a set like this or this?